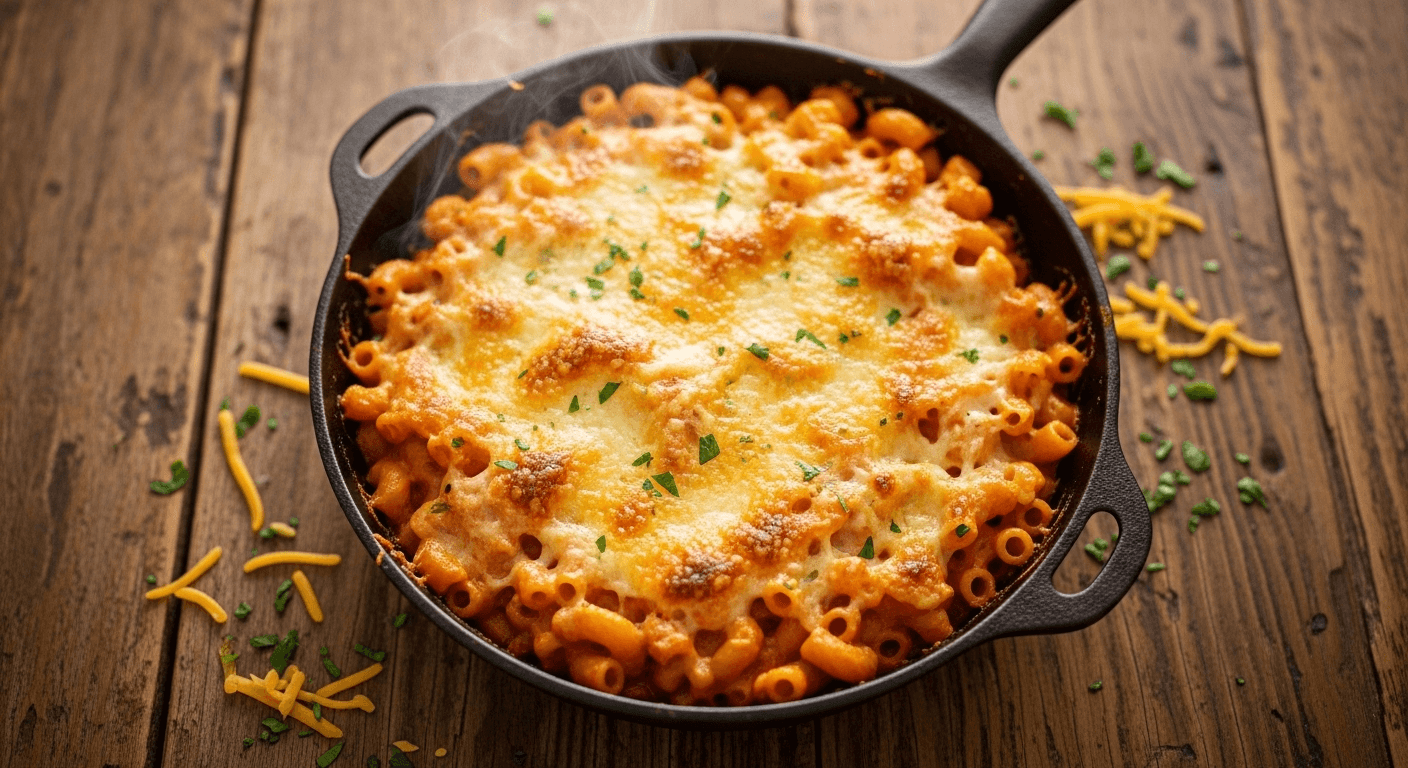

Few dishes say “comfort” quite like a warm bowl of creamy mac and cheese. This recipe takes the classic to the next level with an ultra-smooth, velvety cheese sauce that clings perfectly to each tender noodle. Whether you’re planning a cozy weeknight dinner, a holiday side dish, or a potluck crowd-pleaser, this recipe will make everyone ask for seconds.
Homemade mac and cheese is beloved because it’s nostalgic, simple, and endlessly customizable. Unlike the boxed version, this recipe uses real cheese, real creaminess, and no shortcuts — resulting in a dish that tastes like it came straight from a family kitchen.
Mac and cheese has a rich and comforting history. It traces its origins back to Europe, with early versions found in 18th-century English and Italian cookbooks. However, it became truly iconic in the United States thanks to Thomas Jefferson, who famously enjoyed the dish after visiting Paris and brought a pasta machine home to replicate it.
By the 1930s, macaroni and cheese grew into a staple of American households, especially during the Great Depression because it was affordable and filling. Over time, this creamy pasta became a holiday essential in Southern homes, a quick weeknight meal for busy families, and a beloved comfort dish in restaurants and potlucks alike.
Today, mac and cheese is celebrated in many regional variations — from sharp cheddar classics to baked versions with a crunchy breadcrumb topping, or extra creamy stovetop renditions like this one.
Why You’ll Love This Recipe
This isn’t just any mac and cheese — it’s the kind that makes people close their eyes with the first bite.
-
Ultra Creamy: A silky smooth sauce made with real cheese and cream.
-
Quick & Easy: Ready in under 30 minutes.
-
Customizable: Perfect base for add-ins like bacon, jalapeños, or veggies.
-
Family Favorite: A guaranteed crowd-pleaser.
-
Budget-Friendly: Uses pantry staples and affordable cheeses.
-
Perfect for Any Occasion: Weeknight dinners, holiday sides, potlucks, and game days.
Ingredient Notes
Here’s what makes this creamy mac and cheese truly special:
-
Elbow Macaroni: The classic pasta shape that holds the sauce perfectly. You can also use shells or cavatappi for extra creaminess.
-
Butter: Creates the roux — the foundation of a smooth cheese sauce.
-
All-Purpose Flour: Thickens the sauce to a perfect consistency.
-
Whole Milk & Heavy Cream: Gives the sauce its rich and silky texture.
-
Sharp Cheddar Cheese: The star of the show. Melts beautifully and gives that classic cheesy flavor.
-
Gruyère or Mozzarella: Optional but adds extra creaminess and flavor depth.
-
Salt, Pepper & Mustard Powder: Simple seasonings that elevate the sauce.
-
Panko Breadcrumbs (optional): For a crispy baked topping if desired.
Substitutions:
-
Use gluten-free pasta and flour for a gluten-free version.
-
Swap whole milk with 2% milk or evaporated milk if needed.
-
Mix cheeses like Monterey Jack, Colby, or white cheddar for a twist.
Equipment Needed
-
Large pot (for boiling pasta)
-
Medium saucepan (for making cheese sauce)
-
Whisk
-
Measuring cups and spoons
-
Wooden spoon or spatula
-
Baking dish (optional if baking)
-
Colander
Creamy Mac and Cheese Recipe
- Total Time: 30 minutes
- Yield: 6 servings 1x
- Diet: Vegetarian
Description
This ultra creamy mac and cheese recipe combines tender elbow macaroni with a rich, velvety cheese sauce made from scratch. Perfect for weeknight dinners, holiday sides, or potluck gatherings.
Ingredients
- 1 lb elbow macaroni
- 4 tbsp unsalted butter
- 4 tbsp all-purpose flour
- 2 cups whole milk
- 1 cup heavy cream
- 3 cups sharp cheddar cheese (shredded)
- 1 cup Gruyère or mozzarella (shredded)
- 1 tsp mustard powder
- Salt & pepper to taste
- Optional: ½ cup panko breadcrumbs for topping
Instructions
- Bring a large pot of salted water to a boil. Cook macaroni according to package instructions until al dente. Drain and set aside.
- In a medium saucepan, melt butter over medium heat. Whisk in flour and cook for 1–2 minutes to form a roux.
- Slowly whisk in milk and cream, stirring constantly until smooth and thickened.
- Remove from heat. Add shredded cheeses, mustard powder, salt, and pepper. Stir until melted and silky.
- Combine cooked macaroni with cheese sauce, stirring until evenly coated.
- Optional: Transfer to a baking dish, top with panko breadcrumbs, and broil for 2–3 minutes for a golden crust.
- Serve warm and enjoy!
Notes
- For extra creaminess, reserve ½ cup pasta water to loosen the sauce if needed.
- Use freshly shredded cheese for the best melt — pre-shredded cheese can be grainy.
- This dish can be doubled easily for parties or large family meals.
- Prep Time: 10 minutes
- Cook Time: 20 minutes
- Category: Dinner
- Method: Stovetop (optional baking)
- Cuisine: American
Nutrition
- Serving Size: 1 cup
- Calories: 480
- Sugar: 4g
- Sodium: 610mg
- Fat: 28g
- Saturated Fat: 16g
- Unsaturated Fat: 10g
- Trans Fat: 0g
- Carbohydrates: 38g
- Fiber: 2g
- Protein: 20g
- Cholesterol: 20g
Tips & Variations
-
Spicy Kick: Add chopped jalapeños, hot sauce, or pepper jack cheese.
-
Bacon Lovers: Mix in cooked, crumbled bacon for a smoky flavor.
-
Vegetarian Boost: Stir in steamed broccoli, peas, or spinach for extra nutrition.
-
Healthy Twist: Use whole wheat pasta, low-fat milk, and reduced-fat cheese.
-
Baked Version: Top with breadcrumbs and bake at 350°F for 20 minutes for a classic casserole-style mac and cheese.
Pro Chef Tips
-
Warm your dairy: Adding cold milk to the roux can create lumps — warming it helps make a silky sauce.
-
Use freshly shredded cheese: Pre-shredded cheese contains anti-caking agents that affect texture.
-
Salt the pasta water: It’s your only chance to season the pasta itself.
-
Combine cheeses: A mix of sharp cheddar and creamy Gruyère or mozzarella gives the best balance of flavor and melt.
Common Mistakes to Avoid
-
❌ Overcooking the pasta: It will get mushy when mixed with sauce.
-
❌ Using pre-shredded cheese: It won’t melt as smoothly.
-
❌ Skipping the roux step: It’s essential for thick, creamy sauce.
-
❌ Not seasoning enough: Cheese sauces need salt and a little mustard or spice for depth.
-
❌ Letting the sauce sit too long: It thickens quickly, so combine immediately.
Storage & Meal Prep
-
Refrigeration: Store leftovers in an airtight container for up to 4 days.
-
Reheating: Warm gently on the stove with a splash of milk or cream to restore creaminess. Microwave in short intervals, stirring in between.
-
Meal Prep: Make the sauce ahead, then cook pasta fresh when serving.
Make-Ahead & Freezer Notes
-
Make-Ahead: Prepare the sauce up to 2 days in advance and refrigerate. Cook pasta right before serving for best texture.
-
Freezing: Transfer fully cooked mac and cheese to a freezer-safe dish. Freeze up to 2 months.
-
Reheating: Thaw overnight in the fridge, then bake covered at 350°F until heated through.
Serving Suggestions
Mac and cheese pairs beautifully with a variety of sides and mains:
-
Crispy fried chicken or baked chicken tenders
-
Garden salad with vinaigrette
-
Garlic bread or soft dinner rolls
-
Roasted vegetables
-
Coleslaw
-
Sweet iced tea or lemonade
FAQs Section
Q1: Can I use pre-shredded cheese?
Yes, but for the best texture and flavor, freshly shredded cheese melts much smoother.
Q2: Can I make this recipe gluten-free?
Absolutely. Use gluten-free pasta and substitute flour with a gluten-free blend.
Q3: What’s the best cheese combination for mac and cheese?
Sharp cheddar for flavor, Gruyère or mozzarella for creaminess. A mix gives the perfect texture.
Q4: How can I keep the sauce from getting grainy?
Use low heat when adding cheese, and stir constantly. Don’t overheat the sauce.
Q5: Can I bake this instead of stovetop only?
Yes! Add breadcrumbs on top and bake at 350°F for 20 minutes for a golden crust.
Q6: How long does homemade mac and cheese last?
Up to 4 days in the fridge, or up to 2 months in the freezer.
Q7: How can I make it extra creamy?
Use a combination of milk and cream, and don’t skimp on the cheese. Adding a bit of cream cheese can make it even silkier.
Conclusion
This creamy mac and cheese is everything comfort food should be — cheesy, rich, and easy to make. Whether you’re cooking for family dinner or hosting a holiday feast, it’s a guaranteed hit that brings everyone to the table.
✨ If you try this recipe, leave a comment, share your twist, and save it on Pinterest so more home cooks can enjoy it too!