
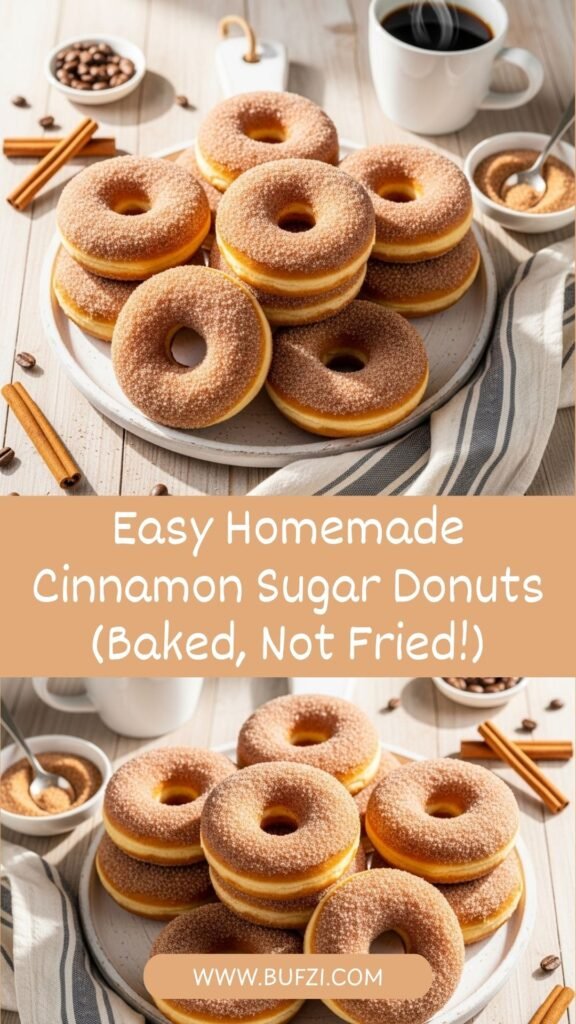
There’s something utterly irresistible about a warm, fluffy cinnamon sugar donut fresh from the oven—the tender, cake-like texture, the sweet cinnamon coating that melts on your tongue, and that comforting aroma that fills your kitchen. These easy homemade cinnamon sugar donuts bring all the deliciousness of bakery-style donuts right to your home kitchen, but with a twist: they’re baked instead of fried, making them lighter, healthier, and so much easier to make!
What makes these baked cinnamon sugar donuts truly special is their incredible versatility and crowd-pleasing appeal. They’re perfect for lazy weekend breakfasts when you want to treat your family to something special, elegant enough for brunch gatherings with friends, ideal for birthday parties and celebrations, wonderful for holiday mornings, and they make thoughtful homemade gifts for teachers and neighbors. These quick cinnamon donuts work for any occasion—from casual Sunday mornings in pajamas to impressive brunches where you want to show off your baking skills.
The beauty of this homemade donut recipe lies in its simplicity. Unlike traditional fried donuts that require special equipment, careful temperature monitoring, and dealing with hot oil, these baked donuts come together quickly with basic baking ingredients and a standard muffin tin or donut pan. The result? Tender, fluffy donuts coated in sweet cinnamon sugar that taste just as delicious as the fried version, but with less guilt and hassle. Once you try these easy cinnamon sugar donuts, you’ll never buy store-bought donuts again!
History / Background
The donut (or doughnut) has a rich and fascinating history that spans centuries and continents. While fried dough treats have existed in various cultures for thousands of years, the modern American donut has a uniquely interesting origin story.
Fried dough confections date back to ancient times—the Romans and Greeks made fried dough treats, and similar pastries appeared in medieval Europe. Dutch settlers brought their tradition of “olykoeks” (oil cakes)—fried balls of sweetened dough—to New Amsterdam (New York) in the early 19th century. These early versions were often filled with nuts or fruit to ensure the center cooked through, since the outside would brown faster than the inside could cook.
The iconic ring shape we associate with donuts today has an interesting origin story. According to popular legend, in 1847, a teenage sailor named Hanson Gregory was unhappy with the greasy, undercooked centers of the fried cakes his mother made. He took a tin pepper shaker and punched a hole in the center of the dough before frying, creating the ring shape that allowed for even cooking. While this story may be apocryphal, Gregory did claim credit for the invention later in life, and the ring-shaped donut became the American standard.
Donuts gained massive popularity in the United States during World War I when “Donut Lassies”—female Salvation Army volunteers—served fresh donuts to American soldiers on the front lines in France. These women fried donuts in soldiers’ helmets and served them to homesick troops, creating a powerful association between donuts and comfort, home, and American identity. When soldiers returned home, they brought their love of donuts with them, sparking a nationwide donut craze in the 1920s.
The first donut machine was invented in 1920 by Adolph Levitt, a Russian-born immigrant in New York City. His automated donut-making machine could produce 80 dozen donuts per hour, making them affordable and accessible to the masses. Donuts became so popular during the Great Depression because they were inexpensive, filling, and could be made from simple ingredients.
Cinnamon sugar donuts specifically represent a simpler, more old-fashioned style of donut—before the advent of glazes, frostings, and elaborate toppings. The combination of cinnamon and sugar has been used to coat fried dough treats for centuries across many cultures. In America, cinnamon sugar donuts became popular at cider mills and farm stands, particularly in the fall when fresh apple cider was available for dunking.
Baked donuts are a more modern innovation, gaining popularity in the 2000s as home bakers sought healthier alternatives to fried versions. Special donut pans with ring-shaped cavities made it possible to achieve the classic donut shape without frying. While purists argue that baked donuts aren’t “true” donuts, they’ve become beloved in their own right for their tender, cake-like texture and ease of preparation.
Today, donuts remain one of America’s most beloved treats, with National Donut Day celebrated on the first Friday of June each year to honor those Salvation Army “Donut Lassies” from World War I.
Why You’ll Love This Recipe
These homemade cinnamon sugar donuts will quickly become your new favorite weekend baking project. Here’s why these easy baked donuts are absolutely irresistible:
These fluffy cinnamon sugar donuts deliver all the deliciousness of bakery donuts without the hassle of deep frying! They’re incredibly tender and cake-like with a light, fluffy crumb that melts in your mouth. Coated in sweet cinnamon sugar while still warm, they’re the perfect combination of comforting flavors that everyone loves from kids to grandparents.
- No Deep Frying Required: Baked in the oven means no messy hot oil, no splattering, and no lingering fried food smell in your kitchen.
- Incredibly Easy: Simple one-bowl batter that comes together in minutes—no special techniques or pastry skills required.
- Quick to Make: From mixing bowl to your mouth in just 30 minutes total—faster than going to a bakery!
- Healthier Alternative: Baked instead of fried means significantly less fat and calories while still being utterly delicious.
- Perfect Texture: Tender, fluffy, and cake-like with a delicate crumb that’s never dry or dense.
- Kid-Friendly Activity: Children love helping measure ingredients, fill the donut pan, and coating warm donuts in cinnamon sugar.
- Budget-Friendly: Made with simple pantry staples—no expensive or specialty ingredients needed.
- Customizable: Easily adapted with different coatings, glazes, or mix-ins based on your preferences.
- Impressive Presentation: Look bakery-worthy and will make you seem like a baking superstar with minimal effort.
- Make-Ahead Friendly: Batter can be prepared the night before, and baked donuts freeze beautifully.
- Crowd-Pleasing: Everyone loves a warm cinnamon sugar donut—perfect for pleasing picky eaters and adventurous foodies alike.
- Nostalgia Factor: Evokes memories of county fairs, apple picking, and childhood weekend mornings.
Ingredient Notes
Let’s explore what makes these cinnamon sugar donuts so tender, fluffy, and delicious:
All-Purpose Flour: Forms the structure of your donuts. Measure carefully using the spoon-and-level method—too much flour creates dense, dry donuts. Cake flour can be substituted for an even more tender texture.
Granulated Sugar: Provides sweetness in the batter and creates the coating. The sugar in the batter also helps keep donuts moist and tender.
Baking Powder: This leavening agent makes donuts rise and become fluffy. Make sure yours is fresh (check the expiration date!) or your donuts won’t rise properly. To test freshness, drop a teaspoon in hot water—it should fizz immediately.
Baking Soda: Works with the buttermilk to create additional lift and a tender crumb. It also helps with browning.
Salt: Essential for balancing sweetness and enhancing all the other flavors. Never skip salt in baking!
Ground Cinnamon: Used both in the batter and the coating. Cinnamon adds warmth, depth, and that signature comforting flavor. Use fresh cinnamon for the best aroma and taste—old cinnamon loses potency.
Ground Nutmeg: Optional but recommended! Adds a subtle warm spice note that complements cinnamon beautifully. Use freshly grated if possible for the most vibrant flavor.
Eggs: Provides structure, richness, and helps bind everything together. Use large eggs at room temperature for best incorporation.
Buttermilk: The secret ingredient for incredibly tender, fluffy donuts! The acidity tenderizes the gluten and reacts with baking soda for extra lift. The tangy flavor also adds depth. Don’t have buttermilk? Make your own by adding 1 tablespoon lemon juice or vinegar to 1 cup of milk and letting it sit for 5 minutes.
Melted Butter: Adds richness, flavor, and moisture. Make sure it’s melted and slightly cooled—too hot and it can cook the eggs. You can substitute vegetable oil or melted coconut oil, but butter provides the best flavor.
Vanilla Extract: Enhances all the other flavors and adds warmth. Use pure vanilla extract rather than imitation for the best taste.
Melted Butter (for coating): Brushed on warm donuts before rolling in cinnamon sugar. This helps the coating stick and adds extra richness and flavor.
Cinnamon Sugar Coating: Made by mixing granulated sugar with ground cinnamon. The ratio is typically 1/2 cup sugar to 1-2 tablespoons cinnamon, depending on how cinnamon-forward you like it.
Substitutions: For dairy-free donuts, use non-dairy milk with lemon juice in place of buttermilk, and coconut oil or vegan butter instead of butter. For gluten-free, use a 1:1 gluten-free baking flour blend. For lower sugar, reduce the sugar in the batter by 25% (though they’ll be less sweet and slightly denser).
Equipment Needed
You don’t need any special equipment to make these bakery-style donuts—just basic baking tools:
- Donut Pan: A 6-cavity standard donut pan is ideal and creates the classic ring shape. You’ll need 2 pans to make a full batch, or bake in batches. If you don’t have a donut pan, you can use a muffin tin—the donuts will have a muffin shape instead of rings, but they’ll taste just as delicious!
- Large Mixing Bowl: For combining wet and dry ingredients.
- Medium Mixing Bowl: For mixing dry ingredients separately.
- Measuring Cups and Spoons: Accurate measurements are crucial in baking for consistent results.
- Whisk: For mixing dry ingredients and whisking wet ingredients.
- Rubber Spatula or Wooden Spoon: For folding ingredients together gently and scraping down bowl sides.
- Piping Bag or Zip-Top Bag: Optional but helpful for filling donut cavities neatly without spills. You can also use a spoon, though it’s messier.
- Cooling Rack: Allows air to circulate around donuts as they cool, preventing soggy bottoms.
- Pastry Brush or Silicone Brush: For brushing melted butter on warm donuts before coating.
- Shallow Bowl or Plate: For the cinnamon sugar mixture used to coat donuts.
- Non-Stick Cooking Spray: For greasing donut pans to ensure easy release.
- Toothpick or Cake Tester: For testing doneness—donuts are ready when a toothpick inserted comes out clean.
Easy Homemade Cinnamon Sugar Donuts (Baked, Not Fried!)
- Total Time: 27 minutes
- Yield: 12 donuts 1x
- Diet: Vegetarian
Description
These easy homemade cinnamon sugar donuts are baked, not fried, making them lighter and healthier while still being incredibly fluffy and delicious! Tender cake-like donuts coated in sweet cinnamon sugar are ready in just 30 minutes—perfect for weekend breakfasts or special brunches!
Ingredients
For the Donuts:
- 2 cups (250g) all-purpose flour
- ½ cup (100g) granulated sugar
- 2 teaspoons baking powder
- ½ teaspoon baking soda
- ¾ teaspoon salt
- 1 teaspoon ground cinnamon
- ¼ teaspoon ground nutmeg (optional but recommended)
- 2 large eggs, at room temperature
- ¾ cup (180ml) buttermilk, at room temperature
- 4 tablespoons (60g) unsalted butter, melted and slightly cooled
- 2 teaspoons vanilla extract
For the Cinnamon Sugar Coating:
- ½ cup (100g) granulated sugar
- 1½ tablespoons ground cinnamon
- 4 tablespoons (60g) unsalted butter, melted
Instructions
- Preheat and Prepare: Preheat your oven to 350°F (175°C). Generously spray two 6-cavity donut pans with non-stick cooking spray, making sure to coat all the grooves and the center posts well. If using a muffin tin, spray 12 cavities. Set aside.
- Mix Dry Ingredients: In a large mixing bowl, whisk together the flour, sugar, baking powder, baking soda, salt, cinnamon, and nutmeg (if using) until well combined and no lumps remain. This ensures even distribution of leavening agents throughout the batter.
- Mix Wet Ingredients: In a medium bowl, whisk together the eggs until lightly beaten. Add the buttermilk, melted butter, and vanilla extract. Whisk until smooth and well combined.
- Combine Wet and Dry: Pour the wet ingredients into the bowl with the dry ingredients. Using a rubber spatula or wooden spoon, gently fold the mixture together just until combined. The batter should be thick and slightly lumpy—do NOT overmix! Overmixing develops gluten and creates tough, dense donuts. A few flour streaks are perfectly fine. The batter will be thick, almost like a very thick cake batter or soft cookie dough.
- Fill the Donut Pan: Transfer the batter to a piping bag or large zip-top bag. Snip off about ½ inch from the corner/tip. Pipe the batter into the prepared donut cavities, filling each about ⅔ to ¾ full—don’t overfill or they’ll lose their shape and puff over the edges. If you don’t have a piping bag, carefully spoon the batter into each cavity using two spoons, though this method is messier. Smooth the tops gently if needed.
- Bake: Bake for 10-12 minutes, or until the donuts are lightly golden brown on top, spring back when gently touched, and a toothpick inserted comes out clean or with just a few moist crumbs (not wet batter). The exact time depends on your oven and whether you’re using a donut pan or muffin tin. Muffin-shaped donuts may need 13-15 minutes. Don’t overbake or they’ll be dry!
- Cool Slightly: Let donuts cool in the pan for 3-4 minutes. This brief cooling period helps them set and makes them easier to remove without breaking. Then carefully turn the pans over onto a cooling rack or gently remove donuts from the pan using your fingers or a small offset spatula. They should release easily if the pan was well-greased. Let cool for another 3-5 minutes until they’re warm but cool enough to handle.
- Prepare Coating: While donuts cool slightly, prepare the cinnamon sugar coating. In a shallow bowl or plate, mix together the granulated sugar and ground cinnamon until evenly combined. Place the melted butter for coating in another shallow bowl.
- Coat the Donuts: Working with one donut at a time while they’re still warm (this is important!), use a pastry brush to brush all surfaces with melted butter—don’t skip any spots! Alternatively, you can dip each donut quickly into the melted butter. Immediately roll the buttered donut in the cinnamon sugar mixture, coating all sides generously. Press gently to help the coating adhere. Place coated donuts on a plate or cooling rack.
- Serve: Serve donuts warm or at room temperature. They’re best enjoyed fresh on the day they’re made, though they’ll keep for 2-3 days. The cinnamon sugar coating tastes best when the donuts are still slightly warm!
Notes
- Don’t Overmix: Mix just until the dry ingredients are moistened. Overmixing creates tough, dense donuts instead of tender, fluffy ones.
- Room Temperature Ingredients: Bring eggs and buttermilk to room temperature for easier mixing and more even rising. Cold ingredients don’t incorporate as well.
- Fill Carefully: Don’t overfill the donut cavities—⅔ to ¾ full is ideal. Overfilling causes donuts to lose their shape and create a mess.
- Coat While Warm: The cinnamon sugar adheres best to warm donuts. If they cool too much, the butter won’t brush on as easily and the coating won’t stick as well.
- No Donut Pan: Use a standard muffin tin to make donut “holes” or muffin-shaped donuts. They won’t have the ring shape but will taste identical!
- Adjust Cinnamon: Use less cinnamon (1 tablespoon) for a milder flavor, or more (2 tablespoons) for intense cinnamon lovers.
- Prep Time: 15 minutes
- Cook Time: 12 minutes
- Category: Breakfast
- Method: Baking
- Cuisine: American
Nutrition
- Serving Size: 1 donut
- Calories: 215
- Sugar: 18g
- Sodium: 240mg
- Fat: 8g
- Saturated Fat: 5g
- Unsaturated Fat: 3g
- Trans Fat: 0g
- Carbohydrates: 33g
- Fiber: 1g
- Protein: 3g
- Cholesterol: 50mg
Tips & Variations
Customize these classic cinnamon sugar donuts to suit your taste and create exciting new flavors:
Apple Cider Donuts: Replace the buttermilk with apple cider reduced by half (boil ¾ cup cider until it reduces to ⅓ cup), and add ½ teaspoon of apple pie spice to the batter for that fall festival flavor.
Chocolate Donuts: Add 3 tablespoons of cocoa powder to the dry ingredients and reduce flour by 3 tablespoons. Coat in cinnamon sugar or dip in chocolate glaze.
Pumpkin Spice Donuts: Add ½ cup pumpkin puree to the wet ingredients, reduce buttermilk to ½ cup, and replace the cinnamon with pumpkin pie spice for autumn-perfect donuts.
Glazed Donuts: Skip the cinnamon sugar coating and dip cooled donuts in a simple glaze made from 1½ cups powdered sugar mixed with 3-4 tablespoons milk and ½ teaspoon vanilla.
Maple Glazed Donuts: Make a maple glaze using 1½ cups powdered sugar, 3 tablespoons maple syrup, and 2 tablespoons milk. Dip cooled donuts and let glaze set.
Powdered Sugar Donuts: Coat warm donuts in plain powdered sugar instead of cinnamon sugar for a simpler, classic version.
Mini Donuts: Use a mini donut pan and reduce baking time to 6-8 minutes. Perfect for parties and portion control!
Filled Donuts: Inject cooled donuts with jam, lemon curd, chocolate ganache, or pastry cream using a piping bag fitted with a long filling tip.
Cardamom Sugar Donuts: Replace cinnamon with ground cardamom in both the batter and coating for a Scandinavian twist.
Brown Butter Donuts: Brown the butter before adding it to the batter for rich, nutty flavor that takes these donuts to the next level.
Vegan Cinnamon Donuts: Use non-dairy milk with vinegar for buttermilk, flax eggs (2 tablespoons ground flaxseed + 6 tablespoons water), and vegan butter throughout.
Pro Chef Tips
Elevate your homemade donuts from good to absolutely bakery-quality with these professional techniques:
Room Temperature Matters: Bring eggs, buttermilk, and butter to room temperature before starting. Cold ingredients don’t incorporate smoothly and can create lumps or uneven texture. This simple step makes a noticeable difference in the final crumb structure.
Don’t Overmix the Batter: This is the number one rule for tender donuts! Mix just until the dry ingredients are moistened—the batter should be lumpy. Overmixing develops gluten, creating tough, rubbery, dense donuts instead of fluffy, cake-like ones. It’s better to undermix slightly than overmix.
Measure Flour Correctly: Too much flour is the most common cause of dry, dense donuts. Always use the spoon-and-level method: fluff the flour, spoon it into your measuring cup without packing, and level off the top with a knife. Never scoop directly from the bag or pack it down.
Grease Thoroughly: Make sure every single groove and crevice of your donut pan is well-greased, including the center posts. Use non-stick spray with flour in it, or brush with melted butter. Inadequately greased pans cause donuts to stick and break when removed.
Fill Evenly: Use a piping bag for the neatest, most even filling. This ensures all donuts are the same size and bake evenly. Unevenly filled cavities result in some donuts being overdone while others are underdone.
Watch Baking Time Carefully: Donuts bake quickly! Check them at the minimum time. They’re done when they spring back when lightly touched and a toothpick comes out clean. Overbaked donuts are dry and crumbly—better to slightly underbake than overbake.
Coat While Warm: The butter and cinnamon sugar adhere best to warm donuts. The warmth helps the butter soak in slightly and the sugar stick. If donuts cool completely, warm them briefly in the microwave (10-15 seconds) before coating.
Use Fresh Spices: Cinnamon and nutmeg lose their potency over time. Fresh, aromatic spices make a huge difference in flavor. If your cinnamon smells weak or dusty, replace it—you’ll notice the difference immediately.
Don’t Skip the Buttermilk: The acidity in buttermilk is crucial for activating the baking soda and creating tender donuts. If you don’t have buttermilk, make a substitute—don’t just use regular milk, as the chemistry won’t work the same way.
Let Batter Rest: If you have time, let the mixed batter rest for 5-10 minutes before filling the pan. This allows the flour to hydrate fully and the leavening agents to activate, creating even better texture.
Common Mistakes to Avoid
Even simple recipes can go wrong. Here are the most common pitfalls and how to avoid them:
Overmixing the Batter: This is the biggest mistake! When you mix too vigorously or for too long after adding wet to dry ingredients, you develop the gluten in the flour, which creates tough, dense, chewy donuts instead of tender, fluffy ones. Mix gently just until combined—lumps are fine! The moment you don’t see large pockets of dry flour, stop mixing immediately.
Overfilling the Donut Cavities: If you fill the cavities more than ¾ full, the donuts will puff up and over the edges during baking, losing their ring shape and creating a mess. They may also have raw centers because they’re too thick. Fill each cavity about ⅔ to ¾ full for perfect donuts that rise evenly and bake through properly.
Overbaking: Donuts can go from perfect to dry and crumbly in just a minute or two. Start checking at the minimum baking time. They’re done when they’re lightly golden, spring back when touched, and a toothpick comes out clean or with just a few moist crumbs. Remember, they’ll continue cooking slightly from residual heat after you remove them from the oven.
Using Old Leavening Agents: Baking powder and baking soda lose potency over time, especially once opened. Old leavening agents result in flat, dense donuts that don’t rise properly. Check expiration dates and test your baking powder by dropping a teaspoon in hot water—it should fizz vigorously. Replace every 6-12 months for best results.
Not Greasing the Pan Well: If you skimp on greasing, donuts will stick and break apart when you try to remove them. Every groove, corner, and the center post must be thoroughly coated. Use non-stick spray with flour, or brush liberally with melted butter. When in doubt, use more grease rather than less.
Coating Cooled Donuts: If donuts cool completely before coating, the butter won’t brush on smoothly and the cinnamon sugar won’t adhere properly. You’ll end up with patchy, unevenly coated donuts. Always coat while donuts are still warm—within 5-10 minutes of coming out of the oven is ideal.
Measuring Flour Incorrectly: Scooping flour directly from the bag packs it down, giving you too much flour and resulting in dry, dense donuts. Always fluff the flour first, then spoon it into your measuring cup and level off. This simple technique can prevent most texture problems.
Storage & Meal Prep
Keep your cinnamon sugar donuts fresh and delicious with these storage guidelines:
Room Temperature Storage: Store completely cooled donuts in an airtight container at room temperature for 2-3 days. Place a sheet of parchment paper between layers to prevent them from sticking together. They’ll gradually dry out over time, so they’re definitely best enjoyed within the first 24 hours when they’re at peak freshness and moisture.
Maintaining Freshness: To keep donuts soft longer, place a slice of bread in the container with them. The bread will dry out, but it helps keep the donuts moist. Replace the bread slice daily. You can also wrap individual donuts in plastic wrap to seal in moisture.
Refreshing Day-Old Donuts: If donuts have dried out slightly, warm them in the microwave for 8-10 seconds to restore softness and make them taste freshly baked again. You can also wrap them in foil and warm in a 300°F oven for 5 minutes.
Refrigerator Storage: While you can refrigerate donuts in an airtight container for up to 5 days, refrigeration tends to dry them out and make them stale faster. Room temperature storage is better for texture. If you do refrigerate them, bring to room temperature or warm briefly before eating.
Freezing Baked Donuts: Donuts freeze beautifully for up to 3 months! Let them cool completely, then wrap individually in plastic wrap or aluminum foil. Place wrapped donuts in a freezer-safe zip-top bag or airtight container, removing as much air as possible. Label with the date.
Thawing Frozen Donuts: Remove donuts from the freezer and let thaw at room temperature for 1-2 hours, or thaw in the refrigerator overnight. For faster thawing, microwave unwrapped donuts for 15-20 seconds. You can also refresh thawed donuts in a 300°F oven for 5 minutes to restore that fresh-baked taste.
Recoating: If the cinnamon sugar coating loses its appeal after storage, you can brush donuts with a bit of melted butter and roll in fresh cinnamon sugar to refresh them.
Make-Ahead & Freezer Notes
These cinnamon sugar donuts are perfect for advance preparation:
Make-Ahead Batter: You can prepare the batter the night before and refrigerate it in a covered bowl. Let it come to room temperature for 15-20 minutes before filling the donut pan and baking. The donuts may be slightly denser with overnight batter, but still delicious. Stir gently before using as the batter may have settled.
Freezing Unbaked Batter: Unfortunately, donut batter doesn’t freeze well unbaked. The leavening agents activate when mixed with liquid, so freezing prevents proper rising. It’s best to bake first, then freeze the finished donuts.
Freezing Baked Donuts (Best Method): This is the ideal make-ahead approach! Bake donuts completely, let them cool, then freeze them with or without the cinnamon sugar coating. Both methods work well:
- Freeze coated: Wrap individually after coating, freeze, then thaw and enjoy as-is.
- Freeze uncoated: Freeze plain donuts, then thaw and coat fresh with butter and cinnamon sugar for the best texture and flavor.
Freezing in Batches: Make a double or triple batch and freeze extras for quick breakfasts throughout the month. Having homemade donuts in your freezer feels like a superpower when unexpected guests arrive or you need a special breakfast in minutes.
Quick Thawing Method: For breakfast emergencies, microwave frozen donuts for 20-30 seconds until thawed and warm. They’ll taste freshly baked! Be careful not to overheat or they’ll dry out.
Freezer Life: Properly wrapped donuts maintain quality for 2-3 months in the freezer. After that, they’re still safe to eat but may develop freezer burn or lose some flavor and texture. Always label with the date so you know when you made them.
Party Prep Strategy: Bake donuts 1-2 days before your event and store at room temperature, or bake up to a month ahead and freeze. Thaw the morning of your gathering and serve at room temperature or slightly warmed. This reduces day-of stress while still providing fresh-tasting donuts.
Weekend Breakfast Routine: Make a batch every Sunday and freeze half. During the busy week, grab frozen donuts for quick breakfasts—pop them in the microwave for 20 seconds and you have a hot, fresh-tasting donut ready in seconds!
Serving Suggestions
Cinnamon sugar donuts are delicious on their own, but here are wonderful ways to serve and enjoy them:
Classic Pairing: Serve warm donuts with hot coffee, fresh-squeezed orange juice, or cold milk. The combination of sweet, spiced donuts with coffee is unbeatable!
Brunch Spread: Present donuts on a tiered serving stand or pretty platter as part of a brunch buffet alongside fresh fruit, scrambled eggs, bacon, quiche, and pastries for an impressive spread.
Coffee Bar: Set up a coffee bar with various coffee drinks (lattes, cappuccinos, regular coffee) and a platter of warm cinnamon donuts for a café-style breakfast experience at home.
Ice Cream Sandwiches: Slice donuts in half horizontally and fill with vanilla ice cream or frozen yogurt for an indulgent dessert that’s fun for kids and adults alike.
Donut Sundae: Top a warm donut with a scoop of vanilla ice cream, drizzle with caramel sauce, sprinkle with chopped nuts, and add whipped cream for an over-the-top dessert.
Apple Cider Pairing: Serve with hot or cold apple cider, especially in the fall—the flavors complement each other beautifully. Add a cinnamon stick to the cider for extra cozy vibes.
Breakfast Sandwich: While unconventional, a bacon and egg sandwich on a sliced cinnamon sugar donut creates an amazing sweet-savory combination.
Dunking Station: Serve donuts with small bowls of chocolate sauce, caramel sauce, vanilla glaze, or Nutella for dipping—perfect for parties where guests can customize.
With Fresh Fruit: Pair with fresh berries, sliced peaches, or apple slices to balance the sweetness and add freshness and nutrition to your breakfast.
Hot Chocolate: Serve alongside rich hot chocolate topped with whipped cream for a cozy winter breakfast or afternoon snack.
Tea Party: Present on a decorative plate with assorted teas for an elegant afternoon tea experience.
Gift Presentation: Arrange donuts in a decorative box or on a plate covered with plastic wrap and tied with a ribbon for a thoughtful homemade gift for teachers, neighbors, or friends.
FAQs Section
Can I make these donuts without a donut pan?
Absolutely! Use a standard muffin tin instead. Fill muffin cups about ⅔ full and bake for 13-15 minutes until a toothpick comes out clean. You’ll have donut “holes” or muffin-shaped donuts instead of rings, but they’ll taste identical. You can also use a mini muffin pan for bite-sized treats—bake for 8-10 minutes. Some people even make donut holes by dropping spoonfuls of batter onto a greased baking sheet, though the shape won’t be as uniform.
Why are my donuts dense instead of fluffy?
Dense donuts are usually caused by one of these issues: overmixing the batter (which develops gluten), using too much flour (measure with the spoon-and-level method), old or expired baking powder/baking soda (test yours by dropping in hot water—it should fizz vigorously), overbaking (which dries them out), or using cold ingredients that don’t incorporate properly. Make sure your leavening agents are fresh, mix gently just until combined, and measure accurately for the fluffiest results.
Can I make these donuts ahead of time?
Yes! Baked donuts are best fresh but can be made 1-2 days ahead and stored in an airtight container at room temperature. For longer storage, freeze them for up to 3 months. I recommend freezing them uncoated, then thawing and coating with fresh cinnamon sugar for the best texture. You can also prepare the batter the night before, refrigerate it, and bake fresh in the morning—though fresh-mixed batter produces slightly better texture.
What’s the difference between baked and fried donuts?
Baked donuts have a tender, cake-like texture similar to muffins, while fried donuts have a slightly denser, chewier texture with a crispy exterior. Baked donuts are significantly lower in fat and calories since they don’t absorb oil during cooking. They’re also much easier to make at home since you don’t need to deal with hot oil, temperature monitoring, or the mess and smell of deep frying. While purists prefer fried, baked donuts are delicious in their own right and much more practical for home bakers.
Can I use regular milk instead of buttermilk?
Buttermilk is really important for the texture and flavor of these donuts—the acidity tenderizes the gluten and reacts with baking soda for extra lift. If you don’t have buttermilk, make a substitute by adding 1 tablespoon of lemon juice or white vinegar to ¾ cup of regular milk. Stir and let sit for 5 minutes until it curdles slightly, then use as directed. This homemade “sour milk” works almost as well as real buttermilk. Don’t use plain milk without the acid or your donuts won’t rise properly.
How do I prevent donuts from sticking to the pan?
Thorough greasing is essential! Spray the pan very generously with non-stick cooking spray (the kind with flour works best), or brush every surface with melted butter, making sure to get into all the grooves and coat the center posts completely. Let donuts cool in the pan for 3-4 minutes before removing—this allows them to set. If they still stick, run a small offset spatula or butter knife around the edges to loosen before inverting the pan. Properly greased pans should release donuts easily.
Can I make these donuts gluten-free or vegan?
Yes! For gluten-free donuts, substitute the all-purpose flour with a 1:1 gluten-free baking flour blend (like Bob’s Red Mill or King Arthur). The texture will be slightly different but still delicious. For vegan donuts, use flax eggs (2 tablespoons ground flaxseed mixed with 6 tablespoons water, let sit 5 minutes), non-dairy milk with 1 tablespoon vinegar or lemon juice for the buttermilk substitute, and vegan butter throughout. Both versions work well with minor texture differences.
Conclusion
There’s something truly magical about homemade cinnamon sugar donuts fresh from the oven—the warm, tender texture, the sweet cinnamon coating, and the incredible aroma that fills your kitchen create a breakfast experience that can’t be matched by store-bought donuts. These easy baked cinnamon sugar donuts prove that you don’t need a deep fryer or professional bakery equipment to create absolutely delicious, bakery-quality donuts right in your own kitchen.
Whether you’re making these fluffy cinnamon donuts for a special weekend breakfast when you want to treat your family, serving them at a brunch gathering where they’ll disappear in minutes, baking them for a birthday celebration, or simply craving something sweet and comforting on a lazy Sunday morning, this recipe delivers incredible flavor with minimal effort and hassle. The baked method makes them so much more approachable than traditional fried donuts, and the fact that they’re ready in just 30 minutes means you can enjoy fresh, warm donuts anytime the craving hits.
The best part? These homemade donuts taste infinitely better than anything you’d buy at the store, they’re made with simple ingredients you probably already have in your pantry, and you can customize them endlessly with different coatings, glazes, and flavors. Once you experience how easy and rewarding it is to make donuts at home, it will become one of your favorite weekend baking traditions.
Now it’s your turn to fill your kitchen with the irresistible aroma of fresh-baked cinnamon sugar donuts! I promise that once your family tastes these warm, fluffy, perfectly spiced donuts, they’ll be requesting them every weekend. You’ll love how quick and easy they are to make, and the smiles on everyone’s faces will make it all worthwhile.
Have you made these cinnamon sugar donuts? I’d absolutely love to hear about your experience! Leave a comment below telling me how they turned out, what variations you tried, or any questions you have. Don’t forget to rate this recipe and save it to your Pinterest boards so you can find it whenever you need a special breakfast treat. Share photos of your donuts—I love seeing your beautiful baking creations! Happy baking, friends!