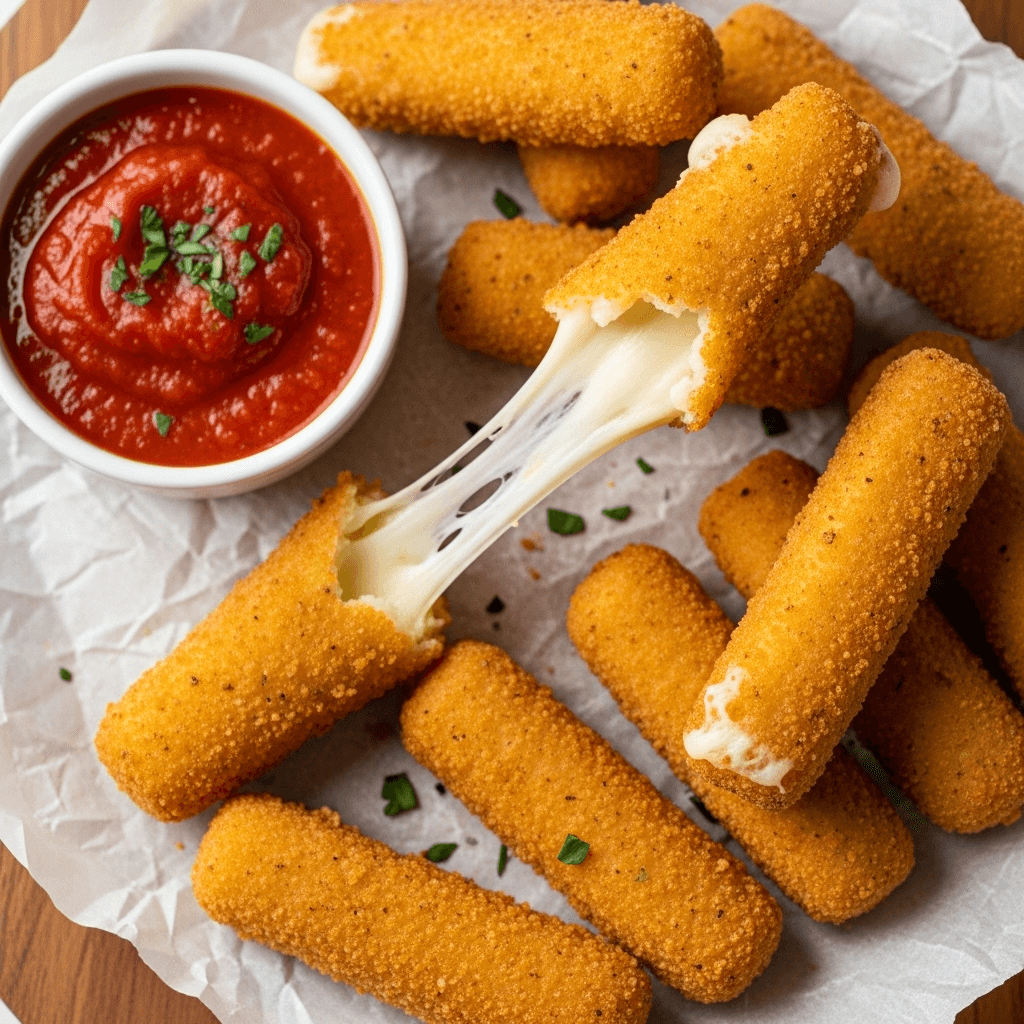

Get ready to fall in love with these homemade baked mozzarella sticks—crispy golden breadcrumb coating on the outside, melty, stretchy mozzarella cheese on the inside. This baked mozzarella sticks recipe delivers all the deliciousness of the deep-fried restaurant version but with a healthier twist that you can feel good about serving your family.
Whether you’re planning game day snacks, looking for kid-friendly appetizers, or just craving something cheesy and comforting, these easy baked mozzarella sticks are your answer. They’re perfect for parties, after-school snacks, movie nights, or whenever you need a crowd-pleasing finger food that disappears in minutes. The best part? You probably have most of the ingredients in your kitchen right now, and they’re surprisingly simple to make from scratch.
Unlike store-bought frozen mozzarella sticks that can be bland and disappointing, these homemade versions are bursting with real cheese flavor and have that perfect crispy-crunchy exterior everyone craves. Dip them in warm marinara sauce, and you’ve got an appetizer that rivals anything from your favorite Italian restaurant—except you made it yourself and baked it instead of frying it.
History / Background: From Italian Roots to American Classic
Mozzarella sticks as we know them today are a distinctly American creation, but their origins trace back to the rich culinary traditions of Italy and France. The concept of breading and frying cheese has European roots—the French have long enjoyed “mozzarella en carrozza” (mozzarella in a carriage), where mozzarella is sandwiched between bread, breaded, and fried.
Mozzarella cheese itself originated in Southern Italy, particularly in the Campania region near Naples, where it was traditionally made from the milk of water buffaloes. This fresh, creamy cheese became a staple of Italian cuisine, featured prominently in dishes like Caprese salad and, of course, pizza.
The transformation of mozzarella into the stick-shaped, breaded, and fried appetizer we recognize today happened in America during the 1970s. As Italian-American cuisine evolved and adapted to American tastes, restaurants began experimenting with ways to make Italian ingredients more accessible as finger foods and appetizers. Mozzarella sticks emerged during this era of innovation, quickly becoming a menu staple at casual dining restaurants, bars, and pizzerias across the country.
By the 1980s and 1990s, mozzarella sticks had achieved iconic status in American food culture. They appeared on appetizer menus nationwide, from TGI Fridays to local pizza joints. The introduction of frozen mozzarella sticks for home consumption in the 1990s solidified their place as a beloved comfort food and party snack.
The shift toward baked mozzarella sticks came much later, as health-conscious home cooks sought ways to enjoy their favorite foods with less oil and fewer calories. Baking instead of deep-frying reduces fat content significantly while still achieving that coveted crispy exterior, especially when you use the right techniques and coating methods.
Today, mozzarella sticks represent the perfect fusion of Italian cheese-making tradition and American snack culture—a food that’s equally at home at Super Bowl parties, kids’ birthday celebrations, and casual weeknight dinners. They’ve transcended their restaurant origins to become a comfort food that brings people together, one stretchy cheese pull at a time.
Why You’ll Love This Recipe
These baked mozzarella sticks prove that you don’t need a deep fryer to achieve crispy, golden, restaurant-quality results. They’re healthier, easier to make, and just as satisfying as the fried version—maybe even more so because you can eat them guilt-free.
Here’s what makes this baked mozzarella sticks recipe absolutely irresistible:
- Healthier Than Fried: Baking instead of deep-frying cuts the fat and calories dramatically while still delivering that crispy, crunchy texture everyone loves
- Kid-Approved: Children go crazy for these cheesy sticks. They’re a great way to get picky eaters excited about dinner or snack time
- Budget-Friendly: Make a big batch for a fraction of what you’d pay at a restaurant or for frozen store-bought versions
- Freezer-Friendly: Make a double batch and freeze half for instant snacks whenever cravings strike—perfect for busy families
- Customizable: Easily adjust the seasonings, add spices to the coating, or experiment with different cheeses to suit your taste
- No Deep Fryer Required: No messy oil, no splatter, no complicated equipment. Just your oven and a baking sheet
- Party Perfect: Scale up easily to feed a crowd. These disappear fast at gatherings, game days, and celebrations
- Simple Ingredients: No exotic items or specialty ingredients needed. Everything is available at your regular grocery store
- Quick Prep: With about 20 minutes of hands-on prep, you can have homemade mozzarella sticks ready to bake
- That Cheese Pull: Bite into these and experience that gorgeous, Instagram-worthy cheese stretch that makes mozzarella sticks so satisfying
- Versatile Serving: Great as appetizers, snacks, party food, or even a fun dinner alongside salad and garlic bread
Ingredient Notes: Building Blocks of Crispy Perfection
Understanding your ingredients helps you make the best baked mozzarella sticks possible. Here’s what you’ll need and why each component matters:
Mozzarella Cheese: The star of the show! Use low-moisture, whole milk mozzarella cheese—not fresh mozzarella, which contains too much water and will leak out during baking. String cheese works fantastically because it’s already the perfect stick shape and size. You can also buy a block of mozzarella and cut it into sticks yourself (about 3-4 inches long and 1/2 inch thick). Low-moisture mozzarella melts beautifully without becoming watery.
All-Purpose Flour: The first layer in your breading station. Flour helps the egg wash stick to the cheese and creates a dry surface for better coating adhesion. All-purpose flour works perfectly, but you can substitute with gluten-free flour blend if needed.
Eggs: Acts as the “glue” that helps breadcrumbs stick to the cheese. Beat the eggs well so the whites and yolks are fully combined. Room temperature eggs work slightly better than cold eggs straight from the fridge.
Breadcrumbs: Use Italian-seasoned breadcrumbs for maximum flavor, or plain breadcrumbs if you want to control the seasonings yourself. Panko breadcrumbs create an extra-crispy coating with more crunch and texture than regular breadcrumbs. For the crispiest results, use a combination of regular breadcrumbs and panko.
Parmesan Cheese: Grated Parmesan mixed into the breadcrumb coating adds savory, umami flavor and helps the coating turn golden brown. Use freshly grated Parmesan if possible—the pre-grated kind works but fresh tastes better.
Italian Seasoning: A blend of dried herbs (basil, oregano, thyme, rosemary) that gives your coating that classic Italian flavor profile. You can also use individual dried herbs if you don’t have Italian seasoning blend.
Garlic Powder: Adds savory depth to the breading without the moisture that fresh garlic would introduce. Don’t substitute with garlic salt, as this can make the coating too salty.
Salt and Pepper: Essential for seasoning each layer of the coating. Don’t skip salting the flour and breadcrumb mixture—this ensures flavor throughout.
Cooking Spray or Olive Oil: A light coating of oil helps the breadcrumbs crisp up and turn golden brown in the oven. Cooking spray is convenient, but you can also lightly brush olive oil over the breaded sticks before baking.
Marinara Sauce for Dipping: While not technically part of the mozzarella stick itself, marinara sauce is the classic accompaniment. Use your favorite store-bought marinara, or make homemade if you’re feeling ambitious. Warm the sauce before serving for the best experience.
Equipment Needed
Having the right tools makes preparing baked mozzarella sticks much simpler. Here’s what you’ll need:
- Three Shallow Bowls or Plates: For your breading station (flour, egg, breadcrumbs). Shallow containers work better than deep bowls for easy coating
- Baking Sheet: A large rimmed baking sheet that can fit all your mozzarella sticks in a single layer without overcrowding
- Parchment Paper or Silicone Baking Mat: Lines the baking sheet and prevents sticking. Parchment paper also makes cleanup a breeze
- Wire Cooling Rack (optional but helpful): Placing a wire rack on your baking sheet allows air to circulate around the mozzarella sticks for even crispier results
- Whisk or Fork: For beating the eggs until smooth and well-combined
- Kitchen Tongs or Two Forks: For handling the cheese sticks during the breading process without getting your hands completely covered in breading
- Sharp Knife and Cutting Board: If you’re cutting your own mozzarella sticks from a block instead of using string cheese
- Measuring Cups and Spoons: For accurate measurements of your coating ingredients
- Cooking Spray: For lightly coating the breaded mozzarella sticks before baking
- Freezer-Safe Container or Bag (if freezing): For storing unbaked mozzarella sticks in the freezer
Baked Mozzarella Sticks Recipe
- Total Time: 1 hour (or up to 2 hours)
- Yield: 12 mozzarella sticks (4-6 servings) 1x
- Diet: Vegetarian
Description
These crispy baked mozzarella sticks feature golden, crunchy breadcrumb coating with perfectly melted, stretchy mozzarella cheese inside. Healthier than deep-fried versions, they’re baked to crispy perfection in the oven. Serve with warm marinara sauce for dipping for the ultimate party appetizer or family-friendly snack!
Ingredients
For the Mozzarella Sticks:
- 12 mozzarella string cheese sticks (or 1 pound block mozzarella, cut into 3–4 inch sticks)
- 1/2 cup all-purpose flour
- 2 large eggs
- 2 tablespoons water
- 1 1/2 cups Italian-seasoned breadcrumbs (or use plain breadcrumbs and add seasonings)
- 1/2 cup panko breadcrumbs
- 1/2 cup grated Parmesan cheese
- 1 teaspoon garlic powder
- 1 teaspoon dried Italian seasoning
- 1/2 teaspoon salt
- 1/4 teaspoon black pepper
- Cooking spray or olive oil for coating
For Serving:
- 1 1/2 cups marinara sauce, warmed
- Fresh basil leaves for garnish (optional)
- Red pepper flakes (optional)
Instructions
Step 1: Prepare Your Breading Station
Set up three shallow bowls or plates on your counter in assembly-line fashion. In the first bowl, place the flour. In the second bowl, whisk together the eggs and water until smooth and well-combined. In the third bowl, combine the Italian breadcrumbs, panko breadcrumbs, grated Parmesan cheese, garlic powder, Italian seasoning, salt, and black pepper. Mix thoroughly so all seasonings are evenly distributed.
Step 2: Cut Cheese if Needed
If using string cheese, unwrap each stick and set aside. If using a block of mozzarella, cut it into sticks about 3-4 inches long and 1/2 inch thick. Try to keep them uniform in size so they cook evenly. Pat the cheese sticks dry with paper towels to remove any surface moisture—this helps the breading stick better.
Step 3: Bread the Mozzarella Sticks (First Coat)
Working with one cheese stick at a time, roll it in the flour, coating all sides and shaking off any excess. Next, dip it into the egg mixture, turning to coat completely and letting excess drip off. Finally, roll it in the breadcrumb mixture, pressing gently so the crumbs adhere to all sides. Place the breaded stick on a clean plate or baking sheet.
Step 4: Double Bread for Extra Crispiness
Here’s the secret to ultra-crispy, leak-proof mozzarella sticks: bread them twice! After all sticks have their first coating, repeat the process. Dip each stick back into the egg mixture, then roll again in the breadcrumb mixture. This double coating creates a thicker barrier that prevents cheese from leaking out during baking and provides extra crunch. Make sure the cheese is completely covered with no gaps in the coating.
Step 5: Freeze the Breaded Sticks
This step is absolutely critical and cannot be skipped! Arrange the double-breaded mozzarella sticks on a parchment-lined baking sheet in a single layer, not touching each other. Place the entire baking sheet in the freezer for at least 30 minutes, or up to 2 hours. This freezing step firms up the cheese so it doesn’t melt out of the coating during baking. If you’re short on time, 30 minutes is the minimum; longer is even better.
Step 6: Preheat Your Oven
About 10 minutes before you’re ready to bake, preheat your oven to 425°F (220°C). This high temperature is essential for getting crispy breadcrumbs before the cheese melts completely. If using a wire rack on your baking sheet, place it now and spray generously with cooking spray. Otherwise, line a fresh baking sheet with parchment paper and spray with cooking spray.
Step 7: Prepare Sticks for Baking
Remove the frozen mozzarella sticks from the freezer. Arrange them on your prepared baking sheet (or wire rack) in a single layer with space between each one. Spray the tops and sides of the mozzarella sticks generously with cooking spray, or brush lightly with olive oil. This fat is crucial for achieving golden, crispy breadcrumbs.
Step 8: Bake to Golden Perfection
Place the baking sheet on the middle rack of your preheated oven. Bake for 8-10 minutes, watching carefully. The mozzarella sticks are done when the coating is golden brown and crispy, and you just start to see tiny bits of cheese beginning to ooze out. Don’t overbake, or you’ll lose all the cheese! Every oven is different, so start checking at 8 minutes. If using a wire rack, the sticks may cook slightly faster due to air circulation underneath.
Step 9: Serve Immediately
Remove from the oven and let the mozzarella sticks rest for 1-2 minutes (this allows the cheese to set slightly so it doesn’t completely run out when you bite into them). Transfer to a serving platter. Serve immediately with warm marinara sauce for dipping. Garnish with fresh basil leaves and a sprinkle of red pepper flakes if desired.
Notes
- Freezing is Essential: Don’t skip the freezing step! This prevents cheese explosion during baking and ensures the coating stays intact while the inside melts perfectly.
- Double Coating Matters: The double breading creates a thicker barrier and crispier texture. It’s worth the extra few minutes.
- Watch Closely: Oven temperatures vary. Start checking at 8 minutes to prevent over-baking and cheese leakage.
- Make-Ahead Friendly: Bread the mozzarella sticks completely, freeze on a baking sheet, then transfer to a freezer bag. Store for up to 3 months and bake directly from frozen, adding 1-2 extra minutes to the baking time.
- String Cheese Shortcut: String cheese is already perfectly sized and shaped, making prep much easier than cutting a block of mozzarella.
- Oil is Important: Don’t skip spraying or brushing with oil before baking. This helps achieve that golden, crispy exterior.
- Prep Time: 20 minutes
- Cook Time: 10 minutes
- Category: Appetizer
- Method: Baking
- Cuisine: Italian-American
Nutrition
- Serving Size: 3 mozzarella sticks
- Calories: 285
- Sugar: 3g
- Sodium: 645mg
- Fat: 14g
- Saturated Fat: 7g
- Unsaturated Fat: 5g
- Trans Fat: 0g
- Carbohydrates: 24g
- Fiber: 2g
- Protein: 16g
- Cholesterol: 85mg
Tips & Variations: Make Them Your Own
Cheese Variations:
- Mix half mozzarella and half cheddar for a sharper flavor
- Use pepper jack cheese for a spicy kick
- Try provolone for a smokier, more complex taste
- Make a combination of different cheeses for variety in one batch
Flavor Boost Add-Ins:
- Add 1/2 teaspoon red pepper flakes to the breadcrumb mixture for heat
- Mix in 1 teaspoon dried basil and 1 teaspoon dried oregano for extra Italian flavor
- Include 1/2 cup finely crushed pretzels in the breadcrumb mixture for added crunch and saltiness
- Add 1/4 cup finely crushed Doritos or Cheez-Its to the breading for unique flavor
Gluten-Free Version:
- Use gluten-free all-purpose flour blend for the flour coating
- Substitute gluten-free breadcrumbs or crushed gluten-free crackers for regular breadcrumbs
- Use gluten-free panko breadcrumbs (widely available now)
Extra Crispy Technique:
- Add 2 tablespoons cornstarch to the flour for an even crispier coating
- Use all panko breadcrumbs instead of mixing regular and panko
- Freeze for a full hour or more instead of just 30 minutes
Dipping Sauce Alternatives:
- Classic marinara is traditional, but try ranch dressing for a different twist
- Garlic aioli makes an elegant dipping sauce
- Spicy arrabbiata sauce for heat lovers
- Pesto for an herby, fresh alternative
- Warm pizza sauce seasoned with extra oregano
Healthier Modifications:
- Use part-skim mozzarella instead of whole milk mozzarella
- Make your own breadcrumbs from whole wheat bread
- Use egg whites only instead of whole eggs
- Increase the Parmesan in the coating and reduce breadcrumbs slightly for lower carbs
Pro Chef Tips: Restaurant-Quality Results
The Freeze-Before-Baking Rule: Professional kitchens always freeze breaded cheese sticks before frying or baking. This crucial step firms up the cheese so it maintains its shape and doesn’t leak out before the coating crisps. Think of the coating as a protective shell—it needs time to set and harden in the heat before the cheese inside melts. Without freezing first, you’ll end up with empty breadcrumb shells and melted cheese all over your baking sheet.
Double Breading is Non-Negotiable: A single coating of breadcrumbs isn’t thick enough to contain melting cheese. The double breading creates a thicker, more protective barrier and results in a crunchier texture that more closely resembles deep-fried mozzarella sticks. The second coat fills in any thin spots or gaps from the first coating, ensuring complete coverage.
Work with Cold Hands: When breading, keep your hands as cold as possible. Run them under cold water between batches and dry them off. Warm hands heat up the cheese slightly, which can cause melting to begin prematurely. Some chefs even wear disposable gloves and keep a bowl of ice water nearby to cool their hands periodically.
The One-Hand Dry, One-Hand Wet Method: Keep one hand for dry ingredients (flour and breadcrumbs) and one hand for wet ingredients (eggs). This prevents your hands from becoming completely coated in thick, gloppy breading that interferes with your work. It’s a professional technique that keeps the process clean and efficient.
High Heat is Essential: A 425°F oven creates quick crisping action on the outside before the inside has time to completely melt out. Lower temperatures allow the cheese to heat through and escape before the coating browns. Think fast and hot, not slow and low. Some restaurants even use 450°F, though this requires very careful watching.
Don’t Overcrowd the Baking Sheet: Leave at least an inch of space between each mozzarella stick. Overcrowding causes them to steam rather than bake, resulting in soggy coating instead of crispy texture. The hot air needs to circulate freely around each stick. If necessary, bake in two batches rather than cramming them all on one sheet.
The Wire Rack Trick: Placing a wire rack on your baking sheet and arranging the mozzarella sticks on the rack (instead of directly on the pan) allows hot air to circulate completely around each stick, including the bottom. This results in even browning on all sides and eliminates the soft bottom spot that can happen when they sit directly on the pan.
Timing is Everything: There’s a narrow window between “perfectly crispy outside with melty inside” and “cheese has escaped and left an empty shell.” Start checking at 8 minutes, and pull them out the moment you see the tiniest bit of cheese starting to peek out. Residual heat will continue melting the cheese slightly even after you remove them from the oven.
Common Mistakes to Avoid
Mistake #1: Skipping or Shortening the Freezing Time
This is the number one reason homemade mozzarella sticks fail. If the cheese isn’t frozen solid before baking, it will melt out of the coating before the breadcrumbs have time to crisp up. You’ll end up with hollow, cheeseless breadcrumb tubes and a melted cheese puddle on your pan. Always freeze for at least 30 minutes minimum, though 1-2 hours is even better. If you’re in a huge rush, even 20 minutes in the freezer is better than nothing, but your results won’t be as good.
Mistake #2: Using Fresh Mozzarella
Fresh mozzarella (the kind packed in water or whey) contains way too much moisture for this recipe. It will leak out excessively during baking, creating a soggy mess. Always use low-moisture mozzarella—either string cheese or a block labeled “low-moisture mozzarella.” The lower water content means the cheese melts beautifully without becoming watery.
Mistake #3: Not Coating Thoroughly or Leaving Gaps
Every millimeter of cheese must be completely covered with breading. Even tiny gaps or thin spots in the coating will become escape routes for melted cheese. Pay special attention to the ends of each stick—these are the most common problem areas. Press the breadcrumbs firmly to ensure good adhesion, and inspect each stick carefully before freezing. The double coating helps eliminate gaps, so don’t skip it.
Mistake #4: Baking at Too Low a Temperature
Baking at 350°F or 375°F doesn’t work for mozzarella sticks. The coating needs intense heat to crisp up quickly before the cheese inside melts completely. At lower temperatures, you’ll have melted-out cheese before achieving crispy breadcrumbs. Stick to 425°F or even 450°F for best results, and watch them carefully.
Mistake #5: Forgetting the Oil Spray
Breadcrumbs need fat to turn golden brown and crispy in the oven. Without a coating of cooking spray or brushed oil, your mozzarella sticks will come out pale and relatively soft instead of golden and crunchy. Don’t be shy with the spray—give them a generous coating on all visible sides. This replaces the oil that deep-frying would provide and is essential for achieving that crispy texture.
Storage & Meal Prep: Planning Ahead
Refrigerator Storage:
Leftover baked mozzarella sticks aren’t quite the same as fresh-from-the-oven, but they can be stored in the refrigerator. Let them cool completely, then transfer to an airtight container and refrigerate for up to 3 days. The coating will soften during storage, but you can re-crisp them in the oven.
Reheating Baked Mozzarella Sticks:
Never microwave leftover mozzarella sticks unless you want rubbery, soggy results. Instead, reheat in a 375°F oven for 5-7 minutes until the coating crisps up again and the cheese warms through. You can also use an air fryer at 375°F for 3-4 minutes for excellent results. Place them in a single layer with space between each one for even reheating.
Best Practices for Leftovers:
Honestly, mozzarella sticks are always best fresh and hot from the oven. The cheese is at its optimal stretchiness and the coating is at peak crispiness right after baking. If you know you won’t eat them all immediately, consider baking only what you’ll eat and keeping the rest unbaked in the freezer for later.
Why Fresh is Best:
The contrast between piping hot, stretchy melted cheese and crispy, crunchy coating is what makes mozzarella sticks magical. This contrast diminishes significantly once they cool and are reheated. For the best experience, bake only what you’ll serve right away.
Make-Ahead & Freezer Notes: Ultimate Convenience
Freezing Unbaked Mozzarella Sticks (Highly Recommended):
This is my favorite make-ahead method and the way to always have mozzarella sticks ready for last-minute cravings. After double-breading the cheese sticks, arrange them on a parchment-lined baking sheet and freeze until solid (about 2 hours). Once frozen hard, transfer them to a freezer-safe bag or container, removing as much air as possible. Label with the date. They’ll keep for up to 3 months.
Baking from Frozen:
When you’re ready to eat, do not thaw! Place the frozen, breaded mozzarella sticks directly on a prepared baking sheet, spray with cooking spray, and bake at 425°F for 10-12 minutes (slightly longer than fresh). They’ll be just as good as if you’d made them that day. This method is perfect for quick appetizers when friends drop by unexpectedly or for easy after-school snacks.
Batch Prep Strategy:
Smart home cooks make double or triple batches, baking only what they need immediately and freezing the rest. This way, you do the messy breading work just once but enjoy homemade mozzarella sticks multiple times. It’s like having your own personal freezer stash of restaurant-quality appetizers ready anytime.
Freezing Baked Mozzarella Sticks:
You can freeze already-baked mozzarella sticks, though the texture won’t be quite as good as freezing them unbaked. Let them cool completely, arrange in a single layer on a baking sheet and freeze until solid, then transfer to a freezer bag. They’ll keep for about 1 month. Reheat from frozen at 375°F for 8-10 minutes.
Portion Control Freezing:
Freeze unbaked mozzarella sticks in smaller portions based on how many people you typically serve. Put 6 sticks in one bag, 12 in another, etc. This makes it easy to bake exactly the right amount without thawing a huge batch.
Organization Tips:
Label your freezer bags clearly with the contents, date, and baking instructions. Include the oven temperature and time right on the bag so you don’t have to hunt for the recipe every time. Trust me, future-you will appreciate this organization when you’re hungry and want mozzarella sticks NOW.
Serving Suggestions: Complete Your Appetizer Spread
Baked mozzarella sticks are fantastic on their own, but pairing them with complementary items creates a memorable appetizer spread or even a fun, casual dinner.
Dipping Sauce Varieties:
While classic marinara is traditional and beloved, offer a variety of dipping sauces to please everyone. Set out small bowls of warm marinara, ranch dressing, garlic aioli, honey mustard, or spicy buffalo sauce. People love having options, and different sauces completely change the flavor experience.
Italian Appetizer Spread:
Create an Italian-themed appetizer board by serving mozzarella sticks alongside other Italian favorites: bruschetta, caprese skewers, olives, sliced salami and prosciutto, roasted red peppers, and marinated artichoke hearts. Add some crusty Italian bread and you’ve got a feast.
Game Day Platter:
Mozzarella sticks are perfect game day food. Serve them as part of a larger appetizer spread with chicken wings, loaded potato skins, nachos, and veggie sticks with dip. The variety ensures everyone finds something they love.
Casual Dinner Option:
Believe it or not, mozzarella sticks can anchor a fun, casual family dinner. Serve them with a big Caesar salad, garlic bread, and maybe some pasta with marinara sauce. Kids especially love this kind of “fun dinner” night.
Salad Pairing:
Balance the richness of fried cheese with a fresh, bright salad. A simple mixed greens salad with Italian vinaigrette, an arugula salad with lemon dressing, or a classic Caesar salad all work beautifully. The crisp, acidic vegetables cut through the richness perfectly.
Beverage Pairings:
Mozzarella sticks pair wonderfully with Italian sodas, sparkling water with lemon, or for adults, a crisp Italian white wine like Pinot Grigio or a light red like Chianti. Beer lovers should try them with a cold lager or pilsner.
Party Presentation:
Arrange baked mozzarella sticks standing upright in a tall glass or jar for a fun, dramatic presentation. Place a small bowl of marinara sauce in the center of a platter and arrange the sticks around it in a sunburst pattern. Garnish with fresh basil leaves and a light dusting of Parmesan cheese for Instagram-worthy appeal.
FAQs: Your Questions Answered
Q: Can I use an air fryer instead of the oven?
A: Absolutely! Air fryers work fantastically for mozzarella sticks and produce exceptionally crispy results. Preheat your air fryer to 390°F. Spray the basket with cooking spray, arrange frozen breaded mozzarella sticks in a single layer (don’t overcrowd), spray the tops with cooking spray, and air fry for 6-8 minutes, flipping halfway through. Watch them carefully—air fryers can cook faster than ovens.
Q: Why did all my cheese melt out during baking?
A: This happens for a few reasons: not freezing the breaded sticks long enough before baking, having gaps or thin spots in the breading coating, baking at too low a temperature, or overbaking. Make sure you double-bread, freeze for at least 30 minutes, use high heat (425°F), and watch them carefully. Remove them the moment you see tiny bits of cheese starting to appear.
Q: Can I make these ahead for a party?
A: Yes! Bread the mozzarella sticks completely up to 24 hours before your party and keep them in the freezer. Then just bake them right before serving—they only take 10 minutes. Alternatively, bake them up to an hour before and keep them warm in a 200°F oven, though they’re truly best served immediately.
Q: What’s the difference between using string cheese versus a block of mozzarella?
A: String cheese is more convenient because it’s already perfectly sized and shaped—no cutting required. It’s also individually wrapped, which helps prevent the cheese from drying out in storage. Block mozzarella gives you more flexibility in size and shape, and some people prefer its texture. Both work equally well in this recipe, so choose based on what’s easier for you.
Q: Do I have to double bread them?
A: While you can skip the double breading, I strongly recommend against it. The double coating creates a thicker protective barrier that prevents cheese leakage and provides that satisfying extra-crunchy texture. The few extra minutes of work make a significant difference in the final result. Think of it as insurance for perfect mozzarella sticks.
Q: Can I make these without eggs?
A: For egg-free mozzarella sticks, you have a couple options. Use buttermilk as your “glue” layer instead of beaten eggs—dip floured cheese sticks in buttermilk, then breadcrumbs, then buttermilk again, then breadcrumbs again. Or make a simple mixture of 3 tablespoons ground flaxseed mixed with 1/2 cup water (let sit 5 minutes to thicken) to use in place of beaten eggs.