
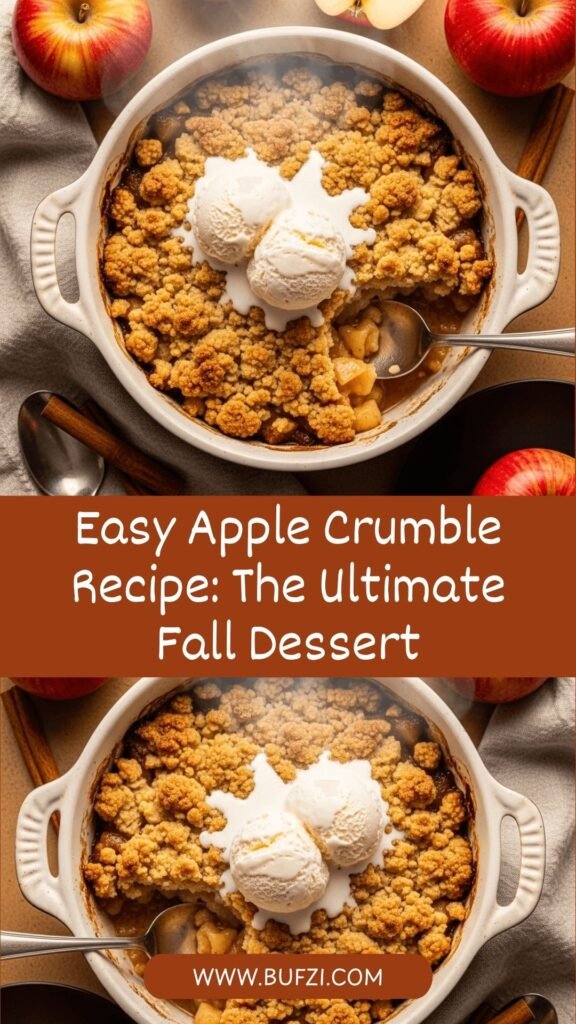
There’s nothing quite like the aroma of a homemade apple crumble baking in the oven—it’s pure comfort in dessert form. This classic apple crumble recipe features tender, cinnamon-spiced apples topped with a buttery, golden-brown crumble topping that’s crispy on top and slightly soft underneath. It’s the perfect balance of sweet and tart, warm and cozy, simple yet absolutely delicious.
Apple crumble is one of those timeless desserts that never goes out of style. Whether you’re serving it for a casual weeknight family dinner, bringing it to a holiday gathering, or making it for a special fall celebration, this easy apple crumble always impresses. It’s particularly popular during autumn when apples are at their peak, but honestly, it’s so good that you’ll want to make it year-round.
What makes this dessert so beloved is its simplicity and flexibility. Unlike apple pie with its fussy crust, apple crumble comes together quickly with just a handful of pantry staples. Serve it warm with a scoop of vanilla ice cream or a dollop of whipped cream, and you’ve got a dessert that will have everyone asking for seconds. It’s comfort food at its finest—the kind of recipe that fills your home with the most amazing scent and brings everyone to the kitchen asking, “When will it be ready?”
History / Background
Apple crumble has a rich history that’s deeply rooted in British culinary tradition, though it’s become a beloved dessert across the pond in America as well. The story of this humble yet delicious dessert is quite fascinating and speaks to resourcefulness during challenging times.
The apple crumble as we know it today emerged during World War II in Britain. During wartime rationing, traditional ingredients for making pastry—particularly butter, flour, and sugar—were severely limited. British home cooks needed to find a way to make their favorite fruit desserts without using precious rationed ingredients for elaborate pie crusts. The solution was brilliant in its simplicity: instead of making a bottom and top crust for apple pie, they created a simple topping that required less butter and could stretch further to feed more people.
This topping, made from a mixture of flour, sugar, and butter rubbed together to create a crumbly texture, was scattered over stewed or fresh fruit and baked until golden. It required fewer ingredients than traditional pastry and was much easier and faster to prepare. The name “crumble” comes from the texture of the topping, which literally crumbles in your hands as you sprinkle it over the fruit.
Before World War II, similar desserts existed in British cuisine called “crisps” or “crunch,” but the modern crumble gained massive popularity during and after the war years. It represented both frugality and comfort—a way to create something delicious and satisfying with limited resources.
Interestingly, different regions developed their own variations. In America, similar desserts are sometimes called “crisp” when oats are added to the topping, or “cobbler” when the topping is more biscuit-like. The British crumble typically has a more fine, sandy texture without oats, though modern variations include all sorts of additions.
Apple was the most popular fruit choice for crumbles, especially in autumn when apples were abundant and affordable. The tartness of cooking apples like Bramleys balanced perfectly with the sweet, buttery topping. This combination became so iconic that “apple crumble and custard” is considered a quintessential British dessert, served in homes, schools, and restaurants across the UK.
Today, apple crumble has transcended its wartime origins to become a beloved comfort dessert on both sides of the Atlantic. It represents warmth, home, and the simple pleasure of good food made with care.
Why You’ll Love This Recipe
This homemade apple crumble recipe is about to become your go-to fall dessert, and I’m excited to tell you why. It delivers all the deliciousness of apple pie with a fraction of the effort, and honestly, that buttery, crunchy topping is even better than pie crust in my opinion!
Here’s what makes this apple crumble absolutely irresistible:
- Incredibly Easy: No rolling out dough or crimping edges—just mix, layer, and bake. Perfect for beginner bakers!
- Quick to Assemble: Ready for the oven in just 15 minutes of hands-on prep time.
- Budget-Friendly: Uses simple, affordable ingredients you probably already have in your pantry.
- Perfect for Fall: Showcases seasonal apples at their absolute best, making your home smell amazing.
- Crowd-Pleasing: Everyone loves this dessert—from picky kids to sophisticated dinner guests.
- Versatile: Serve it for everyday dinners, holiday gatherings, potlucks, or special occasions.
- Make-Ahead Friendly: Prepare components in advance or bake ahead and reheat for easy entertaining.
- Customizable: Easily adapt with different fruits, add nuts or oats, adjust sweetness, or make it gluten-free.
- Naturally Vegetarian: Perfect for most dietary preferences without any modifications.
- Comfort Food Classic: That warm, cozy feeling you get from the perfect comfort dessert.
- Freezer-Friendly: Make extra and freeze for whenever a craving hits.
- Less Messy Than Pie: No rolling pin, no dough scraps, and much easier cleanup.
Whether you’re an experienced baker or someone who rarely makes desserts, this foolproof apple crumble recipe will make you look like a star. It’s the kind of dessert that tastes like you spent hours in the kitchen when it actually took just minutes to put together.
Ingredient Notes
Let’s talk about each component of this delicious apple crumble dessert and why it matters. Understanding your ingredients helps you make the best choices and smart substitutions.
Apples: The foundation of your crumble! Choose firm, tart baking apples that hold their shape during cooking. Granny Smith apples are the classic choice—they’re tart, firm, and don’t turn to mush when baked. Other excellent options include Honeycrisp, Braeburn, Jonathan, or Cortland. I love mixing two varieties for complex flavor—try pairing tart Granny Smith with sweeter Honeycrisp. Avoid Red Delicious or McIntosh as they become too soft and mushy. You’ll need about 6-7 medium apples (roughly 2½ pounds). Peel them for a more refined texture, or leave the skins on for extra fiber and a rustic look.
Granulated Sugar (for filling): Sweetens the tart apples and creates a delicious syrup as the fruit bakes. The amount needed depends on your apple variety—tart apples need more sugar, sweet apples need less. You can reduce sugar by 2-3 tablespoons if using sweeter apple varieties or if you prefer less sweetness.
All-Purpose Flour: Used in both the filling and the crumble topping. In the filling, it helps thicken the apple juices into a lovely sauce. For gluten-free crumble, substitute with your favorite gluten-free flour blend (like Bob’s Red Mill 1-to-1).
Cinnamon and Nutmeg: These warm spices are essential for that classic apple crumble flavor. Cinnamon provides sweet warmth, while nutmeg adds depth. Always use ground spices for even distribution, and freshly ground nutmeg is noticeably more flavorful than pre-ground.
Lemon Juice: A secret ingredient that brightens the apple flavor and prevents browning. The acidity also helps the apples maintain some structure during baking. Fresh lemon juice is best, but bottled works in a pinch.
Butter (for topping): The star of the crumble topping! Use cold, unsalted butter cut into small cubes. The butter creates those wonderful crispy, golden bits when it bakes. For the richest flavor, use European-style butter with higher fat content. Cold butter is crucial—it should be straight from the refrigerator. For vegan apple crumble, use cold vegan butter or coconut oil.
Brown Sugar (for topping): Gives the crumble topping its wonderful caramel notes and helps it achieve that gorgeous golden color. Light or dark brown sugar both work—dark creates deeper, more molasses-like flavor. You can substitute with coconut sugar for a less refined option.
Oats (optional): Adding rolled oats to the crumble topping creates extra texture and makes it heartier. Use old-fashioned rolled oats, not quick oats or steel-cut. This turns your crumble into more of an “apple crisp,” which is equally delicious.
Salt: Just a pinch enhances all the other flavors and balances the sweetness.
Vanilla Extract: A small amount in the apple filling adds wonderful depth and aroma.
Equipment Needed
You don’t need any fancy equipment to make this simple apple crumble—just basic kitchen tools:
- 9×13-inch Baking Dish: The perfect size for this recipe, though an 8×8-inch or 9×9-inch dish works if you want thicker layers. Glass, ceramic, or metal all work well.
- Peeler and Sharp Knife: For peeling and slicing apples. A Y-peeler makes quick work of peeling.
- Cutting Board: Large enough to comfortably slice all your apples.
- Large Mixing Bowl: For tossing the apples with sugar and spices.
- Medium Mixing Bowl: For making the crumble topping.
- Pastry Blender or Fork: For cutting the butter into the flour mixture. A pastry blender is ideal, but two forks or even your fingers work perfectly fine.
- Measuring Cups and Spoons: For accurate measurements.
- Wooden Spoon or Spatula: For mixing the apple filling.
- Oven Mitts: For safely handling the hot baking dish.
Optional but helpful: An apple corer and slicer makes prep faster, a microplane for fresh nutmeg, and aluminum foil if you need to tent the crumble to prevent over-browning.
Print
Apple Crumble Recipe
- Total Time: 60 minutes
- Yield: 8-10 servings 1x
- Diet: Vegetarian
Description
This classic easy apple crumble features tender, spiced apples topped with a buttery, golden crumble topping. It’s simpler than pie, absolutely delicious, and perfect served warm with vanilla ice cream or whipped cream.
Ingredients
For the Apple Filling:
- 6–7 medium apples (about 2½ lbs), peeled, cored, and sliced ¼-inch thick
- ½ cup granulated sugar
- 2 tablespoons all-purpose flour
- 1 tablespoon lemon juice
- 1 teaspoon ground cinnamon
- ¼ teaspoon ground nutmeg
- ½ teaspoon vanilla extract
- Pinch of salt
For the Crumble Topping:
- 1 cup all-purpose flour
- ¾ cup packed light brown sugar
- ½ cup cold unsalted butter, cut into small cubes
- ½ teaspoon ground cinnamon
- ¼ teaspoon salt
- ½ cup old-fashioned rolled oats (optional, for extra texture)
Instructions
- Preheat Oven: Preheat your oven to 350°F (175°C). Lightly grease a 9×13-inch baking dish with butter or non-stick spray.
- Prepare the Apples: Peel, core, and slice your apples into ¼-inch thick slices. Try to keep them relatively uniform in thickness so they cook evenly. You should have about 6-7 cups of sliced apples.
- Make Apple Filling: In a large mixing bowl, combine the sliced apples, granulated sugar, 2 tablespoons flour, lemon juice, cinnamon, nutmeg, vanilla extract, and a pinch of salt. Toss everything together until the apples are evenly coated with the mixture. The flour will help thicken the juices as the apples bake.
- Transfer to Baking Dish: Pour the apple mixture into your prepared baking dish, spreading it out evenly. Use a spatula to level the top and make sure apples are distributed uniformly.
- Make Crumble Topping: In a medium bowl, combine the flour, brown sugar, cinnamon, and salt. If using oats, add them now. Add the cold butter cubes to the flour mixture.
- Cut in Butter: Using a pastry blender, two forks, or your fingertips, work the butter into the flour mixture until it resembles coarse crumbs with some pea-sized pieces of butter remaining. Don’t overmix—you want some larger butter chunks that will create crispy bits as they bake. The mixture should hold together when squeezed but still be crumbly.
- Top the Apples: Sprinkle the crumble topping evenly over the apples, covering them completely. Don’t press down—just let it sit loosely on top for maximum crispiness.
- Bake: Place the baking dish on a baking sheet (to catch any drips) and bake in the preheated oven for 40-45 minutes, or until the topping is golden brown and the apple filling is bubbling around the edges. If the topping browns too quickly, loosely tent with aluminum foil for the last 10-15 minutes.
- Cool Slightly: Remove from the oven and let the apple crumble rest for at least 15-20 minutes before serving. This allows the filling to thicken slightly and makes it easier to serve.
- Serve Warm: Scoop portions into bowls and serve warm with vanilla ice cream, whipped cream, or custard. Enjoy the perfect balance of tender spiced apples and crispy, buttery topping!
Notes
- Apple Variety: Mix different apple types for more complex flavor—try 3 Granny Smith and 3 Honeycrisp.
- Adjust Sweetness: Taste your apples before adding sugar. If they’re very tart, use the full ½ cup; if they’re sweet, reduce to ⅓ cup.
- Prevent Soggy Bottom: Make sure your apples are well-tossed with flour to absorb excess moisture. You can also sprinkle 2 tablespoons of breadcrumbs or crushed cookies on the bottom of the dish before adding apples.
- Topping Too Brown: If the crumble topping is browning too quickly but apples aren’t tender, cover loosely with foil and continue baking.
- Storage: Store covered in the refrigerator for up to 4 days. Reheat portions in the microwave or warm the whole dish in a 300°F oven for 15-20 minutes.
- Prep Time: 15 minutes
- Cook Time: 45 minutes
- Category: Dessert
- Method: Baking
- Cuisine: British
Nutrition
- Serving Size: 1 slice (1/10 of recipe)
- Calories: 285
- Sugar: 32g
- Sodium: 85mg
- Fat: 10g
- Saturated Fat: 6g
- Unsaturated Fat: 3.5g
- Trans Fat: 0g
- Carbohydrates: 48g
- Fiber: 3g
- Protein: 2g
- Cholesterol: 25mg
Tips & Variations
The beauty of this best apple crumble recipe is how easily you can customize it to your taste or dietary needs. Here are some fantastic variations:
Apple Pear Crumble: Replace 2-3 apples with ripe but firm pears for a more complex, delicate fruit flavor. Bartlett or Bosc pears work wonderfully.
Mixed Berry Apple Crumble: Add 1 cup of fresh or frozen blueberries, raspberries, or blackberries to the apple mixture for a fruity twist and gorgeous color.
Nutty Crumble: Add ½ cup of chopped pecans, walnuts, or almonds to the topping for extra crunch and richness. Toasting the nuts first enhances their flavor.
Oatmeal Apple Crisp: Use the full ½ cup of oats in the topping (or even increase to ¾ cup) for a heartier, more textured topping.
Caramel Apple Crumble: Drizzle 3-4 tablespoons of caramel sauce over the apples before adding the crumble topping. It creates pockets of gooey caramel throughout.
Maple Apple Crumble: Replace half the granulated sugar with pure maple syrup in the filling, and use maple sugar in the topping for deeper flavor.
Gluten-Free Apple Crumble: Use a 1-to-1 gluten-free flour blend in both the filling and topping. The texture will be nearly identical.
Vegan Apple Crumble: Substitute cold vegan butter or coconut oil for the butter in the topping. Make sure the coconut oil is solid, not melted.
Reduced Sugar: Cut the sugar in half in both components if you prefer less sweet desserts or are using very sweet apples.
Spiced Up: Add ¼ teaspoon of ground ginger, cardamom, or allspice to the filling for more complex spice notes.
Cranberry Apple Crumble: Add 1 cup of fresh or frozen cranberries for a tart contrast—perfect for Thanksgiving!
Individual Servings: Make mini apple crumbles in ramekins or small mason jars. Reduce baking time to 25-30 minutes.
Pro Chef Tips
Ready to elevate your homemade apple crumble from good to absolutely spectacular? Here are professional techniques:
Choose the Right Apple Blend: Professional bakers often use a 2:1 ratio of tart to sweet apples. Try 4 Granny Smith to 2 Honeycrisp for perfectly balanced flavor—the tart apples hold structure while sweet apples add natural sweetness.
Slice Apples Uniformly: Consistent ¼-inch slices ensure even cooking. Use a mandoline if you have one for perfect uniformity. Inconsistent sizes mean some pieces will be mushy while others are undercooked.
Macerate the Apples: For even better flavor, toss the sliced apples with sugar, spices, and lemon juice, then let them sit for 15-30 minutes before baking. This draws out some juice and intensifies the apple flavor. Drain excess liquid if it’s more than ¼ cup.
Keep Butter Cold: This is crucial! Cold butter creates steam pockets as it melts, resulting in that wonderfully crispy, flaky topping texture. If your kitchen is warm, pop the butter back in the freezer for 5 minutes before making the topping.
Don’t Overmix the Topping: Stop mixing when you still see pea-sized butter chunks. Overmixing creates a dense, heavy topping instead of light and crumbly. Those butter pieces will create delicious crispy bits.
Add Topping at the Last Minute: Don’t make the crumble topping too far ahead. If it sits, the butter warms up. Make it right before assembling for the best texture.
Create Texture Variation: For the ultimate topping, mix some large crumbs with smaller ones. Sprinkle the fine crumbs first (they’ll filter down around the apples), then add larger chunks on top for varying textures.
Use a Baking Sheet: Always place your baking dish on a rimmed baking sheet. Apples release a lot of juice that can bubble over and burn on your oven bottom.
Test for Doneness: The crumble is ready when the topping is deeply golden brown and you can see thick, bubbling juices around the edges. A knife inserted into the center should meet tender (not crunchy) apples.
Rest Before Serving: Let the crumble rest for at least 15 minutes after baking. This allows the filling to thicken properly. It will be molten hot straight from the oven anyway!
Boost the Bottom: Sprinkle 2-3 tablespoons of panko breadcrumbs or crushed graham crackers on the bottom of the dish before adding apples. This creates a barrier that absorbs excess juice and prevents sogginess.
Common Mistakes to Avoid
Even though apple crumble is forgiving, these common mistakes can impact your results:
Using Mushy Apples: Soft, mealy apples create a watery, unappetizing filling. Always choose firm baking apples like Granny Smith, Honeycrisp, or Braeburn. Give apples a gentle squeeze—they should feel rock solid, not give at all.
Not Draining Excess Liquid: If your apples release a lot of juice while sitting, drain off any liquid beyond ¼ cup before baking. Too much liquid creates a soupy filling that never thickens properly, and the crumble topping can become soggy instead of crispy.
Warm Butter in the Topping: Using room temperature or melted butter creates a dense, greasy topping instead of light and crumbly. The butter must be cold and solid for those crispy, flaky bits. If your butter has softened, pop it in the freezer for 5 minutes.
Pressing Down the Topping: When you add the crumble topping, resist the urge to press it down or pack it. Just sprinkle it loosely over the apples. Packed topping becomes dense and heavy rather than crispy and light.
Underbaking: The most common mistake! The crumble needs the full baking time for the apples to become tender and the juices to thicken. If you pull it out too early, you’ll have crunchy apples in watery juice. Look for deep golden brown color and enthusiastically bubbling edges.
Skipping the Lemon Juice: Lemon juice isn’t optional—it brightens the apple flavor, prevents browning, and helps balance sweetness. Without it, the filling can taste flat and one-dimensional.
Cutting Apples Too Thick: Slices thicker than ¼ inch won’t cook through in the given time, resulting in crunchy, undercooked apples. Use a mandoline or take care to slice uniformly.
Storage & Meal Prep
Apple crumble stores beautifully, making it perfect for make-ahead entertaining or enjoying throughout the week:
Room Temperature Storage: If you plan to eat the crumble within 2 hours of baking, you can leave it at room temperature, loosely covered. This maintains the crispiest topping texture.
Refrigerator Storage: Once cooled completely, cover the baking dish tightly with plastic wrap or aluminum foil, or transfer portions to airtight containers. Refrigerate for up to 4-5 days. The topping will soften somewhat in the fridge, but reheating crisps it back up.
Reheating from Refrigerator: For best results, reheat in a 300°F oven for 15-20 minutes until warmed through. This re-crisps the topping beautifully. You can also reheat individual portions in the microwave for 30-60 seconds, though the topping won’t be as crispy. For extra crispy topping, finish microwave-reheated portions under the broiler for 1-2 minutes.
Serving Cold: Some people love eating leftover apple crumble cold straight from the fridge for breakfast (I won’t judge—it’s delicious!). The cold filling is less runny and the topping has a cookie-like texture.
Meal Prep Strategy: Make the apple filling and crumble topping separately up to 1 day ahead. Store the filling in the refrigerator and keep the topping cold. When ready to bake, assemble and bake as directed, adding 5-10 minutes to account for cold ingredients.
Portion Control: Store individual portions in small containers for grab-and-go desserts throughout the week. Perfect for packing in lunches or having a controlled serving ready to reheat.
Make-Ahead & Freezer Notes
Planning ahead? This easy apple crumble recipe is incredibly freezer-friendly and perfect for advance preparation:
Prepare Unbaked and Freeze: Assemble the entire crumble in a disposable aluminum pan or freezer-safe dish. Cover tightly with plastic wrap, then aluminum foil. Freeze for up to 3 months. When ready to bake, you can bake directly from frozen at 350°F for 60-75 minutes (covered for the first 45 minutes), or thaw overnight in the refrigerator and bake as directed.
Freeze Baked Crumble: Let the baked crumble cool completely, then wrap tightly in plastic wrap and foil. Freeze for up to 3 months. Thaw overnight in the refrigerator, then reheat covered at 300°F for 20-30 minutes until warmed through. Remove cover for the last 5 minutes to re-crisp the topping.
Freeze Topping Separately: Make a double batch of crumble topping and freeze half in a freezer bag for up to 3 months. When you need a quick dessert, toss sliced apples with sugar and spices, top with frozen crumble mixture, and bake. No need to thaw the topping first.
Freeze Prepared Apples: Toss peeled, sliced apples with lemon juice and freeze in measured portions (6 cups) in freezer bags. When ready to use, thaw slightly, add sugar and spices, and proceed with the recipe. This is perfect when apples are on sale or at peak season.
Best Thawing Method: For best texture, thaw frozen unbaked crumble overnight in the refrigerator rather than at room temperature. This prevents excess moisture from forming.
Quality Timeline: For optimal flavor and texture, consume frozen crumble within 3 months. It’s still safe beyond that, but the quality may decline with ice crystal formation.
Individual Frozen Portions: Divide baked crumble into individual portions, wrap well, and freeze. Microwave straight from frozen for 2-3 minutes for a quick single serving dessert.
Serving Suggestions
While apple crumble is absolutely delicious on its own, the right accompaniments take it to the next level:
Classic Pairings:
- Vanilla Ice Cream: The traditional and still the best! The cold, creamy ice cream against warm crumble is perfection. Use high-quality vanilla bean ice cream for the best experience.
- Whipped Cream: Light and airy, fresh whipped cream adds richness without weighing down the dessert. Make it fresh and add a touch of vanilla extract.
- Custard: Very British and absolutely delicious! Warm vanilla custard poured over warm crumble is heavenly.
- Heavy Cream: Simply pour cold heavy cream or half-and-half over your warm crumble. It pools around the dessert beautifully.
Elevated Toppings:
- Salted Caramel Sauce: Drizzle warm salted caramel over your crumble for decadent, sweet-salty perfection.
- Maple Whipped Cream: Whip heavy cream with maple syrup and a pinch of cinnamon for a fall-spiced topping.
- Greek Yogurt: For a healthier, tangy option, dollop vanilla Greek yogurt on warm crumble.
- Crème Fraîche: This tangy French cream adds sophisticated richness.
Beverage Pairings:
- Hot spiced apple cider or mulled wine for a cozy fall dessert
- Strong black coffee or espresso to balance the sweetness
- Hot tea—Earl Grey or chamomile pair particularly well
- A sweet dessert wine like late harvest Riesling or Moscato
- Cold milk for a comforting, nostalgic combination
Make it a Complete Dessert Spread: Serve your apple crumble as part of a dessert buffet alongside pumpkin pie, pecan pie, or other fall desserts for holiday gatherings.
Breakfast Treat: Controversial but delicious—leftover apple crumble makes a wonderful breakfast served with yogurt and granola!
FAQs Section
Can I make apple crumble without oats?
Absolutely! Traditional British apple crumble doesn’t include oats at all—just flour, sugar, and butter create that classic sandy, crumbly texture. Oats are an American addition that creates what’s technically called an “apple crisp.” Both versions are delicious, so it’s entirely your preference. Without oats, the topping is lighter and more delicate; with oats, it’s heartier and chewier. This recipe works perfectly either way.
Do I need to peel the apples for apple crumble?
It’s your choice! Peeling apples creates a more refined, smoother texture and prevents any toughness from the skins. However, leaving the peels on adds extra fiber, nutrients, and a rustic appearance. If you leave peels on, slice the apples thinly so the skins soften during baking. For a compromise, peel half the apples for texture while keeping some with skins for nutrition and color.
Why is my apple crumble topping not crispy?
Several factors can cause soggy topping: using warm butter instead of cold, pressing the topping down instead of sprinkling it loosely, too much liquid in the apple filling that steams the topping, or not baking long enough. Make sure your butter is very cold, don’t pack the topping, ensure apples are well-coated with flour to absorb moisture, and bake until deeply golden brown with bubbling edges. Reheating in the oven (not microwave) also restores crispiness.
Can I use frozen apples for apple crumble?
Yes, but with a caveat. Frozen apples release much more liquid than fresh, which can make your crumble watery. If using frozen apples, thaw them first and drain thoroughly, pressing out excess moisture. Add an extra tablespoon of flour or cornstarch to the filling to compensate for the extra liquid. You may need to bake 5-10 minutes longer. Fresh apples definitely give better results, but frozen works when fresh aren’t available.
What’s the best apple for apple crumble?
Granny Smith apples are the gold standard for apple crumble because they’re tart, hold their shape beautifully during baking, and won’t turn to mush. Other excellent choices include Honeycrisp, Braeburn, Jonathan, Cortland, or Pink Lady. For the best flavor, mix two varieties—pair tart Granny Smith with sweeter Honeycrisp for balanced, complex flavor. Avoid soft apples like Red Delicious or McIntosh, which become mushy and watery when baked.
How do I know when my apple crumble is done?
Your apple crumble is perfectly done when the topping is deep golden brown (not pale), the apple filling is bubbling enthusiastically around the edges, and a knife inserted into the center meets tender (not crunchy) apples with ease. This typically takes 40-45 minutes at 350°F. If the topping browns too quickly before apples are tender, cover loosely with foil and continue baking. Under-baked crumble has crunchy apples and runny juice; properly baked has tender fruit and thickened, syrupy juices.
Can I make apple crumble ahead of time?
Yes! You have several options: 1) Assemble completely and refrigerate unbaked for up to 24 hours, then bake as directed (add 5-10 minutes). 2) Bake fully, cool, refrigerate, and reheat at 300°F for 15-20 minutes before serving. 3) Prepare filling and topping separately, store separately in the fridge for 1 day, then assemble and bake when needed. 4) Freeze unbaked or baked crumble for up to 3 months. The topping may soften when refrigerated but crisps up beautifully when reheated.
Conclusion
And there you have it—everything you need to know to make the most incredible, comforting apple crumble! This classic dessert truly is one of the most satisfying things you can bake. The combination of tender, cinnamon-spiced apples and that buttery, crispy-crunchy topping is simply unbeatable.
What I love most about this easy apple crumble recipe is its beautiful simplicity. While apple pie can feel intimidating with its finicky crust, apple crumble welcomes bakers of all skill levels with open arms. It’s forgiving, flexible, and always delicious—plus it makes your entire house smell absolutely amazing while it bakes. That aroma alone is worth making it!
Whether you’re serving this for a casual family dinner on a Tuesday night, bringing it to Thanksgiving dinner, hosting a fall gathering, or treating yourself to a cozy dessert with a cup of tea, this homemade apple crumble delivers every single time. And don’t forget that scoop of vanilla ice cream melting into the warm crumble—it’s basically mandatory!
I really hope you’ll give this best apple crumble recipe a try! Make sure to save this recipe to your Pinterest boards so you can find it whenever you need a reliable, crowd-pleasing dessert.