

If you love the irresistible combination of rich chocolate and creamy peanut butter, these peanut butter brownies are about to become your new obsession! Imagine perfectly fudgy chocolate brownies marbled with swirls of sweet, creamy peanut butter—it’s the ultimate indulgent treat that combines two beloved flavors into one show-stopping dessert.
These peanut butter swirl brownies are everything a brownie should be: dense and fudgy (never cakey!), intensely chocolatey, with gorgeous ribbons of peanut butter running throughout. Each bite delivers that perfect balance of rich cocoa and nutty peanut butter that tastes like a homemade Reese’s peanut butter cup in brownie form. They’re the kind of dessert that disappears from the pan within hours and has everyone begging for the recipe.
What makes these brownies truly special is how they look as impressive as they taste. The beautiful peanut butter swirl pattern makes them perfect for bake sales, potlucks, holiday gatherings, or anytime you want to wow a crowd. Yet despite their bakery-worthy appearance, they’re incredibly easy to make—no mixer required! Perfect for satisfying chocolate cravings, special occasions, game day treats, or whenever you need an impressive dessert that’s guaranteed to be a hit.
History / Background
The marriage of chocolate and peanut butter is a relatively modern American love story that’s become one of the country’s most iconic flavor combinations. While chocolate and peanuts have been enjoyed separately for centuries, their partnership into the legendary duo we know today has fascinating roots in American candy history.
Peanut butter itself was invented in the late 1800s, with several people claiming credit for its creation. However, it was popularized at the 1904 World’s Fair in St. Louis. Chocolate, of course, has ancient origins dating back to the Aztecs and Mayans, but American-style chocolate candy bars became widespread in the early 1900s.
The chocolate-peanut butter combination we obsess over today was truly born in 1928 when H.B. Reese, a former dairy farmer and employee of Milton Hershey, created Reese’s Peanut Butter Cups. This revolutionary candy paired milk chocolate with peanut butter filling, and it was an immediate sensation. The combination proved so irresistible that it spawned countless variations and became deeply embedded in American food culture.
Brownies themselves have their own American origin story. The first known brownie recipe appeared in the 1896 Boston Cooking-School Cook Book, though the fudgy brownie we know today became popular in the early 20th century. Brownies were originally made without chocolate, but once chocolate was added, there was no going back—they became an instant classic.
The idea of combining brownies with peanut butter likely emerged in home kitchens during the mid-20th century as creative bakers experimented with America’s favorite flavor combinations. By the 1970s and 1980s, recipes for peanut butter brownies began appearing in community cookbooks and magazines. The swirl technique—where peanut butter is dolloped on top of brownie batter and swirled with a knife—became popular because it created beautiful patterns while ensuring every bite had both flavors.
Today, peanut butter brownies represent quintessential American baking. They embody the country’s love affair with rich, indulgent desserts and the brilliant chocolate-peanut butter pairing that has become as American as apple pie. Whether you’re baking for a school event, holiday party, or just because, peanut butter brownies always deliver that nostalgic, crowd-pleasing combination everyone craves.
Why You’ll Love This Recipe
These aren’t just any peanut butter brownies—this recipe has been tested and perfected to achieve that ideal fudgy texture with the most gorgeous peanut butter swirl that tastes as incredible as it looks. Unlike dry, cakey brownies or ones where the peanut butter sinks to the bottom, this recipe delivers brownie perfection every single time.
Here’s why this recipe will become your go-to:
- Incredibly Fudgy – Dense, rich, and intensely chocolatey (never dry or cakey!)
- Perfect Peanut Butter Swirl – Beautiful marbled pattern throughout every brownie
- Easy to Make – No mixer required, comes together in one bowl
- Bakery-Worthy Results – Looks professional but uses simple techniques
- Balanced Flavors – Neither chocolate nor peanut butter overwhelms the other
- Crowd-Pleaser – Appeals to both chocolate and peanut butter lovers
- Make-Ahead Friendly – Actually tastes better the next day
- Perfect Portion Control – Cut into squares for easy serving
- Budget-Friendly – Uses affordable, everyday ingredients
- Freezer-Friendly – Freezes beautifully for future chocolate emergencies
- Versatile Occasions – Perfect for parties, bake sales, gifts, or everyday treats
- Kid-Approved – Children absolutely love these brownies
- Customizable – Easy to add chocolate chips, nuts, or other mix-ins
Ingredient Notes
Understanding your ingredients is crucial for brownie success. Here’s what goes into these amazing peanut butter brownies and why each component matters:
Unsalted Butter – Provides richness, moisture, and helps create that fudgy texture. Melted butter (not softened) is key for dense, fudgy brownies rather than cakey ones. Unsalted butter allows you to control the salt level. Make sure it’s completely melted and slightly cooled before adding eggs.
Granulated Sugar – Sweetens the brownies and contributes to texture. Sugar also helps create that beautiful shiny, crackly top that characterizes great brownies. Don’t reduce the amount or your brownies will be dry and less fudgy.
Brown Sugar – Adds moisture, chewiness, and a hint of molasses flavor that adds depth to the chocolate. The combination of granulated and brown sugar creates the perfect texture and flavor balance.
Eggs – Provide structure, richness, and help bind everything together. Room temperature eggs incorporate more easily than cold eggs. The eggs should be beaten into the butter and sugar mixture until glossy for the best texture.
Vanilla Extract – Pure vanilla extract enhances the chocolate flavor and adds warmth. Don’t skip this—vanilla makes chocolate taste more chocolatey!
Unsweetened Cocoa Powder – The chocolate base for your brownies. Use high-quality cocoa powder (Dutch-process or natural) for the best chocolate flavor. Don’t substitute hot cocoa mix, which contains sugar and milk powder.
All-Purpose Flour – Provides structure. The amount is minimal compared to cake recipes, which is what makes brownies dense and fudgy rather than light and cakey. Measure carefully—too much flour makes dry, cakey brownies.
Salt – Essential for enhancing all the flavors and balancing the sweetness. Don’t skip the salt—it makes everything taste better!
Baking Powder – Just a tiny amount helps the brownies rise slightly and creates that perfect fudgy texture. Don’t confuse with baking soda!
Creamy Peanut Butter – The star of the swirl! Use regular commercial peanut butter like Jif or Skippy, not natural peanut butter which is too oily and will separate. The peanut butter should be at room temperature so it’s easy to swirl.
Powdered Sugar – Mixed into the peanut butter to create a thicker, sweeter swirl that holds its shape and doesn’t sink into the batter. This is the secret to perfect peanut butter swirls!
Optional Add-Ins:
- Chocolate Chips – Add 1 cup semi-sweet or milk chocolate chips to the batter
- Peanut Butter Chips – Fold in 1/2 cup for extra peanut butter flavor
- Chopped Peanuts – Add 1/2 cup for crunch and saltiness
- Mini Reese’s Cups – Press into the top before baking for ultimate indulgence
Substitutions:
- Butter: Can use coconut oil for dairy-free brownies
- Cocoa Powder: Use either Dutch-process or natural cocoa (not hot chocolate mix)
- All-Purpose Flour: Gluten-free 1:1 baking flour works well
- Peanut Butter: Almond butter or sunflower seed butter for nut allergies (texture may vary)
Equipment Needed
You don’t need fancy equipment to make these incredible brownies—just a few basic kitchen tools:
- 9×9-inch baking pan or 8×8-inch pan – A 9×9 makes slightly thinner brownies; 8×8 makes thicker ones
- Parchment paper or aluminum foil – To line the pan for easy removal and cleanup
- Large mixing bowl – For the brownie batter
- Medium microwave-safe bowl – For melting butter
- Small bowl – For mixing the peanut butter swirl
- Whisk – For mixing the batter (no electric mixer needed!)
- Rubber spatula – For scraping bowls and spreading batter
- Measuring cups and spoons – For accurate measurements
- Butter knife or skewer – For creating the peanut butter swirl pattern
- Toothpick – For testing doneness
- Cooling rack – For cooling the brownies properly
Pro tip: Line your baking pan with parchment paper with overhang on the sides. This creates “handles” that let you lift the entire brownie slab out of the pan for perfectly clean cuts!
Print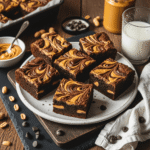
Peanut Butter Brownies Recipe
- Total Time: 45 minutes (plus cooling time)
- Yield: 16 brownies 1x
- Diet: Vegetarian
Description
These ultra-fudgy peanut butter brownies feature rich chocolate brownie batter marbled with sweet, creamy peanut butter swirls. Dense, intensely chocolatey, and studded with gorgeous peanut butter ribbons, they’re easy to make, impressive to serve, and absolutely irresistible. Perfect for chocolate-peanut butter lovers!
Ingredients
For the Brownies:
- 1/2 cup (1 stick) unsalted butter, melted
- 1 cup granulated sugar
- 1/2 cup packed light brown sugar
- 2 large eggs, at room temperature
- 2 teaspoons pure vanilla extract
- 1/2 cup unsweetened cocoa powder
- 3/4 cup all-purpose flour
- 1/2 teaspoon salt
- 1/4 teaspoon baking powder
For the Peanut Butter Swirl:
- 1/2 cup creamy peanut butter, at room temperature
- 1/4 cup powdered sugar
- 1/2 teaspoon vanilla extract
Instructions
- Preheat and prepare pan: Preheat your oven to 350°F (175°C). Line a 9×9-inch baking pan with parchment paper or aluminum foil, leaving overhang on two sides for easy removal. Lightly grease the parchment with butter or cooking spray.
- Mix wet ingredients: In a large mixing bowl, combine the melted butter, granulated sugar, and brown sugar. Whisk vigorously for about 1 minute until well combined and slightly glossy. Add the eggs one at a time, whisking well after each addition until the mixture is smooth and shiny. Stir in the vanilla extract.
- Add dry ingredients: Sift the cocoa powder, flour, salt, and baking powder directly into the wet ingredients (or whisk together first in a separate bowl). Using a rubber spatula or wooden spoon, gently fold the dry ingredients into the wet ingredients until just combined. Don’t overmix—stop as soon as you don’t see any more dry flour streaks. A few small lumps are fine. The batter will be thick and fudgy.
- Spread brownie batter: Pour the brownie batter into your prepared pan. Use a spatula to spread it evenly into all corners and smooth the top. The batter will be quite thick, which is exactly what you want for fudgy brownies.
- Prepare peanut butter mixture: In a small bowl, mix together the peanut butter, powdered sugar, and vanilla extract until smooth and well combined. The powdered sugar will thicken the peanut butter so it holds its shape when swirled.
- Create the swirl: Drop spoonfuls of the peanut butter mixture over the top of the brownie batter in 8-10 dollops, spacing them evenly across the surface. Use a butter knife, wooden skewer, or toothpick to gently swirl the peanut butter through the chocolate batter. Make figure-8 patterns, swirls, or zig-zag motions—don’t overmix or you’ll lose the distinct swirl pattern. The goal is visible ribbons of peanut butter throughout.
- Bake: Bake for 28-32 minutes. The brownies are done when a toothpick inserted into the center comes out with a few moist crumbs (not wet batter, but not completely clean either). The edges should look set and the center should no longer look wet or jiggly. Don’t overbake—slightly underdone is better than overdone for fudgy brownies!
- Cool completely: Remove from oven and let the brownies cool completely in the pan on a wire rack. This takes at least 1-2 hours. This step is crucial—cutting warm brownies will result in a messy, gooey situation. For the cleanest cuts, refrigerate the cooled brownies for 30 minutes before slicing.
- Cut and serve: Using the parchment paper overhang, lift the entire brownie slab out of the pan onto a cutting board. Use a sharp knife to cut into 16 squares (4×4 grid). For the cleanest cuts, wipe the knife clean between each cut. Serve and watch them disappear!
Notes
- Room temperature matters: Make sure eggs and peanut butter are at room temperature for best results.
- Don’t overmix: Once you add the dry ingredients, mix only until just combined to maintain fudgy texture.
- Underbake slightly: Brownies continue cooking from residual heat after removal from oven. Slightly underdone = perfectly fudgy.
- Cool completely: Patience is key! Warm brownies fall apart when cut. Fully cooled brownies slice beautifully.
- Clean cuts: For bakery-perfect squares, refrigerate before cutting and wipe knife between cuts.
- Pan size matters: 9×9 makes thinner brownies; 8×8 makes thicker ones. Adjust baking time accordingly (8×8 needs 5-7 minutes longer).
- Storage: Store in an airtight container at room temperature for up to 4 days or refrigerated for up to 1 week.
- Prep Time: 15 minutes
- Cook Time: 30 minutes
- Category: Dessert
- Method: Baking
- Cuisine: American
Nutrition
- Serving Size: 1 brownie (1/16 of recipe)
- Calories: 215
- Sugar: 21g
- Sodium: 125mg
- Fat: 11g
- Saturated Fat: 4g
- Unsaturated Fat: 5g
- Trans Fat: 0g
- Carbohydrates: 27g
- Fiber: 1g
- Protein: 4g
- Cholesterol: 40mg
Tips & Variations
Make these peanut butter brownies your own with these creative variations and helpful tips:
Flavor Variations:
- Triple Chocolate Peanut Butter Brownies – Fold 1 cup chocolate chips into the batter before spreading in pan
- Peanut Butter Cup Brownies – Press mini Reese’s cups into the top before baking (about 12-15 cups)
- Salted Peanut Butter Brownies – Sprinkle flaky sea salt over the peanut butter swirl before baking
- Cookie Butter Brownies – Replace peanut butter with Biscoff cookie butter for a different twist
- Nutella Brownies – Use Nutella instead of peanut butter for chocolate-hazelnut version
- Almond Butter Brownies – Substitute almond butter for a nuttier, more sophisticated flavor
- Peanut Butter Pretzel Brownies – Top with crushed pretzels before baking for sweet-salty combo
Texture Add-Ins:
- Chopped peanuts or peanut butter chips (1/2-1 cup folded into batter)
- White chocolate chips for sweet contrast
- Crushed graham crackers for extra texture
- Chopped Oreos pressed into the top
- Toffee bits for crunch
- Marshmallows added during last 5 minutes of baking
Dietary Modifications:
- Gluten-Free: Use 1:1 gluten-free flour blend (ensure peanut butter is also gluten-free)
- Dairy-Free: Replace butter with coconut oil or vegan butter
- Nut-Free: Use sunflower seed butter instead of peanut butter (color and taste will differ)
- Lower Sugar: Reduce sugar by up to 1/4 cup (texture will be slightly different)
Presentation Ideas:
- Cut into large squares and top with vanilla ice cream for brownie sundaes
- Dust with powdered sugar before serving
- Drizzle with melted peanut butter or chocolate
- Top with whipped cream and chopped peanut butter cups
- Serve warm with a glass of cold milk
- Cut into small squares for bite-sized treats at parties
Pro Chef Tips
Take your peanut butter brownies from homemade to bakery-quality with these professional techniques:
The Melted Butter Secret: Using melted butter instead of softened butter is crucial for fudgy brownies. Melted butter creates a denser crumb structure, while softened butter (creamed with sugar) incorporates more air and creates a cakier texture. Make sure your butter is melted but not hot when adding eggs, or you’ll scramble them!
Sugar Whisking Technique: When you whisk the melted butter and sugars together vigorously for a full minute, you’re not just mixing—you’re creating the foundation for that beautiful shiny, crackly top that characterizes perfect brownies. This step dissolves the sugar and creates a glossy mixture. Don’t rush this step!
Room Temperature Eggs: Cold eggs don’t incorporate smoothly into the butter mixture and can cause the butter to seize up and become grainy. Room temperature eggs blend seamlessly, creating a smooth, emulsified batter. If you forgot to take eggs out ahead, place them in a bowl of warm (not hot) water for 5-10 minutes.
Gentle Folding: Once you add the flour and cocoa powder, switch from whisking to gentle folding with a spatula. Overmixing develops gluten in the flour, which creates tough, cakey brownies instead of tender, fudgy ones. Mix only until the last streaks of flour disappear—a few small lumps are perfectly fine.
The Parchment Paper Trick: Always line your pan with parchment paper leaving overhang on two sides. This creates “handles” that let you lift the entire brownie slab out of the pan once cooled. Not only does this make cutting easier and cleaner, but it also ensures your brownies don’t stick to the pan.
Perfect Swirl Technique: When creating the peanut butter swirl, less is more! Make just 6-8 gentle swirls through the batter. Over-swirling blends everything together and you lose that beautiful distinct marbling. Use a knife or skewer and make figure-8 or S-shaped motions without stirring too much.
The Toothpick Test (Modified): Unlike cake, brownies should NOT come out with a completely clean toothpick. For fudgy brownies, you want a few moist crumbs on the toothpick when inserted in the center—not wet batter, but definitely not clean. The residual heat will finish cooking them perfectly as they cool.
Underbake Slightly: Brownies continue cooking from residual heat after you remove them from the oven. If you wait until they’re completely done in the oven, they’ll be overbaked by the time they cool. Pull them out when they still look slightly underdone in the center—this ensures perfectly fudgy texture.
Cool Completely Before Cutting: This is the hardest but most important step! Warm brownies are too soft and will fall apart or look messy when cut. Fully cooled brownies (2+ hours at room temperature or 30 minutes in the fridge) cut into perfect, clean squares. Use a sharp knife and wipe it clean between each cut for professional-looking results.
The Refrigeration Trick: For the absolute cleanest, most professional cuts, refrigerate your cooled brownies for 30 minutes before slicing. The cold firms up the chocolate and peanut butter, making cutting effortless. Let them come back to room temperature before serving for the best flavor and texture.
Common Mistakes to Avoid
Don’t let these common brownie pitfalls ruin your peanut butter brownies:
Using Softened Butter Instead of Melted: This is a critical mistake! Creaming softened butter with sugar incorporates air, which creates a cakey texture. For dense, fudgy brownies, you must use melted butter. The melted butter creates a denser crumb structure that gives you that signature fudgy texture everyone loves.
Overmixing the Batter: Once you add the flour and cocoa powder, overmixing develops gluten which makes brownies tough and cakey instead of tender and fudgy. Mix only until you no longer see dry flour streaks—a few small lumps are fine. The batter should look thick and fudgy, not smooth and pourable like cake batter.
Overbaking: This is the number one brownie killer! Overbaked brownies are dry, crumbly, and lack that fudgy center we all crave. Remember that brownies continue cooking from residual heat after removal from the oven. Pull them out when a toothpick inserted in the center comes out with moist crumbs (not wet batter, but not clean). The edges should look set but the center should still look slightly soft.
Using Natural Peanut Butter: Natural peanut butter (the kind where oil separates on top) is too thin and oily for this recipe. It won’t mix properly with the powdered sugar and will create an oily mess that sinks into the brownies instead of creating beautiful swirls. Use regular commercial peanut butter like Jif, Skippy, or Peter Pan for the best results.
Cutting While Still Warm: I know it’s hard to wait, but cutting warm brownies results in a gooey, messy disaster where everything falls apart and sticks to your knife. Brownies need to cool completely (at least 1-2 hours) to firm up properly. For the cleanest cuts, refrigerate cooled brownies for 30 minutes, then use a sharp knife and wipe it clean between cuts.
Wrong Pan Size: Using a different sized pan than specified significantly affects baking time and texture. A larger pan spreads the batter thinner, causing faster baking and potentially dry brownies. A smaller pan makes very thick brownies that take much longer to bake and risk being undercooked in the center. Stick to 9×9 or 8×8 inch pans and adjust time accordingly.
Skipping the Parchment Paper: Brownies can stick stubbornly to the pan, especially around the edges where the chocolate caramelizes. Always line your pan with parchment paper or foil with overhang. This ensures easy removal and makes cleanup effortless. Greasing alone isn’t enough—you need the parchment for foolproof removal.
Storage & Meal Prep
Peanut butter brownies store beautifully and some would argue they taste even better the day after baking:
Room Temperature Storage: Store completely cooled brownies in an airtight container at room temperature for up to 4 days. Layer parchment paper or wax paper between layers if stacking to prevent them from sticking together. Room temperature storage maintains the fudgy texture perfectly.
Refrigerator Storage: For longer storage, keep brownies in an airtight container in the refrigerator for up to 1 week. Refrigerated brownies firm up significantly and have a more dense, fudge-like texture. Let them sit at room temperature for 15-20 minutes before serving for the best flavor and texture, or enjoy them cold if you prefer extra-firm brownies.
Preventing Drying: To keep brownies moist during storage, place a piece of bread in the container with them. The brownies will absorb moisture from the bread, staying soft and fudgy while the bread gets stale. Replace the bread every couple of days.
Individual Wrapping: For packed lunches or gifts, wrap individual brownies in plastic wrap or parchment paper. This keeps them fresh and makes for easy grab-and-go treats.
Already Cut vs. Uncut: Brownies stay fresher slightly longer if you keep them uncut as a whole slab, cutting only what you need each time. However, the difference is minimal if properly stored in an airtight container.
Make-Ahead & Freezer Notes
Peanut butter brownies are fantastic for advance preparation and freeze exceptionally well:
Make-Ahead Baking: Brownies actually taste better the day after baking as the flavors meld and develop. You can bake these 1-2 days in advance, let them cool completely, cover tightly with plastic wrap or store in an airtight container, and keep at room temperature until ready to serve.
Freezing Baked Brownies: These brownies freeze beautifully! Once completely cooled, cut into squares and wrap each brownie individually in plastic wrap, then place all wrapped brownies in a freezer-safe bag or container. Alternatively, freeze the entire uncut slab wrapped tightly in plastic wrap and foil. Properly stored, brownies will keep in the freezer for up to 3 months.
Thawing Instructions: For best results, thaw frozen brownies overnight in the refrigerator, still wrapped. For quicker thawing, leave wrapped brownies at room temperature for 2-3 hours. Individual brownies can be microwaved for 10-15 seconds if you want to enjoy them warm. The texture and flavor will be just as good as fresh!
Freezing Unbaked Batter: You can freeze the prepared brownie batter! Spread it in your parchment-lined pan, add the peanut butter swirl, cover tightly with plastic wrap and foil, and freeze for up to 1 month. When ready to bake, no need to thaw—just remove the coverings and bake directly from frozen, adding 10-15 minutes to the baking time.
Gifting from Freezer: Frozen brownies make fantastic last-minute gifts! Keep a batch in your freezer, then thaw, arrange on a pretty plate, and wrap with cellophane when needed. No one will know they were frozen—they’ll just think you’re an amazing baker who whipped up fresh brownies!
Serving Suggestions
Transform your peanut butter brownies into an even more indulgent experience with these serving ideas:
Classic Pairings:
- Cold glass of milk (essential!)
- Hot coffee or espresso
- Vanilla ice cream for brownie sundaes
- Whipped cream dollop on top
- Fresh strawberries on the side for fruit contrast
Elevated Desserts:
- Brownie Sundae: Warm brownie topped with vanilla ice cream, hot fudge, whipped cream, and chopped peanuts
- Brownie Trifle: Layer cubed brownies with pudding, whipped cream, and crushed Reese’s cups
- Brownie Milkshake: Blend brownies with vanilla ice cream and milk
- Brownie S’mores: Toast marshmallows and sandwich between two brownies
- A la Mode: Serve warm with peanut butter ice cream
Beverage Pairings:
- Ice-cold whole milk
- Hot chocolate or mocha
- Peanut butter chocolate milkshake
- Cold brew coffee
- Red wine (like Cabernet Sauvignon for adults)
Party Presentation:
- Cut into small bite-sized squares for dessert platters
- Stack on a tiered cake stand for dramatic display
- Dust with powdered sugar for elegant presentation
- Drizzle with melted chocolate and peanut butter
- Top each brownie with a mini Reese’s cup
- Arrange on a wooden board with fresh berries
Special Occasions:
- Birthday parties (add candles to a large uncut brownie)
- Valentine’s Day (cut into heart shapes with cookie cutters)
- Bake sales (wrap individually in cellophane with ribbon)
- Game day snacks (cut into small squares)
- Teacher appreciation gifts (arrange in a decorative tin)
- Holiday cookie exchanges
FAQs Section
Can I use natural peanut butter instead of regular?
Natural peanut butter (the kind with oil separation) is not recommended for this recipe. It’s too thin and oily, which prevents it from mixing properly with the powdered sugar and causes the swirl to sink and become greasy rather than maintaining beautiful ribbons. Natural peanut butter also has a grainier texture that doesn’t swirl as smoothly. For best results, use regular commercial peanut butter like Jif, Skippy, or Peter Pan. If you only have natural peanut butter, stir it very well and add extra powdered sugar (up to 1/3 cup total) to thicken it enough to swirl properly.
Why are my brownies cakey instead of fudgy?
Cakey brownies usually result from one or more of these issues: using softened butter instead of melted butter (melted is crucial for fudgy texture), adding too much flour (measure carefully by spooning into the cup and leveling off), overmixing the batter after adding flour (which develops gluten), overbaking (pull them out when they still look slightly underdone), or using too many eggs. This recipe is specifically designed for fudgy brownies, so following the instructions precisely—especially using melted butter and not overmixing—will give you perfect fudgy results.
Can I make these brownies gluten-free?
Yes! Simply replace the all-purpose flour with a 1:1 gluten-free baking flour blend (like Bob’s Red Mill or King Arthur). Make sure to also check that your peanut butter, cocoa powder, and other ingredients are certified gluten-free if you have celiac disease or severe gluten sensitivity. The texture will be nearly identical to the regular version. Do not use only almond flour or coconut flour alone—you need a proper flour blend that contains xanthan gum or guar gum to replicate the texture of regular flour.
How do I know when the brownies are done?
Brownies are tricky because the “toothpick test” is different than for cake. Insert a toothpick or cake tester into the center—it should come out with moist crumbs attached, NOT clean and not with wet batter. The edges should look set and pull away slightly from the pan sides, but the center should still look soft and slightly shiny. Remember that brownies continue cooking from residual heat after removal, so slightly underdone in the oven = perfectly fudgy when cooled. When in doubt, err on the side of underbaking rather than overbaking.
Can I double this recipe?
Absolutely! To double the recipe, simply double all ingredients and bake in a 9×13-inch pan. The baking time will increase to 35-40 minutes. Check for doneness starting at 35 minutes using the same toothpick test (moist crumbs, not wet batter). A doubled batch makes 24-32 brownies depending on how you cut them, perfect for large gatherings or potlucks.
Why did my peanut butter swirl sink to the bottom?
This usually happens when the peanut butter mixture is too thin. The powdered sugar thickens the peanut butter so it holds its shape when swirled rather than sinking. Make sure you’re using regular (not natural) peanut butter and that you mix in the full 1/4 cup of powdered sugar. Also, don’t swirl too much—just a few gentle passes with the knife. Over-swirling can break up the peanut butter and cause it to sink. Finally, ensure your peanut butter is at room temperature, which makes it the perfect consistency for swirling.
How long do these brownies last?
Stored in an airtight container at room temperature, these brownies stay fresh for up to 4 days. Refrigerated, they’ll keep for up to 1 week. Frozen brownies last up to 3 months. The brownies actually taste better after sitting overnight as the flavors meld, so don’t hesitate to make them a day ahead. Just make sure they’re completely cooled and stored properly to maintain that fudgy texture.
Conclusion
And there you have it—the ultimate peanut butter brownies that combine rich, fudgy chocolate with creamy, sweet peanut butter swirls in every single bite! This recipe proves that sometimes the best desserts come from classic flavor combinations done absolutely right. Whether you’re baking for a special occasion, satisfying a serious chocolate craving, or just want to impress friends and family, these brownies deliver every single time.
The beauty of these peanut butter swirl brownies is that they look as impressive as they taste, yet they’re surprisingly easy to make. No mixer required, simple ingredients, and a straightforward method that yields bakery-worthy results. Plus, they’re perfect for so many occasions—from bake sales to birthday parties to cozy nights at home with a glass of milk.
I hope this recipe becomes a staple in your dessert rotation! The combination of fudgy chocolate brownies and that gorgeous peanut butter swirl is simply irresistible, and I promise they’ll disappear faster than you can make them.
Now it’s your turn to get baking! When you make these peanut butter brownies, I’d absolutely love to hear how they turned out. Did you add any creative mix-ins? What occasion did you bake them for? Drop a comment below and share your experience!
Don’t forget to save this recipe to your favorite Pinterest dessert board so you can find it easily the next time a chocolate-peanut butter craving strikes! Share it with your fellow dessert lovers, and if you make them, snap a photo and tag me on social media—nothing makes me happier than seeing your beautiful brownie creations!
Happy baking, and may your brownies always be perfectly fudgy!