
Get ready to bite into the most incredible homemade spicy chicken sandwich you’ve ever tasted! This crispy, juicy, perfectly seasoned chicken breast is nestled between soft toasted buns with crunchy pickles, creamy sauce, and just the right amount of heat. It’s the kind of sandwich that rivals—and honestly beats—anything you’d get at your favorite fast-food chain, and you can make it right in your own kitchen.
What makes this spicy chicken sandwich so irresistible is the combination of textures and flavors. The chicken is double-breaded for maximum crunch, seasoned with a blend of spices that delivers real heat without being overwhelming, and fried to golden perfection. Each bite gives you crispy coating, tender juicy chicken, cool creamy sauce, and tangy pickles all working together in perfect harmony.
This recipe is perfect for weekend lunches, game day gatherings, casual dinners, or anytime you’re craving that fast-food fix but want to make something fresher and more delicious at home. Whether you’re feeding hungry teenagers, hosting a casual get-together, or just treating yourself to an indulgent meal, this crispy spicy chicken sandwich delivers restaurant-quality results that will have everyone asking for seconds.
History / Background
The spicy chicken sandwich has become an American cultural phenomenon, but its journey to sandwich stardom is surprisingly recent. While fried chicken has deep roots in Southern cuisine dating back centuries—with techniques brought to America by Scottish immigrants and enslaved West Africans who perfected the seasoning and cooking methods—the spicy chicken sandwich as we know it today is largely a product of fast-food innovation.
The modern spicy chicken sandwich gained widespread popularity in the 1980s when major fast-food chains began experimenting with spicier menu options to appeal to changing American tastes. However, it wasn’t until 2019 that the “chicken sandwich wars” erupted, sparked by a particular chain’s viral sandwich launch. This cultural moment transformed the spicy chicken sandwich from a menu item into a full-blown craze, with restaurants across the country racing to perfect their own versions.
The appeal of the spicy chicken sandwich lies in its roots in Southern cooking traditions, particularly Nashville hot chicken—a regional specialty that originated in the 1930s in Nashville, Tennessee. According to legend, hot chicken was created when a scorned woman tried to punish her unfaithful partner by making his fried chicken unbearably spicy. Instead of punishment, it became a beloved delicacy. Nashville hot chicken features fried chicken coated in a cayenne-laced paste, creating intense heat that’s become iconic.
The sandwich format made this spicy chicken accessible and portable, perfect for America’s on-the-go culture. What started as regional Southern comfort food evolved into a nationwide obsession, with home cooks and restaurants putting their own spins on the classic combination of crispy fried chicken, pickles, and soft buns.
Today, the homemade spicy chicken sandwich represents a democratization of this fast-food favorite. Home cooks discovered they could recreate—and often improve upon—restaurant versions using simple techniques and readily available ingredients. The beauty of making it at home is complete control over the spice level, quality of ingredients, and customization options, creating a sandwich that’s uniquely yours.
Why You’ll Love This Recipe
This homemade spicy chicken sandwich is about to become your new obsession, and I’m not exaggerating. The combination of crispy perfection, bold flavors, and that satisfying fast-food vibe makes this recipe absolutely irresistible, but with the quality and freshness you can only get from homemade cooking.
- Better Than Takeout – Honestly rivals the best fast-food versions but fresher, juicier, and made with ingredients you can trust
- Incredibly Crispy – The double-breading technique creates an ultra-crunchy coating that stays crispy even after sitting
- Perfectly Spicy – Adjustable heat level lets you make it as mild or fiery as you prefer
- Juicy Every Time – The buttermilk brine ensures the chicken stays tender and moist, never dry
- Budget-Friendly – Costs a fraction of restaurant prices and feeds the whole family
- Customizable – Easy to adjust spice levels and toppings to suit everyone’s preferences
- Impressive Yet Achievable – Looks and tastes restaurant-quality but uses straightforward home cooking techniques
- Family Favorite – Kids and adults both love this satisfying, crave-worthy sandwich
- Perfect for Entertaining – Great for game day parties, casual gatherings, or weekend cookouts
- Make Your Own – Control the quality, spice level, and every ingredient that goes into it
Ingredient Notes
Understanding your ingredients helps you achieve the best spicy chicken sandwich possible. Here’s what you’ll need and why each component matters:
Chicken Breasts – Boneless, skinless chicken breasts are the foundation of your sandwich. Look for breasts that are similar in size (about 6-8 oz each) for even cooking. You’ll pound them to an even thickness, which ensures they cook uniformly and fit perfectly on the bun. For extra juicy chicken, avoid “enhanced” or injected chicken.
Buttermilk – This is crucial for both flavor and tenderness. Buttermilk’s acidity breaks down proteins in the chicken, making it incredibly tender while adding tangy flavor. The thickness also helps the breading adhere better. If you don’t have buttermilk, make a substitute by adding 1 tablespoon of lemon juice or vinegar to regular milk and letting it sit for 5 minutes.
Hot Sauce – Adds flavor and heat to both the marinade and the coating. Frank’s RedHot or Louisiana-style hot sauce works perfectly. The vinegar base in hot sauce also helps tenderize the chicken. Adjust the amount based on your heat preference—more for spicier, less for milder.
All-Purpose Flour – Creates the crispy coating that makes this sandwich so addictive. Regular all-purpose flour works best. For extra crispiness, you can replace up to ¼ of the flour with cornstarch.
Spice Blend – The combination of cayenne pepper, paprika, garlic powder, onion powder, and black pepper creates complex, layered heat and flavor. Cayenne provides the main heat, while paprika adds color and subtle smokiness. Smoked paprika takes it up a notch if you have it.
Eggs – Help the flour coating stick to the chicken. Room temperature eggs work best as they mix more easily with the buttermilk mixture.
Buns – Soft brioche or potato buns are ideal because they’re sturdy enough to hold up to the juicy chicken without getting soggy, yet soft and pillowy. Lightly toast them for extra texture and to create a barrier against moisture.
Pickles – Dill pickle chips provide tangy, crunchy contrast to the rich, spicy chicken. Use crinkle-cut for authenticity, or regular dill chips work fine. The acidity cuts through the richness beautifully.
Mayonnaise-Based Sauce – The creamy sauce balances the heat and adds richness. A simple mixture of mayo with hot sauce, pickle juice, and spices creates that signature tangy-spicy flavor. Some people add a touch of honey for sweetness.
Oil for Frying – Use neutral oils with high smoke points like vegetable oil, canola oil, or peanut oil. You need enough to come about halfway up the chicken (about 2 inches deep in your pan).
Equipment Needed
Having the right tools makes frying chicken much easier and safer. Here’s what you’ll need:
- Meat mallet or rolling pin (for pounding chicken)
- Large mixing bowls (at least 2-3)
- Measuring cups and spoons
- Whisk and fork
- Large, heavy-bottomed skillet or Dutch oven (for frying)
- Cooking thermometer (highly recommended for oil temperature)
- Tongs or slotted spoon
- Wire cooling rack set over a baking sheet
- Paper towels
- Plastic wrap or zip-top bags (for pounding chicken)
- Shallow dishes or pie plates (for dredging station)

Spicy Chicken Sandwich Recipe
- Total Time: 1 hour 5 minutes
- Yield: 4 sandwiches 1x
- Diet: Gluten Free
Description
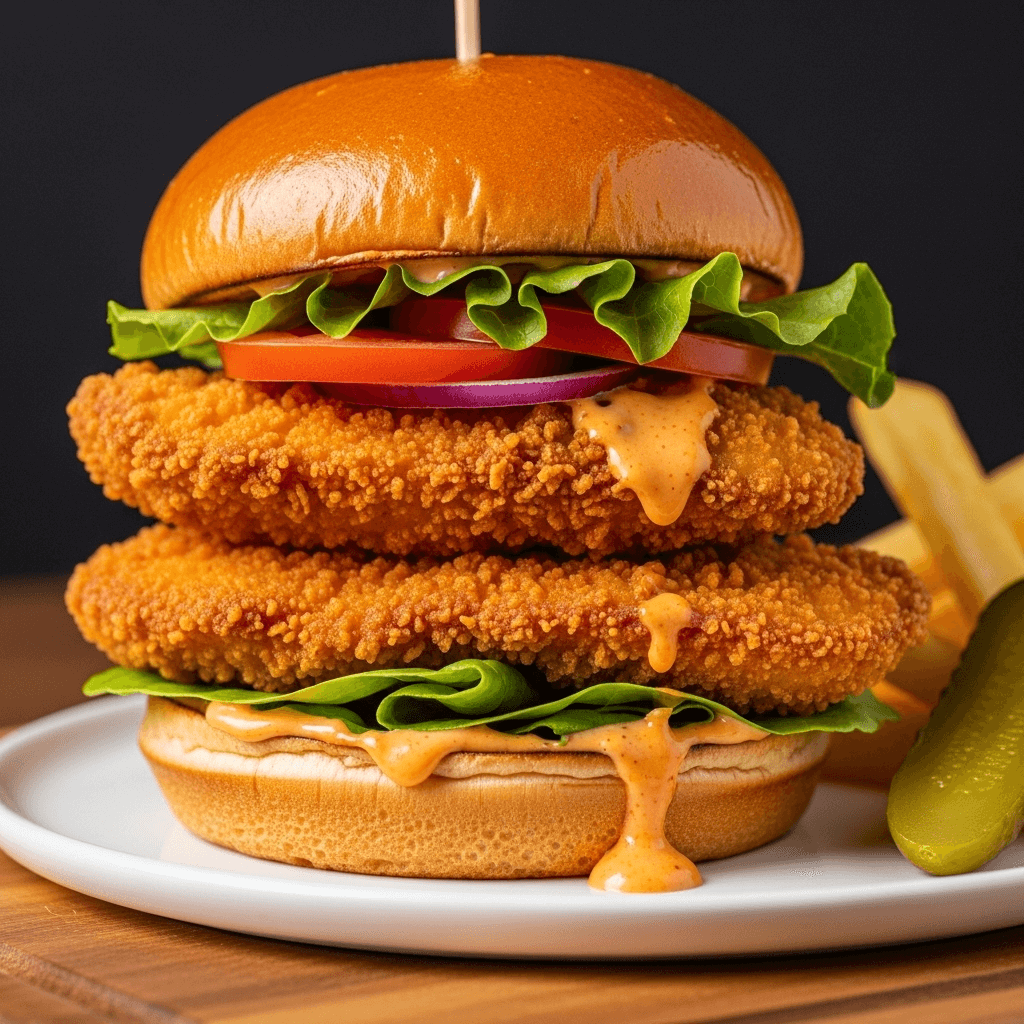
This crispy spicy chicken sandwich features buttermilk-marinated chicken breasts coated in a perfectly seasoned spicy breading and fried until golden and crunchy. Served on toasted buns with pickles and creamy sauce, it’s a homemade version that beats any fast-food favorite.
Ingredients
For the Chicken:
- 4 boneless, skinless chicken breasts (6–8 oz each)
- 2 cups buttermilk
- 3 tablespoons hot sauce (divided)
- 2 cups all-purpose flour
- 2 tablespoons cayenne pepper (adjust for heat preference)
- 1 tablespoon paprika (smoked if possible)
- 2 teaspoons garlic powder
- 2 teaspoons onion powder
- 1 teaspoon black pepper
- 2 teaspoons salt
- 2 large eggs
- Vegetable oil for frying (about 2-3 cups)
For Assembly:
- 4 brioche or potato hamburger buns
- 12–16 dill pickle chips
- Butter for toasting buns
For the Spicy Mayo Sauce:
- ½ cup mayonnaise
- 2 tablespoons hot sauce
- 1 tablespoon pickle juice
- ½ teaspoon garlic powder
- ½ teaspoon paprika
- Pinch of salt
Instructions
- Prepare the Chicken – Place each chicken breast between two pieces of plastic wrap or in a zip-top bag. Using a meat mallet or rolling pin, pound to an even thickness of about ½-¾ inch. This ensures even cooking and proper sandwich proportions.
- Make the Marinade – In a large bowl, whisk together buttermilk and 2 tablespoons of hot sauce. Add the pounded chicken breasts, making sure they’re completely submerged. Cover and refrigerate for at least 30 minutes, or up to 4 hours for maximum tenderness and flavor.
- Prepare the Breading Station – In a shallow dish, whisk together flour, cayenne pepper, paprika, garlic powder, onion powder, black pepper, and salt. In another shallow dish, whisk together eggs and remaining 1 tablespoon hot sauce until well combined.
- Make the Spicy Mayo – In a small bowl, whisk together mayonnaise, hot sauce, pickle juice, garlic powder, paprika, and salt. Adjust seasoning to taste. Refrigerate until ready to use.
- Set Up for Frying – Place a wire rack over a baking sheet lined with paper towels. Pour oil into a large, heavy-bottomed skillet or Dutch oven to a depth of about 2 inches. Heat over medium-high heat until oil reaches 350°F on a cooking thermometer (this is important for proper frying).
- Bread the Chicken – Remove one chicken breast from the buttermilk marinade, letting excess drip off. Dredge in the seasoned flour, coating completely and pressing gently so the flour adheres. Dip into the egg mixture, coating completely. Dredge again in the seasoned flour, pressing firmly to create a thick coating. Place on a clean plate. Repeat with remaining chicken breasts.
- Fry the Chicken – Carefully place 2 breaded chicken breasts into the hot oil (don’t overcrowd). Fry for 6-7 minutes per side, until golden brown and the internal temperature reaches 165°F. The coating should be deeply golden and crispy. Adjust heat as needed to maintain oil temperature around 325-350°F during cooking.
- Drain and Rest – Transfer fried chicken to the prepared wire rack to drain. Let rest for 2-3 minutes. Repeat with remaining chicken breasts.
- Toast the Buns – While chicken rests, butter the cut sides of the buns and toast in a skillet or under the broiler until golden brown.
- Assemble the Sandwiches – Spread spicy mayo generously on both sides of each toasted bun. Place a fried chicken breast on the bottom bun, top with 3-4 pickle chips, then cover with the top bun. Press down gently.
- Serve Immediately – Serve the sandwiches while the chicken is hot and crispy for the best texture and flavor.
Notes
- Oil temperature is crucial—too hot and the coating burns before the chicken cooks through; too cold and you get greasy, soggy coating. Use a thermometer for best results.
- Don’t skip the marinating time—buttermilk tenderizes the chicken significantly.
- The double-dredging (flour-egg-flour) creates that extra-crispy coating that makes this sandwich special.
- For less spicy sandwiches, reduce cayenne to 1 tablespoon or use all paprika instead.
- Let the breaded chicken rest for 5 minutes before frying if possible—this helps the coating adhere better.
- Work in batches to avoid overcrowding, which drops oil temperature and creates soggy coating.
- Prep Time: 20 minutes (plus 30 minutes marinating time)
- Cook Time: 15 minutes
- Category: Dinner
- Method: Frying
- Cuisine: American
Nutrition
- Serving Size: 1 sandwich
- Calories: 785
- Sugar: 8g
- Sodium: 1,650mg
- Fat: 38g
- Saturated Fat: 8g
- Unsaturated Fat: 28g
- Trans Fat: 0g
- Carbohydrates: 62g
- Fiber: 3g
- Protein: 48g
- Cholesterol: 185mg
Tips & Variations
The beauty of making spicy chicken sandwiches at home is the ability to customize every element. Here are ways to make this recipe your own:
Heat Level Adjustments:
- Mild Version – Reduce cayenne to 1 teaspoon and use mild hot sauce
- Medium Heat – Use the recipe as written with 2 tablespoons cayenne
- Extra Spicy – Increase cayenne to 3 tablespoons and add ½ teaspoon red pepper flakes to the flour
- Nashville Hot Style – Brush fried chicken with a spicy oil mixture (melted butter mixed with cayenne and brown sugar) after frying
Breading Variations:
- Extra Crispy – Replace ¼ cup of flour with cornstarch for added crunch
- Seasoned Coating – Add 1 teaspoon each of dried oregano and thyme to the flour mixture
- Buttermilk Crust – Add 2 tablespoons of buttermilk to the flour mixture and work with your fingers to create small clumps—this creates a really craggy, crispy coating
Cooking Method Variations:
- Air Fryer Method – Spray breaded chicken with oil and air fry at 375°F for 12-15 minutes, flipping halfway through
- Oven-Fried – Bake breaded chicken on a wire rack at 425°F for 20-25 minutes, flipping once
- Deep Fryer – Use a deep fryer set to 350°F for most consistent results
Sauce Options:
- Classic Mayo – Plain mayo for those who don’t want extra heat
- Ranch Dressing – Creamy ranch provides cooling contrast
- Comeback Sauce – Southern-style sauce with mayo, chili sauce, and Worcestershire
- Honey-Hot Sauce – Mix equal parts honey and hot sauce for sweet heat
- Garlic Aioli – Mayo with fresh minced garlic and lemon juice
Topping Ideas:
- Coleslaw for crunch and coolness
- Sliced tomatoes and lettuce for freshness
- Jalapeño slices for extra heat
- Crispy bacon strips
- Melted pepper jack cheese
- Fried egg for breakfast sandwich version
- Caramelized onions for sweetness
Healthier Modifications:
- Use chicken tenders instead of breasts for smaller portions
- Air fry or bake instead of deep frying
- Use whole wheat buns
- Increase pickle quantity and add lettuce and tomato
- Use Greek yogurt-based sauce instead of mayo
Pro Chef Tips
Take your spicy chicken sandwich from good to absolutely phenomenal with these professional techniques:
The Brine Is Non-Negotiable – Don’t skip the buttermilk marinade! Even 30 minutes makes a huge difference in tenderness and flavor. The acidity tenderizes while the thickness helps seasoning penetrate. For next-level juiciness, brine for 2-4 hours.
Pound for Even Cooking – Chicken breasts have a thick end and a thin end. Pounding them to even thickness (about ½-¾ inch) ensures every part cooks at the same rate. This prevents dry, overcooked thin parts or undercooked thick parts. Even thickness also creates a sandwich that’s easier to eat.
Temperature, Temperature, Temperature – Use a thermometer for both oil (350°F) and chicken doneness (165°F internal temp). Consistent oil temperature is the single most important factor in achieving crispy, non-greasy fried chicken. If oil gets too hot, reduce heat; if too cool, increase it.
The Double-Dredge Secret – Going flour-egg-flour creates layers that fry up extra crispy. Press the flour firmly into the chicken during the second dredge—really pack it on. Those uneven, craggy bits create the crunchiest parts.
Rest the Breaded Chicken – If time allows, let the breaded chicken sit for 5-10 minutes before frying. This helps the coating adhere better and creates fewer loose bits in your oil.
Don’t Overcrowd – Fry only 2 pieces at a time in a standard 12-inch skillet. Overcrowding drops the oil temperature dramatically, resulting in greasy, soggy coating. Be patient and work in batches.
The Wire Rack Trick – Always drain fried chicken on a wire rack, never paper towels. Paper towels trap steam underneath, making the bottom soggy. A rack allows air circulation all around for maximum crispiness.
Toast Those Buns – Toasting the buns isn’t optional—it creates a barrier that prevents the bread from getting soggy from the sauce and chicken juices. Plus, the butter adds richness and the toasted texture adds another layer of contrast.
Build Strategically – Sauce on both buns, chicken on bottom, pickles on top of chicken. This order ensures every bite gets all the flavors without the pickles sliding out.
Serve Immediately – Fried chicken is at its absolute best when hot and fresh. The coating is crispiest within the first 5-10 minutes after frying. If you must wait, keep chicken warm in a 200°F oven on a wire rack, but know that crispiness will gradually decrease.
Common Mistakes to Avoid
Even straightforward recipes have pitfalls. Here’s how to ensure perfect spicy chicken sandwiches every time:
Mistake #1: Not Drying the Chicken Before Breading – While you want some buttermilk clinging to the chicken, too much excess moisture prevents the flour from adhering properly and can cause the coating to separate during frying. Let the chicken drip for a moment and gently shake off excess buttermilk before dredging.
Mistake #2: Using the Wrong Oil Temperature – This is the most common reason for disappointing fried chicken. Too hot (over 375°F) and the outside burns before the inside cooks. Too cool (under 325°F) and you get greasy, soggy coating that absorbs too much oil. Invest in a thermometer—it’s a game-changer.
Mistake #3: Flipping Too Often – Once you place the chicken in the oil, resist the urge to move it around. Let it cook undisturbed for 6-7 minutes per side. Constant flipping can cause the coating to fall off and prevents proper browning. Flip only once.
Mistake #4: Not Checking Internal Temperature – Cutting into the chicken to check doneness releases all those precious juices. Use an instant-read thermometer instead—insert it into the thickest part of the chicken. It should read 165°F. Carryover cooking will take it to 170°F as it rests.
Mistake #5: Skipping the Buttermilk Marinade – Some people try to rush this step or skip it entirely. Don’t! The marinade is what makes the chicken tender, juicy, and flavorful. Even 30 minutes makes a significant difference. Without it, you’ll have tough, dry chicken no matter how perfect your frying technique.
Mistake #6: Assembling Too Early – Build sandwiches right before serving. If assembled too early, steam from the hot chicken makes the bun soggy and the coating loses crispiness. Keep components separate until the moment you’re ready to eat.
Mistake #7: Using a Shallow Pan – A deep, heavy-bottomed pot or Dutch oven maintains temperature better than a shallow skillet. It also reduces splatter risk and allows you to use enough oil for proper frying (at least 2 inches deep).
Storage & Meal Prep
While this spicy chicken sandwich is best enjoyed fresh, proper storage techniques help you salvage leftovers or prep components ahead:
Storing Fried Chicken – Let chicken cool completely, then store in an airtight container lined with paper towels (to absorb moisture) in the refrigerator for up to 3 days. Don’t stack pieces directly on top of each other—layer with paper towels between. The coating won’t be as crispy as fresh, but proper storage helps maintain some texture.
Reheating for Best Results – Never microwave fried chicken if you want to preserve any crispiness. Instead, reheat in a 375°F oven on a wire rack set over a baking sheet for 10-12 minutes until heated through. The wire rack allows air circulation and helps re-crisp the coating. You can also reheat in an air fryer at 350°F for 5-7 minutes.
Storing Sauce – The spicy mayo sauce keeps well in an airtight container in the refrigerator for up to 1 week. Stir before using as ingredients may separate slightly.
Bun Storage – Store buns in their original packaging at room temperature for up to 3 days, or freeze for longer storage. Toast fresh before serving.
Component Storage – If making sandwiches for a gathering, store all components separately: fried chicken in the fridge, sauce in a separate container, pickles in their juice, and buns at room temperature. Assemble just before serving.
Not Recommended for Full Assembly – Don’t assemble complete sandwiches and store them. The combination of hot chicken, sauce, and pickles will make the bun hopelessly soggy within 30 minutes.
Make-Ahead & Freezer Notes
Strategic make-ahead prep can save time while maintaining quality:
Marinating Ahead – You can marinate the chicken in buttermilk for up to 24 hours before frying. In fact, longer marinating (4-24 hours) makes the chicken even more tender and flavorful. This is the best make-ahead step.
Pre-Breading – You can bread the chicken up to 2 hours before frying. Place breaded chicken on a wire rack set over a baking sheet and refrigerate uncovered. This actually helps the coating adhere better, though you’ll want to let it come closer to room temperature (15-20 minutes) before frying.
Freezing Raw Breaded Chicken – Bread the chicken completely, then freeze on a baking sheet until solid. Transfer to freezer bags and freeze for up to 2 months. Fry from frozen, adding 3-4 minutes to the cooking time and monitoring internal temperature carefully.
Freezing Cooked Chicken – Let fried chicken cool completely, then wrap individual pieces tightly in plastic wrap and aluminum foil. Freeze for up to 1 month. Thaw in the refrigerator overnight. Reheat in a 375°F oven on a wire rack for 15-20 minutes. The texture won’t be quite as crispy as fresh, but it’s still good.
Make Sauce Ahead – Prepare the spicy mayo up to 5 days in advance and store refrigerated. The flavors actually improve as they meld together.
Day-Of Strategy – For entertaining, marinate chicken the night before. Set up your breading station 30 minutes before guests arrive. Fry the chicken while people are arriving (they’ll love the smell). Assemble sandwiches to order so everyone gets theirs fresh and hot.
Serving Suggestions
A great spicy chicken sandwich deserves equally delicious accompaniments. Here’s how to build the perfect meal:
Classic Side Dishes:
- French Fries – Crispy fries are the traditional pairing. Try regular, waffle, or sweet potato fries
- Coleslaw – Creamy or vinegar-based slaw provides cooling contrast to the spicy chicken
- Onion Rings – Extra indulgent but so good with spicy chicken
- Potato Salad – Classic Southern-style potato salad complements the sandwich perfectly
- Mac and Cheese – Ultimate comfort food combo
- Corn on the Cob – Buttery sweet corn balances the heat
Lighter Sides:
- Simple Green Salad – Light vinaigrette-dressed greens cut through the richness
- Cucumber Salad – Cool, refreshing, and palate-cleansing
- Watermelon Slices – The sweetness and water content help with the heat
- Pickles and Pickle Spears – More pickles are always welcome!
- Carrot and Celery Sticks – Crunchy vegetables with ranch dip
Beverages:
- Iced Tea – Sweet tea is traditional with Southern fried chicken
- Lemonade – Tart and sweet, perfect for washing down spicy food
- Cola or Root Beer – Classic soda pairings
- Milkshakes – Creamy and cooling, especially vanilla or chocolate
- Beer – Light lagers or wheat beers complement fried chicken well
Make It a Meal: Create a complete “fried chicken feast” with multiple sides, or keep it simple with just fries and a drink. For parties, set up a sandwich bar where guests can customize their heat level and toppings.
Leftover Ideas:
- Slice leftover fried chicken and make a spicy chicken salad
- Cut into strips and serve over a Cobb salad
- Make chicken and waffles for breakfast
- Create spicy chicken quesadillas
- Dice and add to mac and cheese
FAQs Section
Can I bake or air fry instead of deep frying?
Yes! For oven-baked, place breaded chicken on a wire rack over a baking sheet, spray generously with cooking spray, and bake at 425°F for 20-25 minutes, flipping halfway through. For air fryer, cook at 375°F for 12-15 minutes, flipping once. Both methods produce crispy results, though not quite as crunchy as traditional frying. The flavor is still excellent.
How do I make it less spicy?
Reduce the cayenne pepper to 1 teaspoon (or omit entirely), use mild hot sauce, and skip the hot sauce in the mayo. You’ll still get great flavor from the other seasonings. You can also serve with extra pickles and regular mayo to balance any remaining heat.
Can I use chicken thighs instead of breasts?
Absolutely! Boneless, skinless chicken thighs work wonderfully and are actually more forgiving (they stay juicier). Pound them to even thickness just like breasts. Cooking time may be slightly less—check internal temperature to ensure they reach 165°F.
Why is my breading falling off?
This usually happens for a few reasons: the chicken was too wet when breading (pat dry after marinating), the oil temperature was wrong (too hot or too cold), or you flipped the chicken too many times during cooking. Make sure to press the flour firmly onto the chicken during the second dredge, and let breaded chicken rest 5-10 minutes before frying if possible.
Can I make this gluten-free?
Yes! Use gluten-free all-purpose flour for the breading and gluten-free buns. The results are nearly identical. Make sure your hot sauce and other ingredients are certified gluten-free if you have celiac disease.
How do I keep the chicken crispy if I’m serving a crowd?
Fry the chicken and keep it warm in a 200°F oven on a wire rack. Don’t cover it—covering traps steam and makes the coating soggy. The chicken will stay warm and relatively crispy for 20-30 minutes. Assemble sandwiches just before serving.
What’s the best oil for frying?
Vegetable oil, canola oil, and peanut oil all work excellently. They have neutral flavors and high smoke points. Avoid olive oil (too low smoke point) and butter (burns easily). Peanut oil is traditional for Southern fried chicken and creates particularly crispy results, but any neutral oil works.
My chicken is cooked on the outside but raw inside. What happened?
Your oil was too hot. When oil exceeds 375°F, the outside browns quickly while the inside remains raw. Use a thermometer to maintain 325-350°F. Also, make sure your chicken is pounded to even thickness (no thicker than ¾ inch) so it cooks through in the time it takes to brown.
Conclusion
There you have it—everything you need to create the most incredible homemade spicy chicken sandwich that rivals anything you’d get at a restaurant. The crispy, golden coating, tender buttermilk-marinated chicken, tangy pickles, and creamy sauce come together to create sandwich perfection that’s absolutely worth the effort.
The beauty of making this at home is the control you have over every element. You can adjust the heat to your exact preference, choose quality ingredients, and customize the toppings to create your perfect sandwich. Plus, there’s something incredibly satisfying about pulling off restaurant-quality fried chicken in your own kitchen—it’s a skill that will serve you well for years to come.
I hope this recipe becomes a regular in your meal rotation, whether you’re making it for family dinners, game day gatherings, or those times when you’re craving something indulgent and delicious. Once you master the technique, you’ll find yourself craving these sandwiches regularly, and your family and friends will be asking you to make them again and again.
Now it’s time to heat up that oil and create some magic! Don’t forget to take a photo of your gorgeous crispy chicken sandwich and share it on Pinterest—I’d love to see your creations! Drop a comment below and let me know how yours turned out, what heat level you chose, or any creative variations you tried.
Happy frying, and enjoy every crispy, spicy, juicy bite!