

There’s something undeniably comforting about the smell of banana bread baking in your oven—that warm, sweet aroma that fills every corner of your home and makes everyone ask, “What are you making?” This easy banana bread recipe is the ultimate solution for those overripe bananas sitting on your counter, transforming them from forgotten fruit into the most delicious, moist, perfectly sweet quick bread you’ve ever tasted. With its golden-brown crust, tender crumb, and rich banana flavor, this isn’t just banana bread—it’s THE banana bread recipe you’ll make again and again.
This simple banana bread has earned its place as one of America’s most beloved homemade treats for excellent reasons. It’s incredibly forgiving (perfect for beginner bakers), uses basic pantry ingredients you probably already have, requires just one bowl and minimal cleanup, and delivers consistently delicious results every single time. The texture is perfectly moist without being gummy, the banana flavor is present but not overwhelming, and it stays fresh for days—though it rarely lasts that long!
This moist banana bread recipe works beautifully for countless occasions. Enjoy thick slices for breakfast or brunch with your morning coffee, pack it in lunchboxes for a homemade treat that beats any store-bought snack, serve it as an afternoon pick-me-up with tea, bring it to potlucks and bake sales where it always disappears first, gift it to neighbors and friends as a thoughtful gesture, or savor it as a simple dessert that satisfies sweet cravings without being too heavy. It’s the kind of versatile recipe that fits seamlessly into your daily routine while still feeling special enough for company.
History / Background
Banana bread holds a fascinating place in American culinary history, and its story is deeply intertwined with both economic necessity and marketing innovation. Unlike many traditional recipes with centuries-old origins, banana bread as we know it is a relatively modern creation that emerged during a specific moment in American history.
Bananas themselves didn’t become widely available in the United States until the late 1800s when improved refrigeration and shipping methods made it possible to transport them from Central and South America. Before this, bananas were considered exotic, expensive fruit that most Americans had never tasted. As transportation improved and prices dropped, bananas became increasingly popular and accessible to the average household.
The first banana bread recipes began appearing in American cookbooks in the 1930s, during the Great Depression. This timing wasn’t coincidental—it was a period when American homemakers were desperately seeking ways to avoid wasting any food. Throwing away overripe bananas wasn’t an option when every penny and every ingredient mattered. Resourceful home cooks discovered that very ripe (even spotty) bananas, which were too soft for eating but still perfectly good, could be mashed and baked into delicious quick bread.
The widespread adoption of banana bread also coincided with two other important developments: the proliferation of baking powder and baking soda as reliable leavening agents, and the standardization of recipes through popular cookbooks and women’s magazines. Companies like Chiquita banana actually promoted banana bread recipes as a way to sell more bananas—encouraging consumers to buy extra bunches knowing they could use overripe ones for baking rather than discarding them.
The recipe gained massive popularity during World War II when home baking became both a patriotic duty and an economic necessity. Banana bread fit perfectly into the era’s ethos of thrift and resourcefulness—it used inexpensive ingredients, prevented food waste, didn’t require hard-to-find items like fresh cream or eggs (many recipes were adapted to use fewer eggs), and created something delicious from something that might otherwise be thrown away.
By the 1950s and 1960s, banana bread had become firmly established as an American classic, featured in virtually every community cookbook, church recipe collection, and family recipe box across the country. Each family developed their own version—some adding nuts or chocolate chips, others incorporating sour cream or yogurt for extra moisture, and some experimenting with spices like cinnamon or nutmeg.
Today, banana bread represents more than just a recipe—it’s a symbol of home baking, resourcefulness, and comfort. It’s often one of the first recipes people learn to bake, passed down from grandmothers and mothers, and it continues to be one of the most searched and baked recipes in America. The COVID-19 pandemic even sparked a massive banana bread renaissance, with millions of people turning to this nostalgic, comforting bake during uncertain times.
Why You’ll Love This Recipe
This easy banana bread recipe is about to become your absolute go-to for using those overripe bananas, and once you taste it, you’ll understand why it’s been saved and shared thousands of times. It delivers everything you want in banana bread—incredible moistness, perfect sweetness, rich banana flavor—with none of the fuss or complicated techniques that can intimidate home bakers.
Here’s why this moist banana bread will become your most-made recipe:
- One-Bowl Wonder: Everything mixes together in a single bowl using just a whisk and spatula. No stand mixer needed, no multiple bowls to wash—just simple, straightforward mixing that anyone can do.
- Foolproof & Forgiving: This recipe is incredibly hard to mess up. Even if you’re a complete beginner or your measurements are slightly off, you’ll still end up with delicious banana bread every time.
- Uses Overripe Bananas: Finally, a perfect use for those brown, spotty bananas you feel guilty about tossing! The riper the bananas, the better this bread tastes.
- Pantry Staple Ingredients: No exotic ingredients or special trips to the store. Flour, sugar, eggs, butter, and bananas—that’s basically it.
- Ready in One Hour: From start to finish, you can have warm banana bread on your table in about an hour, with only 10 minutes of hands-on work.
- Incredibly Moist Texture: The perfect ratio of wet to dry ingredients creates that tender, moist crumb that stays soft for days without ever being gummy or dense.
- Not Too Sweet: This recipe strikes the perfect balance—sweet enough to satisfy but not so sweet that it’s cloying. The banana flavor shines through.
- Highly Customizable: Add chocolate chips, nuts, cinnamon, or other mix-ins to make it your own. The basic recipe is a perfect canvas.
- Freezer-Friendly: Bakes and freezes beautifully for up to 3 months, so you can always have homemade banana bread ready when the craving hits.
- Kids Love It: Even picky eaters enjoy this moist, sweet bread. It’s a great way to get kids interested in baking too—they can help mash bananas!
- Budget-Friendly: Costs just a few dollars to make an entire loaf, making it much more economical than store-bought quick breads.
- Stays Fresh for Days: Thanks to the moisture from bananas and the right ingredient ratios, this bread stays soft and delicious for 4-5 days at room temperature.
Whether you’re looking for your first baking project, need to rescue those brown bananas before they go to waste, or simply want comfort food that tastes like home, this simple banana bread recipe delivers every single time.
Ingredient Notes
Understanding why each ingredient matters will help you bake the best possible banana bread. Let’s break down what goes into this recipe and why:
Overripe Bananas: The star ingredient! You need 3-4 very ripe bananas (the ones covered in brown spots that nobody wants to eat). These overripe bananas are sweeter, easier to mash, and have more concentrated banana flavor than yellow bananas. The brown spots indicate that starches have converted to sugar—that’s exactly what we want for maximum sweetness and flavor. If your bananas aren’t ripe enough, you can speed up the process by baking whole, unpeeled bananas at 300°F for 15-20 minutes until the skins turn black.
All-Purpose Flour: Provides structure without making the bread heavy or dense. All-purpose flour has the perfect protein content for tender quick breads. Measure by spooning flour into your cup and leveling off—scooping directly from the bag packs in too much flour and creates dry, dense bread.
Granulated Sugar: Adds sweetness and helps create that slightly crispy top crust we all love. It also tenderizes the crumb and helps retain moisture. You can reduce it slightly if your bananas are extremely ripe and sweet, but don’t eliminate it entirely.
Eggs: Bind everything together, provide structure, add richness, and help create lift. Room temperature eggs incorporate more easily—set them out 30 minutes before baking or place in warm water for 5 minutes.
Melted Butter: Creates rich flavor and that tender, moist crumb. Butter must be melted and slightly cooled (not hot) before mixing. For dairy-free banana bread, substitute with melted coconut oil or neutral vegetable oil, though the flavor will be slightly different.
Baking Soda: The leavening agent that makes the bread rise and creates a tender crumb. Baking soda reacts with the natural acidity in bananas to create lift. Make sure yours is fresh (check the expiration date) or the bread won’t rise properly.
Salt: Essential for balancing sweetness and enhancing all the other flavors. Never skip the salt—without it, banana bread tastes flat and one-dimensional.
Vanilla Extract: Adds depth and warmth that complements banana flavor beautifully. Always use pure vanilla extract, not imitation, for the best flavor.
Optional Add-Ins: While not in the base recipe, you can customize with chocolate chips (½-1 cup) for chocolatey goodness, chopped walnuts or pecans (½-1 cup) for crunch and nuttiness, ground cinnamon (1 teaspoon) for warm spice notes, or a streusel topping for bakery-style presentation. These additions are wonderful but the basic recipe is perfect on its own.
Equipment Needed
Making this easy banana bread requires only the most basic kitchen equipment:
- 9×5-inch Loaf Pan: The standard size for banana bread. Metal pans conduct heat best and create nice browning, but glass or ceramic work too (add 5 minutes to baking time for glass). Make sure it’s a true 9×5-inch—smaller pans will overflow.
- Large Mixing Bowl: For combining all ingredients. Glass or stainless steel both work perfectly.
- Fork or Potato Masher: For mashing the bananas. They don’t need to be perfectly smooth—some small chunks add nice texture.
- Whisk: For mixing dry ingredients and combining wet ingredients smoothly.
- Rubber Spatula: For folding everything together gently and scraping down bowl sides to ensure even mixing.
- Measuring Cups and Spoons: Accurate measurements matter in baking! Use dry measuring cups for flour and sugar, liquid cups for wet ingredients.
- Small Microwave-Safe Bowl: For melting the butter.
- Parchment Paper (Optional but Recommended): For lining the loaf pan. This guarantees easy removal and minimal cleanup. Alternatively, grease and flour your pan thoroughly.
- Cooling Rack: Allows air to circulate around the bread as it cools, preventing a soggy bottom.
- Toothpick or Cake Tester: For checking doneness. A wooden toothpick works perfectly.
That’s everything! No stand mixer, no fancy gadgets, no special equipment—just the basics that every home kitchen has. This simplicity is part of what makes this recipe so accessible and beginner-friendly.
Print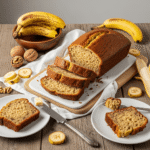
Easy Banana Bread Recipe
- Total Time: 1 hour 10 minutes
- Yield: 1 loaf (10-12 slices) 1x
- Diet: Vegetarian
Description
This incredibly moist, perfectly sweet easy banana bread is made with simple pantry ingredients in just one bowl. It’s the ultimate way to use overripe bananas and creates the most tender, flavorful quick bread you’ll ever taste!
Ingredients
- 3–4 very ripe bananas (about 1½ cups mashed)
- ⅓ cup (75g) melted butter, slightly cooled
- ¾ cup (150g) granulated sugar
- 1 large egg, room temperature, lightly beaten
- 1 teaspoon pure vanilla extract
- 1 teaspoon baking soda
- Pinch of salt (about ¼ teaspoon)
- 1½ cups (190g) all-purpose flour
Optional Add-Ins:
- ½ cup chocolate chips
- ½ cup chopped walnuts or pecans
- 1 teaspoon ground cinnamon
- ¼ teaspoon ground nutmeg
Instructions
Step 1: Prep and Preheat
Preheat your oven to 350°F (175°C). Line a 9×5-inch loaf pan with parchment paper (leaving overhang on the long sides for easy removal) or thoroughly grease and flour the pan. Set aside.
Step 2: Mash the Bananas
Peel your very ripe bananas and place them in a large mixing bowl. Using a fork or potato masher, mash the bananas until mostly smooth with just a few small lumps remaining. You should have about 1½ cups of mashed banana. A few chunks are fine and actually add nice texture to the finished bread.
Step 3: Mix in Butter and Sugar
Pour the melted butter into the bowl with the mashed bananas and stir together with a whisk or fork until well combined. Add the sugar and mix thoroughly until the mixture is smooth and well incorporated. The mixture may look slightly grainy from the sugar—this is normal.
Step 4: Add Egg and Vanilla
Add the beaten egg and vanilla extract to the banana mixture. Whisk everything together until smooth and well combined. The mixture should look cohesive and slightly frothy.
Step 5: Add Baking Soda and Salt
Sprinkle the baking soda and salt over the wet mixture. Stir gently to incorporate. You might see some foaming action from the baking soda reacting with the bananas—this is exactly what should happen!
Step 6: Fold in Flour
Add all the flour at once. Using a rubber spatula, gently fold the flour into the wet ingredients using a folding motion (bring spatula down the center, across the bottom, and up the side). Mix only until no dry flour streaks remain—the batter should look thick, slightly lumpy, and cohesive. Do not overmix! Overmixing develops gluten and creates tough, dense banana bread. A few small lumps are perfectly fine.
Step 7: Add Optional Mix-Ins
If using chocolate chips, nuts, or spices, gently fold them into the batter now using the same folding motion. Distribute evenly throughout.
Step 8: Bake
Pour the batter into your prepared loaf pan, spreading it evenly and smoothing the top with your spatula. Tap the pan gently on the counter 2-3 times to release any air bubbles. Bake for 50-60 minutes, or until the top is deeply golden brown, the bread has risen with a nice crack down the center, and a toothpick inserted into the center comes out clean or with just a few moist crumbs (no wet batter). If the top starts browning too quickly, loosely tent with aluminum foil after 40 minutes.
Step 9: Cool
Remove from the oven and let the banana bread cool in the pan on a wire rack for 10-15 minutes. Then, using the parchment overhang or by carefully inverting, remove the bread from the pan and transfer to the wire rack to cool completely. This takes about 30-45 minutes. The bread continues to set as it cools, so resist cutting into it immediately!
Step 10: Slice and Enjoy
Once cooled (or still slightly warm if you can’t wait!), slice the bread into thick slices using a serrated knife. Serve plain, with butter, or however you prefer. Store any leftovers wrapped tightly at room temperature.
Notes
- Banana Ripeness: The riper, the better! Those brown, spotty bananas everyone avoids are PERFECT for banana bread. They’re sweeter and have more concentrated flavor.
- Don’t Overmix: Once flour is added, mix only until combined. Overmixing makes tough, dense bread. Some lumps are okay!
- Check Early: Start checking at 50 minutes since ovens vary. The toothpick should come out clean or with a few crumbs, not wet batter.
- Room Temperature: Let the bread cool at least 10 minutes before removing from pan, or it may fall apart. Patience pays off!
- Freezer-Friendly: Wrap cooled bread tightly and freeze for up to 3 months. Thaw at room temperature or toast individual slices.
- Prep Time: 10 minutes
- Cook Time: 50-60 minutes
- Category: Breakfast
- Method: Baking
- Cuisine: American
Nutrition
- Serving Size: 1 slice (1/10 of loaf)
- Calories: 185
- Sugar: 16g
- Sodium: 180mg
- Fat: 6g
- Saturated Fat: 4g
- Unsaturated Fat: 2g
- Trans Fat: 0g
- Carbohydrates: 31g
- Fiber: 1g
- Protein: 3g
- Cholesterol: 30mg
Tips & Variations
This simple banana bread recipe is incredibly versatile! Here are some delicious ways to customize it:
Chocolate Chip Banana Bread: Fold in ½ to 1 cup of chocolate chips (semi-sweet, dark, or milk chocolate) for classic chocolatey goodness. For extra indulgence, sprinkle a few more chips on top before baking.
Banana Nut Bread: Add ½ to 1 cup of chopped walnuts or pecans for that classic combination. Toast the nuts first for 5 minutes at 350°F to enhance their flavor and crunch.
Cinnamon Banana Bread: Mix 1-2 teaspoons of ground cinnamon into the dry ingredients for warm, spiced flavor. Add a pinch of nutmeg and/or cloves for even more depth.
Peanut Butter Banana Bread: Swirl ⅓ cup of peanut butter into the batter before baking, or mix 2-3 tablespoons of peanut butter directly into the wet ingredients for peanut butter flavor throughout.
Double Banana Bread: Add ½ cup of dried banana chips (chopped) along with the mashed bananas for intense banana flavor and interesting texture.
Blueberry Banana Bread: Gently fold in 1 cup of fresh or frozen blueberries (tossed in 1 tablespoon flour first to prevent sinking). The combination is surprisingly delicious!
Coconut Banana Bread: Add ½ cup of shredded coconut to the batter and use melted coconut oil instead of butter for tropical flavor.
Healthier Options: Substitute half the all-purpose flour with whole wheat flour, replace half the butter with unsweetened applesauce or Greek yogurt, reduce sugar to ½ cup, or add 2 tablespoons of ground flaxseed for extra fiber.
Streusel Topping: Before baking, sprinkle a mixture of ¼ cup flour, ¼ cup brown sugar, 3 tablespoons cold butter (cut into small pieces), and ½ teaspoon cinnamon over the top for bakery-style crumb topping.
Mini Loaves: Divide batter among three 5.75×3-inch mini loaf pans and bake for 35-40 minutes. Perfect for gifting!
Muffins: Fill a lined 12-cup muffin tin ⅔ full and bake at 375°F for 18-22 minutes. Great for portion control and freezing individually.
Vegan Banana Bread: Replace the egg with a “flax egg” (1 tablespoon ground flaxseed + 3 tablespoons water, let sit 5 minutes), use melted coconut oil instead of butter, and ensure your sugar is vegan. Works beautifully!
Pro Chef Tips
These professional techniques will elevate your banana bread from good to absolutely incredible:
Use Very Ripe Bananas: I cannot stress this enough—the riper your bananas, the better your bread. Those bananas covered in brown spots that are too soft to eat? Those are PERFECT. They’re sweeter, more flavorful, and easier to mash. If your bananas aren’t ripe enough, place whole, unpeeled bananas on a baking sheet and bake at 300°F for 15-20 minutes until the skins turn completely black. Let cool, then peel and use. This concentrates the sugars and creates incredibly flavorful banana bread.
Don’t Overmix the Batter: This is the most common mistake that leads to tough, dense banana bread. Once you add the flour, mix only until you can’t see dry flour anymore. The batter should be thick and slightly lumpy—this is perfect! Overmixing develops gluten strands that create a tough, chewy texture rather than the tender, moist crumb we want. Use a gentle folding motion with your spatula rather than vigorous stirring.
Measure Flour Correctly: Too much flour is the second most common cause of dry, dense banana bread. Never scoop flour directly from the bag with your measuring cup—this packs it down and you’ll end up with way too much. Instead, fluff the flour with a spoon, then spoon it into your measuring cup and level off with a knife. Even better, weigh your flour if you have a kitchen scale (1½ cups = 190 grams).
Let Butter Cool Slightly: Melted butter straight from the microwave can be hot enough to cook the egg when combined, creating scrambled egg bits in your batter. After melting, let the butter sit for 2-3 minutes until it’s warm but not hot. Test by touching the bowl—it should feel comfortably warm, not too hot to touch.
Line Your Pan with Parchment: Even non-stick pans can sometimes stick, especially along the bottom edges. Lining with parchment paper (with overhang you can grab) makes removal completely foolproof. Alternatively, grease your pan thoroughly with butter or cooking spray, then dust with flour, tapping out excess. This double protection ensures your bread releases cleanly.
Check Early and Often: Every oven is different, and opening the door briefly to check doneness won’t harm your bread after the 45-minute mark. Start checking at 50 minutes by inserting a toothpick into the center. It should come out clean or with just a few moist crumbs. Overbaking is one of the few ways to ruin banana bread—it becomes dry and crumbly instead of moist and tender.
Let It Cool Before Slicing: I know warm banana bread smells incredible and is tempting, but if you cut into it too soon, it may fall apart or seem gummy in the center. The bread continues to set as it cools. Let it rest in the pan for 10-15 minutes, then transfer to a cooling rack for at least 15-20 more minutes. The texture will be significantly better, and it will slice cleanly.
Use the Crack as a Guide: A crack down the center of banana bread is not only normal—it’s desirable! It means your leavening worked properly. The crack usually forms along the hottest part of the pan and indicates good oven spring and rise.
Common Mistakes to Avoid
Understanding what can go wrong helps prevent disappointment. Here are the most common banana bread mistakes and how to avoid them:
Using Bananas That Aren’t Ripe Enough: Yellow bananas or bananas with just a few brown spots aren’t ripe enough for the best banana bread. They’re less sweet, have more starch and less sugar, and won’t provide that rich banana flavor we want. Wait until your bananas are covered in brown spots and very soft, or speed-ripen them in the oven. The difference in flavor between barely-ripe and very-ripe bananas is dramatic—don’t skip this step!
Overmixing After Adding Flour: Once flour hits liquid, gluten begins developing. That’s good for chewy bread but terrible for tender quick bread. Mix only until the flour disappears—15-20 gentle folds with your spatula should do it. The batter will look thick and lumpy, and that’s exactly right. Overmixed banana bread is tough, dense, full of tunnels, and lacks that melt-in-your-mouth tenderness we’re after.
Measuring Flour Incorrectly: Scooping flour directly from the bag compacts it, and you can end up with 25-30% more flour than the recipe intends. This excess flour absorbs too much liquid, creating dry, crumbly bread instead of moist, tender loaf. Always spoon flour into your measuring cup and level off, or use a kitchen scale for precision. This single change can transform your results dramatically.
Overbaking: Banana bread continues cooking from residual heat even after you remove it from the oven. If you bake until a toothpick comes out completely clean with no crumbs, you’ve likely overbaked it. Pull it out when the toothpick has a few moist crumbs still attached. The internal temperature should be about 200-205°F. Overbaked banana bread is dry, crumbly, and disappointing—check early and don’t be afraid to pull it out even if you’re not sure. It’s better to err on the side of slightly underbaked.
Not Letting It Cool Before Slicing: I know it’s hard to resist, but cutting into banana bread while it’s still hot causes it to fall apart, seem gummy in texture, and not hold its shape. The structure is still setting as it cools. Give it at least 15-20 minutes out of the pan before slicing. The wait is worth it for neat slices and the proper texture.
Using a Pan That’s Too Small: If your loaf pan is smaller than 9×5 inches, the batter will overflow and make a mess. If it’s larger, the bread will be flat and may bake unevenly. Stick with a true 9×5-inch loaf pan for the recipe as written, or adjust baking time if using a different size (smaller pans need more time, larger pans need less).
Storage & Meal Prep
Banana bread stores exceptionally well and actually tastes better the next day as the flavors meld. Here’s how to keep it fresh:
Room Temperature Storage: Once completely cooled, wrap the banana bread tightly in plastic wrap, aluminum foil, or place in an airtight container. Store at room temperature for 3-4 days. Banana bread stays moist at room temperature and doesn’t require refrigeration for short-term storage. The tight wrapping prevents it from drying out and keeps the crust from getting too hard.
Refrigerator Storage: If you want to extend shelf life to 7-10 days, you can refrigerate banana bread, though this isn’t necessary. Wrap it well in plastic wrap and store in an airtight container to prevent it from absorbing refrigerator odors. Cold banana bread is actually delicious—some people prefer the slightly denser texture when cold. Let it come to room temperature or warm slices before eating if you prefer soft, tender texture.
Slicing for Storage: You can slice the entire loaf after it’s completely cool, then wrap individual slices in plastic wrap or parchment paper. Store all wrapped slices together in a freezer bag or container. This makes it easy to grab single servings for breakfast or snacks without exposing the entire loaf to air repeatedly.
Keeping It Moist: The natural moisture from bananas and the right ingredient ratios keep this bread soft for days, but proper wrapping is essential. Make sure it’s wrapped tightly with no exposed edges. If slices start feeling dry, toast them lightly or microwave for 10-15 seconds to revive softness.
Refreshing Day-Old Bread: If your banana bread seems a bit dry or you just want to enjoy it warm, wrap a slice in a damp paper towel and microwave for 15-20 seconds, or toast slices and spread with butter. This brings back that fresh-baked texture and warmth.
Make-Ahead & Freezer Notes
Banana bread is one of the most freezer-friendly baked goods, making it perfect for batch baking and always having homemade treats on hand:
Freezing Whole Loaf: Let the banana bread cool completely (very important—any residual heat creates condensation and ice crystals). Wrap the entire loaf tightly in two layers of plastic wrap, then wrap again in aluminum foil or place in a freezer-safe bag, removing as much air as possible. Label with the date. Freeze for up to 3 months. To thaw, leave wrapped at room temperature for 2-3 hours, or thaw overnight in the refrigerator. The texture and flavor remain excellent.
Freezing Individual Slices: This is my preferred method for maximum convenience. Slice the cooled loaf completely, wrap each slice individually in plastic wrap (make sure they’re fully sealed), then place all wrapped slices in a large freezer bag. Freeze for up to 3 months. To enjoy, remove one slice at a time and thaw at room temperature for 20-30 minutes, or microwave from frozen for 20-30 seconds at 50% power. Perfect for grab-and-go breakfasts and portion control!
Flash-Freezing Method: For slices that won’t stick together, place unwrapped slices on a parchment-lined baking sheet and freeze for 1-2 hours until solid. Then wrap each slice and store in a freezer bag. This prevents slices from freezing together and makes it even easier to grab just what you need.
Baking Multiple Loaves: Since you’re already measuring and mixing, consider doubling the recipe and freezing extra loaves. Use two loaf pans and bake simultaneously (may need a few extra minutes). One loaf for now, one for the freezer—future you will be so grateful!
Thawing Tips: The best way to thaw is slowly at room temperature while still wrapped—this prevents condensation from making the exterior soggy. For whole loaves, this takes 2-3 hours. For individual slices, 20-30 minutes is plenty. You can also toast frozen slices directly from the freezer for quick breakfasts.
Freezer Burn Prevention: The key is airtight wrapping with no exposed areas. Double-wrapping ensures no freezer burn or ice crystal formation. Well-wrapped banana bread tastes just as good after 3 months as it did fresh from the oven.
Making Ahead for Gifting: Bake banana bread 1-2 days before you need to gift it, wrap beautifully in cellophane or parchment with a ribbon once completely cool, and include storage instructions. Or bake and freeze up to a month ahead, then thaw the day before gifting for maximum freshness.
Serving Suggestions
While banana bread is absolutely perfect on its own, here are some wonderful ways to serve it and complementary items that make it even better:
Classic Breakfast: Serve thick slices of banana bread with hot coffee or tea, scrambled eggs or a veggie omelet for protein, fresh fruit salad with berries, and crispy bacon. This creates a balanced, satisfying breakfast that feels special without being complicated.
Butter & Spreads: Enhance your banana bread by spreading softened salted butter on warm slices (the butter melts into all the nooks and crannies), cream cheese (plain or flavored) for tangy richness, peanut butter or almond butter for protein and nutty flavor, Nutella for chocolate-hazelnut decadence, or honey butter (softened butter mixed with honey) for extra sweetness.
Toasted Perfection: Toast slices of banana bread in a toaster or toaster oven for 2-3 minutes until the edges are golden and slightly crispy. The exterior gets crunchy while the interior stays soft. Spread with butter immediately for maximum deliciousness. Some people argue toasted banana bread is even better than fresh!
Dessert Ideas: Transform banana bread into a special dessert by serving warm slices topped with vanilla ice cream or frozen yogurt, drizzling with caramel or chocolate sauce, adding a dollop of whipped cream, sprinkling with chopped nuts and a drizzle of honey, or making banana bread French toast (dip slices in egg mixture and pan-fry—incredible!).
Brunch Platter: Include banana bread as part of a brunch spread with assorted muffins and pastries, fresh fruit skewers, yogurt parfaits, quiche or egg casserole, and coffee and tea service. It’s always a hit!
Afternoon Snack: Pair with hot tea or coffee, a glass of cold milk (especially for kids), fresh fruit, or cheese cubes and nuts for a balanced snack that provides energy without being too heavy.
Sandwich Creation: Make a banana bread sandwich by spreading peanut butter between two slices (like a PB&J but better), cream cheese and berry preserves, or Nutella and sliced strawberries. It sounds unusual but it’s amazingly good!
Holiday Breakfast: Banana bread makes a wonderful addition to holiday morning spreads alongside cinnamon rolls, quiche, fresh fruit, and hot beverages. It’s easier than many holiday baking projects but still feels festive and homemade.
Coffee Shop Pairing: Banana bread and coffee is a match made in heaven. Try it with medium or dark roast for contrast, a latte or cappuccino for creaminess, cold brew for summer mornings, or chai tea for warm spice notes that complement the banana flavor.
Kids’ Lunchbox: Pack slices in school lunches with cheese cubes, apple slices, carrot sticks with ranch, and a juice box. It’s a homemade treat that kids actually get excited about.
FAQs Section
Why is my banana bread too dense?
Dense banana bread usually results from one of these issues: (1) Too much flour—always measure by spooning and leveling, never scooping directly from the bag; (2) Overmixing after adding flour, which develops too much gluten—mix only until combined; (3) Bananas that weren’t ripe enough, lacking the moisture and sugar needed; (4) Old baking soda that’s lost its leavening power—check expiration dates; (5) Not enough leavening for the amount of batter. For the lightest texture, measure flour carefully, mix gently, use very ripe bananas, and ensure your baking soda is fresh. The batter should be thick but not stiff.
Can I use frozen bananas?
Yes! Frozen bananas work perfectly for banana bread and many bakers keep a stash specifically for baking. To use frozen bananas, thaw them completely (easiest in the microwave for 1-2 minutes or overnight in the fridge), then drain off any excess liquid that accumulates. The thawed bananas will be very soft and easy to mash. Some people even prefer frozen bananas because the freezing process breaks down cell walls, making them sweeter and easier to incorporate into batter. Just make sure to measure after thawing—you need 1½ cups of mashed banana.
How do I know when banana bread is done?
There are several reliable indicators: (1) The top should be deeply golden brown with a crack down the center; (2) A toothpick or cake tester inserted into the center should come out clean or with just a few moist crumbs (no wet batter); (3) The bread should spring back when gently pressed in the center; (4) The edges should be pulling away slightly from the pan; (5) An instant-read thermometer inserted in the center should read 200-205°F. Start checking at 50 minutes since ovens vary. If the top is browning too quickly but the center isn’t done, tent loosely with foil and continue baking.
Can I make this banana bread healthier?
Yes, there are several modifications you can make: Replace half the all-purpose flour with whole wheat flour for more fiber (the texture will be slightly denser but still good), substitute half the butter with unsweetened applesauce or mashed avocado, reduce sugar to ½ cup if your bananas are very ripe (the bread will be less sweet but still delicious), add 2-3 tablespoons of ground flaxseed or chia seeds for omega-3s and fiber, or use coconut oil instead of butter for different healthy fats. You can also reduce the overall amount to ¼ cup of butter/oil if desired. Keep in mind that healthier versions may be slightly less moist and sweet than the original.
Why did my banana bread sink in the middle?
A sunken center usually happens because: (1) You opened the oven door too early during baking, causing the structure to collapse before it set—wait at least 40 minutes before opening; (2) The oven temperature was too high, causing the outside to set before the inside cooked through; (3) Too much leavening (if you accidentally doubled the baking soda), causing over-rising then collapse; (4) The bread was underbaked and the center didn’t set properly—use the toothpick test; (5) Too much liquid in the batter from using more than 3-4 bananas or adding extra wet ingredients. To prevent sinking, resist opening the oven early, use an oven thermometer to verify temperature, and bake until the center is fully set.
Can I substitute oil for butter?
Yes, you can substitute vegetable oil, canola oil, or melted coconut oil for the butter in equal amounts (⅓ cup). Oil creates a slightly more tender, moist crumb and the banana bread stays soft longer. However, butter provides richer flavor, so it’s a trade-off between flavor and texture. Many people actually prefer oil-based banana bread for its incredibly moist texture. If using coconut oil, use refined (flavorless) coconut oil unless you want coconut flavor, and make sure it’s melted and at room temperature before mixing.
How ripe should my bananas be?
The riper, the better! Your bananas should be covered in brown spots—the more spots, the sweeter and more flavorful they are. The peels should be at least 50% brown, ideally more. Many bakers wait until bananas are almost entirely brown or even black. At this stage, they’re too soft and sweet for eating but absolutely perfect for baking. The sugars are concentrated, they’re easier to mash, and they provide maximum banana flavor. If your bananas aren’t ripe enough, you can speed up the process by baking unpeeled bananas at 300°F for 15-20 minutes until the skins turn black.
Conclusion
And there you have it—everything you need to bake the most incredible, moist, perfectly sweet banana bread that’ll become your go-to recipe for years to come! This easy banana bread recipe truly is foolproof, uses the simplest ingredients, requires just one bowl, and delivers consistent, delicious results every single time. It’s the ultimate solution for those overripe bananas on your counter, transforming them from kitchen guilt into absolute kitchen gold.
What makes this simple banana bread so special is how it manages to be both incredibly easy and incredibly delicious. There’s no complicated technique, no fancy equipment, no unusual ingredients—just straightforward mixing that anyone can do, followed by the magic of baking. Yet somehow, the result is this tender, moist, flavorful bread that tastes like it came from a bakery and makes your whole house smell absolutely amazing.
Whether you’re a complete beginner taking on your very first baking project, an experienced baker looking for a reliable recipe, a parent trying to sneak fruit into your kids’ diets, or simply someone who loves the comfort of homemade baked goods, this moist banana bread recipe will not disappoint. It’s versatile enough to customize with your favorite add-ins, convenient enough to make ahead and freeze, and delicious enough to gift to people you really like.
The beauty of banana bread is that it’s more than just a recipe—it’s a tradition, a memory-maker, a way to show love through baking. It’s the smell of home, the taste of comfort, and the satisfaction of creating something delicious from ingredients you already have. Once you master this recipe (which honestly takes just one try), you’ll find yourself making it again and again, perhaps passing it down to your own children someday.
I truly hope this recipe brings as much joy to your kitchen as it has to mine. There’s something incredibly satisfying about rescuing those brown bananas and turning them into something everyone loves. It never gets old hearing “Is there more banana bread?” or seeing someone reach for a second slice.
Now I want to hear from you! When you bake this easy banana bread, please come back and tell me how it turned out. Did your kitchen smell amazing? Did it disappear within hours? Did you try any add-ins or variations? What’s your favorite way to enjoy it? Drop a comment below—I genuinely love hearing about your baking adventures and I respond to every comment!
And if this recipe made you as happy as I think it will, please pin it to your Pinterest boards so you can find it easily next time those bananas start getting spotty. Share it with your friends, family, neighbors—anyone who needs a foolproof, delicious banana bread recipe in their life. Let’s spread the joy of home baking together!
Happy baking, and may your bananas always be perfectly overripe when you need them!