
If you’re looking for an easy, budget-friendly dinner that delivers maximum flavor with minimal effort, these crispy baked chicken legs are about to become your new weeknight hero. This simple oven-baked chicken leg recipe transforms affordable chicken drumsticks into golden, crispy-skinned perfection with juicy, tender meat that falls right off the bone. Whether you’re feeding a hungry family on a Tuesday night, meal prepping for the week ahead, or hosting a casual backyard gathering, these baked chicken drumsticks check all the boxes. The best part? You only need a handful of basic seasonings, one baking sheet, and about 45 minutes to create a restaurant-quality meal that rivals any fried chicken—without the mess or added calories. From game day spreads to Sunday dinners, this foolproof baked chicken legs recipe is versatile enough to pair with any side dish and guaranteed to please even the pickiest eaters at your table.
History / Background
Chicken legs, particularly drumsticks, have been a staple protein across cultures for centuries, valued for their affordability, rich flavor, and satisfying dark meat. Unlike the more recently popular boneless, skinless chicken breast that emerged as a health trend in the 1980s, chicken legs have been enjoyed throughout culinary history because they stay moist during cooking and pack incredible flavor from the bone and skin.
The practice of roasting or baking chicken dates back to ancient civilizations, but the modern technique of oven-baking chicken legs as we know it today became popular in American home cooking during the mid-20th century. As electric and gas ovens became standard household appliances in the 1940s and 1950s, baking replaced more labor-intensive cooking methods like rotisserie roasting or pan-frying as the preferred way to cook chicken for family meals.
Baked chicken legs gained particular prominence in African American and Southern cuisine, where slow-roasted or baked chicken seasoned with aromatic spices became a cornerstone of soul food tradition. These preparations often featured paprika, garlic powder, onion powder, and cayenne—seasonings that remain popular in baked chicken recipes today.
The beauty of baked chicken legs lies in their democratic nature—this is a dish that transcends economic boundaries. Because drumsticks are one of the most affordable cuts of chicken (often selling for less than $1 per pound), they’ve provided nourishing, delicious meals for families across all income levels. During economic downturns, including the Great Depression and recent recessions, chicken legs have remained a reliable, budget-friendly protein that doesn’t sacrifice flavor.
Today, the resurgence of whole-animal cooking and nose-to-tail eating has brought renewed appreciation for dark meat cuts like chicken legs. Modern home cooks have rediscovered what previous generations always knew: properly baked chicken legs deliver superior flavor and juiciness compared to lean white meat, all while being kinder to your wallet.
Why You’ll Love This Recipe
This easy baked chicken legs recipe is about to solve your weeknight dinner dilemmas and become a recipe you turn to again and again. I’ve perfected this method over years of cooking for my family, and it never fails to deliver crispy skin and juicy meat every single time.
Here’s why this recipe is absolutely unbeatable:
- Incredibly Budget-Friendly – Chicken legs cost a fraction of other cuts; you can feed a family of four for under $5
- Foolproof Method – Perfect for beginner cooks; almost impossible to mess up
- Minimal Hands-On Time – Just 10 minutes of prep, then the oven does all the work
- Crispy Skin Without Frying – Achieves that crave-worthy crunch without a drop of oil splattering your stovetop
- Naturally Juicy – Dark meat stays moist and tender, never dry like chicken breast can be
- Meal Prep Champion – Makes excellent leftovers that taste great cold or reheated
- Kid-Approved – The ultimate finger food that children love eating
- Versatile Seasoning Base – Easy to customize with your favorite spices and flavors
- One-Pan Wonder – Minimal cleanup with just one baking sheet to wash
- Gluten-Free and Keto-Friendly – Works for multiple dietary preferences without modification
Ingredient Notes
Understanding your ingredients helps you make smart substitutions and achieve the best possible results every time you bake chicken legs.
Chicken Drumsticks – Look for evenly sized pieces so they cook uniformly. I prefer fresh over frozen, but thawed frozen drumsticks work perfectly fine. Organic or free-range chicken will have superior flavor if your budget allows. Plan for 2-3 drumsticks per person depending on appetite.
Olive Oil – Helps the seasonings stick and promotes crispy skin. Any neutral oil works (vegetable, canola, avocado), or you can use melted butter for even richer flavor. Don’t skip the oil—it’s essential for that golden-brown exterior.
Paprika – Adds beautiful color and a subtle sweet-smoky flavor. Smoked paprika takes this to the next level with deeper flavor, while Hungarian sweet paprika keeps it traditional. Spanish pimentón is another excellent option.
Garlic Powder – Provides savory depth without the risk of burning that fresh garlic has at high heat. Granulated garlic works equally well; use the same amount.
Onion Powder – Adds sweet, savory complexity to the seasoning blend. Don’t substitute with onion salt or you’ll over-salt the chicken.
Dried Oregano – Brings an herbaceous note that complements poultry beautifully. Italian seasoning blend works as a substitute and adds basil and thyme notes as well.
Salt – Essential for flavor and for drawing out moisture from the skin (which creates crispiness). I prefer kosher salt for its texture and even distribution, but table salt works using about ¾ the amount.
Black Pepper – Freshly ground provides the best flavor and slight heat. Pre-ground is fine but less aromatic.
Cayenne Pepper (optional) – Adds gentle heat without overwhelming the dish. Adjust to your spice tolerance or omit entirely for mild-flavored chicken.
Equipment Needed
One of the best things about this recipe is how minimal the equipment requirements are. Here’s what you’ll need:
- Large Baking Sheet – A rimmed half-sheet pan (18×13 inches) is ideal and fits 8-10 drumsticks comfortably
- Wire Cooling Rack – Optional but highly recommended; elevating chicken allows air circulation for even crispier skin
- Small Mixing Bowl – For combining the dry seasonings
- Measuring Spoons – For accurate seasoning ratios
- Paper Towels – Essential for patting chicken completely dry
- Large Bowl or Ziplock Bag – For coating chicken with oil and seasonings
- Tongs – For turning and handling chicken safely
- Meat Thermometer – Takes the guesswork out of doneness (should read 175-180°F)
- Aluminum Foil or Parchment Paper – Optional, for easy cleanup

Crispy Baked Chicken Legs Recipe
- Total Time: 55 minutes
- Yield: 4 servings (8 drumsticks) 1x
- Diet: Gluten Free
Description
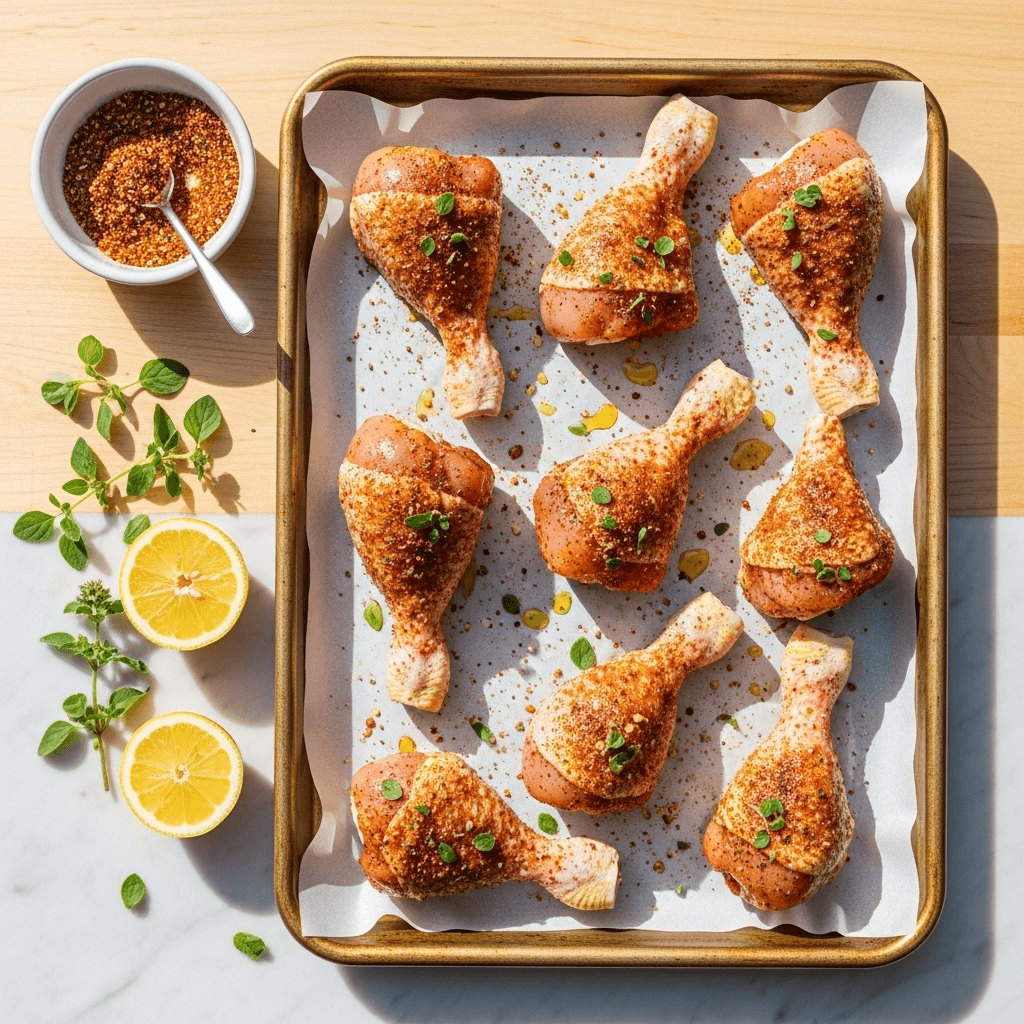
These perfectly crispy baked chicken legs feature golden-brown skin, juicy tender meat, and a flavorful spice blend that makes them irresistible. This easy oven-baked chicken drumsticks recipe requires just simple pantry seasonings and delivers restaurant-quality results every time.
Ingredients
- 8 chicken drumsticks (about 2½–3 pounds)
- 2 tablespoons olive oil
- 1½ teaspoons paprika (smoked or sweet)
- 1 teaspoon garlic powder
- 1 teaspoon onion powder
- 1 teaspoon dried oregano
- 1 teaspoon kosher salt (or ¾ teaspoon table salt)
- ½ teaspoon black pepper
- ¼ teaspoon cayenne pepper (optional, for heat)
- Fresh parsley for garnish (optional)
- Lemon wedges for serving (optional)
Instructions
- Preheat the Oven – Position a rack in the center of your oven and preheat to 425°F (220°C). If using a wire rack, place it inside a rimmed baking sheet. If not using a rack, line the baking sheet with aluminum foil or parchment paper for easier cleanup.
- Prepare the Chicken – Remove chicken drumsticks from refrigerator packaging and pat them completely dry with paper towels. This is a critical step—any moisture on the skin will prevent it from crisping up. Get them as dry as possible, paying special attention to crevices.
- Make the Seasoning Mix – In a small bowl, combine paprika, garlic powder, onion powder, oregano, salt, black pepper, and cayenne (if using). Whisk together until evenly mixed.
- Coat with Oil – Place the dried drumsticks in a large bowl or gallon-sized ziplock bag. Drizzle with olive oil and toss or massage until each piece is lightly and evenly coated with oil.
- Season Generously – Sprinkle the seasoning mixture over the oiled chicken. If using a bowl, toss with your hands to coat evenly. If using a bag, seal it and shake vigorously until every drumstick is completely covered with seasoning. Don’t be shy—you want full coverage for maximum flavor.
- Arrange on Baking Sheet – Place drumsticks on the prepared baking sheet (or on the wire rack), leaving space between each piece so air can circulate. Don’t crowd them or they’ll steam instead of crisp. Arrange them in a single layer with the meatier side facing up.
- Bake – Place in the preheated oven and bake for 40-45 minutes. The chicken is done when the skin is deeply golden brown and crispy, the internal temperature reaches 175-180°F when measured with a meat thermometer inserted into the thickest part (avoiding bone), and the juices run clear when pierced.
- Optional Crisping – For extra crispy skin, turn on the broiler during the last 2-3 minutes of cooking. Watch carefully to prevent burning. The skin should be dark golden brown and crackling.
- Rest Before Serving – Remove from oven and let the chicken rest for 5 minutes before serving. This allows the juices to redistribute throughout the meat, ensuring every bite is moist and flavorful.
- Garnish and Serve – Transfer to a serving platter, garnish with fresh chopped parsley if desired, and serve with lemon wedges for squeezing over the top. Enjoy while hot!
Notes
- Pat chicken completely dry for the crispiest skin—this is the #1 secret to success.
- Don’t skip preheating the oven; starting with high heat helps crisp the skin.
- Using a wire rack elevates the chicken for air circulation and crispier skin all around, but it’s not required.
- Chicken leg internal temperature should reach 175-180°F for the best texture; dark meat benefits from cooking slightly past the standard 165°F minimum.
- Cooking time may vary by 5-10 minutes depending on the size of your drumsticks and individual oven characteristics.
- For meal prep, these taste excellent cold and can be reheated or eaten straight from the fridge.
- Prep Time: 10 minutes
- Cook Time: 45 minutes
- Category: Dinner
- Method: Baking
- Cuisine: American
Nutrition
- Serving Size: 2 drumsticks
- Calories: 285
- Sugar: 0g
- Sodium: 420mg
- Fat: 18g
- Saturated Fat: 2g
- Unsaturated Fat: 12g
- Trans Fat: 0g
- Carbohydrates: 1g
- Fiber: 0g
- Protein: 28g
- Cholesterol: 125mg
Crispy Baked Chicken Legs Recipe – Juicy, Flavorful & Perfect Every Time
Introduction of Recipe
If you’re looking for an easy, budget-friendly dinner that delivers maximum flavor with minimal effort, these crispy baked chicken legs are about to become your new weeknight hero. This simple oven-baked chicken leg recipe transforms affordable chicken drumsticks into golden, crispy-skinned perfection with juicy, tender meat that falls right off the bone. Whether you’re feeding a hungry family on a Tuesday night, meal prepping for the week ahead, or hosting a casual backyard gathering, these baked chicken drumsticks check all the boxes. The best part? You only need a handful of basic seasonings, one baking sheet, and about 45 minutes to create a restaurant-quality meal that rivals any fried chicken—without the mess or added calories. From game day spreads to Sunday dinners, this foolproof baked chicken legs recipe is versatile enough to pair with any side dish and guaranteed to please even the pickiest eaters at your table.
History / Background
Chicken legs, particularly drumsticks, have been a staple protein across cultures for centuries, valued for their affordability, rich flavor, and satisfying dark meat. Unlike the more recently popular boneless, skinless chicken breast that emerged as a health trend in the 1980s, chicken legs have been enjoyed throughout culinary history because they stay moist during cooking and pack incredible flavor from the bone and skin.
The practice of roasting or baking chicken dates back to ancient civilizations, but the modern technique of oven-baking chicken legs as we know it today became popular in American home cooking during the mid-20th century. As electric and gas ovens became standard household appliances in the 1940s and 1950s, baking replaced more labor-intensive cooking methods like rotisserie roasting or pan-frying as the preferred way to cook chicken for family meals.
Baked chicken legs gained particular prominence in African American and Southern cuisine, where slow-roasted or baked chicken seasoned with aromatic spices became a cornerstone of soul food tradition. These preparations often featured paprika, garlic powder, onion powder, and cayenne—seasonings that remain popular in baked chicken recipes today.
The beauty of baked chicken legs lies in their democratic nature—this is a dish that transcends economic boundaries. Because drumsticks are one of the most affordable cuts of chicken (often selling for less than $1 per pound), they’ve provided nourishing, delicious meals for families across all income levels. During economic downturns, including the Great Depression and recent recessions, chicken legs have remained a reliable, budget-friendly protein that doesn’t sacrifice flavor.
Today, the resurgence of whole-animal cooking and nose-to-tail eating has brought renewed appreciation for dark meat cuts like chicken legs. Modern home cooks have rediscovered what previous generations always knew: properly baked chicken legs deliver superior flavor and juiciness compared to lean white meat, all while being kinder to your wallet.
Why You’ll Love This Recipe
This easy baked chicken legs recipe is about to solve your weeknight dinner dilemmas and become a recipe you turn to again and again. I’ve perfected this method over years of cooking for my family, and it never fails to deliver crispy skin and juicy meat every single time.
Here’s why this recipe is absolutely unbeatable:
- Incredibly Budget-Friendly – Chicken legs cost a fraction of other cuts; you can feed a family of four for under $5
- Foolproof Method – Perfect for beginner cooks; almost impossible to mess up
- Minimal Hands-On Time – Just 10 minutes of prep, then the oven does all the work
- Crispy Skin Without Frying – Achieves that crave-worthy crunch without a drop of oil splattering your stovetop
- Naturally Juicy – Dark meat stays moist and tender, never dry like chicken breast can be
- Meal Prep Champion – Makes excellent leftovers that taste great cold or reheated
- Kid-Approved – The ultimate finger food that children love eating
- Versatile Seasoning Base – Easy to customize with your favorite spices and flavors
- One-Pan Wonder – Minimal cleanup with just one baking sheet to wash
- Gluten-Free and Keto-Friendly – Works for multiple dietary preferences without modification
Ingredient Notes
Understanding your ingredients helps you make smart substitutions and achieve the best possible results every time you bake chicken legs.
Chicken Drumsticks – Look for evenly sized pieces so they cook uniformly. I prefer fresh over frozen, but thawed frozen drumsticks work perfectly fine. Organic or free-range chicken will have superior flavor if your budget allows. Plan for 2-3 drumsticks per person depending on appetite.
Olive Oil – Helps the seasonings stick and promotes crispy skin. Any neutral oil works (vegetable, canola, avocado), or you can use melted butter for even richer flavor. Don’t skip the oil—it’s essential for that golden-brown exterior.
Paprika – Adds beautiful color and a subtle sweet-smoky flavor. Smoked paprika takes this to the next level with deeper flavor, while Hungarian sweet paprika keeps it traditional. Spanish pimentón is another excellent option.
Garlic Powder – Provides savory depth without the risk of burning that fresh garlic has at high heat. Granulated garlic works equally well; use the same amount.
Onion Powder – Adds sweet, savory complexity to the seasoning blend. Don’t substitute with onion salt or you’ll over-salt the chicken.
Dried Oregano – Brings an herbaceous note that complements poultry beautifully. Italian seasoning blend works as a substitute and adds basil and thyme notes as well.
Salt – Essential for flavor and for drawing out moisture from the skin (which creates crispiness). I prefer kosher salt for its texture and even distribution, but table salt works using about ¾ the amount.
Black Pepper – Freshly ground provides the best flavor and slight heat. Pre-ground is fine but less aromatic.
Cayenne Pepper (optional) – Adds gentle heat without overwhelming the dish. Adjust to your spice tolerance or omit entirely for mild-flavored chicken.
Equipment Needed
One of the best things about this recipe is how minimal the equipment requirements are. Here’s what you’ll need:
- Large Baking Sheet – A rimmed half-sheet pan (18×13 inches) is ideal and fits 8-10 drumsticks comfortably
- Wire Cooling Rack – Optional but highly recommended; elevating chicken allows air circulation for even crispier skin
- Small Mixing Bowl – For combining the dry seasonings
- Measuring Spoons – For accurate seasoning ratios
- Paper Towels – Essential for patting chicken completely dry
- Large Bowl or Ziplock Bag – For coating chicken with oil and seasonings
- Tongs – For turning and handling chicken safely
- Meat Thermometer – Takes the guesswork out of doneness (should read 175-180°F)
- Aluminum Foil or Parchment Paper – Optional, for easy cleanup
📋 Recipe Card
Prep Time: 10 minutes
Cook Time: 45 minutes
Total Time: 55 minutes
Yield: 4 servings (8 drumsticks)
Category: Dinner
Method: Baking
Cuisine: American
Diet: Gluten-Free, Keto-Friendly
Description
These perfectly crispy baked chicken legs feature golden-brown skin, juicy tender meat, and a flavorful spice blend that makes them irresistible. This easy oven-baked chicken drumsticks recipe requires just simple pantry seasonings and delivers restaurant-quality results every time.
Ingredients
- 8 chicken drumsticks (about 2½-3 pounds)
- 2 tablespoons olive oil
- 1½ teaspoons paprika (smoked or sweet)
- 1 teaspoon garlic powder
- 1 teaspoon onion powder
- 1 teaspoon dried oregano
- 1 teaspoon kosher salt (or ¾ teaspoon table salt)
- ½ teaspoon black pepper
- ¼ teaspoon cayenne pepper (optional, for heat)
- Fresh parsley for garnish (optional)
- Lemon wedges for serving (optional)
Instructions
- Preheat the Oven – Position a rack in the center of your oven and preheat to 425°F (220°C). If using a wire rack, place it inside a rimmed baking sheet. If not using a rack, line the baking sheet with aluminum foil or parchment paper for easier cleanup.
- Prepare the Chicken – Remove chicken drumsticks from refrigerator packaging and pat them completely dry with paper towels. This is a critical step—any moisture on the skin will prevent it from crisping up. Get them as dry as possible, paying special attention to crevices.
- Make the Seasoning Mix – In a small bowl, combine paprika, garlic powder, onion powder, oregano, salt, black pepper, and cayenne (if using). Whisk together until evenly mixed.
- Coat with Oil – Place the dried drumsticks in a large bowl or gallon-sized ziplock bag. Drizzle with olive oil and toss or massage until each piece is lightly and evenly coated with oil.
- Season Generously – Sprinkle the seasoning mixture over the oiled chicken. If using a bowl, toss with your hands to coat evenly. If using a bag, seal it and shake vigorously until every drumstick is completely covered with seasoning. Don’t be shy—you want full coverage for maximum flavor.
- Arrange on Baking Sheet – Place drumsticks on the prepared baking sheet (or on the wire rack), leaving space between each piece so air can circulate. Don’t crowd them or they’ll steam instead of crisp. Arrange them in a single layer with the meatier side facing up.
- Bake – Place in the preheated oven and bake for 40-45 minutes. The chicken is done when the skin is deeply golden brown and crispy, the internal temperature reaches 175-180°F when measured with a meat thermometer inserted into the thickest part (avoiding bone), and the juices run clear when pierced.
- Optional Crisping – For extra crispy skin, turn on the broiler during the last 2-3 minutes of cooking. Watch carefully to prevent burning. The skin should be dark golden brown and crackling.
- Rest Before Serving – Remove from oven and let the chicken rest for 5 minutes before serving. This allows the juices to redistribute throughout the meat, ensuring every bite is moist and flavorful.
- Garnish and Serve – Transfer to a serving platter, garnish with fresh chopped parsley if desired, and serve with lemon wedges for squeezing over the top. Enjoy while hot!
Notes
- Pat chicken completely dry for the crispiest skin—this is the #1 secret to success.
- Don’t skip preheating the oven; starting with high heat helps crisp the skin.
- Using a wire rack elevates the chicken for air circulation and crispier skin all around, but it’s not required.
- Chicken leg internal temperature should reach 175-180°F for the best texture; dark meat benefits from cooking slightly past the standard 165°F minimum.
- Cooking time may vary by 5-10 minutes depending on the size of your drumsticks and individual oven characteristics.
- For meal prep, these taste excellent cold and can be reheated or eaten straight from the fridge.
Nutrition Facts Table
Serving Size: 2 drumsticks
Calories: 285
Sugar: 0g
Sodium: 420mg
Fat: 18g
Saturated Fat: 4g
Unsaturated Fat: 12g
Trans Fat: 0g
Carbohydrates: 1g
Fiber: 0g
Protein: 28g
Cholesterol: 125mg
Note: Nutrition information is approximate and will vary based on the exact size of drumsticks used.
Tips & Variations
The beauty of this baked chicken legs recipe is how easily you can customize it to create completely different flavor profiles. Here are some delicious variations:
BBQ Baked Chicken Legs – After the first 30 minutes of baking, brush drumsticks generously with your favorite BBQ sauce. Return to oven for the final 10-15 minutes until the sauce caramelizes and becomes sticky.
Honey Garlic Chicken Drumsticks – Mix ¼ cup honey, 3 tablespoons soy sauce, 2 minced garlic cloves, and 1 tablespoon rice vinegar. Brush on chicken during the last 15 minutes of baking.
Lemon Herb Chicken Legs – Replace oregano with fresh thyme and rosemary. Add lemon zest to the seasoning mix and squeeze fresh lemon juice over chicken before baking.
Buffalo Style Drumsticks – After baking, toss hot chicken legs in buffalo sauce mixed with melted butter. Serve with ranch or blue cheese dressing.
Cajun Spiced Chicken – Replace the seasoning blend with 2 tablespoons Cajun seasoning for a Louisiana-inspired kick with more heat and complexity.
Asian-Inspired Drumsticks – Use sesame oil instead of olive oil, add ginger powder and Chinese five-spice to seasonings, and brush with a mixture of soy sauce, honey, and sriracha during the last 10 minutes.
Italian Herb Chicken – Use Italian seasoning blend, add fresh or dried basil, and serve with marinara sauce for dipping.
Parmesan Crusted – Mix ½ cup grated Parmesan cheese into the seasoning blend for extra savory, crispy coating.
Maple Mustard Glaze – Brush with a mixture of maple syrup, Dijon mustard, and soy sauce during the final 10 minutes of cooking.
Pro Chef Tips
After years of perfecting baked chicken legs, here are the professional techniques that guarantee superior results every single time:
The Dry Skin Secret – This cannot be overstated: bone-dry skin is the absolute key to crispiness. After patting with paper towels, I even let the chicken sit uncovered in the refrigerator for 1-2 hours (or overnight) if I have time. This air-drying process removes even more surface moisture and guarantees crackling-crisp skin.
Room Temperature Matters – Let chicken sit at room temperature for 20-30 minutes before baking. Cold chicken from the fridge will take longer to cook, potentially drying out the exterior while waiting for the interior to reach temperature.
High Heat Is Your Friend – Don’t be afraid of 425°F. This high temperature is what creates that golden, crispy exterior. Lower temperatures will cook the chicken through but won’t achieve the same textural contrast.
Use a Wire Rack – Elevating chicken on a wire rack allows hot air to circulate underneath, crisping the entire surface rather than leaving the bottom soggy from sitting in rendered fat. This single upgrade makes a dramatic difference.
Season Under the Skin Too – For next-level flavor, gently loosen the skin from the meat (without completely removing it) and rub some seasoning directly onto the meat before replacing the skin. This seasons from the inside out.
Don’t Overcrowd – Leave at least 1 inch between drumsticks on the pan. Crowding creates steam, and steam is the enemy of crispy skin. Use two pans if necessary.
The Thermometer Never Lies – Dark meat is actually better when cooked to 175-180°F rather than the minimum safe 165°F. At this slightly higher temperature, the connective tissues break down, making the meat incredibly tender and allowing it to pull cleanly from the bone.
Broiler Finish – A quick 2-3 minute broil at the end adds professional-level crispness and color. Just watch constantly to prevent burning—the difference between perfectly charred and burnt happens in seconds under a broiler.
Common Mistakes to Avoid
Even with such a simple recipe, there are a few pitfalls that can affect your results. Here’s how to avoid them:
Not Drying the Chicken Thoroughly – This is the number one mistake. Moisture is the enemy of crispy skin. If you skip or rush the drying step, you’ll end up with rubbery, pale skin instead of golden, crispy perfection. Take the extra minute to really dry each piece thoroughly with paper towels.
Overcrowding the Pan – When chicken pieces touch or are too close together, they steam rather than roast. Steam creates moisture, which prevents browning and crisping. Always leave space between pieces, even if it means using two pans.
Cooking at Too Low a Temperature – Many people are nervous about high heat and reduce the temperature to 350°F or 375°F. While this will eventually cook the chicken, you’ll miss out on that crispy, golden skin. Trust the 425°F temperature—it’s what creates the textural magic.
Flipping Too Often (or at All) – Unlike pan-frying, you don’t need to flip chicken legs when baking. In fact, flipping can cause the seasoning to rub off and disrupt the crisping process. If using a wire rack, leave them alone. If baking directly on the sheet, one flip halfway through is sufficient at most.
Removing from Oven Too Soon – Many home cooks remove chicken when it reaches 165°F, but chicken legs actually taste better at 175-180°F. The extra cooking breaks down connective tissue and makes the meat incredibly tender. Don’t be afraid to let them go those extra few minutes—dark meat is forgiving and won’t dry out.
Skipping the Resting Period – Cutting into chicken immediately after removing from the oven causes all those delicious juices to run out onto the plate. Let it rest for 5 minutes, and the juices redistribute throughout the meat for maximum juiciness in every bite.
Storage & Meal Prep
Baked chicken legs are excellent for meal prep and storing leftovers, making them perfect for busy weeks.
Refrigerator Storage – Store cooled chicken legs in an airtight container in the refrigerator for up to 4 days. Let them cool to room temperature first (but don’t leave out longer than 2 hours for food safety).
Reheating for Crispy Skin – To restore that crispy skin texture, reheat in a 375°F oven for 10-12 minutes rather than using the microwave. Place on a wire rack or directly on a baking sheet. The oven will re-crisp the skin beautifully while warming the meat through.
Microwave Reheating – If you’re short on time, microwave on high for 1-2 minutes until heated through. The skin won’t be crispy, but the chicken will still taste delicious, especially if you’re shredding it for other uses.
Cold Chicken Excellence – These drumsticks taste fantastic straight from the fridge! Cold baked chicken makes excellent lunch additions, picnic fare, or quick protein snacks. Many people actually prefer them cold.
Meal Prep Strategy – Bake a large batch on Sunday and portion into individual containers with your favorite sides (roasted vegetables, rice, salad) for grab-and-go lunches all week.
Storing Without Getting Soggy – If you want to maintain some crispness overnight, store chicken legs loosely wrapped or in a container with a paper towel to absorb excess moisture, rather than sealed tightly.
Food Safety – Always refrigerate chicken within 2 hours of cooking (1 hour if the room temperature is above 90°F). Use clean containers and never mix cooked chicken with anything that touched raw chicken.
Make-Ahead & Freezer Notes
This recipe is incredibly freezer-friendly and perfect for advance preparation, making weeknight dinners even easier.
Freezing Cooked Chicken – Let baked drumsticks cool completely, then freeze in a single layer on a baking sheet until solid (about 2 hours). Transfer to freezer bags or airtight containers, removing as much air as possible. Properly stored, they’ll maintain quality for up to 3 months.
Freezing Seasoned Raw Chicken – You can also prep ahead by seasoning raw drumsticks, placing them in freezer bags, and freezing for up to 3 months. Thaw overnight in the refrigerator, then bake according to recipe instructions. This is perfect for batch prep.
Thawing Instructions – Always thaw frozen chicken in the refrigerator, never on the counter. Raw chicken takes 24 hours to thaw; cooked chicken takes 12-18 hours depending on quantity. For faster thawing, submerge sealed packages in cold water, changing the water every 30 minutes.
Reheating from Frozen – You can reheat frozen cooked drumsticks without thawing. Place on a baking sheet in a 350°F oven for 25-30 minutes until heated through. Cover with foil for the first 15 minutes to prevent over-browning.
Marinating Ahead – For even more flavor, combine oil and seasonings with the chicken up to 24 hours ahead. Store in the refrigerator, then bring to room temperature for 20 minutes before baking.
Weekend Prep for Week – Bake 2-3 batches on Sunday for easy protein throughout the week. Portion into meal prep containers or store in bulk for flexible meal building.
Best Quality Timeline – While safe for 3 months, frozen chicken tastes best within 1-2 months. Label containers with the date so you can rotate your stock.
Serving Suggestions
These versatile baked chicken legs pair beautifully with countless side dishes and work for various meal occasions. Here are some perfect pairings:
Classic Comfort Sides – Serve with creamy mashed potatoes, mac and cheese, coleslaw, and corn on the cob for a traditional American comfort food dinner that satisfies everyone.
Healthy Veggie Plates – Pair with roasted vegetables (broccoli, Brussels sprouts, carrots, sweet potatoes), quinoa, and a fresh garden salad for a balanced, nutritious meal.
Southern Soul Food Spread – Accompany with collard greens, black-eyed peas, cornbread, and sweet potato casserole for an authentic Southern feast.
BBQ Style Picnic – Serve alongside baked beans, potato salad, watermelon slices, and corn bread for the ultimate backyard cookout spread.
Rice and Grain Bowls – Place drumsticks over rice pilaf, cilantro-lime rice, or cauliflower rice with sautéed vegetables for an easy bowl meal.
Kid-Friendly Dinner – Pair with french fries or tater tots, carrot sticks, apple slices, and ranch dressing for dipping to create a meal kids will actually eat.
Mediterranean Twist – Serve with Greek salad, tzatziki sauce, hummus, pita bread, and roasted vegetables for a Mediterranean-inspired dinner.
Game Day Spread – Perfect for parties alongside wings, loaded nachos, potato skins, and various dipping sauces (ranch, BBQ, honey mustard, blue cheese).
Sandwich Fillings – Shred leftover chicken and use for sandwiches, wraps, tacos, quesadillas, or chicken salad.
Meal Prep Bowls – Build balanced prep containers with drumsticks, roasted sweet potatoes, steamed broccoli, and a side of hot sauce or your favorite condiment.
FAQs Section
How do I know when baked chicken legs are done?
The most accurate way is using an instant-read thermometer inserted into the thickest part of the meat (not touching bone). Chicken legs are done at 175-180°F. Visually, the skin should be deeply golden brown, juices should run clear (not pink) when pierced, and the meat should pull away from the bone easily.
Why is my chicken skin not crispy?
The most common cause is moisture on the skin surface before baking. Make sure to thoroughly pat chicken dry with paper towels. Other factors include overcrowding the pan (which creates steam), cooking at too low a temperature, or using a pan without airflow underneath. A wire rack dramatically improves crispiness.
Can I bake chicken legs from frozen?
While technically possible, I don’t recommend it. Frozen chicken won’t crisp properly and will cook unevenly, with dry exterior and potentially undercooked interior. Always thaw chicken completely in the refrigerator before baking for best results and food safety.
What temperature should I bake chicken drumsticks?
425°F (220°C) is the ideal temperature for achieving crispy skin while cooking the meat through perfectly. Lower temperatures (350-375°F) will work but won’t produce the same crispy texture. Higher temperatures risk burning the outside before the inside cooks.
How many chicken legs per person should I plan?
For adults, plan on 2-3 drumsticks per person depending on appetite and what sides you’re serving. For children, 1-2 drumsticks is usually sufficient. If chicken is the only main protein with light sides, lean toward 3 per person.
Can I use this method for chicken thighs?
Absolutely! This recipe works perfectly for bone-in, skin-on chicken thighs. Thighs may cook slightly faster (35-40 minutes) since they’re typically smaller than drumsticks, so check temperature early. The internal temp target is the same: 175-180°F.
Do I need to flip the chicken while baking?
Not if you’re using a wire rack—the elevated position allows air circulation on all sides. If baking directly on the pan, one flip halfway through ensures both sides brown, but it’s not strictly necessary if you’re okay with one side being slightly less crispy.
Conclusion
These crispy baked chicken legs prove that simple ingredients and straightforward techniques can create absolutely spectacular results. With minimal prep time, one pan, and a handful of seasonings you probably already have in your pantry, you can deliver a dinner that rivals anything from a restaurant—at a fraction of the cost. The combination of crispy, golden skin and juicy, tender meat makes every bite completely satisfying.
Whether you’re cooking for picky kids, meal prepping for busy weeks, feeding a crowd on a budget, or just craving comfort food without the fuss, this easy baked chicken drumsticks recipe delivers every single time. It’s one of those reliable recipes you’ll turn to again and again because it simply works.
I hope you’ll give this recipe a try soon! It’s been a family favorite in my house for years, and I know it’s about to become a staple in yours too. Have you made it yet? I’d absolutely love to hear how it turned out for you! Drop a comment below sharing your experience, any creative variations you tried, or what sides you served alongside. And if this recipe made your dinner easier or your family happy, please pin it to your favorite Pinterest board and share it with friends who need a reliable, delicious chicken dinner in their rotation. Happy cooking!