
If you’ve ever wished you could capture the nostalgic magic of campfire s’mores in a rich, fudgy brownie, this S’mores Brownie Recipe is about to become your new obsession. These decadent treats combine everything we love about classic brownies—that dense, chocolatey center and crispy edges—with the iconic trio of graham crackers, melted chocolate, and toasted marshmallows that define the perfect s’more.
This recipe is perfect for summer gatherings, backyard barbecues, potlucks, holiday parties, or those cozy nights when you’re craving something indulgent but don’t want to build an actual campfire. These s’mores brownies are incredibly versatile and can be served warm with a scoop of vanilla ice cream, cut into neat squares for a bake sale, or packaged up as homemade gifts that will make you everyone’s favorite friend. Whether you’re seasoned baker or someone who just discovered the joy of homemade brownies, this foolproof recipe delivers bakery-quality results every single time.
History / Background
The story of s’mores brownies is really a beautiful collision of two beloved American dessert traditions. S’mores themselves have been a camping staple since the 1920s, with the first known recipe appearing in the 1927 Girl Scout guidebook “Tramping and Trailing with the Girl Scouts.” The name “s’more” is a contraction of “some more,” because honestly, who can stop at just one?
Brownies, on the other hand, have an even older pedigree. Legend has it that brownies were invented by accident in the late 1800s when a chef forgot to add baking powder to a chocolate cake recipe. The result was a dense, fudgy square that became an instant American classic. The first brownie recipe appeared in the 1906 Boston Cooking-School Cook Book, and they’ve been a lunchbox and bake sale favorite ever since.
The genius of combining these two classics into s’mores brownies likely emerged in home kitchens across America in the late 20th century, as creative bakers looked for ways to enjoy campfire flavors year-round. This indoor version captures all the gooey, melty satisfaction of roasting marshmallows over an open flame, with the added bonus of a rich chocolate brownie base and crunchy graham cracker layers. It’s the perfect example of American comfort food innovation—taking something we already love and making it even better.
Why You’ll Love This Recipe
These s’mores brownies are the ultimate crowd-pleaser that brings together the best of both worlds. Imagine biting into a perfectly fudgy brownie with a buttery graham cracker crust, studded with chocolate chips, and topped with golden, toasted marshmallows that get all caramelized and gooey. It’s pure dessert heaven, and here’s why this recipe deserves a permanent spot in your baking rotation:
- No campfire required – Enjoy authentic s’mores flavor without leaving your kitchen or dealing with smoky clothes and bug bites
- Easy to make – Simple ingredients and straightforward steps mean even beginner bakers can nail this recipe on the first try
- Perfect for crowds – One 9×13 pan yields enough brownies to feed a party, making it ideal for potlucks and gatherings
- Customizable – Easily adapt the recipe to your preferences with different chocolate types, add-ins, or flavor variations
- Impressive presentation – Those toasted marshmallow tops look bakery-professional and photograph beautifully for social media
- Budget-friendly – Uses pantry staples and affordable ingredients you probably already have on hand
- Kid-approved – The combination of chocolate, graham crackers, and marshmallows is universally loved by children and adults alike
- Make-ahead friendly – Prepare components in advance for stress-free entertaining
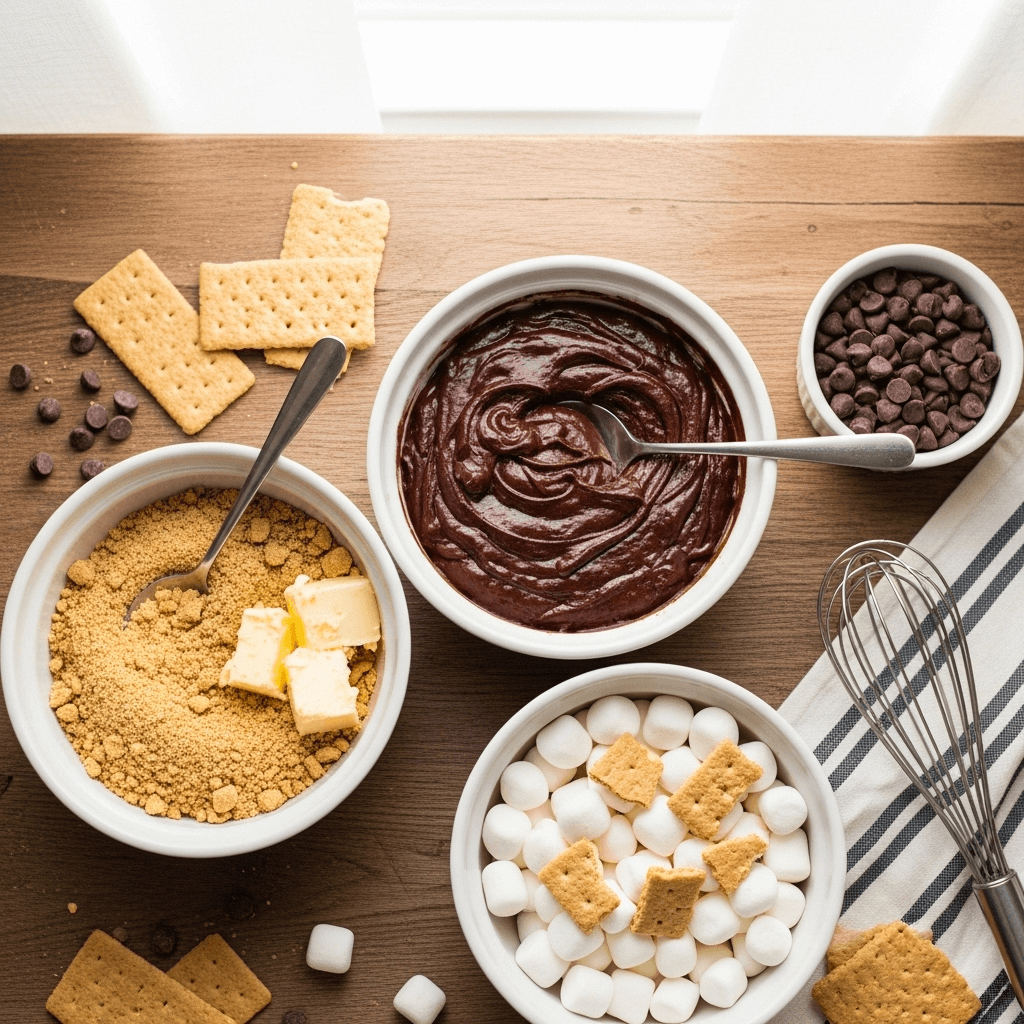
Ingredient Notes
Understanding your ingredients is the secret to baking success. Here’s what you’ll need for these amazing s’mores brownies and why each component matters:
Graham Crackers: The foundation of authentic s’mores flavor. Use regular honey graham crackers for the classic taste, or try cinnamon or chocolate graham crackers for a fun twist. You’ll need them both crushed for the crust and in larger pieces for layering. Substitute with digestive biscuits if graham crackers aren’t available in your area.
Unsalted Butter: Provides richness and moisture to both the crust and brownie layer. Using unsalted butter lets you control the salt level in your recipe. If you only have salted butter, reduce the added salt by half. Make sure it’s properly melted and slightly cooled before mixing.
Granulated Sugar: Sweetens the brownies and helps create that signature crackly top. Don’t substitute with other sweeteners as sugar also affects texture and structure.
Brown Sugar: Adds moisture and a subtle molasses flavor that makes brownies extra fudgy. Light or dark brown sugar both work, though dark will give a slightly richer flavor.
Eggs: These bind everything together and create structure. Use large eggs at room temperature for best results. Cold eggs can seize up melted chocolate.
Vanilla Extract: Enhances all the chocolate flavors. Use pure vanilla extract rather than imitation for the best taste.
All-Purpose Flour: Provides structure without making brownies cakey. Measure by spooning into your measuring cup and leveling off—don’t pack it down.
Unsweetened Cocoa Powder: The star of chocolate flavor. Dutch-processed or natural both work, but Dutch-processed gives a deeper, less acidic chocolate taste. Sift it if it’s lumpy.
Salt: Just a pinch enhances sweetness and balances flavors. Don’t skip it—it makes everything taste better.
Semi-Sweet Chocolate Chips: Studded throughout for extra pockets of melted chocolate. You can use milk chocolate for sweeter brownies or dark chocolate for more sophisticated flavor.
Mini Marshmallows: The classic s’mores topping that gets golden and gooey under the broiler. Mini marshmallows toast more evenly than large ones. You can also use marshmallow fluff for a different texture.
Equipment Needed
Having the right tools makes baking so much easier and more enjoyable. Here’s everything you’ll need to create perfect s’mores brownies:
- 9×13-inch baking pan – The standard size for sheet brownies; glass, metal, or ceramic all work
- Parchment paper or aluminum foil – Lines the pan for easy removal and cleanup
- Large mixing bowl – For combining wet ingredients
- Medium mixing bowl – For the graham cracker crust
- Whisk – Essential for mixing eggs and creating smooth batter
- Rubber spatula – For folding ingredients and scraping down bowl sides
- Measuring cups and spoons – Accurate measurements are crucial in baking
- Food processor or rolling pin – To crush graham crackers into fine crumbs
- Offset spatula – Helpful for spreading batter evenly (optional but nice to have)
- Toothpick or cake tester – To check brownie doneness
- Oven mitts – Safety first when handling hot pans
- Wire cooling rack – Allows air circulation for even cooling

S’mores Brownies Recipe
- Total Time: 55 minutes
- Yield: 16 brownies 1x
- Diet: Vegetarian
Description
Indulgent s’mores brownies with a buttery graham cracker crust, fudgy chocolate brownie center, and golden toasted marshmallow topping. The perfect combination of campfire nostalgia and homemade brownie perfection.
Ingredients
For the Graham Cracker Crust:
- 1½ cups graham cracker crumbs (about 10–12 full crackers)
- ¼ cup granulated sugar
- 6 tablespoons unsalted butter, melted
For the Brownie Layer:
- ¾ cup (1½ sticks) unsalted butter, melted
- 1½ cups granulated sugar
- ½ cup packed light brown sugar
- 3 large eggs, room temperature
- 1 tablespoon vanilla extract
- ¾ cup all-purpose flour
- ¾ cup unsweetened cocoa powder
- ½ teaspoon salt
- 1 cup semi-sweet chocolate chips
For the Topping:
- 4–5 graham crackers, broken into pieces
- 2 cups mini marshmallows
- ½ cup semi-sweet chocolate chips
Instructions
- Preheat and Prepare: Preheat your oven to 350°F (175°C). Line a 9×13-inch baking pan with parchment paper, leaving an overhang on two sides for easy removal. Lightly grease the parchment with cooking spray.
- Make the Graham Cracker Crust: In a medium bowl, combine graham cracker crumbs, ¼ cup sugar, and 6 tablespoons melted butter. Mix until the mixture resembles wet sand. Press firmly and evenly into the bottom of your prepared pan. Bake for 8 minutes, then remove and let cool slightly while you prepare the brownie batter.
- Mix Wet Ingredients: In a large mixing bowl, whisk together ¾ cup melted butter, 1½ cups granulated sugar, and ½ cup brown sugar until well combined and slightly glossy. Add eggs one at a time, whisking well after each addition. Stir in vanilla extract.
- Add Dry Ingredients: Sift cocoa powder into the bowl (or whisk it in a separate bowl first to remove lumps). Add flour and salt. Gently fold everything together with a rubber spatula until just combined—don’t overmix or your brownies will be tough. The batter should be thick and glossy.
- Add Chocolate Chips: Fold in 1 cup of chocolate chips, reserving some for the top if desired. The batter will be very thick and fudgy.
- Layer and Bake: Pour the brownie batter over the pre-baked graham cracker crust. Use an offset spatula or the back of a spoon to spread it evenly into all corners. Tap the pan gently on the counter to release air bubbles. Bake for 28-30 minutes, until a toothpick inserted in the center comes out with just a few moist crumbs (not wet batter).
- Add Toppings: Remove brownies from oven and immediately scatter graham cracker pieces, mini marshmallows, and the remaining ½ cup chocolate chips over the top.
- Toast Marshmallows: Turn your oven to broil and position the rack about 6 inches from the heat source. Return the pan to the oven and broil for 1-2 minutes, watching constantly, until marshmallows are golden and toasted. They can burn quickly, so don’t walk away!
- Cool Completely: Remove from oven and let cool completely in the pan on a wire rack for at least 2 hours. This allows the brownies to set properly for clean cuts. For even cleaner cuts, refrigerate for 30 minutes before slicing.
- Slice and Serve: Use the parchment overhang to lift the entire brownie slab out of the pan. Place on a cutting board and use a sharp knife (wiped clean between cuts) to slice into 16 squares.
Notes
- For fudgier brownies: Reduce baking time by 2-3 minutes. They’ll seem underdone but will set as they cool.
- For a stronger marshmallow flavor: Add ½ teaspoon of marshmallow extract to the brownie batter.
- Kitchen torch method: If you don’t want to use the broiler, toast marshmallows with a kitchen torch for more control.
- Clean cuts: For the neatest squares, chill brownies completely, then use a hot knife (dipped in hot water and wiped dry between cuts).
- Storage: These brownies stay fresh for up to 5 days when stored properly in an airtight container.
- Prep Time: 20 minutes
- Cook Time: 35 minutes
- Category: Dessert
- Method: Baking
- Cuisine: American
Nutrition
- Serving Size: 1 brownie (based on 16 servings)
- Calories: 345
- Sugar: 32g
- Sodium: 125mg
- Fat: 16g
- Saturated Fat: 9g
- Unsaturated Fat: 6g
- Trans Fat: 0g
- Carbohydrates: 48g
- Fiber: 2g
- Protein: 4g
- Cholesterol: 60mg
Tips & Variations
Flavor Variations:
- Peanut Butter S’mores: Swirl ½ cup of creamy peanut butter into the brownie batter before baking
- Salted Caramel: Drizzle salted caramel sauce over the marshmallow layer after broiling
- Mint Chocolate: Add ½ teaspoon peppermint extract to the batter and use chocolate graham crackers
- Cookies and Cream: Mix in crushed Oreo cookies with the graham cracker crust
- Rocky Road Style: Add chopped walnuts or pecans along with the chocolate chips
Dietary Modifications:
- Gluten-Free: Use gluten-free graham crackers and substitute with gluten-free 1-to-1 baking flour
- Reduced Sugar: Cut the sugar by ¼ cup and use sugar-free chocolate chips (note: texture will be slightly less fudgy)
- Dairy-Free: Replace butter with coconut oil or vegan butter and use dairy-free chocolate chips
Presentation Ideas:
- Cut into triangles instead of squares for a fun geometric look
- Drizzle with melted chocolate after the marshmallows cool
- Dust lightly with cocoa powder for an elegant finish
- Serve warm with vanilla ice cream and hot fudge sauce
- Stack two brownies together with marshmallow fluff in between for “double-decker” s’mores brownies
Pro Chef Tips
Temperature Matters: Room temperature eggs incorporate more smoothly and create better texture. Take them out of the fridge 30 minutes before baking, or place them in warm water for 5 minutes.
Don’t Overbake: The single biggest mistake in brownie-making is overbaking. Pull them when a toothpick has moist crumbs clinging to it, not when it comes out completely clean. Brownies continue cooking from residual heat even after leaving the oven.
Quality Chocolate is Key: Since chocolate is the star flavor here, use good quality cocoa powder and chocolate chips. The difference in taste is remarkable and worth the few extra dollars.
The Toothpick Test Location: Always test for doneness in the center of the pan, not near edges. Edges set faster and will give you a false reading. Avoid testing where chocolate chips are, as melted chocolate looks like wet batter.
Create Steam for Fudginess: Place a small oven-safe dish of water on the bottom rack while baking. This creates a humid environment that keeps brownies ultra-moist and fudgy.
Watch the Broiler Like a Hawk: Marshmallows go from perfectly golden to burnt in literally seconds under the broiler. Stay in front of the oven with the door slightly open, and rotate the pan if needed for even browning.
Let Chemistry Work: Cooling brownies isn’t just about safety—it’s about texture. As brownies cool, the structure sets and flavors meld. Cutting them warm results in a crumbly mess. Patience yields perfect squares.
Common Mistakes to Avoid
Mistake #1: Using Cold Ingredients – Cold eggs and butter don’t incorporate smoothly, leading to lumpy batter and uneven texture. Always bring eggs to room temperature and ensure melted butter has cooled slightly (but is still liquid).
Mistake #2: Overmixing the Batter – Stirring too vigorously or for too long develops gluten in the flour, resulting in tough, cakey brownies instead of fudgy ones. Mix just until you no longer see dry flour streaks, then stop.
Mistake #3: Skipping the Parchment Paper – Even with a greased pan, brownies can stick stubbornly. The parchment overhang lets you lift the entire batch out cleanly for perfect cutting.
Mistake #4: Not Pressing the Crust Firmly – A loose graham cracker crust will crumble and separate from the brownie layer. Use the bottom of a measuring cup or glass to press it down firmly and evenly across the entire pan.
Mistake #5: Cutting Too Soon – I know they smell amazing and you’re eager, but cutting warm brownies leads to crumbly, uneven pieces. Wait at least 2 hours, or refrigerate for cleaner cuts. Your patience will be rewarded with bakery-perfect squares.
Storage & Meal Prep
Room Temperature Storage: Once completely cooled, store s’mores brownies in an airtight container with layers separated by parchment or wax paper. They’ll stay fresh and fudgy at room temperature for up to 4 days. Keep them away from direct sunlight and heat sources.
Refrigerator Storage: For longer storage or if your kitchen is particularly warm, refrigerate brownies in an airtight container for up to 1 week. The marshmallow topping may lose some of its toasted appearance but will still taste delicious. Let them come to room temperature for 15-20 minutes before serving for the best texture and flavor.
Reheating Tips: These brownies are delicious cold, at room temperature, or gently warmed. To reheat, microwave individual brownies for 10-15 seconds or warm them in a 300°F oven for 5-7 minutes. Don’t overheat or the marshmallows will melt completely.
Preventing Staleness: Brownies can dry out if not stored properly. Make sure your container seals tightly, and consider adding a slice of bread to the container—it will help maintain moisture without affecting flavor.
Transporting: If taking these to a party, keep them in the baking pan covered with foil, or arrange cut brownies in a single layer in a covered container. They’re sturdy enough to travel well and hold up beautifully at room temperature for several hours.
Make-Ahead & Freezer Notes
Prepare in Stages: You can make the graham cracker crust up to 2 days in advance. Bake it, let it cool completely, wrap the pan tightly in plastic wrap, and refrigerate. When ready to finish, bring to room temperature and continue with the brownie layer.
Freeze Before Topping: For best results with long-term storage, bake the brownies through step 6 (without the marshmallow topping), cool completely, wrap tightly in plastic wrap and then aluminum foil, and freeze for up to 3 months. When ready to serve, thaw overnight in the refrigerator, add toppings, and broil as directed.
Freezing Finished Brownies: You can freeze fully assembled s’mores brownies, though the marshmallows may lose some texture. Wrap individual brownies in plastic wrap, place in a freezer bag, and freeze for up to 2 months. Thaw at room temperature for 1-2 hours.
Best Reheating Method from Frozen: Unwrap brownies and let them thaw completely at room temperature (about 2-3 hours). For that fresh-baked experience, warm in a 300°F oven for 8-10 minutes before serving.
Pre-Portioning for Convenience: Cut brownies into squares before freezing for grab-and-go treats. Individually wrapped frozen brownies make perfect lunchbox desserts that thaw by lunchtime or late-night snacks that can be enjoyed straight from the freezer for a fudgy, almost ice-cream-like texture.
Serving Suggestions
S’mores brownies are spectacular on their own, but pairing them with complementary treats takes dessert to the next level. Here are some delicious ways to serve these crowd-pleasers:
Ice Cream Pairings: Serve warm brownies with a scoop of vanilla bean, salted caramel, or peanut butter ice cream. The contrast between hot, gooey brownie and cold, creamy ice cream is absolutely heavenly. Coffee or chocolate ice cream also works beautifully.
Beverage Pairings: These rich brownies pair perfectly with cold milk (classic), hot coffee, espresso, or a cold brew for adults. For special occasions, try them with red wine (a fruity Zinfandel or Port), bourbon, or Irish cream liqueur.
Dessert Boards: Include s’mores brownies on a dessert charcuterie board alongside fresh strawberries, raspberries, whipped cream, chocolate-covered pretzels, and additional graham crackers for dipping.
Build a Brownie Sundae: Create an epic brownie sundae bar with these as the base. Offer various ice cream flavors, hot fudge, caramel sauce, whipped cream, chopped nuts, sprinkles, and fresh berries. Let guests build their own masterpieces.
Morning After Treat: Believe it or not, these make an indulgent breakfast pastry with coffee. Cut them slightly smaller and serve alongside fresh fruit for a special brunch.
S’mores Brownie Sandwich: Slice brownies horizontally and fill with marshmallow fluff and a thin layer of peanut butter for an over-the-top treat that takes the s’mores concept even further.
FAQs Section
Q: Can I use a different size pan?
A: While 9×13 is ideal, you can use an 8×8 or 9×9 pan for thicker brownies—just increase baking time by 8-10 minutes and check for doneness with a toothpick. For thinner brownies, use a larger sheet pan but reduce baking time by 5-7 minutes.
Q: Why did my marshmallows burn?
A: Broilers vary significantly in heat intensity. Always watch carefully during the broiling stage, and if your broiler runs very hot, move the oven rack down one position farther from the heat source. You can also toast marshmallows with a kitchen torch for more control.
Q: Can I make these without eggs?
A: Yes! Substitute each egg with ¼ cup of unsweetened applesauce or a commercial egg replacer. The texture will be slightly different—a bit more cake-like—but they’ll still be delicious.
Q: How do I know when brownies are done?
A: Insert a toothpick into the center (avoiding chocolate chips). It should come out with a few moist crumbs attached—not wet batter, but not completely clean either. The edges should look set and may just be pulling away from the pan slightly.
Q: My graham cracker crust is too crumbly. What went wrong?
A: The graham crackers likely weren’t crushed finely enough, or there wasn’t enough butter to hold them together. Make sure crackers are ground to fine crumbs and the mixture feels like wet sand. Press very firmly into the pan—this is crucial for a cohesive crust.
Q: Can I use marshmallow fluff instead of mini marshmallows?
A: Absolutely! Spread a thick layer of marshmallow fluff over the baked brownies, then use a kitchen torch to toast the top until golden. The texture will be smoother and creamier than using mini marshmallows.
Q: These are too sweet for me. How can I reduce the sugar?
A: You can reduce the granulated sugar in the brownie layer by up to ¼ cup without dramatically affecting texture. Also, using dark chocolate chips (60-70% cacao) instead of semi-sweet helps balance sweetness with more intense chocolate flavor.
Conclusion
There you have it—the ultimate s’mores brownie recipe that brings together everything we love about chocolate, graham crackers, and marshmallows in one incredible dessert. These brownies are guaranteed to disappear fast at any gathering, and the combination of that buttery graham crust, fudgy chocolate center, and golden toasted marshmallow top creates pure magic in every bite.
Whether you’re baking these for a summer cookout, a holiday celebration, a bake sale, or just because Tuesday needs something special, this recipe delivers consistent, crowd-pleasing results. The beauty of s’mores brownies is that they’re simple enough for beginners yet impressive enough to serve to the toughest dessert critics.
I’d love to hear how your s’mores brownies turn out! Did you try any of the variations? Do you prefer them warm with ice cream or straight from the pan? Leave a comment below sharing your experience, and don’t forget to snap a photo and share it on Pinterest using #SmoresBrownies—I can’t wait to see your creations!
If you loved this recipe, be sure to pin it to your favorite dessert board so you can find it easily next time that chocolate craving hits. Happy baking, friends!