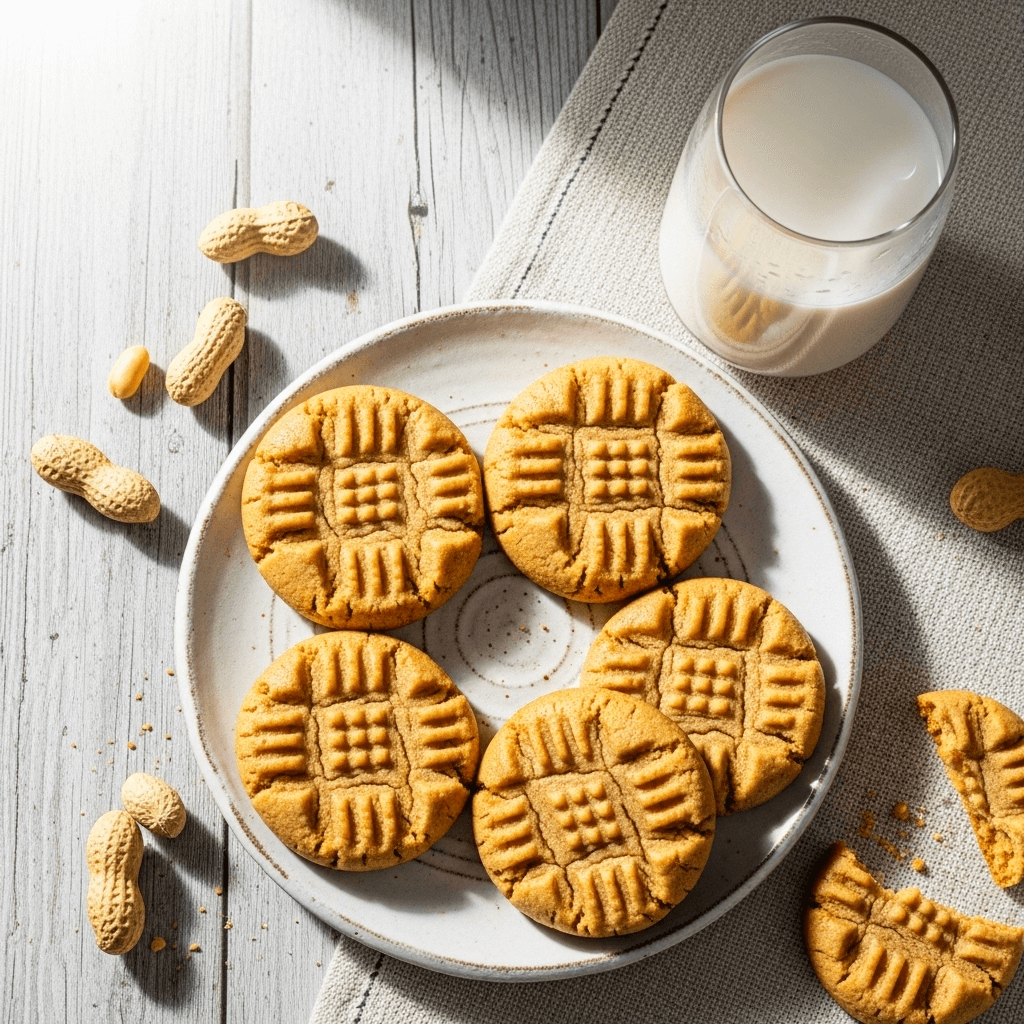

If there’s one cookie that screams comfort, nostalgia, and pure deliciousness, it’s the classic peanut butter cookie. These soft and chewy peanut butter cookies are everything you want in a homemade treat—rich peanut butter flavor, a perfectly tender center, slightly crispy edges, and those iconic crisscross fork marks on top. Whether you’re baking for a school party, holiday cookie exchange, or just craving something sweet on a lazy Sunday afternoon, these peanut butter cookies are always a crowd-pleaser.
What makes this recipe truly special is its versatility. You can make traditional peanut butter cookies with pantry staples, or go the minimalist route with a simple 3-ingredient version when you’re short on time. They’re perfect for any occasion—afternoon snacks with a cold glass of milk, dessert after dinner, care packages for college students, or wrapped up as edible gifts during the holidays. Kids absolutely love helping make these cookies, especially when it comes to creating those signature fork patterns on top.
These homemade peanut butter cookies taste infinitely better than store-bought versions, and they fill your kitchen with the most irresistible aroma while baking. Trust me, once you make these easy peanut butter cookies from scratch, you’ll never go back to the packaged stuff again.
History / Background
The peanut butter cookie has a rich American history that dates back to the early 1900s. Peanut butter itself became popular in the United States after it was introduced at the 1904 World’s Fair in St. Louis, though George Washington Carver is often credited with promoting hundreds of uses for peanuts starting in 1916. As peanut butter gained popularity as an affordable, protein-rich food during the Great Depression, home bakers began experimenting with adding it to cookie recipes.
The first published peanut butter cookie recipe appeared in the 1916 edition of “Recipes and Menus” by George Washington Carver, but the cookies really took off in the 1930s when they started appearing in mainstream cookbooks and community recipe collections. The iconic crisscross fork pattern—which has become synonymous with peanut butter cookies—wasn’t just decorative. It served a practical purpose: peanut butter cookie dough is denser than other cookie doughs and doesn’t spread much during baking, so pressing the dough with a fork helped flatten the cookies for even baking and created a larger surface area for that delightful slightly crispy texture.
During World War II, peanut butter cookies became even more popular because the recipe required relatively few ingredients, some of which weren’t rationed like butter and eggs often were. Peanut butter was shelf-stable, affordable, and packed with protein—making it perfect for wartime baking.
The 3-ingredient peanut butter cookie variation (using just peanut butter, sugar, and an egg) gained viral fame in the 1990s and 2000s as home bakers discovered this simplified version that required no flour, no butter, and minimal effort while still producing delicious results. Today, peanut butter cookies remain one of America’s most beloved cookie varieties, ranking consistently in the top five favorite cookies across the country.
Why You’ll Love This Recipe
These homemade peanut butter cookies are the ultimate crowd-pleaser, and once you try them, they’ll become your go-to cookie recipe. The dough comes together in just minutes, and the results are consistently perfect every single time. Here’s what makes this recipe so amazing:
- Super Simple Recipe: No complicated techniques or fancy equipment needed—just basic mixing and baking skills that any beginner can master.
- Incredible Flavor: Rich, nutty peanut butter taste in every single bite with the perfect balance of sweet and salty.
- Perfect Texture: Soft and chewy centers with slightly crispy edges—exactly what a peanut butter cookie should be.
- Budget-Friendly: Made with affordable pantry staples that you probably already have on hand.
- Quick to Make: From mixing bowl to cooling rack in under 30 minutes total.
- Customizable: Easily adapt this recipe with chocolate chips, peanut butter chips, or even go gluten-free.
- Kid-Friendly Activity: Children love helping press the fork marks and eating warm cookies straight from the oven.
- Make-Ahead Friendly: The dough freezes beautifully, so you can bake fresh cookies anytime.
- Allergy Considerations: Can be made gluten-free naturally with the 3-ingredient version.
- Always a Hit: I’ve never met anyone who doesn’t love a good peanut butter cookie—they’re guaranteed to disappear fast!
Ingredient Notes
Let’s talk about what goes into these delicious peanut butter cookies and why each ingredient matters:
Peanut Butter: This is the star of the show! Use creamy or crunchy peanut butter depending on your preference. I recommend using regular peanut butter (like Jif or Skippy) rather than natural peanut butter for this recipe. Natural peanut butter has a higher oil content and different texture that can affect the cookies’ consistency. If you must use natural peanut butter, stir it extremely well first and be prepared for a slightly different texture. For a fun twist, try using crunchy peanut butter for added texture.
Granulated Sugar: Provides sweetness and helps create that slightly crispy exterior. The sugar also helps the cookies spread properly during baking.
Brown Sugar: Adds moisture, chewiness, and a deeper caramel-like flavor. The molasses in brown sugar keeps the cookies soft and tender. You can use light or dark brown sugar—dark will give a richer flavor.
Butter: Use unsalted butter so you can control the salt level in your cookies. Make sure it’s softened to room temperature for easy creaming with the sugars. If you only have salted butter, reduce the added salt in the recipe by half.
Egg: Binds everything together and provides structure. Bring your egg to room temperature for best results—it incorporates more easily into the dough.
Vanilla Extract: Enhances all the other flavors and adds warmth to the cookies. Don’t skip this—it makes a noticeable difference!
All-Purpose Flour: Provides structure to the cookies. Make sure to measure correctly by spooning flour into your measuring cup and leveling it off—don’t pack it down.
Baking Soda: This leavening agent helps the cookies rise slightly and contributes to their tender texture. Make sure yours isn’t expired or your cookies won’t rise properly.
Salt: Balances the sweetness and enhances the peanut butter flavor. A little salt goes a long way in bringing out the best in desserts.
Substitutions: For gluten-free cookies, use a 1:1 gluten-free baking flour blend or try the 3-ingredient version. For dairy-free, substitute the butter with coconut oil or vegan butter. You can also use a flax egg (1 tablespoon ground flaxseed + 3 tablespoons water) for egg-free cookies, though the texture will be slightly different.
Equipment Needed
You don’t need any special tools to make these peanut butter cookies—just basic baking equipment:
- Mixing Bowls: One large bowl for creaming butter and sugar, one medium bowl for dry ingredients.
- Electric Mixer: A stand mixer or hand mixer makes creaming the butter and sugar much easier, though you can do it by hand with a wooden spoon and some elbow grease.
- Measuring Cups and Spoons: For accurate measurements—baking is a science!
- Baking Sheets: Two or three rimmed baking sheets work best. Light-colored aluminum sheets prevent over-browning on the bottom.
- Parchment Paper or Silicone Baking Mats: These prevent sticking and make cleanup a breeze. You can also use non-stick cooking spray.
- Fork: For creating those classic crisscross marks on top of each cookie.
- Wire Cooling Rack: Allows air to circulate around the cookies as they cool, preventing soggy bottoms.
- Cookie Scoop (optional): A 1.5-tablespoon cookie scoop helps create uniform cookies that bake evenly, but you can also portion the dough by hand.
- Spatula: For transferring hot cookies from the baking sheet to the cooling rack.

Peanut Butter Cookie Recipe
- Total Time: 25 minutes
- Yield: 24 cookies 1x
- Diet: Vegetarian
Description
These classic soft and chewy peanut butter cookies are made with simple pantry ingredients and feature the iconic crisscross fork pattern. With rich peanut butter flavor and a perfect tender texture, they’re the ultimate nostalgic cookie that everyone loves!
Ingredients
- 1 cup (240g) creamy peanut butter
- ½ cup (115g) unsalted butter, softened to room temperature
- ½ cup (100g) granulated sugar, plus extra for rolling
- ½ cup (110g) packed light brown sugar
- 1 large egg, at room temperature
- 1 teaspoon vanilla extract
- 1¼ cups (155g) all-purpose flour
- ¾ teaspoon baking soda
- ½ teaspoon salt
For 3-Ingredient Version:
- 1 cup (240g) creamy peanut butter
- 1 cup (200g) granulated sugar
- 1 large egg
Instructions
- Preheat and Prepare: Preheat your oven to 350°F (175°C). Line two large baking sheets with parchment paper or silicone baking mats. Set aside.
- Cream Butter and Sugars: In a large mixing bowl, use an electric mixer to cream together the softened butter, granulated sugar, and brown sugar on medium speed for about 2-3 minutes until light and fluffy. The mixture should look pale and airy. Scrape down the sides of the bowl as needed.
- Add Wet Ingredients: Beat in the peanut butter until fully combined and smooth, about 1 minute. Add the egg and vanilla extract, mixing until just incorporated. The mixture should look smooth and creamy.
- Combine Dry Ingredients: In a separate medium bowl, whisk together the flour, baking soda, and salt until evenly distributed.
- Mix the Dough: Add the dry ingredients to the wet ingredients in two additions, mixing on low speed just until combined after each addition. Do not overmix—stop as soon as you no longer see flour streaks. The dough will be thick and slightly sticky.
- Shape the Cookies: Place some granulated sugar in a small bowl. Using a 1.5-tablespoon cookie scoop or your hands, roll the dough into balls about 1.5 inches in diameter. Roll each ball in the granulated sugar to coat completely, then place on the prepared baking sheets about 2 inches apart.
- Create Crisscross Pattern: Using a fork, gently press down on each cookie ball to flatten it slightly, creating a crisscross pattern. Press once vertically, then once horizontally. The cookies should be about ½ inch thick after pressing.
- Bake: Bake for 9-11 minutes, or until the edges are just set and lightly golden. The centers will look slightly underdone—that’s perfect! They’ll continue cooking on the hot baking sheet after you remove them from the oven.
- Cool: Let the cookies cool on the baking sheet for 5 minutes (this is crucial for the right texture), then carefully transfer them to a wire cooling rack to cool completely. They’ll firm up as they cool.
- Serve and Enjoy: Serve warm or at room temperature. Store leftovers in an airtight container at room temperature for up to 5 days, or freeze for up to 3 months.
For 3-Ingredient Version: Simply mix the peanut butter, sugar, and egg together until smooth. Roll into balls, press with a fork, and bake at 350°F for 8-10 minutes. That’s it!
Notes
- Don’t Overbake: These cookies continue to cook on the hot pan after removing from the oven. Take them out when the edges are set but centers still look slightly soft for the perfect chewy texture.
- Room Temperature Ingredients: Bring butter and eggs to room temperature for easiest mixing and best texture.
- Measuring Peanut Butter: Spray your measuring cup with non-stick spray first so the peanut butter slides right out.
- Cookie Size: Keep all cookies the same size so they bake evenly. A cookie scoop is your best friend here!
- Flatten Evenly: Press the fork marks gently but firmly enough to flatten the cookies to about ½ inch thickness for even baking.
- Cooling Time: Don’t skip the 5-minute cooling period on the baking sheet—it’s essential for the cookies to set properly without breaking.
- Prep Time: 15 minutes
- Cook Time: 10 minutes
- Category: Dessert
- Method: Baking
- Cuisine: American
Nutrition
- Serving Size: 1 cookie
- Calories: 165
- Sugar: 12g
- Sodium: 125mg
- Fat: 9g
- Saturated Fat: 3g
- Unsaturated Fat: 5g
- Trans Fat: 0g
- Carbohydrates: 18g
- Fiber: 1g
- Protein: 4g
- Cholesterol: 18mg
Tips & Variations
Here are some delicious ways to customize these peanut butter cookies and make them your own:
Chocolate Lover’s Version: Fold in ½ cup of chocolate chips (semi-sweet, milk chocolate, or dark chocolate) into the dough, or press a few chocolate chips on top of each cookie before baking.
Peanut Butter Chip Cookies: Add ½ cup of peanut butter chips for an extra peanut butter punch.
Reese’s Peanut Butter Cookies: Press a miniature peanut butter cup into the center of each cookie immediately after removing them from the oven for an indulgent treat.
Sea Salt Finish: Sprinkle a tiny pinch of flaky sea salt on top of each cookie right before baking for a sophisticated sweet-and-salty flavor.
Crunchy Style: Use crunchy peanut butter instead of creamy for added texture and peanut pieces in every bite.
Add-Ins: Try mixing in chopped peanuts, toffee bits, butterscotch chips, or mini M&Ms for fun variations.
Sandwich Cookies: Make cookie sandwiches by spreading a layer of chocolate frosting, vanilla buttercream, or marshmallow fluff between two cookies.
Gluten-Free Option: The 3-ingredient version is naturally gluten-free if you use certified gluten-free peanut butter.
Brown Butter Enhancement: For a gourmet touch, brown the butter first before using it in the recipe. This adds a nutty, caramel-like depth of flavor.
Spice It Up: Add ¼ teaspoon of cinnamon or a tiny pinch of cayenne pepper to the dough for warm spice notes.
Pro Chef Tips
Take your peanut butter cookies from good to absolutely extraordinary with these professional baking secrets:
Room Temperature is Key: Seriously, let your butter and eggs sit out for 30-60 minutes before you start. Room temperature ingredients emulsify better, creating a smoother dough and more evenly textured cookies.
Cream Properly: When creaming butter and sugar, don’t rush it. Beat for the full 2-3 minutes until the mixture is light, fluffy, and has increased in volume. This incorporates air that helps create tender cookies with the perfect texture.
Don’t Overmix: Once you add the flour, mix just until combined. Overmixing develops the gluten in the flour, which makes cookies tough instead of tender. Stop mixing the moment you no longer see flour streaks.
Chill for Thicker Cookies: If you prefer thicker, chewier cookies that spread less, refrigerate the dough for 30 minutes before baking. The cold dough takes longer to spread in the oven, resulting in puffier cookies.
Rotate Your Pans: Halfway through baking, rotate your baking sheet 180 degrees to ensure even browning, especially if your oven has hot spots.
The 5-Minute Rule: This cannot be stressed enough—let cookies rest on the hot baking sheet for exactly 5 minutes before transferring them. They’re extremely fragile when hot and will break if you move them too soon. During this time, they finish setting and develop their final texture.
Underbake Slightly: The secret to soft, chewy cookies is taking them out of the oven when they still look slightly underdone in the center. They’ll look too soft but will firm up perfectly as they cool. Overbaked cookies become dry and crumbly.
Quality Peanut Butter Matters: Use a good-quality peanut butter that you actually enjoy eating by the spoonful. The flavor of the peanut butter is the dominant taste in these cookies, so it really matters.
Consistent Sizing: Use a cookie scoop to ensure all cookies are exactly the same size. This guarantees they all bake evenly and finish at the same time, preventing some from burning while others are underdone.
Fresh Ingredients: Check the expiration date on your baking soda. Old baking soda loses its leavening power, resulting in flat, dense cookies.
Common Mistakes to Avoid
Even simple recipes can go wrong if you’re not careful. Here are the most common pitfalls and how to avoid them:
Using Natural Peanut Butter: Natural peanut butter has more oil and a different consistency that can make cookies too greasy and cause them to spread too much or not hold together properly. Stick with regular processed peanut butter like Jif, Skippy, or Peter Pan for best results.
Overmixing the Dough: Once you add the flour, mix only until just combined. Overmixing develops gluten, which makes cookies tough, dense, and cake-like instead of tender and chewy. Use a light hand and stop as soon as the flour disappears.
Skipping the Sugar Roll: Rolling the dough balls in sugar before pressing isn’t just decorative—it creates a slightly crispy, sweet exterior that contrasts beautifully with the soft interior. Don’t skip this step!
Not Flattening Enough: Peanut butter cookie dough is very dense and doesn’t spread much during baking. If you don’t flatten the cookies with a fork, you’ll end up with thick, doughy centers that are undercooked while the edges burn.
Overbaking: This is the number one mistake! Cookies continue to bake on the hot pan even after removing from the oven. Take them out when the edges are set but the centers still look slightly soft and puffy. They’ll firm up perfectly as they cool.
Moving Cookies Too Soon: I know they smell amazing and you’re impatient, but please wait the full 5 minutes before transferring cookies to a cooling rack. Hot cookies are extremely delicate and will break apart if moved too soon.
Using Cold Ingredients: Cold butter won’t cream properly with sugar, and cold eggs don’t incorporate well into the dough. Plan ahead and let everything come to room temperature for the best texture.
Storage & Meal Prep
Keep your peanut butter cookies fresh and delicious with these storage tips:
Room Temperature Storage: Store completely cooled cookies in an airtight container at room temperature for up to 5-7 days. Place a piece of bread in the container to keep cookies soft—the bread will dry out, but your cookies will stay perfectly chewy.
Refrigerator Storage: You can refrigerate cookies in an airtight container for up to 2 weeks, though I find room temperature storage keeps them softer and more flavorful.
Freezing Baked Cookies: Freeze baked and cooled cookies for up to 3 months. Place cookies in a single layer on a baking sheet and freeze until solid (about 1 hour), then transfer to a freezer-safe container or zip-top bag. This prevents them from sticking together. Thaw at room temperature for 20-30 minutes before serving.
Freezing Cookie Dough: This is my favorite meal prep trick! Shape the dough into balls, arrange on a parchment-lined baking sheet, and freeze until solid (about 2 hours). Transfer frozen dough balls to a freezer bag and freeze for up to 3 months. Bake directly from frozen, adding 1-2 extra minutes to the baking time. No thawing needed!
Reheating: Warm cookies in a 300°F oven for 3-5 minutes to restore that fresh-baked taste and soft texture. You can also microwave individual cookies for 8-10 seconds.
Portion Control Tip: Freeze the dough in balls so you can bake just one or two cookies whenever a craving hits. It’s dangerous having cookie dough in the freezer, but also wonderful!
Make-Ahead & Freezer Notes
These peanut butter cookies are perfect for make-ahead baking and meal prepping:
Make the Dough in Advance: Prepare the dough up to 3 days ahead and store it tightly covered in the refrigerator. Let it sit at room temperature for 10-15 minutes before scooping and baking so it’s easier to work with.
Freeze Unbaked Dough: For the ultimate convenience, portion all the dough into balls, freeze them on a baking sheet, then store in a freezer bag for up to 3 months. You can bake these frozen dough balls anytime you want fresh cookies without the hassle of making dough from scratch. Just add 1-2 minutes to the baking time and bake directly from frozen—no thawing required!
Flash Freeze Method: To prevent dough balls from sticking together, use the flash freeze method: arrange shaped and sugar-rolled dough balls on a parchment-lined baking sheet with space between them. Freeze for 1-2 hours until solid, then transfer to a freezer-safe container or zip-top bag.
Freeze Baked Cookies: Already baked cookies freeze beautifully for up to 3 months. Make sure they’re completely cooled before freezing. Thaw at room temperature for 20-30 minutes, or warm them in a 300°F oven for 3-5 minutes for that just-baked taste.
Cookie Dough Log Method: You can also shape the entire batch of dough into a log (about 2 inches in diameter), wrap tightly in plastic wrap, and freeze. When ready to bake, let the log sit at room temperature for 10 minutes, then slice into ½-inch rounds and bake as directed.
Best Reheating Method: For frozen baked cookies, I prefer thawing them at room temperature first, then warming in a 300°F oven for 3-4 minutes. This restores the perfect texture—soft and slightly warm with crispy edges. Microwaving works in a pinch (8-10 seconds per cookie) but can make them a bit chewy.
Gift-Giving Tip: Frozen cookie dough balls make fantastic gifts! Package them in a decorative container with baking instructions attached. Your friends and family will love having fresh-baked cookies ready to go.
Serving Suggestions
Peanut butter cookies are delicious on their own, but here are some wonderful ways to serve them:
Classic Pairing: Serve warm cookies with an ice-cold glass of whole milk or cold brew coffee. The combination of warm, nutty cookies and cold milk is pure nostalgia.
Ice Cream Sandwiches: Place a scoop of vanilla, chocolate, or peanut butter ice cream between two cookies for an incredible frozen treat.
Dessert Board: Arrange cookies on a dessert board alongside fresh strawberries, chocolate-covered pretzels, brownie bites, and various candies for parties or gatherings.
Coffee or Tea Time: These cookies are perfect alongside your afternoon coffee, tea, or hot chocolate. They’re not too sweet, so they pair beautifully with beverages.
With Fruit: Serve with fresh apple slices, banana slices, or strawberries for a balanced snack that includes some nutrition along with the treat.
Yogurt Parfait Topping: Crumble a cookie over Greek yogurt with berries and granola for a decadent breakfast or snack.
Dunking Station: Create a fun dunking station with small cups of milk, hot chocolate, or coffee for a party activity that kids and adults love.
Chocolate Drizzle: Melt some chocolate (dark, milk, or white) and drizzle it over cooled cookies for an elegant presentation.
Lunchbox Treat: Pack one or two cookies in lunchboxes as a sweet surprise—they travel well and don’t require refrigeration.
Party Platters: Arrange on a pretty platter with other homemade cookies like chocolate chip, oatmeal raisin, and sugar cookies for cookie exchanges or holiday parties.
FAQs Section
Can I use natural peanut butter instead of regular?
I don’t recommend it for this recipe. Natural peanut butter has a higher oil content and different consistency that can make cookies greasy, overly spread, or not hold together properly. The oils also separate, which affects the dough’s structure. Stick with processed peanut butter (Jif, Skippy, Peter Pan) for best results. If you must use natural peanut butter, stir it very well first and be prepared for slightly different results.
Why did my cookies turn out dry or crumbly?
The most common reason is overbaking. Remember, cookies continue to bake on the hot pan after you remove them from the oven, so take them out when the centers still look slightly underdone. Other causes include measuring too much flour (use the spoon-and-level method, don’t pack it), overmixing the dough after adding flour, or using old, dried-out peanut butter. Make sure you’re measuring ingredients accurately.
Can I make these cookies gluten-free?
Absolutely! The easiest way is to use the 3-ingredient version (peanut butter, sugar, egg) which is naturally flour-free and gluten-free. For the traditional recipe, substitute the all-purpose flour with a 1:1 gluten-free baking flour blend like Bob’s Red Mill or King Arthur Measure for Measure flour. The texture will be nearly identical.
Why do peanut butter cookies have fork marks?
The crisscross fork pattern serves both a functional and decorative purpose. Peanut butter cookie dough is very dense and doesn’t spread much during baking, so pressing with a fork flattens the cookies to ensure even baking and helps create more surface area for those delicious crispy edges. The pattern has become iconic and is how everyone recognizes a classic peanut butter cookie!
How do I keep my cookies soft and chewy?
Several factors contribute to soft, chewy cookies: don’t overbake them (take them out when centers still look slightly soft), store them in an airtight container with a slice of bread to maintain moisture, use brown sugar (the molasses keeps them soft), and don’t overmix the dough after adding flour. Also, slightly underbaking creates a chewier texture than baking until fully set.
Can I make the dough ahead of time?
Yes! You can refrigerate the dough for up to 3 days or freeze it for up to 3 months. For refrigerated dough, let it sit at room temperature for 10-15 minutes before scooping to make it easier to work with. For frozen dough, you can bake the dough balls directly from frozen—just add 1-2 minutes to the baking time.
My cookies spread too much during baking. What went wrong?
If your cookies spread too much and turn out flat and greasy, several things could be the culprit: your butter was too soft or melted instead of just softened, you used natural peanut butter instead of regular, your oven temperature is too low, or you didn’t use enough flour. Make sure your oven is properly preheated to 350°F and that your butter is softened but not melted (it should hold its shape but be easily pressed with a finger). Chilling the dough for 30 minutes before baking also helps reduce spreading.
Conclusion
There’s something truly special about homemade peanut butter cookies—they’re comforting, nostalgic, and absolutely delicious. Whether you’re making them for the first time or you’re a seasoned baker, these soft and chewy peanut butter cookies are sure to become a staple in your recipe collection. The rich peanut butter flavor, perfect tender texture, and those iconic crisscross fork marks make them irresistible to everyone who tries them.
The best part? These cookies are incredibly easy to make with simple pantry ingredients, and you can have warm, freshly-baked cookies ready in under 30 minutes. Whether you stick with the traditional recipe or opt for the quick 3-ingredient version, you really can’t go wrong. They’re perfect for after-school snacks, holiday cookie exchanges, bake sales, care packages, or just because you’re craving something sweet and homemade.
I hope you love this easy peanut butter cookie recipe as much as my family does! They disappear so quickly in my house that I usually make a double batch. Don’t forget to try some of the fun variations and customizations—chocolate chips, sea salt, or Reese’s cups take these cookies to the next level.
Now it’s your turn! Head to your kitchen and whip up a batch of these amazing cookies. Your house will smell incredible, and your family will be so grateful. If you make this recipe, I’d love to hear about it! Leave a comment below telling me how they turned out, and don’t forget to rate this recipe. Save this recipe to your Pinterest boards so you can find it easily next time the cookie craving hits. Happy baking, friends!