
Get ready to master one of the most versatile and satisfying meals you can make—the perfect fluffy omelette! This easy omelette recipe transforms simple eggs into a restaurant-quality breakfast (or lunch, or dinner!) that’s tender, flavorful, and endlessly customizable. Whether you’re cooking for yourself on a busy weekday morning or impressing guests at a leisurely weekend brunch, a well-made omelette never fails to deliver.
What makes this simple omelette recipe truly special is how it achieves that ideal texture—soft and creamy on the inside with a delicate, golden exterior that’s never rubbery or overcooked. The secret lies in proper technique: the right pan temperature, gentle folding, and knowing exactly when to remove it from the heat. With just a few eggs and your choice of fillings, you can create a complete, protein-packed meal in less than 10 minutes from start to finish.
This classic breakfast omelette works for virtually any occasion: quick weekday breakfasts before work or school, luxurious weekend brunches with mimosas, light and healthy dinners when you want something fast, or even elegant brunch parties where you make custom omelettes to order for your guests. Fill it with cheese, vegetables, herbs, ham, mushrooms, or whatever you’re craving—the possibilities are truly endless.
Whether you’re a beginner learning basic cooking skills or an experienced home cook looking to perfect your technique, this foolproof omelette recipe will become your go-to method for creating delicious, fluffy omelettes every single time. Let’s make the best omelette you’ve ever tasted!
History / Background
The omelette (also spelled omelet in American English) has a fascinating culinary history that spans centuries and cultures. While the exact origin is debated, egg dishes similar to omelettes appear in ancient Persian and Roman texts, suggesting humans have been cooking beaten eggs for thousands of years. The word “omelette” comes from the French “amelette” or “alumette,” though its precise etymology remains unclear—some suggest it derives from “lamelle” (blade), referring to the flat shape.
The French refined the omelette into an art form during the 16th and 17th centuries, establishing it as a cornerstone of classic French cuisine. Different regions of France developed their own styles: the classic French omelette is rolled, creamy in the center, and pale golden with no browning, while country-style omelettes are heartier with visible fillings. The famous omelette de la mère Poulard from Mont-Saint-Michel became legendary for its fluffy texture achieved by vigorous whisking.
In the 19th century, French chef Auguste Escoffier codified omelette techniques in his influential culinary guides, cementing its place in professional kitchens. Meanwhile, variations emerged worldwide: Spanish tortillas (technically frittatas) became bar staples, Japanese tamagoyaki developed into a delicate rolled sweet omelette, and American diners popularized the generously stuffed, folded omelette we know today.
The omelette gained prominence in American cuisine through several waves of influence. French restaurants in the early 20th century introduced refined omelette techniques to wealthy diners. Then, the post-WWII era saw diners and coffee shops across America adopting the omelette as a breakfast staple, usually stuffed with cheese, ham, peppers, and onions. Julia Child’s television programs in the 1960s taught home cooks the French technique, making omelette-making accessible to everyone.
Today, the omelette represents culinary versatility at its finest. It’s simultaneously a measure of a chef’s skill (French culinary schools famously use omelette-making as a fundamental test) and one of the most approachable dishes for home cooks. Whether you prefer the classic French style, a hearty American diner version, or something in between, the omelette remains a beloved dish that proves simple ingredients prepared with care can create something truly special.
Why You’ll Love This Recipe
This isn’t just another omelette tutorial—this is THE method that will transform you into an omelette-making pro, creating restaurant-quality results every single time.
Here’s why this fluffy omelette recipe will become your go-to:
- Ready in 10 minutes – From cracking eggs to plating, you’ll have a complete meal faster than ordering takeout
- Incredibly versatile – Works for breakfast, lunch, dinner, or brunch with endless filling possibilities
- Budget-friendly – Eggs are inexpensive and you probably have everything you need already
- High in protein – Keeps you full and energized for hours
- Foolproof technique – Clear step-by-step instructions ensure success even for beginners
- Customizable – Adapt to your taste preferences, dietary needs, or whatever’s in your fridge
- One-pan meal – Minimal cleanup with everything cooked in a single skillet
- Naturally gluten-free and low-carb – Fits keto, paleo, and other dietary approaches
- Impressive yet easy – Looks and tastes restaurant-quality with minimal effort
- Perfect portion control – Easy to make single servings or scale up for a crowd
- Teaches fundamental skills – Master this technique and improve your overall cooking ability
- Kid-friendly – Children love the soft texture and you can hide vegetables inside
- Elegant presentation – Beautiful enough to serve guests at brunch parties
Ingredient Notes
The beauty of omelettes lies in their simplicity—just a few quality ingredients create magic:
Eggs – The star of the show! Use large, fresh eggs for the best results. Room temperature eggs whisk more easily and cook more evenly than cold eggs, though cold eggs work fine if you’re in a hurry. Free-range or pasture-raised eggs have richer flavor and deeper yellow yolks, but any eggs work. You’ll need 2-3 eggs per omelette depending on appetite (2 eggs for a lighter meal, 3 for heartier).
Butter – Essential for flavor and preventing sticking. Real butter (not margarine or oil) provides the best taste and helps achieve that golden exterior. Unsalted butter is preferred so you can control salt levels. You need about 1 tablespoon per omelette—don’t skimp! The butter should foam but not brown.
Milk or Cream – Optional but recommended. Just 1 tablespoon per 2-3 eggs adds richness and helps create a tender, fluffy texture. Whole milk, half-and-half, or heavy cream all work. Some chefs prefer water for a lighter omelette. For dairy-free, use unsweetened almond or oat milk.
Salt and Pepper – Non-negotiable for proper seasoning. Add to the beaten eggs before cooking so the seasoning distributes evenly. Use about ¼ teaspoon salt and a pinch of black pepper per 2-3 eggs. Always taste and adjust—under-seasoned eggs taste flat and disappointing.
Fillings (Your Choice):
- Cheese – Cheddar, Swiss, Gruyère, feta, goat cheese, mozzarella, or any favorite. Shred or crumble yourself for best melting.
- Vegetables – Sautéed mushrooms, bell peppers, onions, spinach, tomatoes, or asparagus. Pre-cook harder vegetables before adding.
- Proteins – Diced ham, crispy bacon, smoked salmon, or cooked sausage
- Herbs – Fresh chives, parsley, dill, basil, or tarragon add brightness
- Aromatics – Minced garlic or shallots (sauté first)
Optional Enhancers:
- Fresh herbs for garnish
- Hot sauce or salsa
- Sour cream or Greek yogurt
- Avocado slices
Equipment Needed
Making the perfect omelette requires just a few basic tools:
- Non-stick skillet – Essential! An 8-inch non-stick pan is ideal for 2-3 egg omelettes. The non-stick surface allows the omelette to slide out easily. A 10-inch pan works for larger omelettes but makes folding trickier.
- Whisk or fork – For beating eggs until smooth and slightly frothy. A whisk incorporates more air for fluffier results.
- Rubber spatula – A flexible, heat-resistant rubber spatula is perfect for gently pushing cooked egg toward the center and folding the omelette.
- Small bowl – For whisking eggs
- Measuring spoons – For accurate butter and milk measurements
- Plate – For serving your beautiful creation
Optional but useful:
- Offset spatula – Makes folding easier
- Small cutting board and knife – For prepping fillings
- Grater – If shredding your own cheese

Perfect Easy Omelette Recipe
- Total Time: 10 minutes
- Yield: 1 serving 1x
- Diet: Gluten Free
Description
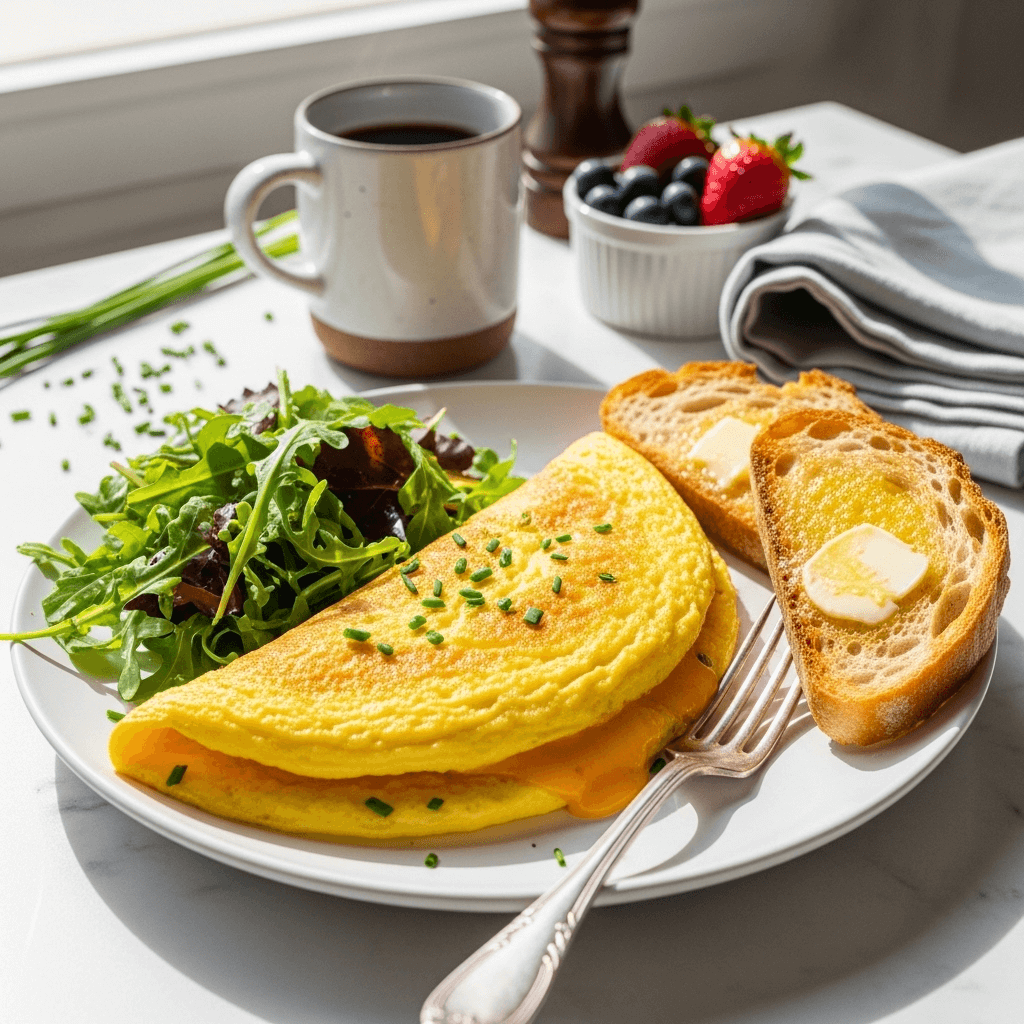
This easy omelette recipe creates a perfectly fluffy, tender omelette with a golden exterior and creamy interior. Made with just eggs, butter, and your choice of fillings, this classic breakfast omelette comes together in 10 minutes. The simple technique ensures restaurant-quality results every time, whether you’re a beginner or experienced cook. Customize with cheese, vegetables, herbs, or meats for endless variations!
Ingredients
For the Basic Omelette:
- 2–3 large eggs
- 1 tablespoon whole milk or cream (optional but recommended)
- ¼ teaspoon salt
- Pinch of black pepper
- 1 tablespoon butter
Suggested Fillings (choose 2-3):
- ⅓ cup shredded cheese (cheddar, Swiss, or Gruyère)
- ¼ cup sautéed mushrooms
- ¼ cup diced bell peppers (pre-sautéed)
- 2 tablespoons chopped fresh herbs (chives, parsley, dill)
- 2 tablespoons diced ham or crumbled bacon
- 2 tablespoons diced tomatoes
- ¼ cup fresh spinach
Instructions
- Prep your fillings first: This is crucial! Before you start cooking, have all your fillings ready to go. Shred cheese, chop vegetables, dice meats, and mince herbs. If using harder vegetables like peppers, onions, or mushrooms, sauté them first in a separate pan until tender. Set everything within arm’s reach.
- Whisk the eggs: Crack eggs into a small bowl. Add milk (if using), salt, and pepper. Whisk vigorously with a fork or whisk for about 30 seconds until the mixture is smooth, uniform yellow in color, and slightly frothy. You should see small bubbles on the surface. Proper whisking incorporates air for a fluffier omelette.
- Heat the pan: Place your non-stick skillet over medium heat (not high!). Let it heat for 1-2 minutes. Medium heat is crucial—too hot and the omelette will brown too quickly and become rubbery; too cool and it will be tough and pale.
- Add butter: Add the butter to the hot pan. Swirl it around as it melts to coat the entire bottom and sides of the pan. The butter should foam and sizzle gently but not brown. If it browns immediately, your pan is too hot—reduce heat and let it cool slightly.
- Pour in eggs: Once butter is melted and foaming, pour in the whisked eggs. Tilt the pan to spread eggs evenly across the bottom. Let cook undisturbed for about 20-30 seconds until the edges just start to set.
- Gently scramble the center: Using a rubber spatula, gently push the cooked edges toward the center, tilting the pan so uncooked egg flows to the edges. Do this in 3-4 spots around the pan. Work gently—you’re not scrambling eggs, just helping them cook evenly. Continue until most of the egg is set but the top still looks slightly wet and glossy (about 1-2 minutes total).
- Add fillings: When the omelette is about 75% cooked (mostly set with just a bit of liquid egg on top), sprinkle your chosen fillings over one half of the omelette. Don’t overfill—less is more! The egg should still look slightly undercooked on top; it will continue cooking from residual heat.
- Fold the omelette: Using your spatula, gently fold the empty half of the omelette over the filled half to create a half-moon shape. Let it cook for another 15-30 seconds to warm the fillings and finish cooking the eggs. The omelette should still jiggle slightly when you shake the pan.
- Slide onto plate: Tilt the pan and let the omelette gently slide onto your plate. If it sticks, use your spatula to help guide it. The omelette should be golden yellow with perhaps a few light brown spots, but not deeply browned.
- Serve immediately: Omelettes are best enjoyed right away while hot and fluffy. Season with additional salt and pepper if desired, garnish with fresh herbs, and serve with your favorite sides.
Notes
- Pan temperature is everything: Medium heat ensures tender, fluffy eggs. High heat creates rubbery omelettes.
- Don’t overfill: Too many fillings make the omelette difficult to fold and can make it soggy.
- Cook fillings first: Raw vegetables release water and won’t cook fully in the short cooking time.
- Work quickly: From pouring eggs to plating should take 3-4 minutes total.
- Slightly undercooked is perfect: The omelette continues cooking from residual heat after folding and plating.
- Practice makes perfect: Your first omelette might not be perfect, but technique improves quickly!
- Fresh eggs matter: Fresher eggs have better flavor and fluffier texture.
- Prep Time: 5 minutes
- Cook Time: 5 minutes
- Category: Breakfast
- Method: Stovetop
- Cuisine: French
Nutrition
- Serving Size: 1 omelette (3 eggs, cheese, vegetables)
- Calories: 320
- Sugar: 2g
- Sodium: 520mg
- Fat: 24g
- Saturated Fat: 11g
- Unsaturated Fat: 11g
- Trans Fat: 0g
- Carbohydrates: 4g
- Fiber: 1g
- Protein: 22g
- Cholesterol: 540mg
Tips & Variations
The basic omelette technique is versatile—here are delicious ways to customize:
Classic French Omelette – Use 3 eggs, no milk, and minimal fillings (just herbs or a small amount of cheese). Cook over medium-low heat, constantly stirring with a fork until just set. Roll instead of fold for the traditional cylindrical shape. Should be pale yellow with no browning.
Denver Omelette – Classic American diner style! Fill with sautéed diced ham, bell peppers, onions, and cheddar cheese. Hearty and satisfying.
Mediterranean Omelette – Fill with feta cheese, sun-dried tomatoes, Kalamata olives, and fresh spinach. Top with fresh basil after cooking.
Western Omelette – Similar to Denver but with more emphasis on peppers and onions, plus sometimes mushrooms and tomatoes.
Mushroom and Swiss – Sautéed mushrooms with melted Swiss or Gruyère cheese and fresh thyme. Elegant and earthy.
Veggie-Loaded Omelette – Spinach, mushrooms, tomatoes, bell peppers, and onions with a sprinkle of feta. Nutrient-packed!
Mexican-Style Omelette – Fill with pepper jack cheese, black beans, salsa, and jalapeños. Top with avocado, sour cream, and cilantro after cooking.
Smoked Salmon Omelette – Smoked salmon, cream cheese, capers, and fresh dill. Luxurious brunch option.
Caprese Omelette – Fresh mozzarella, diced tomatoes, and fresh basil. Drizzle with balsamic glaze after plating.
Spinach and Feta – Classic combination of wilted spinach and crumbled feta cheese. Add sun-dried tomatoes for extra flavor.
Protein-Packed Omelette – Add extra egg whites for more protein with fewer calories. Fill with turkey, cottage cheese, and vegetables.
Herbs de Provence Omelette – Mix dried herbs de Provence into eggs, fill with goat cheese and sautéed mushrooms.
Pro Chef Tips
These professional insights will elevate your omelette game from good to exceptional:
Room temperature eggs beat fluffier – Let eggs sit out for 15-20 minutes before cooking. They whisk to a better consistency and cook more evenly. Cold eggs work but won’t be quite as fluffy.
Whisk until frothy – Really go at it! Vigorous whisking for 30-45 seconds incorporates air that creates lighter, fluffier omelettes. You should see tiny bubbles throughout the mixture.
The pan must be properly heated – This is absolutely crucial. Heat the empty pan over medium heat for 1-2 minutes before adding butter. A properly heated pan ensures even cooking and prevents sticking. Test by adding a drop of water—it should sizzle and evaporate immediately.
Use clarified butter for high heat – If your regular butter keeps browning too quickly, use clarified butter (butter with milk solids removed) which has a higher smoke point. Or use half butter, half neutral oil.
Don’t overstir the eggs – Once you pour eggs into the pan, let them set for 20-30 seconds before doing anything. Then gently push cooked portions toward center just 3-4 times. Over-stirring creates scrambled eggs, not an omelette.
Fill on one side only – Professional chefs always place fillings on one half of the omelette, leaving the other half empty for clean folding. This creates better structure and presentation.
Less is more with fillings – Overstuffed omelettes are difficult to fold and can become soggy. Use modest amounts of 2-3 fillings maximum for best results.
Cook to baveuse (French term) – The French prefer omelettes slightly undercooked in the center—creamy and soft, called “baveuse.” The eggs continue cooking from residual heat after folding. Don’t wait until completely set!
Fold with confidence – Hesitation causes torn omelettes. When ready to fold, commit! Use your spatula to fold decisively in one smooth motion.
The perfect omelette jiggles – When you shake the pan, the omelette should jiggle slightly like jello. This indicates it’s cooked perfectly—tender, not rubbery.
Practice the French roll – For ultimate elegance, learn to roll the omelette into a cylinder as it slides onto the plate. This takes practice but looks stunning.
Common Mistakes to Avoid
Even simple recipes have pitfalls. Here’s what to watch out for:
Using high heat – This is the number one mistake! High heat creates rubbery, tough omelettes that brown too quickly on the outside while remaining undercooked inside. Always use medium or medium-low heat. The entire cooking process should take 3-4 minutes, not 60 seconds.
Not having fillings prepped – Starting to chop vegetables after your eggs are in the pan leads to disaster. The eggs overcook while you scramble to prep. Always have everything ready before you start cooking. Professional kitchens call this “mise en place” (everything in its place).
Overfilling the omelette – More is not better! Too many fillings make the omelette impossible to fold properly and can make it soggy from excess moisture. Use restraint—about ⅓ cup total fillings is plenty for a 2-3 egg omelette.
Not whisking eggs enough – A quick stir isn’t sufficient. Whisk vigorously for at least 30 seconds until the mixture is uniform, smooth, and slightly frothy. Proper whisking incorporates air and ensures even seasoning distribution.
Using the wrong size pan – Too large and your omelette will be thin and overcooked; too small and it will be thick and difficult to cook through. An 8-inch pan is perfect for 2-3 eggs. If you only have a larger pan, use more eggs.
Overcooking the eggs – Waiting until the omelette is completely set and dry before folding results in a tough, rubbery texture. Remove from heat when still slightly glossy and jiggly on top. It will continue cooking after folding.
Not using enough butter – Skimping on butter leads to sticking and poor flavor. A full tablespoon isn’t excessive—it’s necessary for proper cooking and taste. If worried about calories, make peace with it or cook something else!
Storage & Meal Prep
While omelettes are best fresh, here’s how to handle leftovers and meal prep:
Immediate Consumption – Omelettes are absolutely best eaten immediately after cooking when they’re hot, fluffy, and tender. The texture changes as they cool, becoming firmer and less delicate.
Short-Term Storage – If you must store a cooked omelette, let it cool completely, then wrap tightly in plastic wrap or place in an airtight container. Refrigerate for up to 1 day (2 days maximum, but texture declines). The omelette will firm up and become more dense.
Reheating Cooked Omelettes – Microwave for 30-45 seconds on 50% power to gently warm without overcooking. You can also reheat in a pan over low heat for 1-2 minutes. The texture won’t be as good as fresh but is acceptable for meal prep.
Meal Prep Approach – Instead of cooking full omelettes ahead, prep your fillings in advance. Dice vegetables, cook meats, shred cheese, and store in containers. In the morning, you can make a fresh omelette in under 10 minutes with all prep done.
Egg Mixture Prep – You can whisk eggs with milk, salt, and pepper and store in the refrigerator for up to 24 hours. Pour and cook when ready. Give it a quick whisk before using as it may separate slightly.
Baked Omelette Alternative – For feeding a crowd or meal prep, consider making a baked omelette (essentially a frittata) in a casserole dish. This reheats better than stovetop omelettes and can be portioned.
Make-Ahead & Freezer Notes
Omelettes are best fresh, but here are strategies for advance prep:
Prep Fillings Ahead – This is the best make-ahead strategy. Chop vegetables, cook meats, and shred cheese up to 3 days in advance. Store separately in airtight containers. This reduces morning prep to just whisking eggs and cooking.
Egg Mixture – Whisk eggs with milk and seasonings the night before. Store covered in the refrigerator. In the morning, give it a quick whisk and you’re ready to cook. This saves precious time on busy mornings.
Freezing Cooked Omelettes – Not ideal, but possible. Let omelettes cool completely, wrap individually in plastic wrap, then place in freezer bags. Freeze for up to 1 month. The texture will change significantly—they become more dense and rubbery. Thaw overnight in refrigerator and reheat gently.
Freezing Egg Mixture – Beaten eggs can be frozen, though texture changes slightly. Freeze in portions in ice cube trays or small containers for up to 3 months. Thaw in refrigerator overnight before using.
Better Alternative: Egg Muffins – For meal prep, consider making egg muffins (mini baked omelettes in muffin tins) instead. These freeze and reheat much better than traditional omelettes while offering similar flavors.
Reheating from Frozen – Thaw frozen omelettes overnight in the refrigerator. Microwave on 50% power for 1-2 minutes, checking frequently to prevent overcooking. They’ll never be as good as fresh but work for busy mornings.
Weekend Meal Prep – Many people successfully meal prep components on Sunday: cook and dice vegetables and meats, shred cheese, portion into containers. Each morning, make a fresh omelette using prepped ingredients in under 5 minutes.
Serving Suggestions
Omelettes are complete meals but pair beautifully with many sides:
Classic Breakfast Sides:
- Buttered toast (white, wheat, sourdough, or English muffins)
- Hash browns or breakfast potatoes
- Fresh fruit salad or berries
- Crispy bacon or breakfast sausage
- Avocado slices or guacamole
- Sautéed tomatoes
Lighter Options:
- Mixed green salad with vinaigrette
- Fresh fruit plate
- Cottage cheese with fruit
- Greek yogurt with honey
- Sliced tomatoes with fresh basil
Brunch Spreads:
- Croissants or pastries
- Smoked salmon
- Cream cheese and bagels
- Fresh-squeezed orange juice
- Mimosas or Bellinis
- Coffee or espresso drinks
International Inspired:
- French baguette with butter and jam
- Sautéed mushrooms
- Grilled asparagus
- Roasted tomatoes with herbs
- Baked beans (British style)
Beverage Pairings:
- Freshly brewed coffee or lattes
- Orange juice or grapefruit juice
- Green tea or herbal tea
- Bloody Marys for brunch
- Champagne or prosecco
Dinner Omelette Sides:
- Simple green salad
- Roasted vegetables
- Soup (omelettes make great light dinners with soup)
- Crusty bread
- Sautéed greens
FAQs Section
How many eggs should I use for one omelette?
Two eggs create a modest omelette perfect for lighter appetites or when you’re eating with sides. Three eggs make a heartier, more filling omelette ideal for hungrier appetites or when it’s your main meal. Most restaurants use 3 eggs as standard. I don’t recommend going above 3 eggs for a single omelette as they become difficult to manage and fold properly.
Why is my omelette rubbery and tough?
This almost always means your heat was too high or you overcooked it. Omelettes should cook gently over medium heat for 3-4 minutes. High heat creates a tough, rubbery texture. Also, make sure you’re removing the omelette from heat when still slightly jiggly and glossy on top—it continues cooking from residual heat. Finally, don’t skimp on butter!
Do I need to add milk to my omelette?
No, it’s optional. Milk or cream adds richness and helps create a tender, fluffy texture, but some chefs prefer eggs alone for a more custardy consistency. Water is another option that creates a lighter omelette. Try both ways and see which you prefer! I personally recommend 1 tablespoon of milk for 2-3 eggs.
Can I make omelettes ahead of time?
Fresh is always best, but you can prep everything in advance. Pre-cook and dice your fillings, whisk your eggs (store in fridge up to 24 hours), and have everything ready to go. Then cook the omelette fresh when needed—it only takes 5 minutes. Cooked omelettes can be refrigerated and reheated but the texture suffers significantly.
What’s the difference between an omelette and a frittata?
An omelette is cooked quickly on the stovetop, folded in half, and served immediately with fillings inside. A frittata is an Italian dish where ingredients are mixed directly into the eggs, cooked slowly on the stovetop, then finished under the broiler or in the oven. Frittatas are thicker, serve multiple people, and aren’t folded. Both are delicious but quite different!
My omelette won’t fold without breaking. What am I doing wrong?
Several factors: your omelette might be too thick (use an 8-inch pan for 2-3 eggs), overcooked (remove from heat while still slightly glossy), or overfilled (use less filling). Also ensure you’re using a flexible rubber spatula and working quickly before the omelette cools. Practice helps—even professional chefs tear omelettes sometimes!
Can I make omelettes without a non-stick pan?
It’s very difficult. Well-seasoned cast iron can work but requires more butter and careful heat management. Stainless steel is challenging even for experienced cooks—eggs tend to stick no matter how much fat you use. Non-stick pans truly are the best tool for omelettes. If you make them regularly, investing in a good 8-inch non-stick skillet is worthwhile.
Conclusion
And there you have it—everything you need to make perfect, fluffy, restaurant-quality omelettes right in your own kitchen! This easy omelette recipe proves that with just a few eggs, the right technique, and a bit of practice, you can create something truly special for breakfast, lunch, or dinner. The beauty of mastering this simple omelette recipe is that it opens up endless possibilities—change your fillings daily and you’ll never get bored.
What I love most about omelettes is their perfect combination of simplicity and sophistication. They’re quick enough for busy weekday mornings yet elegant enough to serve at brunch parties. They’re budget-friendly but feel indulgent. They’re customizable to any taste or dietary need. And once you nail the technique, you can make them confidently any time a craving strikes.
The key takeaways? Medium heat is your friend, less is more with fillings, and slightly undercooked is better than overcooked. Master these principles and you’ll be making beautiful, fluffy omelettes that rival any restaurant. Plus, learning proper omelette technique actually improves your overall cooking skills—you’ll develop better heat control, timing, and pan handling that translate to other dishes.
Now I want to hear from YOU! What’s your favorite omelette filling combination? Are you team cheese-only or team vegetable-loaded? Do you prefer classic French style or hearty American diner style? Have you tried any creative variations? Drop a comment below and share your omelette adventures—I love hearing from fellow home cooks!
If this recipe helped you master the art of omelette-making, please give it a 5-star rating and leave a review. Your feedback helps other readers and lets me know what content you’d like to see more of. And don’t forget to PIN this recipe to your Breakfast Recipes, Easy Meals, or Quick Dinners boards on Pinterest so you can find it whenever you need a fast, delicious, protein-packed meal!
Happy cooking, and may all your omelettes be fluffy and your folding be flawless! 🍳