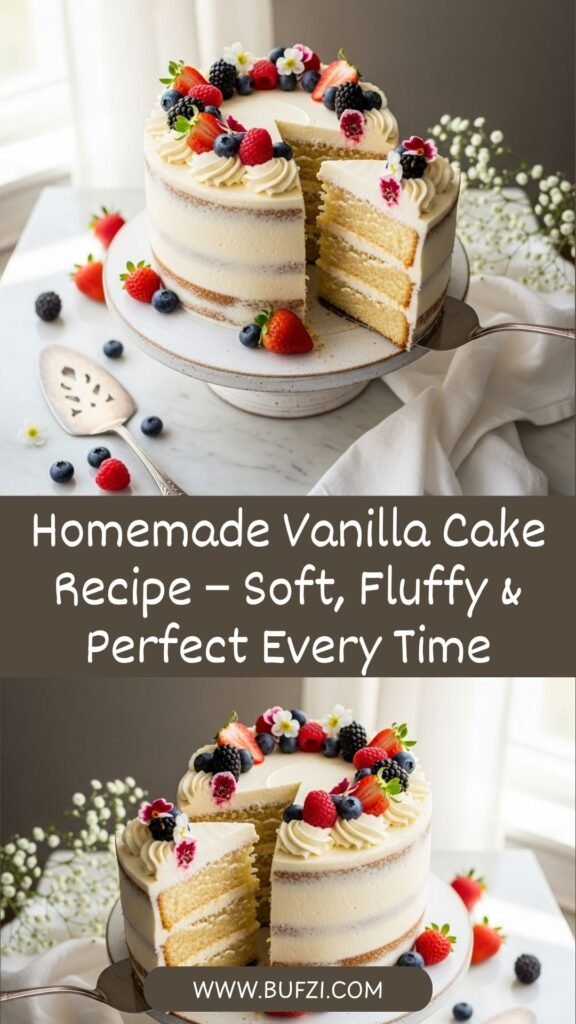
There’s something truly magical about a classic vanilla cake. It’s the kind of dessert that brings people together, whether you’re celebrating a birthday, hosting a dinner party, or simply treating yourself to something sweet on a quiet Sunday afternoon. This homemade vanilla cake recipe is everything you want in a cake: tender, moist, and bursting with rich vanilla flavor that melts in your mouth.
Unlike store-bought mixes that can taste artificial and flat, this from-scratch vanilla cake delivers that authentic, bakery-quality taste right from your own kitchen. The crumb is soft and delicate, the flavor is perfectly balanced, and the texture is so light and fluffy you’ll wonder how you ever lived without this recipe. Whether you’re frosting it for a special occasion or enjoying it plain with a cup of coffee, this easy vanilla cake is about to become your go-to dessert recipe.
Perfect for birthdays, anniversaries, potlucks, baby showers, or just because you deserve cake, this recipe is foolproof enough for beginners yet impressive enough to wow even the pickiest dessert lovers. Let’s dive into creating the most delicious homemade vanilla cake you’ve ever tasted!
History / Background
The vanilla cake holds a special place in American baking history, evolving from simple butter cakes that graced colonial tables to the beloved birthday staple we know today. Vanilla itself was considered an exotic luxury in early America, imported from Mexico where the Totonac people first cultivated vanilla orchids centuries ago.
The classic American vanilla cake as we know it today really came into its own during the late 1800s and early 1900s, when baking powder became commercially available and made light, fluffy cakes accessible to home bakers. Before this innovation, cakes were dense and heavy, relying on yeast or extensive beating of eggs for any rise at all.
The introduction of vanilla extract in the mid-1800s revolutionized home baking. Suddenly, home cooks could capture that warm, sweet, complex flavor without accessing fresh vanilla beans, which were incredibly expensive and difficult to obtain. The combination of chemical leaveners and accessible vanilla flavoring democratized cake baking, turning what was once a laborious, unpredictable process into something almost anyone could master.
Vanilla cake became the canvas for American celebration culture. It’s the foundation for countless variations: layer cakes, sheet cakes, cupcakes, and wedding cakes. The neutrality of vanilla makes it incredibly versatile, pairing beautifully with virtually any frosting, filling, or flavor addition you can imagine. From Southern church potlucks to elegant wedding receptions, vanilla cake has earned its place as America’s most beloved cake flavor, accounting for nearly 30% of all cake sales in the United States.
Why You’ll Love This Recipe
This isn’t just another vanilla cake recipe, this is THE vanilla cake recipe you’ll make again and again. I’ve tested and tweaked this recipe countless times to get it absolutely perfect, and the results speak for themselves. The texture is incredibly tender without being crumbly, the flavor is rich and buttery with prominent vanilla notes, and the cake stays moist for days.
Here’s why this recipe stands out:
- Foolproof and beginner-friendly – Clear instructions that guarantee success even if you’re new to baking
- Incredibly moist texture – Uses the perfect ratio of butter, oil, and buttermilk to keep the cake tender and never dry
- Rich vanilla flavor – Real vanilla extract and a secret ingredient boost the vanilla taste without any artificial notes
- Perfect crumb structure – Not too dense, not too airy, just the right balance for easy slicing and stacking
- Versatile for any occasion – Make it as a layer cake, sheet cake, or cupcakes using the same batter
- Budget-friendly ingredients – Uses pantry staples you probably already have on hand
- Make-ahead friendly – Bakes and freezes beautifully, perfect for planning ahead
- Pairs with any frosting – The neutral vanilla flavor complements everything from chocolate buttercream to cream cheese frosting
- Crowd-pleaser guarantee – Even picky eaters and kids absolutely love this cake
- Bakery-quality results at home – Tastes like it came from an expensive bakery but costs a fraction of the price
Ingredient Notes
Understanding your ingredients is the key to baking success. Here’s what you need and why each component matters:
All-Purpose Flour – The foundation of your cake structure. I recommend spooning and leveling your flour rather than scooping directly from the bag, which can pack too much flour and make your cake dense. If you only have cake flour, you can use it for an even more tender crumb, though all-purpose works beautifully.
Granulated Sugar – Provides sweetness and helps create a tender crumb by interfering with gluten development. Don’t substitute with other sweeteners as sugar plays a structural role in cakes.
Unsalted Butter – Adds rich flavor and creates a tender texture. Room temperature butter is crucial, it should be soft enough to leave an indent when pressed but not greasy or melted. If you only have salted butter, reduce the added salt to 1/4 teaspoon.
Vegetable Oil – This is the secret to keeping your cake moist for days. Oil stays liquid at room temperature, unlike butter which solidifies, keeping the cake tender even when chilled. Canola or avocado oil work great as substitutes.
Eggs – Provide structure, moisture, and richness. Large eggs at room temperature incorporate best. To quickly bring cold eggs to room temperature, place them in a bowl of warm water for 5-10 minutes.
Buttermilk – The acidity tenderizes the gluten and reacts with baking soda for extra lift. It also adds a subtle tang that balances the sweetness. No buttermilk? Make your own by adding 1 tablespoon of lemon juice or vinegar to 1 cup of regular milk and letting it sit for 5 minutes.
Vanilla Extract – Use pure vanilla extract, not imitation, for the best flavor. This recipe uses a generous amount because vanilla is the star of the show.
Baking Powder & Baking Soda – The leavening agents that make your cake rise and create that light, fluffy texture. Make sure they’re fresh (less than 6 months old) for maximum effectiveness.
Salt – Enhances all the other flavors and balances the sweetness. Don’t skip it!
Sour Cream – Adds extra moisture and a slight tang that deepens the flavor. Greek yogurt is an excellent substitute if needed.
Equipment Needed
Having the right tools makes baking so much easier and more enjoyable. Here’s what you’ll need:
- Two 9-inch round cake pans (or one 9×13-inch pan for a sheet cake)
- Parchment paper for lining pans
- Stand mixer or hand mixer – A stand mixer makes it easier, but a hand mixer works perfectly
- Large mixing bowls (at least two)
- Measuring cups and spoons – Accurate measurements are crucial in baking
- Rubber spatula for scraping bowls and folding
- Wire cooling racks to prevent soggy bottoms
- Whisk for mixing dry ingredients
- Toothpick or cake tester to check doneness
- Offset spatula (optional but helpful for frosting)
- Cake leveler or serrated knife if you’re making a layer cake

Homemade Vanilla Cake Recipe
- Total Time: 50 minutes
- Yield: 12 servings (one 2-layer 9-inch cake) 1x
- Diet: Vegetarian
Description
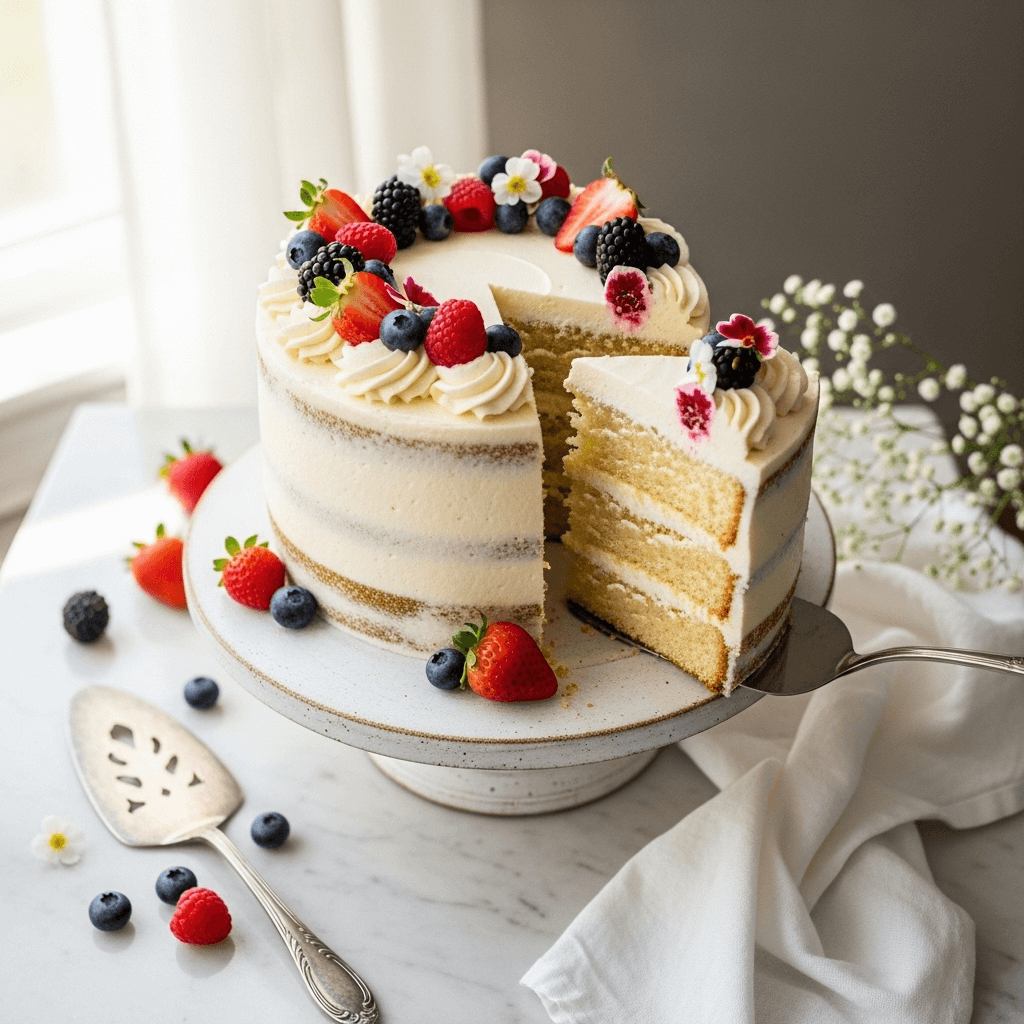
This homemade vanilla cake is incredibly soft, moist, and bursting with rich vanilla flavor. Perfect for birthdays, celebrations, or any time you’re craving a classic, delicious cake that tastes better than any bakery version. The tender crumb and buttery taste make this the ultimate vanilla cake recipe.
Ingredients
- 2 ¾ cups (345g) all-purpose flour
- 2 cups (400g) granulated sugar
- ¾ cup (170g) unsalted butter, softened to room temperature
- ½ cup (120ml) vegetable oil
- 4 large eggs, room temperature
- 1 cup (240ml) buttermilk, room temperature
- ½ cup (120g) sour cream, room temperature
- 2 tablespoons pure vanilla extract
- 1 tablespoon baking powder
- ½ teaspoon baking soda
- ¾ teaspoon salt
Instructions
- Preheat and prepare pans: Preheat your oven to 350°F (175°C). Grease two 9-inch round cake pans with butter or non-stick spray, then line the bottoms with parchment paper circles. Grease the parchment paper as well. This double-greasing ensures your cakes release perfectly every time.
- Mix dry ingredients: In a large bowl, whisk together the flour, baking powder, baking soda, and salt. Set this aside. Whisking aerates the flour and ensures the leavening agents are evenly distributed.
- Cream butter and sugar: In the bowl of your stand mixer fitted with the paddle attachment (or using a hand mixer), beat the softened butter and sugar together on medium-high speed for 4-5 minutes until light, fluffy, and pale in color. This creaming process incorporates air into the batter, which helps create a light texture. Stop to scrape down the sides of the bowl at least once.
- Add oil: With the mixer running on medium speed, slowly pour in the vegetable oil and continue beating for another minute until well combined. The mixture should look smooth and glossy.
- Add eggs one at a time: Add the eggs one at a time, beating well after each addition (about 30 seconds per egg). This ensures proper emulsification. Add the vanilla extract with the last egg.
- Combine wet ingredients: In a measuring cup or small bowl, whisk together the buttermilk and sour cream until smooth.
- Alternate adding dry and wet ingredients: With the mixer on low speed, add the flour mixture in three additions, alternating with the buttermilk mixture in two additions. Start and end with the flour mixture. The pattern should be: flour, buttermilk, flour, buttermilk, flour. Mix just until combined after each addition. Don’t overmix or your cake will be tough.
- Final mix: Once everything is added, stop the mixer and scrape down the bottom and sides of the bowl with a rubber spatula. Give it a few final folds by hand to make sure no pockets of flour remain, but be gentle and don’t overmix.
- Divide and bake: Divide the batter evenly between your prepared pans. Use a kitchen scale for precision if you have one. Smooth the tops with your spatula and gently tap the pans on the counter a few times to release any air bubbles.
- Bake: Bake for 30-35 minutes, or until a toothpick inserted into the center comes out clean or with just a few moist crumbs (not wet batter). The tops should spring back when lightly pressed, and the edges should just start pulling away from the pan. Start checking at 30 minutes.
- Cool properly: Let the cakes cool in the pans for 15 minutes, then run a knife around the edges to loosen. Carefully turn the cakes out onto wire cooling racks, peel off the parchment paper, and let them cool completely before frosting (at least 1-2 hours). Rushing this step will cause your frosting to melt.
- Frost and serve: Once completely cool, level the tops if needed using a serrated knife or cake leveler, then frost with your favorite frosting. For a classic presentation, spread frosting between the layers, over the top, and around the sides.
Notes
- Room temperature ingredients are essential – Cold ingredients don’t emulsify properly and can result in a dense cake. Set everything out 1-2 hours before baking.
- Don’t overmix – Mix just until ingredients are combined. Overmixing develops too much gluten, making the cake tough instead of tender.
- Oven temperature matters – Use an oven thermometer to ensure your oven is accurate. Too hot and your cake will dome and crack; too cool and it will be dense.
- Test for doneness – Every oven is different. Start checking at 30 minutes, but yours might need up to 35 minutes.
- Cool completely before frosting – This is non-negotiable. Warm cake will make frosting slide right off.
- Prep Time: 20 minutes
- Cook Time: 30 minutes
- Category: Dessert
- Method: Baking
- Cuisine: American
Nutrition
- Serving Size: 1 slice (1/12 of cake, unfrosted)
- Calories: 385
- Sugar: 34g
- Sodium: 285mg
- Fat: 18g
- Saturated Fat: 8g
- Unsaturated Fat: 9g
- Trans Fat: 0g
- Carbohydrates: 51g
- Fiber: 1g
- Protein: 6g
- Cholesterol: 95mg
Tips & Variations
This vanilla cake recipe is wonderfully versatile and can be customized in so many delicious ways:
Flavor Variations:
- Almond Vanilla Cake: Replace 1 tablespoon of vanilla extract with almond extract for a subtle nutty flavor that pairs beautifully with berry frostings.
- Lemon Vanilla Cake: Add 2 tablespoons of fresh lemon zest and 1 tablespoon of lemon juice to the batter for a bright, citrusy twist.
- Chocolate Chip Cake: Fold in 1 cup of mini chocolate chips at the end of mixing for a fun surprise in every bite.
- Funfetti Cake: Gently fold in ½ cup of rainbow sprinkles (make sure they’re non-bleeding sprinkles or they’ll turn your batter gray).
Frosting Pairings: This vanilla cake tastes amazing with virtually any frosting. Try classic American buttercream, cream cheese frosting, Swiss meringue buttercream, chocolate ganache, or even a simple dusting of powdered sugar. For a truly decadent treat, try a salted caramel buttercream or cookies and cream frosting.
Dietary Modifications:
- Gluten-Free: Use a 1:1 gluten-free baking flour blend that contains xanthan gum. The texture will be slightly different but still delicious.
- Dairy-Free: Substitute the butter with vegan butter, use non-dairy milk with vinegar instead of buttermilk, and use dairy-free yogurt instead of sour cream.
Size Adjustments:
- Cupcakes: This recipe makes about 24 cupcakes. Bake at 350°F for 18-22 minutes.
- Sheet Cake: Bake in a 9×13-inch pan for 35-40 minutes.
- Three-Layer Cake: Divide batter among three 8-inch pans and bake for 25-28 minutes.
Pro Chef Tips
As someone who’s baked countless cakes, these professional techniques will take your vanilla cake from good to absolutely exceptional:
Master the Creaming Method: The creaming of butter and sugar is the most crucial step. Don’t rush it. Beat for the full 4-5 minutes until the mixture is noticeably lighter in color and fluffy. This incorporates air that helps create a tender, light crumb. Under-creaming results in a dense cake.
The Temperature Test: All your ingredients should be at room temperature (about 65-70°F). This includes eggs, buttermilk, sour cream, and butter. Room temperature ingredients emulsify better, creating a smoother batter and more even texture. If you forget to set out your eggs, place them in a bowl of warm (not hot) water for 10 minutes.
Weigh Your Flour: If you have a kitchen scale, use it. Measuring flour by weight (345g) is far more accurate than volume measurements. Too much flour is the number one cause of dry, dense cakes. If you must use measuring cups, spoon the flour into the cup and level it off with a knife. Never scoop directly from the bag.
Don’t Overmix After Adding Flour: Once you add the flour, gluten development begins. Mix only until the flour streaks disappear. Those final folds with a spatula should be gentle. Overmixing creates too much gluten, resulting in a tough, chewy cake instead of a tender one.
The Toothpick Test Nuance: When testing for doneness, you want a few moist crumbs clinging to the toothpick, not wet batter. If it comes out completely clean, your cake is actually slightly overbaked. The residual heat will continue cooking the cake as it cools, so pulling it a minute early ensures maximum moisture.
Level Your Cakes for Professional Results: Cakes naturally dome during baking. For a picture-perfect layer cake, use a serrated knife or cake leveler to trim off the domed tops once cooled. This creates flat, even layers that stack beautifully and look bakery-professional.
Brush with Simple Syrup: Professional bakers often brush cake layers with simple syrup (equal parts sugar and water, heated until dissolved) before frosting. This adds extra moisture and helps the cake stay fresh longer. You can even flavor the syrup with vanilla or other extracts.
Common Mistakes to Avoid
Even experienced bakers can run into these pitfalls. Here’s how to avoid them:
Using Cold Ingredients: This is the most common mistake I see. Cold butter won’t cream properly, cold eggs can cause the batter to curdle, and cold dairy doesn’t incorporate smoothly. Always bring ingredients to room temperature. Set everything out at least an hour before you start baking, or use the warm water trick for eggs and dairy.
Overmixing the Batter: Once you add flour, resist the urge to keep mixing. Every stroke develops more gluten, which makes the cake tough and chewy instead of tender. Mix just until you can’t see dry flour anymore, then stop. A few small lumps are perfectly fine and will disappear during baking.
Incorrect Oven Temperature: An oven that’s too hot will cause your cake to dome excessively, crack on top, and potentially burn on the outside while staying raw in the middle. Too cool, and your cake will be dense and take forever to bake. Invest in an oven thermometer (they’re only a few dollars) and check your actual oven temperature. You might be surprised how far off it is.
Opening the Oven Door Too Early: I know it’s tempting, but don’t open the oven door during the first 25 minutes of baking. The rush of cool air can cause your cake to collapse. The cake needs time to set its structure before it can handle temperature changes.
Not Greasing Pans Properly: Even with non-stick pans, you need to grease and line with parchment paper. I’ve learned this the hard way too many times. Nothing is more heartbreaking than a beautiful cake that breaks apart because it stuck to the pan. Grease the pan, add parchment, then grease the parchment. This double insurance ensures easy release every time.
Frosting Warm Cake: I know you’re excited, but patience is crucial here. If you frost a warm or even slightly warm cake, the frosting will melt and slide right off. Your cake needs to be completely cool, room temperature or even slightly chilled. Wait at least 1-2 hours after baking.
Not Measuring Accurately: Baking is science. Too much flour makes dry cake, too much sugar makes overly sweet cake that doesn’t set properly, too much liquid makes gummy cake. Use proper measuring techniques: spoon flour into cups, level with a knife, and don’t pack ingredients unless specified.
Storage & Meal Prep
Proper storage keeps your vanilla cake tasting fresh and delicious for days:
Room Temperature Storage: If your cake is frosted with American buttercream (made with butter and powdered sugar), you can keep it covered at room temperature for up to 3 days. Use a cake dome or cover it loosely with plastic wrap or aluminum foil. The cake actually tastes best at room temperature because the butter in the cake and frosting is soft and the flavors are more pronounced.
Refrigerator Storage: If your frosting contains cream cheese, whipped cream, custard, or fresh fruit, refrigerate the cake. Cover it well to prevent it from absorbing refrigerator odors or drying out. Refrigerated cake will keep for up to 5 days. Let it sit at room temperature for 30-60 minutes before serving for the best flavor and texture.
Unfrosted Cake Storage: Unfrosted cake layers can be wrapped tightly in plastic wrap and stored at room temperature for 2 days, or refrigerated for up to 5 days. I actually think the cake tastes even better on day two after the flavors have had time to develop.
Preventing Dry Cake: The key to keeping cake moist is preventing air exposure. Wrap tightly with plastic wrap, pressing it directly against any cut surfaces. For sliced cake, press a piece of plastic wrap against the cut side before covering the whole cake.
Serving After Storage: If refrigerated, always let your cake come to room temperature before serving (unless you specifically want cold cake). Cold cake can taste muted and the texture will seem a bit firm. Thirty minutes on the counter makes a huge difference in flavor and texture.
Make-Ahead & Freezer Notes
This vanilla cake is incredibly freezer-friendly, making it perfect for party planning and meal prep:
Freezing Unfrosted Cake Layers: This is my favorite make-ahead method. Once the cakes are completely cooled, wrap each layer tightly in plastic wrap (two layers of wrap for extra protection), then wrap in aluminum foil or place in a freezer bag. Label with the date. Freeze for up to 3 months. When you’re ready to use them, let them thaw in the refrigerator overnight, still wrapped. The wrapping traps moisture as they thaw, keeping them perfectly moist.
Freezing Frosted Cake: Yes, you can freeze a fully frosted cake! First, place the frosted cake in the freezer uncovered for about 30 minutes until the frosting is firm. This prevents the frosting from smearing. Then wrap the entire cake in plastic wrap and foil. Freeze for up to 2 months. To thaw, unwrap and let it sit in the refrigerator overnight, then bring to room temperature before serving.
Freezing Cake Slices: Wrap individual slices in plastic wrap and store them in a freezer bag. This is perfect for portion control or when you want just one piece of cake. Frozen slices thaw in about 30 minutes at room temperature.
Make-Ahead Baking Schedule: You can bake the cake layers up to 1 month ahead and freeze them, or bake them 1-2 days ahead and store at room temperature (wrapped) or refrigerate. Frost the cake the day of serving or the night before for the freshest taste and prettiest appearance.
Best Thawing Method: Always thaw frozen cake in the refrigerator, still wrapped. This slow thaw prevents condensation from forming on the cake surface, which can make it soggy. Unwrap only after it’s completely thawed. Then let it come to room temperature for the best flavor and texture.
Quality After Freezing: Honestly, you can barely tell the difference between fresh-baked and properly frozen cake. The key is wrapping it tightly to prevent freezer burn and using it within the recommended timeframe. I frequently bake cake layers weeks ahead for birthday parties, and they taste just as delicious as fresh.
Serving Suggestions
Vanilla cake is beautifully versatile and pairs wonderfully with so many accompaniments. Here are my favorite ways to serve it:
Classic Pairings:
- A tall glass of cold milk (classic for a reason)
- Hot coffee or espresso (the slight bitterness balances the sweetness perfectly)
- Vanilla ice cream or gelato alongside a slice of warm cake
- Fresh berry compote spooned over each slice for a sophisticated touch
- Whipped cream for a lighter, less sweet option than frosting
Fruit Additions: Fresh fruit adds beautiful color, fresh flavor, and a lighter element that balances the richness of the cake. Try sliced strawberries between the layers, a layer of raspberry preserves, fresh blueberries and lemon curd, sliced peaches with a touch of cinnamon, or a mix of fresh berries macerated with a little sugar.
For Special Occasions: Turn this simple vanilla cake into show-stopping centerpiece. Add edible flowers for an elegant garden party feel, use a piping bag to create beautiful rosette or ruffle designs with your frosting, top with sparkler candles for birthdays, create an ombre effect by tinting your frosting in graduating shades, or add a drip of chocolate or caramel ganache around the edges for a modern, trendy look.
Beverage Pairings: Beyond milk and coffee, consider champagne or prosecco for celebrations, sweet dessert wine like Moscato, hot tea (Earl Grey and vanilla are especially lovely together), hot chocolate for a double-dose of dessert, or even a vanilla latte to complement the cake’s flavor.
Make It a Dessert Board: Slice the cake and arrange it on a large platter or board with complementary treats: macarons, chocolate truffles, fresh berries, nuts, and small cookies. This creates a stunning display perfect for parties and gives guests variety in their dessert choices.
FAQs Section
Can I use cake flour instead of all-purpose flour?
Yes, absolutely! Cake flour will make your cake even more tender and delicate because it has a lower protein content than all-purpose flour. Use the same amount (2 ¾ cups). Just be extra gentle when mixing, as cake flour creates a more delicate structure that’s easier to deflate with overmixing.
Why did my cake turn out dense?
Dense cake usually results from one of these issues: overmixing the batter after adding flour (which develops too much gluten), using too much flour (either from incorrect measuring or packing the measuring cup), ingredients that were too cold and didn’t incorporate properly, or expired leavening agents (baking powder/soda that have lost their potency). Make sure to cream your butter and sugar for the full time and don’t skip bringing ingredients to room temperature.
Can I make this cake without buttermilk?
Yes! Make your own buttermilk substitute by adding 1 tablespoon of white vinegar or lemon juice to a measuring cup, then adding enough regular milk to reach 1 cup. Stir and let it sit for 5 minutes before using. You can also use store-bought buttermilk powder mixed according to package directions, or substitute with an equal amount of plain yogurt thinned slightly with milk.
How do I know when my cake is done baking?
Look for these signs: the top should spring back when gently pressed with your finger, the edges should start pulling away slightly from the pan, a toothpick inserted in the center should come out with just a few moist crumbs (not wet batter), and the top should be golden brown. Remember that every oven is different, so start checking at 30 minutes but don’t be surprised if yours needs up to 35 minutes.
Can I halve this recipe?
You can, but I don’t recommend it. This recipe is designed to make two 9-inch layers, and the ingredient ratios work best at this quantity. If you only need one layer, make the full recipe and freeze the second layer for later. Alternatively, make the full recipe and turn half into cupcakes, which freeze beautifully and are great for unexpected guests or lunchbox treats.
Why did my cake crack or dome on top?
Doming is natural in most cakes due to how heat rises and bakes from the outside in. However, excessive doming or cracking usually means your oven temperature was too high. The outside bakes and sets too quickly, then the inside continues rising and pushes up, creating a dome or causing cracks. Use an oven thermometer to verify your oven’s true temperature. You can also try baking at 325°F for a slightly longer time (38-42 minutes) for a flatter top.
How far in advance can I bake this cake?
Unfrosted cake layers can be baked 2 days ahead and kept wrapped at room temperature, or up to 5 days ahead if refrigerated. For longer storage, freeze the layers for up to 3 months. Frosted cake is best enjoyed within 3 days. For optimal freshness and flavor, I recommend baking the cake no more than 1-2 days before serving, or freezing the layers weeks ahead and frosting 1 day before serving.
Conclusion
Congratulations! You now have everything you need to create the most delicious, tender, and flavorful homemade vanilla cake. This recipe has been my go-to for years, and I’m confident it’s about to become yours too. There’s something incredibly satisfying about pulling a perfectly golden cake from your oven, knowing you created something special from simple ingredients.
Whether you’re baking for a birthday celebration, a weekend treat, or just because you’re craving something sweet, this vanilla cake delivers every single time. The soft, fluffy texture and rich vanilla flavor make it a true crowd-pleaser that both kids and adults can’t resist.
Remember, baking is as much about the love and care you put into it as it is about following the recipe. Don’t stress if your first attempt isn’t Instagram-perfect – it will still taste absolutely amazing. And with each cake you bake, you’ll get more comfortable with the process and develop your own techniques.
I’d absolutely love to see your beautiful vanilla cake creations! After you make this recipe, please share your photos on Pinterest and tag me so I can admire your baking success. Leave a comment below telling me what frosting you chose or how you customized the recipe. Did you add fresh berries? Try the lemon variation? I’m always excited to hear how you made this recipe your own.
Don’t forget to pin this recipe to your dessert board so you can find it easily whenever a cake craving strikes. And if you love this vanilla cake as much as I do, please share it with your friends and family who appreciate homemade goodness.
Happy baking, and may your kitchen always smell like vanilla and happiness!