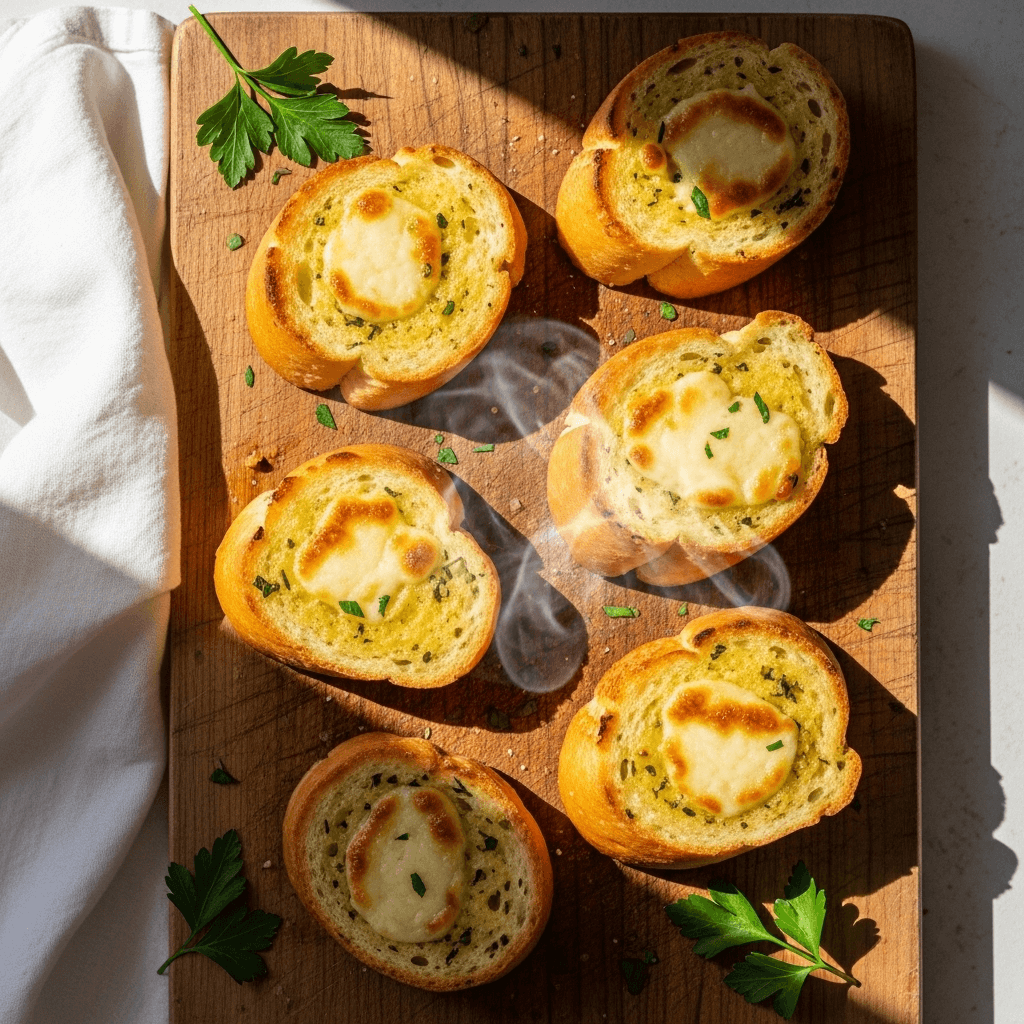
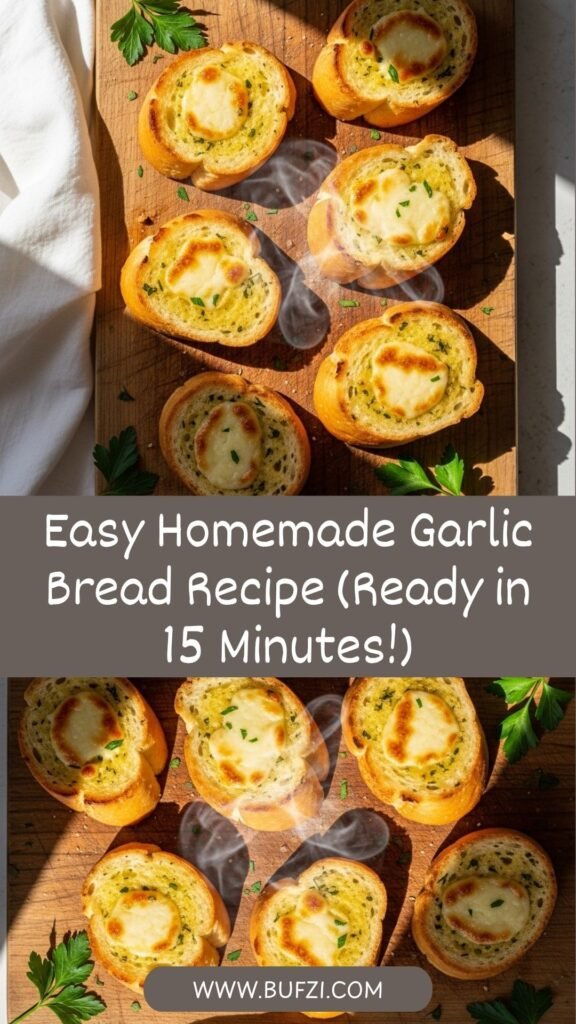
There’s nothing quite like the aroma of freshly baked garlic bread wafting through your kitchen. This easy garlic bread recipe transforms a simple loaf into a golden, buttery, garlicky masterpiece that pairs perfectly with virtually any meal. Whether you’re serving it alongside a hearty pasta dinner, a bowl of warming soup, or simply enjoying it as a snack, homemade garlic bread is always a crowd-pleaser.
What makes this recipe truly special is its simplicity and versatility. You don’t need to be an experienced baker or have fancy ingredients to create restaurant-quality garlic bread at home. With just a handful of pantry staples and about 15 minutes of your time, you can serve up crispy, golden slices loaded with aromatic garlic butter that will have your family asking for seconds. This classic garlic bread recipe is perfect for weeknight dinners, weekend gatherings, game day spreads, or any time you want to elevate a simple meal into something memorable.
History / Background
Garlic bread, as we know it today, has an interesting cultural journey that spans continents and centuries. While many people associate garlic bread with Italian cuisine, its origins are actually a beautiful blend of Old World traditions and New World innovation.
The concept of rubbing bread with garlic dates back to ancient times in Mediterranean regions, particularly in Italy, Spain, and Greece. Italian bruschetta, which involves grilling bread and rubbing it with raw garlic cloves before drizzling with olive oil, is considered one of the earliest ancestors of modern garlic bread. This simple preparation was a way for peasants and farmers to use stale bread and make it delicious again with minimal ingredients.
However, the buttery, herb-laden garlic bread that Americans love today emerged in the United States during the mid-20th century, particularly in Italian-American communities. As Italian immigrants adapted their traditional recipes to American tastes and ingredients, they began using butter instead of olive oil, which was more readily available and affordable in America at the time. They also started adding parsley, cheese, and other seasonings to create a richer, more indulgent version.
The popularity of garlic bread exploded in the 1940s and 1950s as Italian restaurants became mainstream across America. It became the quintessential side dish for spaghetti dinners and pizza nights. Today, garlic bread is a beloved staple in American households and restaurants worldwide, transcending its Italian-American roots to become a universal comfort food. It’s served everywhere from casual family dinners to upscale steakhouses, proving that simple, flavorful food never goes out of style.
Why You’ll Love This Recipe
This easy garlic bread recipe is about to become your go-to side dish for every occasion. It strikes the perfect balance between simplicity and impressive results, making it ideal for both busy weeknights and special gatherings.
Here’s why this recipe is a winner:
- Lightning-Fast: From start to finish, you’ll have hot, crispy garlic bread on the table in just 15 minutes
- Budget-Friendly: Made with simple, inexpensive ingredients you probably already have in your pantry
- Foolproof Method: Even beginner cooks can master this recipe on their first try with clear, easy-to-follow instructions
- Customizable: Easily adapt the recipe to your taste preferences with different herbs, cheeses, or spice levels
- Crowd-Pleaser: Loved by kids and adults alike, making it perfect for family dinners and parties
- Versatile Pairing: Complements everything from Italian pasta dishes to soups, salads, and grilled meats
- Make-Ahead Friendly: Prepare the garlic butter mixture in advance for even quicker assembly
- Restaurant Quality at Home: Achieve that golden, crispy exterior and soft, buttery interior without leaving your kitchen
- Minimal Cleanup: Requires just one bowl for mixing and one baking sheet, making cleanup a breeze
Ingredient Notes
The beauty of this homemade garlic bread lies in its simplicity. Each ingredient plays an important role in creating that perfect combination of crispy, buttery, garlicky goodness.
French Bread or Italian Bread: The foundation of great garlic bread starts with the right loaf. French or Italian bread works best because of their sturdy crust and soft, airy interior that soaks up the garlic butter beautifully. The crusty exterior becomes wonderfully crispy when baked, while the inside stays soft and fluffy. If you can’t find these, a sourdough loaf or even a baguette works wonderfully. Avoid soft sandwich bread as it becomes too soggy.
Unsalted Butter: Butter is the rich, creamy base that carries all the flavors and creates that golden, crispy surface. Using unsalted butter gives you better control over the saltiness of your final product. Make sure your butter is softened to room temperature so it mixes easily with the other ingredients and spreads smoothly on the bread. If you only have salted butter, reduce or omit the added salt in the recipe.
Fresh Garlic: Fresh garlic cloves are essential for authentic garlic bread flavor. Minced or pressed garlic distributes evenly throughout the butter and provides that characteristic punch. While garlic powder can work in a pinch, fresh garlic delivers a more complex, robust flavor. Plan on using 4-6 cloves depending on your love for garlic and the size of your cloves.
Fresh Parsley: Finely chopped fresh parsley adds a bright, herbaceous note and beautiful green color that makes your garlic bread look as good as it tastes. Italian flat-leaf parsley has the best flavor, but curly parsley works too. In a pinch, you can substitute dried parsley, though you’ll need less (about 1 tablespoon dried for 3 tablespoons fresh).
Parmesan Cheese: Grated Parmesan adds a salty, nutty, umami-rich dimension that takes your garlic bread from good to extraordinary. It also helps create those irresistible golden-brown spots on top. Use freshly grated Parmesan for the best flavor and texture. Pre-grated cheese from a container works but won’t melt as smoothly.
Salt and Pepper: Just a pinch of salt enhances all the other flavors, while black pepper adds a subtle kick. Start with less and adjust to taste.
Optional Additions: Red pepper flakes for heat, Italian seasoning for more herbs, or a drizzle of olive oil for extra richness.
Equipment Needed
You don’t need specialized equipment to make amazing garlic bread. Here’s what you’ll need:
- Bread Knife: For slicing the loaf evenly
- Cutting Board: For safe bread slicing and garlic prep
- Medium Mixing Bowl: To combine the garlic butter mixture
- Garlic Press or Mincer: For crushing fresh garlic (or use a chef’s knife)
- Fork or Whisk: To blend the butter mixture thoroughly
- Measuring Spoons: For accurate ingredient measurements
- Baking Sheet: For baking the garlic bread
- Aluminum Foil: To line the baking sheet and wrap bread if desired
- Pastry Brush or Butter Knife: For spreading the garlic butter mixture evenly
- Oven Mitts: For safe handling of hot baking sheets
Homemade Garlic Bread Recipe
- Total Time: 20 minutes
- Yield: 8-10 servings 1x
- Diet: Vegetarian
Description
This easy homemade garlic bread recipe delivers crispy, golden perfection with a buttery garlic flavor in just 20 minutes. Made with simple ingredients and perfect for pairing with pasta, soup, or any meal that needs a delicious bread side.
Ingredients
- 1 large French or Italian bread loaf (about 16 inches long)
- ½ cup (1 stick) unsalted butter, softened to room temperature
- 4–6 cloves fresh garlic, minced or pressed
- 3 tablespoons fresh parsley, finely chopped
- ¼ cup grated Parmesan cheese
- ¼ teaspoon salt (adjust to taste)
- ⅛ teaspoon black pepper
- Optional: ¼ teaspoon red pepper flakes for a spicy kick
- Optional: 1 teaspoon Italian seasoning for extra herbs
Instructions
Step 1: Preheat and Prepare
Preheat your oven to 400°F (200°C). Line a large baking sheet with aluminum foil for easy cleanup. This temperature ensures your bread gets crispy on the outside while staying soft inside.
Step 2: Slice the Bread
Using a sharp bread knife, cut the loaf in half lengthwise, creating two long halves. If your loaf is very long, you can cut it crosswise first to make it more manageable. Place the bread halves cut-side up on your prepared baking sheet.
Step 3: Make the Garlic Butter Mixture
In a medium mixing bowl, combine the softened butter, minced garlic, chopped parsley, grated Parmesan cheese, salt, and pepper. Using a fork or spoon, mix everything together until well blended and creamy. The mixture should be smooth and spreadable. If your butter is too cold, microwave it for 5-10 seconds to soften.
Step 4: Spread the Garlic Butter
Using a pastry brush or butter knife, generously spread the garlic butter mixture evenly over the cut surfaces of both bread halves. Make sure to cover the entire surface, going all the way to the edges. Don’t be shy with the butter—this is what makes it delicious! Press the mixture slightly into the bread so it absorbs well.
Step 5: First Bake (Optional Wrap)
For softer garlic bread, loosely tent the bread with aluminum foil and bake for 10 minutes. For extra crispy bread, skip the foil and proceed to step 6.
Step 6: Bake Until Golden
Place the baking sheet in the preheated oven and bake uncovered for 10-12 minutes, until the edges are golden brown and crispy, and the butter is bubbling. For an extra-crispy top, turn on the broiler for the last 1-2 minutes, watching carefully to prevent burning.
Step 7: Slice and Serve
Remove from the oven and let cool for 1-2 minutes. Using your bread knife, cut each half into 1-2 inch slices. Arrange on a serving platter or basket and serve immediately while hot and fresh.
Notes
- Garlic Intensity: Adjust the amount of garlic to your preference. Start with 4 cloves for mild garlic flavor or use up to 6 for extra garlicky bread.
- Butter Consistency: Make sure butter is truly softened (not melted) for the best spreading consistency.
- Cheese Variations: Feel free to add mozzarella for extra cheesy garlic bread.
- Crispiness Control: Watch carefully during the last few minutes of baking. Every oven is different, and the line between perfectly crispy and burnt is thin.
- Serving Temperature: Garlic bread is best served hot and fresh from the oven. If needed, rewarm before serving.
- Prep Time: 10 minutes
- Cook Time: 10 minutes
- Category: Appetizer
- Method: Baking
- Cuisine: Italian-American
Nutrition
- Serving Size: 1 slice (based on 10 servings)
- Calories: 185
- Sugar: 1g
- Sodium: 310mg
- Fat: 11g
- Saturated Fat: 7g
- Unsaturated Fat: 3g
- Trans Fat: 0g
- Carbohydrates: 17g
- Fiber: 1g
- Protein: 5g
- Cholesterol: 28mg
Tips & Variations
One of the best things about this easy garlic bread recipe is how easily you can customize it to suit your preferences or what you have on hand.
Cheesy Garlic Bread: Add 1 cup of shredded mozzarella cheese on top of the garlic butter before baking for an ultra-cheesy version. You can also mix cheddar, provolone, or Gruyere for different flavor profiles.
Spicy Garlic Bread: Mix in ½ teaspoon of red pepper flakes or a dash of cayenne pepper to the garlic butter for a spicy kick that pairs perfectly with pasta dishes.
Herb Variations: Experiment with different fresh herbs like basil, oregano, thyme, or rosemary. Italian seasoning blend works wonderfully if you don’t have fresh herbs.
Garlic Bread with Olive Oil: For a lighter version, replace half the butter with extra virgin olive oil for a Mediterranean twist that’s still incredibly flavorful.
Roasted Garlic Version: Instead of raw garlic, use roasted garlic for a sweeter, mellower, more sophisticated flavor. Simply roast a whole head of garlic until soft, then squeeze out the cloves and mash into the butter.
Vegan Garlic Bread: Substitute the butter with vegan butter or a quality plant-based margarine, and omit the Parmesan or use nutritional yeast for a cheesy flavor.
Garlic Bread Sticks: Cut the bread into thick strips before spreading with garlic butter and baking for fun, dippable garlic bread sticks perfect for marinara sauce.
Everything Bagel Garlic Bread: Sprinkle everything bagel seasoning on top before baking for an unexpected flavor twist.
Pro Chef Tips
Take your homemade garlic bread from good to restaurant-quality with these professional techniques:
Use Room Temperature Butter: This is crucial. Butter that’s perfectly softened spreads smoothly and evenly without tearing the bread. Take it out of the fridge 30-60 minutes before making the recipe, or microwave in 5-second intervals until soft but not melted.
Toast Before Buttering: For an extra crispy texture, lightly toast the bread in the oven for 3-4 minutes before spreading the garlic butter. This creates a barrier that prevents sogginess and results in maximum crunch.
Press Garlic Don’t Chop: Using a garlic press instead of chopping gives you finer, more evenly distributed garlic that blends better with the butter and doesn’t create harsh, raw garlic pockets.
Let Garlic Rest in Butter: If you have time, mix the garlic into the softened butter 15-30 minutes before using. This allows the garlic flavor to infuse throughout the butter for more even, mellow garlic flavor.
Edge-to-Edge Coverage: Make sure to spread the garlic butter all the way to the edges. The crust areas that don’t get butter will be disappointingly dry.
Butter Temperature Watch: Don’t let your melted butter sit in the hot bread too long before baking, as it will soak in too much. Apply and bake promptly for the best texture.
Broiler Finish: For that professional golden-brown top with slightly charred edges, finish under the broiler for 1-2 minutes. Stay close and watch constantly—broilers are unforgiving!
Fresh Over Dried: Always choose fresh garlic and fresh parsley over their dried counterparts when possible. The flavor difference is remarkable and worth the minimal extra effort.
Common Mistakes to Avoid
Even simple recipes can go wrong. Here’s how to avoid the most common garlic bread pitfalls:
Using Cold Butter: Cold butter won’t spread evenly and will tear your bread. It also won’t blend well with garlic and herbs, creating an uneven distribution of flavors. Always use softened butter at room temperature.
Burning the Garlic: Garlic burns quickly and becomes bitter. If you’re broiling for extra crispiness, watch like a hawk. Burnt garlic tastes acrid and ruins the whole dish. When in doubt, pull it out early rather than risk burning.
Skimping on Butter: Don’t be stingy! The butter is what makes garlic bread delicious. Under-buttered garlic bread is dry and disappointing. Use the full amount called for in the recipe.
Cutting Uneven Slices: Uneven slices mean some pieces get overcooked while others stay undercooked. Take your time to cut even slices, and use a sharp serrated bread knife for clean cuts.
Over-Baking: Leaving garlic bread in the oven too long creates rock-hard toast instead of perfectly crispy bread with a soft interior. Set a timer and check frequently near the end of cooking time.
Using Stale Bread: While slightly stale bread can work, very old or hard bread won’t absorb the butter properly and will be tough. Use fresh or day-old bread for the best results.
Forgetting to Preheat: Putting bread in a cold oven leads to uneven baking and soggy results. Always preheat your oven fully before baking.
Storage & Meal Prep
Proper storage ensures you can enjoy your garlic bread at its best, even as leftovers.
Room Temperature Storage: If you plan to eat the garlic bread within 2-3 hours, you can keep it at room temperature loosely covered with foil. This keeps it somewhat fresh without making it soggy.
Refrigerator Storage: Place leftover garlic bread in an airtight container or wrap tightly in aluminum foil. Store in the refrigerator for up to 3 days. Be aware that refrigeration will make the bread lose some crispiness, but it’s easily restored when reheating.
Reheating Instructions: To revive leftover garlic bread, preheat your oven to 350°F (175°C). Wrap the bread loosely in foil and heat for 10-12 minutes until warmed through. For extra crispiness, unwrap the foil for the last 2-3 minutes. You can also reheat individual slices in a toaster oven at 350°F for 3-5 minutes. Avoid microwaving, as it makes the bread chewy and soggy.
Texture Tip: When storing, don’t seal the container or foil wrap too tightly while the bread is still warm, as trapped steam will make it soggy. Let it cool slightly with loose coverage first.
Best Fresh: Garlic bread is always best enjoyed fresh from the oven. The longer it sits, the more it loses that perfect crispy-soft texture, though proper reheating helps restore it.
Make-Ahead & Freezer Notes
Planning ahead? This garlic bread recipe is wonderfully prep-friendly!
Make-Ahead Garlic Butter: Prepare the garlic butter mixture up to 3 days in advance and store it in an airtight container in the refrigerator. Let it come to room temperature before spreading on bread for easier application.
Pre-Assembled Unbaked Bread: Slice the bread, spread with garlic butter, and wrap tightly in aluminum foil. Refrigerate for up to 24 hours before baking. When ready to serve, unwrap and bake as directed, adding 2-3 extra minutes to the cooking time since it’s starting cold.
Freezing Unbaked Garlic Bread: This is the best way to have garlic bread ready anytime! Prepare the bread through Step 4 (spreading the garlic butter), then wrap each half tightly in plastic wrap, followed by aluminum foil. Label with the date and freeze for up to 3 months. When ready to bake, you can bake from frozen—just add 5-7 minutes to the baking time. No need to thaw!
Freezing Baked Garlic Bread: You can freeze already-baked garlic bread, though the texture won’t be quite as good as freezing it unbaked. Let it cool completely, wrap tightly in foil, and freeze for up to 2 months. Reheat from frozen in a 350°F oven for 15-20 minutes, wrapped in foil.
Best Freezer Method: For optimal results, freeze the bread unbaked. The texture will be nearly identical to freshly made garlic bread when you bake it straight from the freezer.
Freezer Garlic Butter: You can also freeze just the garlic butter mixture in an airtight container or ice cube tray for up to 3 months. Thaw overnight in the refrigerator before using.
Serving Suggestions
Garlic bread is the ultimate versatile side dish that elevates countless meals. Here are some perfect pairings:
Classic Italian Dishes: Serve alongside spaghetti and meatballs, lasagna, chicken parmesan, fettuccine Alfredo, or any pasta dish with marinara or cream sauce. The bread is perfect for soaking up extra sauce.
Soups and Stews: Garlic bread is the ideal accompaniment to tomato soup, minestrone, Italian wedding soup, beef stew, chili, or creamy potato soup. Use it for dipping or simply enjoying alongside.
Salads: Pair with a fresh Caesar salad, Caprese salad, mixed green salad with Italian vinaigrette, or antipasto platter for a light but satisfying meal.
Grilled Meats: Serve with grilled steak, chicken, pork chops, or Italian sausages. The buttery, garlicky bread complements smoky grilled flavors beautifully.
Pizza Night: Yes, bread with bread! Garlic bread makes a delicious appetizer before pizza or as a side for dipping in extra marinara sauce.
Game Day Spread: Cut into smaller pieces and serve as part of a party platter with dips, wings, and other finger foods.
Breakfast or Brunch: Believe it or not, garlic bread pairs wonderfully with eggs, especially shakshuka or baked eggs in tomato sauce.
Dipping Options: Serve with marinara sauce, ranch dressing, garlic aioli, or warm spinach artichoke dip for an irresistible appetizer.
FAQs Section
Q: Can I use garlic powder instead of fresh garlic?
A: Yes, but the flavor won’t be as robust. Use about 1-1½ teaspoons of garlic powder mixed into the butter if you don’t have fresh garlic. Fresh garlic provides a more complex, aromatic flavor that’s really worth the extra effort.
Q: What’s the best type of bread for garlic bread?
A: French bread and Italian bread work best because of their sturdy crust and soft interior. Sourdough is also excellent. Avoid soft sandwich breads as they become too soggy. A good crusty loaf with an airy crumb structure is ideal.
Q: Can I make this in an air fryer?
A: Absolutely! Air fryer garlic bread is fantastic. Cut the bread into slices, spread with garlic butter, and air fry at 350°F for 5-7 minutes until golden and crispy. Work in batches if needed to avoid overcrowding.
Q: How do I keep garlic bread warm for a party?
A: Keep baked garlic bread warm in a 200°F oven wrapped loosely in foil for up to 30 minutes. For longer periods, place it in a slow cooker set to “warm” wrapped in a clean kitchen towel. Don’t wrap too tightly or it will get soggy.
Q: Why is my garlic bread soggy?
A: Sogginess usually happens when too much butter soaks into the bread or when it’s covered too tightly while still hot, trapping steam. Use room temperature butter (not melted), bake uncovered for maximum crispiness, and don’t wrap tightly until completely cooled.
Q: Can I add cheese to this recipe?
A: Definitely! Sprinkle shredded mozzarella, provolone, or additional Parmesan on top of the garlic butter before baking. Add the cheese during the last 5 minutes of baking so it melts perfectly without burning.
Q: How do I prevent the garlic from burning?
A: Since garlic burns easily, there are a few tricks: don’t bake at temperatures higher than 400°F, use softened (not melted) butter so the garlic is protected, and if broiling for extra crispiness, watch constantly and keep the rack at least 6 inches from the heating element.
Conclusion
There you have it—the ultimate guide to making easy homemade garlic bread that rivals anything you’d find at your favorite Italian restaurant! This classic recipe proves that the simplest dishes, when made with care and quality ingredients, can be the most satisfying. Whether you’re serving it alongside a weeknight pasta dinner, bringing it to a potluck, or simply enjoying it as a savory snack, this garlic bread will never disappoint.
The beauty of this recipe lies in its versatility and simplicity. Once you’ve mastered the basic technique, you can customize it endlessly with different herbs, cheeses, and seasonings to make it your own signature dish. The fact that it comes together in just 15 minutes means there’s never an excuse not to make homemade garlic bread!
I’d love to hear how your garlic bread turns out! Did you add any special touches? What did you serve it with? Leave a comment below sharing your experience, and don’t forget to rate the recipe if you loved it. If you’re feeling generous, share this recipe on Pinterest so other home cooks can discover how easy it is to make restaurant-quality garlic bread at home. Your friends and family will thank you!
Happy cooking, and may your kitchen always smell like fresh garlic bread!