
There’s nothing quite like biting into a warm, freshly made donut with that perfect combination of crispy exterior and soft, pillowy interior. This easy donut recipe brings the magic of your favorite donut shop right into your own kitchen, and trust me, once you taste these homemade donuts, you’ll never look at store-bought the same way again.
These homemade glazed donuts are surprisingly simple to make, requiring just basic pantry ingredients and a little bit of patience while the dough rises. Unlike complicated yeast donut recipes that intimidate beginners, this foolproof method walks you through each step, ensuring bakery-quality results every time. The dough comes together quickly, yields incredibly tender donuts, and can be customized with your favorite glazes, toppings, and fillings.
Perfect for weekend breakfast treats, special occasion brunches, birthday celebrations, or simply when you’re craving something sweet and indulgent, these easy homemade donuts are guaranteed to become a family favorite. Whether you glaze them classically with vanilla icing, dust them with cinnamon sugar, fill them with jam, or go wild with chocolate and sprinkles, the possibilities are endless. And the best part? Making donuts at home costs a fraction of what you’d spend at a bakery, and you’ll have the satisfaction of creating something truly special from scratch.
History / Background
The donut (or doughnut, as it’s sometimes spelled) has a rich and fascinating history that spans continents and centuries. While fried dough has been enjoyed by various cultures for thousands of years – from ancient Rome’s globuli to Native American frybread – the modern donut as we know it is distinctly American.
The iconic ring-shaped donut likely originated with Dutch settlers who brought their tradition of “olykoeks” (oily cakes) to New Amsterdam (now New York) in the early 19th century. These were balls of sweetened dough fried in pork fat, but they had a problem: the centers often remained raw and doughy while the outside cooked. The solution? Remove the center entirely.
There are several colorful legends about who first created the hole in the donut. One popular story credits a New England ship captain named Hanson Gregory who, in 1847, supposedly punched out the center of a fried cake with the ship’s tin pepper box, creating the first ring donut. Whether true or not, the innovation solved the undercooked center problem and created the iconic shape we recognize today.
Donuts exploded in popularity during World War I when “Donut Lassies” from the Salvation Army served them to American soldiers in France, providing a comforting taste of home. The soldiers returned with a deep love for donuts, sparking a nationwide craze. The first donut machine was invented in 1920 by Adolph Levitt in New York City, allowing mass production and making donuts accessible to everyone.
Today, Americans consume over 10 billion donuts annually, making them one of the most beloved breakfast treats in the country. National Donut Day (the first Friday of June) celebrates this delicious pastry that has become so deeply woven into American culture. From classic glazed to creative artisan flavors, the humble donut continues to evolve while remaining a cherished comfort food.
Why You’ll Love This Recipe
This isn’t just another donut recipe – this is THE easy donut recipe that will make you feel like a professional baker without the stress or complexity. I’ve tested this recipe countless times to create the perfect balance of simplicity and delicious results, and I’m confident it will become your go-to whenever the donut craving strikes.
Here’s why this recipe is absolutely irresistible:
- Beginner-friendly method – Clear, step-by-step instructions that guarantee success even if you’ve never worked with yeast before
- Incredibly soft and fluffy texture – The perfect tender crumb that melts in your mouth, just like your favorite bakery
- No special equipment required – No donut pan needed; these are traditional fried donuts made with tools you already have
- Classic yeast donuts – That authentic flavor and texture you remember from childhood, not cakey baked donuts
- Budget-friendly – Makes a dozen donuts for less than the cost of two at a donut shop
- Customizable – One basic dough works with any glaze, topping, or filling you can imagine
- Faster than you think – While there’s rising time, the active work is minimal and totally manageable
- Impressive results – Your family and friends will be amazed you made these from scratch
- Fun family activity – Kids love helping cut out donuts and decorating them with toppings
- Fresh is best – Nothing compares to a warm donut straight from your own kitchen
- Make-ahead friendly – Dough can be prepared the night before for fresh morning donuts
- Guaranteed crowd-pleaser – I’ve never met anyone who doesn’t love a homemade donut
Ingredient Notes
Understanding your ingredients is the foundation of great donut making. Here’s what you need and why each component is important:
All-Purpose Flour – The backbone of your donuts, providing structure without making them tough. Bread flour can be used for slightly chewier donuts, but all-purpose gives that perfect tender texture. Spoon and level your flour for accurate measurements, or better yet, weigh it if you have a kitchen scale (300g for 2½ cups).
Active Dry Yeast – This is what creates those beautiful air pockets and makes your donuts light and fluffy. Make sure your yeast is fresh (check the expiration date) and proof it in warm liquid to ensure it’s alive and active. You can substitute instant yeast if needed – use the same amount and skip the proofing step.
Milk – Adds richness, tenderness, and helps create a soft crumb. Whole milk works best, but 2% will also work well. The milk should be warmed to about 110°F – warm to the touch but not hot, as temperatures above 120°F will kill the yeast.
Butter – Contributes to the rich flavor and tender texture. Always use unsalted butter so you can control the salt level. The butter should be softened to room temperature for easy incorporation into the dough.
Eggs – Provide structure, richness, and help create that beautiful golden color. Use large eggs at room temperature for best results. Room temperature eggs incorporate more smoothly into the dough.
Sugar – Not only sweetens the donuts but also feeds the yeast, helping it activate and grow. Granulated white sugar is standard, but you can experiment with a tablespoon of brown sugar for deeper flavor.
Salt – Enhances all the flavors and balances the sweetness. Don’t skip it, even though the amount seems small. Salt also strengthens the gluten structure and controls yeast growth.
Nutmeg – The secret ingredient that gives donuts that classic, nostalgic flavor. Use freshly grated nutmeg if possible for the best taste. If you don’t have nutmeg, the donuts will still be delicious, just missing that signature flavor note.
Vanilla Extract – Adds warmth and depth to the overall flavor. Use pure vanilla extract rather than imitation for the best taste.
Vegetable Oil for Frying – You need an oil with a high smoke point that won’t impart flavor. Vegetable, canola, or peanut oil all work beautifully. You’ll need about 6-8 cups depending on your pot size – enough to give donuts 2-3 inches to float in.
Equipment Needed
Having the right tools makes donut-making so much easier and more enjoyable. Here’s what you’ll need:
- Large mixing bowl for combining ingredients
- Stand mixer with dough hook (or hand mixer and strong arms for kneading)
- Measuring cups and spoons for accuracy
- Small saucepan for warming milk
- Kitchen thermometer – crucial for checking oil and milk temperature
- Rolling pin for rolling out dough
- Donut cutter (or two round cookie cutters – one 3-inch and one 1-inch)
- Heavy-bottomed pot or Dutch oven for frying (at least 3-quart capacity)
- Slotted spoon or spider strainer for removing donuts from oil
- Wire cooling rack set over a baking sheet
- Paper towels for draining
- Pastry brush for glazing (optional)
- Plastic wrap or clean kitchen towel for covering rising dough
- Parchment paper squares for placing cut donuts on before frying

Easy Homemade Donuts Recipe
- Total Time: 2 hours 35 minutes (includes rising time)
- Yield: 12 donuts plus donut holes 1x
- Diet: Vegetarian
Description
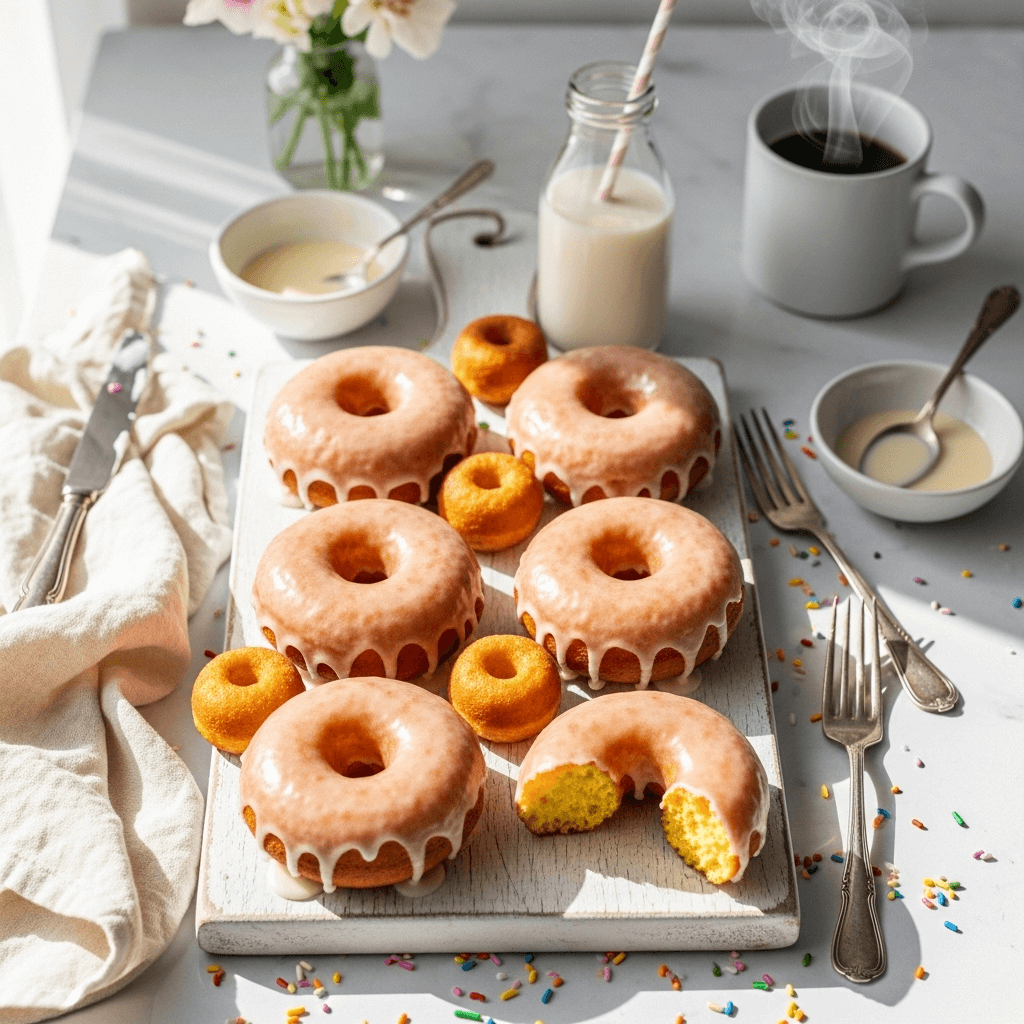
These easy homemade donuts are light, fluffy, and absolutely delicious! Made with simple ingredients and classic yeast dough, they taste just like your favorite bakery donuts but cost a fraction of the price. Perfect for weekend breakfast treats or special occasions, these donuts can be customized with any glaze or topping you love.
Ingredients
For the Donuts:
- 2½ cups (300g) all-purpose flour, plus more for dusting
- ¼ cup (50g) granulated sugar
- 2¼ teaspoons (1 packet) active dry yeast
- ¾ cup (180ml) whole milk, warmed to 110°F
- 3 tablespoons unsalted butter, softened to room temperature
- 2 large egg yolks, room temperature
- ¾ teaspoon salt
- ¼ teaspoon ground nutmeg
- 1 teaspoon vanilla extract
- 6–8 cups vegetable oil for frying
For the Classic Glaze:
- 2 cups (240g) powdered sugar, sifted
- ¼ cup (60ml) whole milk
- 1 teaspoon vanilla extract
- Pinch of salt
Instructions
- Proof the yeast: In a small bowl, combine the warm milk (110°F) and 1 tablespoon of the sugar. Sprinkle the yeast over the top and let it sit for 5-10 minutes until foamy and bubbly. If it doesn’t foam, your yeast is dead – start over with fresh yeast and check your milk temperature.
- Mix the dough: In the bowl of your stand mixer fitted with the dough hook (or in a large bowl), combine the flour, remaining sugar, salt, and nutmeg. Add the proofed yeast mixture, softened butter, egg yolks, and vanilla extract.
- Knead the dough: Mix on low speed until the ingredients come together, then increase to medium speed and knead for 5-7 minutes until the dough is smooth, elastic, and slightly tacky but not sticky. If using a hand mixer or kneading by hand, this will take about 8-10 minutes. The dough should pull away from the sides of the bowl but still stick slightly to the bottom.
- First rise: Form the dough into a ball and place it in a lightly greased bowl, turning once to coat all sides. Cover with plastic wrap or a damp kitchen towel and let rise in a warm, draft-free spot for 1-1½ hours, or until doubled in size. A good trick is to place it in an oven with just the light on.
- Roll and cut: Once risen, punch down the dough to release air bubbles. Turn it out onto a lightly floured surface and roll it to about ½-inch thickness. Using a donut cutter or two round cutters (3-inch for the donut, 1-inch for the hole), cut out as many donuts as possible. Place each donut and hole on individual parchment paper squares on a baking sheet. Gather scraps, re-roll once, and cut more donuts.
- Second rise: Cover the cut donuts loosely with plastic wrap or a kitchen towel and let them rise for 30-45 minutes until puffy and nearly doubled. They should feel light and airy when gently touched. Don’t skip this rise – it’s crucial for fluffy donuts!
- Heat the oil: About 15 minutes before frying, heat 2-3 inches of oil in your heavy pot or Dutch oven to 350-375°F. Use a thermometer to monitor the temperature – this is critical for perfect donuts. Too hot and they’ll burn outside while staying raw inside; too cool and they’ll absorb too much oil and be greasy.
- Fry the donuts: Carefully place 2-3 donuts at a time into the hot oil using the parchment paper to lower them in (the paper will float and can be removed with tongs). Don’t overcrowd the pot. Fry for about 1 minute per side, or until golden brown. The donuts will float and puff up beautifully.
- Drain: Using a slotted spoon or spider strainer, carefully remove donuts and place them on a wire rack set over paper towels to drain. Let them cool for 2-3 minutes before glazing.
- Make the glaze: While donuts cool slightly, whisk together the powdered sugar, milk, vanilla, and salt until smooth. The glaze should be thin enough to coat easily but thick enough to set – add more milk to thin or more powdered sugar to thicken.
- Glaze the donuts: While still slightly warm, dip the top of each donut into the glaze, allowing excess to drip off. Place back on the wire rack and let the glaze set for 5-10 minutes.
- Serve: Enjoy your homemade donuts fresh and warm! They’re best eaten within a few hours of making but will keep at room temperature for up to 2 days.
Notes
- Temperature matters – Both the milk for proofing yeast and the oil for frying must be at the correct temperature. Invest in a good thermometer.
- Don’t skip the rises – Both rising periods are essential for light, fluffy donuts. Rushing this step results in dense, heavy donuts.
- Work in batches – Only fry 2-3 donuts at a time to maintain oil temperature and prevent overcrowding.
- Watch the oil temperature – It will drop when you add donuts, so adjust heat as needed to maintain 350-375°F.
- Fresh is best – Homemade donuts are absolutely best the day they’re made, preferably within a few hours.
- Save those donut holes – Fry them too! They cook faster (about 45 seconds per side) and make delicious little treats.
- Prep Time: 20 minutes
- Cook Time: 15 minutes
- Category: Dessert
- Method: Frying
- Cuisine: American
Nutrition
- Serving Size: 1 glazed donut
- Calories: 245
- Sugar: 18g
- Sodium: 165mg
- Fat: 10g
- Saturated Fat: 3g
- Unsaturated Fat: 6g
- Trans Fat: 0g
- Carbohydrates: 35g
- Fiber: 1g
- Protein: 4g
- Cholesterol: 40mg
Tips & Variations
This basic donut recipe is incredibly versatile and can be customized in countless delicious ways:
Flavor Variations:
- Chocolate Glazed Donuts: Add 3 tablespoons cocoa powder to the glaze and thin with extra milk as needed
- Cinnamon Sugar Donuts: Skip the glaze and toss warm donuts in a mixture of ½ cup sugar and 2 teaspoons cinnamon
- Maple Glazed Donuts: Replace vanilla in the glaze with maple extract and add 2 tablespoons maple syrup
- Lemon Donuts: Add 1 tablespoon lemon zest to the dough and use lemon juice instead of milk in the glaze
- Old-Fashioned Buttermilk: Replace milk with buttermilk in the dough for a tangy, cakey texture
Fun Topping Ideas:
- Crushed cookies (Oreos, graham crackers)
- Toasted coconut flakes
- Chopped nuts (pecans, almonds, pistachios)
- Rainbow sprinkles for birthday donuts
- Crumbled bacon for maple bacon donuts
- Mini chocolate chips
- Crushed candy (candy canes for Christmas, candy corn for Halloween)
Filled Donuts: Instead of cutting out the center, cut the dough into 3-inch circles without holes. Fry as directed, let cool slightly, then use a piping bag with a long tip to inject jelly, custard, Nutella, or cream filling into the side of each donut.
Baked Donut Option: If you prefer not to fry, you can bake these in a donut pan at 375°F for 10-12 minutes. The texture will be more cake-like than classic yeast donuts, but still delicious.
Pro Chef Tips
After making hundreds of donuts, I’ve learned these professional techniques that make all the difference:
Temperature is Everything: This cannot be overstated. Your milk for proofing yeast should be 110°F – warm to the touch but not hot. Too cold and the yeast won’t activate; too hot and you’ll kill it. Your frying oil should stay between 350-375°F. Use a thermometer rather than guessing. At the right temperature, donuts cook quickly with minimal oil absorption, staying light and non-greasy.
The Windowpane Test: To check if your dough is properly kneaded, pinch off a small piece and gently stretch it between your fingers. If you can stretch it thin enough to see light through it without tearing (like a windowpane), your gluten is well-developed. If it tears immediately, knead for another minute or two.
Patience with Rising: Yeast dough needs time and warmth. If your kitchen is cold, create a warm environment by turning your oven on for just 30 seconds, turning it off, and placing the covered bowl inside. The residual heat creates the perfect proofing environment. Don’t rush the rises or your donuts will be dense and bready rather than light and airy.
The Poke Test for Readiness: Before frying, gently poke a risen donut with your finger. If the indentation slowly springs back, they’re ready. If it springs back immediately, give them more time. If it doesn’t spring back at all, you’ve over-proofed (they’ll still be okay, just slightly less perfect).
Maintain Oil Temperature: The oil temperature will drop when you add donuts. Only fry 2-3 at a time and allow the oil to come back to temperature between batches. If the oil is too cool, donuts absorb more oil and become greasy. If it’s too hot, they’ll burn on the outside while staying raw in the middle.
The Flip Technique: When frying, donuts will naturally want to float one side up. After about 1 minute when the bottom is golden, use chopsticks or a slotted spoon to flip them gently. They should flip easily when ready. Forcing them to flip too early can deflate them.
Glaze While Warm: Apply glaze while donuts are still slightly warm (but not hot). The warmth helps the glaze soak in slightly and creates that characteristic thin set layer. If donuts are too hot, the glaze will slide right off. Too cold, and it won’t adhere well.
Common Mistakes to Avoid
Even experienced bakers can run into issues with homemade donuts. Here’s how to avoid the most common pitfalls:
Dense, Heavy Donuts: This is the number one complaint and usually happens because of inadequate rising time, dead or old yeast, or over-flouring the dough. Make sure your yeast is fresh and properly proofed (it should foam and bubble). Give the dough full rising time until truly doubled. When kneading, add only enough flour to make the dough workable – it should be slightly tacky but not sticky.
Greasy, Oil-Soaked Donuts: This happens when the oil temperature is too low. At lower temperatures, donuts take longer to cook and absorb more oil. Always maintain 350-375°F and use a thermometer. Also, don’t let donuts drain on paper towels for too long – transfer them to a wire rack so air circulates and excess oil drips away rather than being reabsorbed.
Raw Centers or Burnt Exteriors: Temperature problems again! If your oil is too hot, the outside cooks and browns too quickly while the inside stays raw. If this happens, lower the heat and give each donut a full minute per side. Consider frying a test donut first to check your timing. Break it open to ensure it’s cooked through before frying the whole batch.
Donuts Lose Their Shape While Frying: This usually means they were over-proofed or the dough was too soft. During the second rise, donuts should be puffy but still hold their shape when gently touched. If they feel like they’re collapsing or spreading significantly, they’ve risen too long. Also, make sure your dough isn’t too soft – it should be easy to handle when you cut the shapes.
Glaze Won’t Stick or Runs Off Completely: Timing and consistency are key. Donuts need to be warm (not hot or cold) when glazed. Your glaze should have the consistency of thick cream – thin enough to dip easily but thick enough to coat and set. If it’s too thin, add more powdered sugar. If too thick, thin with a teaspoon of milk at a time.
Storage & Meal Prep
Donuts are absolutely best fresh, but proper storage can extend their life:
Room Temperature Storage: Store donuts in an airtight container at room temperature for up to 2 days. Line the container with paper towels to absorb any moisture. Don’t refrigerate donuts – the cold dries them out and makes them stale faster. Keep glazed and unglazed donuts separate if possible, as the glaze can make them stick together.
Keeping Donuts Fresh: The biggest enemy of leftover donuts is air exposure, which dries them out. Store them in an airtight container as soon as they’ve completely cooled and the glaze has set. If you must stack them, place parchment paper between layers.
Reheating Donuts: Day-old donuts can be revived! Microwave individual donuts for 8-10 seconds to warm them up and restore some softness. You can also place them in a 300°F oven for 3-5 minutes. Be careful not to overheat, which will dry them out further.
Freezing Unglazed Donuts: For longer storage, freeze unglazed donuts. Let them cool completely, then place them in a single layer on a baking sheet and freeze for 1 hour. Transfer frozen donuts to a freezer bag or airtight container, separating layers with parchment paper. Freeze for up to 2 months.
Thawing and Glazing: Thaw frozen donuts at room temperature for about 30 minutes, or warm them in a 300°F oven for 5-7 minutes. Glaze while still slightly warm for best results. They’ll taste nearly as good as fresh!
Make-Ahead & Freezer Notes
Donuts are surprisingly make-ahead friendly with the right techniques:
Make-Ahead Dough Method: You can prepare the dough through the first rise the night before. After punching down, cover tightly and refrigerate overnight. The next morning, let the dough sit at room temperature for 30 minutes, then roll, cut, and proceed with the second rise and frying. The cold fermentation actually improves flavor!
Cut and Refrigerate: After cutting your donut shapes, you can place them on a parchment-lined baking sheet, cover tightly with plastic wrap, and refrigerate for up to 12 hours. Let them sit at room temperature for 45 minutes to 1 hour before frying, allowing them to complete their rise.
Freezing Fried Donuts: Fully cooked, cooled, unglazed donuts freeze beautifully. Wrap individually in plastic wrap, then place all wrapped donuts in a freezer bag. Freeze for up to 3 months. Thaw at room temperature, warm slightly in the oven, then glaze and serve.
Freezing Glazed Donuts: While I prefer to freeze unglazed donuts and add fresh glaze after thawing, you can freeze already-glazed donuts if needed. The glaze may crack slightly during freezing, but they’ll still taste good. Freeze in a single layer on a baking sheet first, then transfer to a container to prevent crushing.
Best Reheating Method: For frozen donuts, thaw at room temperature for 30-45 minutes, then warm in a 300°F oven for 5-7 minutes. This brings back some of that fresh-made texture and warmth. Glaze immediately after warming if you froze them unglazed.
Planning for Fresh Morning Donuts: Start the dough the night before and refrigerate after the first rise. In the morning, let sit for 30 minutes, roll and cut while the oil heats, do the second rise while you have coffee, then fry. You’ll have fresh, warm donuts within 1½ hours of waking up!
Serving Suggestions
Homemade donuts are wonderful on their own, but these pairings elevate the experience:
Perfect Beverage Pairings:
- Fresh hot coffee – The classic pairing that never fails
- Cold milk – Especially perfect for kids or nostalgic adults
- Hot chocolate – For an extra-indulgent treat
- Chai latte – The spices complement the donuts beautifully
- Fresh orange juice – The acidity cuts through the sweetness nicely
- Espresso – For a sophisticated breakfast or brunch
Breakfast & Brunch Spreads: Create a complete spread by serving donuts alongside scrambled eggs, crispy bacon or sausage, fresh fruit salad, yogurt parfaits, and assorted breakfast pastries. Your guests will think they’re at a fancy brunch café!
Donut Bar Party: Set up a DIY donut decorating station with plain glazed donuts and bowls of various toppings: chocolate and vanilla glaze, caramel sauce, sprinkles, chopped nuts, shredded coconut, mini chocolate chips, crushed cookies, and fresh berries. Perfect for birthday parties, bridal showers, or weekend fun with kids.
Dessert Presentations: Serve donuts warm with a scoop of vanilla ice cream for a deconstructed “donut à la mode,” drizzle with chocolate or caramel sauce, dust with extra powdered sugar and serve with whipped cream and berries, or create a donut bread pudding by cubing day-old donuts and baking them in a custard mixture.
Special Occasion Ideas: For Valentine’s Day, use a heart-shaped cutter and glaze with pink icing. For the 4th of July, top with red, white, and blue sprinkles. For Halloween, use orange icing and candy eyeballs. For Christmas, dip in white glaze and sprinkle with peppermint pieces.
FAQs Section
Can I bake these donuts instead of frying them?
Yes, you can bake them in a donut pan at 375°F for 10-12 minutes until golden. However, the texture will be more cake-like rather than the classic airy yeast donut texture you get from frying. They’ll still be delicious, just different. If you prefer baked donuts, you might want to try a recipe specifically developed for baking.
Why didn’t my donuts puff up when frying?
This usually means your second rise was insufficient, your oil temperature was too low (causing them to absorb oil instead of puffing), or your yeast wasn’t active. Make sure donuts are noticeably puffy and almost doubled after the second rise, and always verify oil temperature with a thermometer before frying.
Can I use instant yeast instead of active dry yeast?
Absolutely! Use the same amount (2¼ teaspoons) and mix it directly with the dry ingredients. You can skip the proofing step and add the warm milk and other wet ingredients directly to the flour mixture. Instant yeast is actually easier to work with for beginners.
How do I know when the oil is hot enough without a thermometer?
While I strongly recommend using a thermometer, you can test by dropping a small piece of dough into the oil. If it immediately sizzles and rises to the surface within a second or two, turning golden in about 1 minute, the temperature is right. If it sinks and takes a while to rise, the oil is too cold. If it burns immediately, it’s too hot.
Can I make these donuts dairy-free?
Yes! Substitute the milk with any non-dairy milk (almond, oat, or soy work well), and replace the butter with vegan butter or coconut oil. The texture and flavor will be slightly different but still delicious. Make sure your non-dairy milk is unsweetened and unflavored for best results.
Why do my donuts taste too bready or yeasty?
This can happen if you used too much yeast, let the dough rise too long (over-proofing), or didn’t add enough sugar. Follow the measurements precisely and don’t let the dough rise beyond doubled in size. The nutmeg and vanilla are also important for that classic donut flavor rather than plain bread taste.
How long do I fry each side?
About 1 minute per side at 350-375°F, for a total frying time of about 2 minutes. Donuts should be deep golden brown on both sides. If they’re browning too quickly, your oil is too hot. If they’re taking much longer than 2 minutes total, your oil is too cool. The first donut is always a test – adjust temperature as needed.
Conclusion
Congratulations! You now have all the knowledge and confidence you need to make incredible homemade donuts that rival anything you’d buy at a fancy bakery. While the process might seem intimidating at first, I promise that once you make your first batch and taste that warm, fluffy, absolutely delicious result, you’ll be hooked on homemade donuts forever.
The beauty of this easy donut recipe is that it’s truly accessible to bakers of all skill levels. Yes, you’re working with yeast and hot oil, which sounds scary, but with the detailed instructions and tips I’ve provided, you’ll navigate these techniques with ease. And the payoff is absolutely worth it – there’s simply nothing that compares to a freshly fried, still-warm donut with glaze that melts on your tongue.
Remember, don’t stress if your first batch isn’t Instagram-perfect. Even slightly imperfect donuts taste absolutely amazing, and you’ll improve with practice. Focus on getting the temperatures right (for both yeast proofing and frying), giving the dough enough time to rise, and most importantly, enjoying the process. Baking should be fun, especially when the end result is this delicious!
These homemade glazed donuts are perfect for so many occasions: lazy weekend breakfasts, special birthday treats, holiday mornings, or simply because you’re craving something sweet and wonderful. They also make incredible gifts – show up at someone’s door with a box of warm, homemade donuts and you’ll be their favorite person forever.
I can’t wait to hear about your donut-making adventures! After you try this recipe, please share your photos on Pinterest and tag me so I can see your beautiful creations. Did you try a special glaze flavor? Add fun toppings? Make filled donuts? Leave a comment below sharing your experience and any creative variations you came up with.
Don’t forget to pin this easy homemade donuts recipe to your breakfast and dessert boards so you can find it whenever the craving strikes. And please share it with your friends and family who love donuts – they’ll be so grateful you introduced them to the magic of homemade!
Happy frying, and may your donuts always be perfectly golden and delicious!