
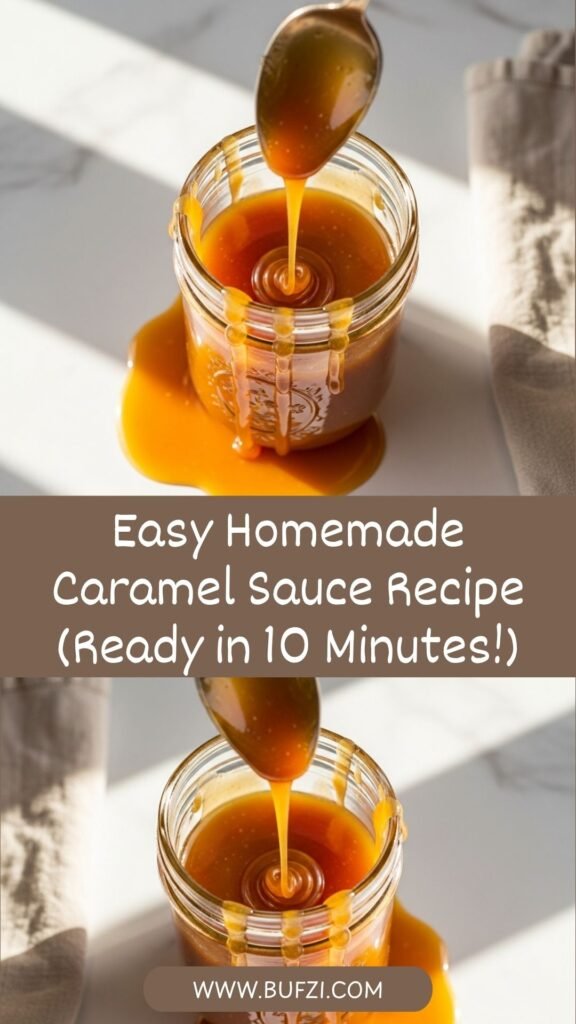
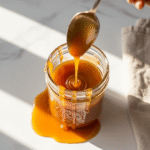
There’s something truly magical about homemade caramel sauce. That rich, buttery, golden liquid transforms ordinary desserts into extraordinary experiences. Whether you’re drizzling it over vanilla ice cream, dipping fresh apple slices, or adding it to your morning coffee, this easy caramel sauce recipe will become your secret weapon in the kitchen.
What makes this recipe so special is that it’s surprisingly simple to make from scratch. With just four basic ingredients and about 10 minutes of your time, you can create a silky-smooth, restaurant-quality caramel sauce that’s infinitely better than anything store-bought. This homemade caramel sauce recipe delivers that perfect balance of sweet and slightly salty, with a luxurious texture that clings beautifully to whatever you’re serving it with. It’s the kind of recipe that makes you look like a culinary genius, even though it’s incredibly straightforward once you understand the basic technique.
Perfect for holiday entertaining, special occasion desserts, or simply elevating your everyday treats, this caramel sauce is versatile, impressive, and absolutely irresistible. Once you master this simple technique, you’ll never go back to jarred caramel again.
History / Background
Caramel has a rich and fascinating history that spans centuries and continents. The word “caramel” comes from the Spanish word “caramelo” or the Portuguese “caramelo,” which likely derived from the Latin word “cannamellis,” meaning sugar cane.
The discovery of caramel was likely accidental, as most great culinary innovations are. The earliest recorded mentions of caramelized sugar date back to around 1000 AD in the Arab world, where confectioners were experimenting with heating sugar and creating various sweetmeats. These early versions were primarily hard candies rather than the liquid sauce we know today.
Caramel making became more refined during the 17th and 18th centuries in Europe, particularly in France, where pastry chefs elevated it to an art form. French confectioners developed the technique of cooking sugar to specific temperatures to achieve different textures and flavors, from soft caramels to brittle toffees. The addition of cream and butter to create a sauce likely emerged during this period as chefs sought to create more luxurious dessert toppings.
By the 19th century, caramel had become a staple in American candy-making, particularly in the form of caramel chews and caramel apples, which became popular at harvest festivals and fairs. The commercial production of caramel sauce began in the early 20th century, but homemade versions have always been prized for their superior flavor and texture.
Today, caramel sauce is a beloved component of global dessert culture. From French crème caramel to Latin American dulce de leche (a close cousin made differently), from American caramel apples to Scandinavian caramel cakes, the appeal of that deep, complex sweetness transcends borders. The beauty of making it at home is that you control the quality of ingredients and can adjust the flavor to your exact preferences—something no store-bought version can offer.
Why You’ll Love This Recipe
This homemade caramel sauce is about to revolutionize your dessert game. It’s one of those recipes that seems intimidating at first but becomes second nature once you’ve made it a couple of times.
Making caramel from scratch means you’re creating something truly special with ingredients you probably already have in your kitchen. The difference between homemade and store-bought caramel is night and day—the depth of flavor, the silky texture, and the satisfaction of making it yourself are unmatched.
Here’s why this recipe is a game-changer:
- Incredibly Quick: From start to finish, you’ll have gorgeous golden caramel in just 10 minutes
- Only 4 Ingredients: Sugar, butter, heavy cream, and a pinch of salt create pure magic
- Restaurant-Quality Results: Achieve that professional, velvety-smooth texture at home
- Endlessly Versatile: Use it as a topping, filling, drizzle, or mix-in for countless desserts
- Impressive Yet Simple: Guests will be amazed when you tell them you made it from scratch
- Budget-Friendly: Much less expensive than premium store-bought caramel
- No Corn Syrup: Made with pure ingredients, no artificial additives or preservatives
- Customizable Flavor: Adjust the saltiness, add vanilla, or experiment with different extracts
- Long Shelf Life: Stores beautifully in the fridge for weeks
- Makes Perfect Gifts: Bottle it up for impressive homemade holiday gifts
Ingredient Notes
The simplicity of this recipe means every ingredient plays a crucial role. Using quality ingredients makes a noticeable difference in the final result.
Granulated White Sugar: This is the foundation of your caramel. As sugar heats, it melts and undergoes a complex chemical process called caramelization, where the sugar molecules break down and create hundreds of new flavor compounds. This is what gives caramel its distinctive deep, complex taste. Use regular granulated white sugar—not brown sugar, which contains molasses and will affect the caramelization process. Measure accurately, as the ratio of sugar to cream affects the final consistency.
Unsalted Butter: Butter adds richness, creates a silky mouthfeel, and contributes to that signature buttery caramel flavor. Using unsalted butter gives you better control over the saltiness of your final sauce. The butter should be cut into tablespoon-sized pieces so it melts quickly and evenly when added to the hot sugar. If you only have salted butter, reduce the added salt or omit it entirely.
Heavy Cream (Heavy Whipping Cream): The cream is what transforms crystallized sugar into a smooth, pourable sauce. It must be heavy cream with at least 36% fat content—don’t substitute with half-and-half or milk, as they don’t have enough fat and will cause the caramel to be too thin or grainy. Bring the cream to room temperature before using, or warm it slightly in the microwave. Cold cream added to hot sugar can cause dangerous splattering and may seize the caramel.
Salt: Just a pinch of salt enhances all the flavors and balances the sweetness. It’s the difference between one-dimensional sweetness and a complex, sophisticated caramel. Fine sea salt or table salt works best. For salted caramel sauce, increase to ½-1 teaspoon depending on your taste preference.
Optional – Pure Vanilla Extract: A teaspoon of vanilla extract added at the end enhances the flavor beautifully. Use pure vanilla extract, not imitation, for the best flavor.
Equipment Needed
Having the right tools makes caramel-making much easier and safer:
- Heavy-Bottomed Saucepan (2-3 quarts): Essential for even heat distribution and preventing hot spots that can burn the sugar. Light-colored pans are ideal so you can monitor the caramel’s color.
- Wooden Spoon or Heat-Resistant Silicone Spatula: For stirring once you add the butter and cream
- Whisk: Helps smooth out any lumps when adding the cream
- Measuring Cups and Spoons: Accurate measurements are crucial for proper consistency
- Candy Thermometer (Optional): Helpful for beginners to monitor temperature
- Small Saucepan or Microwave-Safe Bowl: For warming the cream
- Glass Jar or Airtight Container: For storing the finished caramel
- Oven Mitts: Hot sugar can cause serious burns, so protect your hands
- Pastry Brush and Water: To brush down sugar crystals from the sides of the pan
Homemade Caramel Sauce Recipe
- Total Time: 10 minutes
- Yield: 1½ cups (about 12 servings) 1x
- Diet: Vegetarian
Description
This easy homemade caramel sauce is rich, buttery, and perfectly smooth with just four simple ingredients. Ready in 10 minutes, it’s perfect for drizzling over ice cream, dipping apples, or adding to your favorite desserts.
Ingredients
- 1 cup (200g) granulated white sugar
- 6 tablespoons (85g) unsalted butter, cut into tablespoon-sized pieces
- ½ cup (120ml) heavy cream, at room temperature
- ¼ teaspoon fine sea salt (or up to 1 teaspoon for salted caramel)
- Optional: 1 teaspoon pure vanilla extract
Instructions
Step 1: Prepare Your Ingredients
Before you begin cooking, measure out all your ingredients and have them ready beside the stove. Cut the butter into tablespoon-sized pieces and let the heavy cream come to room temperature, or warm it slightly in the microwave for 15-20 seconds. This preparation is crucial because once you start cooking, things happen quickly.
Step 2: Melt the Sugar
Heat the granulated sugar in a heavy-bottomed saucepan over medium heat. Using a heat-resistant spatula or wooden spoon, stir constantly as the sugar begins to melt. It will first clump up and look lumpy—this is completely normal. Continue stirring, breaking up any clumps. The sugar will gradually liquefy, turning from white to clear, then taking on an amber color.
Step 3: Cook to Deep Amber
Continue cooking and stirring until all the sugar is melted and turns a deep amber color, similar to the color of an old penny or dark honey. This should take about 5-7 minutes total. Watch carefully during this stage, as the sugar can go from perfect to burned very quickly. Remove from heat as soon as you reach the desired color—the residual heat will continue cooking it slightly.
Step 4: Add the Butter
Immediately add the butter pieces all at once. Be careful—the caramel will bubble up vigorously when you add the butter. Whisk until the butter is completely melted and incorporated. The mixture will look separated and grainy at this point, but don’t worry.
Step 5: Add the Cream
Slowly drizzle in the heavy cream while whisking constantly. The mixture will bubble up dramatically again—this is why you need a larger saucepan than you think. Continue whisking until the cream is fully incorporated and the mixture is smooth. If you notice any hardened bits of sugar, return the pan to low heat for 30-60 seconds while whisking to dissolve them.
Step 6: Add Salt and Vanilla
Remove from heat and whisk in the salt (start with ¼ teaspoon and add more to taste). If using vanilla extract, add it now and whisk to combine. The caramel will be quite thin when hot but will thicken considerably as it cools.
Step 7: Cool and Store
Allow the caramel sauce to cool in the pan for a few minutes, then transfer to a heat-safe jar or container. Let it cool to room temperature, where it will thicken to a perfect drizzling consistency. Use immediately or store covered in the refrigerator.
Notes
- Temperature Matters: Room temperature or warm cream is essential. Cold cream can cause the hot sugar to seize and crystallize.
- Color is Key: Don’t undercook the sugar. The deeper the amber color (without burning), the more complex and less sweet the final caramel will be.
- Patience with Lumps: If your caramel seems lumpy after adding the cream, don’t panic. Return it to low heat and whisk gently until smooth.
- Consistency Control: For thicker caramel, use slightly less cream. For thinner caramel, add an extra 1-2 tablespoons of cream.
- Safety First: Hot sugar is extremely hot (around 320°F/160°C) and can cause severe burns. Keep children and pets away from the stove while making caramel.
- Prep Time: 3 minutes
- Cook Time: 7 minutes
- Category: Sauce
- Method: Stovetop
- Cuisine: American
Nutrition
- Serving Size: 2 tablespoons (based on 12 servings)
- Calories: 145
- Sugar: 17g
- Sodium: 60mg
- Fat: 8g
- Saturated Fat: 5g
- Unsaturated Fat: 2g
- Trans Fat: 0g
- Carbohydrates: 18g
- Fiber: 0g
- Protein: 0g
- Cholesterol: 25mg
Tips & Variations
One of the best things about homemade caramel sauce is how easily you can customize it to suit your preferences or pair it with specific desserts.
Salted Caramel Sauce: Increase the salt to ¾-1 teaspoon for that popular sweet-salty combination. You can also sprinkle flaky sea salt on top of whatever you’re serving the caramel with for added texture and visual appeal.
Bourbon or Rum Caramel: Add 2 tablespoons of bourbon, dark rum, or whiskey along with the vanilla for an adult version that’s incredible on bread pudding or pecan pie.
Espresso Caramel: Stir in 1 tablespoon of instant espresso powder with the cream for a mocha-flavored sauce that’s perfect for coffee desserts.
Chocolate Caramel: Whisk in 2-3 ounces of chopped dark chocolate after removing from heat for a decadent chocolate-caramel hybrid.
Cinnamon Caramel: Add ½ teaspoon of ground cinnamon with the salt for a warm, spiced caramel perfect for fall desserts.
Coconut Caramel: Replace the heavy cream with full-fat coconut cream for a dairy-free version with subtle coconut flavor.
Brown Butter Caramel: Brown the butter in a separate pan before adding it to the caramel for an extra layer of nutty complexity.
Thicker Caramel Sauce: For a thicker sauce perfect for filling desserts, reduce the cream to 6 tablespoons instead of ½ cup.
Maple Caramel: Replace 2 tablespoons of the cream with pure maple syrup for a subtle maple undertone.
Pro Chef Tips
Master these professional techniques to take your homemade caramel from good to absolutely perfect:
Use a Light-Colored Pan: A stainless steel or light-colored enamel pan allows you to accurately see the color of the caramel as it develops. Dark pans make it difficult to judge when you’ve reached the perfect amber stage.
Don’t Stir Too Much Initially: When the sugar first starts melting, gentle stirring is fine, but once it fully liquefies, you can stop stirring and just swirl the pan occasionally. Over-stirring can cause crystallization.
The “Wet” Method Alternative: If you’re nervous about burning the sugar, try the wet method: add ¼ cup of water to the sugar before heating. It takes longer but gives you more control. Cook without stirring until it reaches the amber stage.
Temperature Precision: The ideal temperature for perfect caramel is between 340-350°F (170-175°C). Use a candy thermometer clipped to the side of the pan if you want to be precise.
Room Temperature Everything: Having your butter and cream at room temperature ensures smoother incorporation and reduces the risk of the caramel seizing or becoming grainy.
The Bubble Test: When your caramel is done cooking, it should have a thick, slow bubble pattern. Fast, thin bubbles mean it’s not quite ready.
Water Brush Technique: Keep a pastry brush and a small cup of water nearby. If sugar crystals form on the sides of the pan during cooking, brush them down with the wet brush to prevent crystallization from spreading.
Add Salt Gradually: Start with less salt than you think you need, then taste and adjust. You can always add more, but you can’t take it away.
Cool Down Gradually: Let the caramel cool naturally at room temperature rather than refrigerating it immediately. This helps it develop the best texture.
Common Mistakes to Avoid
Caramel-making can be tricky, but avoiding these common pitfalls will set you up for success:
Using Cold Cream: This is the number one mistake. Cold cream added to hot sugar can cause the mixture to seize up and become grainy, or worse, cause dangerous splattering. Always bring cream to room temperature or warm it slightly before adding to the caramel.
Cooking on Too High Heat: Sugar burns easily. Medium heat is ideal—high heat will cause the outside of your sugar pool to burn before the center even melts, leaving you with bitter, acrid-tasting caramel and potential smoke detector activation.
Not Cooking Sugar Dark Enough: Light amber caramel tastes mostly like plain sugar. You need to cook it to a deep amber, almost dark copper color for that complex, slightly bitter-sweet caramel flavor. Don’t be timid—cook it until it’s darker than you think it should be (but not burned!).
Stirring Too Much After Sugar Liquefies: Once your sugar is fully melted and liquid, excessive stirring can cause crystallization. Just gently swirl the pan instead to distribute heat evenly.
Panicking When It Bubbles: When you add butter and especially cream, the caramel will bubble up dramatically. This is normal! Just keep whisking calmly. This is why you need a larger pan than seems necessary—to accommodate that bubbling.
Not Having Everything Ready: Caramel waits for no one. Once your sugar reaches the right color, you need to add butter and cream immediately. Having to stop and measure ingredients means your sugar will overcook and burn.
Giving Up on Lumpy Caramel: If your caramel seems grainy or lumpy after adding the cream, don’t throw it out. Return it to low heat and whisk gently for 30-60 seconds. The heat will dissolve any crystallized sugar and smooth everything out.
Storage & Meal Prep
Properly stored homemade caramel sauce keeps beautifully and is wonderful to have on hand for impromptu desserts.
Refrigerator Storage: Transfer cooled caramel to a clean glass jar or airtight container. Store in the refrigerator for up to 1 month. The caramel will thicken significantly when cold, becoming very firm and almost solid. This is completely normal.
Bringing Back to Life: To use refrigerated caramel, you have several options. For drizzling, microwave in 15-second intervals, stirring between each, until it reaches your desired consistency. Alternatively, place the jar in a bowl of hot water and let it sit for 10-15 minutes, stirring occasionally. You can also warm it gently in a saucepan over low heat, whisking constantly.
Room Temperature Storage: If you plan to use the caramel within 3-4 days and your kitchen isn’t too warm (below 70°F), you can keep it covered at room temperature. This keeps it at the perfect drizzling consistency.
Preventing Skin Formation: Press a piece of plastic wrap directly onto the surface of the caramel before sealing the container. This prevents a skin from forming on top.
Best Container: Glass jars with tight-fitting lids work best. Plastic containers can absorb the caramel’s color and may retain the smell even after washing.
Texture Changes: Some separation may occur during storage, with a thin layer of liquid forming on top. This is normal—just stir it back in when reheating.
Make-Ahead & Freezer Notes
Caramel sauce is an excellent make-ahead component that actually improves slightly in flavor after a day or two as the flavors meld.
Make-Ahead Timeline: You can make this caramel sauce up to 1 month in advance and store it in the refrigerator. In fact, many chefs prefer to make it a day ahead to allow the flavors to develop fully and to have one less thing to prepare on the day of serving.
Freezing Caramel Sauce: Yes, caramel freezes beautifully! Pour the cooled caramel into freezer-safe containers or heavy-duty freezer bags, leaving about ½ inch of headspace for expansion. Freeze for up to 3 months. For easier portioning, freeze in ice cube trays, then transfer the frozen cubes to a freezer bag. Each cube is perfect for individual servings.
Thawing Instructions: Transfer frozen caramel to the refrigerator and let it thaw overnight. Once thawed, reheat gently using one of the methods described in the storage section. Never thaw caramel in the microwave on high power, as it can overheat and burn in spots.
Batch Cooking: Consider doubling or tripling this recipe and freezing portions. Having homemade caramel on hand makes weeknight desserts feel special and is perfect for last-minute entertaining.
Gift-Worthy: Make-ahead caramel is perfect for holiday gift-giving. Pour into decorative jars, add a pretty label with storage and reheating instructions, and tie with ribbon for a thoughtful homemade gift.
Quality After Freezing: Properly frozen and thawed caramel tastes just as good as freshly made. You won’t notice any difference in flavor or texture.
Serving Suggestions
Homemade caramel sauce is incredibly versatile. Here are some delicious ways to use it:
Ice Cream and Frozen Desserts: The classic pairing—drizzle warm caramel over vanilla, chocolate, or coffee ice cream. It’s also wonderful over frozen yogurt, gelato, or sorbet for a gourmet touch.
Apple Everything: Serve as a dipping sauce for fresh apple slices, drizzle over apple pie or apple crisp, or use in apple nachos. The apple-caramel combination is timeless and always crowd-pleasing.
Coffee and Beverages: Stir a spoonful into hot coffee or lattes for a homemade caramel macchiato. You can also add it to hot chocolate, milkshakes, or even cocktails for creative adult beverages.
Breakfast Treats: Transform ordinary breakfast into something special by drizzling caramel over pancakes, waffles, French toast, or oatmeal. It’s also delicious swirled into Greek yogurt with granola.
Cheesecake and Cakes: Use as a topping for plain cheesecake, pound cake, or chocolate cake. It adds moisture and a luxurious finish to any cake.
Dipping Sauce: Perfect for dipping pretzels, graham crackers, shortbread cookies, biscotti, churros, or fresh fruit like pears, bananas, and strawberries.
Pie Enhancer: Drizzle over pecan pie, pumpkin pie, sweet potato pie, or any cream pie for an extra layer of flavor.
Popcorn Magic: Pour over freshly popped popcorn and toss with a bit of salt for homemade caramel corn. Add nuts for an even more decadent snack.
Brownies and Bars: Drizzle over brownies, blondies, or cookie bars before serving, or swirl into the batter before baking.
Bananas Foster: Use as the base for a quick bananas foster by warming the caramel, adding sliced bananas, and flambéing with rum if desired.
FAQs Section
Q: Why did my caramel crystallize and become grainy?
A: Crystallization happens when sugar crystals form in the liquid caramel. This can occur if you stir too much once the sugar liquefies, if undissolved sugar crystals from the sides of the pan fall into the caramel, or if you add cold cream. To prevent it, use the water brush technique to clean the sides of the pan, avoid over-stirring, and use room temperature cream. If it happens, you can sometimes save it by adding a tablespoon of water and reheating gently while whisking.
Q: Can I make caramel without heavy cream?
A: Heavy cream is really the best choice for smooth, rich caramel. In a pinch, you can use half-and-half, but the caramel will be thinner and less rich. Milk doesn’t work well as it lacks sufficient fat. For dairy-free caramel, full-fat coconut cream is the best substitute, though it will have a slight coconut flavor.
Q: How do I know when my caramel is done cooking?
A: Look for a deep amber color similar to an old penny or dark honey. If using a thermometer, aim for 340-350°F. The color is more reliable than temperature, though. It should smell rich and nutty, not burnt. Remember, it will continue to darken slightly off the heat, so remove it just before you think it’s perfect.
Q: My caramel is too thick/thin. How do I fix it?
A: If your caramel is too thick, warm it gently and whisk in additional heavy cream, one tablespoon at a time, until it reaches your desired consistency. If it’s too thin, there’s not much you can do after the fact except use it as a thinner sauce. Next time, reduce the amount of cream slightly.
Q: Is it normal for caramel to harden when refrigerated?
A: Absolutely! Caramel becomes very firm, almost solid, when cold. This is completely normal due to the butter content. Simply reheat it gently in the microwave, in a water bath, or on the stovetop over low heat, and it will return to its smooth, pourable consistency.
Q: Can I make this caramel vegan?
A: Yes! Use vegan butter and replace the heavy cream with full-fat coconut cream. The flavor will be slightly different with subtle coconut notes, but it works well. Make sure your coconut cream is at room temperature before adding.
Q: What’s the difference between caramel sauce and dulce de leche?
A: While both are caramelized, they’re made differently. Caramel sauce is made by cooking sugar until it caramelizes, then adding cream and butter. Dulce de leche is made by slowly cooking sweetened condensed milk until the milk sugars caramelize. Both are delicious but have different flavors and textures—dulce de leche is typically thicker and has a more milk-forward taste.
Conclusion
Congratulations! You now have everything you need to make perfect homemade caramel sauce that rivals anything from a fancy dessert shop. This simple four-ingredient recipe proves that the best things in life really are made from scratch. Once you experience the rich, complex flavor of homemade caramel, you’ll understand why it’s worth those 10 minutes at the stove.
The beauty of this easy caramel sauce recipe is its versatility—it works for everything from casual weeknight desserts to impressive dinner party finales. Keep a jar in your fridge, and you’ll always be prepared to turn ordinary treats into something extraordinary. Whether you’re drizzling it over ice cream, dipping apple slices, or getting creative with coffee drinks and breakfast treats, this caramel sauce is your ticket to dessert success.
I’d love to hear about your caramel adventures! What did you serve it with? Did you try any of the flavor variations? Drop a comment below sharing your experience, and don’t forget to rate the recipe if you loved it. Pin this recipe to your Pinterest boards so you can find it easily when that caramel craving hits—and trust me, it will! Your kitchen is about to smell absolutely amazing. Happy caramel making!