
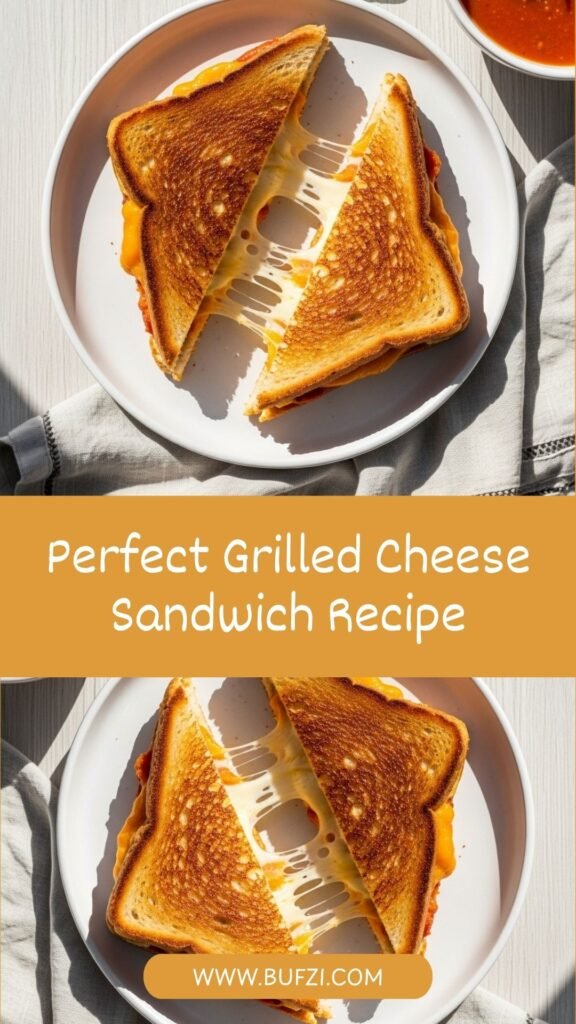
There’s something truly magical about a perfectly grilled cheese sandwich. That golden, crispy exterior giving way to rivers of melted, gooey cheese is pure comfort food bliss. This classic grilled cheese sandwich recipe is the ultimate comfort food that transforms simple ingredients into something extraordinary. Whether you’re making a quick lunch for yourself, feeding hungry kids after school, or craving late-night comfort food, this homemade grilled cheese sandwich delivers every single time.
This isn’t just any grilled cheese recipe – it’s the technique and method that creates restaurant-quality results right in your own kitchen. With the perfect balance of buttery, crispy bread and melted cheese, this easy grilled cheese sandwich will become your go-to recipe. It’s ready in just 10 minutes, requires only a handful of pantry staples, and can be customized in countless ways to suit your taste preferences. From classic American cheese to gourmet combinations, this recipe provides the foundation for grilled cheese perfection.
History / Background
The grilled cheese sandwich has been a beloved American staple for nearly a century, though the concept of pairing bread and cheese dates back thousands of years to ancient Roman times. The modern grilled cheese sandwich as we know it emerged in the 1920s when inexpensive sliced bread and processed cheese became widely available across America. The combination was both economical and delicious, making it accessible to families during the Great Depression.
During World War II, Navy cooks prepared countless “American cheese filling sandwiches” for sailors, and the dish gained even more popularity on the home front as an affordable, filling meal. The 1950s saw the grilled cheese sandwich become a lunchtime icon, particularly when paired with tomato soup – a combination that remains a classic to this day.
The beauty of the grilled cheese sandwich lies in its democratic appeal. It crosses all socioeconomic boundaries, appearing on diner menus, in school cafeterias, and even in upscale restaurants with gourmet variations. Regional differences emerged over time, with some areas preferring white bread and American cheese, while others experiment with sourdough, multiple cheese varieties, and creative additions like bacon, tomatoes, or caramelized onions.
Today, the grilled cheese sandwich has experienced a renaissance, with specialty restaurants dedicated entirely to elevated versions of this humble classic. Food trucks, gastropubs, and home cooks alike continue to innovate while respecting the fundamental principle that makes this sandwich so special: the perfect harmony of butter, bread, and melted cheese.
Why You’ll Love This Recipe
This grilled cheese sandwich recipe delivers foolproof results with a technique that guarantees golden, crispy bread and perfectly melted cheese every single time. I’ve tested countless methods to bring you the absolute best approach that works for beginners and experienced cooks alike.
Here’s why this recipe will become your favorite:
- Ready in 10 minutes – from start to finish, you’ll have a hot, delicious sandwich on your plate in less time than ordering takeout
- Only 4 basic ingredients – you probably already have everything you need in your kitchen right now
- Foolproof technique – the butter-both-sides method ensures even browning and prevents soggy bread
- Perfectly melted cheese every time – using medium heat and the right timing creates that gorgeous cheese pull
- Infinitely customizable – use this as your base recipe and add whatever ingredients you love
- Budget-friendly – costs just pennies per sandwich, making it perfect for feeding a crowd
- Kid-approved comfort food – children absolutely love this classic, and it’s simple enough for them to help make
- No special equipment needed – just a skillet and a spatula are all you need for grilled cheese perfection
- Works with any bread or cheese – adapt this recipe to whatever you have on hand or prefer
Ingredient Notes
The beauty of a classic grilled cheese sandwich lies in its simplicity, but choosing quality ingredients makes all the difference between good and absolutely incredible.
Bread – The foundation of any great grilled cheese. White sandwich bread is traditional and creates that nostalgic diner-style sandwich, but sourdough, whole wheat, rye, or Texas toast all work beautifully. Choose bread that’s sturdy enough to hold melted cheese without getting soggy. Slightly stale bread actually works better than fresh because it absorbs less butter and crisps up more evenly. Avoid very thin or delicate breads that might tear.
Cheese – This is where magic happens. American cheese is the classic choice because it melts smoothly and evenly with that signature creamy texture. Cheddar provides sharp flavor and good meltability. For the ultimate grilled cheese, combine two types of cheese – American for meltability and cheddar or gruyere for flavor. Avoid pre-shredded cheese as it contains anti-caking agents that prevent smooth melting. Always use freshly sliced or block cheese for the best results.
Butter – Salted or unsalted butter both work, but I prefer salted for that slight savory boost. Real butter is essential – don’t substitute with margarine or spreads as they contain water and won’t create the same golden crust. Room temperature butter spreads more easily, but cold butter works too if you let it soften on the bread for a moment before spreading.
Salt – Just a tiny pinch on the buttered bread before grilling elevates all the flavors and enhances that golden crust. This optional addition makes a noticeable difference.
Substitutions: Use gluten-free bread for dietary needs, dairy-free butter and vegan cheese for a plant-based version, or try mayonnaise instead of butter on the outside for an extra crispy, golden crust with a slight tangy flavor.
Equipment Needed
- Heavy-bottomed skillet or griddle – Cast iron or nonstick work best; avoid thin pans that create hot spots
- Spatula – A wide, flat spatula makes flipping easier and prevents the sandwich from falling apart
- Butter knife – For spreading butter evenly on the bread
- Cutting board – For preparing your sandwich
- Plate – For serving your delicious creation
- Optional: Lid or baking sheet – Covering the sandwich with a lid traps heat and helps cheese melt faster

Grilled Cheese Sandwich Recipe
- Total Time: 9 minutes
- Yield: 1 sandwich (easily multiplied) 1x
- Diet: Vegetarian
Description
The ultimate grilled cheese sandwich with perfectly golden, buttery bread and gooey melted cheese. This foolproof recipe delivers restaurant-quality results with simple ingredients and an easy technique that works every time.
Ingredients
- 2 slices bread (white, sourdough, whole wheat, or your choice)
- 2 tablespoons butter, softened and divided
- 2–3 slices cheese (American, cheddar, or your favorite melting cheese, about 2 ounces)
- Pinch of salt (optional)
Instructions
- Prepare your ingredients. Remove butter from the refrigerator and let it soften slightly for easier spreading. If you’re using block cheese, slice it into even pieces about 1/4-inch thick. Having everything ready before you start cooking ensures perfect timing.
- Butter the bread. Spread butter generously on one side of each bread slice, making sure to cover all the way to the edges. This edge-to-edge coverage ensures even browning and prevents dry spots. If using salt, sprinkle a tiny pinch over the buttered surfaces.
- Heat your skillet. Place a heavy-bottomed skillet or griddle over medium heat. Let it preheat for 2-3 minutes – the pan should be hot enough that a drop of water sizzles gently but doesn’t smoke. Medium heat is crucial for giving the cheese time to melt while the bread browns.
- Assemble the sandwich. Place one slice of bread butter-side down in the preheated skillet. Immediately layer your cheese slices on top of the bread in the pan, making sure they don’t extend beyond the edges. Place the second slice of bread on top, butter-side up. The heat will already start working on that bottom slice.
- Cook the first side. Let the sandwich cook undisturbed for 3-4 minutes. Resist the urge to press down on the sandwich or peek too early. You’ll know it’s ready to flip when the edges start to turn golden and you can slide a spatula underneath easily. The bread should be deep golden brown.
- Flip carefully. Using a wide spatula, carefully flip the sandwich in one smooth motion. Cook the second side for another 2-3 minutes until equally golden brown and the cheese is fully melted.
- Check for doneness. The sandwich is perfect when both sides are golden brown and crispy, and you can see melted cheese just beginning to ooze from the edges. If the cheese needs more melting time but the bread is already golden, reduce heat to low and cover with a lid for 30 seconds.
- Rest and serve. Remove the sandwich from the skillet and let it rest on a cutting board for 30 seconds – this allows the cheese to set slightly so it doesn’t all run out when you cut. Slice diagonally and serve immediately while hot and gooey.
Notes
- Temperature is everything: Too hot and the bread burns before cheese melts; too low and the bread gets greasy without crisping. Medium heat is the sweet spot.
- Don’t rush the flip: Wait until you see golden edges and can easily slide a spatula under the sandwich.
- For extra melty cheese: Cover the pan with a lid for the last 30-60 seconds of cooking to trap heat.
- Multiple sandwiches: Keep finished sandwiches warm in a 200°F oven while you cook additional batches.
- Cheese varieties: Mixing cheeses creates the best flavor – try 1 slice American + 1 slice sharp cheddar.
- Prep Time: 3 minutes
- Cook Time: 6 minutes
- Category: Lunch
- Method: Stovetop
- Cuisine: American
Nutrition
- Serving Size: 1 sandwich
- Calories: 440
- Sugar: 4g
- Sodium: 820mg
- Fat: 28g
- Saturated Fat: 16g
- Unsaturated Fat: 10g
- Trans Fat: 0.5g
- Carbohydrates: 32g
- Fiber: 2g
- Protein: 15g
- Cholesterol: 75mg
Tips & Variations
Gourmet Grilled Cheese Variations:
- Pizza Grilled Cheese: Add pepperoni, mozzarella, and a sprinkle of Italian seasoning between the cheese layers
- Bacon Lover’s: Layer crispy bacon strips and use a combination of cheddar and gouda
- Caprese Style: Use fresh mozzarella, sliced tomatoes, and fresh basil leaves
- BBQ Chicken: Add shredded rotisserie chicken mixed with BBQ sauce
- Mushroom & Swiss: Sauté mushrooms and onions, use Swiss and gruyere cheese
- Jalapeño Popper: Add cream cheese, diced jalapeños, and cheddar
- Apple & Brie: Thin apple slices with brie cheese on sourdough
- Mac and Cheese Grilled Cheese: Use leftover mac and cheese as filling with extra cheddar
Bread Options: Use sourdough for tangy flavor, rye for a distinctive taste, brioche for richness, Texas toast for extra thickness, ciabatta for rustic texture, or croissants for an ultra-indulgent treat.
Healthier Swaps: Use whole grain bread, reduce butter to 1 tablespoon total, choose reduced-fat cheese, or add vegetables like spinach, tomatoes, or avocado for extra nutrients.
Pro Chef Tips
Use room temperature cheese – Cold cheese takes longer to melt and can result in burnt bread before the cheese is properly melted. Let cheese sit out for 15-20 minutes before cooking.
Shred your own cheese – Pre-shredded cheese contains anti-caking agents that prevent it from melting smoothly. Block cheese, sliced or shredded yourself, creates that perfect cheese pull.
Low and slow wins the race – Professional chefs use medium-low heat and take their time. This gives the cheese ample time to melt completely while the bread toasts to golden perfection.
Cover for melty magic – Place a lid over the sandwich during the last minute of cooking on the first side. The trapped steam helps melt cheese faster and more evenly.
Mayonnaise secret – Many chefs use mayonnaise instead of butter on the outside of the bread. It creates an incredibly crispy, golden crust and is easier to spread. Use about 1 tablespoon per bread slice.
Weight it down – Place a second heavy skillet on top of the sandwich while cooking for extra-crispy bread and better bread-to-cheese contact. Don’t press too hard or cheese will squeeze out.
Mix cheese varieties – Layer two or three different cheeses for complex flavor and optimal texture. Use American cheese as the base for meltability, then add sharp cheddar, gruyere, or fontina for flavor.
Butter the pan too – For extra-crispy results, add a small pat of butter to the pan before placing your sandwich. This creates an even more golden, restaurant-quality crust.
Common Mistakes to Avoid
Using high heat – This is the number one mistake. High heat burns the bread before the cheese melts, leaving you with a charred exterior and cold, solid cheese inside. Always use medium or medium-low heat and be patient.
Skipping the butter on edges – When you don’t butter all the way to the edges of the bread, those spots stay pale and soft instead of achieving that golden, crispy perfection. Spread butter generously from edge to edge.
Flipping too early – If you flip before the first side is properly golden, the sandwich may fall apart or stick to the pan. Wait for deep golden color and for the bread to release easily from the pan.
Using too much cheese – Overstuffing causes cheese to ooze out and burn on the pan, creating a mess and actually leaving less cheese in the sandwich. Stick to 2-3 slices of cheese or about 2 ounces.
Pressing down on the sandwich – Constantly pressing with the spatula squeezes out the melted cheese and compresses the bread. Let the sandwich cook undisturbed except when flipping.
Wrong pan temperature – Starting with a cold pan means the bread absorbs butter and gets greasy. Starting too hot means burnt bread. Always preheat your pan for 2-3 minutes on medium heat.
Cutting too soon – Slicing immediately after cooking causes all the melted cheese to run out. Let the sandwich rest for 30 seconds so the cheese can set slightly while staying gooey.
Storage & Meal Prep
Storing Leftovers: While grilled cheese sandwiches are best enjoyed fresh and hot, you can store leftovers in an airtight container in the refrigerator for up to 2 days. Be aware that the bread will soften and lose its crispiness during storage.
Reheating Instructions: The best way to reheat a grilled cheese is in a skillet over medium-low heat for 2-3 minutes per side. This re-crisps the bread while melting the cheese again. Avoid microwaving as it makes the bread soggy and rubbery. You can also reheat in an air fryer at 350°F for 3-4 minutes, or in a 375°F oven for 8-10 minutes.
Meal Prep Tips: Grilled cheese doesn’t meal prep well as a finished product, but you can prep components ahead. Pre-butter bread slices and store them wrapped in plastic wrap in the refrigerator for up to 3 days. Slice cheese ahead of time and keep refrigerated. When ready to eat, simply assemble and cook fresh.
Shelf Life: Cooked grilled cheese sandwiches maintain best quality for 1-2 days refrigerated. The bread texture deteriorates significantly after this point, though the sandwich is still safe to eat for 3-4 days if properly stored.
Make-Ahead & Freezer Notes
Freezing Grilled Cheese: Yes, you can freeze grilled cheese sandwiches, though the texture won’t be quite as perfect as fresh. Cook sandwiches completely, let them cool to room temperature, wrap individually in plastic wrap and then aluminum foil, and freeze for up to 2 months.
Freezing Uncooked: For better results, assemble sandwiches without buttering the outside, wrap tightly in plastic wrap, and freeze for up to 1 month. When ready to eat, butter the outside and cook from frozen, adding 2-3 extra minutes to the cooking time.
Thawing Instructions: For best texture, thaw frozen cooked sandwiches in the refrigerator overnight, then reheat in a skillet as directed above. You can also reheat directly from frozen in a 350°F oven for 15-20 minutes, flipping halfway through.
Make-Ahead for Parties: For a crowd, assemble multiple sandwiches on a baking sheet, brush tops with melted butter, and bake at 400°F for 10-12 minutes. Flip, butter the other side, and bake another 8-10 minutes. This method lets you make 6-8 sandwiches simultaneously without standing at the stove.
Best Freezing Method: Flash freeze assembled, uncooked sandwiches on a baking sheet for 1-2 hours, then wrap individually. This prevents them from sticking together and makes it easy to grab just one or two at a time.
Serving Suggestions
A perfect grilled cheese sandwich deserves equally delicious accompaniments. Here are my favorite pairings:
Classic Combinations:
- Tomato soup (the ultimate pairing – the acidity cuts through the richness perfectly)
- Creamy potato soup
- French onion soup
- Chicken noodle soup
- Minestrone soup
Fresh Sides:
- Simple green salad with vinaigrette
- Coleslaw
- Pickles (the tangy crunch is perfect with melted cheese)
- Pickle spears or bread and butter pickles
- Fresh fruit like apple slices or grapes
Heartier Accompaniments:
- Sweet potato fries
- Regular French fries
- Potato chips (for that satisfying crunch contrast)
- Onion rings
- Roasted vegetables
Beverages:
- Cold milk
- Iced tea
- Lemonade
- Apple cider (especially in fall)
- Beer or wine for adult gatherings
Make it a Meal: Serve with a cup of soup and side salad for a complete, satisfying lunch or light dinner. Add sliced tomatoes on the side for freshness, or serve with a small portion of pasta salad for a picnic-perfect plate.
FAQs Section
What’s the best cheese for grilled cheese sandwiches? American cheese is the gold standard for meltability and classic flavor, but sharp cheddar, gruyere, fontina, and Havarti all make excellent choices. For the ultimate grilled cheese, use a combination – American cheese for smooth melting plus a flavorful cheese like sharp cheddar or gruyere. Avoid cheeses that don’t melt well like fresh mozzarella, feta, or aged parmesan as the only cheese.
Why is my grilled cheese soggy? Soggy grilled cheese usually results from heat that’s too low, causing the bread to absorb butter without crisping, or from adding wet ingredients like tomatoes without pre-cooking them. Make sure your pan is properly preheated to medium heat, butter the bread all the way to the edges, and if adding moist ingredients, pat them very dry first or sauté them before adding.
Can I make grilled cheese without butter? Yes! Mayonnaise is an excellent substitute that creates an incredibly crispy, golden crust. Use about 1 tablespoon of mayo per bread slice, spread on the outside. You can also use olive oil brushed on the bread, though the flavor will be slightly different. Avoid cooking spray as it doesn’t create the same rich flavor and texture.
How do I get my cheese to melt without burning the bread? The key is using medium or medium-low heat and being patient. Cover the pan with a lid during cooking to trap heat and help the cheese melt faster. Make sure your cheese is at room temperature before cooking, and consider using a cheese that melts easily like American, cheddar, or fontina. If the bread is browning too quickly, reduce the heat immediately.
What type of bread is best for grilled cheese? Any bread that’s sturdy enough to hold melted cheese works well. White sandwich bread is traditional and creates that classic diner-style sandwich. Sourdough adds tangy flavor and hearty texture. Texas toast provides extra thickness for more cheese. Whole wheat offers more fiber and nutrients. Avoid very thin or delicate breads like regular sandwich thins that might tear or become too crispy.
Can I add vegetables or meat to my grilled cheese? Absolutely! Grilled cheese is infinitely customizable. Cook vegetables like tomatoes, mushrooms, or onions before adding to remove excess moisture. Add thinly sliced ham, turkey, or cooked bacon between the cheese layers. Keep additions thin so the sandwich holds together and the cheese can still melt properly. Don’t overstuff or the sandwich becomes difficult to flip and eat.
How do you make grilled cheese for a crowd? For multiple sandwiches, use the oven method: assemble sandwiches on baking sheets, brush tops generously with melted butter, bake at 400°F for 10-12 minutes, flip, butter the other side, and bake another 8-10 minutes until golden. This method allows you to make 6-8 sandwiches at once. Keep finished sandwiches warm in a 200°F oven until serving.
Conclusion
There you have it – the ultimate guide to making the perfect grilled cheese sandwich every single time! This classic comfort food is so much more than just bread and cheese. With the right technique, quality ingredients, and a little patience, you can create restaurant-quality grilled cheese right in your own kitchen.
Whether you stick with the classic version or experiment with gourmet variations, this recipe provides the foundation for grilled cheese success. The crispy, golden-brown exterior and that incredible cheese pull make every bite pure comfort food heaven. It’s a recipe that works for quick weeknight dinners, lazy weekend lunches, or whenever that grilled cheese craving hits.
I’d love to hear how your grilled cheese turns out! What cheese combinations are you trying? Are you team classic American or gourmet gruyere? Drop a comment below with your favorite variations and tips. And if you loved this recipe, please pin it to your favorite Pinterest board so you can find it again easily – and help other home cooks discover the joy of perfect grilled cheese too!
Happy cooking, and may your cheese always be melty and your bread always be golden!