
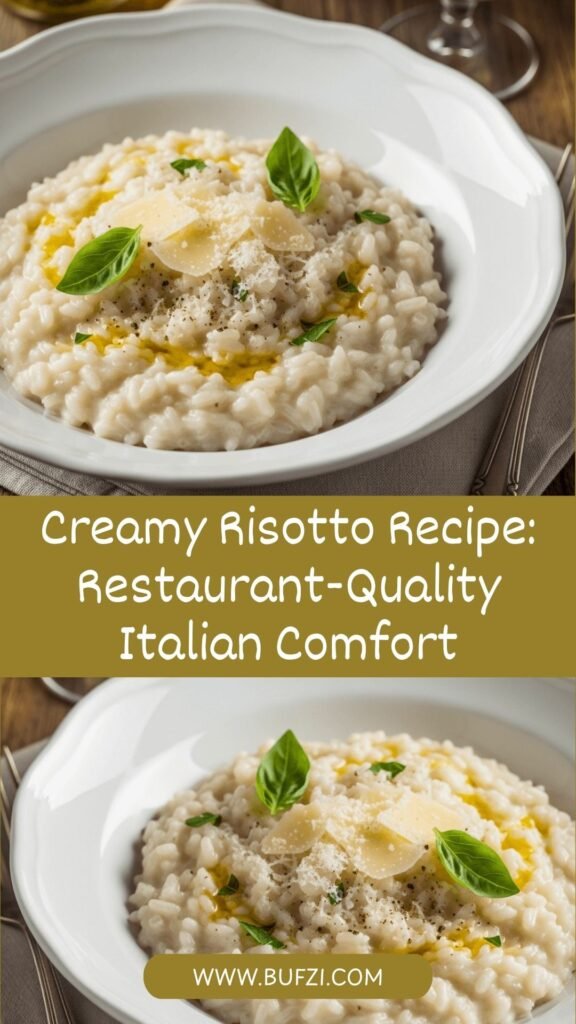
There’s something undeniably luxurious about a perfectly cooked risotto—each grain of rice tender yet toothsome, suspended in a silky, creamy sauce that coats your spoon like velvet. This classic creamy risotto recipe brings authentic Italian comfort food to your home kitchen, transforming humble ingredients into an elegant dish that feels like a warm hug on a plate. While risotto has a reputation for being finicky or time-consuming, this foolproof method breaks down every step so you can confidently create restaurant-quality results.
What makes this easy risotto recipe so special is the technique. Unlike regular rice dishes where you set it and forget it, risotto requires just 20-25 minutes of gentle stirring and attention—but the payoff is absolutely worth it. The rice releases its natural starches as it cooks, creating that signature creamy texture without needing heavy cream. This versatile Italian risotto serves beautifully as a side dish alongside roasted chicken or grilled fish, or as a satisfying vegetarian main course when loaded with seasonal vegetables. It’s perfect for date nights at home, Sunday family dinners, or whenever you want to impress guests with minimal effort and maximum flavor.
History / Background
Risotto is a treasured cornerstone of Northern Italian cuisine, with roots tracing back several centuries to the rice-growing regions of Lombardy, Piedmont, and Veneto. Rice cultivation began in Italy during the 15th century, introduced through trade routes with Spain and the Arab world. The Po Valley’s climate and terrain proved ideal for growing rice, and Italian farmers quickly embraced this versatile grain.
The word “risotto” comes from “riso,” the Italian word for rice, with the diminutive suffix “-otto” suggesting something small or endearing. The cooking technique likely evolved from Spanish paella traditions but developed its own distinct identity in Italian kitchens. By the 18th and 19th centuries, risotto had become a staple in wealthy Milanese households, where it was often enriched with butter, cheese, and saffron—giving birth to the famous Risotto alla Milanese.
The dish gained legendary status partly due to a charming tale from 1574, when a young apprentice working on the stained glass windows of Milan’s Duomo cathedral supposedly added saffron (used for coloring glass) to his master’s daughter’s wedding risotto as a joke. The golden, aromatic result was such a hit that saffron risotto became a regional treasure.
Throughout the centuries, different regions developed their own signature variations: Risotto al Nero di Seppia (squid ink risotto) from Venice, Risotto ai Funghi (mushroom risotto) from Piedmont, and seafood risottos along the coastal areas. What remained constant was the cooking technique—patient stirring, gradual addition of warm stock, and the use of high-starch rice varieties like Arborio, Carnaroli, or Vialone Nano.
Today, risotto represents Italian culinary artistry at its finest—proof that simple, quality ingredients combined with proper technique can create something truly extraordinary. It’s become beloved worldwide as comfort food that’s both rustic and refined, adaptable yet distinctly Italian in character.
Why You’ll Love This Recipe
This isn’t just another rice dish—it’s a transformative cooking experience that yields the most luxuriously creamy, perfectly textured risotto you’ve ever tasted. Even if you’ve never made risotto before or you’ve been intimidated by the process, this recipe will guide you step-by-step to foolproof success.
Here’s why this creamy Italian risotto will become your new favorite dish:
- Incredibly Creamy Without Cream – The magic comes from the rice’s natural starches, creating velvety texture without heavy dairy
- Surprisingly Simple – Just 7 basic ingredients you probably already have in your pantry
- Ready in 30 Minutes – Faster than ordering takeout and infinitely more satisfying
- Naturally Gluten-Free – Perfect for those avoiding gluten without sacrificing flavor or comfort
- Endlessly Versatile – This base recipe adapts to countless variations with vegetables, proteins, or herbs
- Restaurant-Quality at Home – Impress your family and guests with professional-level results
- Therapeutic to Make – The rhythmic stirring process is actually quite relaxing and meditative
- Budget-Friendly Elegance – Inexpensive ingredients create a dish that feels luxurious
- Vegetarian-Friendly – Easily adaptable to vegetarian diets with vegetable stock
- One-Pot Wonder – Minimal cleanup for maximum deliciousness
Ingredient Notes
The beauty of classic risotto lies in its simplicity, but each ingredient plays a crucial role in achieving that perfect creamy consistency.
Arborio Rice – This is the key to authentic risotto. Arborio is a short-grain Italian rice with high starch content that creates the signature creamy texture. The grains are plump and pearly white with a visible white dot in the center. While you can substitute Carnaroli rice (slightly firmer texture, preferred by many Italian chefs) or Vialone Nano rice (traditional in Venice), don’t use long-grain rice, jasmine rice, or basmati—they won’t release enough starch and you’ll end up with something more like rice soup. Arborio is widely available in most grocery stores in the rice or international aisle.
Chicken or Vegetable Stock – Quality stock is non-negotiable for flavorful risotto. Homemade stock is ideal, but good-quality low-sodium boxed or canned stock works beautifully. Avoid using bouillon cubes if possible—they’re often too salty and can overpower the delicate rice. For vegetarian risotto, use vegetable stock or mushroom stock for extra depth. The stock must be kept warm throughout the cooking process, which helps the rice cook evenly and absorb liquid faster.
White Wine – Dry white wine adds acidity and brightness that balances the rich, creamy texture. Use something you’d actually drink—Pinot Grigio, Sauvignon Blanc, or dry Vermouth all work wonderfully. The alcohol cooks off, leaving behind complex flavor notes. If you prefer not to use wine, substitute with additional stock mixed with a tablespoon of fresh lemon juice for acidity.
Onion or Shallot – Finely diced yellow onion provides a sweet, aromatic base. Shallots are more traditional and offer a milder, more refined flavor that many chefs prefer, but yellow onion is perfectly acceptable and more budget-friendly. Avoid red onions (too sharp) or sweet onions (too mild).
Butter – Unsalted butter is essential for both sautéing the rice and finishing the dish (a technique called “mantecatura”). The butter adds richness and helps create that glossy, silky texture. European-style butter with higher fat content is even better. For dairy-free options, use olive oil throughout, though the texture won’t be quite as luscious.
Parmesan Cheese – Authentic Parmigiano-Reggiano is the gold standard—aged 24+ months for complex, nutty flavor. Always grate it fresh just before using; pre-grated cheese contains anti-caking agents that prevent smooth melting. The cheese should be stirred in at the very end, off heat, to prevent it from becoming stringy. For vegetarian diets, ensure your Parmesan is made without animal rennet, or substitute with aged Pecorino Romano or nutritional yeast.
Olive Oil – Extra-virgin olive oil is used for the initial sauté. It prevents the butter from burning and adds subtle fruity notes. Use a good-quality but not premium oil—you’re cooking with it, not drizzling it raw.
Salt and Pepper – Since you’ll be reducing stock and concentrating flavors, go easy on salt initially. Season lightly at the beginning and adjust at the end. Freshly cracked black pepper adds a pleasant bite without overwhelming the delicate flavors.
Equipment Needed
Risotto doesn’t require fancy equipment, but having the right tools makes the process much smoother.
- Heavy-Bottomed Saucepan or Dutch Oven – A 4-6 quart pan with thick bottom distributes heat evenly and prevents scorching. The wide base allows for proper evaporation and stirring. Stainless steel or enameled cast iron works best.
- Second Saucepan – For keeping your stock warm throughout the cooking process
- Wooden Spoon or Heat-Resistant Silicone Spatula – For the constant stirring. Wood is traditional and doesn’t conduct heat, keeping your hand comfortable during the stirring process.
- Ladle – For adding stock gradually. A ½ cup ladle is ideal for controlled additions.
- Sharp Knife and Cutting Board – For finely dicing onions and other additions
- Box Grater or Microplane – For grating fresh Parmesan cheese
- Measuring Cups and Spoons – For accuracy, especially when you’re learning the technique
- Timer – Helpful for tracking cooking times until you develop a feel for doneness
- Serving Bowls – Warm shallow bowls show off risotto beautifully and help it stay warm while eating
Creamy Risotto Recipe
- Total Time: 30 minutes
- Yield: 4 servings 1x
- Diet: Gluten Free
Description
This classic creamy risotto recipe delivers authentic Italian restaurant-quality results with simple ingredients and straightforward technique. The Arborio rice becomes perfectly tender with a slight bite, suspended in a silky, luxurious sauce created by the rice’s natural starches. Ready in just 30 minutes with patient stirring and love.
Ingredients
- 6 cups chicken stock or vegetable stock (low-sodium)
- 3 tablespoons unsalted butter, divided
- 2 tablespoons extra-virgin olive oil
- 1 medium yellow onion or 2 large shallots, finely diced
- 2 cups Arborio rice
- ¾ cup dry white wine (Pinot Grigio or Sauvignon Blanc)
- 1 cup freshly grated Parmigiano-Reggiano cheese
- 1 teaspoon kosher salt (adjust to taste)
- ½ teaspoon freshly ground black pepper
- 2 tablespoons fresh parsley, chopped (for garnish, optional)
Instructions
- Warm the stock by pouring it into a medium saucepan and bringing it to a gentle simmer over medium-low heat. Reduce heat to low to keep it warm throughout the cooking process. This is crucial—cold stock will shock the rice and slow down cooking significantly.
- Prepare the base by heating 2 tablespoons of butter and the olive oil in a large, heavy-bottomed saucepan over medium heat. Once the butter has melted and starts to foam, add the finely diced onion or shallot. Cook, stirring frequently, for 3-4 minutes until softened and translucent but not browned. The onions should look glossy and release a sweet aroma.
- Toast the rice by adding the Arborio rice to the pot. Stir constantly for 2-3 minutes, coating every grain with the butter-oil mixture. The rice should become slightly translucent around the edges and make a clicking sound against the pot—this is called “tostatura” and it’s essential for proper texture. You should smell a light, nutty aroma. Don’t skip this step—it seals the grains and helps them maintain structure.
- Deglaze with wine by pouring in the white wine all at once. Stir constantly while the wine bubbles vigorously and is absorbed into the rice, about 2-3 minutes. The alcohol will cook off and the liquid will almost completely evaporate. The kitchen will smell amazing—this is where the depth of flavor begins building.
- Begin adding stock by adding one ladle (about ½ cup) of the warm stock to the rice. Stir constantly until the liquid is almost completely absorbed—you should be able to drag your spoon through the rice and see the bottom of the pan briefly before the rice flows back. The mixture should look creamy, not soupy or dry.
- Continue the process by adding another ladle of stock and stirring until absorbed. Repeat this process, adding stock one ladle at a time and stirring constantly, for about 18-20 minutes. Maintain a gentle simmer—the rice should be bubbling gently but not violently boiling. This is the meditative part where the magic happens. Stir in a smooth, rhythmic motion, making sure to scrape the bottom and sides of the pan.
- Test for doneness after about 18 minutes by tasting a grain of rice. It should be tender with a very slight firmness at the center (al dente)—creamy on the outside with just a tiny bit of resistance when you bite down. The risotto itself should be loose and flow slowly when you tilt the pan—not stiff or gloppy. If it’s still too firm, continue adding stock and stirring for another 3-5 minutes.
- Finish with butter and cheese by removing the pan from heat once the rice reaches perfect doneness. Add the remaining 1 tablespoon of butter and the freshly grated Parmesan cheese. Stir vigorously for 1-2 minutes—this technique called “mantecatura” creates extra creaminess and a glossy sheen. The risotto should be fluid and creamy, moving like slow lava when you tilt the pan (all’onda or “like a wave”).
- Season and adjust by tasting and adding salt and pepper as needed. Remember that the cheese and stock already contain salt, so go carefully. If the risotto seems too thick, stir in a splash more warm stock to loosen it.
- Serve immediately by dividing among warm shallow bowls. Garnish with fresh parsley and additional grated Parmesan if desired. Risotto waits for no one—it continues absorbing liquid and thickens as it sits, so serve and eat right away for the best texture.
Notes
- Stock Temperature: Keeping the stock warm is crucial. Cold stock will lower the cooking temperature and extend cooking time significantly, potentially resulting in mushy rice.
- Constant Stirring: While you don’t need to stir every single second, frequent stirring is essential for releasing the starches that create creaminess. Set aside the 25-30 minutes without distractions.
- Al Dente Texture: The rice should have a slight firmness at the center. Overcooked risotto becomes mushy and loses its signature texture.
- Consistency: Properly finished risotto should flow slowly when you tilt the pan. If it’s stiff, add more warm stock. If it’s too soupy, simmer for another minute while stirring.
- Parmesan Addition: Always add cheese off heat to prevent it from becoming stringy and clumping.
- Prep Time: 5 minutes
- Cook Time: 25 minutes
- Category: Main Dish
- Method: Stovetop
- Cuisine: Italian
Nutrition
- Serving Size: 1½ cups
- Calories: 445
- Sugar: 3g
- Sodium: 890mg
- Fat: 15g
- Saturated Fat: 7g
- Unsaturated Fat: 7g
- Trans Fat: 0g
- Carbohydrates: 58g
- Fiber: 2g
- Protein: 14g
- Cholesterol: 30mg
Tips & Variations
This versatile base recipe is your canvas for endless delicious variations. Once you master the basic technique, you can customize it to your taste and what’s in season.
Mushroom Risotto: Sauté 1 pound sliced mushrooms (cremini, shiitake, or mixed wild mushrooms) in butter until golden and caramelized. Remove and set aside. Make the risotto as directed, then stir in the mushrooms during the last few minutes of cooking. Finish with fresh thyme and extra Parmesan.
Lemon Asparagus Risotto: Blanch 1 pound asparagus cut into 1-inch pieces. Add to the risotto in the last 5 minutes of cooking. Finish with lemon zest, lemon juice, and fresh basil for a bright spring dish.
Butternut Squash Risotto: Roast cubed butternut squash with olive oil and sage until caramelized. Stir into the finished risotto along with a pinch of nutmeg. Top with crispy sage leaves and toasted pumpkin seeds.
Seafood Risotto: Sauté shrimp, scallops, or a mix of seafood separately with garlic. Fold into the finished risotto and garnish with fresh parsley and lemon. Use fish stock instead of chicken stock for deeper ocean flavor.
Sun-Dried Tomato and Spinach: Stir in chopped sun-dried tomatoes halfway through cooking and fresh baby spinach at the end. The spinach will wilt beautifully in the hot risotto. Add a pinch of red pepper flakes for subtle heat.
Pea and Mint Risotto: Add frozen peas during the last 5 minutes of cooking. Finish with fresh mint, lemon zest, and ricotta cheese for a vibrant, fresh variation perfect for spring and summer.
Truffle Risotto: Finish the basic risotto with a drizzle of white truffle oil and shaved fresh truffle if you’re feeling luxurious. Use mushroom stock for extra umami depth.
Saffron Risotto (Risotto alla Milanese): Steep a pinch of saffron threads in ¼ cup warm stock, then add to the risotto about halfway through cooking for stunning golden color and subtle floral flavor.
Vegan Risotto: Use vegetable stock, replace butter with olive oil, and substitute nutritional yeast or vegan Parmesan for cheese. The technique remains exactly the same.
Pro Chef Tips
These insider techniques will elevate your risotto from good to absolutely exceptional—the kind that makes people ask for your secret.
The Rice-to-Stock Ratio: A general rule is 3:1 liquid to rice, but you may not use all the stock. Always prepare more than you think you’ll need (6 cups is usually perfect for 2 cups rice), but stop adding when the rice reaches perfect doneness—texture matters more than using all the liquid.
The “Tostatura” Makes All the Difference: Toasting the rice in butter and oil before adding liquid is non-negotiable. This step seals the exterior of each grain, helping it maintain structure and creating a pleasantly firm center (al dente) while the outside becomes creamy. You’ll know it’s ready when the grains become slightly translucent and smell nutty.
Maintain Consistent Temperature: The risotto should simmer gently and steadily throughout cooking—not boiling rapidly (which cooks the outside too fast) or barely bubbling (which extends cooking time and can result in mushy rice). Adjust your heat as needed to maintain a gentle, steady bubble.
The “All’Onda” Test: Properly finished risotto should move like a wave (all’onda in Italian) when you shake the pan—flowing slowly and settling back down smoothly. If your risotto sits stiffly in the pan, it’s too thick. Add warm stock or water a few tablespoons at a time until it reaches the right consistency.
Vigorous Mantecatura: When you add the final butter and cheese, stir vigorously and quickly for 1-2 minutes. This emulsifies everything together, incorporating air and creating an incredibly silky, glossy texture. Don’t be gentle here—beat it energetically with your wooden spoon.
Room Temperature Cheese: If your Parmesan is very cold from the refrigerator, it won’t incorporate as smoothly. Let it sit at room temperature for 15-20 minutes before adding, or grate it very finely so it melts quickly.
Timing is Everything: Risotto begins absorbing liquid and thickening the moment you stop stirring. Plan your meal so the risotto is the last thing ready, and everyone is sitting at the table ready to eat the moment you plate it.
Layer Your Flavors: If adding vegetables or proteins, season them separately and properly before incorporating. This builds complex, well-rounded flavor rather than relying on the risotto base alone to do all the work.
Save Your Arm: While constant attention is needed, you don’t need to stir absolutely every second. Stir consistently and rhythmically every 15-20 seconds, making sure to scrape the bottom and sides. Take brief breaks to add stock or take a sip of wine—just don’t walk away completely.
Common Mistakes to Avoid
Even experienced home cooks make these risotto mistakes. Here’s how to sidestep the most common pitfalls and achieve perfect results.
Using Cold Stock: This is the number one mistake that throws off timing and texture. Cold stock drops the temperature every time you add it, extending cooking time and potentially resulting in unevenly cooked rice. Always keep your stock at a gentle simmer in a separate pot throughout the entire cooking process.
Not Toasting the Rice Properly: Skipping or rushing the “tostatura” (toasting step) results in rice that breaks down too much and becomes mushy. Take the full 2-3 minutes to toast the rice in the butter and oil until it’s translucent around the edges and smells nutty—this step is fundamental to proper texture.
Adding Too Much Liquid at Once: Dumping in multiple ladles of stock or adding the next ladle before the previous one is absorbed will result in boiled rice rather than risotto. The slow, gradual addition of liquid allows the rice to release its starches properly, creating that signature creaminess. Be patient and add stock one ladle at a time.
Not Stirring Enough: Insufficient stirring means the starches won’t release properly, the rice may stick and scorch on the bottom, and you’ll miss the creamy texture that makes risotto special. Plan to spend 25-30 minutes standing at the stove, stirring consistently. Put on music or a podcast and embrace it as a mindful cooking experience.
Overcooking the Rice: Mushy, blown-out rice has lost its structure completely. Properly cooked risotto should be al dente—tender but with a slight firmness when you bite into a grain. Start testing at 18 minutes and pull it from heat as soon as it reaches that perfect texture. Remember, it continues cooking slightly from residual heat.
Adding Cheese on Heat: If you add Parmesan while the risotto is still on the burner, the cheese can become stringy and clump instead of melting smoothly into the rice. Always remove from heat first, then add butter and cheese, stirring vigorously to emulsify everything together beautifully.
Making It Too Far in Advance: Risotto is meant to be eaten immediately—it’s not a dish that holds well. As it sits, it continues absorbing liquid and becomes thick and stodgy. If you must wait, keep it slightly looser than ideal and reheat gently with additional warm stock, stirring constantly.
Storage & Meal Prep
While risotto is best enjoyed fresh, you can successfully store and repurpose leftovers with the right techniques.
Refrigerator Storage: Let leftover risotto cool to room temperature (within 2 hours), then transfer to an airtight container. Store in the refrigerator for up to 3 days. The risotto will firm up considerably as it chills—this is completely normal as the starches set.
Reheating Stovetop Method (Best): Place cold risotto in a saucepan over medium-low heat. Add warm stock or water a few tablespoons at a time, stirring constantly until the risotto loosens and heats through. It will never be quite as creamy as when first made, but this method comes close. You may need to add 1/2 to 1 cup of liquid total to restore the proper consistency. Finish with a pat of butter and freshly grated Parmesan.
Reheating Microwave Method: Place risotto in a microwave-safe bowl and add 2-3 tablespoons of stock or water. Cover with a damp paper towel and microwave on 50% power in 1-minute intervals, stirring between each, until heated through. While convenient, this method doesn’t restore the texture as well as stovetop reheating.
Repurposing Leftovers: Cold, firm risotto is actually perfect for making arancini (fried risotto balls). Form the cold risotto into balls, stuff with mozzarella if desired, coat in breadcrumbs, and fry until golden and crispy. You can also form leftover risotto into patties and pan-fry them for risotto cakes—delicious for breakfast topped with a poached egg.
Meal Prep Considerations: While traditional risotto doesn’t lend itself to make-ahead preparation, you can prep your ingredients (dice onions, grate cheese, measure rice) and warm your stock ahead of time. The actual cooking must happen just before serving for optimal texture.
Make-Ahead & Freezer Notes
Risotto’s delicate texture makes it challenging for advance preparation, but there are some strategies that work.
Partial Cooking Method: You can cook risotto about 80% of the way through (until rice is still quite firm), spread it on a baking sheet to cool quickly, then refrigerate for up to 24 hours. When ready to serve, reheat with warm stock, stirring constantly, and finish cooking until tender. Add the butter and cheese at the end as usual. The texture won’t be absolutely perfect, but it’s quite good and helpful for entertaining.
Freezing Cooked Risotto: While not ideal, risotto can be frozen for up to 2 months. Let it cool completely, portion into airtight containers or freezer bags, and freeze flat for easier storage. Thaw overnight in the refrigerator before reheating. Add plenty of warm stock while reheating to restore creaminess. The rice texture will be softer than fresh, but the flavor remains good.
Best Make-Ahead Strategy for Entertaining: Prepare all your ingredients (mise en place) well before guests arrive. Keep the stock warm on the back burner. Start cooking the risotto about 30 minutes before you plan to serve the meal. Most of the stirring requires attention but not intense concentration, so you can still chat with guests while cooking.
Freezing Raw Components: You can freeze homemade stock in measured portions (1-cup servings are handy), thaw what you need, and have fresh risotto any time. You can also freeze sautéed mushrooms, roasted butternut squash, or other add-ins separately, making weeknight risotto prep much faster.
Arancini Prep: If you’re specifically making risotto to transform into arancini later, this actually works beautifully. Make the risotto, let it cool and firm up in the refrigerator overnight (or even 2-3 days), then form and fry. The firmed-up texture is actually ideal for this purpose.
Serving Suggestions
Risotto is remarkably versatile, working equally well as an elegant side dish or a satisfying main course depending on how you serve it.
As a Main Course: Serve generous portions (about 1½ to 2 cups) with a simple arugula salad dressed with lemon vinaigrette and shaved Parmesan. Add crusty Italian bread for soaking up every creamy bit. A glass of the same white wine you cooked with makes the perfect pairing.
As a Side Dish: Smaller portions (about 1 cup) pair beautifully with Osso Buco (traditional Milanese pairing), roasted chicken, pan-seared pork chops, grilled lamb chops, or any protein that benefits from a rich, creamy accompaniment.
Seafood Pairings: Risotto is a natural match for seafood. Serve alongside grilled shrimp, pan-seared scallops, seared salmon, or whole roasted fish. The mild, creamy rice balances the delicate seafood perfectly.
Italian Feast: Build a complete Italian dinner with risotto as the primo (first course), followed by a secondo (second course) of grilled meat or fish, and finished with a light dessert like panna cotta or tiramisu.
Vegetarian Main: Load your risotto with roasted vegetables, sautéed mushrooms, or wilted greens to transform it into a hearty vegetarian entrée. Serve with a simple Caprese salad (fresh mozzarella, tomatoes, and basil) and garlic bread.
Wine Pairings: The white wine you cook with is an excellent drinking choice, but risotto also pairs well with light-bodied reds like Pinot Noir or Chianti, especially with mushroom or meat-based variations. For richer preparations, try a Chardonnay with good acidity.
Garnishes That Elevate: Beyond parsley and Parmesan, consider finishing your risotto with crispy prosciutto, toasted pine nuts, truffle oil drizzle, microgreens, edible flowers, or a drizzle of aged balsamic reduction for visual appeal and added complexity.
Complete Italian Menu: Start with bruschetta or caprese salad, serve the risotto as your main or side, offer roasted vegetables on the side, and finish with gelato or affogato.
FAQs Section
Do I really need to stir risotto constantly?
While “constant” stirring is often cited, you don’t need to stir every single second. However, you do need to stir frequently and consistently—every 15-20 seconds—throughout the 20-25 minute cooking process. This frequent agitation serves multiple purposes: it releases the rice’s starches (creating creaminess), prevents sticking and scorching on the bottom, and ensures even cooking. You can take brief breaks to add more stock or sip wine, but plan to stay at the stove rather than multitasking elsewhere. Many cooks find the rhythmic stirring meditative and relaxing once they embrace it.
Can I make risotto ahead of time?
Traditional risotto is really meant to be cooked and served immediately for optimal creamy texture. However, you can par-cook risotto until it’s about 80% done, spread it on a baking sheet to cool, refrigerate, then finish cooking just before serving. The texture won’t be quite as perfect as freshly made, but it’s acceptable for entertaining when timing is crucial. Alternatively, fully cooked leftover risotto can be repurposed into arancini (fried risotto balls) or risotto cakes, where the firmer texture is actually desirable.
What if I don’t have white wine?
White wine adds acidity and depth, but it’s not absolutely required. You can substitute with additional stock plus 1 tablespoon of fresh lemon juice or white wine vinegar for the acidic brightness. Dry vermouth is another excellent substitute—it’s essentially fortified wine and works beautifully in risotto. Some cooks successfully use a splash of apple cider vinegar. Just avoid sweet wines or red wine, which will significantly alter the flavor profile and color.
Why is my risotto gluey or gummy?
Gluey risotto usually results from one of three issues: using the wrong type of rice (long-grain rice or pre-cooked rice won’t work), overcooking until the grains completely break down and release too much starch, or over-stirring too vigorously. Make sure you’re using proper risotto rice (Arborio, Carnaroli, or Vialone Nano), cooking just until al dente, and stirring rhythmically but not aggressively. The risotto should be creamy but the individual grains should still be distinct and have slight firmness.
Can I use brown rice or other grains?
Traditional risotto requires high-starch, short-grain Italian rice varieties to achieve the characteristic creamy texture. Brown rice, while healthier, has the bran layer intact which prevents proper starch release and requires significantly longer cooking time (45-50 minutes). The result won’t have the same creamy consistency. That said, some cooks make “risotto-style” dishes with farro, barley, or even quinoa using similar techniques—just know these are inspired by risotto rather than authentic risotto, and the texture will be different.
How do I know when the risotto is done?
Proper doneness involves both texture and consistency. Bite into a grain of rice—it should be tender but with a slight firmness at the center (al dente), not crunchy or mushy. The risotto itself should flow slowly like lava when you tilt the pan (all’onda, meaning “like a wave”), neither too stiff nor too soupy. Start testing around the 18-minute mark. Remember that risotto continues to absorb liquid after you remove it from heat, so err slightly on the looser side.
Why do I need to keep the stock warm?
Adding cold stock to hot risotto dramatically lowers the cooking temperature, which extends the cooking time and prevents the rice from cooking evenly. Cold liquid shocks the rice, potentially causing the exterior to overcook before the interior is tender. Keeping the stock at a gentle simmer means it integrates seamlessly, maintaining consistent cooking temperature and allowing the rice to release its starches properly for maximum creaminess. It’s a small step that makes a significant difference in the final result.
Conclusion
Congratulations—you now have all the knowledge you need to create absolutely stunning, restaurant-quality creamy risotto right in your own kitchen! While risotto has a reputation for being intimidating or fussy, the truth is that with proper technique and a bit of patience, anyone can master this classic Italian comfort dish. The rhythmic process of stirring and gradually adding stock becomes almost meditative, and the reward is one of the most satisfying, luxurious dishes you can make from simple ingredients.