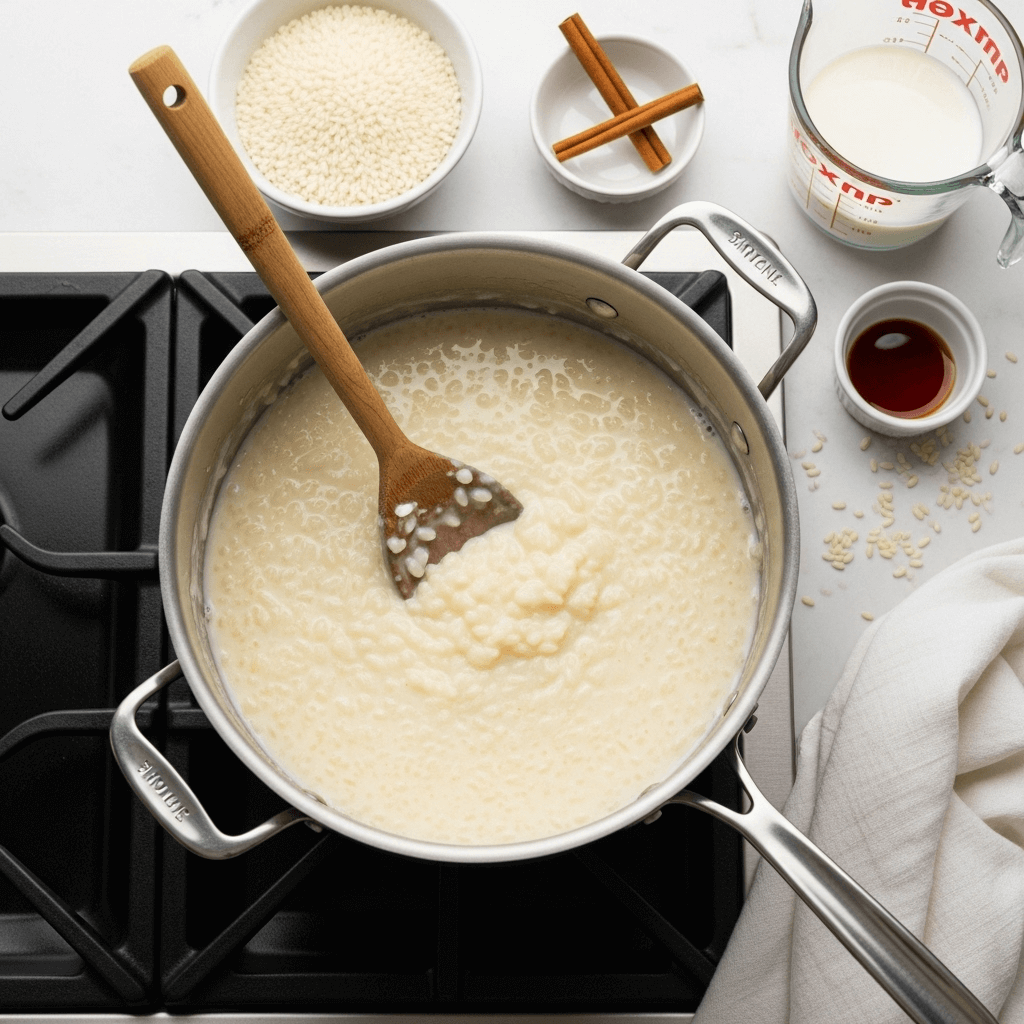
Get ready to fall in love with the ultimate comfort dessert—this easy rice pudding recipe transforms simple pantry staples into a creamy, dreamy bowl of pure nostalgia. This old-fashioned rice pudding is everything you remember from childhood (or wish you did): tender rice suspended in a luscious vanilla-scented custard, sweetened just right, and finished with a generous sprinkle of cinnamon. It’s the kind of dessert that hugs you from the inside out.
What makes this creamy rice pudding truly special is its perfect texture—soft, creamy rice that’s neither too thick nor too soupy, with just enough sweetness to satisfy without being cloying. Unlike those instant pudding mixes or pre-made cups, this homemade rice pudding delivers authentic flavor and comforting richness that only comes from slow simmering on the stovetop. The gentle cooking process allows the rice to release its natural starches, creating that signature creamy consistency without any artificial thickeners.
This classic dessert rice pudding works beautifully for so many occasions: cozy family dinners when you want something sweet and comforting, weekend meal prep for easy weekday desserts, potluck contributions that everyone loves, holiday gatherings where tradition matters, or simply those evenings when you’re craving something warm and nostalgic. Serve it warm right off the stove, chilled from the fridge, or somewhere in between—it’s delicious at any temperature.
Whether you’re making rice pudding for the first time or looking to perfect your grandma’s recipe, this foolproof method delivers consistent, delicious results every single time. Let’s make the creamiest, most comforting rice pudding you’ve ever tasted!
History / Background
Rice pudding is one of the world’s oldest and most universal desserts, with variations appearing in nearly every culture that cultivates rice. Archaeological evidence suggests rice pudding dates back thousands of years, with early versions appearing in ancient India, China, and the Middle East. As rice cultivation spread along trade routes, so did rice pudding recipes, adapting to local ingredients and tastes.
The European version of rice pudding that Americans know today has roots in medieval England, where it was called “rice pottage.” Initially, rice pudding was considered a luxury because rice was an expensive imported commodity. Only wealthy households could afford to use precious rice for desserts. By the Tudor period (1485-1603), rice pudding had become a more common dish, often flavored with rosewater, saffron, or honey.
British colonists brought rice pudding traditions to America, where it evolved into the comforting, cinnamon-dusted version we know today. The dish gained particular popularity in the American South, where rice cultivation thrived. During the Great Depression, rice pudding became even more beloved as an economical dessert that could stretch limited ingredients into a satisfying treat for the whole family.
Different cultures developed their own distinctive versions: Indian kheer is perfumed with cardamom and saffron; Spanish arroz con leche includes cinnamon and lemon zest; Scandinavian risgrynsgröt is traditionally served at Christmas with hidden almonds; and Middle Eastern rice puddings often feature orange blossom water and pistachios. Each variation reflects local flavors while maintaining the essential appeal of creamy, sweet rice.
In mid-20th century America, rice pudding became a diner and cafeteria staple, often served in individual portions topped with whipped cream or a maraschino cherry. Grandmother’s rice pudding became synonymous with home cooking and comfort. Today, while instant and pre-made versions exist, homemade rice pudding remains a beloved comfort food that connects us to culinary traditions spanning millennia and continents.
The enduring popularity of rice pudding speaks to its fundamental appeal: simple ingredients transformed through patience and care into something greater than the sum of its parts. It’s peasant food elevated to comfort food classic.
Why You’ll Love This Recipe
This isn’t just another rice pudding recipe—this is THE creamy, dreamy version that will transport you straight to grandma’s kitchen with every spoonful.
Here’s why this homemade rice pudding will become your family’s favorite:
- Incredibly creamy texture – The perfect consistency that’s thick but still spoonable, never gluey or soupy
- Simple pantry ingredients – Made with rice, milk, sugar, eggs, and vanilla you probably already have
- Budget-friendly comfort – Costs just a few dollars to make enough for the whole family
- Naturally gluten-free – Perfect for those avoiding gluten without any modifications
- Nostalgic and comforting – Tastes just like the rice pudding from your childhood memories
- Easy stovetop method – No baking required, just gentle stirring on the stove
- Customizable sweetness – Adjust sugar to your preference for lighter or richer dessert
- Perfect temperature flexibility – Delicious served warm, cold, or at room temperature
- Great for meal prep – Keeps well in the fridge for easy desserts all week
- Kid-approved – Even picky eaters love the mild, sweet flavor and soft texture
- Impressive yet simple – Looks and tastes fancy but requires minimal skill
- Versatile serving options – Enjoy plain or dressed up with fruits, nuts, and spices
- Uses leftover rice – Perfect way to use up extra cooked rice from dinner
Ingredient Notes
The magic of rice pudding lies in transforming humble ingredients into something extraordinary:
White Rice – The foundation of your pudding. Medium-grain white rice (like Calrose) or short-grain rice works best because they’re starchy and create a creamy texture. Long-grain rice like basmati or jasmine can work but won’t be quite as creamy. Arborio rice (risotto rice) makes exceptionally creamy pudding. Do NOT use instant or minute rice—they turn mushy. You can use leftover cooked white rice (see variations), though starting with uncooked rice gives you more control.
Whole Milk – Creates the rich, creamy base. Whole milk (full-fat) provides the best flavor and creamiest texture. You can use 2% milk but the pudding will be less rich. Avoid skim milk—it’s too watery. For dairy-free rice pudding, use full-fat coconut milk or oat milk (the creamiest non-dairy options).
Heavy Cream – Optional but highly recommended for extra richness and silky texture. Half-and-half works too. If you want lighter pudding, you can omit it and use all milk, though texture won’t be quite as luscious.
Granulated Sugar – Sweetens the pudding to perfection. The amount here creates moderately sweet pudding—adjust to taste. Brown sugar can substitute for deeper, caramel-like sweetness.
Eggs or Egg Yolks – Create custard-like richness and help thicken the pudding. Whole eggs work fine, but using just yolks creates an even richer, more luxurious texture. The eggs must be tempered (gradually warmed) before adding to hot milk or they’ll scramble.
Vanilla Extract – Essential for that classic rice pudding flavor! Pure vanilla extract tastes significantly better than imitation. A full tablespoon creates pronounced vanilla flavor—reduce to 1-2 teaspoons if you prefer more subtle vanilla.
Salt – Just a pinch enhances all the other flavors. Never skip salt in desserts—it makes everything taste better and more balanced.
Cinnamon – The traditional topping for rice pudding. Ground cinnamon sprinkled on top is classic, though you can also add it to the pudding itself or use cinnamon sticks during cooking.
Butter – Optional but adds richness and glossy sheen. Just 1-2 tablespoons stirred in at the end creates silky texture.
Optional Flavorings:
- Lemon or orange zest for brightness
- Nutmeg or cardamom for warmth
- Raisins or dried fruit
- Almond extract alongside vanilla
Equipment Needed
Making rice pudding requires just basic kitchen equipment:
- Large heavy-bottomed saucepan or pot – A 3-4 quart saucepan with a heavy bottom prevents scorching and ensures even heat distribution. Non-stick is helpful but not necessary.
- Wooden spoon or silicone spatula – For frequent stirring. Wooden spoons won’t scratch your pot and are gentle on rice grains.
- Whisk – For beating eggs and smoothly incorporating them into the pudding
- Measuring cups and spoons – Accurate measurements ensure consistent results
- Small bowl – For tempering the eggs
- Fine-mesh strainer – Optional, for straining out any cooked egg bits if tempering goes slightly wrong
- Serving bowls or ramekins – For individual portions
- Plastic wrap – To prevent skin formation while chilling
Optional but useful:
- Double boiler – For gentler, more forgiving cooking (though not necessary)
- Kitchen timer – To track cooking time
- Ladle – For easy serving
Easy Creamy Rice Pudding Recipe
- Total Time: 50 minutes
- Yield: 6-8 servings 1x
- Diet: Gluten Free
Description
This easy rice pudding recipe creates the creamiest, most comforting old-fashioned dessert with just a handful of simple ingredients. Tender rice simmered in sweetened milk with vanilla creates a luscious, custard-like pudding that’s perfect served warm or cold. This classic homemade rice pudding tastes just like grandma used to make, with that signature creamy texture and gentle sweetness. Ready in under an hour and naturally gluten-free!
Ingredients
Main Ingredients:
- ¾ cup uncooked white rice (medium or short-grain preferred)
- 4 cups whole milk, divided
- ⅓ cup granulated sugar
- ¼ teaspoon salt
- 2 large eggs (or 3 egg yolks for richer pudding)
- ½ cup heavy cream (optional but recommended)
- 1 tablespoon vanilla extract
- 2 tablespoons butter (optional)
- Ground cinnamon for serving
Optional Add-Ins:
- ½ cup raisins or dried cranberries
- ½ teaspoon ground cinnamon (mixed into pudding)
- ¼ teaspoon nutmeg
- 1 teaspoon lemon or orange zest
Instructions
- Rinse the rice: Place rice in a fine-mesh strainer and rinse under cold water until the water runs clear (about 30 seconds). This removes excess starch and prevents gummy texture. Drain well.
- Cook rice in milk: In a large heavy-bottomed saucepan, combine the rinsed rice, 3 cups of milk, sugar, and salt. Bring to a gentle boil over medium heat, stirring frequently to prevent sticking. Once boiling, reduce heat to low and simmer uncovered, stirring frequently (every 3-4 minutes), for 30-35 minutes. The rice should be tender and the mixture should thicken considerably. Don’t walk away—frequent stirring prevents burning!
- Temper the eggs: While rice cooks, prepare your eggs. In a small bowl, whisk together eggs (or egg yolks), the remaining 1 cup of milk, and heavy cream (if using). Once rice mixture has cooked for 30-35 minutes, take about ½ cup of the hot rice mixture and SLOWLY whisk it into the egg mixture in a thin stream. This gradually warms the eggs (called tempering) and prevents them from scrambling. Whisk constantly!
- Add egg mixture: Pour the tempered egg mixture into the saucepan with the rice, whisking constantly. Cook over medium-low heat, stirring constantly with a wooden spoon, for 3-5 more minutes until the pudding thickens to a creamy consistency that coats the back of the spoon. It should be thick but still pourable—remember it will thicken more as it cools.
- Add vanilla and butter: Remove from heat. Stir in vanilla extract and butter (if using). The butter adds richness and glossy sheen. Stir until butter melts completely.
- Serve warm or chill: For warm rice pudding, let it sit for 5-10 minutes (it will thicken), then divide among serving bowls and sprinkle with cinnamon. For cold rice pudding, transfer to a bowl and press plastic wrap directly onto the surface (this prevents skin from forming). Refrigerate for at least 2 hours or until completely chilled. The pudding will thicken significantly as it cools.
- Adjust consistency if needed: If pudding becomes too thick after refrigeration, stir in a little milk (1-2 tablespoons at a time) until you reach desired consistency.
- Serve: Spoon into bowls, sprinkle generously with ground cinnamon, and enjoy! Top with optional additions like fresh berries, sliced bananas, chopped nuts, caramel sauce, or whipped cream.
Notes
- Stir frequently: This isn’t a “set it and forget it” recipe. Frequent stirring prevents rice from sticking and ensures even cooking.
- Watch the heat: Keep temperature at a gentle simmer, not a rolling boil. Too high heat causes scorching.
- Tempering is crucial: Add hot liquid to eggs slowly while whisking constantly. Rushing creates scrambled eggs in your pudding!
- Consistency guide: Pudding should look slightly loose when hot—it thickens dramatically as it cools.
- Leftover rice option: You can use 2 cups cooked white rice. Skip step 2 and start by heating milk, then add cooked rice and proceed from step 3. Cooking time will be shorter (about 15-20 minutes).
- Prevent skin: Always press plastic wrap directly on pudding surface while cooling if you don’t like the skin that forms.
- Prep Time: 5 minutes
- Cook Time: 45 minutes
- Category: Dessert
- Method: Stovetop
- Cuisine: American
Nutrition
- Serving Size: About ¾ cup
- Calories: 245
- Sugar: 18g
- Sodium: 140mg
- Fat: 10g
- Saturated Fat: 6g
- Unsaturated Fat: 3g
- Trans Fat: 0g
- Carbohydrates: 32g
- Fiber: 0g
- Protein: 7g
- Cholesterol: 75mg
Tips & Variations
The basic rice pudding is perfect, but here are delicious ways to customize:
Coconut Rice Pudding – Replace 2 cups of milk with coconut milk and add ½ cup shredded coconut. Top with toasted coconut flakes. Tropical and delicious!
Chocolate Rice Pudding – Stir in ⅓ cup cocoa powder with the sugar and add 4 oz melted dark chocolate when you add the vanilla. Decadent and kid-friendly!
Chai-Spiced Rice Pudding – Add 2 teaspoons chai spice blend (or ½ teaspoon each cinnamon, cardamom, ginger, and a pinch of cloves) with the rice. Aromatic and warming!
Lemon Rice Pudding – Add 2 teaspoons lemon zest with the rice and 2 tablespoons lemon juice with the vanilla. Fresh and bright!
Maple Rice Pudding – Replace half the sugar with pure maple syrup added at the end. Top with toasted pecans for a fall-inspired treat.
Almond Rice Pudding – Add ½ teaspoon almond extract with the vanilla and top with toasted sliced almonds. Classic combination!
Raisin Rice Pudding – Add ½ cup raisins during the last 10 minutes of cooking so they plump up. Traditional and beloved!
Vegan Rice Pudding – Use coconut milk or oat milk, omit eggs (the pudding will be less rich but still creamy from rice starch), use maple syrup instead of sugar, and skip butter or use vegan butter.
Brown Rice Pudding – Use short-grain brown rice but increase cooking time to 50-60 minutes and add an extra ½ cup milk. Nuttier flavor and more fiber!
Cardamom Orange Rice Pudding – Add ½ teaspoon ground cardamom and 1 tablespoon orange zest. Middle Eastern-inspired and elegant!
Pumpkin Spice Rice Pudding – Add ½ cup pumpkin puree and 1 teaspoon pumpkin pie spice with the eggs. Perfect for fall!
Dulce de Leche Rice Pudding – Swirl in ½ cup dulce de leche at the end and top with caramel sauce. Utterly indulgent!
Pro Chef Tips
These professional insights will elevate your rice pudding from good to exceptional:
Rinse your rice first – This simple step removes excess surface starch that can make pudding gummy. Takes 30 seconds and makes a noticeable difference in texture.
Use the right rice – Medium or short-grain rice (like sushi rice or Calrose) creates the creamiest pudding because they’re higher in starch. Arborio rice makes exceptionally creamy pudding. Long-grain rice works but is less creamy.
Stir frequently and gently – Frequent stirring prevents sticking and ensures even cooking, but stir gently to avoid breaking rice grains. Use a wooden spoon and scrape the bottom and sides of the pot each time.
Master the tempering technique – This is crucial! Always add hot liquid to eggs (not eggs to hot liquid), add it slowly in a thin stream while whisking constantly, and whisk at least ½ cup of hot mixture into eggs before adding everything back to the pot.
Cook low and slow – Patience creates creamier pudding. Low heat and gentle simmering allow rice to release maximum starch while preventing scorching. Rushing with high heat creates grainy, separated pudding.
Judge doneness by texture, not time – Rice should be completely tender and the mixture should coat the back of a spoon. When you drag your finger across the coated spoon, it should leave a clear line. This indicates perfect thickness.
Remember carryover thickening – Rice pudding thickens dramatically as it cools. What looks too thin on the stove will be perfectly thick when chilled. Aim for a consistency slightly looser than you want in the final product.
Prevent skin formation – Press plastic wrap directly onto the pudding surface while it cools. The wrap touching the pudding prevents air exposure, which causes skin. Some people love the skin, but most prefer smooth pudding.
Add dairy gradually if thinning – If refrigerated pudding becomes too thick, thin it with milk added 1 tablespoon at a time, stirring well between additions. Adding too much at once makes it watery.
Toast your spices – For deeper flavor, toast whole spices (cinnamon sticks, cardamom pods) in the pot before adding rice and milk. Remove before serving or leave in for rustic presentation.
Common Mistakes to Avoid
Even simple recipes have pitfalls. Here’s what to watch out for:
Not stirring frequently enough – This is the number one mistake! Rice settles to the bottom and scorches if not stirred regularly. Set a timer for every 3-4 minutes and give it a good stir each time, scraping the bottom and sides. The pudding needs attention—don’t walk away for long periods.
Using high heat – High heat causes rice to stick and burn on the bottom before cooking through. It also causes milk to scorch, creating an unpleasant burnt taste. Always use medium heat to bring to a boil, then reduce to low for simmering. Gentle, patient cooking creates the best texture.
Adding eggs incorrectly – Pouring eggs directly into hot liquid creates scrambled eggs, not custard. Always temper eggs by slowly whisking hot liquid into them first. Whisk constantly and add hot liquid in a thin, slow stream—patience here prevents disaster!
Overcooking the pudding – Cooking too long makes rice mushy and can cause the pudding to break or separate. Once rice is tender and mixture coats a spoon, it’s done. Remember it continues thickening off heat and even more when chilled.
Making it too thick initially – A too-thick pudding on the stove becomes cement-like when refrigerated. Aim for a consistency that’s thick but still pourable while hot. It should slowly drip off a spoon rather than plop. You want it looser than you think!
Using instant or minute rice – These pre-cooked rices turn mushy and don’t release enough starch to create proper creaminess. They also cook too quickly to develop flavor. Always use regular white rice, preferably medium or short-grain.
Skipping the rinse – Unrinsed rice carries excess starch that makes pudding gummy and overly thick. The 30-second rinse is worth it for better texture.
Storage & Meal Prep
Rice pudding is excellent for meal prep and stores beautifully:
Refrigerator Storage – Store rice pudding in an airtight container or covered bowl in the refrigerator for up to 5 days. Press plastic wrap directly onto the surface before sealing to prevent skin formation. The pudding will thicken considerably when cold.
Texture After Storage – Cold rice pudding becomes much thicker than warm. This is normal and actually preferred by many! If you want it thinner, stir in milk 1-2 tablespoons at a time until you reach desired consistency.
Reheating Instructions – For warm rice pudding, reheat gently on the stovetop over low heat, stirring frequently and adding milk as needed to loosen. Microwave works too: heat in 30-second intervals, stirring between each, adding milk if needed. Don’t overheat or eggs can curdle.
Serving Temperature Flexibility – One of rice pudding’s best features is that it’s delicious at any temperature! Serve it straight from the fridge cold, gently warmed, or at room temperature. Experiment to find your preference.
Preventing Skin – If you hate the skin that forms on top, always press plastic wrap directly onto the pudding surface. If skin does form and you don’t like it, simply peel it off before serving.
Meal Prep Strategy – Make a big batch on Sunday and portion into individual containers for easy grab-and-go desserts all week. Top with fresh fruit, nuts, or cinnamon just before eating.
Thickening After Storage – If your pudding has thickened too much in the fridge and you want it creamier, stir in milk 1 tablespoon at a time. The rice will reabsorb liquid and return to creamy consistency.
Make-Ahead & Freezer Notes
Rice pudding is perfect for advance preparation:
Make-Ahead Timeline – Rice pudding actually improves when made ahead! The flavors meld and develop as it sits. Make it 1-3 days before serving and keep refrigerated. This makes it ideal for holiday meal prep or entertaining.
Best Make-Ahead Method – Cook pudding completely, let cool to room temperature, then refrigerate. Don’t add final toppings like cinnamon, fruit, or nuts until serving. This keeps toppings fresh and allows guests to customize.
Freezing Rice Pudding – Technically you can freeze rice pudding, but I don’t recommend it. The texture changes when frozen and thawed—rice becomes grainy and the custard can separate. If you must freeze, use an airtight container and freeze for up to 2 months.
Thawing Frozen Pudding – Thaw overnight in the refrigerator. Stir well and add milk to restore creaminess. The texture won’t be quite as good as fresh but is acceptable. Reheat gently if serving warm.
Freezing Individual Portions – If freezing, portion into individual containers first. This allows you to thaw only what you need. Stir well after thawing and add milk if too thick.
Fresh vs Frozen – Really, rice pudding is so easy and quick that making it fresh is better than dealing with freezer storage. Make only what you’ll eat within 5 days for best quality.
Component Prep – While you can’t really prep components ahead (it all cooks together), you can measure out ingredients and have them ready to go for quick weeknight cooking.
Serving Suggestions
Rice pudding is delicious on its own but pairs beautifully with many accompaniments:
Classic Toppings:
- Ground cinnamon (the traditional choice)
- Fresh berries (strawberries, blueberries, raspberries)
- Sliced bananas
- Toasted nuts (almonds, pecans, walnuts)
- Caramel sauce or dulce de leche
- Whipped cream or Cool Whip
- Maple syrup drizzle
Fruit Compotes:
- Berry compote (mixed berries simmered with sugar)
- Apple cinnamon compote
- Peach or mango compote
- Cherry sauce
- Rhubarb compote
International Inspired:
- Chopped pistachios and rosewater (Middle Eastern)
- Mango and cardamom (Indian)
- Coconut flakes and lime zest (Thai)
- Orange zest and honey (Spanish)
- Lingonberry jam (Scandinavian)
Decadent Add-Ons:
- Chocolate chips or shavings
- Cookie crumbles (graham crackers, vanilla wafers)
- Toffee bits
- Nutella swirl
- Peanut butter drizzle
Breakfast Service:
- Serve as a warm breakfast porridge
- Top with granola for crunch
- Add chia seeds for extra nutrition
- Pair with coffee or tea
Elegant Presentation:
- Serve in vintage teacups or elegant ramekins
- Garnish with fresh mint leaves
- Dust with powdered sugar
- Add edible flowers for special occasions
Beverage Pairings:
- Hot tea (chai, English breakfast, or green tea)
- Coffee or espresso
- Warm milk with honey
- Dessert wine or port (for adults)
FAQs Section
Can I use leftover cooked rice?
Yes! Use 2-2½ cups of cooked white rice. Skip the initial rice cooking step and start by heating milk with sugar and salt, then add the cooked rice. Simmer for 15-20 minutes, stirring frequently, until mixture is creamy. Proceed with tempering and adding eggs as directed. The pudding won’t be quite as creamy as starting with uncooked rice, but it’s still delicious and saves time!
Why did my rice pudding turn out watery/soupy?
Several causes: not cooking long enough (rice needs time to release starch), using too much liquid, or not adding eggs (which help thicken). Also, remember pudding is quite liquid when hot but thickens dramatically when cooled. If your hot pudding coats the back of a spoon, it’s thick enough. If it’s truly too thin, return to heat and simmer longer, or mix a bit of cornstarch with cold milk and stir in.
How do I fix lumpy/scrambled eggs in my pudding?
This happens when eggs aren’t tempered properly. Prevention is best: always add hot liquid to eggs slowly while whisking constantly. If scrambling does occur, immediately remove from heat and whisk vigorously. You can strain the pudding through a fine-mesh sieve to remove any cooked egg bits. It might not look perfect but will still taste good.
Can I make rice pudding without eggs?
Yes, though it won’t be quite as rich or custardy. Omit the eggs and simply cook rice in milk with sugar until creamy and tender (about 40-45 minutes). The rice starch alone will create creaminess. You can add a tablespoon of cornstarch mixed with cold milk near the end for extra thickness. Vegan rice pudding uses this method.
Why is my rice pudding too thick?
Rice pudding thickens significantly as it cools, especially when refrigerated. If it’s too thick when cold, simply stir in milk 1-2 tablespoons at a time until you reach your desired consistency. The rice will reabsorb the liquid and the pudding will become creamy again. This is normal and easy to fix!
How long does homemade rice pudding last?
Properly stored in an airtight container in the refrigerator, rice pudding keeps for 4-5 days. The quality is best within the first 3 days. Always check for any off smells or changes in appearance before eating. Don’t leave rice pudding at room temperature for more than 2 hours for food safety.
Can I use brown rice instead of white rice?
You can, but it requires adjustments. Brown rice takes much longer to cook (50-60 minutes vs 30-35 minutes) and needs more liquid. Use an extra ½-1 cup of milk. The pudding will have a nuttier flavor and chewier texture. Short-grain brown rice works better than long-grain. The result is heartier and less creamy than traditional white rice pudding.
Conclusion
And there you have it—everything you need to make the creamiest, most comforting old-fashioned rice pudding that tastes just like grandma used to make! This easy rice pudding recipe proves that the best comfort foods don’t require complicated techniques or exotic ingredients—just simple pantry staples, patience, and a little love stirred in.
What I love most about this homemade rice pudding is how it brings people together. It’s the kind of dessert that creates memories, whether you’re making it for your own kids, recreating a beloved family recipe, or discovering this comforting classic for the first time. There’s something deeply satisfying about transforming humble rice and milk into something so delicious and soul-warming.
The versatility is wonderful too! Enjoy it warm on a chilly evening, serve it cold on a hot summer day, dress it up with fancy toppings for company, or keep it simple for everyday dessert. Make a batch on Sunday and enjoy easy, satisfying desserts all week long. However you serve it, this creamy rice pudding delivers comfort in every spoonful.
Now I want to hear from YOU! Do you have memories of eating rice pudding as a child? What’s your favorite way to serve it—warm or cold? Do you love it plain or loaded with toppings? Have you tried any creative variations? Drop a comment below and share your rice pudding stories and tips—I love hearing from fellow comfort food lovers!
If this recipe helped you create the perfect creamy rice pudding, please give it a 5-star rating and leave a review. Your feedback helps other readers and lets me know what recipes you’d like to see more of. And don’t forget to PIN this recipe to your Dessert Recipes, Comfort Food, or Easy Recipes boards on Pinterest so you can find it whenever a rice pudding craving strikes!
Happy cooking, and may your pudding always be creamy and your spoon always be full!