

There’s something magical about a homemade chicken pot pie—the golden, flaky crust giving way to a bubbling, creamy filling loaded with tender chicken and colorful vegetables. This creamy chicken pot pie recipe is the definition of comfort food, perfect for chilly evenings, Sunday family dinners, or whenever you need a warm hug in food form.
This isn’t just any chicken pot pie. This is the kind that makes your kitchen smell like heaven, the kind that has everyone gathering around the table before you even call them for dinner. Whether you’re feeding picky eaters, hosting a cozy dinner party, or meal prepping for the week ahead, this classic American dish delivers every single time. It’s hearty enough to satisfy hungry appetites, elegant enough to impress guests, and comforting enough to become a regular in your dinner rotation.
The beauty of this homemade chicken pot pie lies in its versatility. You can use rotisserie chicken for a shortcut, load it up with your favorite vegetables, or customize the seasonings to your family’s taste. Plus, once you master this easy chicken pot pie filling, you’ll wonder why you ever bought the frozen version.
History / Background: An American Classic with Deep Roots
Chicken pot pie has been warming American hearts and bellies for generations, but its origins stretch back much further than you might think. The concept of encasing savory fillings in pastry dates back to ancient Rome, where cooks discovered that pastry crusts helped preserve meat fillings. However, the pot pie as we know it today is distinctly American.
Early American colonists adapted English meat pie recipes using ingredients they had available in the New World. Chicken became the protein of choice because it was affordable and readily available on most family farms. The term “pot pie” likely comes from the deep ceramic pots these pies were traditionally baked in, though some food historians suggest it derives from the thick, hearty stew-like filling.
During the Great Depression, chicken pot pie gained even more popularity as a way to stretch a single chicken to feed an entire family. Resourceful home cooks would use every bit of a chicken, adding affordable vegetables and a creamy sauce thickened with flour, then topping it all with biscuits or pastry to make the meal feel special despite tight budgets.
By the 1950s, frozen pot pies became an American staple, introducing a new generation to this comfort food classic. But while convenient, nothing compares to a homemade chicken pot pie made from scratch. The tradition of gathering around the table to enjoy this dish has been passed down through generations, making it more than just a recipe—it’s a connection to our culinary heritage.
Today, chicken pot pie remains one of America’s most beloved comfort foods, ranking alongside mac and cheese and meatloaf as a dish that instantly transports us back to grandma’s kitchen. Regional variations exist throughout the country, from Pennsylvania Dutch-style pot pies with square noodles to Southern versions with buttermilk biscuit toppings, but the creamy, savory filling always remains the star.
Why You’ll Love This Recipe
This creamy chicken pot pie recipe strikes the perfect balance between indulgent comfort food and practical weeknight dinner. It’s the kind of recipe that looks and tastes impressive but doesn’t require professional chef skills or hours in the kitchen.
Here’s what makes this chicken pot pie recipe absolutely irresistible:
- Ultimate Comfort Food: Rich, creamy sauce with tender chicken and vegetables wrapped in golden pastry—pure satisfaction in every bite
- Family-Friendly: Even picky eaters love this classic dish. The familiar flavors and creamy texture make it a guaranteed crowd-pleaser
- Great for Meal Prep: Make the filling ahead and refrigerate until ready to bake, or freeze individual portions for quick future dinners
- Uses Simple Ingredients: No exotic ingredients or specialty items required. Everything you need is probably already in your pantry and fridge
- Budget-Friendly: Stretches a few cups of chicken into a hearty meal that feeds 6-8 people. Perfect for feeding families without breaking the bank
- Customizable: Easily adapt to dietary needs or preferences. Use different vegetables, swap in turkey, or make it gluten-free with simple substitutions
- Perfect for Rotisserie Chicken: Turn leftover rotisserie chicken into an impressive dinner that tastes like you spent hours cooking
- Make-Ahead Friendly: Assemble completely ahead of time and bake when ready, making it ideal for busy weeknights or entertaining
- Freezer-Friendly: Double the batch and freeze one for those nights when you need comfort food fast
- Restaurant-Quality at Home: Achieve that creamy, perfectly seasoned filling and flaky crust that rivals any restaurant version
Ingredient Notes: Building Blocks of Perfect Pot Pie
Understanding your ingredients is key to creating the best chicken pot pie. Here’s what you’ll need and why each component matters:
Chicken: The star protein of your pot pie. Cooked, shredded chicken breast or rotisserie chicken works beautifully. You’ll need about 3-4 cups of cubed or shredded chicken. Rotisserie chicken is a fantastic time-saver and adds extra flavor. You can also use leftover turkey for a post-Thanksgiving variation, or even cooked chicken thighs for richer flavor.
Butter: Creates the base for your roux (the thickening agent for your creamy sauce). Use unsalted butter so you can control the salt level in your dish. Don’t substitute with oil here—butter adds essential richness and flavor.
All-Purpose Flour: Combines with butter to create the roux that thickens your filling into that signature creamy, gravy-like consistency. For gluten-free versions, use a 1:1 gluten-free flour blend or cornstarch (use half the amount).
Chicken Broth: The liquid base that becomes your luscious sauce. Use good-quality chicken broth or stock for best flavor. Low-sodium versions give you more control over seasoning. Homemade chicken stock takes this dish to the next level if you have it.
Heavy Cream or Whole Milk: Adds richness and creates that luxurious, creamy texture. Heavy cream makes a richer filling, while whole milk creates a lighter version. Half-and-half works as a middle ground. Avoid skim milk—you need the fat for proper texture and flavor.
Mixed Vegetables: Traditional pot pie includes peas, carrots, celery, and onions. Frozen mixed vegetables work perfectly and save prep time. Fresh vegetables are wonderful if you have time to dice them. Feel free to add corn, green beans, or mushrooms based on your preferences.
Garlic: Fresh minced garlic adds depth and aromatic flavor. Don’t skip this—it makes a noticeable difference in the overall taste.
Herbs and Seasonings: Thyme, parsley, salt, and black pepper are classic pot pie seasonings. Dried herbs work fine, but fresh herbs elevate the dish beautifully. A bay leaf simmered in the filling adds subtle complexity.
Pie Crust: You can use homemade pie crust, store-bought refrigerated pie dough, or puff pastry. Store-bought crusts are absolutely acceptable and save significant time. Puff pastry creates an extra-flaky, impressive top. You’ll need crust for both bottom and top, or just a top crust if you prefer.
Equipment Needed
Having the right tools makes preparing chicken pot pie much easier. Here’s what you’ll need:
- Large Skillet or Deep Sauté Pan (at least 12-inch): For making the creamy filling. You need enough room to cook vegetables and create the sauce without overcrowding
- Whisk: Essential for creating a smooth, lump-free sauce when making your roux
- 9-inch Deep Dish Pie Pan or 9×13 Baking Dish: A deep dish pie pan is traditional, but a rectangular baking dish works great for feeding larger groups
- Wooden Spoon or Silicone Spatula: For stirring the filling as it thickens
- Sharp Knife and Cutting Board: For dicing vegetables and cutting chicken if not using rotisserie
- Measuring Cups and Spoons: Accurate measurements ensure consistent results every time
- Rolling Pin (if using homemade crust): For rolling out pie dough to the right thickness
- Pastry Brush (optional): For brushing egg wash on the crust to achieve that beautiful golden color
- Small Bowl: For mixing egg wash
- Cooling Rack: Allows air to circulate around your baked pot pie for even cooling
Creamy Chicken Pot Pie Recipe
- Total Time: 1 hour 10 minutes
- Yield: 6-8 servings 1x
- Diet: Gluten Free
Description
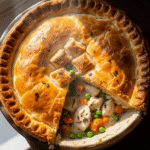
This creamy chicken pot pie recipe features tender chicken and colorful vegetables in a rich, velvety sauce, all wrapped in a golden, flaky crust. It’s the ultimate comfort food that’s perfect for family dinners, meal prep, or whenever you need a warm, satisfying meal. Easy enough for weeknight cooking yet impressive enough for company!
Ingredients
For the Filling:
- 3 tablespoons unsalted butter
- 1 medium yellow onion, diced (about 1 cup)
- 2 medium carrots, peeled and diced (about 1 cup)
- 2 celery stalks, diced (about 3/4 cup)
- 3 cloves garlic, minced
- 1/3 cup all-purpose flour
- 2 cups chicken broth (low-sodium recommended)
- 1 cup heavy cream or whole milk
- 3–4 cups cooked chicken, cubed or shredded
- 1 1/2 cups frozen peas
- 1 teaspoon dried thyme (or 1 tablespoon fresh)
- 1/2 teaspoon dried parsley (or 2 tablespoons fresh)
- 1 teaspoon salt (adjust to taste)
- 1/2 teaspoon black pepper
- 1/4 teaspoon garlic powder
- 1 bay leaf (optional)
For the Crust:
- 2 store-bought pie crusts (or homemade)
- 1 egg, beaten (for egg wash)
- 1 tablespoon water
Instructions
Step 1: Prepare Your Oven and Pan
Preheat your oven to 400°F (200°C). If using a pie crust for the bottom, line your 9-inch deep dish pie pan with one crust, pressing it gently into the corners and up the sides. Trim any excess dough hanging over the edges, leaving about 1/2 inch overhang. Set aside.
Step 2: Create the Roux Base
In a large 12-inch skillet over medium heat, melt the butter until it’s bubbling gently. Add the diced onion, carrots, and celery (this classic trio is called mirepoix). Cook for 6-8 minutes, stirring occasionally, until the vegetables soften and the onion becomes translucent. The vegetables should be tender but not browned. Add the minced garlic and cook for another 30 seconds until fragrant.
Step 3: Make the Creamy Sauce
Sprinkle the flour over the vegetable mixture, stirring constantly with a wooden spoon to coat all the vegetables. Cook for 2-3 minutes, stirring frequently—this cooks out the raw flour taste and creates your roux. The mixture will look dry and pasty, which is exactly what you want.
Gradually pour in the chicken broth, whisking continuously to prevent lumps from forming. Start with about 1/2 cup, whisk until smooth, then add the remaining broth. The mixture will begin to thicken as it comes to a gentle simmer. Continue whisking for 3-4 minutes until the sauce thickens noticeably and coats the back of a spoon.
Step 4: Add Cream and Seasonings
Reduce heat to medium-low and slowly stir in the heavy cream. Add the thyme, parsley, salt, pepper, garlic powder, and bay leaf if using. Let the sauce simmer gently for 3-4 minutes, stirring occasionally. It should have a thick, gravy-like consistency. If it’s too thick, add a splash more broth; if too thin, let it simmer a bit longer.
Step 5: Combine Chicken and Vegetables
Remove the bay leaf. Stir in the cooked chicken and frozen peas. Mix everything together until the chicken and peas are evenly distributed and completely coated in the creamy sauce. Taste and adjust seasonings—you may want more salt or pepper depending on how salty your broth was. The filling should taste well-seasoned at this point because it won’t get more seasoning once baked.
Step 6: Assemble the Pot Pie
Pour the hot chicken mixture into your prepared pie crust (or directly into a greased baking dish if not using a bottom crust). Spread it out evenly. Place the second pie crust over the top of the filling. Trim the edges to match, leaving about 1/2 inch overhang. Fold the top crust edge under the bottom crust edge and crimp decoratively with your fingers or a fork to seal. This prevents the filling from bubbling out during baking.
Step 7: Prepare for Baking
Cut 4-5 small slits in the top crust to allow steam to escape—this prevents a soggy crust and allows moisture to evaporate. In a small bowl, whisk together the egg and water to create an egg wash. Brush this mixture over the entire top crust using a pastry brush. This creates that gorgeous golden-brown, glossy finish.
Step 8: Bake to Golden Perfection
Place the pot pie on a baking sheet (to catch any drips) and bake in the preheated oven for 35-45 minutes. The crust should be deep golden brown and the filling should be bubbling up through the vents. If the crust edges brown too quickly, tent them with aluminum foil strips after 25 minutes.
Step 9: Rest and Serve
Remove from the oven and let the pot pie rest for 10-15 minutes before slicing. This resting time allows the filling to thicken further and makes serving much easier. The filling will be extremely hot, so this cooling period also prevents burns.
Notes
- Rotisserie Chicken Shortcut: A standard rotisserie chicken yields about 3-4 cups of shredded meat, perfect for this recipe. Remove the skin and shred the meat before measuring.
- Make It Dairy-Free: Substitute butter with olive oil or dairy-free butter alternative, and use full-fat coconut milk instead of heavy cream.
- Crust Options: Puff pastry creates a super flaky, impressive top. Just drape it over the filling and don’t worry about crimping—the dramatic puff is the point.
- Thicker Filling: If you prefer an extra-thick filling, increase the flour to 1/2 cup or add 2 tablespoons of cornstarch mixed with 2 tablespoons of cold water.
- No Bottom Crust: Save calories and carbs by skipping the bottom crust entirely. Just pour filling into a greased baking dish and top with crust.
- Prep Time: 25 minutes
- Cook Time: 45 minutes
- Category: Dinner
- Method: Baking
- Cuisine: American
Nutrition
- Serving Size: 1 slice (1/8 of pie)
- Calories: 485
- Sugar: 4g
- Sodium: 680mg
- Fat: 28g
- Saturated Fat: 13g
- Unsaturated Fat: 12g
- Trans Fat: 0g
- Carbohydrates: 35g
- Fiber: 3g
- Protein: 24g
- Cholesterol: 105mg
Tips & Variations: Make It Your Own
Vegetable Variations:
- Add 1 cup sliced mushrooms for earthy flavor
- Include 1 cup diced potatoes for extra heartiness
- Stir in 1 cup corn kernels for sweetness and texture
- Use green beans instead of peas for a different color and taste
- Add chopped spinach or kale for extra nutrition
Protein Swaps:
- Use leftover Thanksgiving turkey instead of chicken
- Try cooked shredded pork for a completely different flavor profile
- Make it vegetarian with chickpeas, tofu, or extra vegetables
- Use half chicken and half ham for a “chicken cordon bleu” inspired version
Flavor Boosters:
- Add 1/4 cup white wine to the sauce for depth
- Stir in 2 tablespoons Dijon mustard for tanginess
- Include 1/2 cup shredded cheddar cheese in the filling
- Add a pinch of nutmeg to the cream sauce for warmth
- Use fresh rosemary instead of thyme for a different herbal note
Lighter Version:
- Use milk instead of heavy cream
- Skip the bottom crust for fewer calories and carbs
- Increase vegetables and reduce chicken slightly
- Use phyllo dough on top instead of pie crust
Individual Pot Pies:
- Divide filling among 6-8 ramekins
- Top each with a circle of puff pastry or pie crust
- Bake at 400°F for 20-25 minutes until golden
- Perfect for portion control and elegant presentation
Spicy Kick:
- Add 1/4 teaspoon cayenne pepper to the filling
- Include diced jalapeños with the vegetables
- Top with pepper jack cheese before adding the crust
Pro Chef Tips: Restaurant-Quality Results
Perfect Roux Every Time: The key to a lump-free, perfectly thick filling is cooking your flour and butter together for a full 2-3 minutes before adding liquid. This cooks out the raw flour taste and creates a smooth base. When adding the broth, pour it slowly while whisking constantly—this prevents lumps from forming.
Season in Layers: Don’t wait until the end to season. Add salt and pepper when cooking the vegetables, taste and adjust after adding the cream, and taste once more after adding the chicken. This layered seasoning approach creates more complex, well-rounded flavor than adding all the salt at once.
Use Cold Chicken: If possible, use cold or room temperature cooked chicken rather than hot. Hot chicken added to the hot filling can overcook during baking, becoming dry and stringy. Cold chicken heats through perfectly during baking, staying tender and juicy.
Don’t Skip the Egg Wash: That beautiful golden-brown crust you see in bakeries and restaurants comes from brushing with egg wash before baking. The proteins in the egg create a glossy, deeply colored finish that looks professionally done. For extra shine, brush twice—once before baking and once halfway through.
Proper Crust Venting: Those steam vents aren’t just decorative—they’re essential. Without them, steam builds up under the crust, making it soggy instead of crisp. Cut at least 4-5 slits, each about 1-2 inches long, to allow moisture to escape while baking.
Rest Before Serving: This is the hardest tip to follow because the pot pie smells incredible right out of the oven, but resting for 10-15 minutes makes an enormous difference. The filling thickens as it cools slightly, making clean slices possible. Serve too soon and you’ll have a soupy mess, albeit a delicious one.
Baking Sheet Insurance: Always place your pot pie on a rimmed baking sheet before putting it in the oven. Even with perfect crimping, filling sometimes bubbles over. The baking sheet catches drips, preventing oven fires and saving you from a terrible cleanup job.
Blind Bake for Crispy Bottom Crust: If you struggle with soggy bottom crusts, try blind baking. Line your pie pan with crust, prick it with a fork, line with parchment and pie weights, and bake at 375°F for 10 minutes before adding filling. This pre-bakes the bottom crust, ensuring it stays crispy.
Common Mistakes to Avoid
Mistake #1: Adding Vegetables Directly from Frozen
Frozen vegetables release a lot of water as they cook, which can make your filling watery. While frozen peas added at the end are fine (they’re small and cook quickly), larger frozen vegetables should be thawed and drained first, or sautéed with the other vegetables to release their moisture before making the sauce.
Mistake #2: Making the Filling Too Thin
Your filling should be thick and gravy-like before going into the crust. Remember, it won’t thicken much more during baking. If you can pour your filling, it’s too thin—it should plop from the spoon. If your filling is too thin, mix 2 tablespoons cornstarch with 2 tablespoons cold water and stir into the simmering filling until thickened.
Mistake #3: Overfilling the Pie
It’s tempting to pack in as much filling as possible, but overfilling leads to messy bubbling over and prevents the top crust from properly sealing to the bottom. Fill to about 1/4 inch below the rim of your pie pan, leaving room for the filling to expand as it bubbles.
Mistake #4: Not Sealing the Crusts Properly
If your top and bottom crusts aren’t properly sealed, filling will leak out during baking. Press the crusts firmly together, then crimp decoratively. If your bottom crust is dry, brush the edge with a little water before adding the top crust to help them stick together.
Mistake #5: Baking at Too Low a Temperature
Pot pie needs high heat (400°F) to create that golden, flaky crust. Lower temperatures result in pale, soft, sometimes gummy crusts. The high heat creates steam quickly, which separates the layers in the pastry, making it flaky. Don’t be tempted to lower the temperature to prevent browning—just tent with foil if needed.
Storage & Meal Prep: Making Life Easier
Refrigerator Storage:
Leftover chicken pot pie stores beautifully in the refrigerator for 3-4 days. Let it cool completely, then cover tightly with plastic wrap or aluminum foil, or transfer individual slices to airtight containers. The crust will soften during storage, but reheating helps crisp it up again.
Reheating Instructions:
For best results, reheat pot pie in a 350°F oven for 20-25 minutes until heated through and the crust crisps up again. Cover loosely with foil if the crust browns too quickly. Individual slices can be microwaved for 2-3 minutes, though the crust won’t be as crispy. For microwave reheating, place a paper towel underneath to absorb excess moisture.
Storing Filling Separately:
If you’re meal prepping, consider storing the filling and crust separately. Keep the cooled filling in an airtight container in the fridge for up to 4 days. When ready to eat, reheat the filling until hot, pour into a baking dish, top with fresh or thawed pie crust, and bake. This ensures the crispiest crust possible.
Shelf Life Notes:
Chicken pot pie contains dairy and cooked chicken, so it’s perishable. Never leave it at room temperature for more than 2 hours (1 hour if your kitchen is above 90°F). Cool it quickly by placing the whole dish in an ice bath if you’re concerned about food safety, especially important for large pot pies that take a long time to cool.
Make-Ahead & Freezer Notes: Prepare in Advance
Freezing Unbaked Pot Pie:
This is my favorite make-ahead method. Assemble the entire pot pie (filling and crust) but don’t bake it. Wrap it tightly in plastic wrap, then aluminum foil, or use a freezer-safe bag. Freeze for up to 3 months. When ready to bake, don’t thaw—bake directly from frozen at 375°F for 60-75 minutes, covering the edges with foil if they brown too quickly. Add 15-20 minutes to the regular baking time.
Freezing Baked Pot Pie:
You can also freeze already-baked pot pie, though the crust won’t be quite as crispy when reheated. Let it cool completely, wrap well, and freeze for up to 2 months. Thaw overnight in the refrigerator, then reheat at 350°F for 30-35 minutes until hot throughout.
Freezing Just the Filling:
The filling freezes exceptionally well on its own. Cool completely, transfer to freezer-safe containers or bags, and freeze for up to 4 months. Thaw overnight in the refrigerator, reheat until hot, pour into a baking dish, top with fresh crust, and bake. This method gives you the freshest, crispiest crust.
Make-Ahead Assembly:
For same-week meal planning, assemble the unbaked pot pie up to 24 hours in advance. Cover tightly and refrigerate. Let it sit at room temperature for 20-30 minutes before baking, then bake as directed. You may need to add 5-10 extra minutes to the baking time if it’s still cold from the fridge.
Individual Freezer Portions:
Make individual pot pies in oven-safe ramekins or small pie tins, cool completely, wrap individually, and freeze. These are perfect for grab-and-go lunches or single-serving dinners. Bake from frozen at 375°F for 35-45 minutes.
Best Thawing Method:
Always thaw frozen pot pie in the refrigerator, never at room temperature. Plan ahead—a whole pot pie takes 24 hours to thaw completely in the fridge. For food safety, never thaw at room temperature, as the center could stay frozen while the edges reach unsafe temperatures where bacteria multiply.
Serving Suggestions: Complete Your Meal
Chicken pot pie is hearty and filling on its own, but pairing it with the right sides creates a complete, balanced meal. Here are my favorite accompaniments:
Fresh Green Salads:
A crisp salad with bright vinaigrette cuts through the richness of pot pie beautifully. Try a simple mixed greens salad with lemon vinaigrette, or go for an arugula salad with shaved parmesan and balsamic dressing. The acidity and crunch provide perfect contrast to the creamy, soft filling.
Roasted Vegetables:
Roasted Brussels sprouts, asparagus, or green beans add color and nutrition to your plate. Toss them with olive oil, salt, and pepper, then roast at 425°F until crispy and caramelized. The roasted, slightly charred vegetables complement the creamy pot pie perfectly.
Cranberry Sauce:
A small spoonful of cranberry sauce on the side adds a pop of tartness that balances the rich, savory pie. This is especially nice during fall and winter months or for Thanksgiving leftover pot pies made with turkey.
Buttermilk Biscuits:
While pot pie already has a pastry component, some people love serving warm buttermilk biscuits alongside for extra comfort food indulgence. They’re perfect for sopping up any extra filling on your plate.
Coleslaw:
A tangy, crunchy coleslaw (vinegar-based rather than creamy) provides textural contrast and cuts through the richness. Make a simple slaw with shredded cabbage, carrots, apple cider vinegar, a touch of sugar, and salt.
Soup Shooters:
For a dinner party presentation, serve small cups of tomato soup or butternut squash soup as a starter before the pot pie. The soup course makes the meal feel more elegant and special.
Beverages:
Pot pie pairs wonderfully with crisp white wines like Chardonnay or Sauvignon Blanc, light reds like Pinot Noir, or cold sparkling apple cider for a non-alcoholic option. The acidity in these drinks balances the creamy filling beautifully.
Fruit Sides:
Fresh fruit like apple slices or a simple fruit salad adds freshness and helps balance the heaviness of the pot pie. Sliced pears with a honey drizzle are particularly elegant.
FAQs: Your Questions Answered
Q: Can I use raw chicken in my pot pie filling?
A: It’s not recommended. Raw chicken releases juices during baking that can make your filling watery and may not cook through completely during the baking time. Always use pre-cooked chicken for food safety and best texture. If you only have raw chicken, cook it completely first (boil, bake, or sauté), then proceed with the recipe.
Q: Why is my pot pie filling runny?
A: Runny filling usually happens when there’s not enough flour in the roux, the filling didn’t simmer long enough to thicken, or there’s too much liquid. The filling should be thick enough to coat the back of a spoon before you add it to the crust. If it’s too thin, simmer longer to reduce and thicken, or add a cornstarch slurry (2 tablespoons cornstarch mixed with 2 tablespoons cold water).
Q: How do I prevent a soggy bottom crust?
A: Several techniques help: blind bake the bottom crust for 10 minutes before adding filling, brush the unbaked bottom crust with beaten egg white to create a moisture barrier, make sure your filling isn’t too watery before adding it, or skip the bottom crust entirely and just use a top crust.
Q: Can I make chicken pot pie without cream?
A: Absolutely! Use whole milk for a lighter version, or try half chicken broth and half milk. For dairy-free, full-fat coconut milk works well (it doesn’t taste coconutty in savory applications). You can also use evaporated milk for richness without heavy cream.
Q: What’s the best way to get a golden brown crust?
A: Brush the top crust with egg wash (1 beaten egg mixed with 1 tablespoon water) before baking. This creates that beautiful golden, glossy finish. Make sure your oven temperature is correct—400°F is ideal. If your crust browns too quickly, tent the edges with aluminum foil strips.
Q: Can I use puff pastry instead of pie crust?
A: Yes! Puff pastry makes an incredibly flaky, impressive top for pot pie. Just drape it over the filling (you only use it as a top crust, not bottom), trim the edges, cut vents, brush with egg wash, and bake. Puff pastry puffs up dramatically and creates beautiful layers. It’s actually easier to work with than pie dough.
Q: How long does chicken pot pie last in the freezer?
A: Properly wrapped chicken pot pie (either baked or unbaked) lasts 2-3 months in the freezer. After that, it’s still safe to eat but the quality begins to decline—you may notice freezer burn or off flavors. Label your pot pies with the date so you remember when you made them.
Q: My crust shrunk during baking. How do I prevent this?
A: Crust shrinks when the dough is stretched too thin when placing it in the pan, or when it’s overworked (which develops too much gluten). To prevent shrinking: don’t stretch the dough when fitting it into the pan (gently ease it in), let the dough rest in the fridge for 30 minutes before baking if you’ve worked it a lot, and avoid re-rolling dough multiple times.
Conclusion: Time to Create Comfort
There you have it—everything you need to create the most incredible, comforting, absolutely delicious creamy chicken pot pie your family has ever tasted. This isn’t just a recipe; it’s a ticket to cozy family dinners, a solution for busy weeknights, and a delicious way to use up leftover chicken.
The beauty of this chicken pot pie recipe is how adaptable it is to your life. Make it exactly as written for traditional, foolproof results, or customize it with your favorite vegetables, proteins, and flavors. Whether you’re meal prepping for the week, cooking for picky eaters, or creating an impressive centerpiece for Sunday dinner, this pot pie delivers every single time.
I’d love to hear how your chicken pot pie turns out! Did you add any special touches? What did your family think? Drop a comment below with your experience, and don’t forget to rate the recipe. If you’re loving this comfort food vibe, be sure to browse through our other cozy dinner recipes for more inspiration.
Ready to make dinner magic happen? Pin this recipe to your Pinterest boards so you can find it whenever the craving hits! Your future self will thank you when you need comfort food fast.
Happy cooking, and enjoy every warm, creamy, delicious bite of your homemade chicken pot pie!