
If you’re looking for the ultimate comfort food that brings everyone to the table with smiles on their faces, this creamy baked pasta recipe is exactly what you need. Imagine tender pasta coated in a luscious, velvety cheese sauce, topped with a golden, bubbly crust that’s crispy in all the right places. This easy baked pasta dish is the kind of meal that turns a regular weeknight into something special, yet it’s simple enough to make without breaking a sweat.
This creamy baked pasta casserole is what I like to call a “crowd-pleaser extraordinaire.” Whether you’re feeding hungry kids after soccer practice, hosting a casual dinner party, or meal prepping for the busy week ahead, this recipe delivers every single time. It’s the perfect blend of indulgent and practical—rich enough to feel like a treat, but straightforward enough to make any night of the week.
What makes this baked pasta with creamy sauce truly stand out is its incredible versatility. Serve it as a hearty main dish for Sunday family dinner, bring it to potlucks where it’ll disappear in minutes, or make it ahead for those nights when you need dinner on the table in record time. The creamy, cheesy goodness combined with perfectly baked pasta creates a dish that’s become a beloved staple in kitchens across America. Kids devour it, adults love it, and picky eaters actually ask for seconds. Now that’s the kind of recipe worth keeping in your regular rotation!
History / Background
Baked pasta dishes have a rich and fascinating history that spans continents and centuries, with roots firmly planted in Italian culinary tradition. The concept of baking pasta with cheese and sauce dates back to medieval Italy, where resourceful cooks discovered that layering pasta with cheese and baking it created a transformative dish that was greater than the sum of its parts.
The tradition of pasta al forno (pasta from the oven) became particularly popular in Southern Italy, especially in regions like Campania, Sicily, and Calabria. Italian families would prepare large baked pasta dishes for Sunday gatherings and special celebrations, using whatever ingredients were readily available—pasta, local cheeses, maybe some meat or vegetables, and a simple sauce. These dishes were designed to feed large families economically while still feeling festive and special.
When Italian immigrants brought their beloved recipes to America in the late 19th and early 20th centuries, baked pasta dishes evolved to incorporate ingredients that were more readily available in their new home. American cream, cheddar cheese, and convenient pasta shapes transformed the traditional Italian recipes into something uniquely Italian-American. The creamy baked pasta we know and love today is very much a product of this cultural fusion.
The 1950s and 1960s saw an explosion in the popularity of casserole-style baked pasta dishes in American homes. The rise of convenience foods, affordable ovens in every household, and the growing popularity of Italian-American cuisine made baked pasta a weeknight staple. Home cooks loved that they could assemble everything in one dish, pop it in the oven, and have dinner ready with minimal active cooking time.
Today, creamy baked pasta occupies a special place in American comfort food culture. It’s the dish that reminds us of childhood dinners, the meal we crave when we need something warm and satisfying, and the recipe we turn to when we want to show love through food. Every family has their own version, passed down through generations or adapted from various sources, making it a truly personal and beloved dish that continues to bring people together around the dinner table.
Why You’ll Love This Recipe
This creamy baked pasta recipe is about to become your new go-to comfort food for so many reasons. It hits that perfect sweet spot where impressive meets effortless, and delicious meets doable. The combination of tender pasta, rich cream sauce, and melted cheese creates pure magic that’ll have everyone asking for the recipe.
Here’s why this easy baked pasta casserole will become your family’s new favorite:
- Incredibly Simple: Just cook pasta, make a quick cream sauce, mix everything together, and bake. No complicated techniques or fancy chef skills required.
- One-Dish Wonder: Everything bakes together in a single casserole dish, which means minimal cleanup and less time standing at the stove.
- Budget-Friendly: Uses affordable, everyday ingredients you probably already have in your pantry and fridge. No exotic or expensive items needed.
- Feeds a Crowd: Makes a generous 8-10 servings, perfect for large families, gatherings, or meal prep for the week.
- Kid-Approved: The creamy, cheesy goodness appeals to even the pickiest eaters. Kids actually get excited about dinner!
- Customizable: Easily adapt to use whatever pasta shape, cheese, or add-ins you have on hand. Make it your own!
- Make-Ahead Friendly: Assemble hours or even a day in advance, then simply pop it in the oven when ready to eat.
- Freezer-Friendly: Make double and freeze half for those nights when you need dinner in a hurry with zero effort.
- Leftover Perfection: Tastes even better the next day as flavors meld together. Great for lunch the following day.
- Comfort Food at Its Best: Warm, creamy, cheesy, and satisfying—this is the definition of comfort food that hugs you from the inside.
- Always Reliable: This recipe works every single time. No guessing, no fails, just consistent delicious results.
Whether you’re a beginner cook looking for foolproof recipes or an experienced home chef seeking a reliable weeknight meal, this creamy baked pasta delivers on all fronts. It’s the kind of recipe that earns a permanent spot in your meal rotation because it just works.
Ingredient Notes
Let’s talk about what goes into this amazing creamy baked pasta and why each ingredient plays an important role in creating that perfect texture and flavor we’re after.
Pasta: The foundation of our dish! I recommend using short pasta shapes like penne, rigatoni, ziti, or shells. These shapes have ridges and hollows that grab onto the cream sauce beautifully, ensuring every bite is flavorful. Penne is my personal favorite because it’s universally loved and holds up well during baking without getting mushy. Cook your pasta just until al dente (slightly firm to the bite) since it will continue cooking in the oven. For gluten-free versions, use your favorite gluten-free pasta—just follow package directions carefully as cooking times vary.
Heavy Cream: This is what makes the sauce luxuriously creamy and rich. Heavy cream (also called heavy whipping cream) has a high fat content that creates a smooth, velvety sauce that coats the pasta perfectly. Don’t substitute with milk or half-and-half for the full recipe amount as it will be too thin. If you need a lighter version, you can use half heavy cream and half whole milk, but the texture won’t be quite as luscious.
Cheese: We’re using a combination of cheeses for maximum flavor and meltability. Mozzarella provides that gorgeous stretchy, melty quality and mild flavor. Parmesan adds sharp, nutty, salty notes that deepen the overall taste. Sharp cheddar brings tanginess and color. Use freshly shredded cheese whenever possible—pre-shredded cheese contains anti-caking agents that prevent it from melting smoothly. You can substitute with Gruyère for sophistication, fontina for creaminess, or provolone for Italian flavor.
Butter: Creates the base for our sauce (the roux) and adds rich flavor. Use real butter, not margarine, for best results. Unsalted butter gives you control over the salt level in your dish.
Garlic: Adds aromatic depth and savory notes that elevate the entire dish from good to unforgettable. Fresh garlic is far superior to garlic powder here. Mince it finely so it distributes evenly throughout the sauce.
All-Purpose Flour: Thickens the cream sauce and helps it coat the pasta properly. The flour is cooked with butter to create a roux, which thickens the liquid without creating lumps. For gluten-free versions, use a gluten-free flour blend or cornstarch (use slightly less).
Chicken or Vegetable Broth: Adds savory depth and helps thin the sauce to the perfect consistency. Low-sodium broth is best so you can control seasoning. Vegetable broth makes this recipe vegetarian-friendly.
Seasonings: Salt, black pepper, Italian seasoning, and a pinch of nutmeg (secret ingredient!) round out the flavors. The nutmeg adds warmth and enhances the cheese flavor without being identifiable.
Breadcrumbs (Optional): For the topping! Panko breadcrumbs mixed with melted butter and Parmesan create that irresistible golden, crunchy top layer that contrasts beautifully with the creamy pasta underneath.
Equipment Needed
The beauty of this creamy baked pasta recipe is that it requires only basic kitchen equipment that most home cooks already own. Here’s what you’ll need:
- Large Pot or Dutch Oven: For boiling the pasta. Make sure it’s big enough (at least 6 quarts) to allow pasta to move freely while cooking.
- 9×13-inch Baking Dish: The standard size for casseroles and perfect for this recipe. Glass, ceramic, or metal all work great. If using metal, reduce oven temperature by 25°F as metal conducts heat faster.
- Large Saucepan or Skillet: For making the cream sauce. A 3-4 quart size works perfectly and gives you enough room to whisk without splashing.
- Colander or Strainer: For draining the cooked pasta.
- Whisk: Essential for making a smooth, lump-free cream sauce. A wire whisk works best.
- Wooden Spoon or Spatula: For stirring the pasta and sauce together.
- Measuring Cups and Spoons: For accurate ingredient measurements. Baking is chemistry, so precision matters!
- Box Grater or Food Processor: For shredding your own cheese (highly recommended for best melting results).
- Garlic Press or Sharp Knife: For mincing garlic finely.
- Aluminum Foil: For covering the baking dish during the initial baking phase to prevent over-browning.
- Oven Mitts: Because safety first when handling hot dishes!
That’s everything you need! No special equipment or fancy gadgets required—just standard kitchen tools that make this recipe accessible to everyone.
Print
Creamy Baked Pasta Recipe
- Total Time: 50 minutes
- Yield: 8-10 servings 1x
- Diet: Vegetarian
Description
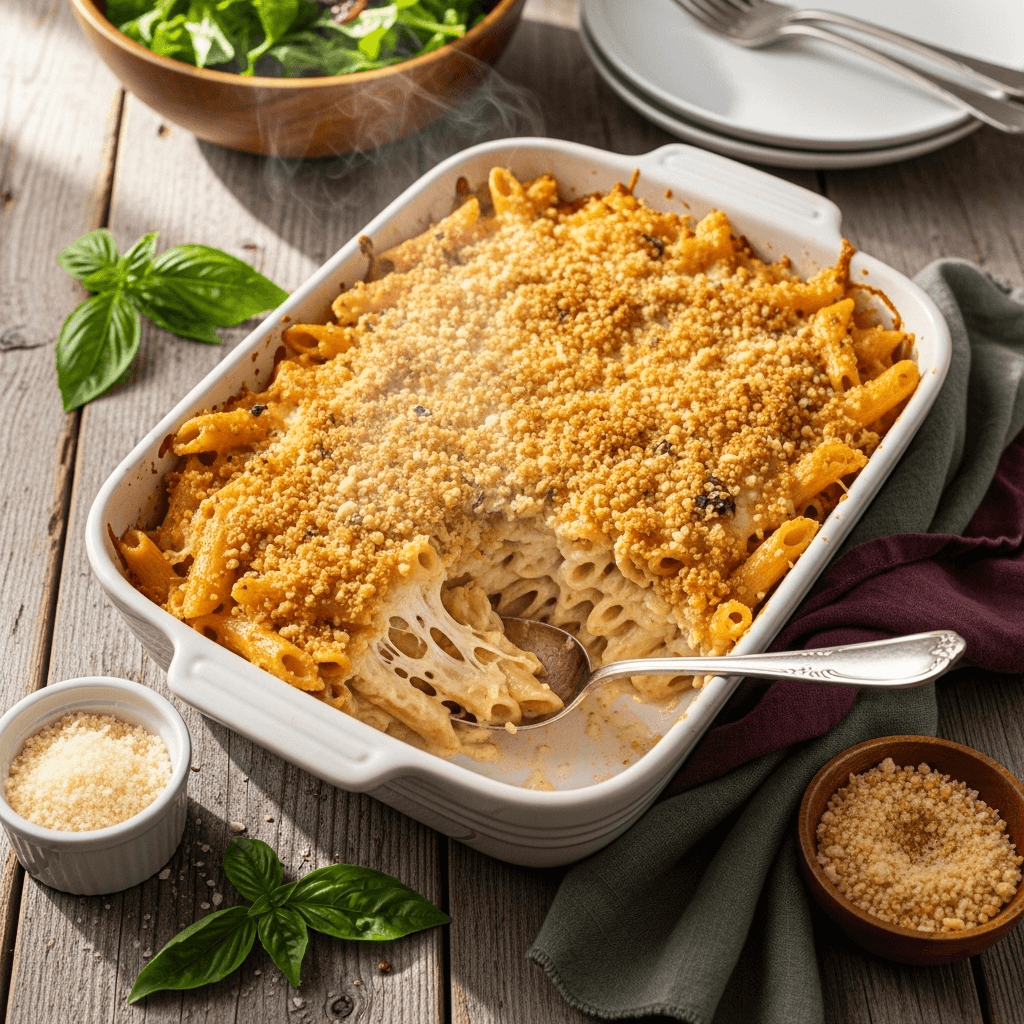
This ultra-creamy baked pasta is the ultimate comfort food featuring tender pasta coated in a rich, velvety cheese sauce and topped with a golden, crispy crust. Easy to make, feeds a crowd, and guaranteed to become a family favorite!
Ingredients
For the Pasta:
- 1 pound penne pasta (or rigatoni, ziti, or shells)
- 2 tablespoons salt (for pasta water)
For the Cream Sauce:
- 4 tablespoons unsalted butter
- 4 cloves garlic, minced
- 4 tablespoons all-purpose flour
- 2 cups heavy cream
- 1 cup whole milk
- 1 cup chicken broth or vegetable broth (low-sodium)
- 2 cups shredded mozzarella cheese, divided
- 1 cup freshly grated Parmesan cheese, divided
- 1 cup shredded sharp cheddar cheese
- 1 teaspoon Italian seasoning
- 1/2 teaspoon salt (plus more to taste)
- 1/2 teaspoon black pepper
- 1/4 teaspoon nutmeg (optional but recommended)
- 1/4 teaspoon red pepper flakes (optional, for a subtle kick)
For the Topping:
- 1/2 cup panko breadcrumbs
- 2 tablespoons melted butter
- 1/4 cup grated Parmesan cheese
- 1 tablespoon fresh parsley, chopped (for garnish)
Instructions
Step 1: Prepare Your Oven and Pasta
Preheat your oven to 375°F (190°C). Grease your 9×13-inch baking dish with butter or cooking spray and set aside. Bring a large pot of water to a rolling boil over high heat. Add 2 tablespoons of salt to the water (it should taste like the ocean). Add pasta and cook according to package directions until al dente, usually 8-10 minutes. You want it slightly firm since it will continue cooking in the oven. Drain pasta in a colander and set aside. Do not rinse—you want the starch to help sauce cling to pasta.
Step 2: Make the Cream Sauce Base
While pasta cooks, start your sauce. In a large saucepan over medium heat, melt the 4 tablespoons of butter. Once melted and foamy, add minced garlic and cook for 1 minute, stirring constantly until fragrant but not browned. Sprinkle the flour over the butter and garlic, stirring continuously with a whisk. Cook this roux for 2-3 minutes, stirring constantly, until it turns a light golden color and smells slightly nutty. This step is crucial for removing the raw flour taste.
Step 3: Add the Liquids
Slowly pour in the heavy cream while whisking constantly to prevent lumps. Then add the milk and broth, continuing to whisk. Bring the mixture to a gentle simmer over medium heat, whisking frequently. The sauce will begin to thicken after about 5-7 minutes. It should coat the back of a spoon nicely. If it seems too thick, add a splash more broth or milk. If too thin, let it simmer a bit longer.
Step 4: Add the Cheese and Seasonings
Reduce heat to low. Add 1½ cups of the mozzarella cheese, ¾ cup of the Parmesan cheese, and all of the cheddar cheese. Stir continuously until all cheese is melted and the sauce is smooth and creamy. Add the Italian seasoning, salt, pepper, nutmeg, and red pepper flakes if using. Taste and adjust seasonings as needed. Remember, the pasta and breadcrumb topping will also add flavor, so don’t over-salt at this stage.
Step 5: Combine Pasta and Sauce
Add the drained pasta to the cheese sauce. Using a wooden spoon or spatula, gently fold everything together until every piece of pasta is coated in that glorious creamy sauce. Be thorough but gentle—you don’t want to break the pasta. The mixture should be very saucy and creamy; it will thicken as it bakes.
Step 6: Transfer to Baking Dish
Pour the pasta mixture into your prepared 9×13-inch baking dish, spreading it into an even layer. Sprinkle the remaining ½ cup mozzarella and ¼ cup Parmesan cheese evenly over the top.
Step 7: Prepare the Breadcrumb Topping
In a small bowl, combine the panko breadcrumbs, 2 tablespoons melted butter, and ¼ cup Parmesan cheese. Mix with a fork until the breadcrumbs are evenly coated with butter. This creates that amazing golden, crispy topping. Sprinkle this mixture evenly over the cheese layer.
Step 8: Bake
Cover the baking dish loosely with aluminum foil (spray the underside with cooking spray to prevent cheese from sticking). Bake for 15 minutes covered. Then remove the foil and bake for an additional 12-15 minutes uncovered, until the top is golden brown and bubbly around the edges. If you want an extra crispy top, turn on the broiler for the last 2-3 minutes, watching carefully to prevent burning.
Step 9: Rest and Serve
Remove from oven and let the baked pasta rest for 5-10 minutes before serving. This allows the sauce to thicken slightly and makes it easier to serve neat portions. Garnish with fresh chopped parsley and serve immediately while hot and bubbly.
Notes
- Don’t Skip the Al Dente: Cooking pasta until just al dente is crucial since it continues cooking in the oven. Overcooked pasta will become mushy during baking.
- Sauce Consistency: The pasta mixture should look quite saucy before baking—almost too saucy. It will thicken considerably as it bakes and the pasta absorbs liquid. If it seems dry before baking, add a splash more cream or broth.
- Cheese Quality Matters: Freshly shredded cheese melts much better than pre-shredded. Take the extra few minutes to shred your own for the smoothest, creamiest sauce.
- Make It Ahead: Assemble completely through Step 6, cover tightly with foil, and refrigerate for up to 24 hours. Add 10-15 minutes to baking time if baking straight from the fridge, and keep covered longer (20 minutes) to heat through.
- Customize Your Add-Ins: Stir in cooked chicken, crispy bacon, sautéed mushrooms, sun-dried tomatoes, or steamed broccoli before baking for extra protein and vegetables.
- Prep Time: 20 minutes
- Cook Time: 30 minutes
- Category: Dinner
- Method: Baking
- Cuisine: Italian-American
Nutrition
- Serving Size: 1/10 of recipe (approximately 1.5 cups)
- Calories: 485
- Sugar: 4g
- Sodium: 620mg
- Fat: 28g
- Saturated Fat: 17g
- Unsaturated Fat: 9g
- Trans Fat: 0g
- Carbohydrates: 39g
- Fiber: 2g
- Protein: 18g
- Cholesterol: 85mg
Tips & Variations
One of the best things about this creamy baked pasta casserole is how easily you can customize it to suit your family’s preferences or use up ingredients you already have. Here are some fantastic variations to try:
Protein-Packed Versions: Stir in 2-3 cups of cooked, shredded rotisserie chicken for an easy chicken baked pasta, add crispy crumbled bacon for smoky richness, include cooked Italian sausage (mild or spicy) for a heartier meal, fold in cooked ground beef seasoned with Italian herbs, or add cooked shrimp during the last 10 minutes of baking for a seafood twist.
Vegetable-Loaded Options: Boost nutrition by adding 2 cups of steamed broccoli florets, sautéed mushrooms and spinach, roasted red peppers and zucchini, or frozen peas and carrots. Add vegetables when combining the pasta with sauce so everything bakes together evenly.
Different Cheese Combinations: Try Gruyère and fontina for a sophisticated French-inspired version, smoked gouda and white cheddar for depth, cream cheese blended into the sauce for extra tanginess, or goat cheese crumbled on top for a gourmet touch.
Lighter Version: Use half-and-half instead of heavy cream (sauce will be thinner but still tasty), reduce cheese by one-third, add extra vegetables to bulk up servings without calories, use whole wheat pasta for added fiber, or substitute Greek yogurt for half the cream (stir in after removing from heat).
Spicy Baked Pasta: Add ½ teaspoon red pepper flakes to the sauce, stir in diced jalapeños, use pepper jack cheese instead of mozzarella, or add a pinch of cayenne pepper for heat that builds.
Italian Sausage and Peppers: Brown Italian sausage and bell peppers, drain excess fat, and stir into pasta before baking. Use extra mozzarella and Parmesan for authentic Italian flavor.
Four Cheese Version: Combine mozzarella, Parmesan, fontina, and Asiago for ultra-cheesy decadence. Adjust quantities to equal the same total amount of cheese in the original recipe.
Gluten-Free Adaptation: Use your favorite gluten-free pasta and substitute all-purpose flour with a 1:1 gluten-free flour blend or cornstarch. Everything else remains the same!
Pro Chef Tips
Want to take your creamy baked pasta from delicious to absolutely restaurant-quality? These professional techniques will elevate your dish to the next level:
Salt Your Pasta Water Generously: The pasta water should taste like seawater (about 2 tablespoons salt per pound of pasta). This is your only opportunity to season the pasta itself from the inside out. Under-salted pasta water is the number one reason homemade pasta dishes taste flat.
Save That Pasta Water: Before draining your pasta, scoop out and reserve 1 cup of the starchy pasta cooking water. If your sauce seems too thick when combining with pasta, add splashes of this liquid gold. The starch helps bind the sauce to the pasta and creates a silkier texture. It’s a professional chef’s secret weapon.
Make a Proper Roux: When making the flour and butter base, cook it for a full 2-3 minutes while stirring constantly. This “cooks out” the raw flour taste and creates a nutty, toasted flavor base that adds depth to your sauce. The roux should smell like popcorn and turn a light golden color.
Add Liquids Gradually: When adding cream, milk, and broth to your roux, pour slowly while whisking constantly. This prevents lumps from forming and ensures a silky-smooth sauce. If you do get lumps, don’t panic—use an immersion blender or regular blender to smooth it out before adding cheese.
Low and Slow for Cheese: Once you add cheese to your sauce, keep the heat on low and stir patiently. High heat can cause cheese to become grainy, stringy, or separated. The cheese should melt gradually into the sauce, creating a smooth, homogeneous mixture.
Layer Your Flavors: Don’t add all seasonings at once. Add some at the beginning when cooking garlic, more when the sauce comes together, and finish by tasting and adjusting just before baking. This builds complexity rather than one-note flavor.
Don’t Overbake: The pasta is done when it’s bubbly around the edges and the top is golden brown. Overbaking dries out the dish and can make it grainy. Watch closely during the last 10 minutes and use your eyes as the best indicator.
Let It Rest: Allowing the baked pasta to rest for 5-10 minutes after removing from the oven lets the sauce thicken up and makes serving much neater. The internal carryover heat continues cooking gently during this time.
Fresh Herbs at the End: If using fresh herbs like parsley or basil, add them as garnish after baking rather than during cooking. This preserves their bright flavor and vibrant color.
Broiler for Perfect Browning: For that professional-looking golden crust, finish under the broiler for 2-3 minutes. Watch it like a hawk—the difference between perfectly browned and burnt happens in seconds under the broiler.
Common Mistakes to Avoid
Even straightforward recipes can go wrong if you’re not careful about a few key details. Here are the most common pitfalls and how to avoid them:
Overcooking the Pasta Initially: This is the biggest mistake people make with baked pasta recipes. If you boil your pasta until it’s fully tender, it will become mushy and unpleasant during baking. Always cook pasta 2 minutes less than package directions suggest (until al dente, meaning it still has a slight firmness when bitten). Remember, it will continue cooking in the hot sauce and again in the oven. The final texture should be tender but not falling apart.
Making the Sauce Too Thick Before Baking: Your cream sauce should look almost too thin when you mix it with the pasta. It seems counterintuitive, but as the dish bakes, the pasta absorbs a significant amount of liquid, and the sauce naturally thickens. If your sauce is already thick before baking, you’ll end up with a dry, clumpy casserole rather than a creamy, saucy one. The mixture should be easily pourable and quite saucy when you transfer it to the baking dish.
Using Pre-Shredded Cheese: Pre-shredded cheese contains cellulose (an anti-caking agent) that prevents it from melting smoothly. This can result in a grainy, separated sauce rather than a silky, creamy one. Take the extra 5 minutes to shred cheese from a block yourself. The difference in texture is dramatic and absolutely worth the minimal extra effort. Your sauce will be noticeably smoother and creamier.
Not Seasoning Adequately: Pasta and cream are both fairly bland on their own and need generous seasoning to taste delicious. Many home cooks under-season from fear of using too much salt, but this results in a flat, boring dish. Taste your sauce before mixing with pasta and make sure it’s well-seasoned. Remember to account for the fact that some seasoning will be diluted when mixed with the pasta, so it should taste slightly over-seasoned on its own.
Skipping the Resting Time: The temptation to dig in immediately is strong when that gorgeous, bubbly pasta comes out of the oven, but patience pays off. If you serve it right away, the sauce will be very thin and runny. Letting it rest for 5-10 minutes allows the sauce to set up slightly, making it much easier to serve neat portions. The dish also remains dangerously hot right out of the oven, and the resting time brings it to a perfect eating temperature.
Storage & Meal Prep
One of the best features of this creamy baked pasta recipe is how wonderfully it stores and reheats, making it perfect for meal prep and planned leftovers. Here’s everything you need to know:
Refrigerator Storage: Allow the baked pasta to cool to room temperature (no more than 2 hours after baking for food safety). Transfer leftovers to an airtight container or cover the baking dish tightly with plastic wrap or aluminum foil. Store in the refrigerator for up to 4-5 days. The flavors actually meld and improve slightly on day two, making leftovers particularly delicious.
Portioning for Meal Prep: If you’re meal prepping, divide the baked pasta into individual portions in airtight containers. This makes it easy to grab single servings for lunch throughout the week. Glass containers with snap-on lids work beautifully and are microwave-safe for reheating.
Reheating in the Oven: For best results, especially if reheating larger portions, use the oven. Preheat to 350°F. Place pasta in an oven-safe dish, cover with foil, and add 2-3 tablespoons of milk, cream, or broth to prevent drying. Heat for 20-25 minutes until warmed through and bubbly. Remove foil for the last 5 minutes if you want to re-crisp the topping.
Reheating in the Microwave: For quick individual portions, microwave on 70% power for 2-3 minutes, stirring halfway through. Add a splash of milk or cream to restore creaminess. Microwave in 1-minute intervals until heated through to 165°F internal temperature. Cover with a damp paper towel to prevent drying out and contain splatters.
Reheating on the Stovetop: For single servings, reheat in a small saucepan over medium-low heat. Add a splash of cream or milk and stir frequently until heated through. This method gives you the best control over texture.
What Happens to Leftovers: The sauce will thicken considerably in the refrigerator as it cools. This is completely normal! Adding a bit of liquid when reheating brings back that creamy consistency. The flavors also intensify as they sit, so your leftovers might actually taste even better than the freshly baked dish.
Food Safety Note: Always reheat leftovers to an internal temperature of 165°F to ensure food safety. Use a food thermometer if you’re unsure. Never leave the baked pasta at room temperature for more than 2 hours total (including cooling time and serving time).
Make-Ahead & Freezer Notes
This creamy baked pasta is an absolute champion when it comes to make-ahead capabilities, making it perfect for busy families and meal planners. Here’s how to maximize convenience:
Make-Ahead Method (Refrigerator): Assemble the entire dish completely through Step 6 (before adding breadcrumb topping). Cover tightly with aluminum foil and refrigerate for up to 24 hours before baking. When ready to bake, remove from refrigerator and let sit at room temperature for 20-30 minutes while oven preheats. Add the breadcrumb topping just before baking. Increase covered baking time to 20-25 minutes since the dish is starting cold, then uncover and bake as directed until golden and bubbly. This method is perfect for weeknight dinners or entertaining—do all the work the day before, then just bake when needed.
Partial Prep Ahead: You can also prep components separately: cook and drain pasta up to 2 days ahead (toss with a bit of olive oil and refrigerate), shred all cheeses and store in separate containers, or make the cream sauce up to 2 days ahead (refrigerate in airtight container). When ready to bake, gently rewarm sauce, combine with pasta, and proceed with recipe. This breaks the work into smaller tasks.
Freezing Before Baking (Best Method): Assemble the entire dish through Step 6 in a freezer-safe, oven-safe baking dish. Do not add breadcrumb topping yet. Cover tightly with plastic wrap, then wrap again with heavy-duty aluminum foil. Label with the date and baking instructions. Freeze for up to 3 months. To bake from frozen, remove from freezer and thaw in refrigerator overnight (12-24 hours). Let sit at room temperature 30 minutes, add breadcrumb topping, and bake as directed, adding 10-15 extra minutes to covered baking time.
Freezing Already-Baked Pasta: You can freeze already-baked pasta, though texture won’t be quite as perfect as freezing before baking. Allow to cool completely, portion into freezer-safe containers or wrap entire dish well in plastic wrap and foil. Freeze for up to 2 months. Thaw overnight in refrigerator and reheat using oven method for best results.
Freezer-to-Oven Method: If you’re short on time, you can bake from completely frozen (no thawing). Cover tightly with foil and bake at 350°F for 60-75 minutes, then uncover, add breadcrumb topping, and bake 15-20 minutes more until golden and heated through to 165°F. This takes longer but works in a pinch.
Best Reheating from Frozen: Thaw frozen portions in the refrigerator overnight for food safety. Reheat in oven at 350°F, covered with foil with a splash of added liquid, until heated through (30-40 minutes depending on portion size).
Pro Tip for Meal Prep: Make two full pans—one to eat now and one to freeze for later. Since you’re already making the mess and doing the work, doubling the recipe takes minimal extra effort and gives you a ready-made meal for crazy busy weeks.
Serving Suggestions
This creamy baked pasta is absolutely satisfying on its own, but pairing it with the right sides transforms it into a complete, well-rounded meal. Here are some delicious serving suggestions:
Fresh Salads: A crisp, bright salad provides perfect contrast to the rich, creamy pasta. Try a classic Caesar salad with crunchy romaine and garlicky dressing, simple mixed greens with balsamic vinaigrette and cherry tomatoes, arugula salad with lemon and shaved Parmesan, Italian chopped salad with pepperoncini and olives, or a refreshing cucumber and tomato salad with red onion and Italian dressing. The acidity and freshness cut through the richness beautifully.
Garlic Bread: It’s the classic pairing for a reason! Serve warm, buttery garlic bread, cheesy garlic breadsticks, toasted baguette slices brushed with garlic butter, or pull-apart garlic bread for a fun, shareable option. Perfect for soaking up any extra sauce on your plate.
Roasted or Steamed Vegetables: Add more vegetables to round out the meal nutritionally. Roasted broccoli with garlic and Parmesan, roasted Brussels sprouts with balsamic glaze, steamed green beans with lemon and almonds, roasted asparagus with olive oil and sea salt, or honey-glazed carrots all pair wonderfully without competing with the main dish.
Protein Additions on the Side: If the pasta doesn’t include meat, serve with grilled chicken breast, pan-seared Italian sausages, meatballs in marinara, or grilled shrimp skewers. This makes the meal more substantial for big appetites.
Soup Starter: Begin the meal with a light soup course. Minestrone, Italian wedding soup, tomato basil soup, or a simple broth-based vegetable soup complement the pasta course beautifully without being too heavy.
Wine Pairings: For adults, pair this creamy baked pasta with a crisp white wine like Pinot Grigio or Chardonnay, which cuts through the richness. A light Italian red like Chianti also works wonderfully. For non-alcoholic options, serve sparkling water with lemon, iced tea, or Italian sodas.
Complete Family Dinner: Create the ultimate comfort food spread by serving the baked pasta as the main dish alongside garlic bread, a big Caesar salad, and roasted vegetables. Add a simple dessert like tiramisu or gelato to finish the Italian-inspired feast.
Potluck or Party Serving: This baked pasta is perfect for gatherings. Keep it warm in a slow cooker on low setting for buffet-style serving, or bring it in the baking dish wrapped in towels to retain heat. Serve with sturdy paper plates and forks for easy cleanup.
FAQs Section
Can I use different types of pasta for this recipe?
Absolutely! While penne is recommended, virtually any short pasta shape works beautifully in this creamy baked pasta casserole. Rigatoni, ziti, shells, rotini, cavatappi, and even elbow macaroni all work perfectly. The key is using short, sturdy pasta shapes rather than long noodles like spaghetti or fettuccine. Shapes with ridges, tubes, or hollows are ideal because they capture and hold the creamy sauce in every bite. Just cook according to package directions until al dente, regardless of shape. Each shape brings a slightly different texture experience but all taste delicious!
How do I prevent my baked pasta from drying out?
The secret to keeping baked pasta creamy is ensuring your sauce is quite thin and saucy before baking—it should almost look like too much sauce. The pasta absorbs significant liquid during baking, so what seems overly saucy becomes perfectly creamy. Also, cover the dish with foil for the first 15 minutes of baking to trap moisture and prevent the top from drying out. If reheating leftovers, always add a splash of cream, milk, or broth to restore moisture. Store leftovers in airtight containers to prevent drying in the refrigerator. If your pasta does turn out dry, simply stir in some extra cream or broth and heat gently on the stovetop or add liquid before reheating in the oven.
Can I make this recipe dairy-free or vegan?
Yes, with some substitutions! For a dairy-free version, use plant-based butter, substitute heavy cream with full-fat coconut cream or cashew cream, use dairy-free milk like oat or soy milk, and use dairy-free cheese alternatives (brands like Violife, Daiya, or Miyoko’s work well). For the best melting results, use a combination of dairy-free mozzarella and a harder dairy-free cheese like Parmesan. Keep in mind that dairy-free versions won’t be quite as rich and creamy as traditional, but they’re still delicious. Use vegetable broth to keep it fully plant-based. Some dairy-free cheeses don’t melt as smoothly, so you might want to make a cashew-based sauce for the creamiest texture.
What’s the best way to reheat baked pasta without it getting dry?
The best reheating method depends on your portion size. For individual portions, microwave on 70% power for 2-3 minutes, adding 1-2 tablespoons of milk or cream before heating and stirring halfway through. For larger portions, the oven gives best results: preheat to 350°F, add a few tablespoons of liquid (cream, milk, or broth), cover tightly with foil, and heat for 20-25 minutes until warmed through. The stovetop method works great for single servings—heat in a small pan over medium-low with added liquid, stirring frequently. Always add moisture when reheating since the sauce thickens considerably when refrigerated. The key is low, gentle heat and added liquid to restore that creamy consistency.
Can I add vegetables or protein to this recipe?
Definitely! This creamy baked pasta is incredibly versatile and welcomes additions. For vegetables, stir in 2-3 cups of cooked broccoli, spinach, mushrooms, bell peppers, zucchini, or peas when combining pasta with sauce. For protein, add 2-3 cups of cooked, diced chicken, crumbled cooked bacon, browned Italian sausage, or cooked ground beef. If adding raw vegetables that need cooking, sauté them first until tender before adding to the pasta mixture. Pre-cooked proteins and vegetables work best since the baking time isn’t long enough to cook raw ingredients thoroughly. These additions make the dish more substantial and let you customize it to your family’s preferences while sneaking in extra nutrition.
How do I know when the baked pasta is done?
Your baked pasta is perfectly done when you see three key signs: the edges are bubbling vigorously, the top is golden brown (especially the breadcrumb topping), and when you insert a knife into the center, it comes out hot. The internal temperature should reach 165°F if you want to be precise with a food thermometer. Typically, this takes 25-30 minutes total baking time (15 minutes covered, then 12-15 minutes uncovered). Watch the last few minutes carefully—once the top starts browning, it can go from perfect to overdone quickly. If the top is browning too fast before the inside is hot, tent with foil and continue baking. If the top isn’t brown enough but the inside is hot, run it under the broiler for 1-2 minutes, watching constantly.
Can I make individual portions instead of one large casserole?
Yes! Individual portions are fantastic for portion control, meal prep, or entertaining. Divide the pasta mixture among 8-10 oven-safe ramekins, small baking dishes, or even large muffin tins. Top each with cheese and breadcrumbs. Reduce baking time to 15-20 minutes total since smaller portions heat through faster. This presentation is adorable for dinner parties and makes serving super easy. Individual portions also freeze beautifully—wrap each one tightly in plastic wrap and foil, freeze for up to 3 months, and bake from frozen for 30-35 minutes covered, then 5-10 minutes uncovered. Perfect for single-serve meal prep!
Conclusion
And there you have it—everything you need to create the most incredible, creamy, soul-satisfying baked pasta that’ll have your family asking for seconds (and thirds!). This recipe truly is the epitome of comfort food that brings everyone together around the table, creating those warm, cozy moments that become cherished memories.
What makes this easy baked pasta casserole so special is its beautiful combination of simplicity and deliciousness. You don’t need to be a trained chef or spend hours in the kitchen to create something that tastes absolutely restaurant-worthy. Just a handful of everyday ingredients, basic cooking techniques, and about an hour from start to finish gives you a dish that’s guaranteed to impress every single time.
Whether you’re feeding picky kids who suddenly become pasta enthusiasts, meal prepping for your busy week ahead, bringing a dish to a potluck where you want to be the star, or simply craving something warm and comforting on a chilly evening, this baked pasta with creamy sauce delivers on every level. It’s reliable, customizable, budget-friendly, and most importantly, absolutely delicious.
I truly hope this recipe becomes a beloved staple in your home just like it is in mine. There’s something magical about pulling a bubbling, golden, cheese-topped casserole out of the oven and watching everyone’s faces light up. That’s the power of really good comfort food—it nourishes both body and soul.
Now it’s your turn to make this recipe your own! I’d absolutely love to hear how it turns out for you. Did you try any of the variations? Did your kids devour it? Did you make it ahead for a stress-free dinner? Drop a comment below and share your experience—I read every single one and love hearing from you!
And if you loved this creamy baked pasta recipe as much as I think you will, please save it to your Pinterest boards so you can find it again and again. Share it with your friends and family who are always looking for easy, crowd-pleasing dinner ideas. The more people we can help get delicious, home-cooked meals on the table, the better!
Happy cooking, and here’s to many cozy, pasta-filled dinners ahead!