

There’s something truly magical about homemade cinnamon rolls fresh from the oven—the intoxicating aroma of cinnamon and butter wafting through your kitchen, the soft, pillowy dough that practically melts in your mouth, and that luscious cream cheese frosting dripping down the sides. These cinnamon rolls with cream cheese frosting are the ultimate breakfast indulgence, the kind of treat that transforms an ordinary morning into something extraordinary and creates memories that last a lifetime.
This easy cinnamon rolls recipe delivers bakery-quality results right in your own home, and here’s the best part: you don’t need to be an expert baker to pull them off. While they do require some time (mostly hands-off rising time), the actual hands-on work is surprisingly straightforward and incredibly rewarding. The soft, fluffy texture, the perfect swirl of sweet cinnamon filling, and that tangy-sweet cream cheese frosting create a combination that’s simply irresistible.
These homemade cinnamon rolls with cream cheese icing are perfect for so many occasions. Serve them for a special weekend breakfast or brunch, make them the star of your holiday morning spread, bring them to potlucks where they’ll disappear in minutes, or bake them as a thoughtful homemade gift that shows you truly care. They’re the kind of recipe that makes people feel loved and turns regular days into celebrations. Whether you’re a seasoned bread baker or trying your hand at yeast dough for the first time, these cinnamon rolls are about to become your new signature recipe.
History / Background
Cinnamon rolls have a rich and fascinating history that spans centuries and continents, evolving from ancient spice routes to become one of America’s most beloved breakfast pastries. The story begins with cinnamon itself, one of the world’s oldest and most prized spices, which was traded along ancient spice routes from Sri Lanka and Indonesia to Europe as early as 2000 BCE.
The concept of sweet, spiced rolled breads originated in Sweden, where kanelbullar (cinnamon buns) have been a cherished tradition since the 1920s. Swedish immigrants brought these recipes to America in the late 19th and early 20th centuries, where they evolved and adapted to American tastes and available ingredients. The Swedish version traditionally uses cardamom in addition to cinnamon and features a pearl sugar topping, while American cinnamon rolls became larger, sweeter, and eventually adopted the now-iconic cream cheese frosting.
The evolution of American-style cinnamon rolls really took off in the 1980s with the explosion of shopping mall culture and chains like Cinnabon, founded in 1985 in Seattle. These commercial cinnamon rolls were revolutionary—absolutely massive in size, drenched in cream cheese frosting, and baked fresh throughout the day so the aroma would draw customers from across the mall. This created the modern template for what Americans think of as the “perfect” cinnamon roll: oversized, ultra-soft, generously filled with cinnamon sugar, and topped with an abundance of tangy cream cheese frosting.
The addition of cream cheese frosting (rather than simple glaze or no topping at all) is distinctly American. While cream cheese itself was invented in 1872 in New York, its use as a frosting for cinnamon rolls didn’t become widespread until the mid-20th century. The tangy richness of cream cheese perfectly balances the sweet cinnamon filling, and the slightly savory component keeps the overall sweetness from being cloying.
Today, cinnamon rolls hold a special place in American food culture. They’re associated with holiday mornings (especially Christmas and Easter), lazy weekend brunches, and comfort food at its finest. The act of making homemade cinnamon rolls has become a labor of love—something you make when you want to show care and create something truly special. Every family has their own cherished recipe and techniques, passed down through generations or adapted from beloved sources, making cinnamon rolls both a universal treat and a deeply personal creation.
Why You’ll Love This Recipe
These homemade cinnamon rolls with cream cheese frosting are about to become your go-to recipe for special occasions and weekend treats, and once you taste them, you’ll understand why. They deliver that perfect combination of soft, fluffy texture and bold cinnamon flavor that makes cinnamon rolls so crave-worthy, all topped with a dreamy cream cheese frosting that takes them completely over the top.
Here’s why this cinnamon rolls recipe will become your new favorite:
- Incredibly Soft & Fluffy: The dough is enriched with butter, eggs, and milk, creating rolls that are pillow-soft and tender with a melt-in-your-mouth texture that rivals any bakery.
- Perfect Every Time: This recipe has been tested and perfected to give you consistent, foolproof results even if you’re new to working with yeast dough.
- Amazing Cinnamon Flavor: Generous amounts of cinnamon and brown sugar create that classic, bold flavor you’re craving without being overwhelming.
- That Cream Cheese Frosting: Tangy, sweet, rich, and absolutely perfect—this isn’t just any frosting, it’s the stuff dreams are made of.
- Make-Ahead Friendly: Prepare the night before and bake fresh in the morning, or freeze for up to 3 months for future cinnamon roll emergencies.
- Customizable: Easily adapt with different spices, add-ins like nuts or raisins, or try flavor variations to make them your own.
- Special Occasion Worthy: These are impressive enough for holiday mornings, birthdays, or when you want to truly wow your guests.
- Better Than Store-Bought: Once you taste homemade, you’ll never want to go back to tubes or frozen rolls. The difference is night and day.
- Family Activity: Making cinnamon rolls together is a wonderful way to spend time with kids—they love helping roll the dough and watching them rise.
- Your House Will Smell Amazing: The aroma of baking cinnamon rolls is pure magic and might be the best part of all.
- Totally Worth the Time: Yes, they take a few hours from start to finish (mostly rising time), but the actual hands-on work is manageable and the results are absolutely worth every minute.
Whether you’re looking to start a new holiday tradition, want to impress weekend brunch guests, or simply crave that nostalgic bakery experience at home, these fluffy cinnamon rolls deliver on every level.
Ingredient Notes
Let’s break down exactly what goes into these incredible cinnamon rolls and why each ingredient matters for achieving that perfect texture and flavor.
For the Dough:
All-Purpose Flour: The foundation of your cinnamon rolls. All-purpose flour provides the right amount of protein for structure while keeping rolls tender. Bread flour can be used for chewier rolls, but all-purpose gives that classic soft texture. Measure flour correctly by spooning it into your measuring cup and leveling off—don’t pack it down.
Active Dry Yeast or Instant Yeast: The magic ingredient that makes dough rise and creates that fluffy texture. Active dry yeast needs to be dissolved in warm liquid first (proofing), while instant yeast can be mixed directly into dry ingredients. Both work perfectly—just follow the specific instructions for whichever you use. Make sure your yeast is fresh (check expiration date) or your rolls won’t rise properly.
Whole Milk: Adds richness, flavor, and creates a tender crumb. The milk should be warmed to 110°F—warm enough to activate yeast but not so hot that it kills it (think warm bath temperature). You can substitute with 2% milk, though whole milk gives the best results. For dairy-free, use warm oat milk or almond milk.
Granulated Sugar: Feeds the yeast, helps with browning, and adds subtle sweetness to the dough. Don’t reduce the sugar in the dough—it’s necessary for proper yeast activity and texture.
Butter: Use unsalted butter for both the dough and filling so you can control salt levels. Butter adds richness, flavor, and keeps rolls tender. It must be softened to room temperature for the dough and very soft (almost melted) for easy spreading in the filling.
Eggs: Provide structure, richness, and that beautiful golden color. Use large eggs at room temperature for best incorporation into the dough.
Salt: Essential for flavor balance. Don’t skip it or your rolls will taste flat and bland.
For the Cinnamon Filling:
Brown Sugar: Creates that sweet, caramelized filling with deeper molasses notes than white sugar. Light or dark brown sugar both work—dark has a more robust flavor. Pack it into your measuring cup for accurate measurement.
Ground Cinnamon: The star of the show! Use fresh, high-quality cinnamon for the best flavor. If your cinnamon has been sitting in the cabinet for years, it’s time for fresh. Vietnamese or Ceylon cinnamon both work beautifully.
Butter: Softened butter gets spread over the dough before adding cinnamon sugar, helping the filling stick and adding richness. It should be soft enough to spread easily without tearing the dough.
For the Cream Cheese Frosting:
Cream Cheese: Must be full-fat and softened to room temperature. Low-fat versions don’t work well and create grainy frosting. Let it sit out for 30-60 minutes before using or soften gently in the microwave (10 seconds at a time).
Butter: Also needs to be softened to room temperature for smooth, fluffy frosting. Together with cream cheese, it creates that perfect tangy-sweet balance.
Powdered Sugar: Also called confectioners’ sugar. Sift it before adding if it has lumps for the smoothest frosting. This provides sweetness and the right consistency.
Vanilla Extract: Pure vanilla extract adds depth and rounds out the flavors. Don’t skip it!
Milk or Heavy Cream: Just a tablespoon or two to adjust the consistency to your preference—thicker for piping or thinner for drizzling.
Equipment Needed
Making homemade cinnamon rolls requires some specific equipment, but nothing too fancy or specialized. Here’s what you’ll need:
- Stand Mixer with Dough Hook (or Large Bowl): A stand mixer makes kneading dough effortless, but you can absolutely make these by hand with a large mixing bowl and some elbow grease. The dough hook attachment does all the kneading work for you.
- Measuring Cups and Spoons: Accurate measurements are crucial in baking. Use dry measuring cups for flour and sugar, liquid measuring cups for milk, and standard measuring spoons.
- Kitchen Scale (Optional but Recommended): Weighing flour gives the most accurate results. 1 cup flour = 120-125 grams.
- Instant-Read Thermometer: For checking milk temperature (should be 110°F) to ensure it’s perfect for yeast activation without killing it.
- Rolling Pin: Essential for rolling dough into the required rectangle. A traditional wooden rolling pin or marble one both work great.
- 9×13-inch Baking Pan: The standard size for a batch of 12 cinnamon rolls. Metal, glass, or ceramic all work, though metal browns the bottoms nicely.
- Pastry Brush: For brushing melted butter over the dough before adding cinnamon sugar.
- Sharp Knife, Dental Floss, or Serrated Knife: For cutting rolled dough into individual rolls. Dental floss gives the cleanest cuts without squishing.
- Clean Kitchen Towel or Plastic Wrap: For covering dough while it rises.
- Large Mixing Bowl (if not using stand mixer): For mixing and kneading dough by hand.
- Offset Spatula or Butter Knife: For spreading softened butter and frosting.
- Parchment Paper (Optional): Line your baking pan for easy cleanup and removal.
- Wire Cooling Rack: For cooling the pan slightly before frosting.
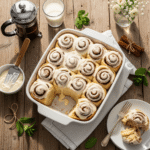
Cinnamon Rolls with Cream Cheese Frosting
- Total Time: 3 hours
- Yield: 12 large cinnamon rolls 1x
- Diet: Vegetarian
Description
These homemade cinnamon rolls are everything you dream of—soft, fluffy, and loaded with cinnamon sugar filling, then topped with the most incredible tangy cream cheese frosting. Perfect for special breakfasts and worth every minute!
Ingredients
For the Dough:
- 4 cups (500g) all-purpose flour, plus more for dusting
- 2¼ teaspoons (1 packet) active dry yeast or instant yeast
- 1 cup whole milk, warmed to 110°F
- ⅓ cup granulated sugar
- ⅓ cup unsalted butter, softened to room temperature
- 1 large egg, room temperature
- 1 large egg yolk, room temperature
- 1 teaspoon salt
For the Cinnamon Filling:
- ¾ cup packed light or dark brown sugar
- 2½ tablespoons ground cinnamon
- ¼ cup unsalted butter, softened (almost melted for easy spreading)
For the Cream Cheese Frosting:
- 4 ounces (½ block) cream cheese, softened to room temperature
- 3 tablespoons unsalted butter, softened to room temperature
- 1½ cups powdered sugar, sifted
- 1 teaspoon pure vanilla extract
- Pinch of salt
- 1–2 tablespoons milk or heavy cream (to adjust consistency)
Instructions
Step 1: Activate the Yeast
If using active dry yeast, combine the warm milk (110°F—test with thermometer), 1 tablespoon of the sugar, and the yeast in the bowl of your stand mixer or a large bowl. Stir gently and let sit for 5-10 minutes until foamy and bubbly. This proves your yeast is alive. If using instant yeast, you can skip this step and add yeast directly to the dry ingredients, then add warm milk when indicated.
Step 2: Make the Dough
Add the remaining sugar, softened butter, egg, egg yolk, and salt to the yeast mixture. Mix with a wooden spoon or paddle attachment on low speed until combined. Add 3½ cups of flour, one cup at a time, mixing after each addition. Once dough starts to come together, switch to the dough hook (or begin kneading by hand). Knead for 6-8 minutes on medium-low speed (or 8-10 minutes by hand) until dough is smooth, elastic, and slightly tacky but not sticky. Add remaining flour gradually only if needed—dough should be soft.
Step 3: First Rise
Shape dough into a ball and place in a large, lightly greased bowl. Turn once to coat all sides with oil. Cover with a clean kitchen towel or plastic wrap. Let rise in a warm, draft-free spot for 1-1½ hours until doubled in size. To test, gently press two fingers into the dough—if the indentation remains, it’s ready.
Step 4: Prepare the Filling
While dough rises, mix the brown sugar and cinnamon in a small bowl until well combined. Set aside. Make sure your ¼ cup butter is very soft, almost melted, so it spreads easily without tearing the dough.
Step 5: Roll Out the Dough
Once dough has doubled, punch it down gently to release air. Turn out onto a lightly floured surface. Roll into a large rectangle approximately 14×9 inches, with the long side facing you. The dough should be about ¼-inch thick. Try to keep edges as straight as possible for even rolls.
Step 6: Add the Filling
Using an offset spatula or knife, spread the softened butter evenly over the entire surface of the dough, leaving a ½-inch border along the top long edge (this helps seal the rolls). Sprinkle the cinnamon sugar mixture evenly over the buttered dough, pressing it gently into the butter so it sticks. Make sure to get cinnamon sugar all the way to the edges except for that top border.
Step 7: Roll It Up
Starting from the long edge closest to you, tightly roll the dough into a log, rolling away from yourself. Keep the roll tight and even as you go. When you reach the end, pinch the seam to seal. Position the log seam-side down.
Step 8: Cut the Rolls
Using a sharp serrated knife, dental floss, or sharp chef’s knife, cut the log into 12 equal pieces (about 1¼ inches each). For the cleanest cuts with dental floss: slide floss under the log, cross the ends over the top, and pull tight to slice through. This prevents squishing. Discard or bake the uneven end pieces for the baker’s treat!
Step 9: Second Rise
Arrange the 12 rolls cut-side up in a greased 9×13-inch baking pan, spacing them slightly apart (they’ll expand and touch as they rise). Cover with a towel and let rise in a warm place for 30-45 minutes until puffy and nearly doubled. They should look pillowy and be touching each other.
Step 10: Bake
Preheat your oven to 350°F during the last 15 minutes of rising. Once rolls are puffy, bake for 25-30 minutes until tops are golden brown and the internal temperature reaches 190°F. The center rolls should be set and cooked through. If tops brown too quickly, tent loosely with foil for the last 10 minutes.
Step 11: Make the Cream Cheese Frosting
While rolls bake, beat together the softened cream cheese and butter in a medium bowl with an electric mixer until smooth and fluffy, about 2 minutes. Add the powdered sugar, vanilla, and pinch of salt. Beat on low, then increase to medium-high and beat for 2-3 minutes until light and fluffy. Add milk or cream one tablespoon at a time until you reach your desired consistency—thicker for spreading, thinner for drizzling.
Step 12: Frost and Serve
Remove cinnamon rolls from the oven and let cool in the pan for just 5-10 minutes—you want them still quite warm. Spread the cream cheese frosting generously over the warm rolls, allowing it to melt slightly into all the nooks and crannies. Serve immediately while warm and gooey.
Notes
- Temperature Matters: Liquid that’s too hot kills yeast; too cold won’t activate it. 110°F is perfect—it should feel like warm bathwater.
- Dough Texture: Your dough should be soft and slightly tacky but not sticky. If it’s sticking to your hands or the bowl excessively, add flour 1 tablespoon at a time. Too much flour makes dense rolls, so add conservatively.
- Rising Environment: If your kitchen is cold, create a warm spot by turning your oven to 200°F for 1-2 minutes, then turning it OFF. Place dough inside the warm (not hot!) oven to rise. Or place near a sunny window.
- Overnight Method: After placing cut rolls in the pan, cover tightly and refrigerate overnight. In the morning, remove from fridge, let sit at room temperature 30-45 minutes, then bake as directed. Fresh cinnamon rolls with minimal morning effort!
- Doubling Recipe: This recipe doubles beautifully. You’ll need two 9×13 pans for 24 rolls total.
- Prep Time: 30 minutes (plus 2 hours rising time)
- Cook Time: 25-30 minutes
- Category: Breakfast
- Method: Baking
- Cuisine: American
Nutrition
- Serving Size: 1 frosted cinnamon roll (1/12 of recipe)
- Calories: 420
- Sugar: 32g
- Sodium: 260mg
- Fat: 16g
- Saturated Fat: 10g
- Unsaturated Fat: 5g
- Trans Fat: 0g
- Carbohydrates: 64g
- Fiber: 2g
- Protein: 6g
- Cholesterol: 65mg
Tips & Variations
The beauty of homemade cinnamon rolls is how customizable they are! Here are some delicious ways to make this recipe your own:
Flavor Variations:
Apple Cinnamon Rolls: Add 1 cup finely diced apples (tossed with lemon juice) sprinkled over the cinnamon sugar before rolling. Use apple pie spice blend instead of just cinnamon.
Maple Pecan Cinnamon Rolls: Replace cream cheese frosting with maple glaze (powdered sugar + maple syrup + butter). Sprinkle ½ cup chopped pecans over cinnamon sugar before rolling.
Pumpkin Spice Cinnamon Rolls: Replace ½ cup milk in dough with pumpkin puree. Use pumpkin pie spice instead of cinnamon in the filling.
Orange Cinnamon Rolls: Add 1 tablespoon orange zest to the dough and 1 teaspoon to the frosting. Add 1 tablespoon fresh orange juice to frosting for bright citrus flavor.
Chocolate Cinnamon Rolls: Sprinkle ½ cup mini chocolate chips over the cinnamon sugar before rolling. Or add 2 tablespoons cocoa powder to the filling mixture.
Sticky Bun Style: Before placing rolls in pan, pour caramel sauce (½ cup brown sugar + ¼ cup butter + 2 tablespoons cream, heated) in bottom of pan. Add pecans, then place rolls on top. Flip onto serving platter after baking.
Cream Cheese Filled: Spread a layer of sweetened cream cheese (4 oz cream cheese + 3 tablespoons sugar) over the butter before adding cinnamon sugar for an extra creamy center.
Add-In Ideas: Mix any of these into your cinnamon sugar: raisins, dried cranberries, chopped walnuts or pecans, white or dark chocolate chips, or shredded coconut.
Different Frostings:
- Classic vanilla glaze (powdered sugar + milk + vanilla)
- Browned butter frosting
- Salted caramel frosting
- Maple cream cheese frosting
- Chocolate cream cheese frosting
Smaller or Larger Rolls: Cut into 9 extra-large rolls for massive cinnamon roll experience, or 15-16 smaller rolls. Adjust baking time accordingly—large rolls need 5 extra minutes, small rolls need 5 fewer minutes.
Pro Chef Tips
These professional techniques will take your homemade cinnamon rolls from good to absolutely spectacular:
Use a Scale for Precision: Baking is science, and measuring flour by weight (rather than volume) gives you the most consistent, reliable results every time. 1 cup flour = 120-125 grams. This prevents heavy, dense rolls from too much flour.
Room Temperature Ingredients Are Key: Cold eggs and butter don’t incorporate smoothly into dough, creating an uneven texture. Set out eggs, butter, and cream cheese 30-60 minutes before starting. This simple step makes a dramatic difference in texture.
Don’t Rush the Rise: Proper rising time is non-negotiable for light, fluffy rolls. The dough needs time to develop flavor and structure. If your kitchen is cold and rising is taking longer than specified, that’s okay—judge by appearance (doubled in size) rather than exact time.
Knead to the Right Consistency: Properly kneaded dough should be smooth, elastic, and pass the “windowpane test”—stretch a small piece thin enough to see light through without tearing. This develops gluten for the right structure. Under-kneaded dough makes dense rolls; over-kneaded dough makes tough rolls.
Roll Dough Evenly: Use a ruler or measuring tape to get your rectangle close to 14×9 inches and even thickness throughout. This ensures uniform rolls that bake at the same rate. Uneven dough thickness means some rolls are gooey while others are overdone.
Spread Butter While Dough Is Slightly Warm: After rolling out, if your dough feels cool and stiff, the butter won’t spread easily and might tear the dough. Let rolled dough rest 5 minutes so it’s slightly warm and relaxed, making butter spreading effortless.
Use Enough Filling: Don’t be shy! A generous layer of cinnamon sugar creates those gooey, flavorful swirls we all crave. The cinnamon-to-sugar ratio in this recipe is balanced—more cinnamon can taste bitter, less makes bland rolls.
Tight Rolling Technique: Roll the dough tightly without pulling or stretching it. Tight rolls create more distinct swirls and prevent gapping in the center. Each turn should be snug against the previous layer.
Sharp Knife = Clean Cuts: A dull knife squishes the dough and distorts the beautiful spiral. Use sharp, decisive cuts, dental floss, or a serrated knife with a gentle sawing motion. Wipe the blade between cuts for the cleanest edges.
Bake Until Just Done: The sweet spot is when rolls are golden brown on top and just set in the center. Internal temperature should read 190°F. Overbaking makes them dry, even if they look okay on the outside. Start checking at 23 minutes.
Frost While Warm: Spread frosting over rolls when they’re still warm (after just 5-10 minutes cooling). The residual heat slightly melts the frosting, allowing it to seep into every crevice and create that irresistible gooey layer.
Common Mistakes to Avoid
Even experienced bakers sometimes struggle with yeast dough. Here are the most common pitfalls and how to avoid them:
Killing the Yeast with Hot Liquid: This is mistake number one. If your milk is too hot (above 120°F), it will kill the yeast and your dough won’t rise at all. Always use a thermometer to check—110°F is the sweet spot. It should feel warm but comfortable to touch, like bathwater. If you accidentally kill your yeast, there’s no fixing it—you’ll need to start over.
Using Old or Expired Yeast: Yeast loses potency over time. Check the expiration date before using, and if it’s close or past, proof it first even if using instant yeast. If it doesn’t foam and bubble after 10 minutes in warm liquid with sugar, it’s dead and needs to be replaced. This is why your dough sometimes just won’t rise no matter what you do.
Adding Too Much Flour: The most common cause of dense, heavy cinnamon rolls is too much flour in the dough. Your dough should be soft and slightly tacky—not sticky, but not dry either. Many beginners keep adding flour until dough is completely non-sticky, resulting in dry, tough rolls. Add flour conservatively, and remember that dough firms up as it kneads. When in doubt, err on the side of slightly wetter dough.
Not Kneading Long Enough: Under-kneaded dough hasn’t developed enough gluten structure, resulting in rolls that don’t rise properly and have a dense, cake-like texture rather than fluffy bread texture. Knead for the full 6-8 minutes in a stand mixer or 8-10 minutes by hand. The dough should transform from shaggy to smooth and elastic.
Skipping the Second Rise: After cutting rolls, that second 30-45 minute rise is crucial. Some people think they can skip straight to baking, but this results in dense rolls that haven’t had time to develop air pockets. The rolls should look noticeably puffier and lighter before baking. Be patient—this rise is what creates that pillowy, soft texture.
Rolling Dough Too Thin or Thick: Too thin and your rolls will be flat with not enough filling in each layer; too thick and the center won’t cook through properly. Aim for ¼-inch thickness after rolling. This creates the perfect ratio of dough to filling and ensures even baking.
Overbaking: Because cinnamon rolls contain sugar, they can look perfectly golden on the outside while still being undercooked inside, or vice versa—they can continue browning even when the interior is done. Use an instant-read thermometer to check internal temperature (should be 190°F) rather than relying only on appearance. Overbaked rolls are dry and disappointing.
Storage & Meal Prep
Cinnamon rolls are absolutely best enjoyed fresh and warm from the oven, but they also store beautifully and reheat well. Here’s how to handle leftovers and meal prep:
Room Temperature Storage: If you’ll eat the cinnamon rolls within 2-3 days, store them at room temperature in an airtight container or cover the pan tightly with plastic wrap or foil. Keep them in a cool, dry place away from direct sunlight. The frosting contains cream cheese, so don’t leave them out longer than 2 days in hot weather—refrigerate instead.
Refrigerator Storage: For longer storage (up to 5-7 days), place frosted cinnamon rolls in an airtight container and refrigerate. The rolls will firm up when cold but can be easily reheated. If you haven’t frosted them yet, you can refrigerate unfrosted rolls and add fresh frosting after reheating for the best presentation.
Reheating Individual Rolls: For single servings, microwave one roll on a plate for 20-30 seconds at 50% power, just until warmed through. Be careful not to overheat or the roll will become tough. Alternatively, wrap in foil and warm in a 300°F oven for 10 minutes.
Reheating Multiple Rolls: To reheat several rolls at once, place them in a baking dish, cover with foil, and warm in a 300°F oven for 15-20 minutes until heated through. For extra moisture, place a pan of hot water on the rack below the rolls while reheating. This creates steam that keeps them soft.
Reheating Tip: If rolls seem dry after storage, brush them lightly with melted butter before reheating. This revives moisture and adds richness. You can also add extra frosting after reheating for that fresh-from-the-oven experience.
Freezing Frosted Rolls: While you can freeze frosted rolls, the frosting texture changes slightly after thawing. If you want to freeze already-baked rolls, let them cool completely, wrap each individually in plastic wrap, then place all wrapped rolls in a freezer bag. Freeze for up to 3 months. Thaw overnight in the refrigerator or at room temperature for 2-3 hours, then reheat.
Best Storage Practice: For optimal quality, freeze unfrosted baked rolls and make fresh frosting when ready to serve. This gives you the closest thing to fresh-baked results.
Make-Ahead & Freezer Notes
The beauty of this cinnamon roll recipe is its incredible make-ahead flexibility. You can prepare them at various stages depending on your schedule:
Overnight Method (Most Popular): This is perfect for Christmas morning or special brunches when you want fresh cinnamon rolls without waking up at 5 AM. After cutting rolls and placing them in the baking pan (Step 9), cover the pan tightly with plastic wrap and refrigerate overnight (up to 16 hours). The next morning, remove from the refrigerator and let sit at room temperature for 30-45 minutes while your oven preheats. They’ll puff up slightly as they come to room temperature. Bake as directed. They might need an extra 5 minutes since they’re starting cold.
Freeze Unbaked Rolls (Best Quality): For maximum convenience with minimal quality loss, freeze the rolls after cutting but before the second rise. Arrange cut rolls in a greased, freezer-safe 9×13 pan, cover tightly with plastic wrap and then foil, and freeze for up to 3 months. When ready to bake, remove from freezer and let thaw in refrigerator overnight. The next morning, let sit at room temperature for 45-60 minutes until puffy and doubled (this takes longer than fresh rolls). Bake as directed.
Freeze Dough Before Rolling: After the first rise, punch down dough, wrap tightly in plastic wrap, and freeze in a freezer bag for up to 3 months. Thaw overnight in the refrigerator, then let come to room temperature (about 1 hour) before rolling, filling, and continuing with the recipe. This method gives you the most flexibility.
Freeze Baked, Unfrosted Rolls: Bake rolls completely, let cool, wrap individually in plastic wrap, and freeze in a freezer bag for up to 3 months. Thaw at room temperature or overnight in the fridge, reheat in a 300°F oven for 10-15 minutes until warmed through, then frost with freshly made cream cheese frosting. This is ideal if you want to bake a double batch and have future cinnamon rolls ready to go.
Prepare Dough the Night Before: If you want to split the work, make the dough the night before, complete the first rise, then punch down, wrap tightly, and refrigerate overnight. The next day, let dough sit at room temperature for 30 minutes to warm slightly, then roll out and continue with the recipe. The cold dough actually becomes easier to roll.
Reheating Frozen Baked Rolls: For frozen fully-baked rolls (frosted or unfrosted), thaw completely at room temperature or in the refrigerator overnight. Reheat covered with foil in a 300°F oven for 15-20 minutes. Add fresh frosting if they were frozen unfrosted.
Freezing Frosting Separately: Cream cheese frosting can be frozen separately in an airtight container for up to 3 months. Thaw in refrigerator overnight, then bring to room temperature and re-whip with a mixer to restore the fluffy texture before spreading on warm rolls.
Time-Saving Tip: Make a double or triple batch of dough, divide into portions, and freeze the extras. You’ll always have cinnamon roll dough ready when the craving hits!
Serving Suggestions
While cinnamon rolls are absolutely perfect on their own, here are some wonderful ways to serve them and complementary items that make the experience even better:
Classic Breakfast Spread: Serve warm cinnamon rolls as the centerpiece of a leisurely weekend breakfast alongside crispy bacon strips, scrambled eggs or a fluffy omelet, fresh fruit salad with berries and melon, and hot coffee or fresh-squeezed orange juice. This creates a balanced breakfast that’s both indulgent and satisfying.
Brunch Buffet Star: Make cinnamon rolls the highlight of your brunch spread. Serve with quiche or frittata, yogurt parfaits with granola, assorted fresh pastries, smoked salmon and bagels, and a mimosa bar. Cinnamon rolls always steal the show at brunches!
Holiday Morning Tradition: Cinnamon rolls are iconic for Christmas, Easter, and other special holiday mornings. Serve them straight from the oven while everyone opens presents or enjoys family time. Pair with hot cocoa with marshmallows for kids, specialty coffee drinks like lattes or cappuccinos, or even champagne for adult celebrations.
Coffee Pairing: These cinnamon rolls pair beautifully with coffee. The richness of cream cheese frosting is perfectly balanced by a bold, dark roast coffee. Try serving with French press coffee, cold brew, lattes, or flavored coffee like vanilla or hazelnut.
Ice Cream Twist: For a truly decadent dessert, warm a cinnamon roll and top with a scoop of vanilla ice cream. The contrast of hot roll and cold ice cream with all that cream cheese frosting is absolutely heavenly. Drizzle with caramel sauce for extra indulgence.
Simple Additions: Enhance the cinnamon roll experience with fresh whipped cream dolloped on top, extra cream cheese frosting on the side for dipping, fresh berries scattered around the plate for color and freshness, or a dusting of powdered sugar for a pretty presentation.
Beverage Pairings: Beyond coffee, these rolls pair wonderfully with cold whole milk (classic for kids), hot spiced apple cider in fall, chai tea lattes for warm spice notes, or hot chocolate with whipped cream.
Make It a Meal: If serving for breakfast or brunch, balance the sweetness with savory sides like breakfast sausage, hash browns, avocado toast, or a simple green salad with vinaigrette.
Party Presentation: For gatherings, place warm cinnamon rolls on a beautiful serving platter or wooden board, drizzle with extra frosting, garnish with a sprig of fresh mint, and let guests serve themselves. Have small plates, forks, and plenty of napkins available!
FAQs Section
Can I make cinnamon rolls without a stand mixer?
Absolutely! While a stand mixer makes the process easier, these cinnamon rolls can be made entirely by hand. Mix the dough ingredients in a large bowl using a wooden spoon, then turn out onto a floured surface and knead by hand for 8-10 minutes. You’ll know it’s ready when the dough is smooth, elastic, and slightly tacky. Hand-kneading actually gives you a better feel for dough texture and many bakers prefer it. It just requires a bit more elbow grease and time. The results are equally delicious!
Why didn’t my cinnamon rolls rise?
There are several possible reasons: (1) The yeast was dead or expired—always check the date and proof active dry yeast to test it; (2) Your liquid was too hot and killed the yeast—it should be 110°F, no hotter; (3) The liquid was too cold and didn’t activate the yeast properly; (4) Your kitchen was too cold for rising—find a warm spot like near a sunny window or in a slightly warmed oven (turned off); (5) You didn’t knead the dough enough to develop gluten structure; or (6) You didn’t give them enough time—be patient and judge by appearance (doubled in size) rather than exact time.
Can I use bread flour instead of all-purpose flour?
Yes, bread flour can be used and will create slightly chewier cinnamon rolls with more structure due to higher protein content. Use the same amount, but you may need to add a tablespoon or two more liquid since bread flour absorbs more moisture. Some people love the chewier texture, while others prefer the more tender crumb that all-purpose flour provides. It’s personal preference! Both work perfectly.
How do I know when the dough has been kneaded enough?
Properly kneaded dough should be smooth, elastic, and slightly tacky (but not sticky). Perform the “windowpane test”: pinch off a small piece of dough and gently stretch it between your fingers. If you can stretch it thin enough to see light through it without it tearing, the gluten is properly developed. If it tears immediately, continue kneading for another 2-3 minutes and test again. In a stand mixer, this typically takes 6-8 minutes at medium-low speed.
Can I reduce the sugar to make them less sweet?
You can reduce the sugar in the filling slightly (by 2-3 tablespoons), but don’t reduce the sugar in the dough itself. The sugar in the dough isn’t just for sweetness—it feeds the yeast, helps with browning, and contributes to texture. Reducing it affects how the dough rises and tastes. The cream cheese frosting amount can be adjusted to your preference, or you can use a simple glaze instead for less sweetness. Remember that cinnamon rolls are meant to be an indulgent treat!
What’s the best way to cut cinnamon rolls without squishing them?
The professional trick is using unflavored dental floss! Slide a piece of dental floss under the rolled log, cross the ends over the top of the roll where you want to cut, and pull the ends in opposite directions. The floss slices cleanly through without applying downward pressure that squishes the roll. If using a knife, make sure it’s very sharp and use a gentle sawing motion rather than pressing down. Wipe the blade clean between cuts for the neatest results.
Why is my cream cheese frosting grainy?
Grainy frosting usually happens when the cream cheese or butter is too cold and not properly softened. Always let both ingredients sit at room temperature for 30-60 minutes before making frosting. They should be soft enough to easily press your finger into them. If your frosting is already made and grainy, try beating it for several more minutes—sometimes the friction warms it enough to smooth out. You can also very briefly microwave the bowl for 5-10 seconds and beat again. For next time, make sure all ingredients are truly at room temperature before mixing.
Can I make mini cinnamon rolls instead of regular size?
Yes! Cut your rolled log into 20-24 smaller pieces instead of 12. Arrange them in the 9×13 pan (they’ll be more crowded) or use two smaller pans. Reduce baking time to 18-22 minutes since smaller rolls bake faster. Mini cinnamon rolls are perfect for parties, portion control, or when you want to serve more people. They’re also adorable and tend to have more of that delicious crispy edge that everyone loves!
Conclusion
Congratulations—you now have everything you need to make the most incredible, bakery-worthy cinnamon rolls right in your own kitchen! These homemade cinnamon rolls with cream cheese frosting are the kind of recipe that becomes part of your family’s story, the treat that everyone remembers and requests again and again. Yes, they take a bit of time, but I promise you that every single minute is worth it when you pull those golden, fragrant rolls from the oven and watch faces light up with anticipation.
There’s something truly magical about making cinnamon rolls from scratch. The process itself is therapeutic—the kneading, the rising, the rolling and filling, and finally that moment when you spread warm cream cheese frosting over the just-baked rolls. It’s not just about the end result (though that’s pretty spectacular); it’s about the experience, the wonderful aroma filling your home, and the love you’re putting into something made with your own hands.
Whether you’re starting a new holiday tradition, treating your family to a special weekend breakfast, or simply indulging your own cinnamon roll craving, this recipe will serve you beautifully. The soft, fluffy texture, the perfect amount of cinnamon sweetness, and that incredible tangy frosting create a combination that’s simply unbeatable. And once you’ve mastered the basic recipe, you can experiment with all the variations and make them truly your own.
I genuinely hope these cinnamon rolls become as beloved in your home as they are in mine. There’s nothing quite like the joy of sharing fresh, homemade cinnamon rolls with the people you love. It’s comfort food at its absolute finest, the kind of recipe that creates memories and brings people together.
Now I want to hear from you! When you make these cinnamon rolls, please come back and let me know how they turned out. Did you try any of the variations? Did your family devour them in record time? Were they gone before they even cooled? Drop a comment below with your experience, questions, or tips—I love hearing from fellow bakers and I read every single comment!
And if you loved this recipe (which I really think you will), please pin it to your favorite Pinterest boards so you’ll always have it handy when the cinnamon roll craving strikes. Share it with your friends, your family, your coworkers—anyone who deserves the gift of amazing homemade cinnamon rolls. The more people we can inspire to bake from scratch, the better!
Happy baking, and may your kitchen always smell like cinnamon and butter!