
If you’re looking for an impressive yet surprisingly simple dessert that screams elegance and indulgence, these homemade chocolate truffles are exactly what you need. These luxurious bite-sized confections feature a silky-smooth ganache center that melts on your tongue, coated in rich cocoa powder, chocolate shavings, or crushed nuts. With just a handful of ingredients and minimal equipment, you can create gourmet-quality chocolate truffles that rival anything from a fancy chocolatier.
Perfect for Valentine’s Day, Christmas gift-giving, bridal showers, dinner party desserts, or simply when you’re craving something special, these easy chocolate truffles are incredibly versatile. You can customize them with different coatings, add flavor infusions like espresso or liqueurs, or keep them classically simple. They’re also wonderfully gift-friendly—packaged in a beautiful box, homemade truffles make thoughtful presents that show you care. Whether you’re a chocolate enthusiast looking to expand your dessert-making skills or someone who wants to impress guests with minimal effort, this foolproof recipe delivers professional results every single time. The best part? They taste exponentially better than store-bought versions and cost a fraction of the price.
History / Background
Chocolate truffles have a fascinating history rooted in French culinary tradition. Legend has it that these decadent confections were invented by accident in the 1920s in the kitchen of French chef Auguste Escoffier. According to the story, one of his apprentices accidentally poured hot cream into a bowl of chocolate chunks instead of the intended bowl of sugared eggs. When the mixture hardened, the apprentice rolled the ganache into balls and coated them with cocoa powder to hide the mistake. The result resembled the expensive Périgord truffles (fungi) found in France, and thus the chocolate truffle was born.
The name “truffle” comes from their visual resemblance to the prized underground fungi that pigs and dogs are trained to hunt. Just as those culinary treasures were reserved for the wealthy, chocolate truffles initially represented luxury and sophistication in the confectionery world. Traditional French truffles feature a simple ganache center rolled in cocoa powder, maintaining that rustic, earthy appearance that mimics their fungal namesake.
Over the decades, chocolate truffles evolved beyond their French origins. Belgian chocolatiers began creating their own versions in the 1910s, often using harder chocolate shells filled with ganache, butter, or cream. Swiss truffles incorporated melted chocolate into the mixture for extra richness. American chocolatiers have since embraced creative freedom, experimenting with countless flavor combinations, coatings, and shapes.
Today, chocolate truffles remain synonymous with celebration, romance, and indulgence. They’ve become a staple gift for Valentine’s Day, a sophisticated dessert for dinner parties, and a popular homemade treat during the holiday season. What makes them truly special is that despite their gourmet reputation, they’re remarkably simple to make at home with just basic ingredients and techniques that anyone can master.
Why You’ll Love This Recipe
These homemade chocolate truffles are pure magic—they look and taste like they came from an expensive chocolate boutique, but they’re actually incredibly easy to make at home. The ganache center is impossibly smooth and rich, melting the moment it touches your tongue, while the coating adds textural contrast and visual appeal. Here’s why this recipe will become your go-to for special occasions and gift-giving:
- Only 3 core ingredients needed – Heavy cream, high-quality chocolate, and cocoa powder create restaurant-quality truffles
- Beginner-friendly technique – No candy thermometer, no tempering, no special skills required
- Impressive presentation – These look professionally made and incredibly elegant on any dessert table
- Endlessly customizable – Infuse with countless flavors, coat with different toppings, or keep them classic
- Perfect for gifting – Homemade truffles in a pretty box show thoughtfulness and make memorable presents
- Make-ahead friendly – Prepare days in advance and store for stress-free entertaining
- Cost-effective luxury – Create gourmet chocolates for a fraction of boutique prices
- Portion control built-in – Individual servings prevent overindulgence (or at least help you keep track!)
- Gluten-free naturally – No special modifications needed for gluten-free guests
- Romantic and special – Perfect for Valentine’s Day, anniversaries, or date night desserts
Ingredient Notes
Quality ingredients are absolutely crucial for chocolate truffles since there’s nowhere for inferior products to hide. Here’s what you need and why each component matters:
Heavy Whipping Cream: The foundation of your ganache, providing richness and creating that melt-in-your-mouth texture. Must be heavy cream with at least 36% fat content—don’t substitute with half-and-half or milk, which lack the fat needed for proper ganache consistency. The cream also helps emulsify the chocolate into a smooth, stable mixture.
High-Quality Dark Chocolate: This is your star ingredient, so invest in good chocolate. Use chocolate bars or chips with 60-70% cacao for balanced sweetness and intense chocolate flavor. Brands like Ghirardelli, Lindt, Callebaut, or Guittard work beautifully. Avoid chocolate chips designed for baking, which contain stabilizers that prevent smooth melting. Chop chocolate bars into small, uniform pieces for even melting.
Unsweetened Cocoa Powder: For the classic coating that gives truffles their signature appearance. Use Dutch-processed cocoa for deeper, less acidic flavor, or natural cocoa powder works too. Sift it before use to remove lumps for a smooth coating.
Unsalted Butter: Optional but highly recommended—a tablespoon or two adds silkiness and helps truffles stay soft even when chilled. It also gives the ganache a beautiful sheen. Use high-quality unsalted butter for best results.
Vanilla Extract: Just a teaspoon enhances chocolate flavor without being identifiable. Use pure vanilla extract, not imitation, for the best taste.
Salt: A tiny pinch (⅛ teaspoon) might seem insignificant but it’s transformative, enhancing chocolate flavor and balancing sweetness. Don’t skip it.
Optional Coatings: Beyond cocoa powder, consider finely chopped toasted nuts (almonds, hazelnuts, pistachios), chocolate shavings, shredded coconut, crushed cookies, or sprinkles. Each adds unique flavor and texture.
Optional Flavor Additions: Elevate your truffles with espresso powder, liqueurs (Grand Marnier, Kahlúa, Bailey’s, rum), extracts (peppermint, almond, orange), spices (cinnamon, cayenne, cardamom), or citrus zest.
Equipment Needed
Making chocolate truffles requires minimal equipment, most of which you probably already have in your kitchen:
- Medium saucepan – For heating the heavy cream
- Heatproof mixing bowl – Glass or metal bowl for combining chocolate and cream
- Whisk or rubber spatula – To stir and create smooth ganache
- Fine-mesh strainer – Optional but ensures ultra-smooth ganache by catching any undissolved bits
- Plastic wrap – To cover ganache while it sets
- Small cookie scoop or melon baller – Creates uniform truffle portions (1-tablespoon size ideal)
- Baking sheet – Lined with parchment paper for setting rolled truffles
- Shallow bowls or plates – For holding coating ingredients
- Fork or dipping tool – For rolling truffles in coatings
- Airtight container – For storing finished truffles
- Kitchen scale – Optional but helpful for precise measurements and uniform sizing
Chocolate Truffles Recipe
- Total Time: 3 hours 20 minutes
- Yield: 30-35 truffles 1x
- Diet: Vegetarian
Description
Luxurious homemade chocolate truffles with silky-smooth ganache centers and classic cocoa powder coating. Simple ingredients and easy techniques create gourmet-quality confections perfect for gifting or special occasions.
Ingredients
For the Ganache:
- 12 oz high-quality dark chocolate (60-70% cacao), finely chopped
- 1 cup heavy whipping cream
- 2 tablespoons unsalted butter, softened
- 1 teaspoon pure vanilla extract
- ⅛ teaspoon fine sea salt
For Coating:
- ¾ cup unsweetened cocoa powder, sifted
- Optional alternatives: finely chopped nuts, chocolate shavings, shredded coconut, crushed cookies
Optional Flavor Add-Ins (choose one):
- 1 tablespoon liqueur (Grand Marnier, Kahlúa, Bailey’s, rum)
- 1 teaspoon instant espresso powder
- ½ teaspoon peppermint or almond extract
- 1 tablespoon orange or lemon zest
- ¼ teaspoon ground cinnamon or cayenne pepper
Instructions
- Prepare the Chocolate: Place finely chopped chocolate in a heatproof bowl (glass or metal works best). The smaller and more uniform your chocolate pieces, the more evenly they’ll melt. Set aside.
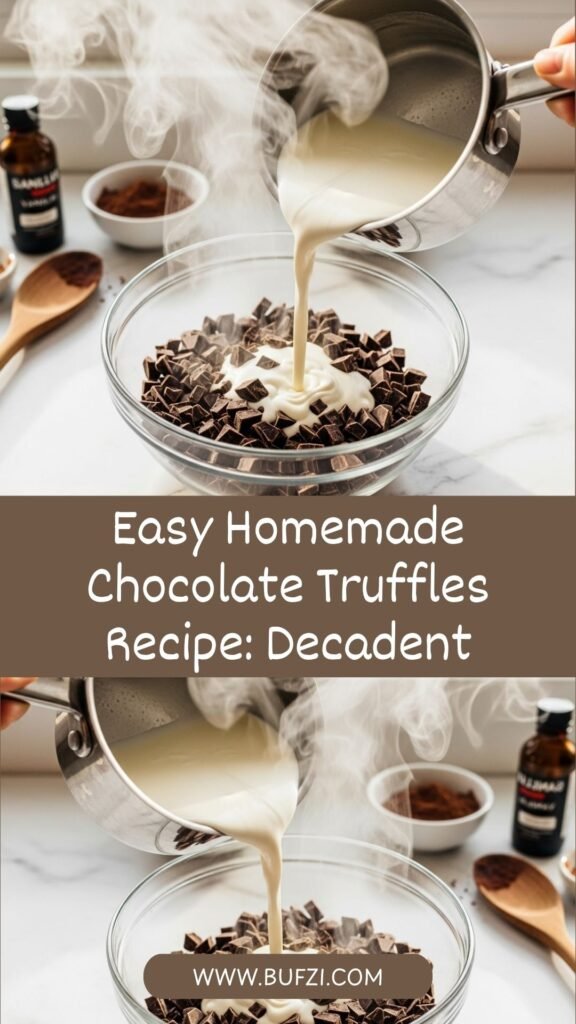
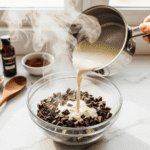
- Heat the Cream: In a medium saucepan over medium heat, warm the heavy cream until it just begins to simmer around the edges. Small bubbles will form around the perimeter, and steam will rise. Don’t let it come to a rolling boil—you want it hot enough to melt chocolate but not so hot it scorches.
- Create the Ganache: Pour the hot cream over the chopped chocolate. Let it sit undisturbed for 2-3 minutes to allow the heat to begin melting the chocolate. This resting period is crucial—resist the urge to stir immediately.
- Stir Until Smooth: Starting from the center and working outward in small circles, gently whisk or stir the mixture until completely smooth and glossy. The chocolate should fully melt into the cream, creating a uniform, silky ganache. If small chocolate pieces remain, place the bowl over a pot of barely simmering water (double boiler method) and stir until completely smooth.
- Add Finishing Touches: Stir in softened butter, vanilla extract, and salt until fully incorporated. If using any optional flavor additions (liqueur, espresso powder, extracts, zest, or spices), add them now and stir until evenly distributed.
- Chill the Ganache: Cover the bowl with plastic wrap, pressing it directly onto the surface of the ganache to prevent a skin from forming. Refrigerate for 2-3 hours or until firm enough to scoop but not rock-hard. The ganache should have the consistency of thick frosting.
- Line Your Pan: While ganache chills, line a large baking sheet with parchment paper or a silicone mat. This prevents truffles from sticking and makes cleanup easy.
- Scoop the Truffles: Using a small cookie scoop, melon baller, or teaspoon, portion out ganache into roughly 1-tablespoon amounts onto the prepared baking sheet. Don’t worry about perfection—they just need to be roughly uniform in size. Work quickly so the ganache doesn’t warm up too much from your hands.
- Roll into Balls: Lightly dust your hands with cocoa powder to prevent sticking. Working with one portion at a time, quickly roll the ganache between your palms to form a ball. Don’t overwork them—the heat from your hands will melt the chocolate. Place rolled truffles back on the baking sheet. If the ganache becomes too soft, refrigerate for 10-15 minutes before continuing.
- Chill Again: Refrigerate the rolled truffles for at least 30 minutes to firm them up before coating. This step ensures they hold their shape during the coating process.
- Prepare the Coating: Place sifted cocoa powder in a shallow bowl or plate. If using alternative coatings, prepare them in separate bowls.
- Coat the Truffles: Working with a few truffles at a time, roll each one in the cocoa powder (or chosen coating) until completely covered. Use a fork to roll them around, then tap off any excess coating. Transfer coated truffles to a clean parchment-lined baking sheet or directly into storage containers.
- Final Chill: Refrigerate coated truffles for another 20-30 minutes to set completely before serving or packaging.
Notes
- Temperature is crucial: If your kitchen is warm, chill the ganache longer. If too firm to scoop, let it sit at room temperature for 10-15 minutes.
- For extra-smooth ganache: Strain the mixture through a fine-mesh sieve after stirring to catch any undissolved chocolate bits.
- Quick rolling trick: Dust your hands with cocoa powder frequently to prevent sticking and make rolling easier.
- Mixed coatings: Create variety by coating different truffles in different toppings—cocoa, nuts, coconut, etc.
- Gift packaging: Store truffles in petit four cups or mini cupcake liners for elegant presentation.
- Shelf life: Homemade truffles keep for 2 weeks refrigerated or 2 months frozen.
- Prep Time: 20 minutes
- Cook Time: 3 hours
- Category: Dessert
- Method: Stovetop
- Cuisine: French
Nutrition
- Serving Size: 1 truffle
- Calories: 85
- Sugar: 6g
- Sodium: 15mg
- Fat: 6g
- Saturated Fat: 4g
- Unsaturated Fat: 2g
- Trans Fat: 0g
- Carbohydrates: 7g
- Fiber: 1g
- Protein: 1g
- Cholesterol: 10mg
Tips & Variations
Flavor Variations:
- Espresso Truffles: Add 1 tablespoon instant espresso powder to the warm cream for intense coffee flavor
- Orange Chocolate: Mix in 1 tablespoon orange zest and 1 teaspoon orange extract
- Mint Chocolate: Add ½ teaspoon peppermint extract and coat in crushed candy canes or Andes mints
- Salted Caramel: Stir in 2 tablespoons caramel sauce and sprinkle with flaky sea salt before serving
- Raspberry: Fold in 2 tablespoons raspberry jam and coat with freeze-dried raspberry powder
- Peanut Butter: Mix in 3 tablespoons creamy peanut butter for peanut butter cup flavor
- Bourbon: Add 2 tablespoons bourbon and coat with crushed pecans for Southern-inspired truffles
- Mexican Chocolate: Add ½ teaspoon cinnamon and ⅛ teaspoon cayenne pepper for spicy warmth
Coating Alternatives:
- Finely chopped toasted almonds, hazelnuts, pistachios, or walnuts
- Shredded sweetened or unsweetened coconut (toast it first for extra flavor)
- Crushed Oreos, graham crackers, or vanilla wafers
- Melted white, milk, or dark chocolate for a double-chocolate shell
- Crushed freeze-dried strawberries or raspberries for fruity, colorful coating
- Colored sanding sugar or edible glitter for festive occasions
- Matcha powder for green tea flavor
- Crushed pretzels for sweet-salty contrast
Dietary Modifications:
- Vegan: Use full-fat coconut cream instead of dairy cream and replace butter with coconut oil
- Dairy-Free: Same substitutions as vegan, ensuring your chocolate is dairy-free
- Sugar-Free: Use sugar-free dark chocolate (check that it melts smoothly) and sugar-free cocoa powder
- Paleo/Keto: Use sugar-free dark chocolate and coat with chopped nuts instead of cocoa powder
Presentation Ideas:
- Roll truffles in multiple coatings to create an assorted collection
- Place in decorative petit four cups or mini cupcake liners
- Drizzle contrasting chocolate over cocoa-coated truffles for elegant design
- Package in clear cellophane bags tied with ribbon for gifts
- Arrange in decorative tin boxes or wooden crates for rustic presentation
- Create truffle “pops” by inserting lollipop sticks before coating
Pro Chef Tips
Chocolate Quality Makes or Breaks This Recipe: Since chocolate is the star ingredient, quality matters tremendously. Splurge on good eating chocolate (not baking chips) with 60-70% cacao. You’ll taste the difference between supermarket chocolate and premium brands. The better the chocolate, the better your truffles.
The 3-Minute Wait is Non-Negotiable: After pouring hot cream over chocolate, let it sit undisturbed for 2-3 minutes before stirring. This allows the heat to penetrate evenly, starting the melting process from the inside out. Stirring immediately can create temperature pockets that lead to grainy ganache.
Stir, Don’t Whisk Aggressively: When combining the ganache, use gentle circular motions starting from the center. Aggressive whisking incorporates air bubbles that can make your ganache less smooth and create a matte appearance instead of glossy. You want smooth, not aerated.
Proper Chilling Temperature is Critical: The ganache needs to be firm enough to hold shape but soft enough to roll. If too cold, it becomes rock-hard and impossible to shape. If too warm, it sticks to everything. The sweet spot is refrigerated for 2-3 hours—it should feel like thick frosting.
Cold Hands are Your Friend: Before rolling truffles, run your hands under cold water (then dry them) or work near an ice bath to keep your hands cool. Body heat melts chocolate quickly, making rolling messy. Work in small batches, refrigerating as needed if the ganache softens too much.
Double-Coating for Professional Look: For the smoothest, most professional appearance, give truffles two coats of cocoa powder. Roll once, refrigerate for 15 minutes, then roll again. This eliminates any bald spots and creates an even, velvety finish.
Temperature Shock Prevents Coating: Make sure your truffles are thoroughly chilled before coating. If they’re even slightly soft, the coating won’t adhere properly and will slide off or look patchy.
Common Mistakes to Avoid
Mistake #1: Using Chocolate Chips Instead of Bar Chocolate – Chocolate chips contain stabilizers designed to help them hold their shape during baking, which interferes with smooth ganache texture. They often remain grainy no matter how much you stir. Always use high-quality bar chocolate, chopped into small pieces, for silky-smooth results.
Mistake #2: Overheating the Cream – If cream boils vigorously or gets too hot, it can scorch or cause the ganache to split and become grainy. Heat just until small bubbles form around the edges and steam rises—that’s hot enough to melt chocolate without damaging it.
Mistake #3: Working with Warm Hands – Body heat is chocolate’s enemy when rolling truffles. If your hands are warm, the ganache will melt, stick everywhere, and become impossible to shape. Keep a bowl of ice water nearby to cool your hands frequently, or dust them generously with cocoa powder.
Mistake #4: Not Chilling Long Enough – Patience is everything with truffles. If you rush the chilling process, the ganache will be too soft to roll properly, resulting in misshapen, messy truffles that lose their form. When in doubt, chill longer rather than less.
Mistake #5: Storing at Room Temperature for Extended Periods – While truffles can sit at room temperature for serving (up to 2 hours), storing them there long-term causes them to soften, lose shape, and potentially spoil since they contain dairy. Always refrigerate for storage, bringing to room temperature 30 minutes before serving for best texture.
Storage & Meal Prep
Refrigerator Storage: Store chocolate truffles in an airtight container with layers separated by parchment or wax paper to prevent sticking. Keep refrigerated for up to 2 weeks. The container should seal tightly to prevent the truffles from absorbing other food odors—chocolate is surprisingly absorbent. For best flavor and texture, remove truffles from the refrigerator 20-30 minutes before serving to bring them to cool room temperature.
Room Temperature Serving: While truffles must be stored cold, they’re best served at cool room temperature (around 65-68°F). At this temperature, the ganache softens slightly and melts beautifully on your tongue, delivering maximum flavor. Too cold and the texture is hard; too warm and they become messy.
Preventing Condensation: When removing truffles from the refrigerator, don’t open the container immediately. Let it sit at room temperature for 10 minutes before opening to prevent condensation from forming on the truffles, which can make coatings look speckled or cause them to dissolve.
Layering for Protection: When storing multiple layers of truffles, place parchment or wax paper between each layer to prevent them from sticking together or transferring coatings. Don’t pack them too tightly—gentle handling preserves their beautiful coating.
Odor Absorption Prevention: Chocolate absorbs flavors and odors from its surroundings easily. Store truffles away from strong-smelling foods like onions, garlic, or fish. Consider using a dedicated container if you make truffles frequently.
Make-Ahead & Freezer Notes
Make-Ahead Timeline: Chocolate truffles are ideal for advance preparation. You can make the ganache up to 3 days ahead and store it covered in the refrigerator, then proceed with rolling and coating when ready. Alternatively, make fully finished truffles up to 2 weeks in advance and store refrigerated in an airtight container.
Freezing Uncoated Truffles: For maximum freshness, freeze ganache centers before coating. Roll the ganache into balls, place on a parchment-lined baking sheet, and freeze until solid (about 2 hours). Transfer to a freezer-safe container or bag, separating layers with parchment, and freeze for up to 3 months. When ready to serve, coat the frozen centers (no thawing needed) and let them come to temperature.
Freezing Finished Truffles: Fully coated truffles freeze beautifully for 2-3 months. Place them in a single layer in an airtight container or freezer bag, separating layers with parchment paper. Freeze quickly to preserve texture. Note that some coatings (like cocoa powder) may look slightly frosted after freezing but will return to normal appearance as they thaw.
Thawing Instructions: Transfer frozen truffles to the refrigerator and let them thaw slowly overnight. This prevents condensation from forming, which can affect coatings. Once thawed, bring to cool room temperature before serving. Never thaw truffles in the microwave or at room temperature quickly, as this causes sweating and texture degradation.
Gift-Giving Strategy: Make truffles 1-2 weeks before a holiday or event and store refrigerated, or make them up to 2 months ahead and freeze. This spreads out your holiday baking workload and ensures you’re not stressed at the last minute.
Serving Suggestions
Chocolate truffles are incredibly versatile confections that work in numerous serving scenarios:
After-Dinner Treat: Serve 2-3 truffles per person alongside espresso, cappuccino, or coffee for an elegant end to dinner parties. The rich chocolate pairs beautifully with the bitter coffee, creating a sophisticated dessert experience that doesn’t require plates or forks.
Dessert Platter: Include truffles on a dessert board alongside fresh berries (strawberries, raspberries, blueberries), dried fruits (apricots, dates, figs), nuts (almonds, hazelnuts), and cheese (aged cheddar, brie, or goat cheese). The variety creates an interactive dessert experience for parties.
Beverage Pairings: Beyond coffee, truffles pair wonderfully with red wine (Cabernet Sauvignon, Port, or Merlot), dessert wines (Moscato, Riesling), liqueurs (Grand Marnier, Kahlúa, Bailey’s), or even craft beer (stouts, porters). The high cocoa content in dark chocolate truffles complements bold, complex beverages.
Ice Cream Topping: Chop truffles into quarters and use as a decadent topping for vanilla, chocolate, or coffee ice cream. The temperature contrast between cold ice cream and slightly softened truffle is extraordinary.
Gift Presentation: Package truffles in decorative boxes lined with tissue paper, clear cellophane bags tied with ribbons, mason jars for rustic charm, or vintage tins for nostalgic appeal. Include a small card noting storage instructions and that they should be consumed within 2 weeks.
Holiday Dessert Tables: Arrange truffles on tiered stands or decorative platters for Christmas, Valentine’s Day, Easter, or New Year’s celebrations. Mix coating types for visual interest—cocoa, crushed nuts, shredded coconut, and colored sprinkles create a beautiful display.
Bridal and Baby Showers: Present truffles in petit four cups or mini cupcake liners arranged on elegant platters. Coordinate coatings with shower colors—pink or blue sprinkles, white chocolate drizzle, or pastel sanding sugar.
FAQs Section
Q: Can I use milk chocolate instead of dark chocolate?
A: Yes, but the texture will be softer and sweeter. Milk chocolate has lower cocoa content and more sugar, creating a sweeter truffle that’s less firm. For best results, use high-quality milk chocolate (not candy bars) and reduce the cream slightly—start with ¾ cup and add more if needed for proper consistency.
Q: Why is my ganache grainy or separated?
A: Graininess typically results from three issues: using chocolate chips with stabilizers, overheating the cream (causing proteins to seize), or stirring too early before the chocolate melts properly. If it happens, try blending the mixture with an immersion blender or placing it over a double boiler and stirring gently until smooth.
Q: How do I keep truffles from melting in my hands while rolling?
A: Work quickly, keep your hands cold (run them under cold water frequently), dust them with cocoa powder, and work in small batches. If the ganache becomes too soft, refrigerate it for 10-15 minutes before continuing. Some people find wearing latex or nitrile gloves helpful since it creates a barrier between warm hands and chocolate.
Q: Can I make truffles without heavy cream?
A: Heavy cream is ideal for the proper fat content needed for smooth ganache, but you can substitute with full-fat coconut cream for dairy-free truffles. Don’t use milk or half-and-half—they lack sufficient fat for proper ganache consistency. The texture won’t be quite as silky, but coconut cream works well.
Q: What’s the white film/bloom on my stored truffles?
A: That’s sugar bloom or fat bloom, caused by temperature fluctuations during storage. It’s completely safe to eat but doesn’t look attractive. Prevent it by storing truffles at consistent, cool temperatures and avoiding condensation. If it happens, you can re-coat the truffles or dust with fresh cocoa powder.
Q: How far in advance can I make truffles for a gift?
A: Make truffles up to 2 weeks in advance and store refrigerated, or up to 2-3 months in advance if frozen. For gift-giving, prepare them 3-7 days ahead for peak freshness and flavor. Include a “best by” date on gift tags and storage instructions.
Q: Do I need to temper chocolate for truffles?
A: No! That’s the beauty of ganache-based truffles—no tempering required. Tempering is necessary for hard chocolate shells but not for ganache centers. The cream stabilizes the chocolate, creating smooth texture without the complex tempering process.
Q: Can I add alcohol to truffles?
A: Absolutely! Liqueurs and spirits add wonderful flavor depth. Add 1-2 tablespoons of your chosen alcohol (Grand Marnier, Kahlúa, rum, bourbon, Bailey’s) when you add the butter and vanilla. Note that alcohol makes ganache slightly softer, so you may need to chill longer before rolling.
Conclusion
And there you have it—everything you need to know to create absolutely stunning homemade chocolate truffles that taste like they came from a luxury chocolatier! These decadent little bites prove that you don’t need professional training or fancy equipment to make something truly spectacular. With just a few quality ingredients, simple techniques, and a little patience, you can create confections that will impress everyone lucky enough to receive them.
The magic of chocolate truffles lies not just in their incredible taste, but in the joy they bring—whether you’re making them as heartfelt gifts, serving them at special celebrations, or simply treating yourself to a moment of pure chocolate indulgence. Each truffle represents a little piece of handcrafted luxury that shows you care.
I’d love to hear about your truffle-making adventures! Which flavor variation did you try? Did you experiment with different coatings? How did your friends and family react when you gifted them? Drop a comment below and share your experience—I read every single one and love hearing your stories!
If this recipe inspired you, please share it with fellow chocolate lovers and pin it to your favorite Pinterest dessert board using #HomemadeChocolateTruffles. Let’s spread the chocolate truffle love so more people can discover just how easy and rewarding it is to make these gourmet treats at home!
Happy chocolate-making, friends! May your truffles be perfectly smooth, deliciously rich, and beautifully coated! 🍫