

If you’re looking for a show-stopping dessert that’s as impressive as it is delicious, this rich chocolate tart is your answer! Imagine a buttery, crisp pastry shell filled with the most luxurious, silky-smooth chocolate ganache that melts on your tongue. This isn’t just any chocolate dessert—it’s pure chocolate heaven in elegant tart form.
This decadent chocolate tart recipe is the ultimate indulgence for chocolate lovers. The combination of a tender, cookie-like crust and an intensely chocolatey, velvety filling creates a dessert that’s sophisticated enough for dinner parties yet simple enough for home bakers. Each slice delivers that perfect balance of textures—the satisfying crunch of the pastry giving way to the lusciously creamy chocolate center.
What makes this easy chocolate tart truly special is how it looks like something from a French patisserie but requires no advanced baking skills. It’s naturally gluten-free adaptable, can be made ahead, and always impresses guests. Perfect for Valentine’s Day, birthdays, holiday gatherings, dinner parties, or whenever you need an elegant chocolate dessert that guarantees rave reviews!
History / Background
The chocolate tart, known as “tarte au chocolat” in France, has its roots in classic French patisserie where chocolate-based desserts have been elevated to an art form. While France is famous for elaborate pastries, the chocolate tart represents the French philosophy of “less is more”—using the finest ingredients and impeccable technique to create something simple yet extraordinary.
Chocolate itself arrived in Europe from the Americas in the 16th century, but it wasn’t until the 19th century that chocolate desserts as we know them became popular. Early chocolate preparations were mainly beverages, but as chocolate processing improved and became more affordable, European pastry chefs began incorporating it into their creations.
The modern chocolate tart evolved from traditional French fruit tarts (tartes aux fruits) which featured buttery pastry crusts filled with pastry cream and fresh fruit. As chocolate became more accessible and refined in the late 1800s, French pâtissiers began creating chocolate-based fillings. The classic chocolate tart we know today—featuring a thin pastry shell and rich ganache filling—became popular in the early 20th century.
The technique of making ganache (the smooth chocolate filling) was allegedly discovered by accident in France when an apprentice poured hot cream into a bowl of chocolate chunks. His master chef scolded him, calling him a “ganache” (French for fool), but they quickly realized they’d created something magical—a silky, pourable chocolate mixture that set into the perfect creamy consistency.
In America, chocolate tarts gained popularity in the 1970s and 1980s as French cooking became trendy and home cooks discovered that impressive-looking French desserts could be achievable at home. Julia Child’s television shows introduced Americans to French techniques, and the chocolate tart became a go-to elegant dessert.
Today, the chocolate tart appears on menus at fine dining restaurants worldwide, but it’s equally at home on family dinner tables. Its appeal lies in its simplicity—just pastry and chocolate—which means the quality of ingredients truly shines through. Whether served at a Michelin-starred restaurant or made in a home kitchen, a well-executed chocolate tart is universally loved for its pure, intense chocolate flavor and luxurious texture.
Why You’ll Love This Recipe
This chocolate tart recipe has been perfected to deliver that silky, restaurant-quality texture and deep chocolate flavor that makes people think you spent hours in the kitchen. Unlike complicated layer cakes or temperamental soufflés, this tart is surprisingly straightforward while delivering maximum wow factor.
Here’s why this recipe will become your signature dessert:
- Elegant & Impressive – Looks like it came from a fancy bakery
- Surprisingly Easy – Simple technique with foolproof results
- Intensely Chocolatey – Pure, deep chocolate flavor in every bite
- Silky Smooth Texture – Luxurious ganache filling melts in your mouth
- Make-Ahead Friendly – Actually better when made a day ahead
- No Baking the Filling – The ganache sets without baking
- Customizable – Easy to add different flavors and toppings
- Perfect Portions – Slices beautifully for elegant presentation
- Guest-Worthy – Always receives compliments and recipe requests
- Versatile Occasions – Perfect for holidays, birthdays, or date nights
- Rich but Not Too Sweet – Sophisticated chocolate flavor, not candy-like
- Beautiful Presentation – Photograph-worthy for special occasions
Ingredient Notes
Understanding your ingredients is key to chocolate tart success. Here’s what you need and why each component matters:
For the Tart Crust:
All-Purpose Flour – Forms the structure of the pastry. The flour creates a tender, cookie-like crust that holds its shape. Measure correctly by spooning into measuring cups and leveling off—too much makes a tough crust.
Unsalted Butter – Provides rich flavor and creates that tender, melt-in-your-mouth texture. Must be cold and cubed for proper pastry texture. Unsalted allows you to control salt levels. European-style butter with higher fat content makes an even more tender crust.
Powdered Sugar – Sweetens the crust and creates a finer, more tender texture than granulated sugar. The cornstarch in powdered sugar also contributes to the delicate crumb.
Egg Yolk – Binds the dough together and adds richness. The fat in yolks creates a tender, flaky texture. Room temperature yolk incorporates more easily.
Salt – Enhances all the flavors and balances sweetness. Just a pinch makes a huge difference.
Vanilla Extract – Adds warmth and depth to the pastry flavor.
For the Chocolate Filling:
Dark Chocolate – The star ingredient! Use high-quality chocolate (60-70% cacao) for the best flavor. The filling is pure chocolate, so quality matters immensely. Chop it finely for smooth melting. Avoid chocolate chips—they contain stabilizers that prevent smooth melting.
Heavy Cream – Creates the silky ganache texture when combined with chocolate. The high fat content produces that luxurious mouthfeel. Use heavy cream, not half-and-half or milk.
Butter – A small amount adds extra richness and gives the ganache a glossy sheen. It also helps the filling set to the perfect sliceable consistency.
Salt – A tiny pinch enhances the chocolate flavor and balances sweetness.
Vanilla Extract – Complements the chocolate and adds depth.
Optional Add-Ins:
- Espresso powder – Intensifies chocolate flavor without tasting like coffee
- Liqueur – Grand Marnier, Kahlua, or Frangelico add sophisticated flavor (2 tablespoons)
- Sea salt flakes – For finishing the top
- Whipped cream or berries – For serving
Substitutions:
- Flour: Use gluten-free 1:1 baking flour for gluten-free tart
- Butter: Coconut oil works for dairy-free (texture slightly different)
- Cream: Full-fat coconut cream for dairy-free version
- Chocolate: Use semi-sweet (55-60% cacao) for sweeter tart, or bittersweet (70%+) for more intense flavor
Equipment Needed
You’ll need some specific baking equipment for this tart:
- 9-inch tart pan with removable bottom – Essential for clean removal and presentation
- Food processor – Makes quick work of the pastry dough (or use pastry cutter)
- Rolling pin – For rolling out the dough evenly
- Parchment paper or plastic wrap – For chilling dough
- Pie weights or dried beans – For blind baking the crust
- Medium saucepan – For heating cream
- Heatproof bowl – For melting chocolate
- Whisk or spatula – For mixing ganache until smooth
- Sharp knife – For chopping chocolate finely
- Offset spatula – Optional, for smoothing the top
Pro tip: A tart pan with a removable bottom is truly essential for this recipe. It allows you to remove the outer ring and present the tart beautifully on its base. Without it, getting clean slices is much harder!
Print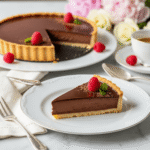
Chocolate Tart Recipe
- Total Time: 4 hours (includes chilling time)
- Yield: 8-10 servings 1x
- Diet: Gluten Free
Description
This rich chocolate tart features a buttery, crisp pastry crust filled with silky-smooth chocolate ganache. Elegant, decadent, and surprisingly easy to make, it’s the perfect impressive dessert for special occasions. The intense chocolate flavor and luxurious texture will make everyone think you’re a professional pastry chef!
Ingredients
For the Tart Crust:
- 1 1/4 cups all-purpose flour
- 1/2 cup unsalted butter, cold and cubed
- 1/4 cup powdered sugar
- 1 large egg yolk
- 1/4 teaspoon salt
- 1 teaspoon vanilla extract
- 2–3 tablespoons ice water (if needed)
For the Chocolate Filling:
- 12 ounces high-quality dark chocolate (60-70% cacao), finely chopped
- 1 cup heavy cream
- 2 tablespoons unsalted butter, room temperature
- 1/4 teaspoon salt
- 1 teaspoon vanilla extract
- Optional: 1 teaspoon instant espresso powder
Instructions
Make the Tart Crust:
- Prepare dough: In a food processor, combine flour, powdered sugar, and salt. Pulse to mix. Add cold cubed butter and pulse 8-10 times until mixture resembles coarse crumbs with pea-sized butter pieces. Add egg yolk and vanilla. Pulse until dough just starts to come together. If too dry, add ice water 1 tablespoon at a time.
- Chill dough: Turn dough out onto a piece of plastic wrap, form into a disk, wrap tightly, and refrigerate for at least 30 minutes (up to 2 days). This rest period is crucial for tender pastry.
- Roll out: On a lightly floured surface, roll chilled dough into an 11-inch circle about 1/8-inch thick. Roll from center outward, rotating dough frequently to maintain round shape. If dough cracks, let it warm up slightly.
- Line pan: Carefully transfer dough to a 9-inch tart pan with removable bottom. Gently press dough into bottom and up the sides, allowing excess to hang over edges. Trim excess dough with a knife or roll your rolling pin across the top. Prick bottom all over with a fork. Freeze for 15 minutes.
- Blind bake: Preheat oven to 375°F (190°C). Line tart shell with parchment paper and fill with pie weights or dried beans. Bake for 15 minutes. Remove weights and parchment, and bake another 8-10 minutes until golden brown. Cool completely on a wire rack.
Make the Chocolate Filling:
- Chop chocolate: While crust cools, finely chop chocolate and place in a heatproof bowl. The finer you chop, the smoother your ganache will be.
- Heat cream: In a medium saucepan, heat heavy cream over medium heat until it just begins to simmer (small bubbles around the edges). Don’t let it boil! If using espresso powder, whisk it into the hot cream.
- Make ganache: Pour hot cream over chopped chocolate. Let sit undisturbed for 2 minutes to melt the chocolate. Then whisk gently from the center outward until completely smooth and glossy. Add butter, vanilla, and salt. Whisk until butter melts and mixture is silky smooth.
- Fill tart: Pour chocolate ganache into the cooled tart shell. Gently tap the pan on the counter to release any air bubbles. Use an offset spatula to smooth the top if needed.
- Chill: Refrigerate tart for at least 3 hours or overnight until filling is set. The ganache should be firm but not hard.
- Serve: Remove outer ring from tart pan. Slice with a hot, dry knife (wipe clean between cuts) and serve at room temperature for best flavor and texture. Garnish with whipped cream, berries, or sea salt flakes if desired.
Notes
- Chocolate quality matters: This recipe is all about the chocolate, so use the best quality you can afford.
- Don’t skip chilling: Both the dough and finished tart need proper chilling time for best texture.
- Room temperature serving: Let tart sit at room temperature 30 minutes before serving for optimal texture and flavor.
- Blind baking is essential: Without pre-baking, the crust will be soggy.
- Hot knife for clean slices: Dip knife in hot water, wipe dry, then slice. Repeat between cuts.
- Tart keeps well: Actually tastes better the next day as flavors develop!
- Prep Time: 30 minutes
- Cook Time: 25 minutes
- Category: Dessert
- Method: Baking
- Cuisine: French
Nutrition
- Serving Size: 1 slice (1/10 of tart)
- Calories: 385
- Sugar: 22g
- Sodium: 95mg
- Fat: 28g
- Saturated Fat: 17g
- Unsaturated Fat: 9g
- Trans Fat: 0g
- Carbohydrates: 9g
- Fiber: 0g
- Protein: 34g
- Cholesterol: 85mg
Tips & Variations
Make this chocolate tart your own with these creative ideas:
Flavor Variations:
- Orange Chocolate Tart – Add 1 tablespoon orange zest to ganache and 2 tablespoons Grand Marnier
- Mint Chocolate Tart – Add 1/2 teaspoon peppermint extract to ganache
- Salted Caramel Chocolate Tart – Drizzle with salted caramel before serving
- Mocha Tart – Add 2 teaspoons instant espresso to ganache
- Hazelnut Chocolate Tart – Add 2 tablespoons Frangelico and top with toasted hazelnuts
- Raspberry Chocolate Tart – Add raspberry preserves layer before ganache
- Spiced Chocolate Tart – Add cinnamon, cayenne, or cardamom to ganache
Topping Ideas:
- Whipped cream rosettes
- Fresh berries (raspberries, strawberries, or mixed berries)
- Flaky sea salt
- Chocolate shavings or curls
- Toasted nuts (hazelnuts, almonds, pistachios)
- Edible flowers
- Gold leaf for extra elegance
- Caramel drizzle
Crust Variations:
- Chocolate Crust – Replace 1/4 cup flour with cocoa powder
- Nut Crust – Add 1/4 cup ground almonds or hazelnuts
- Graham Cracker Crust – Use crushed graham crackers instead of pastry
- Oreo Crust – Use crushed Oreos with melted butter (no-bake crust)
Pro Chef Tips
Elevate your chocolate tart from homemade to patisserie-quality with these professional techniques:
The Cold Butter Rule: When making tart pastry, butter must be cold—not softened, not room temperature, but refrigerator-cold and cubed. Cold butter creates those flaky layers and prevents the dough from becoming tough. If your kitchen is warm, chill the flour in the freezer for 10 minutes before starting.
Don’t Overwork the Dough: Mix pastry dough only until it just comes together. Overworking develops gluten, which creates tough, shrink-prone pastry instead of tender, cookie-like crust. The dough should look slightly rough, not smooth like cookie dough. Those visible butter pieces create flakiness.
Freeze Before Baking: After lining your tart pan, always freeze the shell for 15 minutes before blind baking. This firms up the butter, which helps the pastry hold its shape and prevents shrinkage during baking. This step is not optional—it’s insurance against a shrunken crust!
Proper Blind Baking: Line the pastry with parchment that extends over the edges (for easy removal) and fill completely with pie weights, pressing them into the corners. This prevents the bottom from puffing up and sides from slumping. Remove weights for the final baking so the bottom gets golden and crisp—a pale bottom will be soggy.
Chocolate Chopping Matters: Finely chop your chocolate into small, uniform pieces. Large chunks won’t melt completely, leaving lumps in your ganache. Small pieces melt evenly, creating that signature silky texture. Use a serrated knife and a rocking motion for easiest chopping.
The Two-Minute Wait: After pouring hot cream over chocolate, resist the urge to stir immediately. Let it sit undisturbed for 2 full minutes. This resting time allows the chocolate to melt gently and evenly from the heat of the cream, resulting in smoother ganache than constant stirring would produce.
Gentle Whisking Technique: When mixing ganache, whisk gently from the center outward in small circles, gradually incorporating more chocolate. Vigorous whisking incorporates air bubbles that mar the smooth finish. Slow, gentle whisking creates glossy, bubble-free ganache with professional appearance.
Cool Crust Completely: Never pour ganache into a warm crust—the heat will cause the chocolate to separate and become greasy. The crust must be completely cool to room temperature. If you’re impatient, place the baked crust in the freezer for 10 minutes to speed cooling.
Room Temperature Serving: Chocolate tart should be served at cool room temperature, not straight from the refrigerator. Cold chocolate firms up and loses its silky texture and complex flavor notes. Remove tart from fridge 30 minutes before serving for the best experience—the ganache should be firm but not hard, with a luxurious melt-in-your-mouth quality.
Common Mistakes to Avoid
Don’t let these common pitfalls ruin your chocolate tart:
Using Chocolate Chips: Chocolate chips contain stabilizers that prevent them from melting smoothly, resulting in grainy, separated ganache instead of silky perfection. Always use bar chocolate (chopped finely) or chocolate wafers/callets designed for melting. The few extra minutes to chop chocolate properly make all the difference.
Skipping the Blind Baking: Attempting to fill and bake the tart in one step results in soggy, undercooked pastry bottom that never crisps up. The crust must be fully baked before adding the no-bake ganache filling. Proper blind baking creates that essential textural contrast between crisp crust and creamy filling.
Overheating the Cream: If cream boils or gets too hot, it can cause the chocolate to seize (become grainy and clumpy) or separate when mixed. Heat cream only until it just begins to simmer—you’ll see small bubbles around the edges. Remove from heat immediately. The residual heat is enough to melt the chocolate perfectly.
Not Chilling Long Enough: Cutting into the tart before the ganache is fully set results in a messy, runny filling that won’t slice cleanly. The ganache needs at least 3 hours (ideally overnight) in the refrigerator to set to the proper firm-but-creamy consistency. Patience is key! Plan ahead so you’re not tempted to cut it too soon.
Using Low-Quality Chocolate: Since this recipe is essentially butter, chocolate, and cream, there’s nowhere for inferior ingredients to hide. Low-quality chocolate with lots of sugar and additives will taste waxy, overly sweet, and one-dimensional. Invest in good chocolate (60-70% cacao from reputable brands)—the difference is dramatic.
Not Letting Dough Rest: Skipping the dough’s refrigeration period leads to shrinkage during baking and tough, chewy pastry instead of tender, cookie-like crust. The rest allows gluten to relax and butter to firm up, which are both essential for proper texture and shape retention. Always chill at least 30 minutes.
Cutting with a Cold Knife: A room-temperature knife drags through cold ganache, creating messy, uneven slices. For bakery-perfect slices, dip your knife in hot water, wipe completely dry, then cut. The warm blade glides through the ganache cleanly. Repeat between each slice for professional results.
Storage & Meal Prep
Chocolate tart stores beautifully and actually improves with time:
Refrigerator Storage: Cover tart loosely with plastic wrap or aluminum foil (don’t let it touch the ganache surface) and refrigerate for up to 5 days. The flavors actually meld and improve after a day or two. Store in the tart pan or transfer to a cake stand with a dome cover.
Preventing Condensation: When removing tart from refrigerator, let it sit covered at room temperature for 30 minutes. This prevents condensation from forming on the chocolate surface when cold ganache hits warm air, which would dull the glossy finish.
Room Temperature Serving: For best flavor and texture, always serve chocolate tart at cool room temperature, not cold. The ganache should be firm enough to slice cleanly but soft enough to melt on your tongue. Cold tart has muted flavor and harder texture.
Storing Sliced Tart: If you’ve already sliced the tart, store individual slices in airtight containers with parchment paper between layers to prevent sticking. This makes it easy to grab a slice for dessert throughout the week.
Crust Storage: You can bake the tart shell up to 2 days ahead. Let it cool completely, wrap tightly in plastic wrap, and store at room temperature. Add the ganache filling the day before serving.
Make-Ahead & Freezer Notes
Perfect for advance preparation:
Complete Make-Ahead: Chocolate tart is ideal for making ahead! Prepare the entire tart 1-3 days before serving. The ganache sets properly and flavors develop beautifully. In fact, many pastry chefs insist tart tastes better after 24 hours. Just remember to bring to room temperature before serving.
Freezing the Tart Shell: The baked, cooled tart shell freezes perfectly for up to 2 months. Wrap tightly in plastic wrap, then aluminum foil. No need to thaw before filling—just make your ganache and pour into the frozen shell. This actually helps prevent any soaking!
Freezing Completed Tart: While possible, freezing the filled tart isn’t ideal as the texture of the ganache can become slightly grainy upon thawing. If you must freeze, wrap very well and freeze for up to 1 month. Thaw overnight in the refrigerator, then bring to room temperature before serving.
Freezing the Dough: The raw tart dough freezes excellently for up to 3 months. Wrap the disk tightly and freeze. Thaw overnight in refrigerator before rolling. This is perfect for having homemade pastry ready whenever you need it!
Best Make-Ahead Strategy: Bake the shell up to 2 days ahead and store wrapped at room temperature. Make the ganache filling and assemble the tart the day before serving. Refrigerate overnight, then remove 30 minutes before serving. This timing gives you the best texture and least stress!
Serving Suggestions
Transform your chocolate tart into a complete dessert experience:
Classic Accompaniments:
- Lightly sweetened whipped cream
- Crème fraîche or mascarpone
- Fresh berries (raspberries, strawberries, or mixed berries)
- Vanilla ice cream or gelato
- Berry coulis or raspberry sauce
- Caramel sauce drizzle
- Espresso or coffee
Elegant Presentation Ideas:
- Dust with cocoa powder or powdered sugar
- Garnish with chocolate shavings or curls
- Top with edible gold leaf
- Add fresh mint leaves
- Scatter with flaky sea salt
- Arrange fresh berries in a pattern
- Drizzle with white chocolate
Beverage Pairings:
- Espresso or strong coffee
- Port wine or dessert wine
- Champagne or sparkling wine
- Irish cream liqueur
- Hot chocolate
- Red wine (Cabernet Sauvignon pairs beautifully with dark chocolate)
- Cognac or brandy
Special Occasion Serving:
- Valentine’s Day: Cut into heart shapes using cookie cutters
- Holidays: Top with peppermint, cranberries, or festive sprinkles
- Birthdays: Add birthday candles
- Dinner Parties: Serve with coffee in demitasse cups
Make It a Dessert Board: Create an elegant dessert spread with chocolate tart as the centerpiece, surrounded by chocolate truffles, fresh fruit, nuts, and small cookies.
FAQs Section
Can I make chocolate tart without a tart pan?
While a tart pan with removable bottom is ideal for presentation, you can use a 9-inch pie pan or springform pan in a pinch. The tart will still taste delicious, though it will look more rustic and be harder to slice cleanly. If using a pie pan, serve slices directly from the pan rather than trying to remove the whole tart. A springform pan works well if lined with parchment for easy removal.
Why is my ganache grainy instead of smooth?
Grainy ganache usually results from chocolate that seized due to water contamination or overheating. Make sure all bowls and utensils are completely dry—even a drop of water causes chocolate to seize. Also ensure your cream isn’t too hot (it should just barely simmer, not boil). If ganache does seize, try whisking in 1-2 tablespoons of warm cream to smooth it out. Using high-quality chocolate and chopping it finely also prevents graininess.
Can I use milk chocolate or white chocolate instead?
You can, but adjust the ratios. Milk and white chocolate are softer than dark chocolate, so they create a softer filling. For milk chocolate, use a 1:1 ratio of chocolate to cream (12 oz chocolate to 1 cup cream). For white chocolate, use more chocolate—about 14-16 oz to 1 cup cream. Both will be sweeter and less intense than dark chocolate tart.
How do I know when the tart is set and ready to serve?
The ganache should be firm to gentle touch but not rock-hard. It should hold its shape when you remove the tart ring and slice cleanly without being runny. The filling typically needs 3-4 hours to set properly, though overnight is ideal. You can test by gently pressing the center—it should feel firm like set pudding, not liquid or jiggly.
My tart crust shrank during baking. What went wrong?
Pastry shrinkage happens when: the dough was overworked (developing too much gluten), it wasn’t chilled long enough before baking, or the oven was too hot. To prevent this: handle dough minimally, chill at least 30 minutes (or overnight), and freeze the shell for 15 minutes right before baking. Also ensure your oven temperature is accurate—use an oven thermometer to check.
Can I make this tart gluten-free?
Absolutely! Simply substitute the all-purpose flour with a 1:1 gluten-free baking flour blend that contains xanthan gum. The texture will be slightly more delicate but still delicious. Bob’s Red Mill and King Arthur both make excellent gluten-free flour blends that work perfectly for pastry. The chocolate filling is naturally gluten-free.
How far in advance can I make this tart?
The completed tart keeps beautifully for 3-5 days refrigerated and actually tastes better after a day as flavors meld. You can make it up to 3 days ahead for entertaining. The baked tart shell can be made 2 days ahead and stored at room temperature. The unbaked dough can be frozen for up to 3 months. This makes it perfect for stress-free party planning!
Conclusion
And there you have it—everything you need to create the most luxurious, restaurant-quality chocolate tart! This recipe proves that French patisserie elegance is absolutely achievable in your home kitchen. With a buttery, crisp crust and silky-smooth ganache filling, this decadent chocolate tart will become your go-to impressive dessert for every special occasion.
The beauty of this easy chocolate tart is how it delivers maximum impact with minimal stress. It looks like you spent hours, tastes like pure chocolate heaven, and can be made completely ahead of time. Whether you’re celebrating a birthday, hosting a dinner party, or just treating yourself to something special, this tart never disappoints.
I hope this recipe becomes your signature dessert! Once you master this simple technique, you’ll find yourself making it again and again for every celebration.
Now it’s your turn to create some chocolate magic! When you make this rich chocolate tart, I’d love to hear all about it. What occasion are you making it for? Did you add any special toppings or flavors? Drop a comment below and share your experience!
Don’t forget to pin this recipe to your favorite Pinterest dessert board so you’ll have it ready for your next special occasion! Share it with fellow chocolate lovers, and if you make it, snap a photo and tag me on social media—I absolutely love seeing your beautiful baking creations!
Happy baking, and may your chocolate tart be silky, decadent, and absolutely irresistible!