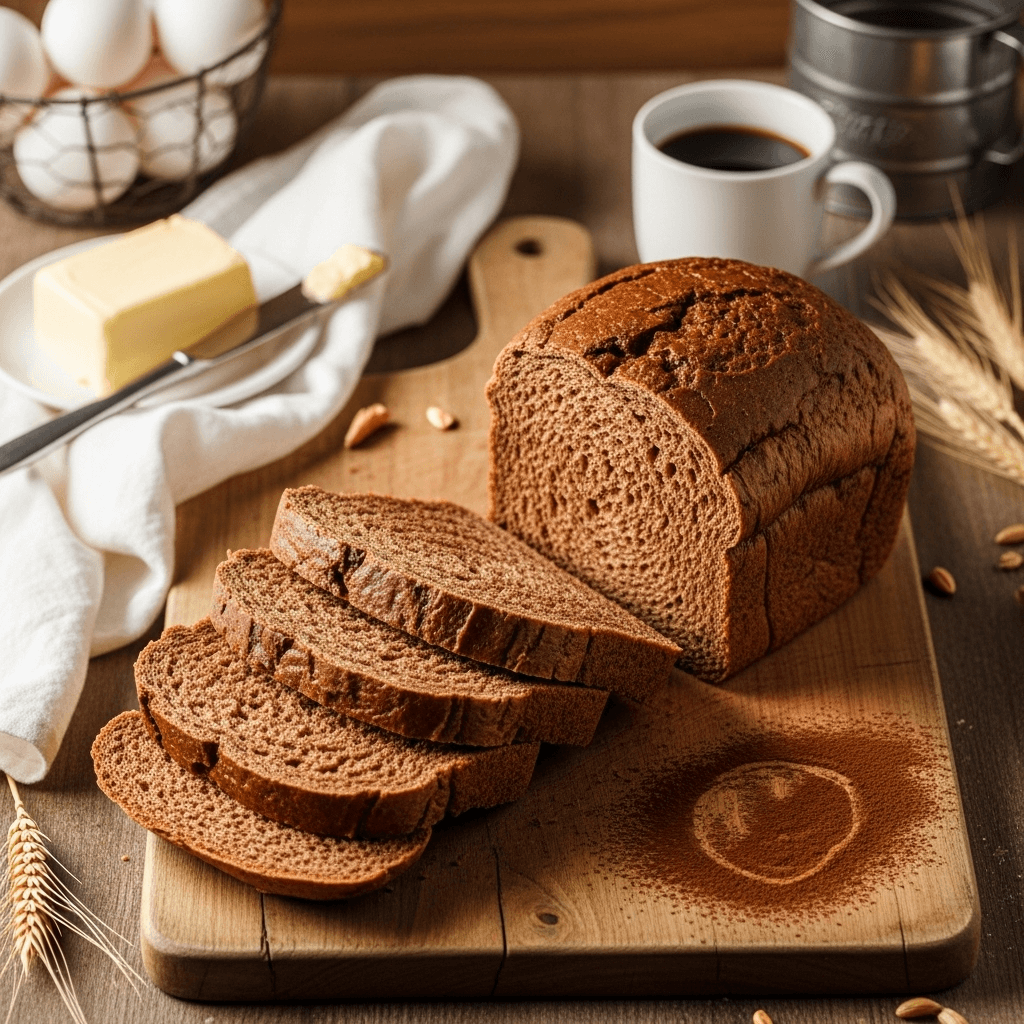

If you’ve ever dreamed of biting into a pillow-soft, slightly sweet bread that melts in your mouth, then this chocolate milk bread recipe is about to become your new obsession! This delightful twist on traditional Japanese milk bread (also known as Hokkaido milk bread or shokupan) combines the iconic fluffy texture with rich cocoa flavor, creating a treat that’s perfect for breakfast, snacking, or even dessert.
What makes this homemade chocolate bread so special? It’s incredibly versatile! Enjoy it toasted with butter for breakfast, make French toast that’ll blow your mind, create decadent bread pudding, or simply tear off a piece and savor it plain. The soft, tender crumb stays fresh for days, and the subtle chocolate flavor isn’t overly sweet, making it suitable for both sweet and savory applications.
This easy chocolate milk bread is perfect for weekend baking projects, special brunches, holiday mornings, or whenever you want to fill your home with the irresistible aroma of freshly baked bread. Whether you’re an experienced bread baker or trying yeast bread for the first time, this recipe will guide you to golden, chocolatey success!
History / Background
Milk bread originated in Japan during the early 20th century, becoming a staple of Japanese bakeries and households. The secret to its signature cloud-like texture lies in a technique called “tangzhong” or “yudane” – a water-roux method borrowed from Chinese baking traditions. This involves cooking a small portion of flour with liquid to create a paste that’s later incorporated into the dough, which helps the bread retain moisture and stay soft for days.
Traditional milk bread gained international fame for its pillowy texture and slightly sweet taste, which comes from the combination of milk, butter, and a touch of sugar. Japanese bakers perfected this technique, creating a bread that’s distinctly different from Western-style loaves – it’s softer, sweeter, and has an almost cake-like crumb that pulls apart in delicate, tender layers.
The chocolate variation is a more modern innovation, popular in Asian bakeries throughout Japan, Korea, Taiwan, and beyond. Bakers discovered that adding cocoa powder to the classic milk bread formula created a beautifully marbled or fully chocolate loaf that maintained all the textural qualities people loved while adding a subtle cocoa richness. Today, chocolate milk bread is found in trendy bakeries worldwide, often sold as premium loaves or used as the base for gourmet sandwiches and French toast.
This recipe honors that tradition while making it accessible for home bakers with standard kitchen equipment. You don’t need a bread machine or fancy tools – just patience, love, and a willingness to get your hands a little doughy!
Why You’ll Love This Recipe
This fluffy chocolate milk bread is everything you want in a homemade loaf and more. It combines the satisfaction of bread baking with the indulgence of chocolate, creating something truly special that’ll have your family asking you to make it again and again.
Here’s why this recipe is a winner:
- Incredibly soft and fluffy texture – Thanks to the tangzhong method, this bread stays tender and moist for up to 5 days
- Not overly sweet – The chocolate flavor is present but balanced, making it versatile for sweet or savory uses
- Beginner-friendly – Clear instructions walk you through each step, even if you’ve never made yeast bread before
- Impressive presentation – The rich brown color and professional-looking loaf make you look like a master baker
- Kid-approved – Children absolutely love the subtle chocolate flavor paired with the soft, tear-apart texture
- Budget-friendly – Uses everyday ingredients you probably already have in your pantry
- Freezer-friendly – Make ahead and freeze for quick breakfasts or last-minute hosting needs
- Versatile – Perfect plain, toasted, as French toast, in bread pudding, or as sandwich bread
- Therapeutic to make – The kneading process is wonderfully relaxing and meditative
- Fills your home with amazing aromas – Your kitchen will smell like a fancy bakery while it bakes
Ingredient Notes
Understanding your ingredients helps you achieve the best results and make smart substitutions when needed. Here’s what goes into this chocolate milk bread recipe and why each component matters:
Bread Flour – This is essential for achieving the proper structure and chewiness. Bread flour has higher protein content (around 12-14%) than all-purpose flour, which develops more gluten and creates that signature pull-apart texture. Don’t substitute with all-purpose flour if you want authentic results.
Cocoa Powder – Use unsweetened Dutch-process cocoa for the deepest chocolate flavor and darker color. Natural cocoa powder works too but will give a slightly lighter color. Don’t use hot cocoa mix as it contains sugar and milk powder.
Whole Milk – The fat content in whole milk contributes to the tender crumb and rich flavor. You can use 2% milk in a pinch, but avoid skim milk. For dairy-free versions, use full-fat oat milk or coconut milk from a carton.
Heavy Cream – Adds extra richness and helps create that melt-in-your-mouth texture. If you don’t have heavy cream, you can substitute with more whole milk, though the bread won’t be quite as rich.
Active Dry Yeast – This makes the bread rise and creates those beautiful air pockets. Make sure your yeast isn’t expired! You can substitute instant yeast in equal amounts (no need to activate it first).
Granulated Sugar – Feeds the yeast and adds subtle sweetness. The amount in this recipe keeps the bread lightly sweet rather than dessert-like.
Unsalted Butter – Adds flavor, richness, and tenderness. Use room-temperature butter for easy incorporation. Salted butter can work if you reduce the added salt slightly.
Egg – Provides structure, richness, and helps create a beautiful golden-brown crust. For egg-free versions, use a flax egg (1 tablespoon ground flaxseed + 3 tablespoons water, let sit 5 minutes).
Salt – Enhances all the flavors and strengthens the gluten structure. Don’t skip it!
Vanilla Extract – Optional but recommended for depth of flavor. Pure vanilla extract is best.
Equipment Needed
Having the right tools makes bread baking easier and more enjoyable. Here’s what you’ll need for this easy chocolate milk bread:
- Stand mixer with dough hook (or strong arms for hand-kneading)
- 9×5-inch loaf pan (standard bread loaf pan)
- Medium saucepan (for making the tangzhong)
- Whisk (for mixing the tangzhong)
- Mixing bowls (various sizes)
- Kitchen scale (optional but highly recommended for precision)
- Measuring cups and spoons
- Rubber spatula
- Instant-read thermometer (to check liquid temperature for yeast)
- Plastic wrap or clean kitchen towel (for covering dough while rising)
- Pastry brush (for egg wash)
- Cooling rack
- Sharp knife or bench scraper (for dividing dough)
- Rolling pin (optional, for shaping)

Chocolate Milk Bread Recipe
- Total Time: 3 hours 30 minutes
- Yield: 1 loaf (12 slices) 1x
- Diet: Vegetarian
Description
This ultra-soft chocolate milk bread uses the traditional Japanese tangzhong method to create an incredibly fluffy, tender loaf with subtle cocoa flavor. Perfect for toast, French toast, or enjoying plain, this bakery-style bread stays fresh for days and is surprisingly easy to make at home.
Ingredients
For the Tangzhong (Water Roux):
- 3 tablespoons (25g) bread flour
- ½ cup (120ml) whole milk
For the Dough:
- 2½ cups (320g) bread flour
- ¼ cup (25g) unsweetened cocoa powder
- ¼ cup (50g) granulated sugar
- 2¼ teaspoons (7g or 1 packet) active dry yeast
- 1 teaspoon salt
- ½ cup (120ml) whole milk, warmed to 110°F
- 1 large egg, room temperature
- ¼ cup (60ml) heavy cream, room temperature
- 3 tablespoons (42g) unsalted butter, softened
- 1 teaspoon vanilla extract
For the Egg Wash:
- 1 egg yolk
- 1 tablespoon milk or cream
Instructions
Step 1: Make the Tangzhong
In a medium saucepan, whisk together 3 tablespoons of bread flour and ½ cup of whole milk until completely smooth with no lumps. Place the pan over medium-low heat and cook, whisking constantly, until the mixture thickens into a paste that resembles mashed potatoes (this takes about 3-5 minutes). You’ll see lines form in the pan when you whisk. Remove from heat and transfer to a small bowl. Let it cool to room temperature while you prepare the other ingredients.
Step 2: Activate the Yeast
In the bowl of your stand mixer (or a large mixing bowl), combine the warmed milk (make sure it’s between 105-115°F – too hot will kill the yeast, too cold won’t activate it) with 1 teaspoon of the sugar from your measured amount. Sprinkle the active dry yeast over the top and let it sit for 5-10 minutes until foamy and bubbly. This proves your yeast is alive and active.
Step 3: Mix the Dry Ingredients
In a separate bowl, whisk together the bread flour, cocoa powder, remaining sugar, and salt. Make sure the cocoa is well distributed with no clumps – sifting helps if your cocoa is lumpy.
Step 4: Combine Wet Ingredients
Once the yeast is foamy, add the cooled tangzhong, egg, heavy cream, and vanilla extract to the yeast mixture. Mix on low speed with the dough hook (or stir with a wooden spoon) until just combined.
Step 5: Form the Dough
Gradually add the flour mixture to the wet ingredients, mixing on low speed until a shaggy dough forms. Increase speed to medium-low and knead for 8-10 minutes with the dough hook. The dough will look dry and rough at first – that’s normal! After about 5 minutes, begin adding the softened butter one tablespoon at a time, allowing each addition to incorporate before adding the next.
Step 6: Knead to Perfection
Continue kneading until the dough is smooth, elastic, and slightly tacky but not sticky (about 10-12 minutes total). It should pass the “windowpane test” – when you stretch a small piece of dough, it should form a thin, translucent membrane without tearing. If kneading by hand, this will take 15-20 minutes of vigorous kneading on a clean, lightly floured surface.
Step 7: First Rise
Form the dough into a smooth ball and place it in a lightly greased bowl, turning once to coat all sides. Cover with plastic wrap or a damp kitchen towel. Let rise in a warm, draft-free place (about 75-80°F) for 1-1.5 hours, or until doubled in size. A turned-off oven with the light on works perfectly!
Step 8: Shape the Dough
Once doubled, gently punch down the dough to release air bubbles. Turn it out onto a lightly floured surface. Divide the dough into 3 equal portions (using a kitchen scale ensures even pieces). Roll each portion into a ball, cover with a towel, and let rest for 10 minutes – this relaxes the gluten and makes shaping easier.
Step 9: Create the Loaf
Grease and flour your 9×5-inch loaf pan. Take one dough ball and roll it into an oval shape about 8 inches long. Fold the top third down toward the center, then fold the bottom third up and over, like folding a letter. Pinch the seam to seal. Repeat with the remaining two pieces. Place all three pieces seam-side down into the prepared loaf pan, arranging them side by side.
Step 10: Second Rise
Cover the pan loosely with plastic wrap or a towel. Let the dough rise for another 45-60 minutes, until it crowns about 1 inch above the rim of the pan. It should look puffy and spring back slowly when gently pressed. Meanwhile, preheat your oven to 350°F (175°C).
Step 11: Apply Egg Wash
Once the dough has risen, whisk together the egg yolk and 1 tablespoon of milk. Gently brush this mixture over the top of the loaf using a pastry brush. This creates a beautiful, shiny, golden-brown crust.
Step 12: Bake
Bake in the preheated oven for 28-32 minutes, until the top is deep golden brown and the internal temperature reaches 190°F when measured with an instant-read thermometer. If the top is browning too quickly, tent it loosely with aluminum foil after 20 minutes.
Step 13: Cool and Enjoy
Remove the pan from the oven and let it cool for 5 minutes, then turn the loaf out onto a cooling rack. For the softest texture, brush the top with melted butter while still hot (optional but delicious!). Let the bread cool completely before slicing – I know it’s tempting, but cutting into hot bread will compress the fluffy texture. Once cooled, slice and enjoy your homemade chocolate milk bread masterpiece!
Notes
- Temperature matters: Keep your ingredients at room temperature (except the yeast-activating milk) for best results. Cold ingredients can slow down yeast activity.
- Humidity affects flour: Depending on your climate, you may need slightly more or less flour. Add flour gradually if the dough is too sticky, or add milk by the teaspoon if it’s too dry.
- Don’t skip the tangzhong: This is what makes the bread stay soft for days! It’s worth the extra step.
- Rising times vary: Your dough may rise faster or slower depending on room temperature. Go by appearance (doubled in size) rather than exact time.
- Pan size matters: This recipe is formulated for a 9×5-inch pan. Using a different size will affect rising time and baking time.
- Prep Time: 30 minutes (plus 2-3 hours rising time)
- Cook Time: 30 minutes
- Category: Bread
- Method: Baking
- Cuisine: Japanese
Nutrition
- Serving Size: 1 slice (1/12 of loaf)
- Calories: 185
- Sugar: 6g
- Sodium: 220mg
- Fat: 6g
- Saturated Fat: 3.5g
- Unsaturated Fat: 2g
- Trans Fat: 0g
- Carbohydrates: 28g
- Fiber: 1.5g
- Protein: 5g
- Cholesterol: 45mg
Soft, Fluffy Chocolate Milk Bread Recipe (Easy Japanese-Inspired Sweet Bread)
Introduction of Recipe
If you’ve ever dreamed of biting into a pillow-soft, slightly sweet bread that melts in your mouth, then this chocolate milk bread recipe is about to become your new obsession! This delightful twist on traditional Japanese milk bread (also known as Hokkaido milk bread or shokupan) combines the iconic fluffy texture with rich cocoa flavor, creating a treat that’s perfect for breakfast, snacking, or even dessert.
What makes this homemade chocolate bread so special? It’s incredibly versatile! Enjoy it toasted with butter for breakfast, make French toast that’ll blow your mind, create decadent bread pudding, or simply tear off a piece and savor it plain. The soft, tender crumb stays fresh for days, and the subtle chocolate flavor isn’t overly sweet, making it suitable for both sweet and savory applications.
This easy chocolate milk bread is perfect for weekend baking projects, special brunches, holiday mornings, or whenever you want to fill your home with the irresistible aroma of freshly baked bread. Whether you’re an experienced bread baker or trying yeast bread for the first time, this recipe will guide you to golden, chocolatey success!
History / Background
Milk bread originated in Japan during the early 20th century, becoming a staple of Japanese bakeries and households. The secret to its signature cloud-like texture lies in a technique called “tangzhong” or “yudane” – a water-roux method borrowed from Chinese baking traditions. This involves cooking a small portion of flour with liquid to create a paste that’s later incorporated into the dough, which helps the bread retain moisture and stay soft for days.
Traditional milk bread gained international fame for its pillowy texture and slightly sweet taste, which comes from the combination of milk, butter, and a touch of sugar. Japanese bakers perfected this technique, creating a bread that’s distinctly different from Western-style loaves – it’s softer, sweeter, and has an almost cake-like crumb that pulls apart in delicate, tender layers.
The chocolate variation is a more modern innovation, popular in Asian bakeries throughout Japan, Korea, Taiwan, and beyond. Bakers discovered that adding cocoa powder to the classic milk bread formula created a beautifully marbled or fully chocolate loaf that maintained all the textural qualities people loved while adding a subtle cocoa richness. Today, chocolate milk bread is found in trendy bakeries worldwide, often sold as premium loaves or used as the base for gourmet sandwiches and French toast.
This recipe honors that tradition while making it accessible for home bakers with standard kitchen equipment. You don’t need a bread machine or fancy tools – just patience, love, and a willingness to get your hands a little doughy!
Why You’ll Love This Recipe
This fluffy chocolate milk bread is everything you want in a homemade loaf and more. It combines the satisfaction of bread baking with the indulgence of chocolate, creating something truly special that’ll have your family asking you to make it again and again.
Here’s why this recipe is a winner:
- Incredibly soft and fluffy texture – Thanks to the tangzhong method, this bread stays tender and moist for up to 5 days
- Not overly sweet – The chocolate flavor is present but balanced, making it versatile for sweet or savory uses
- Beginner-friendly – Clear instructions walk you through each step, even if you’ve never made yeast bread before
- Impressive presentation – The rich brown color and professional-looking loaf make you look like a master baker
- Kid-approved – Children absolutely love the subtle chocolate flavor paired with the soft, tear-apart texture
- Budget-friendly – Uses everyday ingredients you probably already have in your pantry
- Freezer-friendly – Make ahead and freeze for quick breakfasts or last-minute hosting needs
- Versatile – Perfect plain, toasted, as French toast, in bread pudding, or as sandwich bread
- Therapeutic to make – The kneading process is wonderfully relaxing and meditative
- Fills your home with amazing aromas – Your kitchen will smell like a fancy bakery while it bakes
Ingredient Notes
Understanding your ingredients helps you achieve the best results and make smart substitutions when needed. Here’s what goes into this chocolate milk bread recipe and why each component matters:
Bread Flour – This is essential for achieving the proper structure and chewiness. Bread flour has higher protein content (around 12-14%) than all-purpose flour, which develops more gluten and creates that signature pull-apart texture. Don’t substitute with all-purpose flour if you want authentic results.
Cocoa Powder – Use unsweetened Dutch-process cocoa for the deepest chocolate flavor and darker color. Natural cocoa powder works too but will give a slightly lighter color. Don’t use hot cocoa mix as it contains sugar and milk powder.
Whole Milk – The fat content in whole milk contributes to the tender crumb and rich flavor. You can use 2% milk in a pinch, but avoid skim milk. For dairy-free versions, use full-fat oat milk or coconut milk from a carton.
Heavy Cream – Adds extra richness and helps create that melt-in-your-mouth texture. If you don’t have heavy cream, you can substitute with more whole milk, though the bread won’t be quite as rich.
Active Dry Yeast – This makes the bread rise and creates those beautiful air pockets. Make sure your yeast isn’t expired! You can substitute instant yeast in equal amounts (no need to activate it first).
Granulated Sugar – Feeds the yeast and adds subtle sweetness. The amount in this recipe keeps the bread lightly sweet rather than dessert-like.
Unsalted Butter – Adds flavor, richness, and tenderness. Use room-temperature butter for easy incorporation. Salted butter can work if you reduce the added salt slightly.
Egg – Provides structure, richness, and helps create a beautiful golden-brown crust. For egg-free versions, use a flax egg (1 tablespoon ground flaxseed + 3 tablespoons water, let sit 5 minutes).
Salt – Enhances all the flavors and strengthens the gluten structure. Don’t skip it!
Vanilla Extract – Optional but recommended for depth of flavor. Pure vanilla extract is best.
Equipment Needed
Having the right tools makes bread baking easier and more enjoyable. Here’s what you’ll need for this easy chocolate milk bread:
- Stand mixer with dough hook (or strong arms for hand-kneading)
- 9×5-inch loaf pan (standard bread loaf pan)
- Medium saucepan (for making the tangzhong)
- Whisk (for mixing the tangzhong)
- Mixing bowls (various sizes)
- Kitchen scale (optional but highly recommended for precision)
- Measuring cups and spoons
- Rubber spatula
- Instant-read thermometer (to check liquid temperature for yeast)
- Plastic wrap or clean kitchen towel (for covering dough while rising)
- Pastry brush (for egg wash)
- Cooling rack
- Sharp knife or bench scraper (for dividing dough)
- Rolling pin (optional, for shaping)
📋 Recipe Card
Prep Time: 30 minutes (plus 2-3 hours rising time)
Cook Time: 30 minutes
Total Time: 3 hours 30 minutes
Yield: 1 loaf (12 slices)
Category: Bread, Breakfast, Dessert
Method: Baking
Cuisine: Japanese-Inspired, Asian
Diet: Vegetarian
Description
This ultra-soft chocolate milk bread uses the traditional Japanese tangzhong method to create an incredibly fluffy, tender loaf with subtle cocoa flavor. Perfect for toast, French toast, or enjoying plain, this bakery-style bread stays fresh for days and is surprisingly easy to make at home.
Ingredients
For the Tangzhong (Water Roux):
- 3 tablespoons (25g) bread flour
- ½ cup (120ml) whole milk
For the Dough:
- 2½ cups (320g) bread flour
- ¼ cup (25g) unsweetened cocoa powder
- ¼ cup (50g) granulated sugar
- 2¼ teaspoons (7g or 1 packet) active dry yeast
- 1 teaspoon salt
- ½ cup (120ml) whole milk, warmed to 110°F
- 1 large egg, room temperature
- ¼ cup (60ml) heavy cream, room temperature
- 3 tablespoons (42g) unsalted butter, softened
- 1 teaspoon vanilla extract
For the Egg Wash:
- 1 egg yolk
- 1 tablespoon milk or cream
Instructions
Step 1: Make the Tangzhong
In a medium saucepan, whisk together 3 tablespoons of bread flour and ½ cup of whole milk until completely smooth with no lumps. Place the pan over medium-low heat and cook, whisking constantly, until the mixture thickens into a paste that resembles mashed potatoes (this takes about 3-5 minutes). You’ll see lines form in the pan when you whisk. Remove from heat and transfer to a small bowl. Let it cool to room temperature while you prepare the other ingredients.
Step 2: Activate the Yeast
In the bowl of your stand mixer (or a large mixing bowl), combine the warmed milk (make sure it’s between 105-115°F – too hot will kill the yeast, too cold won’t activate it) with 1 teaspoon of the sugar from your measured amount. Sprinkle the active dry yeast over the top and let it sit for 5-10 minutes until foamy and bubbly. This proves your yeast is alive and active.
Step 3: Mix the Dry Ingredients
In a separate bowl, whisk together the bread flour, cocoa powder, remaining sugar, and salt. Make sure the cocoa is well distributed with no clumps – sifting helps if your cocoa is lumpy.
Step 4: Combine Wet Ingredients
Once the yeast is foamy, add the cooled tangzhong, egg, heavy cream, and vanilla extract to the yeast mixture. Mix on low speed with the dough hook (or stir with a wooden spoon) until just combined.
Step 5: Form the Dough
Gradually add the flour mixture to the wet ingredients, mixing on low speed until a shaggy dough forms. Increase speed to medium-low and knead for 8-10 minutes with the dough hook. The dough will look dry and rough at first – that’s normal! After about 5 minutes, begin adding the softened butter one tablespoon at a time, allowing each addition to incorporate before adding the next.
Step 6: Knead to Perfection
Continue kneading until the dough is smooth, elastic, and slightly tacky but not sticky (about 10-12 minutes total). It should pass the “windowpane test” – when you stretch a small piece of dough, it should form a thin, translucent membrane without tearing. If kneading by hand, this will take 15-20 minutes of vigorous kneading on a clean, lightly floured surface.
Step 7: First Rise
Form the dough into a smooth ball and place it in a lightly greased bowl, turning once to coat all sides. Cover with plastic wrap or a damp kitchen towel. Let rise in a warm, draft-free place (about 75-80°F) for 1-1.5 hours, or until doubled in size. A turned-off oven with the light on works perfectly!
Step 8: Shape the Dough
Once doubled, gently punch down the dough to release air bubbles. Turn it out onto a lightly floured surface. Divide the dough into 3 equal portions (using a kitchen scale ensures even pieces). Roll each portion into a ball, cover with a towel, and let rest for 10 minutes – this relaxes the gluten and makes shaping easier.
Step 9: Create the Loaf
Grease and flour your 9×5-inch loaf pan. Take one dough ball and roll it into an oval shape about 8 inches long. Fold the top third down toward the center, then fold the bottom third up and over, like folding a letter. Pinch the seam to seal. Repeat with the remaining two pieces. Place all three pieces seam-side down into the prepared loaf pan, arranging them side by side.
Step 10: Second Rise
Cover the pan loosely with plastic wrap or a towel. Let the dough rise for another 45-60 minutes, until it crowns about 1 inch above the rim of the pan. It should look puffy and spring back slowly when gently pressed. Meanwhile, preheat your oven to 350°F (175°C).
Step 11: Apply Egg Wash
Once the dough has risen, whisk together the egg yolk and 1 tablespoon of milk. Gently brush this mixture over the top of the loaf using a pastry brush. This creates a beautiful, shiny, golden-brown crust.
Step 12: Bake
Bake in the preheated oven for 28-32 minutes, until the top is deep golden brown and the internal temperature reaches 190°F when measured with an instant-read thermometer. If the top is browning too quickly, tent it loosely with aluminum foil after 20 minutes.
Step 13: Cool and Enjoy
Remove the pan from the oven and let it cool for 5 minutes, then turn the loaf out onto a cooling rack. For the softest texture, brush the top with melted butter while still hot (optional but delicious!). Let the bread cool completely before slicing – I know it’s tempting, but cutting into hot bread will compress the fluffy texture. Once cooled, slice and enjoy your homemade chocolate milk bread masterpiece!
Notes
- Temperature matters: Keep your ingredients at room temperature (except the yeast-activating milk) for best results. Cold ingredients can slow down yeast activity.
- Humidity affects flour: Depending on your climate, you may need slightly more or less flour. Add flour gradually if the dough is too sticky, or add milk by the teaspoon if it’s too dry.
- Don’t skip the tangzhong: This is what makes the bread stay soft for days! It’s worth the extra step.
- Rising times vary: Your dough may rise faster or slower depending on room temperature. Go by appearance (doubled in size) rather than exact time.
- Pan size matters: This recipe is formulated for a 9×5-inch pan. Using a different size will affect rising time and baking time.
Nutrition Facts Table
Serving Size: 1 slice (1/12 of loaf)
Calories: 185
Sugar: 6g
Sodium: 220mg
Fat: 6g
Saturated Fat: 3.5g
Unsaturated Fat: 2g
Trans Fat: 0g
Carbohydrates: 28g
Fiber: 1.5g
Protein: 5g
Cholesterol: 45mg
Nutrition facts are estimates based on standard ingredient measurements. Actual values may vary depending on specific brands and ingredient substitutions used.
Tips & Variations
Chocolate Swirl Version: Divide the dough before adding cocoa powder. Keep half plain and add double the cocoa to the other half. Create a swirled effect when shaping!
Extra Chocolatey: Add ½ cup of chocolate chips to the dough during the last minute of kneading for pockets of melted chocolate throughout.
Matcha Chocolate Marble Bread: Replace 2 tablespoons of cocoa powder with ceremonial-grade matcha powder for a stunning green and brown marbled loaf.
Cinnamon Chocolate Bread: Add 1 teaspoon of ground cinnamon to the dry ingredients for warmth and depth.
Vegan Chocolate Milk Bread: Use oat milk or soy milk, vegan butter, flax eggs, and coconut cream instead of dairy products.
Mini Loaves: Divide the dough between three 5×3-inch mini loaf pans. Reduce baking time to 20-25 minutes.
Dinner Rolls: Shape into 12 individual rolls and bake in a 9×13-inch pan for 18-22 minutes. Perfect for sliders!
Sugar-Free Version: Replace granulated sugar with erythritol or monk fruit sweetener for a lower-carb option (note: this may affect yeast activity slightly).
Pro Chef Tips
Temperature is everything: Professional bakers use precise temperatures. Invest in an instant-read thermometer to check your milk (110°F for yeast), dough temperature during kneading (should be around 78-80°F), and doneness (190°F internal temp).
Develop your gluten properly: Don’t rush the kneading process. Proper gluten development is what gives this bread its structure and signature pull-apart texture. The windowpane test doesn’t lie!
Create a proofing box: Place your covered bowl of dough in an oven with just the light on, or boil water in a mug in the microwave, remove it, and place your dough bowl inside the warm microwave (don’t turn it on!).
Steam creates a better crust: Place a small pan of hot water on the bottom rack of your oven while baking. The steam helps create a thinner, more tender crust.
Weigh your flour: Volume measurements can vary significantly. Using a kitchen scale ensures consistent results every single time. Professional bakers always weigh!
Room temperature butter is key: If you forget to take your butter out ahead of time, cut it into small cubes – it’ll soften much faster. Never microwave it to soften, as melted butter doesn’t incorporate the same way.
Score the top (optional): For a professional bakery look, use a very sharp knife or bread lame to make a shallow cut down the center of the loaf just before baking.
The poke test: To check if your dough has risen enough during the second rise, gently poke it with your finger. If the indentation springs back slowly and partially (not all the way), it’s ready. If it springs back quickly, give it more time. If it doesn’t spring back at all, you may have over-proofed.
Common Mistakes to Avoid
Using yeast that’s too old or dead: Always check your yeast’s expiration date and proof it in warm liquid. If it doesn’t foam after 10 minutes, your yeast is dead – start over with fresh yeast rather than wasting all your other ingredients.
Adding butter too early: If you add the butter before the gluten structure is developed, you’ll end up with greasy, slack dough that won’t rise properly. Wait until the dough comes together before adding butter gradually.
Over-flouring your work surface: Too much flour on your kneading surface gets incorporated into the dough, making it dry and dense. Use just a light dusting and flour your hands instead.
Slicing the bread while it’s still hot: This is the hardest mistake to avoid because fresh bread smells incredible! But cutting into hot bread compresses the crumb and releases too much steam, resulting in gummy texture. Wait at least 45 minutes after removing from the oven.
Not letting the tangzhong cool: Adding hot tangzhong to your dough can kill the yeast. Always let it cool to room temperature first – patience pays off!
Opening the oven door frequently: Every time you open the oven, you release heat and can cause the bread to collapse. If you need to check it, turn on the oven light and peek through the window instead.
Incorrect pan size: Using a pan that’s too small will cause overflow; too large and your loaf will be flat. Stick to the 9×5-inch size specified for best results.
Storage & Meal Prep
Room Temperature Storage: Once completely cooled, wrap the chocolate milk bread tightly in plastic wrap or place in an airtight container. It will stay fresh and soft at room temperature for up to 4-5 days, thanks to the tangzhong method. Store in a cool, dry place away from direct sunlight.
Refrigerator Storage: While you can refrigerate the bread, I don’t recommend it. Refrigeration actually speeds up the staling process (called retrogradation) and will make your bread go stale faster. Only refrigerate if your kitchen is very hot and humid.
Preventing Staleness: The tangzhong method naturally keeps this bread moist longer than regular bread, but for extra freshness, you can store it in a bread box or wrap it with a slightly damp (not wet!) paper towel inside the plastic wrap.
Slicing Strategy: For meal prep, slice the entire loaf once cooled, separate the slices with parchment paper squares, then freeze. This allows you to remove individual slices as needed without thawing the whole loaf.
Reviving Day-Old Bread: If your bread starts to lose its freshness, wrap it in a slightly damp towel and microwave for 10-15 seconds, or wrap in foil and warm in a 300°F oven for 5-10 minutes. It’ll taste fresh-baked again!
Reheating Tips: Toast slices in a toaster or toaster oven for the best texture. You can also warm slices in a dry skillet over medium heat for 1-2 minutes per side for a crispy exterior and soft interior.
Make-Ahead & Freezer Notes
Freezing the Baked Loaf: This chocolate milk bread freezes beautifully! Once completely cooled, wrap the entire loaf tightly in two layers of plastic wrap, then wrap in aluminum foil or place in a freezer-safe bag. Freeze for up to 3 months. Thaw overnight at room temperature (still wrapped) before slicing.
Freezing Individual Slices: Slice the cooled loaf, place parchment paper between each slice, and freeze in a freezer bag. Toast frozen slices directly from the freezer – no thawing needed! Perfect for quick breakfasts.
Make-Ahead Dough Method: You can prepare the dough through the first rise, then punch it down, shape it, and place it in the greased pan. Cover tightly with plastic wrap and refrigerate overnight (up to 24 hours). The next morning, remove from the fridge and let it sit at room temperature for 45-60 minutes until it crowns above the pan, then bake as directed. The slow, cold rise actually develops more complex flavors!
Freezing Unbaked Dough: After shaping the loaf in the pan, cover it tightly and freeze for up to 1 month. When ready to bake, remove from the freezer and let it thaw and rise at room temperature for 3-4 hours (or overnight in the refrigerator, then 1 hour at room temperature) until it crowns above the pan. Bake as directed.
Best Thawing Method: For a whole frozen loaf, leave it wrapped at room temperature for 2-3 hours. For faster thawing, unwrap and place in a 300°F oven for 15-20 minutes. For frozen slices, pop them directly in the toaster – they’ll thaw and toast simultaneously.
Make-Ahead Tangzhong: You can prepare the tangzhong up to 2 days ahead. Store it in an airtight container in the refrigerator and bring to room temperature before using.
Serving Suggestions
This versatile chocolate milk bread pairs beautifully with both sweet and savory accompaniments. Here are some delicious ways to enjoy your homemade loaf:
For Breakfast:
- Toast with salted butter and a drizzle of honey
- Spread with Nutella or almond butter for a decadent morning treat
- Top with cream cheese and sliced strawberries
- Make chocolate French toast topped with powdered sugar and maple syrup
- Serve alongside scrambled eggs and bacon for a sweet-savory breakfast
For Snacks:
- Spread with peanut butter and banana slices
- Dip into hot cocoa or coffee for dunking
- Top with mascarpone and fresh berries
- Create a grilled cheese sandwich with brie and fig jam
- Toast and top with ricotta, honey, and crushed pistachios
For Dessert:
- Make bread pudding with vanilla custard and chocolate chips
- Create ice cream sandwiches using thick slices
- Serve warm with a scoop of vanilla ice cream
- Toast and top with whipped cream and chocolate shavings
- Use as the base for a decadent trifle with layers of pudding and whipped cream
Beverage Pairings:
- Hot chocolate or mocha
- Cold milk (classic!)
- Coffee or cappuccino
- Chai latte
- Hot tea (especially Earl Grey or English Breakfast)
- Glass of dessert wine for adult entertaining
Party Ideas:
- Slice thick and serve as finger food at brunch
- Cut into cubes for chocolate fondue dipping
- Make mini sandwiches with sweet fillings for afternoon tea
- Toast and serve with a cheese board for unexpected sophistication
FAQs Section
Can I use all-purpose flour instead of bread flour?
While bread flour is strongly recommended for the best texture, you can substitute all-purpose flour in a pinch. The bread will be slightly less chewy and structured, and more tender and cake-like. If using all-purpose flour, you might need to add 2-3 tablespoons less liquid, as it absorbs less moisture than bread flour. The bread will still be delicious, just with a slightly different texture!
My dough isn’t rising – what went wrong?
There are several common culprits: Your yeast may have been expired or killed by liquid that was too hot (over 120°F kills yeast). Your kitchen might be too cold – yeast needs warmth to activate (ideally 75-80°F). Try placing your dough in a turned-off oven with just the light on, or near a warm (not hot) radiator. Also check that you didn’t accidentally add salt directly to the yeast, as salt can inhibit yeast activity. If your dough hasn’t doubled after 2 hours, the yeast is likely dead and you’ll need to start over with fresh yeast.
Can I make this recipe in a bread machine?
Yes! Add all the tangzhong, liquids, egg, and butter to the bread machine pan first, then add the dry ingredients with yeast on top (don’t let the yeast touch the liquid initially). Use the sweet bread or basic bread cycle. However, you won’t get quite the same light, fluffy texture as hand-kneading or using a stand mixer, as bread machines can over-knead enriched doughs. For best results, use the dough cycle only, then shape and bake in your oven.
How do I know when the bread is fully baked?
The bread should be deep golden brown on top, sound hollow when tapped on the bottom, and register 190°F on an instant-read thermometer inserted into the center. If you don’t have a thermometer, the top should spring back when gently pressed (if it stays indented, it needs more time). The sides should pull slightly away from the pan. Underbaked bread will be gummy in the center, while overbaked bread will be dry.
Can I add chocolate chips to this recipe?
Absolutely! Fold in ½ to ¾ cup of chocolate chips (mini chips work best) during the last minute of kneading, after the butter has been fully incorporated. Be aware that chocolate chips can weigh down the dough slightly, so your bread might not rise quite as high. For best distribution, toss the chips in a teaspoon of flour before adding to prevent them from sinking. Semi-sweet, dark, or even white chocolate chips all work beautifully!
Why is my bread dense instead of fluffy?
Dense bread usually results from under-kneading (gluten wasn’t developed enough), using old yeast, not allowing enough rising time, adding too much flour, or using liquid that was too hot. Make sure you knead until the dough passes the windowpane test, let it rise until truly doubled (go by appearance, not time), and measure your flour carefully (weighing is most accurate). Also ensure your oven temperature is accurate – an oven that’s too hot can cause the exterior to set before the interior has finished rising.
Is this bread suitable for sandwiches?
Yes! While it has a subtle chocolate flavor, it’s not overly sweet and works surprisingly well for both sweet and savory sandwiches. Try it with cream cheese and cucumber for afternoon tea, turkey and cranberry sauce for a unique twist, or almond butter and jam for lunch boxes. The soft texture makes it especially great for children’s sandwiches. However, it’s best suited for sandwiches where the chocolate flavor complements the filling rather than competes with it.
Conclusion
Congratulations – you’re now equipped with everything you need to bake the most incredible chocolate milk bread right in your own kitchen! This recipe combines the beloved Japanese milk bread technique with the irresistible flavor of chocolate, creating a loaf that’s truly special. Whether you enjoy it for breakfast, as an afternoon snack, or transformed into decadent French toast, this bread is sure to become a household favorite.
The beauty of homemade bread is the love and care that goes into every step, from mixing the tangzhong to pulling that golden loaf from your oven. Yes, it takes a few hours (mostly hands-off rising time), but the reward is a bakery-quality loaf that stays soft for days and costs just a fraction of what you’d pay at a specialty bakery.
Don’t be intimidated if this is your first time making yeast bread – just follow the steps, be patient with the rising times, and trust the process. The more you make this fluffy chocolate milk bread, the more confident you’ll become, and soon you’ll be experimenting with variations and sharing loaves with lucky friends and neighbors.
I’d love to hear about your baking experience! Did you try any of the variations? What did you serve it with? Leave a comment below sharing your results, and don’t forget to rate this recipe. If you loved it as much as I do, please share this recipe on Pinterest so other home bakers can discover the magic of homemade chocolate milk bread too!
Happy baking, and may your kitchen always smell like fresh bread!