
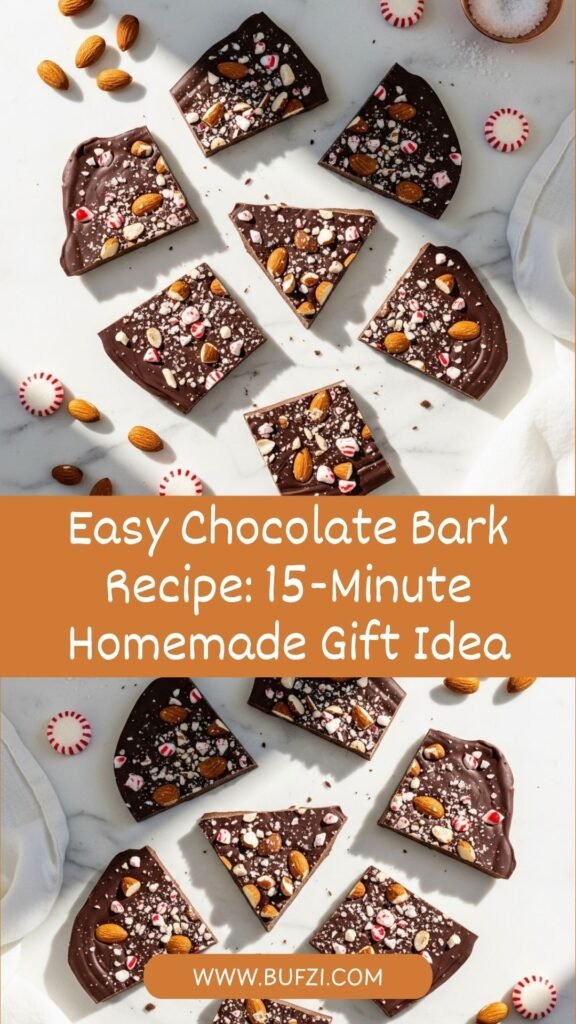
If you’ve ever wanted to make something that looks professionally crafted, tastes absolutely divine, and requires minimal effort—let me introduce you to homemade chocolate bark! This easy chocolate bark recipe is your secret weapon for impressive homemade gifts, last-minute party treats, or satisfying those urgent chocolate cravings. With just a handful of ingredients and about 15 minutes of active time, you’ll create stunning chocolate bark that looks like it came from a fancy chocolate shop. Whether you’re a complete beginner or a seasoned baker, this foolproof recipe delivers gorgeous, delicious results every single time.
Introduction of Recipe
Chocolate bark is a simple yet elegant confection made by melting chocolate, spreading it thin, and topping it with nuts, dried fruits, candies, or other delicious mix-ins before it hardens. The name “bark” comes from its rustic, tree-bark-like appearance when broken into irregular pieces. This isn’t your average candy—it’s a blank canvas for creativity, allowing you to customize flavors and toppings to suit any occasion or preference.
What makes this chocolate bark recipe so universally beloved is its incredible versatility and ease. You can make peppermint bark for Christmas, sea salt dark chocolate bark for sophisticated gifts, festive candy-studded versions for kids’ parties, or elegant combinations with nuts and dried fruits for upscale entertaining. Serve this homemade chocolate bark as holiday gifts that actually impress, party favors for weddings or baby showers, edible gifts for teachers and neighbors, dessert table additions at gatherings, Valentine’s Day treats, or simply as a special treat to keep in your own kitchen for when chocolate calls your name.
The beauty of making chocolate bark at home is that you control the quality of ingredients, can avoid allergens, customize sweetness levels, and create combinations that grocery stores don’t sell. Plus, it’s genuinely fun to make—even kids can help, making it a perfect family activity.
History / Background
While chocolate bark may seem like a modern Pinterest phenomenon, the concept of creating chocolate confections with mix-ins has existed for centuries. The technique traces back to basic chocolate-making traditions in Europe, where chocolatiers would create thin sheets of chocolate studded with nuts, fruits, or spices as an economical way to use chocolate scraps and broken pieces.
The term “bark” likely originated in America during the early 20th century, when candy makers would create irregular sheets of chocolate with various add-ins that, when broken, resembled tree bark. These rustic confections became popular because they were simple to make without specialized equipment—no tempering required, no molds needed, just melted chocolate and creativity.
Peppermint bark specifically became an American holiday tradition in the 1990s, largely thanks to Williams Sonoma, which began selling their signature peppermint bark in 1998. It became so wildly popular that it turned into a cult favorite, with people waiting all year for the seasonal treat to return. This sparked a nationwide peppermint bark obsession and inspired countless home cooks to create their own versions.
The genius of chocolate bark lies in its simplicity and accessibility. Unlike complicated chocolate work that requires precise tempering, specific temperatures, and professional techniques, bark is forgiving and approachable. You don’t need to be a pastry chef or have fancy equipment—just a microwave or double boiler, a baking sheet, and whatever delicious toppings inspire you.
Today, chocolate bark has evolved from a simple confection into an art form. Artisan chocolate makers create stunning versions with exotic ingredients like edible flowers, matcha powder, freeze-dried fruits, and gourmet sea salts. Home bakers share their creative flavor combinations on social media, making chocolate bark more popular than ever. It’s proof that simple can be spectacular.
Why You’ll Love This Recipe
This easy chocolate bark recipe is about to become your go-to for impressive homemade treats, and here’s exactly why it deserves that status:
Imagine needing a dozen homemade gifts by tomorrow, or wanting to contribute something special to a party, or simply craving chocolate in a more interesting form than a plain candy bar. This recipe solves all those problems beautifully and makes you look like a culinary genius in the process.
- Ridiculously easy: If you can melt chocolate and sprinkle toppings, you can make professional-looking bark—no baking or special skills required
- Ready in 15 minutes: Active time is just 15 minutes, then you wait for it to harden. Perfect for procrastinators and busy people
- Infinitely customizable: Create literally any flavor combination you can dream up, from sophisticated to kid-friendly
- Gift-worthy presentation: Looks expensive and thoughtful, costs a fraction of store-bought gourmet chocolate
- No special equipment: Just basic kitchen tools—no candy thermometer, no double boiler necessary, no complicated techniques
- Crowd-pleaser guarantee: Everyone loves chocolate bark because you can make it to suit every taste preference
- Budget-friendly: Much cheaper than buying artisan chocolate, and you get more quantity for less money
- Makes large batches: Easily double or triple the recipe to make gifts for everyone on your list
- Kid-friendly activity: Safe and fun for children to help make (with supervision for melting chocolate)
- Dietary adaptations: Easily make it vegan, gluten-free, dairy-free, or sugar-free based on the chocolate and toppings you choose
- Impressive yet foolproof: Looks like it came from a fancy chocolate shop, but honestly anyone can make it successfully
Ingredient Notes
Let’s break down the simple ingredients that make chocolate bark magic happen:
Chocolate: This is obviously your star ingredient, and quality matters here since chocolate is the main component. You have several options:
- Dark Chocolate: Creates sophisticated, slightly bitter bark that pairs beautifully with sea salt, nuts, and dried fruits. Look for 60-70% cacao for the best balance of flavor and sweetness. Brands like Ghirardelli, Lindt, or Guittard work beautifully.
- Milk Chocolate: Sweeter and creamier, perfect for kid-friendly versions and pairings with cookies, pretzels, and candy pieces. Choose quality brands for best results.
- White Chocolate: Technically not true chocolate (it contains no cocoa solids), but wonderful for peppermint bark, colorful versions, and elegant combinations. Make sure you’re buying real white chocolate, not white coating or candy melts.
- Semi-Sweet Chocolate Chips: The most convenient option—no chopping required and readily available. They melt smoothly and taste great, though bar chocolate gives slightly better results.
For the best melting and texture, use chocolate bars chopped into small pieces or high-quality chocolate chips. Avoid chocolate chips labeled “baking chips” or “morsels” meant for cookies, as they contain stabilizers that prevent smooth melting.
Toppings: This is where you get creative! The sky’s the limit, but here are popular options:
- Nuts: Almonds, pecans, pistachios, walnuts, hazelnuts, peanuts, or cashews (toasted for best flavor)
- Dried Fruits: Cranberries, cherries, apricots, raisins, goji berries, or crystallized ginger
- Candy: Crushed peppermint candies, mini chocolate chips, M&Ms, chopped candy bars, or toffee bits
- Cookies: Crushed Oreos, graham crackers, biscotti, or shortbread
- Pretzels: Adds salty crunch that contrasts beautifully with sweet chocolate
- Sea Salt: Flaky sea salt like Maldon elevates any chocolate bark to gourmet status
- Coconut: Shredded or flaked, toasted or plain
- Seeds: Pumpkin seeds, sunflower seeds, or sesame seeds for texture and nutrition
- Spices: A pinch of cayenne, cinnamon, or espresso powder adds complexity
Optional Add-Ins for Swirling: Create marbled or layered effects by melting different chocolate types (dark + white, milk + white) and swirling them together for visual appeal.
Oil or Coconut Oil (optional): Adding ½ teaspoon of coconut oil per cup of chocolate helps it melt smoother and gives a slight sheen, though this is completely optional.
Equipment Needed
You won’t need any fancy pastry equipment to make gorgeous chocolate bark:
- Microwave-safe bowl or double boiler (for melting chocolate)
- Baking sheet (rimmed is best to prevent spills)
- Parchment paper or silicone baking mat (essential for easy removal)
- Rubber spatula (for spreading chocolate)
- Sharp knife (for chopping chocolate bars if not using chips)
- Cutting board
- Small bowls (for organizing toppings)
- Measuring cups (for proportions)
- Spoon or offset spatula (optional, for creating swirls)
Chocolate Bark Recipe
- Total Time: 1 hour 15 minutes (including setting time)
- Yield: About 20-24 pieces (1 pound of bark) 1x
- Diet: Gluten Free
Description
This easy chocolate bark recipe creates stunning, professional-looking chocolate candy in just 15 minutes of active time. Simply melt chocolate, spread it thin, add your favorite toppings, and let it harden. Perfect for homemade gifts, holiday treats, or satisfying chocolate cravings, this customizable recipe works with any chocolate type and topping combination you can imagine!
Ingredients
Base Recipe:
- 16 oz (about 3 cups) chocolate of choice (dark, milk, semi-sweet, or white chocolate)
- You can use chocolate bars chopped into small pieces or high-quality chocolate chips
- ½ teaspoon coconut oil (optional, helps chocolate melt smoothly)
Topping Ideas (choose 1-1½ cups total):
- ¾ cup chopped nuts (almonds, pecans, pistachios, walnuts)
- ½ cup dried fruit (cranberries, cherries, apricots, raisins)
- ½ cup crushed candy (peppermint, toffee bits, M&Ms)
- ½ cup crushed pretzels or cookies
- 2 tablespoons flaky sea salt
- ¼ cup shredded coconut
- ¼ cup mini chocolate chips (different color than base)
- Any combination of the above!
Popular Combinations:
- Classic Peppermint Bark: White chocolate + crushed candy canes + dark chocolate drizzle
- Sea Salt Dark Chocolate: Dark chocolate + toasted almonds + flaky sea salt
- Trail Mix Bark: Milk chocolate + mixed nuts + dried cranberries + mini chocolate chips
- Pretzel Crunch: Milk chocolate + crushed pretzels + sea salt + toffee bits
- Holiday Bark: White chocolate + crushed Oreos + candy cane pieces + red and green M&Ms
Instructions
Step 1: Prepare Your Workspace
Line a large baking sheet (approximately 13×18 inches or similar) with parchment paper or a silicone baking mat. Make sure the paper lies flat without wrinkles or bubbles. Gather all your toppings and have them ready to go—once you spread the chocolate, you’ll need to work quickly before it begins to set. If using nuts, toast them in a 350°F oven for 5-7 minutes until fragrant and lightly golden, then let them cool completely before using.
Step 2: Chop the Chocolate (if using bars)
If you’re using chocolate bars rather than chips, chop them into small, uniform pieces about the size of chocolate chips. Smaller pieces melt more evenly and quickly than large chunks. If using chocolate chips, skip this step.
Step 3: Melt the Chocolate
Microwave Method (easiest): Place chocolate and coconut oil (if using) in a microwave-safe bowl. Microwave on 50% power in 30-second intervals, stirring thoroughly between each interval. This prevents overheating and ensures smooth melting. Continue until about 75% of the chocolate is melted, then stir vigorously—the residual heat will melt the remaining pieces. This usually takes 2-3 intervals total.
Double Boiler Method (gentler): Fill a medium saucepan with 1-2 inches of water and bring to a gentle simmer. Place a heat-safe bowl on top (it should fit snugly without touching the water). Add chocolate and coconut oil, stirring frequently until completely smooth. Remove from heat immediately once melted.
Step 4: Spread the Chocolate
Pour the melted chocolate onto your prepared baking sheet. Using a rubber spatula or offset spatula, spread it into an even layer about ¼ inch thick. You can make it rectangular, free-form, or any shape you like. The thinner you spread it, the more brittle it will be; thicker creates more substantial pieces. Aim for consistent thickness so it sets evenly.
Step 5: Add Toppings
Working quickly before the chocolate begins to set, sprinkle your chosen toppings evenly over the surface. Gently press larger items (nuts, candy pieces) into the chocolate slightly so they’ll stick when it hardens. If you’re creating swirls or layers, drizzle melted chocolate of a different type over the top and use a toothpick or skewer to create swirl patterns. Don’t overwork it—messy swirls look more artisanal!
Step 6: Let It Set
For faster setting, place the baking sheet in the refrigerator for 30-45 minutes until completely firm. Alternatively, let it set at room temperature for 1-2 hours. The chocolate should be completely hard before breaking. If your kitchen is very warm, refrigeration is best.
Step 7: Break into Pieces
Once fully set, lift the parchment paper from the baking sheet and peel it away from the bark. Break the bark into irregular pieces with your hands or cut it into neat squares with a sharp knife if you prefer uniform pieces. The rustic, broken appearance is traditional and part of the charm!
Step 8: Store and Enjoy
Transfer broken pieces to an airtight container, layering with parchment paper between layers if stacking. Store at room temperature for up to 2 weeks, or refrigerate for up to 1 month.
Notes
- Chocolate Quality: Better chocolate creates better bark. Avoid “chocolate-flavored” candy coating or cheap chips with lots of additives.
- Don’t Overheat: Chocolate is delicate. Overheating makes it grainy, thick, and difficult to spread. Low, slow heat is key.
- Moisture is the Enemy: Even a single drop of water will cause chocolate to “seize” (become thick and grainy). Keep all utensils completely dry.
- Topping Amounts: Don’t overload with toppings—they should cover most of the surface but still show chocolate underneath.
- Room Temperature: If your chocolate seems too thick to spread smoothly, it may have cooled too much. Gently rewarm it briefly.
- Setting Time: Humid or warm environments take longer to set. Refrigeration speeds this up significantly.
- White Chocolate Tip: White chocolate is more finicky than dark or milk chocolate. Use lower microwave power (30-40%) and stir more frequently.
- Prep Time: 15 minutes
- Cook Time: 0 minutes
- Category: Dessert
- Method: No-Bake
- Cuisine: American
Nutrition
- Serving Size: 1 piece (about 1 oz)
- Calories: 145
- Sugar: 14g
- Sodium: 10mg
- Fat: 9g
- Saturated Fat: 5g
- Unsaturated Fat: 3g
- Trans Fat: 0g
- Carbohydrates: 16g
- Fiber: 2g
- Protein: 2g
- Cholesterol: 2mg
Tips & Variations
Let’s explore all the creative ways you can customize this chocolate bark recipe:
Peppermint Bark: Melt 12 oz white chocolate and spread on the sheet. Let it set completely. Melt 12 oz dark chocolate and spread over the white layer. Immediately sprinkle with ¾ cup crushed candy canes or peppermint candies. This creates beautiful layers when broken.
Salted Caramel Pretzel Bark: Use milk chocolate, top with crushed pretzels and toffee bits, then drizzle with caramel sauce and sprinkle with flaky sea salt. Indulgent and addictive!
Healthy-ish Bark: Use dark chocolate (70% cacao or higher), top with raw almonds, goji berries, cacao nibs, and chia seeds for a treat that feels a bit more nutritious.
S’mores Bark: Use milk chocolate, top with crushed graham crackers and mini marshmallows. If you’re feeling adventurous, briefly broil the sheet (watching constantly) to toast the marshmallows slightly.
Cookies and Cream Bark: Use white chocolate and top with crushed Oreo cookies. Simple, crowd-pleasing, and perfect for kids.
Fruit and Nut Bark: Use dark chocolate and top with dried cranberries, apricots, toasted almonds, and pistachios for an elegant, gift-worthy version.
Birthday Cake Bark: Use white chocolate, add rainbow sprinkles and crushed vanilla wafer cookies. Fun and festive!
Espresso Almond Bark: Mix 1 tablespoon instant espresso powder into melted dark chocolate, top with chopped almonds and a sprinkle of sea salt. Perfect for coffee lovers.
Coconut Almond Joy Bark: Use dark chocolate, top with shredded coconut and chopped almonds, drizzle with more chocolate. Tastes like the famous candy bar!
Marbled Bark: Melt equal parts white and dark chocolate separately. Drop spoonfuls of each onto the baking sheet alternately, then swirl together with a toothpick for a gorgeous marbled effect.
Spicy Mexican Chocolate Bark: Add ½ teaspoon cinnamon and ¼ teaspoon cayenne pepper to melted dark chocolate, top with toasted pepitas (pumpkin seeds).
Peanut Butter Cup Bark: Melt chocolate and peanut butter chips together, or layer them, and top with chopped peanut butter cups.
Pro Chef Tips
Want to make your chocolate bark look and taste professionally crafted? Here are insider secrets:
Temper for Perfection (Optional Advanced Step): While not necessary, properly tempered chocolate creates bark with a glossy finish, satisfying snap, and stability at room temperature. Tempering involves heating and cooling chocolate to specific temperatures to stabilize the cocoa butter crystals. This is worth learning if you plan to give bark as gifts in warm weather or want that perfect professional sheen.
Toast Everything: Any nuts or coconut you add should be toasted first. This intensifies flavor dramatically and adds crunch. Spread nuts on a baking sheet and toast at 350°F for 5-7 minutes until fragrant.
Use Couverture Chocolate: For the absolute best results, use couverture chocolate (chocolate with a higher cocoa butter content made specifically for candy-making). Brands like Callebaut, Valrhona, or Guittard are superb. The extra investment creates noticeably better texture and flavor.
The Thinner, The Better: Professional bark is quite thin—about ⅛ to ¼ inch. Thick bark is harder to bite into and doesn’t have that delicate, refined quality. Spread your chocolate thinner than you think you should.
Dry Your Toppings: If you’ve washed berries or fruits, make absolutely sure they’re bone-dry before adding to chocolate. Any moisture causes chocolate to seize or develop white spots (called bloom).
Work in Cool Environment: Chocolate behaves best in cool rooms (65-70°F). If your kitchen is warm, work quickly and use refrigeration for setting.
Layer Strategically: When creating layered bark (like peppermint bark), make sure the first layer is completely set before adding the second. Warm chocolate melts partially set layers beneath it.
Drizzle with Flair: For professional-looking drizzles, put melted chocolate in a small zip-top bag, cut a tiny corner off, and pipe thin lines across the bark. You can also use a fork to create controlled drizzle patterns.
Add Texture Contrast: The best bark combines different textures—creamy chocolate, crunchy nuts, chewy dried fruit, and crunchy candy pieces. This keeps every bite interesting.
Finish with Flair: A final sprinkle of flaky sea salt, edible gold dust, or freeze-dried fruit powder just before the chocolate sets completely elevates bark from homemade to gourmet.
Common Mistakes to Avoid
Even with a recipe this simple, there are a few ways things can go wrong:
Overheating the Chocolate: This is the most common mistake. Chocolate scorches easily, becoming thick, grainy, and difficult to work with. Always use low heat (50% power in microwave) and short intervals with frequent stirring. Remove from heat before it’s completely melted—residual heat will finish the job.
Getting Water in the Chocolate: Even a single drop of water causes chocolate to “seize”—it becomes thick, grainy, and unusable for bark. Make sure all bowls and utensils are completely dry. Be careful when using a double boiler that no steam or condensation drips into the chocolate.
Adding Toppings Too Late: Once chocolate begins to set, toppings won’t stick properly and will fall off when you break the bark. Work quickly after spreading the chocolate. If it starts setting before you finish, gently warm it for a few seconds with a heat gun or return to the microwave very briefly.
Using Too Many Toppings: More isn’t always better. Overloading the chocolate with toppings creates pieces that fall apart and detract from the chocolate itself. Toppings should enhance, not overwhelm. Aim for coverage that still shows plenty of chocolate underneath.
Spreading Chocolate Too Thick: Thick bark is harder to bite into and doesn’t have that satisfying snap. Aim for ⅛ to ¼ inch thickness. If you spread it too thin, it becomes brittle and shatters into dust; too thick and it’s chunky and less enjoyable to eat.
Not Letting It Set Completely: Breaking bark before it’s fully hardened creates messy pieces and fingerprints in the chocolate. Be patient! It should feel completely firm and cool to the touch. When in doubt, refrigerate longer.
Storing Improperly: Chocolate absorbs odors from its environment and develops condensation if temperature changes are too drastic. Store in airtight containers away from strong-smelling foods. If refrigerating, let it come to room temperature in the sealed container before opening to prevent condensation.
Storage & Meal Prep
Chocolate bark stores beautifully, making it perfect for making ahead:
Room Temperature Storage: Store broken bark pieces in an airtight container at room temperature (65-70°F) for up to 2 weeks. Layer pieces with parchment paper if stacking to prevent them from sticking together. Keep away from heat sources, direct sunlight, and humidity.
Refrigerator Storage: In warm or humid climates, refrigerate bark in an airtight container for up to 1 month. Let it come to room temperature in the sealed container before opening and serving to prevent condensation from forming on the chocolate (which creates water spots and affects texture).
Humidity Warning: Chocolate doesn’t do well in humid environments. If your kitchen is humid, definitely store bark in the refrigerator. Humidity can cause sugar bloom (white spots/streaks on the surface) which doesn’t affect safety but makes it look less appealing.
Preventing Stickiness: If pieces stick together in storage, it means the chocolate wasn’t fully set when stored or the storage area is too warm. Always ensure bark is completely hard before storing, and keep in a cool location.
Gift Packaging: For giving as gifts, arrange bark pieces in cellophane bags tied with ribbon, small tins lined with tissue paper, or decorative boxes with parchment paper between layers. Include storage instructions on a small tag.
Make-Ahead & Freezer Notes
One of the best things about chocolate bark is how well it keeps:
Making Ahead: Chocolate bark is the ultimate make-ahead treat. You can make it up to 2-3 weeks in advance if stored properly at room temperature, or up to 1 month if refrigerated. This makes it perfect for holiday gift-giving—make it early and check it off your list!
Freezing Chocolate Bark: While not necessary, you can freeze chocolate bark for up to 3 months. Wrap pieces tightly in plastic wrap, then place in a freezer-safe container or bag. Remove as much air as possible to prevent freezer burn and absorbing freezer odors.
Thawing: When ready to use frozen bark, transfer it to the refrigerator and let it thaw slowly overnight. Then bring to room temperature in the sealed container before opening. This gradual temperature change prevents condensation from forming on the chocolate.
Batch Making: Make multiple varieties at once for variety. Melt different types of chocolate with different topping combinations, spreading each on separate baking sheets. This is efficient and gives you assorted flavors.
Freezing for Long-Term: If making bark for holidays months in advance, freezing is your best bet. It maintains quality better than room temperature storage over long periods.
Serving Suggestions
Chocolate bark is incredibly versatile in how you can serve and present it:
As Gifts: This is where chocolate bark truly shines. Package it beautifully in cellophane bags, decorative tins, or boxes for teacher gifts, hostess gifts, party favors, holiday gifts, or just-because treats. Add a handwritten note or printed label with flavor and ingredients.
Dessert Boards: Include chocolate bark as part of a dessert charcuterie board alongside cookies, fruit, and other sweets. Break into bite-sized pieces for easy grazing.
Ice Cream Topping: Break bark into small chunks and use as a topping for vanilla ice cream or frozen yogurt. Particularly good with peppermint bark over chocolate ice cream!
Gift Baskets: Include homemade chocolate bark in gift baskets alongside other treats, coffee, tea, or wine for impressive presentations.
Holiday Tables: Arrange bark pieces on a pretty platter as part of your dessert spread at Thanksgiving, Christmas, or any celebration.
Party Favors: Package individual pieces in small bags as wedding favors, baby shower treats, or birthday party take-homes. Much more memorable than generic store-bought favors.
Coffee Pairing: Serve alongside coffee or espresso for an elegant after-dinner treat. Dark chocolate bark pairs especially well with strong coffee.
Wine Pairing: Dark chocolate bark with sea salt pairs beautifully with red wine like Cabernet Sauvignon or Port. Milk chocolate works well with sweeter wines.
Afternoon Snack: Keep a container in your pantry for when you need a quick sweet treat. A piece or two satisfies chocolate cravings without overindulging.
Baking Ingredient: Chop bark and fold into brownies, cookies, or use as a topping for cakes and cupcakes for added flavor and texture.
FAQs Section
Can I use chocolate chips instead of bar chocolate?
Yes! High-quality chocolate chips work perfectly for bark. Look for brands labeled “melting chocolate” or premium chocolate chips. Avoid chips meant specifically for baking cookies (labeled “morsels” or “baking chips”), as they contain stabilizers that prevent smooth melting. If using chips, you don’t need to chop anything—just measure and melt!
Why did my chocolate turn thick and grainy instead of smooth?
This is called “seizing,” and it happens when even a tiny bit of water gets into the chocolate, or when chocolate overheats. Chocolate and moisture don’t mix—even steam from a double boiler can cause this. Make sure all equipment is bone dry. If chocolate seizes, sometimes you can save it by stirring in a tablespoon of coconut oil or vegetable shortening, but prevention is easier than fixing it.
Can I make chocolate bark without coconut oil?
Absolutely! The coconut oil is completely optional. It just helps chocolate melt a bit smoother and adds slight sheen, but plenty of people make perfect bark without it. If you don’t have coconut oil or prefer not to use it, skip it—your bark will still turn out great.
How do I keep toppings from falling off?
Add toppings immediately after spreading the chocolate, while it’s still liquid. Press larger pieces (nuts, candy) gently into the chocolate so they’re partially embedded. If toppings are still falling off, you may have spread the chocolate too thin or waited too long before adding toppings. Work quickly!
Can I make this bark dairy-free or vegan?
Yes! Simply use dairy-free chocolate. Many dark chocolates are naturally dairy-free (check labels), and there are excellent vegan milk and white chocolate alternatives available from brands like Enjoy Life, Hu Kitchen, and others. Just verify all your toppings are also dairy-free, and you’re good to go.
Why does my chocolate bark have white spots or streaks?
These white marks are called “bloom” and there are two types: sugar bloom (from moisture/condensation) and fat bloom (from temperature fluctuations). While it looks unappealing, bloom doesn’t affect safety or flavor, just appearance. Prevent it by storing bark in consistent, cool temperatures and avoiding sudden temperature changes. Properly tempered chocolate resists bloom better.
How thin should I spread the chocolate?
Aim for about ⅛ to ¼ inch thickness. Thinner bark has a more delicate, professional quality and satisfying snap. If too thick, it’s chunky and harder to bite; if too thin, it shatters into shards. Picture the thickness of two to three stacked playing cards as your guide.
Conclusion
There you have it—everything you need to know to create stunning, delicious homemade chocolate bark that rivals anything from gourmet chocolate shops! This easy chocolate bark recipe proves that impressive doesn’t have to mean complicated. With just a few ingredients, minimal equipment, and about 15 minutes of your time, you can create beautiful, customizable treats perfect for gifts, parties, or personal enjoyment.
The beauty of chocolate bark is that once you master the basic technique, the creative possibilities are endless. Try different chocolate types, experiment with flavor combinations, create holiday-themed versions, or develop signature flavors that become your trademark. Every batch can be a new adventure.
So grab your favorite chocolate, raid your pantry for exciting toppings, and get ready to impress everyone (including yourself!) with gorgeous homemade chocolate bark. Whether you’re making it for gifts, special occasions, or just because you deserve something delicious, this recipe delivers every time.
Ready to make this easy chocolate bark recipe? I’d love to see your creations! Share your flavor combinations in the comments below—what toppings are you excited to try? Take a photo of your gorgeous bark and pin it to Pinterest to inspire other home cooks. And if you love this recipe, please share it with friends who’d appreciate a simple, impressive homemade treat. Happy chocolate making!
I’m really inspired with your writing talents and also with the structure to your weblog. Is that this a paid subject matter or did you modify it yourself? Either way stay up the nice quality writing, it is rare to look a nice weblog like this one these days..
Good – I should certainly pronounce, impressed with your website. I had no trouble navigating through all the tabs as well as related information ended up being truly simple to do to access. I recently found what I hoped for before you know it at all. Quite unusual. Is likely to appreciate it for those who add forums or anything, website theme . a tones way for your client to communicate. Excellent task..
https://mypsyhealth.ru/%D0%bf%D1%81%D0%b8%D1%85%D0%b8%D0%b0%D1%82%D1%80%D0%b8%D1%8f/2021/12/09/suicide-youth