
If you’re looking for a quick, delicious meal that the whole family will love, these easy chicken quesadillas are about to become your new weeknight favorite! These crispy, golden quesadillas are filled with seasoned chicken, melted cheese, and your choice of delicious add-ins, all sandwiched between perfectly toasted tortillas. They’re the ultimate comfort food that’s somehow both simple and satisfying, making them perfect for busy weeknights, game day snacks, or anytime you’re craving something cheesy and delicious.
Chicken quesadillas are incredibly popular because they’re versatile, customizable, and come together in just 20 minutes from start to finish. Whether you’re feeding picky kids who just want cheese, impressing guests with gourmet additions, or meal prepping for the week ahead, this recipe adapts to your needs perfectly. The combination of crispy, buttery tortillas with gooey melted cheese and tender, seasoned chicken creates that irresistible contrast of textures that makes every bite satisfying. Serve them with sour cream, guacamole, and salsa for dipping, and you’ve got a restaurant-quality meal made right in your own kitchen!
History / Background
Quesadillas have a rich history rooted in Mexican cuisine, though their exact origins are somewhat unclear. The word “quesadilla” comes from the Spanish word “queso,” meaning cheese, combined with the suffix “-dilla,” which is a diminutive form. Essentially, a quesadilla is a “little cheesy thing,” which perfectly describes this beloved dish.
Traditional quesadillas originated in colonial Mexico, likely in the central and northern regions. The indigenous peoples of Mexico had been making corn tortillas for thousands of years, and when Spanish colonizers arrived in the 16th century, they brought dairy cattle and cheese-making techniques. The fusion of indigenous tortilla-making with European cheese created the foundation for what we now know as quesadillas.
In Mexico, authentic quesadillas vary significantly by region. In Mexico City and central Mexico, quesadillas are often made with fresh masa (corn dough) and filled with various ingredients like squash blossoms, huitlacoche (corn fungus), or chorizo, sometimes without cheese at all. In northern Mexico, where wheat tortillas are more common and cheese is abundant, quesadillas more closely resemble what Americans know – flour tortillas filled with melted cheese.
The chicken quesadilla as Americans know it today is really a Tex-Mex creation that evolved in the border regions of Texas and Mexico, then spread throughout the United States. As Mexican food became increasingly popular in America during the 1970s and 80s, quesadillas became a menu staple at Mexican restaurants and eventually a home cooking favorite.
The American adaptation typically uses flour tortillas, lots of melted cheese (often cheddar or Monterey Jack rather than traditional Mexican queso Oaxaca or Chihuahua), and protein additions like seasoned chicken, beef, or shrimp. While purists might argue these are Americanized versions, they’ve become beloved in their own right and introduced millions of people to Mexican-inspired flavors.
Today, chicken quesadillas represent the beautiful evolution of food through cultural exchange. They’re quick enough for a weeknight dinner, fun enough for parties, and customizable enough that everyone can make them their own way. Whether you’re making traditional Mexican-style quesadillas with Oaxaca cheese and handmade tortillas or quick Tex-Mex versions with rotisserie chicken and pre-shredded cheese, you’re participating in a delicious culinary tradition that spans centuries.
Why You’ll Love This Recipe
This easy chicken quesadilla recipe takes all the guesswork out of making perfect quesadillas at home. The result is crispy on the outside, melty on the inside, and packed with flavor that rivals your favorite Mexican restaurant.
Here’s why this recipe is a winner:
- Ready in 20 minutes – From start to finish, one of the quickest satisfying dinners you can make
- Kid-friendly favorite – Even picky eaters love cheesy quesadillas, and you can customize each one
- Budget-friendly meal – Uses affordable ingredients and stretches chicken to feed the whole family
- Perfect for leftovers – Great way to use up leftover cooked chicken, taco meat, or rotisserie chicken
- Customizable to everyone’s taste – Make them mild for kids, spicy for adults, or vegetarian
- No special skills required – If you can flip a tortilla, you can make perfect quesadillas
- Meal prep friendly – Make a batch on Sunday and reheat throughout the week
- Great for parties – Cut into wedges for easy appetizers that disappear fast
- Versatile for any meal – Works for lunch, dinner, snacks, or game day food
- Minimal cleanup – Just one skillet and a cutting board
- Crowd-pleaser every time – Universally loved by kids and adults alike
Ingredient Notes
Let’s break down what makes these chicken quesadillas so delicious. Simple ingredients come together to create maximum flavor.
Flour Tortillas: Use large burrito-size flour tortillas (10-12 inches). They’re more pliable than corn tortillas and create that classic crispy-chewy texture when toasted. Fresh tortillas work better than stale ones. You can also use whole wheat tortillas for more fiber.
Cooked Chicken: You’ll need about 2 cups of cooked, shredded or diced chicken. Rotisserie chicken from the grocery store is perfect and saves time. You can also use leftover grilled chicken, baked chicken breasts, or even canned chicken in a pinch. Season it well or use pre-seasoned chicken for easy flavor.
Shredded Cheese: About 2-3 cups total. Monterey Jack melts beautifully and has mild flavor. Cheddar adds sharp, bold taste. Mexican blend combines multiple cheeses for complexity. For authentic flavor, try Oaxaca cheese or queso quesadilla. Always shred from a block rather than using pre-shredded for better melting.
Butter or Oil: For crisping the tortillas. Butter gives the best flavor and color, but vegetable oil works if you prefer. You’ll need about 1 tablespoon per quesadilla.
Seasonings: Keep it simple with salt, pepper, cumin, chili powder, and garlic powder to season your chicken. A packet of taco seasoning also works great and saves time.
Bell Peppers and Onions (Optional): Add color, nutrition, and flavor. Sauté them until soft before adding to quesadillas. Use any color bell pepper you like.
Black Beans (Optional): Adds protein, fiber, and makes the quesadillas more filling. Use canned beans, drained and rinsed.
Jalapeños (Optional): Fresh or pickled jalapeños add heat. Remove seeds for milder spice.
Fresh Cilantro (Optional): Adds authentic Mexican flavor and freshness. Chop and sprinkle inside before cooking.
Lime Juice: A squeeze of fresh lime juice over the chicken adds brightness that elevates the whole dish.
Equipment Needed
You need minimal equipment to make perfect chicken quesadillas:
- Large skillet or griddle – A 10-12 inch skillet works perfectly; cast iron or non-stick both work great
- Spatula – A wide spatula makes flipping quesadillas easier
- Sharp knife – For dicing chicken and vegetables
- Cutting board – For prep work
- Pizza cutter or sharp knife – For cutting quesadillas into wedges
- Measuring cups – For portioning cheese and chicken
- Mixing bowl – For seasoning chicken and mixing ingredients
- Cheese grater – If shredding cheese from a block
- Tongs (optional) – Can help with flipping

Chicken Quesadilla Recipe
- Total Time: 20 minutes
- Yield: 4 servings (4 quesadillas) 1x
- Diet: Gluten Free
Description
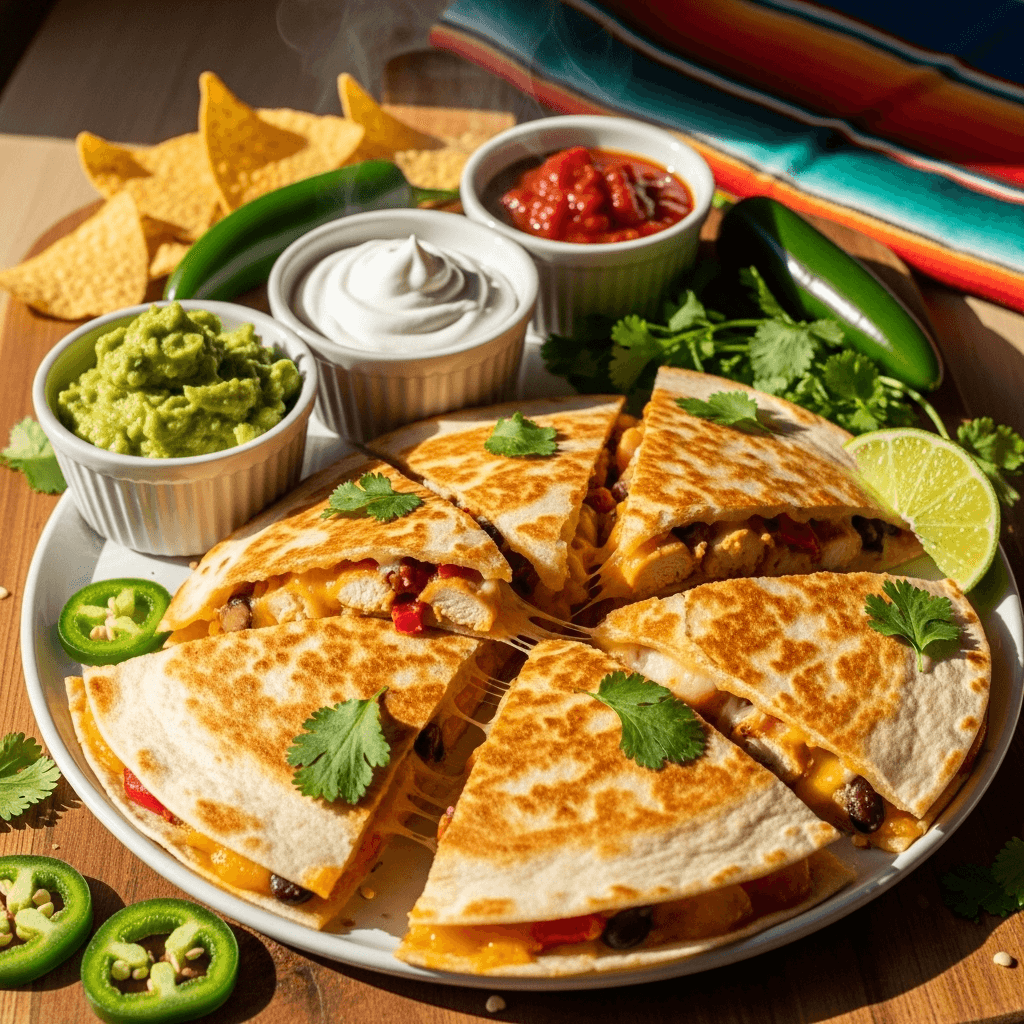
These easy chicken quesadillas are crispy, cheesy, and packed with seasoned chicken. Ready in just 20 minutes for a quick weeknight dinner the whole family loves!
Ingredients
For the Chicken Filling:
- 2 cups cooked chicken, shredded or diced (about 2 chicken breasts or 1 rotisserie chicken)
- 1 teaspoon cumin
- 1 teaspoon chili powder
- 1/2 teaspoon garlic powder
- 1/2 teaspoon onion powder
- 1/2 teaspoon salt
- 1/4 teaspoon black pepper
- Juice of 1 lime
For Assembly:
- 8 large flour tortillas (10–12 inch burrito size)
- 3 cups shredded cheese (Monterey Jack, cheddar, or Mexican blend)
- 3–4 tablespoons butter or vegetable oil (for cooking)
Optional Add-Ins:
- 1 bell pepper, diced and sautéed
- 1/2 onion, diced and sautéed
- 1 cup black beans, drained and rinsed
- 1/4 cup pickled or fresh jalapeños, sliced
- 1/4 cup fresh cilantro, chopped
- 1/2 cup corn kernels
For Serving:
- Sour cream
- Guacamole or sliced avocado
- Salsa or pico de gallo
- Lime wedges
Instructions
Step 1: Season the Chicken
If using plain cooked chicken, place it in a mixing bowl and shred or dice into bite-sized pieces. Add the cumin, chili powder, garlic powder, onion powder, salt, pepper, and lime juice. Toss well to coat the chicken evenly with seasonings. If using rotisserie chicken or already-seasoned chicken, you can skip or reduce the added seasonings. Taste and adjust seasoning as needed.
Step 2: Prep Your Add-Ins (If Using)
If adding vegetables, heat a small amount of oil in your skillet over medium heat. Sauté the diced bell peppers and onions for 5-7 minutes until softened and slightly caramelized. Remove from pan and set aside. This step is optional but adds great flavor and texture. If using black beans, simply drain and rinse them.
Step 3: Assemble the First Quesadilla
Lay one large tortilla on a clean work surface or cutting board. On one half of the tortilla, sprinkle about 1/3 cup of shredded cheese, then add about 1/2 cup of the seasoned chicken. Add any optional ingredients you’re using (sautéed vegetables, beans, jalapeños, cilantro), then top with another 1/3 cup of cheese. The cheese on top and bottom helps everything stick together. Fold the tortilla in half over the filling, creating a half-moon shape. Press down gently.
Step 4: Cook the Quesadilla
Heat a large skillet over medium heat. Add about 1/2 tablespoon of butter and let it melt, swirling to coat the pan. Carefully place the folded quesadilla in the skillet. Cook for 2-3 minutes on the first side without moving it, allowing the tortilla to become golden brown and crispy. You should see the cheese starting to melt at the edges.
Step 5: Flip and Finish
Using a wide spatula, carefully flip the quesadilla to the other side. Cook for another 2-3 minutes until the second side is golden brown and crispy, and the cheese inside is fully melted. Press down gently with the spatula to help the layers adhere. If the tortilla is browning too quickly, reduce heat to medium-low.
Step 6: Rest and Cut
Transfer the cooked quesadilla to a cutting board and let it rest for 1-2 minutes. This allows the cheese to set slightly, making it easier to cut and preventing all the filling from oozing out. Using a sharp knife or pizza cutter, cut the quesadilla into 3-4 wedges.
Step 7: Repeat
Repeat the process with remaining tortillas and filling. You can keep finished quesadillas warm in a 200°F oven on a baking sheet while you cook the remaining batches.
Step 8: Serve
Arrange the quesadilla wedges on a serving platter. Serve immediately while hot and crispy with sour cream, guacamole, salsa, and lime wedges on the side for dipping.
Notes
- For crispier quesadillas, use less filling – overstuffing makes them soggy and harder to flip
- Medium heat is key – too high burns tortillas before cheese melts; too low makes them tough
- Press down gently while cooking to help cheese melt and layers stick together
- Let quesadillas rest 1-2 minutes before cutting to prevent filling from spilling out
- Don’t skip the butter or oil – it’s what makes tortillas crispy and golden
- Use freshly shredded cheese for better melting; pre-shredded contains anti-caking agents
- Can make these in a panini press or quesadilla maker for even easier cooking
- For meal prep, assemble but don’t cook, then cook fresh when ready to eat
- Prep Time: 10 minutes
- Cook Time: 10 minutes
- Category: Dinner
- Method: Stovetop
- Cuisine: Mexican
Nutrition
- Serving Size: 1 quesadilla (1/4 of recipe)
- Calories: 520
- Sugar: 3g
- Sodium: 980mg
- Fat: 26g
- Saturated Fat: 13g
- Unsaturated Fat: 11g
- Trans Fat: 0g
- Carbohydrates: 38g
- Fiber: 3g
- Protein: 35g
- Cholesterol: 105mg
Tips & Variations
Protein Variations:
- Beef Quesadillas: Use seasoned ground beef or leftover steak
- Shrimp Quesadillas: Sauté shrimp with taco seasoning
- Pulled Pork: Use leftover BBQ pulled pork
- Vegetarian: Skip meat and load up on beans, vegetables, and extra cheese
- Breakfast Quesadillas: Fill with scrambled eggs, bacon, and cheese
Cheese Variations:
- Extra Melty: Use all Monterey Jack or Oaxaca cheese
- Sharp Flavor: Use all sharp cheddar or add pepper jack for heat
- Gourmet: Mix in goat cheese or cotija cheese
- Vegan: Use dairy-free cheese alternatives
Flavor Boosts:
- Buffalo Chicken: Toss chicken in buffalo sauce before adding
- BBQ Chicken: Mix BBQ sauce with chicken for sweet-smoky flavor
- Fajita Style: Add sautéed peppers, onions, and extra cumin
- Spinach Artichoke: Add chopped spinach and artichoke hearts
- Chipotle: Add chipotle peppers in adobo for smoky heat
Healthier Options:
- Use whole wheat or low-carb tortillas
- Reduce cheese by half and add more vegetables
- Use chicken breast instead of dark meat
- Cook with cooking spray instead of butter
- Add extra beans and vegetables for fiber
Sauce Variations:
- Drizzle with chipotle crema or cilantro lime sauce
- Add ranch dressing inside for kids
- Brush with garlic butter after cooking
- Spread refried beans inside before adding other fillings
Pro Chef Tips
The Two-Cheese Method Works Best: Professional chefs use cheese strategically. Put cheese directly on the tortilla first – it acts as “glue” when it melts, preventing fillings from sliding out. Add your chicken and other fillings, then top with more cheese. This cheese-filling-cheese layering ensures everything stays together and you get cheese in every bite. The bottom layer also helps prevent the tortilla from getting soggy from other ingredients.
Medium Heat is the Sweet Spot: This is crucial! Too high heat burns the outside before the cheese melts. Too low makes tortillas tough and leathery instead of crispy. Medium heat (about 325-350°F if you have a temp-controlled griddle) allows the tortilla to gradually crisp and brown while giving cheese time to melt completely. If you’re burning tortillas, your heat is too high. If cheese isn’t melting by the time tortillas brown, increase heat slightly.
Don’t Overstuff: The biggest mistake home cooks make is putting too much filling. Restaurant quesadillas use less filling than you’d think – about 1/2 to 3/4 cup total filling for a large tortilla. Overstuffing makes quesadillas impossible to flip without making a mess, prevents even cooking, and can make them soggy. When in doubt, use less filling. You can always make another one!
Let It Rest Before Cutting: Just like steak needs to rest, quesadillas do too! When you cut into a quesadilla immediately after cooking, the melted cheese is still liquidy and everything slides out. Letting it rest on the cutting board for 1-2 minutes allows the cheese to set slightly while staying melty inside. The quesadilla also continues cooking slightly from residual heat, ensuring everything is hot throughout.
Use a Sharp Pizza Cutter: Forget sawing back and forth with a dull knife. Use a sharp pizza cutter or a very sharp chef’s knife in one smooth cutting motion. This slices through cleanly without dragging and pulling, which prevents all your filling from oozing out the sides. If using a knife, rock it in one smooth motion rather than sawing.
Common Mistakes to Avoid
Using Cold Tortillas Straight from the Fridge: Cold tortillas are stiff and more likely to crack when you fold them, especially flour tortillas. Let them come to room temperature, or warm them slightly in the microwave for 10-15 seconds wrapped in a damp paper towel. This makes them pliable and easier to fold without breaking.
Not Draining Wet Ingredients: Adding ingredients that haven’t been properly drained – like canned beans that haven’t been rinsed, watery salsa, or un-sautéed vegetables that release moisture – makes your quesadillas soggy instead of crispy. Always drain canned ingredients well, sauté vegetables to cook off excess moisture, and avoid adding very wet ingredients.
Moving or Flipping Too Early: When you place the quesadilla in the pan, resist the urge to peek underneath or move it around. Let it sit undisturbed for the full 2-3 minutes. Moving it prevents proper browning and crisping. You’ll know it’s ready to flip when you can easily slide the spatula underneath and the edges look golden when you gently lift a corner to peek.
Skipping the Fat: Some people try to make quesadillas in a dry pan to save calories, but this results in tough, leathery tortillas that stick to the pan. The butter or oil is what creates that crispy, golden exterior and prevents sticking. You don’t need a lot – just enough to lightly coat the pan. The fat also helps conduct heat evenly for better cooking.
Using Only Pre-Shredded Cheese: Pre-shredded cheese is convenient, but it contains anti-caking agents (like cellulose) that prevent the cheese from melting as smoothly. If you’ve ever had quesadillas where the cheese seemed grainy or didn’t fully melt, this is why. Shredding cheese from a block takes 2 extra minutes but makes a noticeable difference in that gooey, melty texture everyone loves.
Storage & Meal Prep
Chicken quesadillas are excellent for meal prep and store beautifully when done properly.
Refrigerator Storage:
Store cooked, cooled quesadillas wrapped individually in aluminum foil or plastic wrap, or stack them in an airtight container with parchment paper between each one. They’ll keep in the refrigerator for 3-4 days. The key is letting them cool completely before storing to prevent condensation that makes them soggy.
Reheating Instructions:
The best way to reheat quesadillas is in a skillet over medium heat for 2-3 minutes per side until heated through and crispy again. You can also use a toaster oven at 350°F for 5-7 minutes. The oven works too – place on a baking sheet at 350°F for 10 minutes. Avoid the microwave if possible, as it makes them soggy and chewy rather than crispy. If you must microwave, do so in 30-second intervals and finish in a hot skillet for 1 minute to re-crisp.
Meal Prep Strategy:
You have two options for meal prep. Option 1: Cook quesadillas completely, cool, store, and reheat as needed. Option 2 (better): Prep all your ingredients – season the chicken, shred the cheese, sauté vegetables – and store everything separately. Then assemble and cook fresh quesadillas as needed. This takes 5 minutes per quesadilla and ensures crispy results.
Prep Components Ahead:
- Season chicken up to 3 days ahead and store in airtight container
- Shred cheese and store in ziplock bag for up to 5 days
- Sauté vegetables up to 3 days ahead
- Keep tortillas at room temperature in their original packaging
Make-Ahead & Freezer Notes
Freezing Assembled Uncooked Quesadillas:
This is the best freezer method! Assemble quesadillas completely but don’t cook them. Place assembled quesadillas on a baking sheet and freeze until solid (about 2 hours), then transfer to freezer bags with parchment paper between each one. Freeze for up to 3 months. To cook from frozen, place in a skillet over medium-low heat with a lid on. Cook about 5 minutes per side, allowing time for the frozen center to thaw and heat through while the outside crisps.
Freezing Cooked Quesadillas:
You can also freeze fully cooked quesadillas. Cool completely, wrap each one tightly in plastic wrap and then aluminum foil, or use freezer bags. Freeze for up to 2 months. Reheat from frozen in a 375°F oven for 15-20 minutes, flipping halfway through, or thaw overnight in refrigerator and reheat in a skillet.
Make-Ahead for Parties:
For entertaining, assemble quesadillas up to 4 hours ahead and refrigerate. Keep them well-wrapped so tortillas don’t dry out. Cook just before serving for best results. You can also cook them completely up to 2 hours ahead and keep warm in a 200°F oven until serving time.
Best Thawing Method:
For both cooked and uncooked frozen quesadillas, thawing in the refrigerator overnight gives the best results. If you’re in a hurry, cook from frozen using lower heat and covering the pan with a lid to help the inside thaw while the outside browns.
Serving Suggestions
Chicken quesadillas are satisfying on their own but these sides complete the meal perfectly!
Essential Dipping Sauces:
- Sour Cream: Classic and cooling
- Guacamole: Creamy avocado perfection
- Salsa: Fresh pico de gallo or salsa verde
- Queso Dip: For extra cheese lovers
- Chipotle Crema: Sour cream mixed with chipotle peppers
- Ranch Dressing: Kid-favorite dipping sauce
Classic Mexican Sides:
- Mexican Rice: Fluffy rice with tomatoes and spices
- Refried Beans or Black Beans: Protein-rich and filling
- Elote (Mexican Street Corn): Grilled corn with mayo, cheese, and chili powder
- Chips and Salsa: For extra crunch and dipping
- Mexican Street Corn Salad: Light and fresh
Fresh Salads:
- Simple Side Salad: Mixed greens with lime-cilantro vinaigrette
- Southwest Salad: Romaine, black beans, corn, avocado, and tortilla strips
- Cucumber Tomato Salad: Light and refreshing
- Coleslaw: Cabbage slaw with lime dressing
Soup Pairings:
- Tortilla Soup: Hearty and warming
- Black Bean Soup: Protein-rich complement
- Chicken Enchilada Soup: Double the Mexican flavor
Complete Mexican Feast:
- Chicken quesadillas as the main
- Mexican rice and refried beans
- Fresh guacamole and chips
- Side salad with cilantro lime dressing
- Tres leches cake or churros for dessert
Beverage Pairings:
- Margaritas: Classic lime or flavored varieties
- Mexican Beer: Corona, Modelo, or Dos Equis with lime
- Horchata: Sweet rice milk drink
- Agua Fresca: Refreshing fruit water
- Iced Tea or Lemonade: For non-alcoholic options
FAQs Section
Q: Can I use corn tortillas instead of flour tortillas?
A: Yes, but with some considerations. Corn tortillas are smaller, less pliable, and more prone to breaking, so you’ll need to warm them first to make them flexible. Heat them in a dry skillet for 15-20 seconds per side or wrap in damp paper towels and microwave for 20 seconds. Corn tortillas also don’t get as crispy as flour tortillas and have a different texture. For best results with corn, use smaller tortillas and less filling.
Q: How do I keep quesadillas from getting soggy?
A: Sogginess comes from too much moisture in your fillings. Make sure to drain any canned ingredients well, sauté vegetables to cook off excess water, don’t use watery salsa inside (save it for dipping), and don’t overfill. Also, make sure your pan is hot enough to crisp the tortilla quickly. Cook on medium heat and use butter or oil. Finally, serve immediately – quesadillas get soggy when they sit.
Q: Can I make quesadillas without cheese?
A: While cheese is traditional and helps everything stick together, you can make quesadillas without it, though they’re technically not “quesadillas” (little cheesy things). You’ll need something else to help ingredients adhere – try a thin spread of refried beans. The quesadilla will be drier without cheese. Some people with dairy sensitivities use dairy-free cheese alternatives, which work reasonably well.
Q: What’s the best cheese for quesadillas?
A: Monterey Jack is ideal because it melts smoothly and has mild flavor. Mexican cheese blend (usually Monterey Jack, cheddar, queso quesadilla, and asadero) offers complexity. For authentic Mexican flavor, use Oaxaca cheese (similar to mozzarella) or Chihuahua cheese. Cheddar alone can be greasy and sharp. Whatever you choose, shred it fresh from a block for best melting.
Q: Can I make these ahead for a party?
A: Yes! Assemble quesadillas completely up to 4 hours ahead and refrigerate covered. Cook them just before serving for best results – they only take 5 minutes each. If you need to cook ahead, make them up to 2 hours before and keep warm in a 200°F oven, though they’ll lose some crispness. You can also cut already-cooked quesadillas into smaller triangles for appetizers.
Q: How do I flip quesadillas without making a mess?
A: Use a large, wide spatula and work confidently. Don’t overfill the quesadilla (use less filling than you think you need), and make sure you’ve cooked the first side long enough that it holds together (2-3 minutes). Slide the spatula all the way under, supporting the entire quesadilla, then quickly but smoothly flip it in one motion. If you’re nervous, you can slide it onto a plate and invert the plate back into the pan.
Q: Can I cook multiple quesadillas at once?
A: If you have a large griddle or two skillets, yes! A griddle is perfect for cooking 2-3 quesadillas simultaneously. Just make sure you have enough room to flip each one without them overlapping. This is great when feeding a crowd. Otherwise, cook one at a time and keep finished ones warm in a 200°F oven on a baking sheet until ready to serve.
Conclusion
There you have it – everything you need to make perfect, crispy, cheesy chicken quesadillas that rival your favorite Mexican restaurant! These quesadillas prove that you don’t need complicated techniques or hard-to-find ingredients to create something absolutely delicious. With seasoned chicken, melted cheese, and golden-crispy tortillas, you have a crowd-pleasing meal that comes together in just 20 minutes.
The beauty of chicken quesadillas is their incredible versatility and reliability. Whether you’re feeding hungry kids on a Tuesday night, hosting game day, or looking for a satisfying lunch, this recipe adapts to your needs perfectly. Once you master the basic technique, you can customize them endlessly with different proteins, vegetables, cheeses, and flavors to keep things interesting week after week.
I’d love to hear how your chicken quesadillas turn out! Drop a comment below and let me know what fillings you used, how your family loved them, or any creative variations you tried. Did you make them spicy or keep them mild? What did you serve them with? And if this recipe helped you create quick, delicious quesadillas your family devoured, please share it on Pinterest so other home cooks can discover it too! Save it to your favorite easy dinner and Mexican food recipe boards for whenever you need a fast, satisfying meal. Now grab that skillet and get ready to make the crispiest, cheesiest quesadillas ever! Buen provecho!