
There’s something absolutely magical about pulling a tray of perfectly golden, bubbling cheesy garlic bread from the oven. The aroma of roasted garlic mingling with melted cheese and buttery toasted bread is enough to make anyone’s mouth water. This homemade cheesy garlic bread recipe transforms a simple loaf into an irresistible side dish that steals the show at every meal.
Whether you’re serving it alongside a hearty bowl of pasta, dunking it into marinara sauce, pairing it with soup, or simply enjoying it as a snack, this easy cheesy garlic bread is always a crowd-pleaser. It’s the kind of recipe that makes weeknight dinners feel special and turns ordinary gatherings into memorable occasions. Best of all, it takes less than 30 minutes from start to finish, making it perfect for busy home cooks who don’t want to sacrifice flavor for convenience.
This isn’t your average garlic bread. We’re talking about a restaurant-quality cheesy garlic bread that features a perfect balance of crispy edges, soft buttery center, aromatic garlic, and gloriously melted cheese in every single bite. Once you make this homemade version, you’ll never want to buy the frozen stuff again.
History / Background
Garlic bread has a fascinating history that’s deeply rooted in Italian-American cuisine. While garlic and bread have been paired together for centuries across Mediterranean cultures, the garlic bread we know and love today was actually born in the United States during the 1940s and 1950s.
Italian immigrants brought their traditional “bruschetta” to America, which consisted of toasted bread rubbed with raw garlic and drizzled with olive oil. As Italian-American communities flourished, particularly in cities like New York and Chicago, this simple preparation evolved into something more indulgent. Italian-American restaurants began spreading butter mixed with garlic onto Italian and French bread loaves, then toasting them to create the buttery, aromatic side dish that became a staple.
The addition of cheese came later, likely inspired by the American love for melted cheese and the popularity of dishes like pizza and lasagna. By the 1960s and 1970s, cheesy garlic bread had become a beloved fixture at Italian-American restaurants, pizzerias, and family dinner tables across the country.
Today, cheesy garlic bread has transcended its Italian-American origins to become a universal comfort food. It’s served at chain restaurants, frozen in grocery store aisles, and most importantly, lovingly prepared in home kitchens. The beauty of this dish lies in its simplicity and versatility – it can be as basic or as elaborate as you want, but it always delivers that satisfying combination of carbs, butter, garlic, and cheese that we all crave.
Why You’ll Love This Recipe
This homemade cheesy garlic bread recipe is everything you want in a side dish and more. It strikes the perfect balance between being incredibly easy to make while delivering restaurant-quality results that will have everyone at your table asking for seconds (and thirds!).
Here’s why this recipe will become your new favorite:
- Ready in Under 30 Minutes – From ingredient prep to serving, you’ll have hot, cheesy garlic bread on the table in no time
- Budget-Friendly – Uses simple, affordable ingredients you probably already have in your kitchen
- Crowd-Pleasing Favorite – Kids and adults alike can’t resist this cheesy, garlicky goodness
- Perfectly Customizable – Easily adapt it with different cheeses, herbs, or spice levels to suit your taste
- Restaurant-Quality at Home – Tastes just like (or better than!) your favorite Italian restaurant’s version
- Make-Ahead Friendly – Can be prepared in advance and baked when needed, perfect for entertaining
- Versatile Side Dish – Pairs beautifully with pasta, soups, salads, or stands alone as an appetizer
- Impressive Yet Easy – Looks and tastes fancy but requires minimal cooking skills
Ingredient Notes
Let’s break down each component of this delicious cheesy garlic bread so you understand exactly what makes it so special and what substitutions you can make based on what’s in your pantry.
French or Italian Bread Loaf – The foundation of great garlic bread is great bread. A fresh French baguette or Italian bread loaf with a sturdy crust and soft interior works best. The bread should be hearty enough to hold the butter and cheese without getting soggy. Avoid pre-sliced sandwich bread as it’s too thin and soft. If you can’t find French or Italian bread, a sturdy sourdough loaf works beautifully too.
Butter – Use real butter, not margarine, for the richest flavor. Unsalted butter is preferred so you can control the salt level, but salted butter works fine if that’s what you have. The butter should be softened to room temperature so it spreads easily and mixes smoothly with the garlic. For a lighter option, you can substitute half the butter with olive oil, though the flavor will be slightly different.
Garlic – Fresh garlic cloves are essential for authentic garlic bread flavor. Pre-minced garlic from a jar can work in a pinch, but fresh garlic provides a more vibrant, aromatic taste. For milder garlic flavor, use 3-4 cloves; for bold garlic lovers, go up to 6-8 cloves. You can also experiment with roasted garlic for a sweeter, mellower flavor.
Mozzarella Cheese – The star of the cheese layer! Shredded mozzarella melts beautifully and creates those gorgeous cheese pulls everyone loves. Use a good-quality mozzarella for best results. Freshly shredded from a block melts better than pre-shredded, which contains anti-caking agents. Part-skim or whole milk mozzarella both work great.
Parmesan Cheese – Adds a sharp, nutty flavor that balances the mild mozzarella. Freshly grated Parmesan tastes significantly better than the stuff in the green can, so grate it yourself if possible. Romano or Asiago cheese can be substituted for a slightly different flavor profile.
Fresh Parsley – Provides a pop of color and fresh herbal flavor that cuts through the richness. Italian flat-leaf parsley has more flavor than curly parsley. If you don’t have parsley, fresh basil or oregano make excellent substitutions.
Salt and Black Pepper – Enhance all the other flavors. Use fine sea salt or kosher salt, and freshly ground black pepper for the best taste.
Optional: Red Pepper Flakes – For those who like a little heat, a pinch of red pepper flakes adds a nice kick without overwhelming the other flavors.
Equipment Needed
You won’t need any fancy equipment to make this cheesy garlic bread recipe. Here’s what you’ll use:
- Large Cutting Board – For slicing the bread safely
- Sharp Bread Knife – Essential for slicing through crusty bread without squashing it
- Small Mixing Bowl – To combine the butter, garlic, and seasonings
- Measuring Cups and Spoons – For accurate ingredient measurements
- Garlic Press or Microplane – To mince the garlic finely (or use a knife)
- Baking Sheet – A large rimmed baking sheet works best to catch any butter drips
- Aluminum Foil or Parchment Paper – For easy cleanup and even toasting
- Spreading Knife or Spoon – To spread the garlic butter mixture
- Cheese Grater – If grating your own cheese from blocks
- Oven Mitts – To safely handle the hot baking sheet
Cheesy Garlic Bread Recipe
- Total Time: 25 minutes
- Yield: 8-10 servings 1x
- Diet: Vegetarian
Description
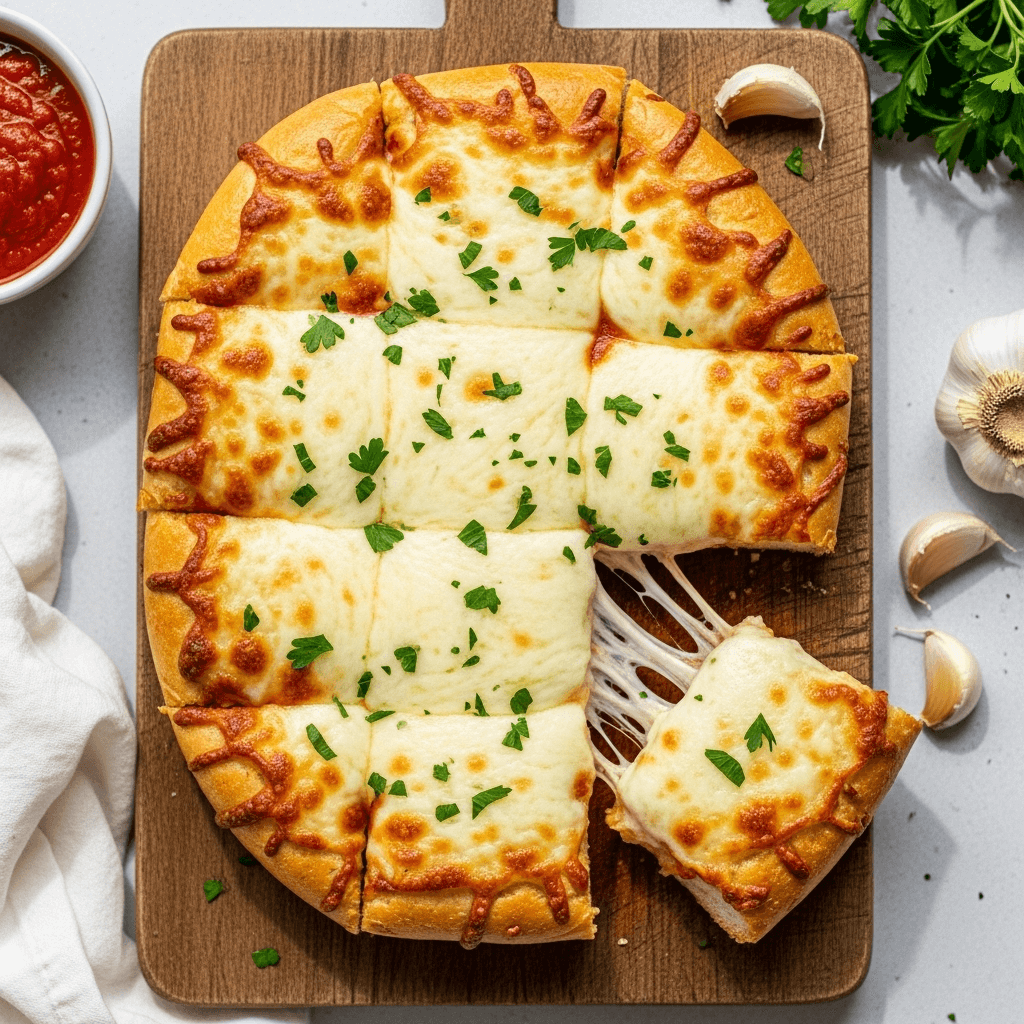
This homemade cheesy garlic bread is loaded with buttery garlic spread, melted mozzarella, and Parmesan cheese. It’s perfectly crispy on the outside, soft on the inside, and ready in just 25 minutes. Better than any restaurant version and endlessly customizable!
Ingredients
- 1 large French or Italian bread loaf (about 16 inches long)
- ½ cup (1 stick) unsalted butter, softened to room temperature
- 4–6 cloves fresh garlic, minced or pressed
- 2 cups shredded mozzarella cheese
- ½ cup freshly grated Parmesan cheese
- 2 tablespoons fresh parsley, finely chopped
- ¼ teaspoon salt (adjust if using salted butter)
- ¼ teaspoon black pepper
- ½ teaspoon Italian seasoning (optional)
- Pinch of red pepper flakes (optional)
Instructions
Step 1: Preheat and Prepare
Preheat your oven to 400°F (200°C). Line a large baking sheet with aluminum foil or parchment paper for easy cleanup. Set aside.
Step 2: Slice the Bread
Using a sharp bread knife, carefully slice the bread loaf in half lengthwise, creating two long halves. Place both halves cut-side up on the prepared baking sheet.
Step 3: Make the Garlic Butter
In a small mixing bowl, combine the softened butter, minced garlic, chopped parsley, salt, black pepper, and Italian seasoning if using. Mix thoroughly with a fork until all ingredients are evenly incorporated and the mixture is creamy and spreadable.
Step 4: Spread the Garlic Butter
Generously spread the garlic butter mixture over the cut side of both bread halves, making sure to cover the entire surface edge to edge. Don’t be shy with the butter – this is what makes the bread incredibly flavorful and prevents it from drying out.
Step 5: First Bake (Toast the Bread)
Place the bread in the preheated oven and bake for 5-7 minutes, just until the edges start to turn golden and the butter has melted into the bread. This pre-toasting step ensures you get a crispy base that won’t become soggy under the cheese.
Step 6: Add the Cheese
Remove the bread from the oven. Sprinkle the shredded mozzarella cheese evenly over both halves, followed by the grated Parmesan cheese. Make sure to distribute the cheese all the way to the edges for maximum cheesy coverage.
Step 7: Final Bake
Return the bread to the oven and bake for an additional 7-8 minutes, or until the cheese is fully melted, bubbling, and starting to turn golden brown in spots. For extra-crispy, browned cheese, you can turn on the broiler for the last 1-2 minutes, but watch it closely to prevent burning.
Step 8: Garnish and Serve
Remove from the oven and immediately sprinkle with additional fresh parsley and a pinch of red pepper flakes if desired. Let cool for 2-3 minutes (just enough so you don’t burn your mouth!), then slice into individual portions and serve hot.
Notes
- For extra crispy garlic bread, toast the bread cut-side down in a skillet for 2-3 minutes before adding toppings
- If your butter is too cold, microwave it for 10-15 seconds to soften, but don’t let it melt completely
- Pre-shredded cheese is convenient, but freshly shredded melts more smoothly
- This recipe easily doubles or triples for large gatherings
- Leftover garlic butter can be stored in the refrigerator for up to a week and used on vegetables, steak, or pasta
- Prep Time: 10 minutes
- Cook Time: 15 minutes
- Category: Appetizer
- Method: Baking
- Cuisine: Italian-American
Nutrition
- Serving Size: 1 slice (based on 10 servings)
- Calories: 285
- Sugar: 2g
- Sodium: 425mg
- Fat: 16g
- Saturated Fat: 9g
- Unsaturated Fat: 6g
- Trans Fat: 0g
- Carbohydrates: 26g
- Fiber: 1g
- Protein: 11g
- Cholesterol: 40mg
Tips & Variations
The beauty of this cheesy garlic bread recipe is how easily you can customize it to your preferences. Here are some delicious ways to make it your own:
Cheese Variations:
- Try a blend of mozzarella, provolone, and fontina for deeper flavor
- Add sharp cheddar for a more intense cheesy taste
- Use Gruyère for a sophisticated, nutty flavor
- Mix in some cream cheese with the garlic butter for extra richness
Herb and Seasoning Options:
- Add fresh basil or oregano instead of (or in addition to) parsley
- Mix in fresh rosemary or thyme for an earthy twist
- Sprinkle everything bagel seasoning on top before baking
- Add sun-dried tomatoes for a Mediterranean flair
Spicy Version:
- Increase red pepper flakes to ½-1 teaspoon
- Add diced jalapeños on top with the cheese
- Mix sriracha or hot sauce into the garlic butter
- Sprinkle cayenne pepper into the butter mixture
Gourmet Upgrades:
- Top with crispy bacon bits before serving
- Add caramelized onions under the cheese layer
- Include roasted red peppers for sweetness
- Drizzle with balsamic glaze after baking
Lighter Version:
- Use half butter and half olive oil
- Choose part-skim mozzarella
- Reduce cheese by one-third and add more herbs
- Use whole wheat or multigrain bread
Pro Chef Tips
Want to take your cheesy garlic bread from great to absolutely extraordinary? Here are professional secrets that will elevate your results:
Use Room Temperature Ingredients: When your butter is at room temperature (not melted, not cold), it creates a smooth, spreadable mixture that absorbs into the bread perfectly. Cold butter won’t spread evenly, and melted butter will soak through and make the bread soggy.
Toast Before Adding Cheese: Many home cooks skip this step, but it’s crucial. Pre-toasting the bread with just the garlic butter for 5-7 minutes creates a moisture barrier that keeps the bread crispy even under all that melted cheese. Without this step, you risk soggy garlic bread.
Let Garlic Sit in Butter: After mixing your garlic butter, let it sit at room temperature for 10-15 minutes before spreading. This allows the garlic flavor to infuse into the butter more thoroughly, resulting in more even, robust garlic flavor throughout.
Cover Every Edge: Don’t leave bare spots on your bread! Spread the garlic butter all the way to the edges and corners. These areas toast beautifully and are some of the most flavorful bites. Plus, it prevents dry, hard edges.
Layer Your Cheeses Strategically: Put mozzarella down first (it melts smoothly and creates that gooey base), then top with Parmesan. The Parmesan on top browns beautifully and adds textural contrast. If you put Parmesan first, it can prevent the mozzarella from melting properly.
Watch the Broiler Carefully: If you use the broiler for extra browning, stay by the oven with the door cracked open. Cheese can go from perfectly golden to burnt in literally 30 seconds under the broiler. Don’t walk away!
Rest Before Slicing: Let the garlic bread rest for 2-3 minutes after removing from the oven. This allows the cheese to set slightly, making it easier to slice cleanly without all the cheese sliding off. It also prevents mouth-burning incidents!
Common Mistakes to Avoid
Even a simple recipe like cheesy garlic bread can go wrong if you’re not careful. Here are the most common pitfalls and how to avoid them:
Using Cold Butter – Cold butter is impossible to spread evenly and will tear your bread. Always let butter soften at room temperature for at least 30-45 minutes before starting. If you forget, microwave it for 10 seconds at a time until spreadable (but not melted).
Skipping the Pre-Toast – Putting cheese directly on untoasted bread creates a soggy middle. The bread needs that initial toasting period with just the garlic butter to develop a crispy base that can support the cheese without getting mushy.
Overcrowding the Cheese – While it’s tempting to pile on mountains of cheese, too much creates a thick, rubbery layer that doesn’t melt evenly and can overpower the garlic butter. Two cups of cheese for a standard loaf is the sweet spot for perfect melt and balance.
Burning the Garlic – If your oven runs hot or you bake too long, the garlic can burn and turn bitter. Check your bread at the minimum baking time, and if the edges are browning too quickly, tent with foil for the remaining time.
Using Pre-Minced Garlic from a Jar – While convenient, jarred minced garlic has a metallic, harsh flavor compared to fresh. Fresh garlic cloves are worth the extra minute of prep time for authentic, sweet garlic flavor.
Not Letting It Cool – Cutting into the bread immediately causes the cheese to slide everywhere and creates messy portions. Those 2-3 minutes of resting time make slicing clean and neat.
Storage & Meal Prep
Cheesy garlic bread is definitely best enjoyed fresh from the oven, but life happens, and sometimes you have leftovers or want to prep ahead. Here’s how to store and reheat it properly:
Storing Leftover Baked Garlic Bread: Once cooled completely, wrap leftover garlic bread tightly in aluminum foil or place in an airtight container. Store in the refrigerator for up to 3 days. The bread will lose some crispness, but proper reheating can help restore it.
Reheating Instructions: The best way to reheat cheesy garlic bread is in the oven at 350°F for 8-10 minutes wrapped in foil (to prevent over-browning), then unwrap and heat for 2-3 more minutes to re-crisp. You can also use a toaster oven with similar timing. Avoid the microwave if possible, as it makes the bread rubbery and soggy.
Room Temperature Storage: If you plan to eat the leftover garlic bread within a few hours, you can leave it at room temperature loosely covered with foil. Beyond 2-3 hours, refrigerate it to prevent bacterial growth, especially if it’s hot outside.
Make-Ahead & Freezer Notes
This recipe is wonderfully make-ahead friendly, which makes it perfect for entertaining or busy weeknight meal prep.
Prepare Unbaked and Refrigerate: You can prepare the entire recipe through Step 6 (with cheese added), then cover tightly with plastic wrap or foil and refrigerate for up to 24 hours. When ready to bake, remove from refrigerator, let sit at room temperature for 15 minutes, then bake as directed, adding 2-3 extra minutes to the baking time.
Prepare Just the Garlic Butter: Make a double or triple batch of the garlic butter mixture and store it in an airtight container in the refrigerator for up to one week, or freeze for up to 3 months. This makes whipping up fresh garlic bread incredibly quick whenever the craving hits.
Freezing Unbaked Garlic Bread: Prepare the recipe through the garlic butter spreading stage (don’t add cheese yet). Wrap each bread half tightly in plastic wrap, then aluminum foil. Freeze for up to 2 months. When ready to bake, thaw in refrigerator overnight, add cheese, and bake as directed.
Freezing Baked Garlic Bread: While not ideal, you can freeze fully baked garlic bread. Let it cool completely, wrap tightly in foil, and freeze for up to 1 month. Reheat from frozen at 375°F wrapped in foil for 20-25 minutes, then unwrap and heat for 5 minutes more to crisp up.
Best Reheating from Frozen: Place frozen garlic bread (wrapped in foil) directly in a preheated 375°F oven for 25-30 minutes. Unwrap and bake 5 more minutes to restore crispness. The result won’t be quite as perfect as fresh, but it’s still delicious.
Serving Suggestions
Cheesy garlic bread is incredibly versatile and pairs beautifully with so many dishes. Here are some perfect serving combinations:
Classic Italian Pairings: Serve alongside spaghetti and meatballs, fettuccine Alfredo, lasagna, chicken Parmesan, or any pasta dish with marinara or meat sauce. The bread is perfect for soaking up extra sauce!
Soup Companions: Pair with tomato soup, minestrone, Italian wedding soup, creamy potato soup, or French onion soup. The crispy, cheesy bread adds satisfying texture contrast to smooth soups.
Salad Partners: Serve with Caesar salad, Caprese salad, antipasto salad, or a simple mixed green salad with Italian vinaigrette. The richness of the garlic bread balances lighter salads perfectly.
Main Dish Sides: Complement grilled chicken, steak, pork chops, meatloaf, or roasted vegetables. The garlicky, cheesy flavors work well with simply seasoned proteins.
Appetizer Presentation: Cut into smaller 2-inch pieces and serve as an appetizer with marinara sauce, ranch dressing, or garlic aioli for dipping. Arrange on a wooden board for a rustic presentation.
Party Platter Ideas: Include on an Italian-themed spread with bruschetta, caprese skewers, olives, cured meats, and marinated vegetables. It’s always the first thing to disappear!
FAQs Section
Q: Can I use a different type of bread?
A: Absolutely! While French or Italian bread works best due to their sturdy crust and soft interior, you can use sourdough, ciabatta, or even a split baguette. Avoid soft sandwich bread as it becomes too soggy. For a fun twist, try using Texas toast or thick-sliced bread – just adjust baking time down by 2-3 minutes.
Q: My garlic bread turned out soggy. What went wrong?
A: Soggy garlic bread usually happens when you skip the pre-toasting step or use too much butter. Make sure to toast the bread with just the garlic butter for 5-7 minutes before adding cheese. This creates a barrier that keeps the bread crispy. Also, don’t melt the butter completely – it should be soft but not liquid.
Q: Can I make this without an oven?
A: Yes! You can make stovetop garlic bread. Spread the garlic butter on the bread, then place it butter-side down in a large skillet over medium heat. Toast until golden, flip carefully, add cheese to the toasted side, cover with a lid, and cook until cheese melts (about 3-4 minutes). You can also use an air fryer at 350°F for 8-10 minutes.
Q: What’s the best way to reheat leftover garlic bread?
A: The oven is your best bet for restoring crispness. Wrap in foil and heat at 350°F for 8-10 minutes, then unwrap and heat 2-3 more minutes. A toaster oven works great too. Avoid the microwave as it makes the bread chewy and the cheese rubbery.
Q: Can I use garlic powder instead of fresh garlic?
A: While fresh garlic tastes significantly better, you can substitute with garlic powder in a pinch. Use about 1-1½ teaspoons garlic powder in place of fresh garlic cloves. Mix it directly into the softened butter. The flavor will be milder and slightly different, but still delicious.
Q: How do I prevent the cheese from sliding off when I cut the bread?
A: Let the garlic bread rest for 2-3 minutes after removing from the oven. This allows the cheese to set slightly. Also, use a sharp serrated knife and cut with a gentle sawing motion rather than pressing down hard. Cutting while the cheese is still bubbling hot causes it to slide around.
Q: Can I make this dairy-free or vegan?
A: Yes! Use vegan butter (like Earth Balance) and substitute the cheese with dairy-free mozzarella and Parmesan alternatives. Brands like Violife, Follow Your Heart, and Miyoko’s make excellent plant-based cheese that melts well. The results won’t be identical, but they’re delicious in their own right.
Conclusion
There you have it – the ultimate homemade cheesy garlic bread that’s guaranteed to become a staple in your recipe rotation! With its perfect balance of crispy, buttery, garlicky, and cheesy goodness, this recipe delivers restaurant-quality results with minimal effort and affordable ingredients. Whether you’re serving it alongside your favorite Italian dinner, pairing it with a comforting bowl of soup, or simply enjoying it as a indulgent snack, this cheesy garlic bread never disappoints.
The beauty of this recipe lies not just in how delicious it tastes, but in how easily you can make it your own. Experiment with different cheese combinations, add your favorite herbs, or spice it up with red pepper flakes. Make it ahead for stress-free entertaining, or whip it up on a busy weeknight when you need something special without the fuss.
Now it’s your turn to get in the kitchen and make this incredible cheesy garlic bread! I promise it’ll be love at first bite. Once you serve this at your dinner table, it’ll become a requested favorite that you’ll make again and again.
I’d love to hear how your garlic bread turns out! Leave a comment below with your results, any creative variations you tried, or questions you have. And if you loved this recipe as much as I do, please share it on Pinterest so other home cooks can discover it too. Pin it to your favorite recipe boards and help spread the cheesy, garlicky love!
Happy cooking, friends!