
If you’ve been searching for the perfect buttermilk biscuit recipe that delivers those tall, flaky, tender layers every single time, your search ends here! These homemade buttermilk biscuits are everything you dream of—golden brown on the outside, impossibly fluffy on the inside, with buttery layers that practically melt in your mouth. This easy buttermilk biscuits recipe captures authentic Southern tradition while being approachable enough for beginner bakers. Whether you’re serving them for breakfast with honey and butter, alongside dinner, or as the base for strawberry shortcake, these fluffy biscuits will become your go-to recipe that gets requested again and again.
Introduction of Recipe
Buttermilk biscuits are a quintessential Southern quick bread made from flour, butter, buttermilk, and leavening agents. Unlike yeast breads that require rising time, these biscuits come together quickly using baking powder and baking soda for lift. The magic happens when cold butter is worked into the flour, creating pockets that steam during baking and produce those beautiful flaky layers. The buttermilk adds tangy flavor and reacts with the baking soda to create additional lift, resulting in biscuits that are tender, tall, and incredibly delicious.
What makes this buttermilk biscuit recipe so universally beloved is its versatility and comforting appeal. Serve these Southern biscuits for weekend breakfast or brunch with jam and butter, holiday meals like Thanksgiving or Christmas morning, Sunday dinners with fried chicken or pot roast, biscuits and gravy for a hearty breakfast, as sandwich bases for breakfast sandwiches or chicken biscuits, or with soup and stew for a cozy meal. They’re the kind of food that makes any meal feel special and brings people together around the table.
The beauty of homemade biscuits is that they’re surprisingly simple to make once you understand the technique. Yes, there’s a bit of method to follow, but it’s not complicated—it just requires a gentle touch and cold ingredients. The reward is fresh, warm biscuits that smell incredible and taste even better, made with ingredients you probably already have in your kitchen.
History / Background
Biscuits have a fascinating history that spans continents and centuries. The word “biscuit” comes from the Latin “bis coctus,” meaning “twice baked.” European biscuits were originally hard, twice-baked breads designed for long storage during sea voyages. However, American biscuits evolved into something entirely different—soft, fluffy, and meant to be eaten fresh from the oven.
The American biscuit as we know it today has its roots in the Southern United States, where it became a staple of regional cuisine. The South’s warm climate wasn’t ideal for yeast breads (yeast behaves unpredictably in heat), so quick breads leavened with baking powder and baking soda became popular. Additionally, wheat flour was more expensive and less available in the South, so biscuits—which use less flour than bread—were economical.
The introduction of baking powder in the 1850s revolutionized biscuit-making, making tall, fluffy biscuits achievable without yeast. Before this, biscuits were denser and flatter. Chemical leavening transformed biscuits into the light, tender treat Southerners came to love.
Buttermilk biscuits specifically gained prominence because buttermilk was readily available in Southern kitchens. Buttermilk is the liquid left over from churning butter, and since most households made their own butter, buttermilk was a common byproduct that couldn’t be wasted. Cooks discovered that buttermilk’s acidity created incredibly tender biscuits with a distinctive tangy flavor and beautiful rise when combined with baking soda.
Different regions of the South developed their own biscuit styles. In the Deep South, biscuits tend to be taller and fluffier. In Appalachia, “cathead biscuits”—large, roughly shaped biscuits said to be the size of a cat’s head—became popular. Some families prefer drop biscuits (wet dough dropped onto baking sheets), while others swear by rolled and cut biscuits for those perfect layers.
Biscuits became deeply woven into Southern culture and hospitality. They appeared at every meal, from breakfast with sausage gravy to dinner alongside fried chicken. Making good biscuits became a point of pride, with techniques passed down through generations. Today, buttermilk biscuits remain one of the most iconic symbols of Southern cooking and comfort food across America.
Why You’ll Love This Recipe
This fluffy buttermilk biscuits recipe is about to become your most treasured baking recipe, and here’s exactly why:
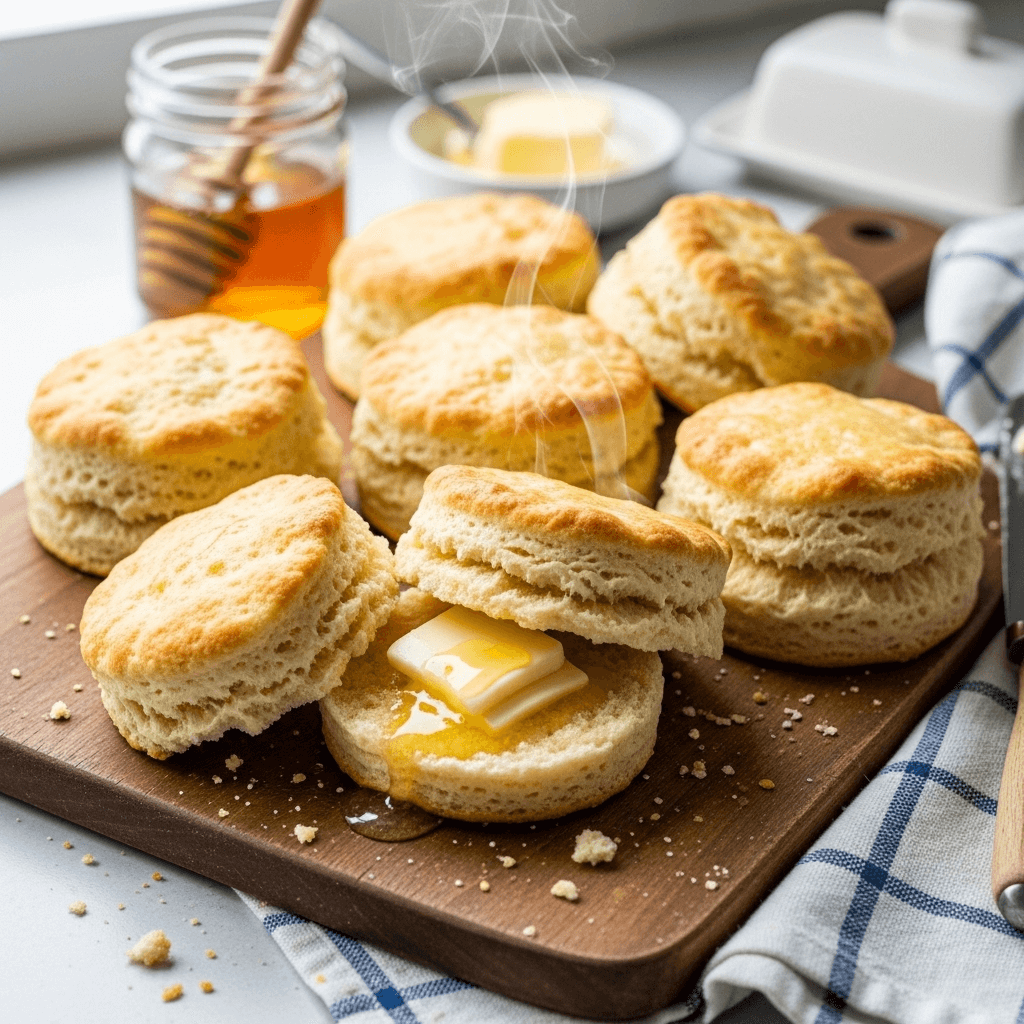
Imagine pulling a pan of golden biscuits from the oven, their tops glistening with melted butter, steam rising as you split one open to reveal tender, flaky layers inside. That first bite with butter and honey? Pure heaven. That’s what you’re about to create!
- Foolproof technique: Clear, detailed instructions ensure success even if you’ve never made biscuits before
- Incredibly tender and flaky: These aren’t hockey pucks—they’re genuinely light, fluffy, and layered
- Quick to make: From start to oven in about 15 minutes with no rising time required
- Simple ingredients: Just basic pantry staples—no special shopping needed
- Budget-friendly: Makes a dozen generous biscuits for just a few dollars
- Impressive results: Look and taste like they came from a Southern grandmother’s kitchen
- Versatile serving options: Perfect for any meal from breakfast to dinner
- Freezer-friendly: Make ahead and freeze for fresh biscuits anytime
- Crowd-pleasing guarantee: Everyone loves warm, buttery biscuits—there are never leftovers!
- Authentic Southern flavor: Captures that traditional tangy buttermilk taste
- Satisfyingly hands-on: There’s something therapeutic about making biscuits from scratch
Ingredient Notes
Let’s break down what makes these Southern buttermilk biscuits so special:
All-Purpose Flour: The foundation of your biscuits. All-purpose flour provides the right protein content for tender yet sturdy biscuits. Self-rising flour is common in Southern biscuit recipes and can be substituted (if using self-rising, omit the baking powder, baking soda, and salt). For the fluffiest biscuits, use a lighter hand when measuring—spoon flour into the measuring cup and level it off rather than scooping, which packs it down.
Cold Butter: Absolutely essential for flaky layers. Use unsalted butter so you can control salt levels. The butter must be very cold—straight from the refrigerator, even partially frozen is ideal. As butter melts during baking, it creates steam pockets that lift the layers. If butter is warm when you mix the dough, it will blend into the flour instead of creating distinct pockets, resulting in dense biscuits. Some Southern cooks use lard or shortening for extra flakiness, but butter provides the best flavor.
Buttermilk: The star ingredient that gives these biscuits their signature tang and tender crumb. Buttermilk’s acidity tenderizes the gluten and reacts with baking soda to create lift. It must be cold when you add it. If you don’t have buttermilk, make a quick substitute: add 1 tablespoon lemon juice or white vinegar to 1 cup milk, stir, and let sit for 5-10 minutes until slightly thickened. This won’t taste exactly like real buttermilk but works in a pinch.
Baking Powder and Baking Soda: The leavening dream team. Baking powder provides immediate lift when it contacts moisture. Baking soda reacts with the acidic buttermilk to create additional rise and neutralize some of the tangy flavor. Make sure both are fresh—old leavening agents lose potency and won’t give you the height you want. Test baking powder by adding ½ teaspoon to hot water; it should fizz vigorously.
Salt: Enhances all the other flavors. Don’t skip it even though it seems like a small amount—biscuits without salt taste flat and boring.
Sugar (optional): Just a teaspoon adds subtle sweetness and promotes browning. Many traditional Southern recipes omit sugar for savory biscuits. It’s your choice based on preference and how you plan to serve them.
Melted Butter for Brushing: Brushing tops with melted butter before baking creates that gorgeous golden color and adds extra richness. Some cooks also brush biscuits with butter immediately after removing from the oven for an extra-indulgent finish.
Equipment Needed
You’ll need these basic tools:
- Large mixing bowl
- Pastry cutter, fork, or two knives (for cutting butter into flour)
- Rolling pin (or clean wine bottle in a pinch)
- Biscuit cutter (2½ to 3-inch round cutter—or use a drinking glass)
- Baking sheet (preferably light-colored; dark pans can over-brown bottoms)
- Parchment paper or silicone baking mat (optional but helps prevent sticking)
- Measuring cups and spoons
- Pastry brush (for brushing with butter)
- Bench scraper (optional but helpful for handling dough)

Fluffy Buttermilk Biscuits Recipe
- Total Time: 27 minutes
- Yield: 12 biscuits 1x
- Diet: Vegetarian
Description
These fluffy buttermilk biscuits feature tender, flaky layers and authentic Southern flavor. Made with cold butter and tangy buttermilk, this easy recipe creates tall, golden biscuits perfect for breakfast, dinner, or anytime you need comfort food. With simple ingredients and foolproof instructions, you’ll achieve bakery-quality results every time!
Ingredients
- 2½ cups all-purpose flour, plus more for dusting
- 2 tablespoons granulated sugar (optional, for slightly sweet biscuits)
- 1 tablespoon baking powder
- ½ teaspoon baking soda
- 1 teaspoon salt
- ½ cup (1 stick) unsalted butter, very cold and cut into small cubes
- 1 cup cold buttermilk
- 2 tablespoons melted butter (for brushing tops)
Instructions
Step 1: Prep Your Ingredients
Preheat your oven to 450°F (230°C). Line a baking sheet with parchment paper or lightly grease it. Cut your butter into small cubes and return it to the refrigerator until you’re ready to use it—keeping it cold is crucial! Make sure your buttermilk is also cold. Having everything ice-cold is the secret to flaky biscuits.
Step 2: Mix the Dry Ingredients
In a large mixing bowl, whisk together the flour, sugar (if using), baking powder, baking soda, and salt until well combined. This ensures the leavening agents are evenly distributed throughout the flour, which means even rise and consistent texture in your biscuits.
Step 3: Cut in the Butter
Add the cold butter cubes to the flour mixture. Using a pastry cutter, two knives, a fork, or your fingertips, work the butter into the flour until the mixture resembles coarse crumbs with some pea-sized butter pieces remaining. This is THE most important step! Those visible butter pieces will create steam pockets during baking that make your biscuits flaky. Don’t overwork it—you want to see butter pieces, not a uniform sandy texture. Work quickly so your hands don’t warm the butter. If the butter starts getting soft, pop the whole bowl in the freezer for 5 minutes.
Step 4: Add the Buttermilk
Make a well in the center of the flour mixture and pour in the cold buttermilk all at once. Using a fork or wooden spoon, stir gently just until the dough comes together. The dough will look shaggy and slightly sticky—that’s perfect! Do not overmix. Overmixing develops gluten and creates tough biscuits. A few flour streaks are fine. The dough should be soft and slightly sticky but manageable.
Step 5: Knead Gently
Turn the dough out onto a lightly floured surface. With floured hands, gently pat or fold the dough over itself 3-4 times. This creates layers without overworking the dough. Don’t knead it like bread dough—you’re just bringing it together and creating a few layers. The dough should hold together but still look a bit rough and rustic.
Step 6: Roll and Cut
Pat or gently roll the dough into a rectangle or circle about ¾ to 1 inch thick. Don’t roll it thinner or your biscuits will be flat! For the tallest biscuits, make it a full inch thick. Using a 2½ to 3-inch biscuit cutter (or drinking glass dipped in flour), cut straight down without twisting—twisting seals the edges and prevents rise. Cut biscuits as close together as possible to minimize scraps. Gather scraps gently, pat together (don’t re-roll with a rolling pin), and cut remaining biscuits. Note that second-cut biscuits won’t be quite as fluffy as first cuts.
Step 7: Arrange and Brush
Place biscuits on your prepared baking sheet. For soft-sided biscuits, place them touching each other. For crispy-sided biscuits, space them about 1 inch apart. Brush the tops generously with melted butter—this creates that gorgeous golden color and adds flavor.
Step 8: Bake
Bake in the preheated 450°F oven for 10-12 minutes until the tops are golden brown. The high temperature creates steam quickly, which helps the biscuits rise dramatically. Don’t open the oven door during baking—you’ll release heat and steam. The biscuits are done when tops are golden and they’ve risen tall. Remove from oven and brush with additional melted butter if desired. Serve immediately while warm!
Notes
- Keep Everything Cold: This is the golden rule of biscuit making. Cold butter, cold buttermilk, cold bowl if possible. Warm ingredients = flat, dense biscuits.
- Don’t Twist the Cutter: Press straight down and lift straight up. Twisting seals the edges and prevents even rise.
- High Heat is Intentional: 450°F seems hot but it’s necessary for maximum rise and golden color. Lower temperatures produce paler, shorter biscuits.
- Handle Dough Gently: The less you work the dough, the more tender your biscuits will be. A light touch is everything.
- Thickness Matters: Roll or pat to at least ¾ inch thick, preferably 1 inch. Thin dough = flat biscuits.
- Fresh Leavening Agents: Check expiration dates! Old baking powder/soda won’t give adequate rise.
- Prep Time: 15 minutes
- Cook Time: 12 minutes
- Category: Breakfast
- Method: Baking
- Cuisine: Southern American
Nutrition
- Serving Size: 1 biscuit
- Calories: 165
- Sugar: 2g
- Sodium: 310mg
- Fat: 8g
- Saturated Fat: 5g
- Unsaturated Fat: 2g
- Trans Fat: 0g
- Carbohydrates: 21g
- Fiber: 1g
- Protein: 3g
- Cholesterol: 22mg
Tips & Variations
Let’s explore delicious ways to customize these buttermilk biscuits:
Cheddar Biscuits: Add 1 cup shredded sharp cheddar cheese to the dry ingredients. For garlic cheddar biscuits, add ½ teaspoon garlic powder too. Brush with garlic butter after baking for copycat Red Lobster vibes.
Herb Biscuits: Add 2 tablespoons fresh chopped herbs (rosemary, thyme, chives, or a combination) to the dry ingredients. Fresh herbs add beautiful flavor and aroma.
Sweet Biscuits: Increase sugar to 3 tablespoons and add ½ teaspoon vanilla extract to the buttermilk. Perfect for strawberry shortcake or serving with jam.
Whole Wheat Biscuits: Replace up to half the all-purpose flour with whole wheat flour for nuttier flavor and more fiber. They’ll be slightly denser but still delicious.
Drop Biscuits: For even easier biscuits, increase buttermilk to 1¼ cups and simply drop spoonfuls of dough onto the baking sheet without rolling or cutting. They won’t be as uniform but they’re just as tasty.
Buttermilk Biscuits with Honey Butter: Whip softened butter with honey and a pinch of cinnamon to serve alongside warm biscuits. Heaven!
Bacon Cheddar Biscuits: Add ½ cup shredded cheddar and ⅓ cup crumbled cooked bacon to the dough for savory, breakfast-worthy biscuits.
Blueberry Biscuits: Gently fold in ¾ cup fresh or frozen blueberries after adding buttermilk. Increase sugar to 3 tablespoons. Great for brunch!
Jalapeño Cheddar Biscuits: Add 1 cup shredded cheese and 2-3 tablespoons finely diced jalapeños for spicy, savory biscuits.
Pro Chef Tips
Want bakery-level buttermilk biscuits? These professional secrets make the difference:
Freeze Your Butter: For the absolute flakiest biscuits, freeze butter for 15 minutes before cutting it into the flour. Some pros even grate frozen butter on a box grater directly into the flour—this creates tiny butter shreds that distribute perfectly.
Use a Light Hand: The number one mistake is overworking the dough. Mix just until combined, knead just 3-4 times, handle as little as possible. Tough biscuits come from overdeveloped gluten caused by too much mixing.
The Folding Technique: For extra-tall, extra-flaky biscuits, after bringing the dough together, pat it into a rectangle, fold it in thirds like a letter, rotate 90 degrees, and repeat 2-3 times. This creates distinct layers like puff pastry. Then pat to 1-inch thickness and cut.
Dip Your Cutter in Flour: This prevents dough from sticking to the cutter and allows clean cuts for maximum rise. Re-dip between each biscuit.
Place Biscuits Close Together: If you want soft, tender sides, arrange biscuits so they’re just touching. They’ll rise up and against each other, creating soft sides and tall biscuits.
Use the Right Temperature: 450°F isn’t negotiable—it’s the temperature that creates maximum rise and golden browning. An oven thermometer ensures accuracy since many ovens run hot or cold.
Don’t Peek: Opening the oven door releases crucial heat and steam. Set a timer and trust the process. Check only at the minimum baking time.
Brush with Buttermilk Alternative: Some Southern cooks brush tops with buttermilk instead of melted butter before baking for extra browning and authentic flavor. You can also do both—buttermilk before baking, butter after!
Steam Creates Rise: Some bakers place a pan of water on the bottom oven rack to create steam, similar to bread baking. The extra moisture helps biscuits rise even higher.
Common Mistakes to Avoid
Even experienced bakers make these biscuit errors:
Using Warm Ingredients: Warm butter melts into the flour instead of staying in distinct pieces, eliminating those flaky layers. Warm buttermilk has the same effect. Everything must be cold! On hot days, chill your mixing bowl and even the flour for extra insurance.
Overworking the Dough: This is the #1 reason for tough, dense biscuits. Every extra stir, knead, or roll develops more gluten, which creates chewiness instead of tenderness. Mix only until just combined—the dough should look shaggy and rough, not smooth. Knead just 3-4 times to bring it together. That’s it!
Rolling Too Thin: Biscuits need to be at least ¾ inch thick, preferably 1 inch, to achieve proper rise and fluffy texture. Thin dough = flat, hard biscuits. Don’t be timid—go thick!
Twisting the Cutter: When cutting biscuits, press straight down and lift straight up. Twisting seals and pinches the edges, preventing them from rising evenly. You want those edges open so steam can escape and lift the layers.
Using Old Leavening Agents: Baking powder and baking soda lose potency over time (typically after 6 months opened). Old leavening agents won’t create adequate rise no matter how perfect your technique is. Test baking powder by adding ½ teaspoon to ¼ cup hot water—it should bubble vigorously immediately.
Overbaking: Once biscuits are golden brown on top, they’re done. Overbaking dries them out and makes them hard. Set a timer and check at the minimum baking time. Remember, they’ll continue cooking slightly after you remove them from the oven from residual heat.
Storage & Meal Prep
Here’s how to keep your biscuits fresh and delicious:
Room Temperature Storage: Store completely cooled biscuits in an airtight container or zip-top bag at room temperature for up to 2 days. They’ll lose some of their initial fluffiness but are still delicious, especially when warmed.
Reheating: The best way to reheat biscuits is in a 350°F oven for 5-7 minutes until warmed through. You can also microwave individual biscuits for 15-20 seconds, but this makes them soft rather than maintaining any crispy exterior. Some people split biscuits and toast them in a toaster or under the broiler with butter.
Refrigerator Storage: You can refrigerate biscuits in an airtight container for up to 5 days, but they’ll become firmer and less fluffy. Reheating helps restore some texture.
Refreshing Day-Old Biscuits: Sprinkle biscuits lightly with water and reheat in a 350°F oven for 5-10 minutes. The moisture creates steam that softens them slightly.
Best Fresh: Honestly, buttermilk biscuits are best eaten within a few hours of baking while they’re still warm and at peak fluffiness. The good news is they’re so quick to make that you can easily bake fresh ones anytime!
Make-Ahead & Freezer Notes
Biscuits are surprisingly freezer-friendly with proper technique:
Freezing Unbaked Biscuits (Best Method): Cut out biscuits and place them on a parchment-lined baking sheet. Freeze until solid (about 2 hours), then transfer to a freezer bag. Freeze for up to 3 months. To bake from frozen, place frozen biscuits on a baking sheet, brush with melted butter, and bake at 450°F for 15-18 minutes. No thawing needed! This method gives you fresh-baked biscuits anytime.
Freezing Baked Biscuits: Let biscuits cool completely, then freeze in a freezer bag for up to 2 months. Reheat from frozen in a 350°F oven for 10-12 minutes. While convenient, the texture won’t be quite as perfect as freezing unbaked and baking fresh.
Make-Ahead Dough: You can prepare the dough through step 5, wrap it tightly in plastic wrap, and refrigerate for up to 24 hours. When ready to bake, remove from refrigerator, let sit for 10 minutes, then roll, cut, and bake as directed. The cold dough may need an extra minute of baking time.
Prepping Dry Ingredients: Mix all dry ingredients together and store in an airtight container for up to 2 weeks. When ready to make biscuits, just add cold butter and buttermilk. This makes biscuit-making even faster!
Why Freeze Unbaked: Freezing unbaked biscuits before the final rise preserves the leavening power of the baking powder and baking soda. When you bake them from frozen, they rise beautifully. Baking first, then freezing, means reheated biscuits won’t have that fresh-from-the-oven texture.
Serving Suggestions
These fluffy biscuits pair perfectly with countless dishes:
Breakfast Classics: Serve with butter and honey, jam, or preserves for a simple breakfast. Make biscuits and gravy by topping with sausage gravy. Create breakfast sandwiches with eggs, cheese, and bacon or sausage.
Dinner Pairings: Serve alongside fried chicken, pot roast, meatloaf, or pork chops. They’re also wonderful with soups and stews—split and dunk them in tomato soup, chicken noodle soup, or beef stew.
Southern Specialties: Make fried chicken biscuits, country ham biscuits, or use them for shrimp and grits. Split and top with butter and honey for classic Southern simplicity.
Sweet Applications: Use for strawberry shortcake—split biscuits, layer with macerated strawberries and whipped cream. Or serve with butter and maple syrup like pancakes.
BBQ Sides: Biscuits are perfect alongside pulled pork, ribs, or brisket. They soak up BBQ sauce beautifully.
Compound Butters: Serve with flavored butters—honey butter, cinnamon butter, herb butter, or garlic butter.
Beverages: Pair with sweet tea, coffee, milk, or hot chocolate for breakfast. For dinner, they complement everything from iced tea to wine.
Holiday Tables: Include in Thanksgiving dinner alongside turkey and dressing, Christmas breakfast spreads, or Easter brunch buffets.
FAQs Section
Can I make buttermilk biscuits without buttermilk?
Yes! Make a buttermilk substitute by adding 1 tablespoon lemon juice or white vinegar to 1 cup of regular milk. Stir and let sit for 5-10 minutes until it thickens slightly and looks curdled. While not identical to real buttermilk, this works well in biscuits. You can also use plain yogurt thinned with milk to a pourable consistency.
Why are my biscuits hard and dense instead of fluffy?
This usually comes from overworking the dough (which develops tough gluten), using warm ingredients (butter must be ice-cold), old leavening agents that have lost potency, or rolling the dough too thin. Follow the recipe carefully, handle dough minimally, keep everything cold, and roll to a full inch thickness.
Can I use self-rising flour instead of all-purpose?
Yes! Self-rising flour already contains baking powder and salt. If using self-rising flour, use 2½ cups and omit the baking powder, baking soda, and salt from the recipe. Just add the butter and buttermilk. The biscuits will be slightly different but still delicious.
Do I need a biscuit cutter, or can I use something else?
Any round cutter works—a drinking glass, a cookie cutter, even a clean soup can with both ends removed. Just make sure to dip the edges in flour between cuts to prevent sticking. For drop biscuits, you don’t need a cutter at all—just scoop and drop spoonfuls of slightly wetter dough onto the baking sheet.
Why did my biscuits spread instead of rise?
This happens when the butter was too warm and melted into the dough instead of staying in pieces, the oven temperature was too low, or the dough was overworked. Make sure butter is very cold, your oven is properly preheated to 450°F, and you handle the dough gently and minimally.
Can I make biscuits ahead and reheat them?
While fresh is always best, you can make biscuits a few hours ahead and reheat in a 350°F oven for 5 minutes before serving. For best results, freeze unbaked cut biscuits and bake from frozen when needed—they’ll taste freshly baked because they are!
What’s the difference between Southern and Northern biscuits?
Southern biscuits tend to be taller, fluffier, and made with buttermilk and baking powder for maximum rise. Northern biscuits are often shorter, denser, and may use cream instead of buttermilk. Southern biscuit-making emphasizes a light touch and cold ingredients for that signature tender, flaky texture.
Conclusion
There you have it—everything you need to master fluffy, tender, absolutely delicious buttermilk biscuits! This classic Southern recipe proves that with the right technique and a few simple ingredients, you can create bakery-quality biscuits in your own kitchen. The secret is in keeping everything cold, handling the dough gently, and not being afraid to make them thick and proud.
Once you’ve made these homemade buttermilk biscuits, store-bought will never satisfy you again. There’s something magical about pulling warm, golden biscuits from your oven and watching them disappear as fast as you can split and butter them. Whether you serve them for breakfast, alongside dinner, or as the foundation for strawberry shortcake, these Southern biscuits deliver comfort and satisfaction in every flaky, buttery bite.
Ready to make these easy buttermilk biscuits? I’d love to hear how yours turn out! Drop a comment below sharing your results—did you add cheese? Make drop biscuits? Serve them with sausage gravy? Your fellow bakers want to know! And if this recipe earns a permanent spot in your kitchen (I’m betting it will), please pin it to your favorite Pinterest board so you can find it easily whenever those biscuit cravings hit. Don’t forget to share it with friends who need a foolproof biscuit recipe that actually works. Happy baking!