
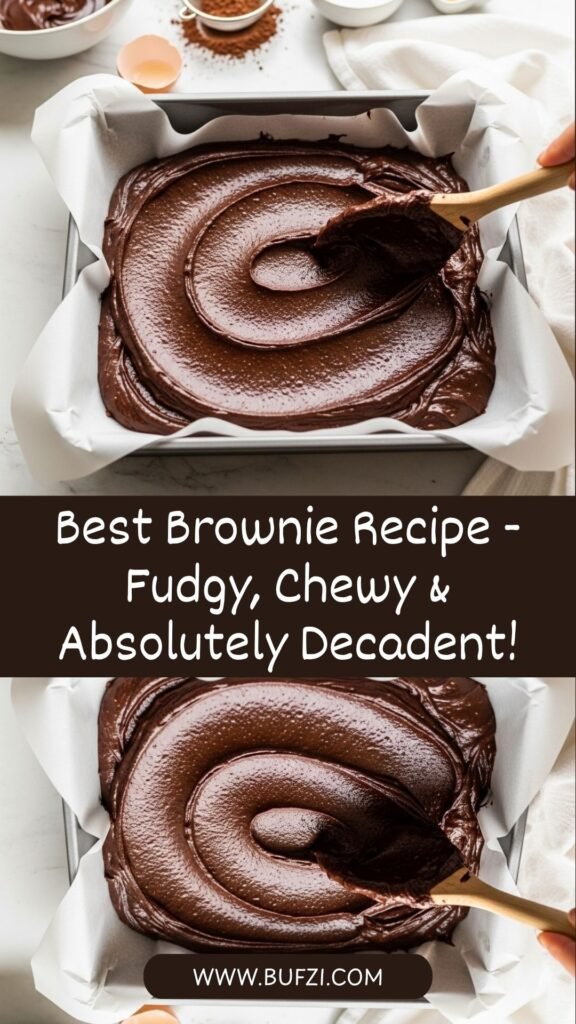
There’s nothing quite like biting into a warm, fudgy homemade brownie – that perfect combination of crispy edges, chewy center, and deep chocolate intensity that makes you close your eyes and savor every bite. This best brownie recipe delivers thick, rich, intensely chocolatey brownies that taste like they came from an upscale bakery yet require only simple ingredients and basic baking skills. Whether you’re craving an indulgent dessert, looking for the perfect treat to bring to a gathering, or seeking a foolproof recipe that impresses family and friends, this easy fudgy brownie recipe delivers outstanding results every single time.
What makes this homemade brownie recipe so special is achieving that coveted brownie texture – crispy, crackly edges giving way to a dense, fudgy, absolutely decadent center that stays moist for days. Unlike cake-like brownies that are too light and fluffy, or overly dense brownies that are almost gooey, these perfect brownies hit that sweet spot between fudgy and chewy. In just 35 minutes from start to finish, you’ll have a pan of incredibly delicious brownies that are actually easier to make than you’d think. This simple yet impressive fudgy brownie recipe has become the gold standard in home kitchens because it combines foolproof technique with absolutely irresistible results.
History / Background
Brownies are a distinctly American dessert with a surprisingly mysterious origin story. Unlike many classic recipes that have clear historical documentation, the exact invention of the brownie remains somewhat debated among food historians. However, most experts credit American home cooks of the late 19th and early 20th centuries with creating this beloved chocolate bar.
The most popular origin story involves a creative baker who allegedly made a mistake – either underbaking a chocolate cake or accidentally creating a hybrid between a cake and a cookie. The result was something entirely new: a dense, chewy chocolate confection that wasn’t quite cake and wasn’t quite candy, but absolutely delicious. This happy accident led to intentional recreation and refinement of the recipe.
Brownies gained particular popularity in the 1920s and 1930s when they appeared in American cookbooks and magazines. During the Great Depression, brownies became beloved not just for their delicious taste but for their practicality – they were economical to make using simple, affordable ingredients, yet felt like an indulgent treat. Brownies became a staple at church bake sales, school functions, and home kitchens throughout America.
The iconic fudgy brownie texture that defines the recipe today was perfected during the 1950s and 1960s as baking techniques became more standardized and ingredient quality improved. The addition of chocolate chips to brownie recipes became popular during this era, and boxed brownie mixes were introduced, bringing brownie accessibility to an even broader audience.
What’s fascinating about brownie history is how varied the recipes became. Different regions and families developed their own preferred brownie style – some preferring cake-like brownies, others favoring dense, fudgy versions, and still others creating thin, crispy brownies almost like chocolate bars. Today, brownies remain one of America’s most beloved desserts, appearing everywhere from fancy restaurants to potlucks to home kitchens, with countless regional and personal variations.
Why You’ll Love This Recipe
This best brownie recipe is the ultimate chocolate dessert – foolproof, indulgent, and absolutely irresistible. I’ve perfected this recipe through countless batches to bring you the definitive version that consistently delivers fudgy, chewy, restaurant-quality brownies every single time you bake.
Here’s why this easy fudgy brownie recipe will become your new favorite:
- Perfectly fudgy texture – Dense, chewy center with crispy edges and that coveted crackly top
- Deep chocolate flavor – Rich, authentic chocolate taste that satisfies serious chocolate cravings
- Ready in just 35 minutes – Prep to finished brownies in about half an hour, perfect for spontaneous dessert cravings
- Simple, affordable ingredients – Just eight basic pantry staples you likely already have on hand
- No special equipment needed – One bowl, one baking pan, basic kitchen tools, that’s all you need
- Makes 16 generous servings – Perfect for sharing or enjoying throughout the week
- Foolproof technique – Even beginner bakers achieve professional-looking, delicious results
- Budget-friendly treat – Costs just a few dollars to make, dramatically less than bakery brownies
- Make-ahead and freezer-friendly – Bake ahead and freeze for months of ready-made desserts
- Naturally customizable – Easily add nuts, chocolate chips, swirls, or other creative additions
- Stays fresh for days – Remains moist and delicious throughout the week when properly stored
- Kid-approved favorite – Children and adults alike adore these irresistible chocolate brownies
Ingredient Notes
Creating the perfect fudgy brownie requires understanding how each ingredient contributes to texture, flavor, and that essential brownie character. Quality ingredients make an enormous difference in the final result.
Chocolate – Six ounces of semi-sweet chocolate combined with cocoa powder creates authentic, intensely chocolatey flavor. Using actual melted chocolate rather than relying only on cocoa powder creates superior texture and deeper chocolate taste. Quality chocolate makes an enormous difference – don’t use the cheapest chocolate bars; invest in good-quality baking chocolate or premium chocolate chips that you’d enjoy eating on their own.
Cocoa Powder – One-third cup of unsweetened cocoa powder provides additional chocolate flavor and helps create the fudgy texture that defines great brownies. Use Dutch-process cocoa for deeper, more sophisticated flavor, though natural cocoa powder works equally well. Sifting cocoa powder prevents lumps that would create texture problems in the finished brownies.
Butter – Half a cup (one stick) of butter provides richness and moisture that creates that essential chewy, fudgy texture. Melted butter creates different texture than creamed butter – it results in denser brownies that are perfect for the fudgy brownie style. Real butter is essential; substitutes don’t provide the same flavor or texture.
Sugar – One and a quarter cups of granulated sugar sweetens the brownies and plays a crucial role in creating the crackly top that’s so desirable. Sugar also helps retain moisture, keeping brownies tender and fresh-tasting for days after baking.
Eggs – Two large eggs bind ingredients together, add moisture, and create structure. Eggs also help create the essential brownie texture when combined with the fat from butter and chocolate. Room temperature eggs incorporate more smoothly, creating better emulsification and more even crumb.
All-Purpose Flour – One-third cup of flour provides minimal structure intentionally – brownies should have much less flour than regular cakes to achieve that dense, fudgy texture. Using too much flour creates cake-like brownies instead of the dense, fudgy version. Spoon flour into measuring cups and level off rather than scooping, which compacts flour.
Salt – One-quarter teaspoon of salt enhances chocolate flavor, making it taste deeper and more complex. Salt adds no perceptible salty taste but dramatically improves overall chocolate intensity.
Vanilla Extract – One teaspoon of pure vanilla extract adds subtle vanilla notes that complement chocolate beautifully. Pure vanilla tastes infinitely better than imitation extract, though imitation works in a pinch.
Optional Additions:
- Chocolate chips for extra fudginess
- Chopped nuts (walnuts or pecans)
- Espresso powder for deeper chocolate flavor
- Sea salt for salted chocolate brownies
- Swirled peanut butter or cream cheese
Substitutions: Use melted coconut oil instead of butter for different flavor (though result will be slightly less rich). Replace some cocoa powder with dark chocolate for more intense flavor. Add Greek yogurt to replace some butter for tangier flavor and denser texture. Use monk fruit or erythritol instead of sugar for lower-sugar brownies. Substitute all-purpose flour with almond flour for lower-carb brownies.
Equipment Needed
- 8×8-inch baking pan – Metal pans conduct heat most evenly; glass pans may require temperature reduction
- Parchment paper – Optional but helpful for easy brownie removal and cleanup
- Mixing bowls – One or two medium/large bowls
- Measuring cups and spoons – Essential for accurate ingredient quantities
- Whisk or fork – For combining ingredients and breaking down cocoa powder
- Rubber spatula or wooden spoon – For folding ingredients and scraping bowls
- Small saucepan or microwave-safe bowl – For melting chocolate and butter
- Kitchen scale – Optional but helpful for measuring flour accurately
- Toothpick or cake tester – For testing doneness
- Cooling rack – Optional but helpful for even cooling
- Sharp knife – For cutting brownies into squares
- Oven thermometer – Optional but useful for accurate baking temperature
Brownie Recipe
- Total Time: 35 minutes
- Yield: 16 brownies (8x8-inch pan) 1x
- Diet: Vegetarian
Description
This best brownie recipe delivers thick, fudgy, intensely chocolatey brownies with crispy edges and a dense, chewy center that stays moist for days. Made with quality chocolate and simple ingredients, these easy homemade brownies taste like they came from an upscale bakery but require only basic baking skills.
Ingredients
- 6 ounces semi-sweet chocolate, chopped
- ½ cup (1 stick) unsalted butter
- ⅓ cup unsweetened cocoa powder
- 1¼ cups granulated sugar
- 2 large eggs, at room temperature
- ⅓ cup all-purpose flour
- ¼ teaspoon salt
- 1 teaspoon pure vanilla extract
Optional Add-Ins:
- ½ cup semi-sweet chocolate chips
- ½ cup chopped walnuts or pecans
- ½ teaspoon instant espresso powder
- Fleur de sel or sea salt for topping
- ¼ cup creamy peanut butter (swirled on top)
Instructions
- Preheat oven and prepare pan. Position an oven rack in the center and preheat to 350°F (175°C). Line an 8×8-inch baking pan with parchment paper, leaving slight overhang on two sides for easy brownie removal. Alternatively, grease the pan thoroughly. Parchment paper makes removal foolproof and ensures clean brownie edges.
- Melt chocolate and butter together. In a small saucepan over low heat or in a microwave-safe bowl in the microwave, combine chopped chocolate and butter. If using the microwave, heat in 30-second intervals, stirring between each interval, until completely melted and smooth. If using the stovetop, heat over low heat, stirring frequently, until melted. Do not let the mixture overheat or the chocolate may burn and become bitter.
- Let mixture cool slightly. Remove from heat and let cool for about 2-3 minutes. This prevents the mixture from cooking the eggs when they’re added. The chocolate should be warm to the touch but not hot.
- Combine cocoa powder with sugar. In a medium mixing bowl, whisk together cocoa powder and sugar, breaking down any lumps of cocoa powder. This distributes cocoa powder evenly and ensures no bitter cocoa pockets in the finished brownies. Whisking also aerates the mixture slightly.
- Add eggs and vanilla. Add room temperature eggs and vanilla extract to the cocoa-sugar mixture and whisk until well combined. The mixture should be smooth and uniform. Whisk for about 1-2 minutes to ensure everything is thoroughly combined.
- Add melted chocolate mixture. Pour the cooled chocolate-butter mixture into the egg mixture and stir until fully combined. Stir well to ensure even distribution of chocolate throughout the batter.
- Combine flour and salt. In a small bowl, whisk together flour and salt. This distributes salt evenly and prevents lumps of flour in the finished brownies.
- Fold flour into chocolate mixture. Add the flour mixture to the chocolate mixture and fold gently using a rubber spatula just until combined – do not overmix. Overmixing develops gluten, which can create cakier brownies instead of fudgy ones. Stop folding as soon as you don’t see flour streaks remaining.
- Add optional mix-ins if using. If using chocolate chips, nuts, or other add-ins, fold them gently into the batter until evenly distributed. Don’t overmix at this stage – just fold until additions are mixed through.
- Pour into prepared pan. Transfer the batter to the prepared pan and spread evenly using a spatula. Pour from the bowl, then use a spatula to spread batter in an even layer. Ensure batter reaches all corners of the pan.
- Add peanut butter swirl if desired. If using peanut butter swirl, drop small spoonfuls of peanut butter over the batter, then swirl gently using a knife or toothpick for a beautiful marbled effect.
- Bake until a toothpick comes out with fudgy crumbs. Bake for 22-26 minutes. The brownies are done when a toothpick inserted in the center comes out with just a few moist crumbs – not completely clean, but not with wet batter either. The top should appear dry with slight cracks visible. Brownies continue cooking in the hot pan after removal from the oven, so slightly underbaking creates that perfect fudgy texture.
- Cool completely in pan. Remove from oven and let brownies cool completely in the pan at room temperature – this typically takes about 1-2 hours. Do not remove brownies from the pan while warm or they’ll break apart. Cooling in the pan allows them to set and firm up properly.
- Lift out using parchment and cut. Once completely cooled, if using parchment paper, lift the entire brownie slab out of the pan using the parchment overhang. Place on a cutting board. Using a sharp knife dipped in hot water and wiped clean between cuts, cut brownies into 16 squares (4×4 grid).
- Serve and store. Serve brownies at room temperature or slightly warmed. Store in an airtight container at room temperature for up to 5 days. Brownies actually improve in flavor and texture as they sit, becoming even fudgier as ingredients continue to meld.
Notes
- Cocoa powder sifting – Sift cocoa powder with sugar to prevent lumps that create bitter spots
- Underbake slightly – Brownies continue cooking in the hot pan; remove when a toothpick comes out with fudgy crumbs
- Room temperature eggs – They incorporate more smoothly and create better emulsification than cold eggs
- Don’t overmix – Fold ingredients just until combined; overmixing develops gluten and creates cake-like texture
- Quality chocolate matters – Use good-quality chocolate for superior flavor and texture
- Cool completely – Warm brownies will break apart; cool completely before cutting
- Make brownies ahead – Brownies actually taste better the next day as flavors meld
- Customize easily – Add chocolate chips, nuts, swirls, or toppings to personalize
- Prep Time: 10 minutes
- Cook Time: 25 minutes
- Category: Dessert
- Method: Baking
- Cuisine: American
Nutrition
- Serving Size: 1 brownie (1/16 of pan)
- Calories: 215
- Sugar: 24g
- Sodium: 85mg
- Fat: 10g
- Saturated Fat: 6g
- Unsaturated Fat: 3g
- Trans Fat: 0g
- Carbohydrates: 28g
- Fiber: 1g
- Protein: 2g
- Cholesterol: 28mg
Tips & Variations
Flavor Variations:
- Dark Chocolate Brownies: Use dark chocolate (70% cacao) instead of semi-sweet for deeper, more intense flavor
- Espresso Brownies: Add ½ to 1 teaspoon instant espresso powder to enhance chocolate flavor
- Salted Brownies: Top with fleur de sel or sea salt before baking for sweet-salty contrast
- Peanut Butter Brownies: Swirl ¼ cup creamy peanut butter on top before baking
- Mint Brownies: Add ½ teaspoon peppermint extract and ½ cup chocolate chips for minty freshness
- Brownie Sundae: Top with vanilla ice cream and hot fudge sauce while warm
- White Chocolate Brownies: Substitute half the chocolate with white chocolate for different flavor profile
Texture Variations:
- Extra Fudgy: Reduce baking time to 20-22 minutes for ultra-fudgy, almost gooey center
- Cake-Like Brownies: Increase flour to ½ cup and bake 28-30 minutes for lighter, cake-like texture
- Chewy Brownies: Add an extra egg yolk and reduce flour slightly for extremely chewy texture
Add-In Combinations:
- Classic with Nuts: ½ cup chopped walnuts or pecans folded into batter
- Chocolate Lover: ½ cup semi-sweet chocolate chips plus ¼ cup chopped dark chocolate
- Nutty Delight: ½ cup chopped almonds plus ¼ cup sliced almonds sprinkled on top before baking
- Sweet and Salty: ½ cup chocolate chips plus coarse salt sprinkled on top
Make-Ahead Strategies:
- Freeze portions: Cut brownies, wrap individually, and freeze for grab-and-go treats
- Bake ahead: Prepare complete brownies up to 3 days before serving
- Partial prep: Mix dry ingredients in advance, combine wet ingredients before baking
Healthier Versions:
- Lower Sugar: Reduce sugar to 1 cup or use monk fruit sweetener
- Gluten-Free: Replace all-purpose flour with gluten-free flour blend
- Black Bean Brownies: Replace half the flour with pureed black beans for added nutrition
- Lighter Brownies: Replace half the butter with Greek yogurt or applesauce
Pro Chef Tips
Use quality chocolate – The chocolate makes an enormous difference in brownie flavor. Invest in good-quality baking chocolate or premium chocolate chips that taste delicious on their own. Cheap chocolate results in inferior brownies no matter how perfect your technique.
Sift cocoa powder – Lumps of cocoa powder create bitter spots and texture problems. Sift cocoa powder with sugar to ensure even distribution throughout the batter. This simple step makes a noticeable difference in brownie quality.
Underbake intentionally – This is the secret to perfect fudgy brownies. Brownies continue cooking in the hot pan after removal from the oven from residual heat. Remove brownies when a toothpick comes out with just a few moist crumbs. They’ll reach perfect fudgy texture as they cool.
Cool completely before cutting – Warm brownies are fragile and will break or tear when cut. Cooling completely allows them to firm up enough to cut cleanly into neat squares. This makes a dramatic difference in presentation.
Use room temperature eggs – Eggs at room temperature incorporate more smoothly, creating better emulsification and more even texture. Cold eggs can cause slight separation in the batter, resulting in coarser crumb.
Don’t overmix the batter – Once flour is added, fold just until combined. Overmixing develops gluten, creating cakier brownies instead of the dense, fudgy texture you want. Stop mixing as soon as flour streaks disappear.
Melt chocolate carefully – Overheating chocolate causes it to break down and become grainy or separated. Melt slowly using low heat or short microwave intervals, stirring frequently. The chocolate should be smooth and glossy.
Line your pan – Parchment paper makes brownie removal foolproof and ensures you can cut clean edges. The overhang allows you to lift the entire brownie slab out of the pan for easy cutting and serving.
Use melted butter intentionally – Melted butter creates different (and better for brownies) texture than creamed butter. It results in denser, fudgier brownies rather than lighter, cakier ones.
Room temperature prep – Having all ingredients at room temperature, especially eggs and butter, ensures smooth mixing and proper emulsification, resulting in better texture.
Common Mistakes to Avoid
Overbaking the brownies – This is the most common mistake that results in cake-like brownies instead of fudgy ones. Remove brownies when a toothpick comes out with fudgy crumbs, not completely clean. Remember that residual heat continues cooking them in the hot pan after removal.
Not sifting cocoa powder – Cocoa powder tends to form lumps in the batter, creating bitter spots and texture problems. Sift cocoa powder with sugar before combining with wet ingredients to prevent this issue.
Using eggs straight from the refrigerator – Cold eggs don’t incorporate smoothly into the batter and may cause separation or lumps. Let eggs reach room temperature for about 30 minutes before baking for best results.
Overmixing the batter – Once flour is added, mix just until combined. Overmixing develops gluten, making brownies cake-like instead of dense and fudgy. Stop mixing as soon as you don’t see flour streaks.
Cutting brownies while warm – Warm brownies are still setting and will break or tear when cut. Wait until completely cool (usually 1-2 hours) to cut neat, attractive squares. Cooling in the pan helps them set properly.
Using inferior quality chocolate – Budget chocolate results in inferior brownie flavor. Invest in good-quality baking chocolate or premium chocolate chips that you’d actually enjoy eating.
Storage & Meal Prep
Storing Brownies: Keep baked brownies in an airtight container at room temperature for up to 5 days. Brownies actually improve in flavor and texture as they sit – they become even fudgier and more delicious as ingredients continue to meld. Don’t refrigerate, as cold temperatures can make them seem dry.
Extended Storage: For storage beyond 5 days, wrap brownies individually in plastic wrap and freeze for up to 3 months. Brownies freeze beautifully and emerge tasting freshly baked when thawed at room temperature.
Freezing Individual Pieces: Cut cooled brownies into squares, wrap each piece individually in plastic wrap, then place in a freezer bag. This allows you to remove just one or two brownies at a time for convenient grab-and-go desserts.
Reheating: No reheating necessary – serve brownies at room temperature straight from storage. If you prefer warm brownies, place on a baking sheet and warm in a 300°F oven for about 5 minutes. Alternatively, microwave individual brownies for about 10-15 seconds.
Shelf Life: Properly stored at room temperature in an airtight container, brownies maintain best quality for 4-5 days. They remain safe to eat for up to 7 days if properly stored, though texture and flavor begin to fade after day 5.
Keeping Fresh: If brownies seem to be drying out, place a slice of bread in the container to help retain moisture. Replace the bread every day or two as it absorbs moisture.
Meal Prep Strategy: Bake brownies on the weekend, cut into portions, wrap individually, and freeze for grab-and-go desserts and lunch box treats throughout the month.
Make-Ahead & Freezer Notes
Can You Make It Ahead? Absolutely! Baked brownies are perfect for advance preparation. Cool completely, wrap tightly, and refrigerate for up to 5 days or freeze for up to 3 months. Brownies actually taste better the next day as flavors continue to meld.
Freezer-Friendly Details: Both whole pan brownies and individual pieces freeze beautifully for up to 3 months. Freeze in airtight containers or individually wrapped in plastic wrap and freezer bags. The brownies maintain excellent quality throughout freezing and emerge tasting just as fresh as when baked.
Best Reheating Method: Thawed brownies need no reheating if served at room temperature – simply let them thaw at room temperature for about 1-2 hours. If you prefer warm brownies, place on a baking sheet and warm in a 300°F oven for about 5 minutes, or microwave individual brownies for about 10-15 seconds.
Thawing Instructions: Remove brownies from the freezer and let thaw at room temperature for 1-2 hours for whole pan brownies, or 30 minutes for individual pieces. Avoid thawing in the microwave as this can create soggy brownies.
Make-Ahead for Events: Bake brownies up to a week ahead and store in an airtight container at room temperature. Bring to room temperature before serving for best flavor and texture. Bake well in advance and freeze for extended storage if planning events far ahead.
Component Freezing: You can prepare the batter ahead, freeze unbaked in the prepared pan covered tightly with plastic wrap, then bake from frozen, adding 5-7 extra minutes to baking time.
Batch Baking Strategy: Make multiple batches at once using all 8×8 pans simultaneously. Cool, cut, wrap individually, and freeze for months of ready-made brownies. This spreads out baking time while providing convenient frozen portions.
Make-Ahead Timeline:
- One month ahead: Bake and freeze brownies individually wrapped
- One week ahead: Thaw brownies in refrigerator overnight
- Day before: Arrange on serving platter and store covered
- Throughout month: Grab individual brownies from freezer as needed
Serving Suggestions
Perfect homemade brownies deserve equally delicious accompaniments and serving occasions that enhance their rich, indulgent appeal.
Beverage Pairings:
- Hot coffee or espresso – classic pairing with chocolate
- Cold milk for traditional brownie and milk combination
- Hot chocolate with whipped cream for chocolate lover’s dream
- Iced coffee for afternoon dessert
- Hot tea – black tea or herbal varieties complement well
- Red wine, particularly Cabernet Sauvignon for sophisticated pairing
- Port wine for elegant after-dinner serving
- Sparkling water with lemon for light contrast
Dessert Accompaniments:
- Vanilla ice cream for classic brownie sundae
- Whipped cream dollop for richness
- Fresh berries for tartness and color contrast
- Caramel sauce drizzle for extra indulgence
- Hot fudge sauce for decadent sundae
- Marshmallow topping while warm
- Salted caramel sauce for sweet-salty combination
- Chocolate mousse for extra chocolate richness
Serving Occasions:
- Afternoon coffee and dessert break
- Elegant dinner party finale
- School bake sale fundraiser
- Potluck contribution
- Lunch box surprise for family members
- Office break room treat
- Party dessert table centerpiece
- Holiday gift wrapped in pretty packaging
Plating Presentations:
- Simple slice on a dessert plate
- Brownie sundae with ice cream and sauce
- Served with fresh berries and whipped cream
- Topped with sea salt and chocolate shavings
- Brownie with dusted powdered sugar
- Warm brownie with vanilla ice cream melting on top
- Broken into chunks for brownie sundae bar
- Individually wrapped for elegant gifting
Flavor Complements:
- Pair with coffee for morning or afternoon treat
- Serve with milk for classic, kid-friendly combination
- Enjoy with wine for sophisticated adult dessert
- Top with ice cream and fruit for complete dessert
- Pair with peppermint for holiday flavors
- Combine with caramel for sweet-on-sweet indulgence
- Serve with nuts for textural contrast
- Top with sea salt for sweet-salty balance
FAQs Section
Why are my brownies cake-like instead of fudgy? Likely causes include overbaking (bake until toothpick comes out with fudgy crumbs, not clean), too much flour (measure by spooning and leveling, not scooping), overmixing the batter (fold just until combined), or using eggs that are too cold. Ensure proper technique and watch baking time carefully – every oven is different.
Can I use different chocolate types? Absolutely! Use dark chocolate for more intense flavor, milk chocolate for sweeter brownies, or white chocolate for different flavor profile. You can also substitute all the chocolate with more cocoa powder and butter, though results will be slightly different. Quality chocolate matters most – use chocolate you’d actually enjoy eating.
How do I get that perfect crackly top? The crackly top develops naturally during baking as the brownie surface sets while the interior is still slightly underbaked. Don’t overmix the batter, use the correct amount of sugar, and underbake slightly. The characteristic crackly top should appear as the brownies are removed from the oven.
Can I make brownies in a larger pan? You can use a 9×9-inch pan (which actually equals about the same volume but with thinner brownies) or a 9×13-inch pan (which requires approximately 1.5 times the recipe and results in thinner brownies). Baking time will change – larger pans result in thinner brownies that bake faster. Use a toothpick to test doneness.
What if I don’t have semi-sweet chocolate? You can use dark chocolate, milk chocolate, or increase the cocoa powder and butter if chocolate isn’t available. Each option will result in slightly different flavor and texture, but all create delicious brownies. Adjust sweetness if needed based on what chocolate you use.
How can I make brownies without eggs? Use egg replacers like flax eggs (1 tablespoon ground flax mixed with 3 tablespoons water per egg) or commercial egg replacer following package directions. Applesauce or Greek yogurt can also substitute for eggs, though texture will differ slightly. These substitutions may result in different brownie texture – less fudgy, slightly more cake-like.
Can I make brownies gluten-free? Yes! Replace all-purpose flour with a gluten-free flour blend using the same amount. The texture will be slightly different but still delicious. Some people prefer adding 2 tablespoons cornstarch to improve texture in gluten-free brownies.
Conclusion
There you have it – the ultimate guide to making the best brownie recipe that tastes absolutely incredible yet requires only simple ingredients and basic baking skills! This easy fudgy brownie recipe proves that bakery-quality desserts don’t require complicated techniques or specialty ingredients. With just eight basic pantry staples and about 35 minutes of your time, you can create thick, rich, intensely chocolatey brownies that will make you the hero of any occasion.
The magic of this brownie recipe lies in its perfect balance of simplicity and indulgence. The combination of quality chocolate, proper technique, and intentional underbaking creates brownies that are greater than the sum of their parts – dense, fudgy, absolutely irresistible squares of pure chocolate bliss. Whether you’re baking for your own enjoyment, creating a treat to share with family and friends, preparing for a special gathering, or making multiple batches to freeze for future dessert emergencies, this best brownie recipe delivers consistent, delicious results every single time.
I’d absolutely love to hear about your brownie-baking adventures! What’s your favorite brownie texture – fudgy, chewy, or somewhere in between? Did you try any fun variations like adding nuts, espresso powder, or a peanut butter swirl? What’s the most exciting place you’ve served these brownies? Drop a comment below and let me know how your baking turned out and what brownie memories you’re creating. And if you loved this recipe, please save it to your favorite Pinterest board so you can find it again easily, and share it with friends and family who deserve to experience these absolutely amazing homemade brownies!
Happy baking, and may your kitchen always be filled with the irresistible aroma of freshly baked, decadent brownies!