
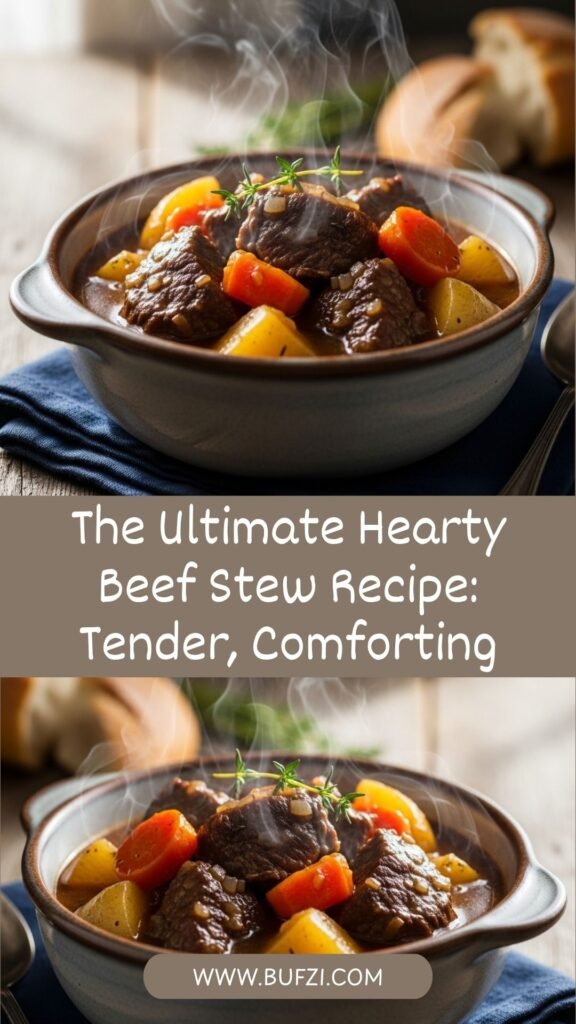
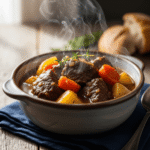
There’s nothing quite like coming home to a pot of rich, hearty beef stew simmering away, filling your kitchen with the most incredible aroma. This classic comfort food is the epitome of cozy home cooking – tender chunks of beef swimming in a thick, savory gravy alongside perfectly cooked vegetables that practically melt in your mouth. It’s the kind of meal that warms you from the inside out and makes everyone gather around the dinner table with happy anticipation.
This homemade beef stew recipe is perfect for chilly autumn evenings, lazy Sunday dinners, or whenever you need a satisfying one-pot meal that feeds a crowd. It’s the ultimate comfort food that works beautifully for weeknight family dinners, meal prep for the week ahead, or even special occasions when you want something rustic and delicious. The best part? While it tastes like you’ve been cooking all day, the hands-on time is surprisingly minimal – just let it simmer and work its magic while you relax.
Whether you make it on the stovetop, in your slow cooker, or in a Dutch oven, this classic beef stew delivers fall-apart tender meat, vegetables bursting with flavor, and a rich gravy that begs to be soaked up with crusty bread. Let’s dive into creating this timeless dish that’s been warming hearts and bellies for generations!
History / Background
Beef stew has ancient roots that trace back to the earliest days of cooking. The concept of stewing meat – cooking it slowly in liquid – is one of humanity’s oldest culinary techniques, dating back thousands of years when our ancestors discovered that tough cuts of meat became tender and delicious when simmered over low heat for extended periods.
The word “stew” comes from the Old French “estuver,” meaning to enclose or shut up tightly, which perfectly describes the covered pot cooking method. In medieval Europe, stews were a staple for both peasants and nobility, though the ingredients varied dramatically based on social class. Common folk used whatever vegetables were available and cheaper cuts of meat, while the wealthy added expensive spices and wine.
Irish stew, one of the most famous variations, emerged in Ireland around the early 1800s. Originally made with mutton, potatoes, and onions, it represented the resourcefulness of Irish cooks making the most of limited ingredients. French cuisine elevated stew to an art form with dishes like Boeuf Bourguignon (beef in red wine) and Pot-au-feu, the traditional French “pot on the fire” that’s considered the foundation of French home cooking.
In America, beef stew became a cornerstone of frontier cooking. Cowboys and pioneers relied on hearty stews cooked in cast iron Dutch ovens over campfires. As waves of immigrants arrived in America, they brought their own stew traditions – from Hungarian goulash to Italian stracotto – all of which influenced the classic American beef stew we know today.
During the Great Depression and both World Wars, beef stew gained even more popularity as an economical way to stretch ingredients and feed large families. One pot could provide a complete, nourishing meal with protein, vegetables, and starch all cooked together. The post-war era saw beef stew become a staple of American home cooking, featured in countless cookbooks and passed down through families as treasured recipes.
Today, beef stew remains one of the most beloved comfort foods across cultures. Every family seems to have their own version, passed down through generations, each with slight variations that make it special. It’s a dish that connects us to our culinary heritage while adapting beautifully to modern cooking methods like slow cookers and instant pots.
Why You’ll Love This Recipe
This isn’t just any beef stew recipe – it’s the result of perfecting techniques that create the most tender meat, perfectly cooked vegetables, and a gravy so rich and flavorful you’ll want to bottle it. It strikes the ideal balance between being easy enough for beginners while incorporating little tricks that make it taste like it came from a restaurant kitchen.
Here’s why this beef stew will become your go-to comfort meal:
- Incredibly tender beef – The meat literally falls apart with just a fork, thanks to proper browning and slow simmering techniques
- Rich, deep flavors – Layers of flavor from browning the meat, sautéing aromatics, and using quality broth and seasonings
- One-pot simplicity – Everything cooks in a single pot, meaning less cleanup and more time to relax
- Budget-friendly comfort – Uses affordable chuck roast and seasonal vegetables to feed a family without breaking the bank
- Versatile cooking methods – Make it on the stovetop, in a slow cooker, or in the oven – all methods work beautifully
- Perfect for meal prep – Tastes even better the next day and freezes beautifully for future easy dinners
- Naturally gluten-free option – Easily adapted by using cornstarch instead of flour for thickening
- Packed with vegetables – A complete meal in one bowl with protein, vegetables, and hearty satisfaction
- Crowd-pleaser guaranteed – Even picky eaters love this classic dish that appeals to all ages
- Adaptable to your taste – Easy to customize with your favorite vegetables or seasonings
- Fills your home with amazing aromas – Nothing says “home” like the smell of stew simmering away
Ingredient Notes
Understanding your ingredients is the first step to stew success. Here’s what you need to know about each component and why it matters:
Chuck Roast (Beef Chuck) – This is the star of the show and the best cut for beef stew. Chuck comes from the shoulder area of the cow and has the perfect balance of meat and marbling (fat). That fat breaks down during slow cooking, creating incredibly tender, flavorful meat. Don’t be tempted to use lean cuts like sirloin – they’ll turn tough and dry. Cut your chuck into 1.5 to 2-inch cubes for the best results. Substitutions: beef stew meat (pre-cut), bottom round, or boneless short ribs.
All-Purpose Flour – Used for dredging the beef before browning, which creates a flavorful crust and helps thicken the gravy naturally as it cooks. The flour also prevents the meat from sticking. For gluten-free, use cornstarch or gluten-free flour blend.
Beef Broth – The foundation of your gravy. Quality matters here! Use low-sodium broth so you can control the salt level. Homemade beef stock is incredible if you have it, but good store-bought works perfectly. Substitutions: beef bone broth for extra richness, or a combination of beef and chicken broth.
Red Wine – Adds depth, richness, and complexity to the gravy. Use a dry red wine you’d actually drink – nothing too expensive, but avoid “cooking wine” which is loaded with salt. Cabernet Sauvignon, Merlot, or Pinot Noir all work beautifully. Don’t worry about the alcohol; it cooks off completely. Substitution: additional beef broth plus 1 tablespoon balsamic vinegar.
Tomato Paste – Concentrated tomato flavor adds umami richness and helps create that beautiful dark brown gravy color. Just 2-3 tablespoons makes a huge difference. Don’t skip it!
Carrots – Provide natural sweetness and earthiness. Cut them into large chunks (about 2 inches) so they don’t turn mushy during the long cooking time. Baby carrots work in a pinch but fresh carrots taste better.
Potatoes – Use Yukon Gold or red potatoes, which hold their shape better than russets. Cut into large chunks (1.5-2 inches). They’ll absorb the delicious gravy while maintaining their texture. Substitutions: sweet potatoes, parsnips, or turnips.
Onions – Yellow onions are traditional and provide sweetness and depth. Cut into large chunks so they maintain some texture. They’ll break down somewhat but still provide nice onion flavor throughout.
Celery – Adds aromatic flavor to the base. Some people skip it, but it really does contribute to that classic stew flavor profile.
Garlic – Fresh garlic is essential for aromatic depth. Don’t substitute garlic powder here; fresh makes a real difference.
Fresh Herbs – Thyme and bay leaves are traditional and provide that classic stew aroma. Fresh thyme is ideal, but dried works (use about 1 teaspoon dried). Always remove bay leaves before serving. Substitutions: rosemary, parsley, or an Italian herb blend.
Worcestershire Sauce – This secret ingredient adds savory depth and umami that makes people wonder what your secret is. Just 2 tablespoons transforms the flavor.
Frozen Peas – Added at the very end to maintain their bright color and tender texture. They’re optional but add a nice pop of color and sweetness.
Equipment Needed
Having the right tools makes cooking beef stew easier and more enjoyable. Here’s what you’ll need:
- Large Dutch oven (5-7 quarts) – This is the ideal vessel for stovetop beef stew. Cast iron or enameled cast iron distributes heat evenly and can go from stovetop to oven if needed. If you don’t have one, a large, heavy-bottomed pot with a tight-fitting lid works.
- Sharp chef’s knife – For cutting beef into uniform cubes and chopping vegetables
- Cutting board – Preferably one for meat and one for vegetables
- Large shallow dish or plate – For dredging beef in flour
- Wooden spoon or sturdy spatula – For stirring and scraping up those flavorful browned bits
- Measuring cups and spoons – For accurate ingredient measurements
- Tongs or slotted spoon – For turning beef pieces while browning and removing them from the pot
- Ladle – For serving the stew into bowls
- Slow cooker (6-quart) OR Instant Pot (optional) – If using alternative cooking methods
Nice to have but not essential:
- Vegetable peeler
- Kitchen timer
- Meat thermometer
Beef Stew Recipe
- Total Time: 2 hours 50 minutes
- Yield: 6-8 servings 1x
- Diet: Gluten Free
Description
This classic homemade beef stew features melt-in-your-mouth tender beef, hearty vegetables, and a rich, savory gravy. It’s the ultimate one-pot comfort food that’s perfect for cozy family dinners and meal prep. Simple ingredients transform into an incredibly satisfying meal through slow simmering and proper technique.
Ingredients
For the Beef:
- 3 pounds beef chuck roast, cut into 1.5–2 inch cubes
- ⅓ cup all-purpose flour (or cornstarch for gluten-free)
- 2 teaspoons salt
- 1 teaspoon black pepper
- 3 tablespoons olive oil or vegetable oil (divided)
For the Stew:
- 1 large yellow onion, cut into large chunks
- 4 cloves garlic, minced
- 3 tablespoons tomato paste
- ¼ cup red wine (optional but recommended)
- 4 cups beef broth (low-sodium)
- 2 cups water
- 2 tablespoons Worcestershire sauce
- 2 bay leaves
- 3–4 sprigs fresh thyme (or 1 teaspoon dried thyme)
- 1 teaspoon dried rosemary (optional)
Vegetables:
- 4 large carrots, peeled and cut into 2-inch chunks
- 1 pound Yukon Gold or red potatoes, cut into 1.5–2 inch chunks
- 3 stalks celery, cut into 1-inch pieces
- 1 cup frozen peas (optional, added at the end)
- Fresh parsley for garnish
Instructions
Step 1: Prepare the Beef
Pat the beef cubes completely dry with paper towels – this is crucial for good browning. In a shallow dish, combine flour, salt, and pepper. Toss the beef cubes in the seasoned flour, coating all sides. Shake off excess flour and set aside.
Step 2: Brown the Beef
Heat 2 tablespoons of oil in a large Dutch oven over medium-high heat until shimmering. Working in batches (don’t crowd the pan!), add beef cubes in a single layer. Let them sear undisturbed for 3-4 minutes until a deep brown crust forms, then turn and brown the other sides. This should take about 8-10 minutes total per batch. Transfer browned beef to a plate. Add remaining tablespoon of oil between batches if needed. Don’t skip this step – browning creates incredible flavor!
Step 3: Sauté Aromatics
Reduce heat to medium. Add onions to the pot with the remaining beef drippings. Cook for 3-4 minutes, stirring occasionally, until softened. Add garlic and cook for 30 seconds until fragrant. Stir in tomato paste and cook for 1-2 minutes, stirring constantly, until it darkens slightly. This removes the raw tomato flavor and adds depth.
Step 4: Deglaze
Pour in the red wine (if using) and scrape up all those beautiful browned bits stuck to the bottom of the pot using a wooden spoon. This is liquid gold – pure flavor! Let the wine simmer for 2 minutes to cook off the alcohol.
Step 5: Build the Stew
Return the browned beef and any accumulated juices to the pot. Add beef broth, water, Worcestershire sauce, bay leaves, thyme, and rosemary. Stir to combine. Bring to a boil over high heat.
Step 6: Simmer
Once boiling, reduce heat to low. Cover with the lid slightly ajar (this allows steam to escape and the liquid to reduce and thicken). Simmer gently for 1.5 hours, stirring occasionally. The beef should be getting tender but not quite falling apart yet.
Step 7: Add Vegetables
After 1.5 hours, add carrots, potatoes, and celery to the pot. Stir gently to combine. Continue simmering, partially covered, for another 45-60 minutes, or until the beef is fork-tender and vegetables are cooked through but not mushy. The gravy should have thickened nicely.
Step 8: Final Touches
Remove and discard bay leaves and thyme stems. If using frozen peas, stir them in during the last 5 minutes of cooking. Taste and adjust seasoning with additional salt and pepper if needed. If the stew is too thick, add a splash of broth or water. If it’s too thin, simmer uncovered for 10-15 minutes to reduce.
Step 9: Serve
Ladle the hot stew into bowls, making sure everyone gets a good mix of meat and vegetables. Garnish with fresh chopped parsley. Serve with crusty bread or dinner rolls for soaking up that delicious gravy!
Notes
- Don’t rush the browning: Properly browned meat is the foundation of flavorful stew. Don’t crowd the pan or the meat will steam instead of sear.
- Low and slow is key: Gentle simmering breaks down the tough connective tissue in chuck roast, creating that melt-in-your-mouth texture. Boiling makes meat tough.
- Cut vegetables large: They cook for a long time, so bigger chunks prevent them from turning to mush.
- Taste before serving: Stews often need a final salt and pepper adjustment at the end.
- Stew thickens as it sits: If reheating leftovers, you may need to add a splash of broth to thin it out.
- Prep Time: 20 minutes
- Cook Time: 2 hours 30 minutes
- Category: Dinner
- Method: Stovetop
- Cuisine: American
Nutrition
- Serving Size: 1 bowl (approximately 1.5 cups)
- Calories: 425
- Sugar: 6g
- Sodium: 680mg
- Fat: 18g
- Saturated Fat: 6g
- Unsaturated Fat: 10g
- Trans Fat: 0g
- Carbohydrates: 28g
- Fiber: 4g
- Protein: 38g
- Cholesterol: 110mg
Tips & Variations
Flavor Variations:
- Guinness Beef Stew: Replace 1 cup of beef broth with Guinness or another dark stout beer for rich, malty depth
- Mushroom Beef Stew: Add 8 oz sliced cremini or button mushrooms with the onions for earthy flavor
- Spicy Beef Stew: Add 1-2 teaspoons smoked paprika, a pinch of cayenne, or diced jalapeños
- Italian-Style: Use Italian seasoning instead of thyme, add a parmesan rind while simmering, and finish with fresh basil
- Root Vegetable Stew: Add parsnips, turnips, or rutabaga along with or instead of some potatoes
Vegetable Swaps:
- Use sweet potatoes instead of regular potatoes for added sweetness
- Add green beans in the last 20 minutes of cooking
- Include pearl onions for a more elegant presentation
- Try butternut squash chunks for fall flavor
- Add corn kernels with the peas at the end
Dietary Modifications:
- Gluten-Free: Use cornstarch instead of flour for dredging beef, or skip dredging entirely
- Keto/Low-Carb: Omit potatoes and increase carrots and celery, or use cauliflower florets instead
- Paleo: Skip the flour coating and thicken naturally through reduction
- Lower Sodium: Use no-salt-added broth and control salt to taste
Cooking Method Adaptations:
- Oven Method: After step 5, transfer covered Dutch oven to 325°F oven for 2.5-3 hours
- Pressure Cooker: Significantly reduces cooking time to about 45 minutes total
- Slow Cooker: Perfect for busy days – prep in the morning, come home to dinner
Pro Chef Tips
Tip #1: Dry your meat thoroughly – This is the #1 secret to perfect browning. Wet meat steams instead of sears. Pat every piece bone-dry with paper towels before coating in flour. Professional chefs sometimes even leave the meat uncovered in the refrigerator for an hour to dry the surface.
Tip #2: Don’t crowd the pan when browning – Overcrowding drops the pan temperature and creates steam, preventing that beautiful crust from forming. Brown in 2-3 batches, leaving space between each piece. Yes, it takes longer, but this step creates 80% of your stew’s flavor through the Maillard reaction.
Tip #3: Embrace the fond – Those dark brown bits stuck to the bottom of the pot after browning? That’s “fond” in chef-speak, and it’s pure concentrated flavor. Deglazing with wine or broth and scraping up every bit is non-negotiable for deeply flavored stew.
Tip #4: Low and slow is the golden rule – The liquid should barely bubble with just a few gentle “blips” on the surface. Vigorous boiling makes meat tough and stringy. If your stew is boiling, your heat is too high. Lower-quality beef cuts need gentle heat to break down collagen into silky gelatin.
Tip #5: Salt in stages – Season the flour, taste after the vegetables are added, and taste again before serving. This builds layers of seasoning and prevents over-salting, since the stew reduces and concentrates as it cooks.
Tip #6: Use fresh herbs but add them at the right time – Hardy herbs like thyme, rosemary, and bay leaves go in early and can withstand long cooking. Delicate herbs like parsley should be added as a fresh garnish at the end to maintain their bright flavor.
Tip #7: Cut vegetables uniformly – Similarly-sized pieces cook at the same rate, preventing some vegetables from being mushy while others are still hard. Aim for 1.5-2 inch chunks across the board.
Tip #8: Let it rest before serving – If time allows, let the stew sit off the heat for 10-15 minutes before serving. This allows flavors to meld and the stew to thicken slightly. It also prevents burned tongues!
Tip #9: Save some vegetables for the end – For the brightest flavor and best texture, cook half your vegetables from the beginning, then add fresh ones in the last 30-45 minutes. This gives you both flavor depth and vegetable texture.
Tip #10: Make it a day ahead – Stew always tastes better the next day after flavors have had time to develop and meld overnight in the refrigerator. This is a professional chef secret for dinner parties – make it the day before!
Common Mistakes to Avoid
Mistake #1: Using the wrong cut of beef – Lean cuts like sirloin or round will turn tough and dry no matter how long you cook them. They don’t have enough fat and connective tissue to break down into tender, flavorful meat. Solution: Always use well-marbled chuck roast or beef stew meat cut from the chuck. The extra fat is essential for flavor and texture. If your budget allows, boneless short ribs create an even richer, more luxurious stew.
Mistake #2: Boiling instead of simmering – High heat and vigorous boiling causes the meat proteins to seize up and become tough and stringy. Solution: Once the stew comes to a boil initially, immediately reduce heat to low. You want just barely a bubble breaking the surface every few seconds. Use a lid that’s slightly ajar to prevent too much pressure from building up.
Mistake #3: Adding vegetables too early – Potatoes and carrots that cook for 2.5 hours turn to mush and disappear into the gravy. Solution: Add sturdy vegetables like carrots and potatoes after the meat has simmered for at least 1.5 hours. Add delicate vegetables like peas only in the last 5 minutes. This ensures everything has the perfect texture.
Mistake #4: Not browning the meat properly – Skipping this step or rushing through it results in pale, bland meat and a weak-flavored gravy. Solution: Take your time browning meat in small batches over medium-high heat. Each piece should develop a deep mahogany crust. This process should take at least 15-20 minutes total for all the beef. The investment in time pays off tremendously in flavor.
Mistake #5: Making the liquid too thin – Watery stew lacks the rich, velvety consistency that makes beef stew so satisfying. Solution: The flour coating on the beef should thicken the stew naturally. If it’s still too thin after cooking, remove the lid and simmer for 15-20 minutes to reduce the liquid. You can also mash a few potato pieces against the side of the pot to release their starch for natural thickening. As a last resort, mix 2 tablespoons cornstarch with 2 tablespoons cold water and stir into the simmering stew.
Mistake #6: Forgetting to taste and adjust – Stew made without final seasoning adjustment often tastes flat and one-dimensional. Solution: Always taste your stew just before serving. Add salt and pepper as needed – you’d be surprised how much a little extra salt can wake up all the flavors. A splash of Worcestershire sauce or a squeeze of lemon juice at the end can add incredible depth.
Storage & Meal Prep
Refrigerator Storage:
Beef stew is excellent for meal prep and actually improves with time! Let the stew cool to room temperature (but don’t leave it out longer than 2 hours for food safety). Transfer to airtight containers and refrigerate for up to 4-5 days. The flavors continue to develop and deepen, making day-two stew even more delicious than day-one.
Pro tip: Store the stew in individual portion containers for easy grab-and-go lunches throughout the week. You can even freeze some portions while keeping a few in the fridge for immediate use.
Freezer Storage:
Beef stew freezes beautifully for up to 3-4 months, making it perfect for batch cooking. Here’s how to freeze it properly:
- Let the stew cool completely to room temperature
- Transfer to freezer-safe containers or heavy-duty freezer bags, leaving about an inch of headspace for expansion
- Remove as much air as possible from bags to prevent freezer burn
- Label with the date and contents
- Freeze flat for easy storage and faster thawing
Note: Potatoes can become slightly grainy when frozen and thawed, though they still taste fine. If this bothers you, consider freezing the stew before adding potatoes, then add fresh potatoes when reheating.
Reheating Instructions:
From refrigerator: Transfer stew to a pot and reheat over medium-low heat, stirring occasionally, for 10-15 minutes until heated through. Add a splash of beef broth or water if it’s thickened too much.
From frozen: Thaw overnight in the refrigerator for best results, then reheat as above. In a hurry? You can reheat from frozen – just add 10-15 minutes to the reheating time and stir frequently to ensure even heating.
Microwave method: Place individual portions in microwave-safe bowls, cover loosely, and heat in 1-minute intervals, stirring between, until hot throughout (usually 3-4 minutes depending on portion size).
Meal Prep Strategy:
Brown the meat and prep all vegetables up to 2 days ahead. Store the browned beef and prepped vegetables separately in the refrigerator. When ready to cook, proceed with the recipe from step 3. This cuts down your active cooking time significantly on the day you want to serve the stew.
Make-Ahead & Freezer Notes
Fully Make-Ahead Method:
The absolute best way to enjoy beef stew is to make it completely a day or two in advance. Here’s why and how:
Make the entire stew recipe as directed, cool completely, and refrigerate overnight in your cooking pot or a storage container. The next day (or up to 3 days later), gently reheat over medium-low heat until warmed through, about 15-20 minutes. The meat will be even more tender, the vegetables will have absorbed more flavor, and the seasonings will have melded into perfect harmony. This is the secret weapon of smart home cooks and professional chefs alike.
Partial Make-Ahead Options:
If you don’t want to fully cook it ahead, here are ways to break up the work:
- Brown the beef up to 2 days ahead; store covered in the refrigerator
- Chop all vegetables up to 1 day ahead; store in sealed containers or bags in the fridge
- Make the gravy base (everything except vegetables) up to 2 days ahead; refrigerate and add vegetables when reheating
Freezing for Future Meals:
Before cooking: You can create a “freezer meal kit.” Place raw, browned beef and all chopped vegetables in a freezer bag with the dried seasonings. Write the cooking liquid ingredients on the bag label. Freeze for up to 3 months. When ready to cook, thaw overnight in the refrigerator, transfer contents to your Dutch oven, add the liquids, and proceed with the recipe from step 5.
After cooking: This is ideal for batch cooking. Make a double or triple batch, portion into freezer containers, and freeze. You’ll have homemade “TV dinners” ready whenever you need them.
Individual portions: Freeze stew in single-serving containers or in muffin tins (once frozen, pop out and store in freezer bags). Perfect for solo meals or easy portion control.
Best Thawing Methods:
- Refrigerator thawing (safest): Transfer frozen stew to the refrigerator 24 hours before you need it. Slow thawing maintains the best texture and food safety.
- Quick thaw method: Place the sealed container in a bowl of cold water, changing the water every 30 minutes. Takes 2-3 hours depending on volume.
- Direct from frozen: You can reheat stew directly from frozen on the stovetop over low heat. Break it up as it thaws and stir frequently. Add 15-20 minutes to reheating time.
Reheating for Best Results:
For frozen stew, the stovetop method produces the best texture. Microwave reheating can sometimes make the meat slightly tougher around the edges. If microwaving is your only option, use 50% power and heat in longer intervals, stirring frequently.
Serving Suggestions
Beef stew is a complete meal on its own, but the right accompaniments can elevate your dinner from great to extraordinary. Here are some delicious ways to serve your hearty homemade beef stew:
Bread & Rolls:
- Crusty French bread or baguette (perfect for soaking up every drop of gravy)
- Warm dinner rolls or Parker House rolls with butter
- Irish soda bread for a traditional touch
- Cornbread for Southern-style comfort
- Buttermilk biscuits (fluffy and buttery)
- Garlic bread for extra flavor
- Sourdough bread bowls (serve the stew inside!)
Side Salads:
- Simple mixed green salad with vinaigrette (cuts through the richness)
- Caesar salad with parmesan and croutons
- Apple walnut salad with cranberries
- Arugula salad with lemon dressing
- Coleslaw for a crunchy contrast
Additional Sides:
- Buttered egg noodles (traditional pairing)
- Mashed potatoes (if you didn’t include potatoes in your stew)
- Creamy polenta or grits
- Rice pilaf for soaking up gravy
- Roasted Brussels sprouts or green beans
- Glazed carrots (if you want extra veggies)
Toppings & Garnishes:
- Fresh chopped parsley or chives
- Dollop of sour cream
- Grated parmesan or sharp cheddar cheese
- Crispy fried onions for texture
- Fresh cracked black pepper
- Horseradish cream for a spicy kick
- Fresh thyme leaves
Beverage Pairings:
- Red wine: The same wine you cooked with (Cabernet, Merlot, or Pinot Noir)
- Dark beer: Stout or porter complements the rich flavors
- Apple cider (warm or cold) for fall dinners
- Iced tea for casual family meals
- Sparkling water with lemon
Complete Menu Ideas:
Cozy Family Dinner: Beef stew, crusty bread, simple green salad, apple crisp for dessert
Sunday Supper: Beef stew, buttermilk biscuits, roasted vegetables, chocolate cake
Casual Gathering: Beef stew in bread bowls, coleslaw, brownies or cookies
Elegant Dinner Party: Beef stew over creamy polenta, arugula salad, red wine, crème brûlée
FAQs Section
Q: What’s the best cut of beef for stew?
A: Chuck roast (also called beef chuck or chuck shoulder) is hands-down the best cut for beef stew. It comes from the shoulder area and contains the perfect balance of meat, fat, and connective tissue. The marbling and collagen break down during slow cooking, creating incredibly tender, flavorful meat. Pre-cut “stew meat” often comes from chuck and works well, though cutting your own from a chuck roast ensures uniform pieces and better quality. Other good options include boneless short ribs (more expensive but incredibly rich) or bottom round if you’re on a budget (though it’s slightly less tender). Avoid lean cuts like sirloin or top round – they don’t have enough fat and will turn tough and dry.
Q: Can I make beef stew in a slow cooker?
A: Absolutely! Slow cookers are perfect for beef stew. After browning the beef and sautéing the aromatics on the stovetop (don’t skip this step – it’s crucial for flavor), transfer everything to your slow cooker. Add all ingredients except potatoes, carrots, and peas. Cook on LOW for 6-7 hours or HIGH for 3-4 hours. Add the potatoes and carrots during the last 2 hours on LOW (or 1 hour on HIGH) so they don’t get mushy. Add frozen peas in the last
Q: Why do restaurants’ beef stew taste better than mine?
A: Professional kitchens have a few tricks up their sleeves! First, they never skip the browning step and take their time developing that deep crust on the meat. They use homemade beef stock that’s rich with gelatin from bones, which creates a silky, luxurious texture. Many restaurants add a splash of fish sauce or anchovy paste for umami depth (sounds weird, but you can’t taste it – it just makes everything taste “more”). They often finish dishes with a pat of cold butter swirled in (called “mounting” the sauce) for richness and shine. Restaurant stews may also include veal or pork bones for added body. Finally, they almost always make it ahead – stew served the next day after flavors have melded tastes significantly better. Try making your stew a day ahead, and you’ll notice a dramatic improvement!
Q: Can I add other vegetables to beef stew?
A: Definitely! Beef stew is very forgiving and adaptable. Great additions include mushrooms (add them when you sauté the onions), parsnips, turnips, or rutabaga (add with the potatoes), sweet potatoes (add in the last hour), butternut squash (last 45 minutes), green beans (last 20 minutes), or pearl onions for elegance. Just be mindful of cooking times – hard vegetables like root vegetables need longer cooking, while delicate ones like peas or green beans should only be added near the end. Avoid watery vegetables like zucchini or tomatoes as they can make your stew thin and mushy. The key is adding vegetables at the right time so everything finishes cooking perfectly together.
Conclusion
And there you have it – everything you need to create the ultimate, soul-warming beef stew right in your own kitchen! This isn’t just a recipe; it’s a gateway to countless cozy dinners, impressed dinner guests, and that incredible feeling of walking into a house that smells absolutely amazing after a long day.
The beauty of homemade beef stew is that it gets better with practice. The first time you make it, you’ll probably think it’s delicious. The second time, you might adjust the seasonings to your family’s taste. By the third time, you’ll be making it with your eyes closed, and everyone will be asking when you’re making “that amazing stew” again. It’s a recipe that becomes part of your cooking DNA, something you can whip up without even looking at the instructions.
Remember, the key to incredible beef stew isn’t complicated techniques or expensive ingredients – it’s patience. Let the beef brown properly. Let it simmer gently. Give it time to work its magic. The slow transformation of tough chuck roast into melt-in-your-mouth tender morsels swimming in rich, flavorful gravy is nothing short of culinary alchemy.
Whether you’re cooking for your family on a Tuesday night, preparing meals for the week ahead, or impressing guests at a dinner party, this classic beef stew recipe has got you covered. It’s comfort food at its absolute finest – hearty, satisfying, and filled with the kind of love that only a homemade meal can provide.
So grab your Dutch oven, pour yourself a glass of that wine you’re using for the stew (you deserve it!), and get cooking. Your kitchen is about to smell incredible, and your family is going to be so happy. Don’t forget to make extra – you’ll want leftovers, trust me.
I’d love to hear how your beef stew turns out! Drop a comment below and let me know if you tried any variations or what your family thought. Did you make it in the slow cooker? Add any special ingredients? Share your experience! And please, don’t forget to pin this recipe to your favorite Pinterest board so you can find it easily the next time that craving for cozy comfort food strikes.
Now stop reading and start cooking – there’s beef stew to be made! Happy cooking, friends!