
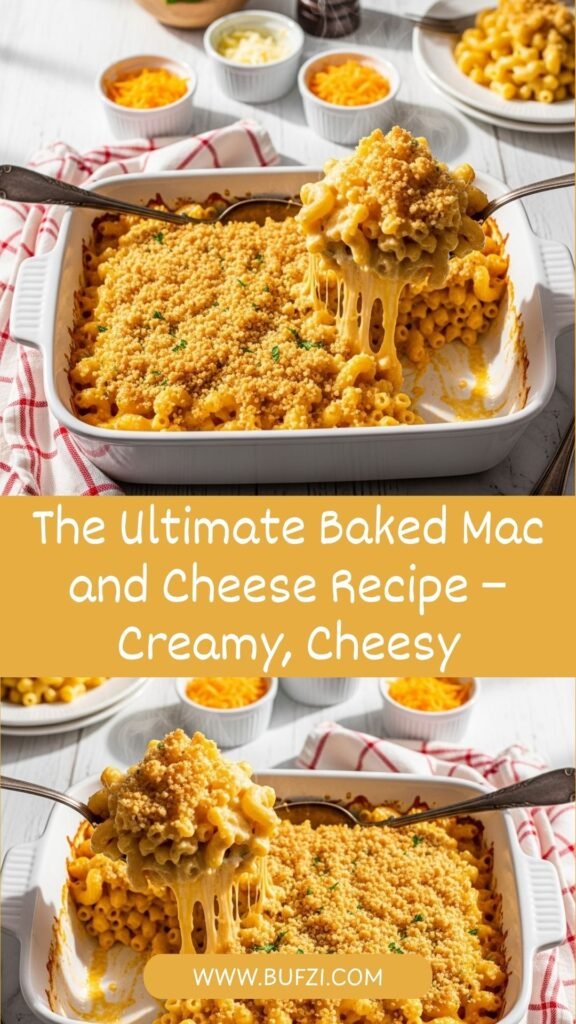
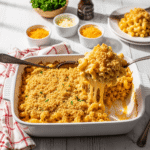
Is there anything more comforting than a big scoop of creamy, cheesy baked mac and cheese fresh from the oven? This homemade baked mac and cheese recipe is the ultimate comfort food that brings everyone to the table with smiles on their faces. With its golden, crispy breadcrumb topping and ultra-creamy cheese sauce coating every piece of tender pasta, this dish is pure comfort in a casserole dish.
This easy baked mac and cheese is perfect for potlucks, holiday dinners, Sunday suppers, and those nights when you need a hearty, satisfying meal that the whole family will devour. Unlike boxed mac and cheese, this homemade version delivers restaurant-quality flavor with a rich, velvety cheese sauce made completely from scratch. Whether you’re feeding a crowd at Thanksgiving, bringing a side dish to a neighborhood gathering, or simply treating your family to something special, this creamy baked macaroni and cheese never disappoints.
The best part? While it tastes like you spent hours in the kitchen, this recipe comes together surprisingly quickly using simple ingredients you probably already have on hand. Get ready to master the art of perfect baked mac and cheese that’ll have everyone asking for seconds!
History / Background
Macaroni and cheese has a fascinating history that spans centuries and continents, evolving from an elite European dish to an American comfort food staple. The earliest known recipe for mac and cheese dates back to medieval England, where cookbook authors documented pasta dishes with cheese as early as the 14th century. However, the dish truly became iconic thanks to an unexpected ambassador: Thomas Jefferson.
After experiencing macaroni and cheese during his travels to France and Italy in the late 1700s, President Jefferson became obsessed with the dish. He brought back a pasta machine and recipes, serving mac and cheese at a state dinner in 1802. His cousin, Mary Randolph, published the first American mac and cheese recipe in her 1824 cookbook “The Virginia Housewife,” calling it “macaroni pudding.” This early version featured layers of pasta, cheese, and butter baked until golden.
Throughout the 19th century, baked mac and cheese remained a dish for special occasions, appearing in cookbooks as an elegant casserole. The game changed dramatically in 1937 when Kraft introduced boxed macaroni and cheese dinner during the Great Depression. Marketed as an affordable meal that could feed a family of four for 19 cents, it became an instant success and brought mac and cheese to American tables nationwide.
However, the homemade baked version never lost its place as the gold standard. Southern cooks particularly embraced baked mac and cheese, making it a staple at church suppers, family reunions, and holiday celebrations. The dish became synonymous with soul food and comfort cooking, with each family passing down their own cherished recipe through generations.
Today, baked mac and cheese represents more than just food—it’s nostalgia, comfort, and love on a plate. Whether served at a casual weeknight dinner or an elegant holiday feast, this creamy, cheesy casserole continues to bring people together, proving that some classics never go out of style.
Why You’ll Love This Recipe
I’ve tested dozens of baked mac and cheese recipes over the years, and this one consistently wins rave reviews from everyone who tries it. The combination of a silky-smooth cheese sauce, perfectly cooked pasta, and that irresistible golden-brown topping creates magic in every bite. What makes this recipe truly special is the balance—it’s rich without being heavy, cheesy without being overwhelming, and comforting without putting you into a food coma.
Here’s why this baked macaroni and cheese will become your go-to recipe:
- Ultra-creamy texture – The homemade cheese sauce is velvety smooth with no graininess
- Perfect cheese blend – Sharp cheddar and Gruyere create complex, sophisticated flavor
- Golden crispy topping – Buttery breadcrumbs add the perfect crunchy contrast
- Family-approved – Kids and adults alike can’t resist this classic comfort food
- Crowd-pleaser – Perfect for potlucks, holidays, and feeding a hungry crowd
- Better than boxed – Infinitely more delicious than processed mac and cheese
- Make-ahead friendly – Assemble in advance and bake when ready
- Budget-friendly – Feeds 8-10 people for under $15
- Customizable – Easy to add mix-ins or adjust cheese varieties
- Soul-satisfying – True comfort food that warms you from the inside out
- Restaurant-quality – Tastes like it came from a fancy gastropub
- Great for leftovers – Reheats beautifully for easy meals throughout the week
Ingredient Notes
Let me walk you through each ingredient and explain why it matters for creating the creamiest, most flavorful baked mac and cheese you’ve ever tasted.
Elbow Macaroni – The classic choice for mac and cheese! The curved shape holds sauce beautifully. You can substitute with cavatappi, shells, or penne, but avoid delicate pastas like angel hair. Cook to al dente since it’ll continue cooking in the oven.
Butter – Creates the base for our roux (the foundation of the cheese sauce). Use unsalted butter so you control the salt level. Don’t substitute with margarine as it won’t create the same rich flavor and smooth texture.
All-Purpose Flour – Combined with butter to make a roux that thickens the cheese sauce. This prevents the sauce from being watery and helps it coat the pasta perfectly. For gluten-free mac and cheese, use a gluten-free flour blend in equal amounts.
Whole Milk – Provides the liquid base for our creamy sauce. I strongly recommend whole milk for the richest, creamiest results. You can use 2% milk in a pinch, but avoid skim milk as it creates a thin, less satisfying sauce.
Heavy Cream – This is the secret ingredient that takes the creaminess to the next level. It adds luxurious richness and helps prevent the cheese from becoming stringy or grainy. Half-and-half works as a substitute, though the sauce won’t be quite as rich.
Sharp Cheddar Cheese – The star of the show! Sharp cheddar provides bold, tangy flavor. Always buy block cheese and shred it yourself—pre-shredded cheese contains anti-caking agents that prevent smooth melting. Extra sharp cheddar works great too for even more flavor.
Gruyere Cheese – This Swiss cheese adds sophisticated, nutty flavor and melts like a dream. If you can’t find Gruyere, substitute with Swiss cheese, fontina, or additional cheddar.
Dry Mustard Powder – Don’t skip this! A small amount adds depth and enhances the cheese flavor without tasting mustardy. It’s a classic mac and cheese secret ingredient.
Garlic Powder and Onion Powder – These add subtle savory notes that round out the flavor. Use powder, not fresh garlic, which can overpower the cheese.
Salt and Black Pepper – Essential for seasoning. Taste and adjust before baking since cheese varies in saltiness.
Panko Breadcrumbs – Creates the ultimate crispy topping. Panko is lighter and crunchier than regular breadcrumbs. Toss with melted butter for golden, crunchy perfection.
Paprika (Optional) – A sprinkle over the top adds color and subtle smokiness. Smoked paprika is especially delicious.
Equipment Needed
You’ll need some basic kitchen equipment to make this baked mac and cheese. Here’s everything required:
- Large pot – For boiling pasta (at least 6-quart capacity)
- Large saucepan – For making the cheese sauce (3-4 quart size)
- Whisk – Essential for creating smooth, lump-free cheese sauce
- 9×13-inch baking dish – Standard casserole dish size for this recipe
- Colander – For draining cooked pasta
- Box grater or food processor – For shredding block cheese
- Measuring cups and spoons – For accurate ingredient measurements
- Wooden spoon or silicone spatula – For stirring pasta and sauce
- Small bowl – For mixing breadcrumb topping
- Aluminum foil – Optional, for covering during initial baking
Baked Mac and Cheese Recipe
- Total Time: 55 minutes
- Yield: 8-10 servings 1x
- Diet: Vegetarian
Description
This creamy baked mac and cheese features a rich, homemade cheese sauce made with sharp cheddar and Gruyere, topped with golden, buttery breadcrumbs. It’s the ultimate comfort food that’s perfect for family dinners and holiday gatherings.
Ingredients
For the Mac and Cheese:
- 1 pound elbow macaroni
- 4 tablespoons unsalted butter
- ¼ cup all-purpose flour
- 2½ cups whole milk
- 1½ cups heavy cream
- 3 cups sharp cheddar cheese, shredded (about 12 oz)
- 1½ cups Gruyere cheese, shredded (about 6 oz)
- 1 teaspoon dry mustard powder
- ½ teaspoon garlic powder
- ½ teaspoon onion powder
- 1 teaspoon salt (plus more for pasta water)
- ½ teaspoon black pepper
- ⅛ teaspoon cayenne pepper (optional)
For the Topping:
- 1½ cups panko breadcrumbs
- 3 tablespoons unsalted butter, melted
- ½ teaspoon paprika (optional)
Instructions
- Preheat and Prep: Preheat your oven to 350°F (175°C). Grease a 9×13-inch baking dish with butter or cooking spray. Shred your cheeses and set aside.
- Cook the Pasta: Bring a large pot of salted water to a rolling boil. Add the elbow macaroni and cook for 2 minutes LESS than package directions (it should be quite firm). Drain well and set aside. Don’t rinse the pasta—the starch helps the sauce cling better.
- Make the Roux: In a large saucepan over medium heat, melt the 4 tablespoons of butter. Once melted and bubbling, add the flour and whisk constantly for 2-3 minutes until the mixture turns light golden and smells nutty. This cooks out the raw flour taste.
- Add the Milk: Gradually pour in the milk while whisking constantly to prevent lumps. Add the heavy cream and continue whisking. Bring the mixture to a gentle simmer, stirring frequently. Cook for 3-4 minutes until the sauce thickens enough to coat the back of a spoon.
- Add Seasonings: Stir in the dry mustard, garlic powder, onion powder, salt, black pepper, and cayenne (if using). Whisk until everything is well combined.
- Melt the Cheese: Reduce heat to low. Add the shredded cheddar and Gruyere one handful at a time, stirring after each addition until completely melted and smooth. Don’t rush this step—adding cheese gradually prevents clumping. The sauce should be silky and coat the spoon heavily.
- Combine Pasta and Sauce: Remove the cheese sauce from heat. Add the drained pasta to the sauce and stir gently until every piece is coated. Taste and adjust seasoning if needed—this is your last chance before baking!
- Transfer to Baking Dish: Pour the mac and cheese mixture into your prepared baking dish, spreading it evenly. Use a spatula to smooth the top.
- Make the Topping: In a small bowl, combine the panko breadcrumbs with melted butter and paprika. Mix until all the crumbs are coated with butter. Sprinkle evenly over the mac and cheese.
- Bake: Place the baking dish on the center rack and bake uncovered for 25-30 minutes, until the top is golden brown and the edges are bubbling. If the top browns too quickly, tent loosely with foil for the last 10 minutes.
- Rest and Serve: Remove from the oven and let rest for 5-10 minutes before serving. This allows the sauce to thicken slightly and makes serving easier. Dig in while it’s hot and bubbly!
Notes
- Cheese Temperature: Bring cheese to room temperature before adding to the sauce for smoother melting.
- Don’t Overcook Pasta: Undercook the pasta by 2 minutes since it continues cooking in the oven.
- Fresh is Best: Always shred block cheese yourself—pre-shredded cheese doesn’t melt as smoothly.
- Leftovers: Store covered in the refrigerator for up to 4 days. Reheat portions in the microwave or oven.
- Scaling: This recipe easily doubles for a crowd. Use a larger roasting pan or two 9×13 dishes.
- Prep Time: 20 minutes
- Cook Time: 35 minutes
- Category: Side Dish
- Method: Baking
- Cuisine: American
Nutrition
- Serving Size: 1 cup (1/10 of recipe)
- Calories: 520
- Sugar: 6g
- Sodium: 580mg
- Fat: 32g
- Saturated Fat: 19g
- Unsaturated Fat: 11g
- Trans Fat: 0g
- Carbohydrates: 38g
- Fiber: 2g
- Protein: 20g
- Cholesterol: 95mg
Tips & Variations
One of the best things about this baked mac and cheese recipe is how easily you can customize it to suit your tastes. Here are my favorite variations:
Bacon Mac and Cheese: Cook 8-10 strips of bacon until crispy, crumble, and fold into the mac and cheese before baking. Reserve some for topping. Absolutely irresistible!
Lobster Mac and Cheese: Fold in 1-2 cups of cooked lobster meat for an elegant, upscale version perfect for special occasions. Use all Gruyere cheese for a more sophisticated flavor.
Buffalo Chicken Mac and Cheese: Mix in 2 cups of shredded rotisserie chicken and ¼ cup buffalo sauce. Top with crumbled blue cheese along with the breadcrumbs.
Truffle Mac and Cheese: Drizzle 1-2 teaspoons of truffle oil into the cheese sauce and top with shaved Parmesan instead of breadcrumbs for a gourmet twist.
Four Cheese Mac and Cheese: Use a combination of sharp cheddar, Gruyere, mozzarella, and Parmesan for ultimate cheesiness. Each cheese brings different flavor notes.
Southern Baked Mac and Cheese: Add 2 beaten eggs to the cheese sauce before mixing with pasta and skip the breadcrumb topping for a traditional Southern-style version.
Veggie-Loaded Mac and Cheese: Fold in steamed broccoli, roasted cauliflower, or sautéed mushrooms for added nutrition and texture.
Spicy Mac and Cheese: Add 1-2 diced jalapeños, extra cayenne pepper, or a splash of hot sauce for heat lovers.
Three Cheese with Fresh Herbs: Skip the Gruyere and use equal parts sharp cheddar, white cheddar, and smoked Gouda. Stir in fresh thyme before baking.
Pro Chef Tips
After making countless batches of baked mac and cheese, I’ve learned some professional tricks that guarantee perfect results every single time:
Shred Your Own Cheese: This is non-negotiable for the smoothest, creamiest sauce. Pre-shredded cheese contains cellulose (an anti-caking agent) that prevents proper melting and creates a grainy texture.
Undercook the Pasta: Cook pasta 2 minutes less than package directions. It continues cooking in the oven and absorbs sauce as it bakes. Overcooked pasta becomes mushy and can’t hold the sauce properly.
Low and Slow for Cheese: Add cheese over low heat and allow each handful to melt completely before adding more. High heat causes cheese to separate and become stringy or grainy.
Season in Layers: Salt the pasta water generously, season the sauce before adding cheese, and taste again after combining with pasta. Proper seasoning at each stage builds complex flavor.
Use Room Temperature Cheese: Cold cheese added to hot sauce creates temperature shock and doesn’t melt smoothly. Let shredded cheese sit at room temperature for 15-20 minutes before using.
Don’t Skip the Roux: Cooking the butter and flour mixture for a full 2-3 minutes removes the raw flour taste and ensures proper thickening. The mixture should smell nutty and toasty.
Butter Those Breadcrumbs: Dry breadcrumbs won’t crisp properly. Tossing panko with melted butter ensures golden, crunchy topping that doesn’t burn.
Let It Rest: Allowing mac and cheese to rest for 5-10 minutes after baking lets the sauce thicken and makes serving much easier. It’ll still be piping hot!
Use Quality Cheese: Since cheese is the star ingredient, using high-quality aged cheddar and authentic Gruyere makes a noticeable difference in flavor and texture.
Common Mistakes to Avoid
Even experienced cooks sometimes struggle with mac and cheese. Here are the most common pitfalls and how to avoid them:
Using Pre-Shredded Cheese: This is the number one mistake! Those convenient bags of shredded cheese contain anti-caking agents that prevent smooth melting and create grainy, clumpy sauce. Always buy block cheese and shred it yourself—it only takes a few minutes and makes a world of difference.
Overcooking the Pasta: If you cook pasta to the package directions, it’ll be mushy after baking. Always undercook by 2 minutes. The pasta should feel quite firm when you drain it—trust the process! It’ll finish cooking perfectly in the oven.
Adding Cheese Over High Heat: High heat causes cheese proteins to seize and separate, creating stringy, oily, or grainy sauce. Always melt cheese over low heat, adding it gradually. Patience here pays off with silky-smooth results.
Not Making a Proper Roux: Rushing the roux stage or not cooking it long enough leaves you with raw flour taste and improper thickening. Cook the butter-flour mixture for the full 2-3 minutes until it smells nutty and turns light golden.
Skipping the Sauce Seasoning: Cheese alone doesn’t provide enough flavor dimension. The dry mustard, garlic powder, onion powder, salt, and pepper are crucial for well-rounded, complex taste. Don’t skip these ingredients!
Overbaking: Mac and cheese can dry out if baked too long. It’s done when the edges are bubbly and the top is golden brown (25-30 minutes). Overbaking creates dry, crusty edges and thick, paste-like sauce.
Using Skim or Low-Fat Milk: Low-fat dairy doesn’t provide the richness needed for creamy mac and cheese. Whole milk and heavy cream create the luxurious texture you’re after. This isn’t the recipe for cutting corners on fat!
Storage & Meal Prep
Baked mac and cheese stores beautifully, making it perfect for meal prep or enjoying leftovers throughout the week. Here’s how to handle storage properly:
Refrigerator Storage: Let the mac and cheese cool completely, then cover the baking dish tightly with plastic wrap or aluminum foil, or transfer to an airtight container. Store in the refrigerator for up to 4 days. The sauce may thicken as it sits—this is normal and will loosen when reheated.
Freezer Storage: Baked mac and cheese freezes well for up to 3 months. For best results, cool completely, then wrap the entire baking dish in plastic wrap followed by two layers of aluminum foil. Label with the date. Alternatively, portion into individual freezer-safe containers for easy single servings.
Reheating from Refrigerator: For the whole dish, cover with foil and reheat at 350°F for 20-25 minutes until warmed through. Add a splash of milk before reheating to restore creaminess. For individual portions, microwave on 50% power for 2-3 minutes, stirring halfway through. Add a teaspoon of milk if needed.
Reheating from Frozen: Thaw overnight in the refrigerator, then reheat as directed above. Or bake from frozen (covered) at 350°F for 45-55 minutes, then uncover and bake 10 minutes more. The center should reach 165°F.
Best Practices: The breadcrumb topping won’t be as crispy after reheating, but the flavor is still fantastic. For crispier topping, you can add fresh buttered breadcrumbs before reheating. Add a splash of milk or cream when reheating to restore the creamy consistency.
Make-Ahead & Freezer Notes
Baked mac and cheese is one of the best make-ahead dishes, perfect for stress-free entertaining and busy weeknight meal planning.
Make-Ahead Instructions (Unbaked): Prepare the recipe through step 8 (spreading in the baking dish), but don’t add the breadcrumb topping yet. Cover tightly with plastic wrap and refrigerate for up to 24 hours. When ready to bake, let it sit at room temperature for 30 minutes, add the breadcrumb topping, and bake as directed, adding 5-10 minutes to the baking time.
Make-Ahead Instructions (Baked): Bake completely, cool, and refrigerate. Reheat covered at 350°F for 20-25 minutes before serving. This method works great for potlucks—just transport cold and reheat at your destination.
Freezing Unbaked: Assemble completely (including breadcrumb topping), wrap tightly in plastic wrap and foil, and freeze for up to 3 months. To bake, thaw overnight in the refrigerator, bring to room temperature for 30 minutes, and bake as directed, adding 10 minutes to baking time.
Freezing Baked: Bake completely, cool to room temperature, then wrap and freeze for up to 3 months. Thaw overnight and reheat covered at 350°F for 25-30 minutes.
Pro Tip for Freezing: For best texture, slightly undercook the pasta (cook 3 minutes less than package directions instead of 2) when you plan to freeze. This prevents mushy pasta after freezing and reheating.
Individual Portions: Freeze individual servings in small containers for quick, single-serve meals. These are lifesavers for busy weeknights or packed lunches!
Serving Suggestions
While baked mac and cheese is incredible on its own, pairing it with the right sides creates a complete, satisfying meal. Here are my favorite ways to serve this creamy comfort food:
Classic BBQ Pairing: Serve alongside pulled pork, BBQ ribs, grilled chicken, or beef brisket for the ultimate comfort food feast. Add coleslaw and cornbread for a complete Southern barbecue spread.
Holiday Dinner Side: Mac and cheese is a staple at Thanksgiving and Christmas dinners. Serve it alongside roasted turkey, honey-glazed ham, green bean casserole, and dinner rolls for a festive meal everyone loves.
With Fresh Vegetables: Balance the richness with fresh, crisp salad. A simple mixed green salad with vinaigrette, tomato cucumber salad, or roasted vegetables like Brussels sprouts and carrots work beautifully.
Protein Pairings: While mac and cheese can be a main dish, it pairs perfectly with simple proteins like grilled chicken breast, pan-seared pork chops, meatloaf, or baked salmon.
Southern Soul Food Spread: Serve with fried chicken, collard greens, black-eyed peas, and cornbread for an authentic soul food experience.
Casual Cookout: Perfect for backyard BBQs alongside burgers, hot dogs, baked beans, and potato salad. It’s always the first dish to disappear at potlucks!
With Fresh Bread: Serve with garlic bread, dinner rolls, or crusty French bread to soak up every bit of cheesy goodness.
Beverage Pairings: Iced tea (sweet or unsweetened), lemonade, or cold beer complement the rich, cheesy flavors perfectly. For wine lovers, try a buttery Chardonnay or light Pinot Noir.
FAQs Section
Can I make baked mac and cheese without heavy cream?
Yes! You can use all whole milk (4 cups total) instead of the milk-cream combination. The sauce will be slightly less rich but still delicious. For a middle-ground option, use half-and-half instead of heavy cream. I don’t recommend using anything less than 2% milk, as the sauce needs some fat content for proper creaminess.
Why did my cheese sauce turn grainy?
Grainy cheese sauce usually happens from three causes: using pre-shredded cheese (which contains anti-caking agents), adding cheese over too-high heat, or overheating the sauce after adding cheese. Always use freshly shredded block cheese, melt it over low heat, and remove from heat once the cheese is melted.
Can I use different types of pasta?
Absolutely! While elbow macaroni is traditional, cavatappi, shells, penne, rotini, or fusilli all work great. Choose pasta shapes with curves or hollows that hold sauce well. Avoid delicate pastas like angel hair or orzo, as they don’t have the structure needed for baked mac and cheese.
How do I prevent dry mac and cheese?
Dry mac and cheese usually results from overbaking or not using enough sauce. Don’t bake longer than 30 minutes, and make sure every piece of pasta is well-coated with sauce before baking. If reheating leftovers, add a splash of milk to restore creaminess. Covering with foil for part of the baking time also helps retain moisture.
Can I make this recipe gluten-free?
Yes! Use gluten-free pasta and substitute the all-purpose flour with a gluten-free flour blend in equal amounts (Bob’s Red Mill 1:1 works great). Use gluten-free panko breadcrumbs or crushed gluten-free crackers for the topping. The cheese sauce technique remains exactly the same.
What’s the best cheese combination?
While I love sharp cheddar and Gruyere, there’s no single “best” combination. Sharp cheddar provides classic mac and cheese flavor, while Gruyere adds nuttiness and smooth melting. Other great options include white cheddar, fontina, Gouda (especially smoked), Monterey Jack, or Parmesan. Use at least one good melting cheese in your blend.
Can I add protein to make it a complete meal?
Definitely! Cooked chicken, bacon, ham, ground beef, or even lobster turn mac and cheese into a hearty main dish. Add 2-3 cups of cooked protein when mixing the pasta with sauce. Just remember that adding protein increases the overall volume, so you might need a larger baking dish.
Conclusion
There’s something deeply satisfying about making homemade baked mac and cheese from scratch. While the boxed version has its place, nothing compares to the creamy, rich, soul-warming comfort of this homemade recipe. The combination of sharp cheddar and Gruyere creates complex flavor that’s both familiar and sophisticated, while the golden breadcrumb topping adds that essential textural contrast everyone loves.
Whether you’re making this creamy baked macaroni and cheese for a holiday gathering, Sunday dinner with the family, or simply because you’re craving comfort food, this recipe delivers every single time. It’s become my most-requested dish at potlucks, and I’ve lost count of how many times people have asked me for the recipe. Now it’s your turn to experience the magic!
I’d love to hear how your baked mac and cheese turns out! Did you try any of the variations? What’s your favorite cheese combination? Drop a comment below and share your experience, and don’t forget to rate the recipe. If you loved this creamy, cheesy goodness as much as my family does, please pin it to your favorite Pinterest boards so you can make it again and again. Your friends and family will thank you when you show up with this incredible comfort food!
Happy cooking, and enjoy every creamy, cheesy bite!