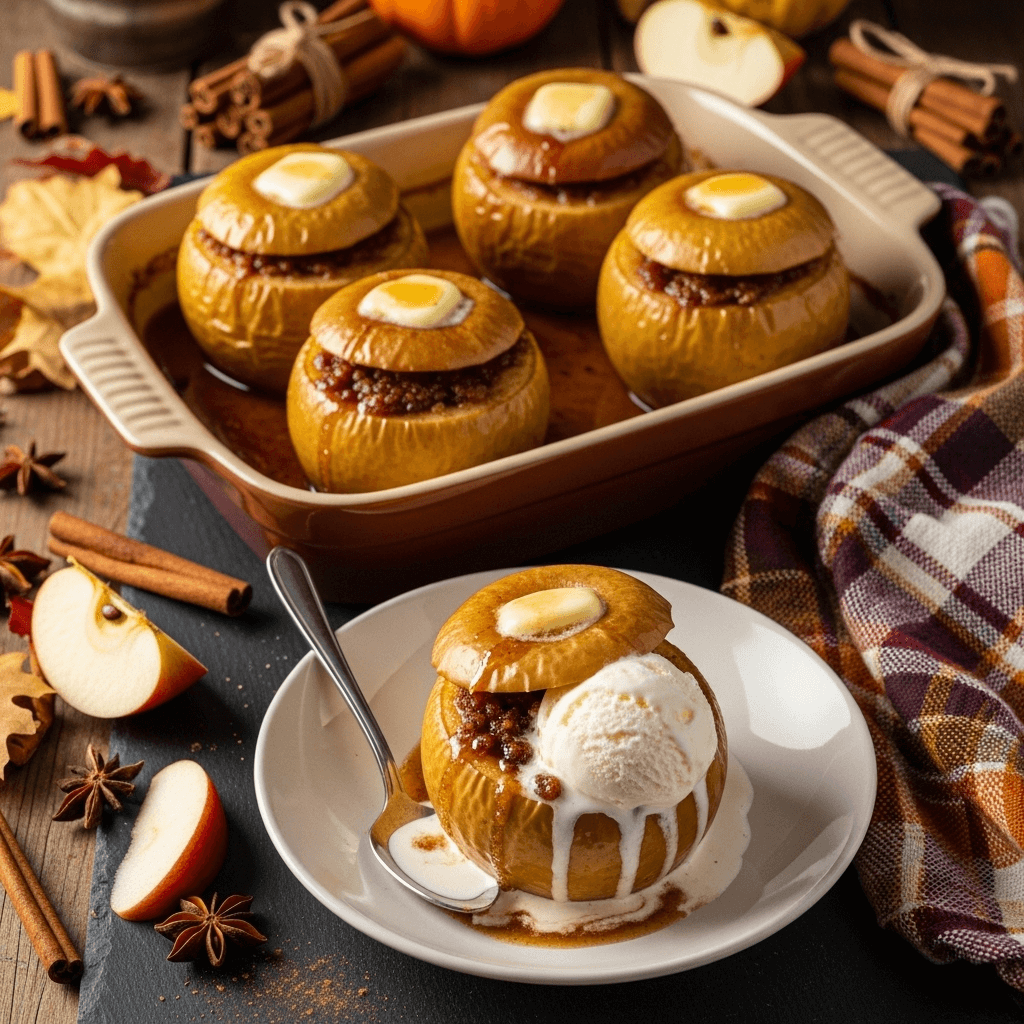

Get ready to fall in love with this simple baked apples recipe that transforms ordinary apples into a warm, comforting dessert that tastes like autumn in every bite! These tender baked apples are filled with a sweet cinnamon-sugar mixture, drizzled with butter, and baked until soft and caramelized. Whether you’re looking for a healthier dessert option, need a cozy fall treat, or want something that makes your house smell absolutely incredible, these easy baked apples deliver pure comfort food magic.
There’s something wonderfully nostalgic about baked apples. The way they perfume your kitchen with cinnamon and butter, the tender texture that yields to a spoon, and that perfect balance of sweet and tart flavors – it’s the kind of dessert that feels like a warm hug from grandma. This isn’t complicated or fussy; it’s straightforward home cooking that anyone can master, yet the results taste special enough for company.
What makes this baked apples recipe truly special is its versatility and simplicity. With just a handful of ingredients and about 10 minutes of prep, you can have a dessert that’s naturally gluten-free, relatively healthy, and absolutely delicious. Serve them for a weeknight family dessert, make them for Thanksgiving or Christmas dinner, enjoy them for a special breakfast treat, or prepare them when you’re craving something sweet but want to avoid overly rich desserts. Plus, they’re perfect for using up those apples sitting in your fruit bowl!
History / Background
Baked apples have a rich history that stretches back centuries, representing one of humanity’s oldest and simplest desserts. The practice of baking apples dates to medieval Europe, where apples were abundant and cooking them with sweeteners and spices became a cherished tradition. Before sugar became widely available, apples were often baked with honey, dried fruits, or nuts, creating a naturally sweet treat that required minimal ingredients.
In colonial America, baked apples became a staple dessert, particularly in New England where apple orchards thrived. Early American settlers brought apple seeds and grafting techniques from Europe, and within a few generations, apple trees dotted the landscape. Johnny Appleseed (John Chapman) famously traveled the frontier planting apple nurseries in the early 1800s, making apples even more accessible to American families.
The beauty of baked apples lies in their frugality and practicality. During times when sugar and flour were expensive or scarce, baked apples provided a satisfying dessert using just fruit, a bit of sweetener, and warming spices like cinnamon and nutmeg. Unlike pies and cakes that required specialized ingredients and techniques, anyone could hollow out an apple, fill it with simple ingredients, and bake it until tender.
Different regions developed their own traditions. In the American South, baked apples might include pecans and brown sugar. In New England, they were often filled with raisins and maple syrup. German immigrants brought their own version called “Bratäpfel,” typically filled with marzipan, nuts, and raisins. In Britain, baked apples have long been a autumn and winter favorite, sometimes served with custard.
Baked apples gained particular prominence during the Victorian era when afternoon tea culture flourished. They were considered an elegant yet economical dessert, suitable for both everyday family meals and special occasions. Cookbooks from the 1800s and early 1900s feature numerous baked apple variations, reflecting the dish’s enduring popularity.
The tradition continued strong through the Great Depression and World War II when resourcefulness in cooking was essential. Baked apples represented wholesome, affordable comfort that could be made with whatever sweeteners and spices were available. Many modern home cooks have fond memories of grandmothers making baked apples, keeping this simple tradition alive.
Today, baked apples are experiencing a renaissance as people seek simpler, more wholesome desserts. In an era of elaborate, Instagram-worthy confections, the humble baked apple reminds us that sometimes the most satisfying desserts are also the simplest. They celebrate seasonal eating, waste nothing, and prove that a few quality ingredients treated with care can create something truly special.
Why You’ll Love This Recipe
This easy baked apples recipe is about to become your go-to healthy dessert! It combines the warmth of autumn spices with the natural sweetness of apples for a treat that feels indulgent but is actually quite wholesome.
Here’s why these baked apples will become your favorite dessert:
- Naturally Healthy – Fruit-based dessert with added fiber and vitamins
- Only 10 Minutes Prep – Incredibly simple with minimal hands-on time
- Makes Your House Smell Amazing – The aroma of cinnamon and baking apples is heavenly
- Naturally Gluten-Free – Perfect for gluten-sensitive guests
- Budget-Friendly – Uses simple, affordable ingredients
- Perfectly Portioned – Each apple is one serving, built-in portion control
- Versatile Serving – Enjoy for dessert, breakfast, or afternoon snack
- Kid-Friendly – Children love the sweet, soft apples
- Easily Customizable – Add your favorite nuts, dried fruits, or spices
- Beautiful Presentation – Looks impressive with minimal effort
- Fall Perfect – Captures all those cozy autumn flavors
- Lower Guilt Dessert – Satisfies sweet cravings without heavy ingredients
Ingredient Notes
Let’s break down the simple ingredients that create these delicious baked apples. Quality matters here since there are so few components!
Apples – The star of the show! Choose firm, tart apples that hold their shape when baked. The best varieties include Honeycrisp (sweet-tart, holds shape beautifully), Granny Smith (classic tart choice, very firm), Jonagold (sweet with slight tartness), Braeburn (spicy-sweet flavor), or Pink Lady (crisp and balanced). You’ll need 4-6 medium to large apples. Avoid soft varieties like Red Delicious or McIntosh which turn mushy when baked.
Brown Sugar – Adds deep, caramel-like sweetness with molasses notes. You’ll need about ⅓ cup. Light or dark brown sugar both work, though dark brown sugar provides richer, more intense flavor. For a healthier option, use coconut sugar or reduce the amount. You can also substitute with maple syrup, honey, or even chopped dates for natural sweetness.
Butter – Unsalted butter (about 3 tablespoons) adds richness and helps create a lovely caramelized coating as the apples bake. The butter melts and mingles with the sugar and apple juices to create a delicious syrup. For dairy-free, use coconut oil or vegan butter.
Cinnamon – The essential warm spice! You’ll need about 1-2 teaspoons. Ground cinnamon adds that classic baked apple flavor we all love. Use quality cinnamon for best flavor – Ceylon cinnamon is sweeter and more delicate, while Cassia cinnamon is more robust.
Nutmeg – Just a pinch (¼ teaspoon) adds warmth and complexity. Freshly grated nutmeg tastes significantly better than pre-ground. This is optional but highly recommended for depth of flavor.
Optional Add-Ins:
- Raisins or Cranberries – ¼ cup dried fruit adds chewy texture and extra sweetness
- Chopped Nuts – Pecans, walnuts, or almonds add crunch (about ¼ cup)
- Oats – 2 tablespoons old-fashioned oats create a streusel-like filling
- Vanilla Extract – ½ teaspoon enhances all the flavors
- Lemon Juice – 1 tablespoon brightens flavors and prevents browning
- Maple Syrup – Drizzle for extra sweetness and authentic fall flavor
Apple Cider or Water – About ½ cup liquid in the baking dish prevents burning and creates steam for tender apples. Apple cider adds extra apple flavor, but water works fine too.
Equipment Needed
Making baked apples requires minimal equipment – you probably have everything you need!
Essential Equipment:
- 8×8 or 9×13 inch Baking Dish – Glass or ceramic dish that fits your apples snugly
- Apple Corer or Paring Knife – For removing the core and creating the cavity
- Small Bowl – For mixing the filling ingredients
- Measuring Cups and Spoons – For accurate ingredient measurements
- Spoon – For filling the apple cavities
- Aluminum Foil – For covering during baking if needed
Helpful but Optional:
- Melon baller (alternative to apple corer for scooping)
- Pastry brush for applying butter
- Sharp vegetable peeler if you want to peel apples partially
Equipment Tip: If you don’t have an apple corer, simply use a paring knife to cut around the core in a circular motion, then use a small spoon to scoop out the core and seeds.
Print
Baked Apples Recipe
- Total Time: 55 minutes
- Yield: 4-6 servings (depending on apple size) 1x
- Diet: Gluten Free
Description
These easy baked apples are filled with cinnamon-sugar, butter, and optional nuts or raisins, then baked until tender and caramelized. A naturally healthy dessert that’s simple to make and absolutely delicious! Perfect for fall gatherings or cozy weeknight treats. Serve warm with vanilla ice cream or whipped cream!
Ingredients
For the Apples:
- 4–6 medium to large apples (Honeycrisp, Granny Smith, or Jonagold)
- ⅓ cup brown sugar (light or dark)
- 1½ teaspoons ground cinnamon
- ¼ teaspoon ground nutmeg
- 3 tablespoons unsalted butter, softened and divided
- ½ teaspoon vanilla extract (optional)
- ½ cup apple cider or water (for baking dish)
Optional Add-Ins:
- ¼ cup raisins or dried cranberries
- ¼ cup chopped pecans or walnuts
- 2 tablespoons old-fashioned oats
- Pinch of salt
For Serving:
- Vanilla ice cream
- Whipped cream
- Caramel sauce
- Extra cinnamon for dusting
Instructions
Step 1: Preheat and Prepare
Preheat your oven to 375°F (190°C). Choose a baking dish that will hold your apples snugly – an 8×8 inch dish works for 4 apples, or use 9×13 inch for 6 apples. Pour ½ cup apple cider or water into the bottom of the dish.
Step 2: Prepare the Apples
Wash and dry the apples. Using an apple corer or paring knife, remove the core from each apple, creating a cavity about 1 inch wide. Be careful not to cut through the bottom – leave about ½ inch intact to hold the filling. If desired, use a vegetable peeler to peel a 1-inch band around the top of each apple (this helps them cook evenly and look pretty, but it’s optional).
Step 3: Make the Filling
In a small bowl, mix together the brown sugar, cinnamon, nutmeg, and 2 tablespoons of softened butter until well combined and crumbly. If using, add raisins, nuts, or oats to the mixture. Stir in vanilla extract if using.
Step 4: Fill the Apples
Place the prepared apples upright in the baking dish. Spoon the sugar-cinnamon mixture into the cavity of each apple, dividing it evenly. Pack it down gently with the back of the spoon. Top each apple with a small piece of the remaining butter (about ½ teaspoon per apple).
Step 5: Bake
Cover the baking dish with aluminum foil. Bake for 30 minutes. Remove the foil and continue baking for another 15-20 minutes, basting the apples with the pan juices once or twice, until the apples are tender when pierced with a fork and the filling is bubbling. Total baking time is 45-50 minutes, though timing varies based on apple size and variety.
Step 6: Baste and Check
The apples are done when they’re tender throughout but still hold their shape. They should be soft enough to easily pierce with a fork but not collapsed. The skin may split slightly, which is normal. The juices in the pan should be syrupy and caramelized.
Step 7: Cool Slightly
Let the baked apples cool for about 5-10 minutes before serving. They’re extremely hot straight from the oven! Spoon some of the caramelized syrup from the baking dish over each apple.
Step 8: Serve
Serve warm in bowls with a scoop of vanilla ice cream, dollop of whipped cream, or drizzle of caramel sauce. Spoon extra pan juices over the top. Enjoy!
Notes
- Apple Choice: Firm, tart varieties work best. Avoid soft apples that become mushy.
- Don’t Cut Through: Leave the bottom ½ inch intact so filling doesn’t leak out.
- Size Matters: Larger apples take longer to bake. Check for tenderness with a fork.
- Foil First: Covering initially helps apples steam and cook through evenly.
- Watch Closely: Near the end, check frequently to prevent over-baking.
- Make It Vegan: Use coconut oil instead of butter and skip ice cream or use dairy-free version.
- Prep Time: 10 minutes
- Cook Time: 45 minutes
- Category: Dessert
- Method: Baking
- Cuisine: American
Nutrition
- Serving Size: 1 baked apple (without ice cream or toppings)
- Calories: 185
- Sugar: 32g
- Sodium: 5mg
- Fat: 6g
- Saturated Fat: 4g
- Unsaturated Fat: 2g
- Trans Fat: 0g
- Carbohydrates: 36g
- Fiber: 5g
- Protein: 0g
- Cholesterol: 15mg
Tips & Variations
Apple Variety Swaps:
- Honeycrisp: Sweet-tart, holds shape perfectly (my favorite!)
- Granny Smith: Classic tart choice, very firm
- Jonagold: Sweet with slight tang
- Braeburn: Spicy-sweet, firm texture
- Pink Lady: Crisp and balanced
Filling Variations:
- Classic Raisin: Add ¼ cup raisins to brown sugar mixture
- Cranberry-Orange: Use dried cranberries + orange zest
- Pecan Pie Style: Add chopped pecans + extra brown sugar
- Apple Crisp: Mix in oats + extra butter for streusel topping
- Maple-Walnut: Use maple syrup instead of brown sugar, add walnuts
- Chai Spiced: Add cardamom, ginger, and allspice to cinnamon
- Caramel Apple: Fill with caramel sauce + chopped pecans
Dietary Modifications:
- Vegan: Use coconut oil or vegan butter
- Paleo: Use coconut sugar + coconut oil
- Lower Sugar: Reduce brown sugar to 2-3 tablespoons
- Keto-Friendly: Use keto sweetener (though apples have natural carbs)
Sauce Options: Instead of water/cider in pan, try:
- Bourbon or rum (2 tablespoons + water)
- Orange juice
- Maple syrup mixed with water
- Apple butter thinned with water
Pro Chef Tips
Tip #1: Choose the Right Apples
Firm, tart apples are essential! Varieties that are good for eating fresh often turn mushy when baked. Granny Smith, Honeycrisp, and Jonagold hold their shape beautifully. The apple should be tender when done but still maintain its structure, not collapse into applesauce.
Tip #2: Don’t Cut Through the Bottom
When coring, leave about ½ inch at the bottom intact. This creates a “bowl” that holds all the delicious filling and prevents it from leaking into the baking dish. If you accidentally cut through, stuff the hole with a raisin or small piece of apple to seal it.
Tip #3: Cover Then Uncover
Start baking covered with foil for the first 30 minutes. This traps steam, helping apples cook through evenly. Then uncover for the final 15-20 minutes to allow the tops to caramelize and the filling to bubble and thicken.
Tip #4: Baste for Extra Flavor
During the final uncovered baking time, baste the apples once or twice with the syrupy juices that accumulate in the pan. This creates a beautiful glaze and intensifies flavor. Use a spoon to drizzle the liquid over each apple.
Tip #5: Test for Doneness
Pierce the side of the apple with a fork or knife. It should slide through easily with little resistance, but the apple should still hold its shape. If it’s mushy and collapsing, it’s overbaked. Cooking time varies by apple size and variety, so check starting at 40 minutes.
Common Mistakes to Avoid
Mistake #1: Using Soft Apple Varieties
Apples like Red Delicious or McIntosh turn into applesauce when baked. Solution: Use firm, tart varieties specifically good for baking like Granny Smith, Honeycrisp, Jonagold, or Braeburn. These hold their shape while becoming tender.
Mistake #2: Cutting Through the Apple Bottom
If you core all the way through, the filling leaks out and you lose all those delicious juices. Solution: Leave ½ inch at the bottom intact to create a bowl. Go slowly when coring and check as you work.
Mistake #3: Overbaking
Apples that bake too long collapse and lose their shape, becoming mushy. Solution: Start checking at 40 minutes. They’re done when fork-tender but still holding shape. Remember they continue cooking slightly after removal from oven.
Mistake #4: Not Adding Liquid to the Pan
Without liquid, the bottoms can burn and apples may not cook evenly. Solution: Always add ½ cup liquid (cider, water, or juice) to the baking dish. This creates steam and prevents burning while adding flavor to the syrup.
Mistake #5: Serving Too Hot
Fresh from the oven, these apples are molten lava hot! Solution: Let cool 5-10 minutes before serving. This allows the filling to set slightly and prevents burnt tongues. They’re still wonderfully warm but safe to eat.
Storage & Meal Prep
Storing Baked Apples:
Transfer cooled baked apples to an airtight container and refrigerate for up to 4 days. Store any pan syrup in a separate container. The apples will soften further as they sit but still taste delicious. Cover individual apples with plastic wrap or store in containers with lids.
Reheating:
Microwave: Place one apple in microwave-safe bowl, cover loosely, heat 1-2 minutes until warm.
Oven: Place apples in baking dish with a splash of water, cover with foil, reheat at 350°F for 15-20 minutes.
Baked apples are actually delicious cold too! Some people prefer them chilled from the refrigerator.
Make-Ahead & Freezer Notes
Prepare Ahead (Up to 4 Hours):
Core and fill apples, place in baking dish covered with plastic wrap, and refrigerate. When ready to bake, add liquid to pan and proceed with recipe, adding 5-10 minutes to baking time since apples are cold.
Freezing:
Baked apples don’t freeze particularly well as they become watery and mushy when thawed. However, you can freeze unbaked prepared apples:
- Core and fill apples
- Wrap individually in plastic wrap then foil
- Freeze up to 3 months
- Bake from frozen, adding 15-20 minutes to baking time
Best Approach:
Bake fresh for best texture and flavor. They’re so easy to make that preparing them fresh is worthwhile!
Serving Suggestions
Classic Toppings:
- Vanilla ice cream (the traditional choice!)
- Fresh whipped cream
- Greek yogurt for healthier option
- Caramel sauce drizzle
- Custard or crème anglaise
Breakfast Option:
Serve baked apples for a special breakfast! Top with:
- Greek yogurt + granola
- Oatmeal alongside
- Cottage cheese
- Nut butter drizzle
Beverage Pairings:
- Hot apple cider
- Mulled wine
- Coffee or tea
- Warm spiced milk
Complete Dessert Presentation:
- Serve in individual bowls
- Add scoop of ice cream
- Drizzle with caramel sauce
- Sprinkle with cinnamon
- Add sprig of mint for color
Holiday Serving: Perfect for Thanksgiving, Christmas, or fall gatherings. Make ahead and reheat when needed. Guests love the individual serving size!
FAQs Section
Q: What are the best apples for baking?
A: Firm, tart varieties like Granny Smith, Honeycrisp, Jonagold, Braeburn, and Pink Lady work best. These apples hold their shape during baking while becoming tender. Avoid soft varieties like Red Delicious or McIntosh which turn mushy.
Q: Can I make baked apples without an apple corer?
A: Yes! Use a paring knife to cut around the core in a circular motion, then use a spoon or melon baller to scoop out the core and seeds. Just be careful not to puncture the bottom. It takes slightly longer but works perfectly fine.
Q: How do I know when baked apples are done?
A: Pierce the side with a fork or knife – it should slide through easily with minimal resistance, but the apple should still hold its shape. The skin may split slightly, and the filling will be bubbling. Total time is usually 45-50 minutes at 375°F.
Q: Can I make these without sugar?
A: Yes! For naturally sweetened baked apples, fill with chopped dates, a drizzle of honey or maple syrup, and cinnamon. The apples themselves provide natural sweetness. You can also use sugar substitutes like monk fruit or stevia.
Q: Why are my baked apples mushy?
A: Either you used a soft apple variety or overbaked them. Solution: Use firm baking apples and start checking for doneness at 40 minutes. Remove from oven when tender but still holding shape.
Q: Can I eat the skin?
A: Absolutely! The skin becomes soft and tender during baking and is perfectly edible. It also adds fiber and nutrients. Some people prefer to peel a strip around the top for aesthetic reasons, but it’s optional.
Q: Are baked apples healthy?
A: Relatively yes! They’re fruit-based with added fiber, vitamins, and antioxidants from apples. While they do contain added sugar and butter, it’s much less than most desserts. You can reduce sugar or use healthier alternatives. Apples provide 5g fiber per serving!
Conclusion
And there you have it – everything you need to make the perfect warm, comforting baked apples that fill your home with the most incredible aroma! This simple recipe proves that the best desserts don’t need to be complicated. With just a few wholesome ingredients and an hour of mostly hands-off baking time, you can create something truly special that’s both delicious and relatively healthy.
I’d love to hear about your baked apple adventures! Did you try any of the filling variations? What did you serve them with? Do your kids love them as much as mine do? Drop a comment below and share your experience. If this recipe becomes your go-to fall dessert (and I think it will!), please give it a five-star rating and share it with friends and family who appreciate simple, cozy desserts.
Don’t forget to pin this recipe to your Pinterest boards so you can find it easily whenever apple season rolls around! Here’s to many more warm, cinnamon-scented evenings with perfectly baked apples. Happy baking! 🍎