

There’s something absolutely magical about a homemade apple pie fresh from the oven. The buttery, flaky crust. The tender, cinnamon-spiced apples bubbling away. That incredible aroma that fills your entire home and makes everyone gather in the kitchen asking, “When can we eat it?” This classic apple pie recipe is the ultimate American dessert that never goes out of style.
Whether you’re baking for Thanksgiving, hosting a fall dinner party, bringing dessert to a potluck, or simply craving that nostalgic comfort food feeling, this traditional apple pie delivers every single time. It’s easier than you think to make from scratch, and the results are absolutely worth it. No store-bought pie can compare to the real deal made with love in your own kitchen. This recipe walks you through every step, from preparing the perfect flaky pie crust to creating that gorgeous golden finish that’ll make your pie Pinterest-worthy and absolutely delicious.
History / Background
Apple pie has been called “as American as apple pie” for good reason, though its origins actually trace back to medieval Europe. The earliest recorded apple pie recipe dates to 1381 in England, but those pies were quite different from what we enjoy today. They featured thick, inedible crusts called “coffyns” that were merely vessels to hold the filling during baking.
When European settlers arrived in America, they brought their pie-making traditions with them. However, apples themselves aren’t native to North America. Colonists imported apple seeds and cultivated orchards, and by the 18th and 19th centuries, apples had become abundant across the American landscape. Pioneers and homesteaders could easily grow apple trees, making apples an accessible and affordable fruit for baking.
Apple pie became deeply woven into American culture during the 19th and 20th centuries. It represented home, comfort, and traditional values. During World War II, American soldiers would say they were fighting “for mom and apple pie,” cementing its status as an iconic symbol of American life and values. Today, apple pie remains the quintessential American dessert, served at holiday gatherings, county fairs, diners, and family tables across the nation. Each region and family often has their own special twist, whether it’s adding a crumb topping, using specific apple varieties, or incorporating unique spice blends.
Why You’ll Love This Recipe
This classic homemade apple pie recipe is truly the gold standard for a reason. It combines traditional techniques with practical tips that make the process achievable for bakers of all skill levels. You’ll fall in love with this recipe because it delivers that perfect balance of tender, spiced apples and buttery, flaky crust that defines what apple pie should be.
Here’s why this recipe will become your go-to:
- Perfectly balanced filling – Not too sweet, not too tart, with just the right amount of cinnamon and spice
- Flaky, buttery crust – Made from scratch with simple ingredients that create layers of golden perfection
- Great for beginners – Clear step-by-step instructions that walk you through every detail
- Make-ahead friendly – You can prep components in advance to save time on baking day
- Crowd-pleaser guaranteed – Everyone loves a classic apple pie, making it perfect for gatherings
- Budget-friendly – Uses simple, affordable ingredients you probably already have
- Customizable – Easy to adjust sweetness, spices, or apple varieties to your preference
- Freezer-friendly – Make extras and freeze for future occasions
- Show-stopping presentation – Looks absolutely beautiful with minimal effort
Ingredient Notes
Let’s talk about what goes into making the perfect apple pie. Understanding your ingredients helps you make better choices and achieve the best results.
For the Pie Crust:
All-purpose flour forms the foundation of your crust. It provides structure while remaining tender. You can substitute with a gluten-free baking blend if needed, though the texture may vary slightly.
Cold butter is absolutely essential for creating those flaky layers. The cold fat creates steam pockets during baking. Never use melted butter or your crust will be tough. You can substitute half the butter with shortening for extra flakiness.
Ice water brings the dough together without warming the butter. Always keep it ice-cold, and add just enough to make the dough come together. Too much water creates tough crust.
Salt and sugar enhance flavor. The salt balances sweetness while sugar adds a subtle sweetness to the crust itself.
For the Apple Filling:
Apples are obviously the star! Use a mix of varieties for the best flavor and texture. Granny Smith provides tartness and holds its shape beautifully. Honeycrisp, Braeburn, or Jonagold add sweetness and depth. Avoid Red Delicious or any apples that turn mushy when cooked. You’ll need about 6-8 medium apples (roughly 3 pounds).
Granulated sugar sweetens the filling. Adjust based on your apple variety and personal preference. Tart apples need more sugar; sweet apples need less.
Brown sugar adds molasses notes and deeper flavor complexity. You can use all granulated sugar if needed, but brown sugar adds richness.
Ground cinnamon is the classic apple pie spice. It’s warm, aromatic, and pairs perfectly with apples.
Nutmeg adds warmth and complexity. Use freshly grated if possible for the best flavor.
Lemon juice brightens the filling and prevents the apples from browning. It also balances sweetness with acidity.
Flour or cornstarch thickens the filling so it’s not soupy. Cornstarch creates a clearer filling; flour creates a more opaque, traditional look.
Butter dots on top of the filling add richness and help create that luscious, glossy texture.
Egg wash (egg beaten with water or milk) gives the crust that beautiful golden shine. You can substitute with milk or cream if you prefer.
Equipment Needed
Having the right tools makes pie baking so much easier. Here’s what you’ll need:
- 9-inch pie dish – Glass or ceramic works best for even baking
- Large mixing bowls – For preparing both crust and filling
- Pastry cutter or fork – To cut butter into flour for the crust
- Rolling pin – For rolling out your pie dough evenly
- Peeler and sharp knife – For preparing apples
- Apple corer/slicer (optional) – Speeds up apple prep significantly
- Measuring cups and spoons – For accurate measurements
- Plastic wrap – For wrapping and chilling dough
- Parchment paper or silicone mat – Prevents sticking when rolling dough
- Pastry brush – For applying egg wash
- Knife or pizza cutter – For trimming excess dough and cutting vents
- Pie weights or dried beans (optional) – If you’re blind baking
- Baking sheet – Place under the pie to catch any drips and ensure even bottom baking
- Cooling rack – Essential for proper cooling
Apple Pie Recipe
- Total Time: 2 hours 30 minutes
- Yield: 8 servings 1x
- Diet: Vegetarian
Description
This classic homemade apple pie features a buttery, flaky double crust filled with tender, cinnamon-spiced apples. It’s the perfect traditional American dessert for holidays, family gatherings, or any time you’re craving something sweet and comforting. With step-by-step instructions, even beginner bakers can achieve bakery-quality results.
Ingredients
For the Pie Crust (Double Crust):
- 2½ cups all-purpose flour
- 1 tablespoon granulated sugar
- 1 teaspoon salt
- 1 cup (2 sticks) cold unsalted butter, cut into small cubes
- 6–8 tablespoons ice water
For the Apple Filling:
- 6–8 medium apples (about 3 pounds), peeled, cored, and sliced ¼-inch thick
- ¾ cup granulated sugar
- ¼ cup light brown sugar, packed
- 2 tablespoons all-purpose flour (or 1 tablespoon cornstarch)
- 1½ teaspoons ground cinnamon
- ¼ teaspoon ground nutmeg
- ¼ teaspoon salt
- 2 tablespoons fresh lemon juice
- 2 tablespoons unsalted butter, cut into small pieces
For Assembly:
- 1 egg beaten with 1 tablespoon water (egg wash)
- 1 tablespoon coarse sugar (optional, for sprinkling)
Instructions
Make the Pie Crust:
- In a large bowl, whisk together flour, sugar, and salt. Add the cold butter cubes and use a pastry cutter or fork to cut the butter into the flour until the mixture resembles coarse crumbs with some pea-sized butter pieces remaining.
- Add ice water one tablespoon at a time, mixing gently with a fork after each addition. Add just enough water for the dough to come together when pressed. It should be slightly shaggy but hold together.
- Divide the dough in half, shape each half into a flat disk, and wrap tightly in plastic wrap. Refrigerate for at least 1 hour or up to 2 days.
Prepare the Apple Filling:
- Peel, core, and slice the apples into ¼-inch thick slices. Place them in a large bowl.
- Add granulated sugar, brown sugar, flour (or cornstarch), cinnamon, nutmeg, salt, and lemon juice to the apples. Toss everything together until the apples are evenly coated. Let the mixture sit for 15-20 minutes to allow the flavors to meld and the apples to release some juice.
Assemble the Pie:
- Preheat your oven to 400°F (200°C). Place a baking sheet on the lower rack to catch any drips.
- On a lightly floured surface, roll out one disk of dough into a 12-inch circle, about ⅛-inch thick. Carefully transfer it to a 9-inch pie dish, letting the excess hang over the edges. Gently press the dough into the bottom and sides of the dish.
- Pour the apple filling into the crust, mounding it slightly in the center. Dot the filling with the 2 tablespoons of butter pieces.
- Roll out the second disk of dough into a 12-inch circle. Place it over the filling. Trim the excess dough to about 1 inch beyond the edge of the pie dish. Fold the top crust edge under the bottom crust edge and crimp or flute the edges to seal.
- Cut 4-5 slits in the top crust to allow steam to escape. You can also create decorative shapes if desired.
- Brush the top crust with egg wash and sprinkle with coarse sugar if using.
Bake the Pie:
- Place the pie on the preheated baking sheet in the oven. Bake at 400°F for 20 minutes.
- Reduce the temperature to 375°F (190°C) and continue baking for 40-50 minutes, until the crust is deep golden brown and the filling is bubbling through the vents.
- If the edges are browning too quickly, cover them with a pie shield or strips of aluminum foil.
- Remove from the oven and let the pie cool on a wire rack for at least 4 hours before slicing. This cooling time allows the filling to set properly.
Notes
- Apple varieties: Use a mix of tart and sweet apples for the best flavor. Good combinations include Granny Smith + Honeycrisp, or Braeburn + Golden Delicious.
- Make-ahead crust: You can make the pie dough up to 2 days ahead and keep it refrigerated, or freeze it for up to 3 months.
- Thickener choice: Flour creates a more traditional, slightly opaque filling. Cornstarch creates a clearer, glossier filling. Both work perfectly.
- Prevent soggy bottom: Baking on a preheated baking sheet helps ensure the bottom crust cooks through and stays crispy.
- Cooling is essential: Don’t skip the cooling time! Cutting into a hot pie will result in a runny filling. The pie needs time to set.
- Store-bought crust: If you’re short on time, you can use store-bought pie crust. The homemade filling will still make it special.
- Prep Time: 30 minutes
- Cook Time: 50-60 minutes
- Category: Dessert
- Method: Baking
- Cuisine: American
Nutrition
- Serving Size: 1 slice (1/8 of pie)
- Calories: 425
- Sugar: 32g
- Sodium: 285mg
- Fat: 18g
- Saturated Fat: 11g
- Unsaturated Fat: 6g
- Trans Fat: 0g
- Carbohydrates: 65g
- Fiber: 4g
- Protein: 4g
- Cholesterol: 75mg
Tips & Variations
Flavor Variations:
- Dutch Apple Pie: Skip the top crust and add a crumb topping made from flour, brown sugar, butter, and oats.
- Caramel Apple Pie: Drizzle ½ cup caramel sauce over the apple filling before adding the top crust.
- Cheddar Apple Pie: Add ½ cup shredded sharp cheddar cheese to the crust dough for a sweet-savory twist.
- Apple Cranberry Pie: Mix in 1 cup fresh or frozen cranberries with the apples for a tart punch.
- Spiced Apple Pie: Add ¼ teaspoon ground ginger, ¼ teaspoon allspice, and a pinch of ground cloves for more complex spice notes.
Dietary Adaptations:
- Gluten-Free: Use a gluten-free flour blend for the crust. The texture may be slightly different but still delicious.
- Vegan: Replace butter with vegan butter or shortening, and use plant-based milk for the wash instead of egg wash.
- Reduced Sugar: Cut the sugar by ¼ cup and add an extra tablespoon of lemon juice to brighten flavors.
Presentation Ideas:
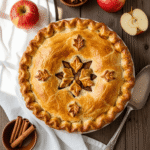
- Create lattice top instead of a solid crust for a classic look
- Use small cookie cutters to cut shapes from the top crust before placing it
- Make decorative leaves or braids from excess dough to decorate the edges
- Brush with milk and sprinkle with cinnamon sugar instead of plain sugar
Pro Chef Tips
Tip #1: Keep everything cold. The secret to flaky pie crust is keeping the butter as cold as possible. Work quickly, and if your kitchen is warm, pop the dough back in the fridge if it starts to feel soft or sticky. Some bakers even freeze their butter and then grate it into the flour for ultimate flakiness.
Tip #2: Don’t skip the resting time. Letting the dough rest in the refrigerator allows the gluten to relax, making it easier to roll out and preventing shrinkage during baking. It also keeps the butter cold for maximum flakiness.
Tip #3: Mix your apple varieties. Using 2-3 different types of apples creates better texture and more complex flavor. Tart apples hold their shape while sweet apples break down slightly, creating the perfect filling consistency.
Tip #4: Pre-cook the filling (optional but game-changing). For an even better pie, you can sauté the apple filling in a large skillet for 5-7 minutes before adding it to the crust. This cooks out excess moisture, intensifies flavors, and ensures your apples are perfectly tender. Let it cool before filling the pie.
Tip #5: Brush with cream for extra richness. Instead of egg wash, brush the crust with heavy cream before baking. This creates an incredibly golden, rich finish.
Tip #6: Use a pizza stone or steel. Placing your pie dish on a preheated pizza stone or baking steel ensures even bottom heat and prevents a soggy bottom crust. It’s a game-changer for perfect pies.
Tip #7: Let it cool completely. This is the hardest tip to follow because warm pie smells amazing, but the filling needs at least 3-4 hours to set properly. Cutting too early results in a soupy, runny pie. Be patient!
Common Mistakes to Avoid
Mistake #1: Using warm butter. This is the number one reason for tough, dense pie crust. Cold butter creates steam pockets as it melts in the oven, which creates flaky layers. Always use butter straight from the refrigerator, and work quickly so it doesn’t warm up.
Mistake #2: Overworking the dough. Kneading or working pie dough too much develops gluten, resulting in tough, chewy crust instead of tender, flaky crust. Mix just until the dough comes together, then stop.
Mistake #3: Slicing apples too thick or too thin. Thick slices won’t cook through properly and will be crunchy. Too-thin slices turn to mush. Aim for consistent ¼-inch slices so everything cooks evenly.
Mistake #4: Not using enough thickener. If you skimp on the flour or cornstarch, your filling will be soupy and run all over the place when you cut into it. Measure carefully, and if your apples are particularly juicy, add an extra tablespoon of thickener.
Mistake #5: Forgetting to vent the top crust. Steam needs to escape during baking. Without vents or slits, the filling can bubble over and make a mess, or the steam can cause the crust to become soggy. Always cut vents in your top crust.
Mistake #6: Cutting into the pie too soon. I know it’s tempting, but the filling needs time to cool and set. Cutting into a hot pie means runny filling that oozes everywhere. Give it at least 3-4 hours to cool completely.
Storage & Meal Prep
Room Temperature Storage: Once the pie has cooled completely, you can store it covered loosely with aluminum foil or plastic wrap at room temperature for up to 2 days. The crust stays crispiest when stored at room temperature, but only do this if your home isn’t too warm.
Refrigerator Storage: For longer storage, cover the cooled pie with plastic wrap or foil and refrigerate for up to 5 days. The crust may soften slightly in the refrigerator, but the pie will still be delicious. Let it come to room temperature before serving, or warm individual slices.
Reheating Instructions: To restore the crust’s crispiness, reheat individual slices in a 350°F oven for 10-15 minutes, or reheat the whole pie for 20-25 minutes until warmed through. You can also microwave individual slices for 20-30 seconds, but the crust won’t be as crispy.
Leftover Tips: Apple pie is honestly just as good the next day! Some people even prefer it after the flavors have had time to meld. Serve leftover pie with a scoop of vanilla ice cream or a dollop of whipped cream.
Make-Ahead & Freezer Notes
Prepare the Dough Ahead: You can make the pie dough up to 2 days in advance and keep it wrapped tightly in the refrigerator. You can also freeze the dough disks for up to 3 months. Thaw overnight in the refrigerator before rolling out.
Freeze Unbaked Pie: Assemble the entire pie (without egg wash), wrap it tightly in plastic wrap, then aluminum foil, and freeze for up to 3 months. When ready to bake, brush with egg wash and bake directly from frozen, adding an extra 20-30 minutes to the baking time. This is perfect for having a homemade pie ready for unexpected guests or holidays.
Freeze Baked Pie: Let the baked pie cool completely, then wrap tightly in plastic wrap and aluminum foil. Freeze for up to 3 months. Thaw overnight in the refrigerator, then reheat at 350°F for 20-25 minutes until warmed through.
Best Reheating Method: For frozen pie, let it thaw in the refrigerator overnight. Reheat at 350°F covered with foil for 20 minutes, then uncover and bake for an additional 10-15 minutes until the crust is crisp and the filling is warm.
Make-Ahead Filling: You can prepare the apple filling up to 1 day ahead and store it in the refrigerator. Drain off any excess liquid before filling the pie crust.
Serving Suggestions
Apple pie is wonderful on its own, but these accompaniments take it to the next level:
Classic Pairings:
- Vanilla ice cream – The absolute classic pairing. The cold, creamy ice cream melting into warm pie is perfection.
- Fresh whipped cream – Light, airy, and slightly sweetened whipped cream adds elegance.
- Sharp cheddar cheese – A traditional pairing, especially in the Midwest. The savory cheese balances the sweet pie beautifully.
- Caramel sauce – Drizzle warm caramel sauce over each slice for extra decadence.
Beverages:
- Hot coffee or espresso
- Apple cider (hot or cold)
- Chai tea latte
- Vanilla milkshake
- Mulled wine
Complete Dessert Table:
If you’re serving this for a holiday or gathering, pair it with other desserts like pumpkin pie, pecan pie, or chocolate cake for variety. Set up a dessert bar with different ice cream flavors, whipped cream, and toppings so guests can customize their slices.
Breakfast Treat:
Don’t forget that apple pie makes an excellent breakfast! Serve a slice with your morning coffee for a special weekend treat.
FAQs Section
Q: What are the best apples for apple pie?
A: The best apple pies use a mix of apple varieties. Combine tart, firm apples like Granny Smith with sweeter varieties like Honeycrisp, Braeburn, Jonagold, or Golden Delicious. The tart apples hold their shape and provide tartness, while sweet apples add flavor complexity and natural sweetness. Avoid Red Delicious or McIntosh, which turn mushy when baked.
Q: Why is my apple pie filling runny?
A: Runny filling usually happens for three reasons: not enough thickener (flour or cornstarch), cutting into the pie before it’s fully cooled, or very juicy apples. Make sure you use the full amount of thickener called for in the recipe, and always let the pie cool for at least 3-4 hours so the filling can set properly. If your apples are exceptionally juicy, add an extra tablespoon of flour or cornstarch.
Q: How do I prevent a soggy bottom crust?
A: Several techniques help prevent soggy bottom crust. First, place your pie on a preheated baking sheet or pizza stone in the lower third of the oven so the bottom gets direct heat. Second, make sure your oven is fully preheated before baking. Third, don’t add the filling until you’re ready to bake. Fourth, avoid too-thin crust on the bottom. Some bakers also brush the bottom crust with a thin layer of egg white before adding the filling to create a moisture barrier.
Q: Can I make apple pie without a food processor?
A: Absolutely! The recipe in this article doesn’t require a food processor at all. You can cut the butter into the flour using a pastry cutter, two forks, or even your hands (work quickly so the butter stays cold). Many bakers actually prefer making pie crust by hand because you have more control over the texture.
Q: Do I need to peel the apples?
A: For traditional apple pie, yes, you should peel the apples. Apple peels can become tough and chewy during baking, and they don’t break down the way the flesh does. Peeling ensures a smooth, tender filling. However, if you prefer a more rustic pie with extra fiber, you can leave the peels on, especially if you’re using thin-skinned apples.
Q: How do I know when my apple pie is done baking?
A: Your apple pie is done when the crust is deep golden brown (not pale) and the filling is bubbling vigorously through the vents in the center of the pie. The edges typically brown before the center, so make sure you see those bubbles in the middle, which indicates the filling has thickened properly. If the edges brown too quickly, cover them with a pie shield or foil and continue baking.
Q: Can I use store-bought pie crust?
A: Yes! While homemade crust tastes best, store-bought crust is a perfectly acceptable time-saver. Focus your energy on making a delicious filling with quality apples and the right spice blend. You can also just make one homemade crust for the bottom and use store-bought for the top, or vice versa. Nobody will judge you for using store-bought crust, and your pie will still be delicious!
Conclusion
There you have it – everything you need to know to bake the perfect classic homemade apple pie! From the buttery, flaky crust to the tender, cinnamon-spiced filling, this recipe delivers that nostalgic, comforting flavor that makes apple pie America’s favorite dessert. Whether you’re a seasoned baker or trying your hand at pie for the first time, this detailed guide walks you through every step of the process.
The beauty of apple pie is that it’s both simple and special at the same time. Yes, it takes a little time and effort, but the reward is absolutely worth it. That first slice, with its golden crust and perfectly spiced apples, brings smiles to everyone’s faces. It’s the kind of dessert that creates memories and becomes a family tradition.
So grab those apples, roll up your sleeves, and get baking! Your kitchen is about to smell absolutely amazing, and your family and friends are going to be so impressed. Don’t forget to serve it warm with a big scoop of vanilla ice cream for the ultimate experience.
I’d love to hear how your apple pie turns out! Leave a comment below with your results, any creative variations you tried, or questions you have. And if you loved this recipe, please share it on Pinterest so other home bakers can enjoy it too. Pin it to your dessert boards and spread the apple pie love!
Happy baking! 🥧🍎