
Get ready to whip up the ultimate thick chocolate milkshake that’s so rich, creamy, and indulgent it tastes like it came straight from a classic American diner! This homemade chocolate milkshake recipe combines premium chocolate ice cream, cold milk, and chocolate syrup to create a thick, frosty treat that’s absolutely irresistible. Whether you’re craving a nostalgic dessert, need the perfect accompaniment to burgers and fries, or want to treat the kids (or yourself!) to something special, this easy chocolate milkshake delivers pure happiness in every sip.
There’s something truly magical about a perfectly made chocolate milkshake. The velvety smooth texture, the intense chocolate flavor, and that satisfying thickness that requires a sturdy straw – it’s the kind of treat that instantly transports you back to carefree summer days and vintage soda fountains. This isn’t a thin, watery milkshake; this is the real deal – so thick you can practically eat it with a spoon, yet smooth enough to drink through a straw.
What makes this chocolate milkshake recipe special is its simplicity and customizability. With just three basic ingredients and five minutes, you can create a milkshake that rivals anything from an ice cream shop or diner. Make it extra thick for a spoon-worthy treat, thin it slightly for easier drinking, add mix-ins for variety, or keep it classic for pure chocolate bliss. It’s perfect for hot summer afternoons, movie nights at home, birthday parties, after-school treats, or anytime you need a little chocolate happiness in your life!
History / Background
The milkshake has been an iconic part of American food culture for over a century, though its origins and evolution tell a fascinating story of innovation and changing tastes. The term “milkshake” first appeared in print in the 1880s, but these early versions bore little resemblance to what we know today. They were alcoholic drinks made with whiskey, eggs, and a bit of milk – essentially eggnog cocktails that were literally shaken to create froth.
The transformation to the sweet, ice cream-based treat we know today happened gradually through the early 20th century. The invention of the electric blender in 1922 by Stephen Poplawski revolutionized milkshake production, making it possible to blend ice cream with milk into a smooth, thick beverage. However, it wasn’t until Walgreens employee Ivar “Pop” Coulson added two scoops of ice cream to a standard malted milk drink in 1922 that the modern milkshake truly took shape.
The 1930s through 1950s marked the golden age of milkshakes in American culture. Soda fountains and malt shops became social gathering places, especially for teenagers, and milkshakes became synonymous with American youth culture. The proliferation of diners across America made milkshakes a staple menu item, served in tall glasses with whipped cream and a cherry on top. Chocolate, vanilla, and strawberry emerged as the classic trio of flavors, with chocolate often reigning as the most popular.
The rise of fast-food restaurants in the 1950s and 1960s further cemented the milkshake’s place in American food culture. McDonald’s, Burger King, and other chains made milkshakes accessible nationwide, though these commercial versions often used “shake mixes” rather than real ice cream. This led to a distinction between authentic ice cream milkshakes (sometimes called “frappes” in parts of New England or “cabinets” in Rhode Island) and the thinner commercial versions.
Chocolate milkshakes gained particular fame through popular culture. They appeared in countless movies and TV shows as symbols of American innocence and nostalgia. Who can forget the iconic scene from “Pulp Fiction” where characters debate the quality of different milkshakes? Or the classic image of 1950s teens sharing milkshakes at a diner counter?
The chocolate milkshake represents more than just a beverage – it’s a cultural touchstone that evokes nostalgia, comfort, and simple pleasures. In an era of artisanal everything and complex flavor profiles, the straightforward deliciousness of a chocolate milkshake remains timeless. It’s proof that sometimes the simplest combinations – ice cream, milk, and chocolate – create the most satisfying results.
Today, while gourmet milkshake shops offer elaborate creations with toppings that defy gravity, the classic chocolate milkshake remains beloved for its pure, uncomplicated chocolate flavor. Making one at home connects you to this rich history of American food culture while giving you complete control over quality and thickness. It’s a taste of nostalgia that never goes out of style!
Why You’ll Love This Recipe
This thick chocolate milkshake recipe is about to become your go-to treat for chocolate cravings! It combines the classic flavors you love with a foolproof technique that guarantees perfect results every single time.
Here’s why this chocolate milkshake will become your favorite indulgence:
- Ready in 5 Minutes – Literally from ingredients to drinking in just five minutes
- Only 3 Ingredients – Just ice cream, milk, and chocolate syrup (plus optional toppings)
- Thick & Creamy – Restaurant-quality thick texture that’s perfectly spoonable
- Intensely Chocolatey – Rich, satisfying chocolate flavor in every sip
- Completely Customizable – Adjust thickness, sweetness, and add your favorite mix-ins
- Kid-Friendly Favorite – Children absolutely love this classic treat
- No Special Skills Required – If you can press a button on a blender, you can make this
- Budget-Friendly – Costs less than $2 per serving using simple ingredients
- Perfect Any Season – Refreshing in summer, comforting year-round
- Nostalgic & Fun – Tastes like memories of classic diners and soda fountains
- Impressive Presentation – Looks beautiful topped with whipped cream and a cherry
- Better Than Store-Bought – No artificial ingredients, just real ice cream goodness
Ingredient Notes
The beauty of a chocolate milkshake is its simplicity – just three main ingredients create magic! But quality matters, so let’s break down what you need.
Chocolate Ice Cream – This is the foundation of your milkshake! Use high-quality, full-fat chocolate ice cream for the richest, creamiest results. You’ll need about 3-4 cups (approximately 1 pint) for 2 large milkshakes. Premium brands like Häagen-Dazs, Ben & Jerry’s, or Tillamook create the thickest, most flavorful milkshakes. Regular ice cream works too, but avoid low-fat or “frozen dairy dessert” products as they contain more air and less cream, creating thin, icy milkshakes. For extra chocolate intensity, use double chocolate or chocolate fudge ice cream.
Cold Milk – Helps achieve the perfect drinkable consistency. You’ll need ½ to 1 cup depending on desired thickness. Whole milk creates the creamiest milkshakes, but 2% works fine too. Start with less milk and add gradually until you reach your preferred thickness – you can always thin it out, but you can’t thicken it without adding more ice cream! For dairy-free milkshakes, use full-fat oat milk, coconut milk, or almond milk (though texture will be slightly different).
Chocolate Syrup – Intensifies the chocolate flavor and adds sweetness. Use 2-4 tablespoons depending on how chocolatey you like it. Hershey’s chocolate syrup is classic, but any brand works. For a less sweet milkshake, reduce to 1-2 tablespoons or omit entirely if your ice cream is already very chocolatey. For a more sophisticated flavor, use quality chocolate sauce or even melted dark chocolate.
Optional Add-Ins:
- Vanilla Extract – ½ teaspoon enhances chocolate flavor
- Malted Milk Powder – 2 tablespoons creates a classic “chocolate malt”
- Cocoa Powder – 1 tablespoon unsweetened cocoa for deeper chocolate flavor
- Peanut Butter – 2 tablespoons for chocolate-peanut butter combo
- Instant Espresso Powder – ½ teaspoon intensifies chocolate (mocha shake!)
- Mini Chocolate Chips – Handful for texture and extra chocolate
Toppings:
- Whipped cream (homemade or store-bought)
- Chocolate syrup drizzle
- Maraschino cherry
- Chocolate shavings or sprinkles
- Crushed cookies (Oreos!)
- Chopped chocolate bar pieces
Equipment Needed
Making the perfect chocolate milkshake requires minimal equipment – you probably have everything already!
Essential Equipment:
- Blender – A standard countertop blender works perfectly. High-powered blenders (Vitamix, Blendtec) make extra-smooth milkshakes, but any blender works. Even a personal-size bullet blender can make individual servings.
- Measuring Cups – For measuring ice cream and milk accurately
- Measuring Spoons – For chocolate syrup
- Tall Glasses – Classic milkshake glasses (16-20 oz) or any tall glass
- Long Spoons or Straws – Thick straws or long spoons for enjoying your shake
- Ice Cream Scoop – Makes portioning ice cream easier
Optional but Fun:
- Milkshake maker or mixer (vintage soda fountain style!)
- Piping bag for decorative whipped cream
- Fancy straws (paper, striped, or reusable metal)
- Milkshake glasses with handles
- Can of whipped cream for quick topping
Blender Tips: If your blender struggles with thick ice cream, let the ice cream soften at room temperature for 5-10 minutes before blending, or add the milk first, then ice cream. Pulse several times before blending continuously.
Print
Chocolate Milkshake Recipe
- Total Time: 5 minutes
- Yield: 2 large milkshakes (or 3-4 smaller servings) 1x
- Diet: Vegetarian
Description
This thick chocolate milkshake recipe creates a rich, creamy, ultra-chocolatey treat that rivals any ice cream shop or diner! Made with just three simple ingredients – chocolate ice cream, cold milk, and chocolate syrup – it’s ready in 5 minutes and completely customizable. Perfect for hot days, movie nights, or anytime you’re craving a classic chocolate shake!
Ingredients
For the Milkshake:
- 3–4 cups chocolate ice cream (about 1 pint), slightly softened
- ½–¾ cup cold whole milk (start with ½ cup)
- 3 tablespoons chocolate syrup (like Hershey’s), plus more to taste
- ½ teaspoon vanilla extract (optional but recommended)
Optional Mix-Ins:
- 2 tablespoons malted milk powder (for a chocolate malt)
- 1 tablespoon unsweetened cocoa powder (for extra chocolate)
- 2 tablespoons peanut butter
- Handful of mini chocolate chips
For Topping:
- Whipped cream
- Extra chocolate syrup drizzle
- Maraschino cherry
- Chocolate shavings or sprinkles
Instructions
Step 1: Prepare Your Ingredients
Let the chocolate ice cream sit at room temperature for 5-10 minutes to soften slightly – this makes blending much easier and creates a smoother texture. Make sure your milk is cold. Place your serving glasses in the freezer for extra-cold presentation (optional but nice!).
Step 2: Add Ingredients to Blender
Add ingredients in this order for best blending: First pour in ½ cup cold milk, then add 3 tablespoons chocolate syrup and vanilla extract if using. Finally, add 3-4 cups of slightly softened chocolate ice cream (about 6-8 scoops). Adding liquid first helps the blender blades move freely.
Step 3: Blend Until Smooth
Secure the blender lid tightly. Start blending on low speed for a few seconds, then increase to medium-high speed. Blend for 20-30 seconds until completely smooth and no ice cream chunks remain. If the mixture is too thick and your blender is struggling, stop and add 1-2 tablespoons more milk, then blend again. Use the blender’s tamper if you have one to push ingredients toward the blades.
Step 4: Check and Adjust Consistency
Stop the blender and check the thickness. The milkshake should be thick enough that it barely drips off a spoon, but still pourable. For a thicker shake: add ½ cup more ice cream and blend again. For a thinner shake: add 2-4 tablespoons more milk and blend briefly. Taste and add more chocolate syrup if you want it sweeter or more chocolatey.
Step 5: Pour and Serve
Immediately pour the milkshake into your chilled glasses. The shake will be thick, so you may need to use a spoon or spatula to help it along. Work quickly as milkshakes start melting immediately!
Step 6: Add Toppings
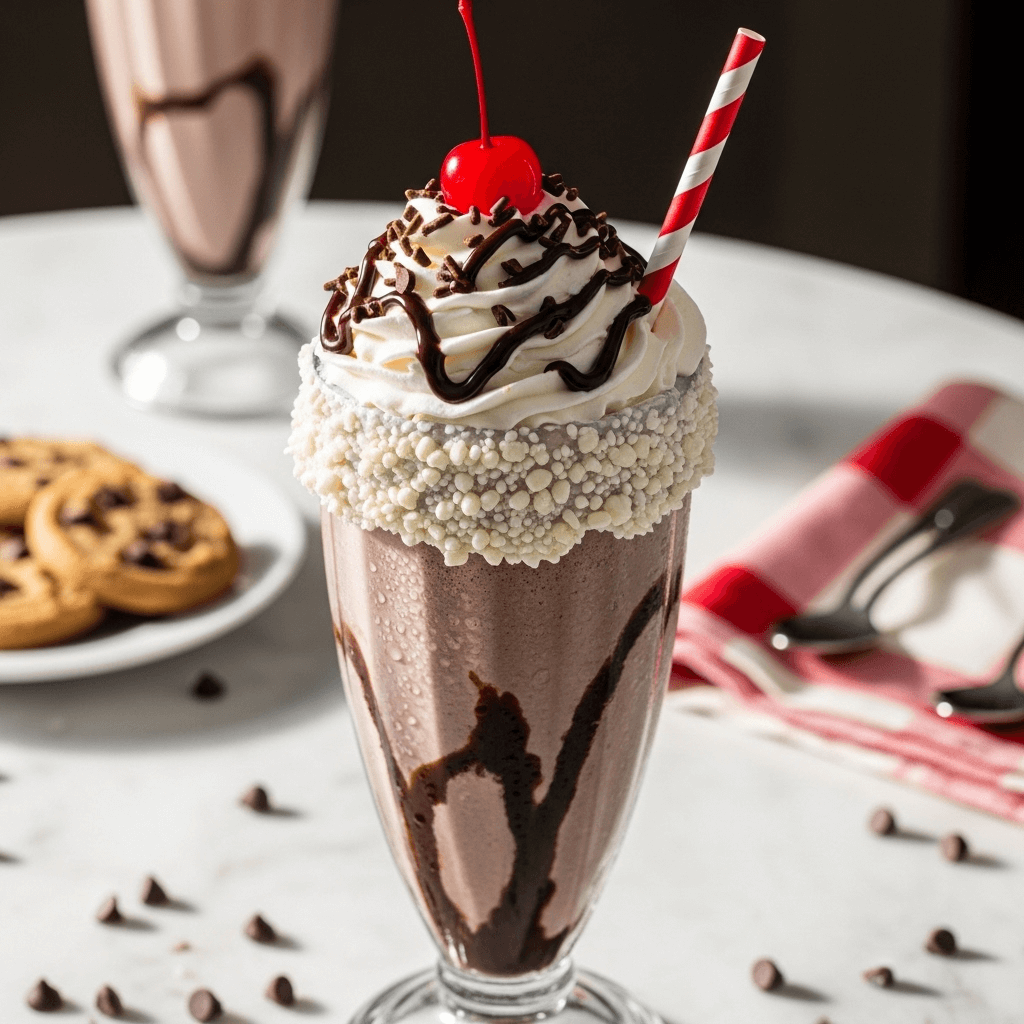
Top generously with whipped cream, drizzle with extra chocolate syrup, and add a maraschino cherry on top. You can also add chocolate shavings, sprinkles, or crushed cookies. Insert a thick straw and a long spoon.
Step 7: Enjoy Immediately
Chocolate milkshakes are best enjoyed right away while they’re thick and frosty! Serve with a straw and a long spoon so you can enjoy every last drop.
Notes
- Thickness Control: The ratio of ice cream to milk determines thickness. Start with less milk – you can always add more!
- Ice Cream Temperature: Slightly softened ice cream blends more easily than rock-hard ice cream straight from the freezer.
- Blender Power: If your blender struggles, pulse several times before running continuously, or add milk in small amounts.
- Sweetness: Adjust chocolate syrup to taste. Some ice creams are sweeter than others.
- Serving Size: This recipe makes 2 large (16 oz) shakes or 3-4 smaller servings.
- Make It Ahead: Milkshakes don’t store well – make and enjoy immediately for best texture!
- Prep Time: 5 minutes
- Cook Time: 0 minutes
- Category: Dessert
- Method: Blending
- Cuisine: American
Nutrition
- Serving Size: 1 large milkshake (16 oz, ½ of recipe)
- Calories: 485
- Sugar: 58g
- Sodium: 165mg
- Fat: 20g
- Saturated Fat: 12g
- Unsaturated Fat: 7g
- Trans Fat: 0g
- Carbohydrates: 68g
- Fiber: 2g
- Protein: 10g
- Cholesterol: 65mg
Tips & Variations
Flavor Variations:
- Chocolate Peanut Butter Shake: Add 2-3 tablespoons creamy peanut butter for irresistible combo
- Mocha Milkshake: Add 1 teaspoon instant espresso powder or 2 tablespoons cold brew concentrate
- Mint Chocolate Shake: Use mint chocolate chip ice cream or add ¼ teaspoon peppermint extract
- Oreo Chocolate Shake: Blend in 3-4 Oreo cookies for cookies and cream version
- Brownie Milkshake: Add a small brownie broken into chunks
- Chocolate Malt: Add 2 tablespoons malted milk powder for classic malt shop flavor
- Nutella Shake: Add 2 tablespoons Nutella for hazelnut chocolate flavor
- Mexican Hot Chocolate Shake: Add ½ teaspoon cinnamon and pinch of cayenne
Thickness Adjustments:
- Extra Thick (Spoon-Worthy): Use only ⅓ cup milk and 4 cups ice cream
- Ultra Smooth: Add an extra ¼ cup milk and blend longer
- Frozen Custard Style: Use frozen custard or premium ice cream
- Soft-Serve Texture: Let it sit 2-3 minutes before serving
Dietary Modifications:
- Dairy-Free: Use dairy-free chocolate ice cream and oat milk or coconut milk
- Lower Sugar: Use no-sugar-added ice cream and sugar-free chocolate syrup
- Protein Shake: Add 1 scoop chocolate protein powder
- Lower Calorie: Use low-fat frozen yogurt instead of ice cream
- Vegan: Use plant-based ice cream and plant milk
Mix-In Ideas:
- Crushed Oreos or chocolate sandwich cookies
- Brownie chunks or cookie dough pieces
- Chocolate chips (mini or regular)
- Caramel sauce swirls
- Crushed peppermint candies
- Banana slices for chocolate-banana shake
- Marshmallow fluff
- Graham cracker pieces
Pro Chef Tips
Tip #1: Soften Ice Cream Slightly
Ice cream straight from the freezer is too hard and makes blending difficult, straining your blender motor. Let it sit at room temperature for 5-10 minutes until it’s slightly soft (but not melted). It should scoop easily but still hold its shape. This creates smoother milkshakes and easier blending.
Tip #2: Start with Less Milk
It’s much easier to thin a too-thick milkshake than to thicken a watery one. Start with just ½ cup milk and add more gradually until you reach your desired consistency. Remember: you can always add liquid, but you can’t take it away!
Tip #3: Layer Ingredients Correctly
Always add liquid (milk) to the blender first, then chocolate syrup, then ice cream on top. This order allows the blender blades to move freely and pulls ingredients down toward the blades efficiently. Adding ice cream first often creates air pockets that prevent proper blending.
Tip #4: Use the Pulse Function
Before running your blender continuously, pulse 5-6 times to break up the ice cream chunks. This prevents the blender from getting stuck or leaving large pieces of unblended ice cream. Then blend continuously for a smooth, even consistency.
Tip #5: Freeze Your Glasses
For that authentic soda fountain experience and to keep your milkshake cold longer, place your serving glasses in the freezer for at least 15-30 minutes before making milkshakes. Cold glasses prevent immediate melting and create beautiful frost on the outside.
Tip #6: Add Vanilla Extract
Even though you’re using chocolate, a small amount of vanilla extract (½ teaspoon) enhances and deepens the chocolate flavor. It’s a secret ingredient that makes milkshakes taste more complex and delicious without making them taste vanilla-y.
Tip #7: Work Quickly
Milkshakes start melting the moment they’re blended. Have your glasses ready, toppings prepared, and serve immediately after blending for the perfect thick consistency. If you wait, you’ll end up with chocolate milk instead of a thick shake!
Common Mistakes to Avoid
Mistake #1: Using Too Much Milk
This is the number one mistake! Too much milk creates a thin, watery milkshake that’s more like chocolate milk than a proper thick shake. Solution: Start with just ½ cup milk for 3-4 cups of ice cream. Add more only if needed, 1-2 tablespoons at a time. A true milkshake should be so thick it’s hard to suck through a straw!
Mistake #2: Using Low-Quality or Low-Fat Ice Cream
“Frozen dairy dessert” products or low-fat ice cream contain more air, less cream, and create thin, icy milkshakes that lack richness. Solution: Invest in premium, full-fat ice cream with high butterfat content. Check the label – real ice cream lists cream and milk as primary ingredients. The difference in texture and flavor is dramatic!
Mistake #3: Over-Blending
Blending too long (more than 30-45 seconds) causes the ice cream to melt, creating a thin, soupy shake instead of a thick, frosty one. The friction from blending generates heat. Solution: Blend just until smooth with no chunks remaining – usually 20-30 seconds maximum. Stop as soon as everything is incorporated.
Mistake #4: Not Softening Ice Cream First
Rock-hard ice cream straight from the freezer is difficult to blend, strains your blender motor, and creates chunks. Solution: Let ice cream sit at room temperature for 5-10 minutes until it’s slightly soft and scoops easily. It should yield when pressed with a spoon but not be melted or soupy.
Mistake #5: Waiting Too Long to Serve
Milkshakes are at their absolute best texture immediately after blending. Waiting even 5-10 minutes causes melting and thinning. Solution: Have everything ready before you blend – glasses, straws, toppings – and serve immediately. If making multiple servings, keep finished milkshakes in the freezer while preparing the rest.
Storage & Meal Prep
Immediate Consumption (Best):
Milkshakes are absolutely best consumed immediately after making them. The thick, frosty texture is at its peak right out of the blender. Within 5-10 minutes, melting begins and the consistency changes significantly.
Short-Term Storage:
If you must save a milkshake for later (though not recommended), pour it into an airtight container or covered glass and place immediately in the freezer. It will become very firm (essentially ice cream again) within 1-2 hours. To serve: let it sit at room temperature for 10-15 minutes to soften slightly, then stir vigorously or re-blend briefly.
Melted Milkshake:
If your milkshake melts before you finish it, you can pour it back into the blender, add ½-1 cup more ice cream, and re-blend to restore thickness. Or simply enjoy it as extra-rich chocolate milk!
Why Milkshakes Don’t Store Well:
The texture of milkshakes relies on millions of tiny air bubbles incorporated during blending. These air bubbles begin collapsing immediately, and temperature changes cause melting. Unlike other frozen desserts, milkshakes are meant to be enjoyed at that perfect moment when they’re perfectly thick and partially melted – a fleeting state that can’t be preserved.
Best Practice:
Make milkshakes fresh each time you want one. With just 5 minutes of prep time, it’s easy to whip up a fresh shake whenever the craving hits!
Make-Ahead & Freezer Notes
Pre-Measured Ingredients:
While you can’t make the actual milkshake ahead, you can pre-measure ingredients for quick preparation:
- Pre-scoop ice cream into individual containers and freeze
- Measure chocolate syrup into small containers
- Pre-measure milk into mason jars in the fridge
- When ready, dump everything into blender and blend!
Ice Cream Prep:
Keep a dedicated pint of ice cream just for milkshakes in your freezer, clearly labeled. This ensures you always have the right amount on hand.
Freezing Leftover Milkshake:
If you absolutely must freeze leftover milkshake:
- Pour into popsicle molds for milkshake pops (actually works great!)
- Or pour into airtight container and freeze solid
- To use: Thaw for 10-15 minutes, re-blend with a splash of milk
Milkshake Popsicles:
This is actually the best way to “save” milkshake! Pour into popsicle molds and freeze for 4-6 hours. You get all the flavor of a milkshake in a fun, frozen treat that stores perfectly!
Bottom Line:
Milkshakes are best made fresh on demand. With only 5 minutes required, it’s worth making them fresh rather than trying to store them.
Serving Suggestions
Classic Pairings:
- Cheeseburgers and fries (classic diner combo!)
- Hot dogs
- Grilled cheese sandwiches
- Pizza night
- BBQ meals
- Chicken tenders and fries
Dessert Serving:
- After dinner treat
- Birthday party dessert
- Movie night snack
- Poolside refreshment
- Game night treat
Accompaniments:
- Fresh cookies (chocolate chip, oatmeal, sugar cookies)
- Brownies or blondies
- Donut or cake slices
- Pretzels (sweet and salty combo!)
- French fries for dipping (trust me!)
Special Occasions:
- Birthday parties (set up a milkshake bar!)
- Summer gatherings
- Kids’ parties
- 1950s themed events
- Valentine’s Day dessert (heart-shaped straws!)
- Father’s Day treat
Milkshake Bar Concept:
Set out vanilla ice cream, chocolate ice cream, and various mix-ins (chocolate syrup, caramel, peanut butter, Oreos, chocolate chips, sprinkles, cherries, whipped cream). Let everyone create their own custom milkshake! This is especially fun for kids’ parties.
FAQs Section
Q: Can I make a milkshake without a blender?
A: While a blender gives the smoothest results, you can make a milkshake using a hand mixer or even vigorous whisking with a whisk. Let ice cream soften significantly, place in a large bowl with milk and chocolate syrup, and beat until smooth. It requires more effort but works! An immersion blender also works if you have one.
Q: Why is my milkshake too thin?
A: You used too much milk or over-blended it. Next time, start with less milk (just ⅓-½ cup for 3-4 cups ice cream) and blend for only 20-30 seconds. To fix a thin shake: add ½-1 cup more ice cream and blend briefly. Or place in freezer for 10-15 minutes to firm up.
Q: Can I use chocolate milk instead of regular milk?
A: Yes! Using chocolate milk creates an extra-chocolatey milkshake. Reduce or omit the chocolate syrup since chocolate milk is already flavored and sweetened. This is a great way to make an intensely chocolate shake.
Q: How do I make a dairy-free chocolate milkshake?
A: Use dairy-free chocolate ice cream (brands like So Delicious, Ben & Jerry’s Non-Dairy, or Häagen-Dazs Non-Dairy) and plant-based milk (oat milk works best for creaminess, but almond or coconut milk work too). Follow the same recipe! The texture will be slightly different but still delicious.
Q: Can I add protein powder to make it healthier?
A: Absolutely! Add 1 scoop of chocolate protein powder when blending. You may need to add 2-4 tablespoons extra milk to maintain the right consistency since protein powder thickens liquids. This turns your milkshake into a protein-packed treat or post-workout recovery drink.
Q: What’s the difference between a milkshake and a malt?
A: A malt (or malted milkshake) is a milkshake with added malted milk powder, which gives it a slightly nutty, toasted grain flavor. To make a chocolate malt, simply add 2 tablespoons of malted milk powder (like Carnation or Ovaltine) to your milkshake when blending.
Q: Why does my blender get stuck when making milkshakes?
A: Your ice cream is too frozen or you’re using too much ice cream relative to liquid. Solutions: Let ice cream soften 5-10 minutes first, start with the liquid in the blender (add milk first, then ice cream), use the pulse function to break up chunks before blending continuously, or add a bit more milk. If your blender has a tamper, use it to push ingredients toward the blades.
Conclusion
And there you have it – everything you need to make the perfect thick chocolate milkshake that rivals any ice cream shop or classic diner! This simple recipe proves that sometimes the best things in life really are the simplest. With just three ingredients and five minutes, you can create a rich, creamy, ultra-chocolatey treat that brings pure joy with every sip.
I’d love to hear about your milkshake creations! Did you try any of the flavor variations? What toppings did you use? Do you have a favorite mix-in? Drop a comment below and share your chocolate milkshake experience. If this recipe becomes your go-to chocolate treat (and I think it will!), please give it a five-star rating and share it with friends and family who appreciate a good old-fashioned chocolate shake.
Don’t forget to pin this recipe to your Pinterest boards so you can find it easily whenever a milkshake craving strikes! Here’s to many more thick, frosty, perfectly chocolatey milkshakes in your future. Happy blending!