
Few dishes evoke comfort, celebration, and pure satisfaction quite like perfectly fried chicken – that golden, crackling exterior giving way to tender, juicy meat that’s seasoned all the way through. This classic fried chicken recipe delivers exactly that: a crispy, crunchy coating that shatters at first bite, revealing incredibly moist and flavorful chicken inside. It’s the kind of fried chicken that makes you close your eyes and savor every single bite, the dish that turns ordinary dinners into memorable occasions.
What makes this Southern fried chicken recipe so special is its foolproof method for achieving restaurant-quality results at home. A buttermilk brine ensures the chicken stays incredibly juicy, while a perfectly seasoned flour coating creates that signature crunch everyone craves. This homemade fried chicken is perfect for Sunday dinners, picnics, potlucks, game day gatherings, or anytime you want to treat your family to something truly special. Serve it hot from the skillet for maximum crispiness, or enjoy it at room temperature for the perfect picnic fare. Either way, this easy fried chicken recipe will quickly become your go-to for creating those crispy, golden pieces that disappear as fast as you can make them.
History / Background
Fried chicken has a complex and fascinating history that reflects the cultural tapestry of the American South. While people have been frying chicken in fat for centuries across many cultures – from Scottish frying traditions to West African cooking techniques – the Southern fried chicken we know and love today emerged from the unique convergence of culinary traditions in the American South.
Scottish immigrants brought their tradition of deep-frying chicken in fat (rather than baking or boiling it), but their version was relatively plain. West African enslaved people contributed essential techniques and seasonings, bringing their expertise in seasoning and frying foods. African cooks introduced flavorful spice blends and the practice of seasoning meat well before cooking, transforming fried chicken from bland to boldly flavorful.
During slavery, enslaved people were often allowed to keep chickens, one of the few means of controlling a small portion of their food supply. They developed superior frying techniques and seasoning methods, creating the template for what would become Southern fried chicken. After emancipation, many African American women became noted for their fried chicken, selling it at train stations, markets, and eventually opening their own restaurants.
Fried chicken became deeply embedded in African American culinary tradition and culture, served at church gatherings, family reunions, and celebrations. It represented community, heritage, and culinary excellence. The dish also became part of broader Southern identity, transcending racial lines to become a beloved regional specialty.
The 20th century saw fried chicken spread across America and eventually worldwide. It remained a dish prepared primarily at home until entrepreneurs like Harland Sanders (KFC) industrialized and franchised it in the 1950s and 60s. Despite commercial success, many people still consider homemade fried chicken the gold standard – made with care, properly seasoned, and fried to crispy perfection.
Today, Southern-style fried chicken represents culinary heritage, comfort, and the art of traditional home cooking. While cooking methods vary (skillet-fried, deep-fried, even air-fried), the essential elements remain: well-seasoned chicken with a crispy coating and juicy interior. This recipe honors that tradition while making it accessible for modern home cooks.
Why You’ll Love This Recipe
This crispy fried chicken recipe is about to become your signature dish – the one everyone requests and remembers. It’s the perfect combination of impressive results and achievable technique, delivering that restaurant-quality fried chicken without requiring professional equipment or years of practice.
Here’s why you’ll fall in love with this homemade fried chicken:
- Incredibly crispy coating – That perfect crunch that everyone craves
- Juicy, tender meat – Buttermilk brine ensures moist chicken every time
- Perfectly seasoned – Flavor in every layer, not just on the surface
- Achievable at home – No deep fryer needed, just a good skillet
- Impressive results – Looks and tastes like it came from a top restaurant
- Great for crowds – Easy to scale up for parties and gatherings
- Versatile serving – Delicious hot or at room temperature
- Budget-friendly – Affordable ingredients create something special
- Southern comfort – Authentic taste that brings people together
- Perfect for any occasion – Sunday dinner, picnics, potlucks, or weeknight treats
- Customizable – Adjust seasonings to your preference
Ingredient Notes
Let’s break down what makes this fried chicken so incredibly crispy, juicy, and flavorful. Each ingredient plays a crucial role in creating that perfect bite.
Chicken Pieces: Use a whole chicken cut into 10 pieces (2 drumsticks, 2 thighs, 2 wings, 2 breasts cut in half) or buy pre-cut pieces. Bone-in, skin-on chicken is essential for the best flavor, moisture, and that classic fried chicken texture. You can use all drumsticks and thighs if you prefer dark meat, or all breasts if you prefer white meat, but a mix provides variety.
Buttermilk: The secret to incredibly tender, flavorful fried chicken. Buttermilk’s acidity tenderizes the meat while adding subtle tangy flavor. The chicken needs to soak in buttermilk for at least 2 hours (preferably overnight) to fully benefit. If you don’t have buttermilk, make your own by adding 1 tablespoon white vinegar or lemon juice to 1 cup regular milk and letting it sit for 5 minutes.
All-Purpose Flour: Creates that crispy coating we all love. All-purpose flour provides the right texture – not too heavy, not too light. Some recipes add cornstarch for extra crispiness, but properly prepared all-purpose flour alone creates excellent results.
Seasonings: A blend of paprika, garlic powder, onion powder, cayenne pepper, black pepper, and salt creates depth and complexity. The seasoning goes in both the buttermilk and the flour, ensuring flavor throughout. Paprika adds color and mild sweetness, while cayenne provides gentle heat (adjust to taste).
Eggs: Mixed with some of the seasoned buttermilk, eggs help the flour coating adhere properly and create an extra-crispy crust. The protein in eggs creates structure and crunch when fried.
Vegetable Oil or Shortening: For frying. Vegetable oil, canola oil, or peanut oil all work excellently for frying, providing neutral flavor and high smoke points. Some traditionalists swear by shortening (like Crisco) or lard for the absolute crispiest coating, though these add more saturated fat. You’ll need enough to come halfway up the chicken pieces – usually 2-3 cups depending on your pan size.
Hot Sauce (Optional): A few dashes in the buttermilk marinade adds flavor complexity without noticeable heat. Frank’s RedHot or Louisiana-style hot sauce work great.
Equipment Needed
Making perfect fried chicken requires just basic kitchen equipment:
- Large cast iron skillet or heavy-bottomed deep skillet (12-inch) – Essential for even heat distribution and maintaining oil temperature
- Large bowl or container – For marinating chicken in buttermilk
- Shallow dish or pie plate – For the seasoned flour mixture
- Tongs – For safely turning chicken while frying
- Wire cooling rack set over baking sheet – For draining fried chicken (maintains crispiness)
- Instant-read or candy thermometer – For monitoring oil temperature (crucial!)
- Paper towels – For patting chicken dry before coating
- Measuring cups and spoons – For accurate seasoning
- Large plate – For holding coated chicken before frying
- Slotted spoon or spider strainer – For removing chicken from oil
Optional but helpful:
- Deep-fry thermometer that clips to the pan
- Splatter screen (reduces mess)
- Disposable gloves (for coating chicken without mess)

Fried Chicken Recipe
- Total Time: 50 minutes
- Yield: 4-6 servings (8-10 pieces) 1x
- Diet: Gluten Free
Description
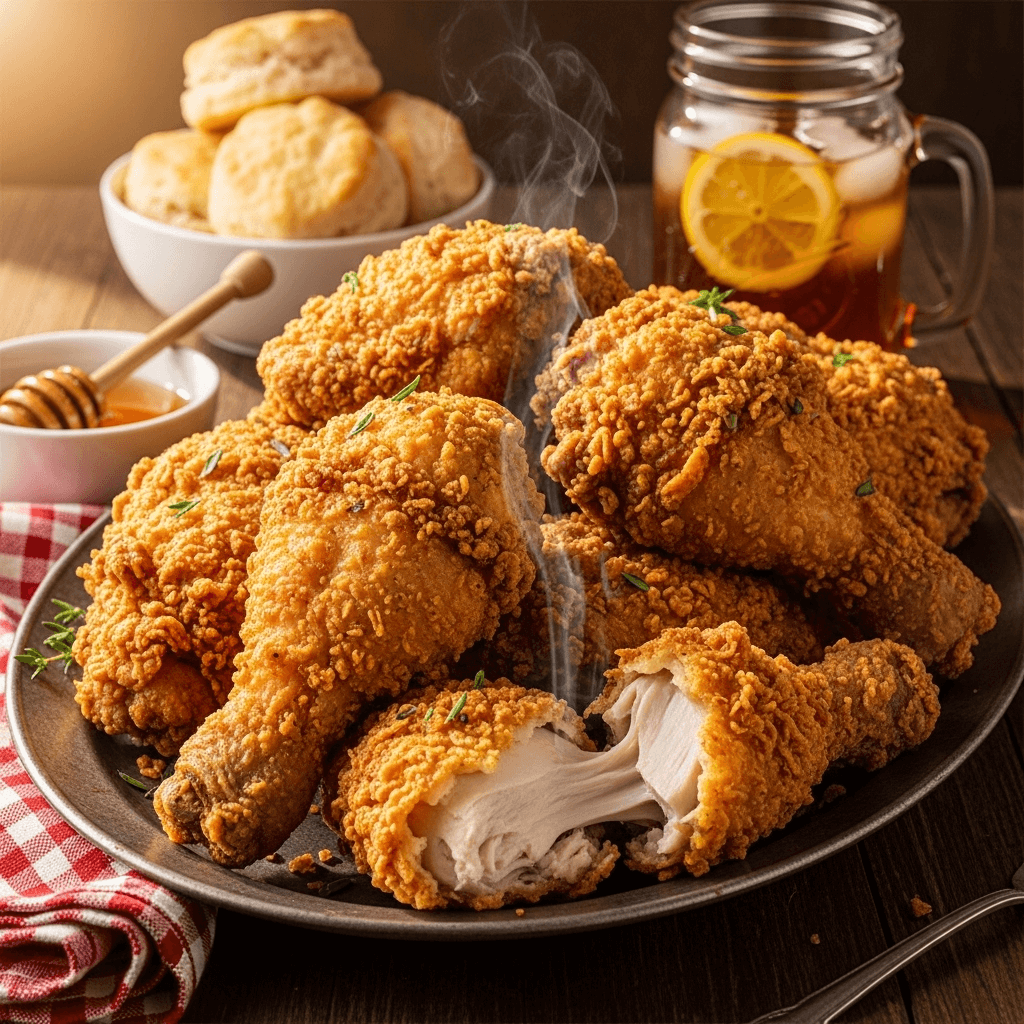
This classic Southern fried chicken features incredibly juicy, tender meat with a perfectly crispy, golden coating that’s seasoned all the way through. Marinated in buttermilk and fried to perfection, it’s the ultimate comfort food that rivals any restaurant!
Ingredients
For the Buttermilk Marinade:
- 3 pounds chicken pieces (whole chicken cut into 10 pieces, or your choice of cuts)
- 2 cups buttermilk
- 2 teaspoons salt
- 1 teaspoon black pepper
- 1 teaspoon paprika
- ½ teaspoon cayenne pepper
- 2 teaspoons hot sauce (optional)
For the Coating:
- 2½ cups all-purpose flour
- 2 tablespoons paprika
- 1 tablespoon garlic powder
- 1 tablespoon onion powder
- 2 teaspoons salt
- 1 teaspoon black pepper
- 1 teaspoon cayenne pepper (adjust for heat preference)
- ½ teaspoon dried thyme
- 2 large eggs
For Frying:
- Vegetable oil, peanut oil, or shortening (enough for 1½ inches depth, about 3 cups)
Instructions
- Marinate the chicken: In a large bowl, whisk together buttermilk, 2 teaspoons salt, 1 teaspoon black pepper, 1 teaspoon paprika, ½ teaspoon cayenne, and hot sauce if using. Add chicken pieces, turning to coat completely. Cover and refrigerate for at least 2 hours, preferably 4-8 hours or overnight for maximum flavor and tenderness.
- Prepare the coating: In a shallow dish, whisk together flour, 2 tablespoons paprika, garlic powder, onion powder, 2 teaspoons salt, 1 teaspoon black pepper, 1 teaspoon cayenne, and dried thyme. Mix thoroughly so seasonings are evenly distributed.
- Set up coating station: Beat the 2 eggs in a bowl and whisk in 3 tablespoons of the seasoned buttermilk from the chicken marinade. This creates your “glue” for extra coating adherence.
- Coat the chicken: Remove one piece of chicken from buttermilk, letting excess drip off but keeping it moist. Dredge in seasoned flour, pressing to coat all sides thoroughly. Dip quickly in the egg-buttermilk mixture, then return to flour for a second coating, pressing firmly. Place on a clean plate or rack. Repeat with all pieces. Let coated chicken rest for 10-15 minutes before frying (this helps the coating adhere).
- Heat the oil: Add oil to your cast iron skillet to a depth of about 1½ inches. Heat over medium-high heat to 350°F (use a thermometer!). This temperature is crucial – too low and chicken absorbs oil and gets soggy; too high and coating burns before meat cooks through.
- Fry the chicken: Carefully add chicken pieces to hot oil without crowding (work in batches if necessary). Larger pieces like breasts should go in first as they take longest. Fry for 12-15 minutes per side for breasts, 10-12 minutes per side for thighs and drumsticks, 8-10 minutes per side for wings. The chicken should be deep golden brown and reach an internal temperature of 165°F.
- Maintain temperature: Monitor oil temperature throughout frying. Adjust heat as needed to maintain 325-350°F. The temp will drop when you add chicken, so expect to increase heat slightly, then reduce once it climbs back up.
- Drain and rest: Transfer fried chicken to a wire rack set over a baking sheet (not paper towels, which make the bottom soggy). Let rest for 5-10 minutes before serving. This allows juices to redistribute and coating to crisp up even more.
- Serve: Enjoy hot for maximum crispiness, or let cool to room temperature for picnic-style serving. Either way, it’s delicious!
Notes
- Marinating time matters: Minimum 2 hours, but overnight is ideal for maximum tenderness and flavor.
- Oil temperature is critical: Use a thermometer! Maintaining 325-350°F ensures crispy coating and fully cooked meat.
- Don’t crowd the pan: Frying too many pieces at once drops oil temperature and results in soggy chicken. Work in batches.
- Double coating creates extra crunch: The dip in egg-buttermilk mixture between flour coatings creates that signature shaggy, crispy crust.
- Let coating rest: The 10-15 minute rest after coating helps the flour adhere better and creates crispier results.
- Dark meat is more forgiving: Thighs and drumsticks stay juicier than breasts if slightly overcooked.
- Use a thermometer for doneness: Chicken should reach 165°F internal temperature.
- Gluten-free option: Use gluten-free flour blend for coating (may be slightly less crispy).
- Prep Time: 20 minutes (plus 2+ hours marinating)
- Cook Time: 30 minutes
- Category: Main Dish
- Method: Frying
- Cuisine: Southern
Nutrition
- Serving Size: 2 pieces (approximately)
- Calories: 525
- Sugar: 3g
- Sodium: 950mg
- Fat: 28g
- Saturated Fat: 7g
- Unsaturated Fat: 19g
- Trans Fat: 0g
- Carbohydrates: 28g
- Fiber: 1g
- Protein: 40g
- Cholesterol: 165mg
Tips & Variations
Spice Level Adjustments:
- Mild: Omit cayenne pepper entirely for family-friendly flavor
- Medium: Use recipe as written (1 teaspoon cayenne total)
- Spicy: Increase cayenne to 2 teaspoons and add hot sauce to marinade
- Extra spicy: Add 1 teaspoon black pepper and red pepper flakes to coating
Flavor Variations:
- Nashville Hot Chicken: Brush fried chicken with cayenne-infused oil
- Buttermilk Ranch: Add ranch seasoning to the flour mixture
- Garlic Parmesan: Add ¼ cup grated Parmesan to flour, double the garlic powder
- Lemon Pepper: Add 2 tablespoons lemon pepper seasoning to flour
- Herb-infused: Add dried sage, rosemary, or Italian seasoning to coating
Cooking Method Variations:
- Oven-fried: Bake coated chicken at 425°F for 35-40 minutes, flipping halfway (less crispy but easier and less messy)
- Air fryer: Cook at 375°F for 25-30 minutes, flipping halfway (uses less oil)
- Deep fryer: Maintain 350°F and fry according to manufacturer’s directions
- Cast iron classic: This recipe’s stovetop method in cast iron is the traditional approach
Different Cuts:
- Use all thighs for the juiciest, most flavorful option
- Use all drumsticks for kids (easy to hold and eat)
- Use boneless, skinless pieces (adjust cooking time to 6-8 minutes per side)
- Use chicken tenders for quick-cooking finger food
Buttermilk Alternatives:
- Regular milk + 1 tablespoon vinegar per cup
- Plain yogurt thinned with milk
- Pickle juice (creates tender, tangy chicken)
- Egg wash only (skip buttermilk marinade, but less tender)
Pro Chef Tips
Tip #1: Temperature Control is Everything
Professional kitchens obsess over oil temperature because it’s the single most important factor in frying. Invest in a good thermometer and check frequently. When oil is too cool (below 325°F), chicken absorbs excess oil and becomes greasy with soggy coating. When too hot (above 375°F), the exterior burns before the interior cooks through. The sweet spot is 325-350°F. Temperature will drop when you add chicken, so be prepared to increase heat slightly, then reduce once it recovers.
Tip #2: The Resting Period Creates Crispier Coating
After coating chicken in seasoned flour, let it rest for 10-15 minutes before frying. This brief rest allows the flour to hydrate from the moisture in the buttermilk-coated chicken, creating a “glue” that adheres better and fries crisper. Professional fried chicken kitchens always include this rest period – it’s a game-changer for coating adhesion and crispiness.
Tip #3: Cast Iron is King
Cast iron skillets are ideal for frying because they retain heat exceptionally well. When you add cold chicken to the oil, cast iron recovers temperature faster than thin aluminum pans, maintaining that crucial 325-350°F range. If you don’t have cast iron, use the heaviest skillet you own – thick aluminum or stainless steel with an aluminum core work second-best.
Tip #4: Pat Chicken Dry Before Coating (But Not Too Dry)
Before coating, remove chicken from buttermilk and let excess drip off, but don’t pat completely dry. You want chicken to be moist enough for flour to adhere, but not so wet that it creates clumps. Think “damp” rather than “dripping wet” or “bone dry.” This moisture level creates the best coating texture.
Tip #5: Don’t Move Chicken Too Soon
When you first add chicken to hot oil, leave it alone! Don’t flip or move it for at least 6-7 minutes. The coating needs time to set and form a crust. If you flip too early, the coating sticks to the pan and comes off the chicken. You’ll know it’s ready to flip when it releases easily from the pan bottom and has a deep golden color.
Tip #6: Use a Wire Rack, Never Paper Towels
Always drain fried foods on a wire rack set over a baking sheet, never directly on paper towels. Paper towels trap steam underneath, making the bottom soggy. A wire rack allows air circulation all around, keeping the entire piece crispy. This is how restaurants maintain that perfect crunch.
Common Mistakes to Avoid
Mistake #1: Skipping the Buttermilk Marinade
Some people try to shortcut by skipping the buttermilk soak, but this results in tough, less flavorful chicken. The buttermilk’s acidity tenderizes the meat and adds flavor throughout, not just on the surface. Marinating for at least 2 hours (preferably overnight) is essential for tender, juicy results. Don’t skip this step!
Mistake #2: Not Monitoring Oil Temperature
Guessing at oil temperature is the fastest way to ruin fried chicken. Without a thermometer, you’re gambling. Too-cool oil creates greasy, soggy chicken that absorbs excess oil. Too-hot oil burns the coating before cooking the meat through. Invest in a simple frying thermometer (they cost under $10) – it’s the difference between mediocre and perfect fried chicken.
Mistake #3: Crowding the Pan
Adding too many pieces at once dramatically drops oil temperature, and chicken pieces touching each other won’t crisp properly. Cook in batches with space between pieces. Yes, this takes longer, but it ensures every piece gets properly crispy. Keep finished pieces warm in a 200°F oven while you fry subsequent batches.
Mistake #4: Flipping Too Often or Too Early
Resist the urge to constantly flip and check your chicken. Flip once, halfway through cooking. Flipping multiple times disrupts crust formation and can cause coating to fall off. Let each side get deep golden brown before flipping – this takes 10-15 minutes depending on piece size.
Mistake #5: Not Letting Chicken Come to Room Temperature
Frying chicken straight from the refrigerator means the outside can overcook before the inside reaches safe temperature. Remove marinated chicken from the fridge 20-30 minutes before frying (while you prepare the coating). Room temperature chicken cooks more evenly with a better texture.
Storage & Meal Prep
Room Temperature Storage:
Fried chicken can sit at room temperature for up to 2 hours according to food safety guidelines. This makes it perfect for picnics, potlucks, and buffets. The coating stays crispier at room temperature than refrigerated, which is why picnic-style fried chicken is so popular.
Refrigerator Storage:
Store leftover fried chicken in an airtight container or loosely wrapped in foil in the refrigerator for up to 4 days. The coating will soften from moisture, but the chicken remains delicious. Many people enjoy cold fried chicken straight from the fridge – it’s a Southern tradition!
Reheating for Crispiness:
To restore crispiness, reheat in a 375°F oven on a wire rack set over a baking sheet for 15-20 minutes until heated through and crispy. Don’t microwave unless you don’t care about crispy coating – microwaving makes it soggy. An air fryer at 350°F for 8-10 minutes also works excellently for recrisping.
Meal Prep Strategy:
Fried chicken is excellent for meal prep! Fry a large batch on Sunday, refrigerate portions, and reheat throughout the week. It’s also great cold in salads or sandwiches. The buttermilk marinade can be prepared and chicken can soak for up to 24 hours before frying.
Make-Ahead & Freezer Notes
Marinating Ahead:
The chicken can marinate in buttermilk for up to 24 hours in the refrigerator. Longer than that and the acid breaks down the meat too much, creating mushy texture. Prepare the marinade and add chicken the night before for next-day frying.
Coating Ahead:
You can coat chicken up to 2 hours before frying and refrigerate uncovered on a rack. This actually improves the coating’s adhesion. Don’t coat more than 2 hours ahead or the flour becomes too saturated.
Freezing Fried Chicken:
Fully cooked fried chicken freezes well for up to 3 months. Let cool completely, wrap individual pieces in plastic wrap, then place in freezer bags. Thaw overnight in refrigerator, then reheat in a 375°F oven for 20-25 minutes until hot and crispy.
Freezing Uncooked Marinated Chicken:
You can freeze chicken in the buttermilk marinade for up to 3 months. Thaw in refrigerator overnight, then coat and fry as usual. This is great for having marinated chicken ready whenever you want to fry.
Best Reheating from Frozen:
Reheat frozen fried chicken (no need to thaw) in a 350°F oven for 30-35 minutes until heated through and crispy. Cover loosely with foil for the first 20 minutes to prevent over-browning, then uncover for the last 10-15 minutes to crisp the coating.
Serving Suggestions
Fried chicken deserves an equally delicious supporting cast. Here’s how to create the perfect Southern-style meal:
Classic Southern Sides:
- Creamy mashed potatoes and gravy
- Mac and cheese (the ultimate comfort food pairing)
- Coleslaw (creamy or vinegar-based)
- Biscuits with butter and honey
- Collard greens or green beans
- Corn on the cob or creamed corn
- Potato salad for picnic-style serving
Lighter Options:
- Mixed green salad with buttermilk ranch dressing
- Grilled or roasted vegetables
- Fresh fruit salad
- Cucumber tomato salad
- Corn and tomato salad
Bread Pairings:
- Buttermilk biscuits (traditional favorite)
- Cornbread or corn muffins
- Dinner rolls
- Texas toast
- Hushpuppies for full Southern experience
Condiments & Sauces:
- Honey for drizzling (sweet and salty perfection)
- Hot sauce for heat lovers
- Buttermilk ranch dressing
- BBQ sauce
- Honey mustard
- Comeback sauce (mayo-based Southern favorite)
Beverage Pairings:
- Sweet iced tea (the Southern classic)
- Lemonade (homemade is best)
- Cola or root beer
- Beer (light lagers work great)
- For adults: bourbon cocktails
Complete Meal Ideas:
- Sunday Dinner: Fried chicken, mashed potatoes, gravy, green beans, biscuits, and fruit cobbler
- Picnic Spread: Cold fried chicken, potato salad, coleslaw, watermelon, and lemonade
- Game Day: Hot fried chicken, mac and cheese, Buffalo wings, and all the dips
- Summer BBQ: Fried chicken, corn on the cob, baked beans, coleslaw, and cornbread
FAQs Section
Q: Can I bake this chicken instead of frying it?
A: Yes! While it won’t be quite as crispy as fried, you can bake coated chicken at 425°F on a wire rack over a baking sheet for 35-45 minutes (flipping halfway), until golden and internal temp reaches 165°F. Spray lightly with cooking spray before baking for better browning.
Q: How do I know when the oil is hot enough without a thermometer?
A: While a thermometer is strongly recommended, you can test by dropping a pinch of flour into the oil. If it sizzles immediately and rises to the surface, the oil is ready. Or use a wooden spoon handle – if bubbles form around it vigorously, you’re at frying temperature. That said, a $10 thermometer is worth the investment!
Q: Why is my fried chicken not crispy?
A: Common causes: oil temperature too low (chicken absorbs oil instead of crisping), coating too wet or thin (needs that double-dredge for crunch), draining on paper towels (traps steam), or not letting coating rest before frying. Follow the recipe carefully, especially the temperature and double-coating steps.
Q: Can I use chicken breasts only?
A: Yes, but breasts are more prone to drying out than dark meat. Use bone-in, skin-on chicken breasts, cut each in half crosswise for more even cooking, and watch temperature carefully. Remove at exactly 165°F internal temp. Consider marinating extra time (up to 24 hours) for maximum moisture.
Q: How do I keep fried chicken warm while cooking batches?
A: Place finished pieces on a wire rack set over a baking sheet in a 200°F oven. This keeps them warm without continuing to cook them or making them soggy. Don’t cover or they’ll steam and lose crispiness.
Q: What’s the white stuff coming out of my chicken while frying?
A: That’s protein (albumin) that coagulates when heated. It’s completely normal and safe. It happens more with chicken that’s been frozen or if you’re frying at slightly too low temperature. It doesn’t affect taste or safety, just appearance.
Q: Can I reuse the frying oil?
A: Yes, you can strain cooled oil through cheesecloth or coffee filters, store in an airtight container, and reuse 2-3 times for frying. However, oil degrades with each use, lowering its smoke point and affecting flavor. Don’t reuse oil that smells off, looks dark, or has been heated past its smoke point.
Conclusion
And there you have it – everything you need to make the most incredible, crispy, juicy fried chicken that rivals (or beats!) any restaurant version! This Southern fried chicken recipe proves that with the right technique and a little patience, you can create something truly special right in your own kitchen. That perfect combination of shatteringly crisp coating and tender, flavorful meat is absolutely achievable, and once you master it, you’ll be the person everyone asks to bring fried chicken to every gathering.
The beauty of this classic fried chicken recipe is how it brings people together. Whether you’re making Sunday dinner for family, preparing for a picnic in the park, or contributing to a potluck, homemade fried chicken always steals the show. It’s comfort food at its finest – nostalgic, satisfying, and made with love.
Ready to make the best fried chicken ever? I’d absolutely love to hear how yours turns out! Drop a comment below and let me know what you think, any variations you tried, or how quickly it disappeared. And if this becomes your new signature dish (and I think it will!), please save this recipe to your Pinterest boards so you can find it easily next time – and help other home cooks discover the joy of perfect homemade fried chicken too! Your pins and shares truly keep this blog going and inspire me to create more delicious recipes for you. Now grab that buttermilk, heat up that oil, and get ready to make some seriously amazing fried chicken! 🍗