

There’s something truly magical about a slice of homemade coconut cake – that perfect combination of fluffy, tender layers, luscious frosting, and the unmistakable tropical flavor of coconut. This easy coconut cake recipe combines moist, delicate cake layers with creamy frosting and toasted coconut flakes to create a showstopping dessert that looks elegant enough for special occasions yet simple enough for weeknight cravings. Whether you’re celebrating a birthday, hosting a dinner party, or simply treating yourself to something special, this best coconut cake recipe delivers every single time.
What makes this homemade coconut cake recipe so special is the perfect balance of flavor and texture – moist, delicious cake that absolutely melts in your mouth paired with cloud-like frosting that tastes purely coconut-delicious. Unlike dry store-bought versions, this coconut cake stays moist for days thanks to the clever technique of brushing the warm cake layers with coconut milk syrup. In about two hours from start to finish, you’ll have a stunning coconut cake that tastes like it came from an upscale bakery but requires only basic baking skills.
History / Background
The coconut cake has a rich and fascinating history that reflects the spice trade, colonialism, and the evolution of American dessert traditions. Coconut has been cultivated in tropical regions for thousands of years, particularly in Southeast Asia and the South Pacific. However, it didn’t become widely available in America until the late 1800s and early 1900s when improved transportation networks brought exotic tropical fruits to mainland markets.
The introduction of commercially processed coconut – shredded and sweetened coconut sold in bags – revolutionized American baking in the early 20th century. Suddenly, home bakers could create coconut-flavored desserts without harvesting and processing fresh coconuts themselves. Coconut cake became particularly popular in the American South and Midwest, appearing frequently at church socials, county fairs, and special celebrations.
The classic Southern coconut cake, still popular today, typically features a white or vanilla cake base with coconut frosting and toasted coconut flake coating. This style became iconic during the mid-20th century and remains a beloved tradition at weddings, church gatherings, and holiday celebrations throughout the South and beyond.
The coconut cake gained national prominence during the 1950s and 1960s as television cooking shows and cookbooks like Betty Crocker popularized home baking. The cake represented sophistication and special-occasion elegance, becoming a staple at important family gatherings and celebrations. Its popularity never waned; today, coconut cake appears on upscale restaurant dessert menus, in specialty bakeries, and in countless home kitchens where it remains a beloved classic.
The beauty of coconut cake lies in its versatility. While the classic Southern version with white layers and coconut frosting remains beloved, modern variations include using yellow cake as a base, adding pineapple for Hawaiian-inspired versions, or incorporating cream cheese frosting for tangy-sweet richness. Coconut cake represents comfort, celebration, and timeless elegance all in one beautiful dessert.
Why You’ll Love This Recipe
This easy coconut cake recipe is the ultimate celebration cake – elegant, impressive, and absolutely delicious. I’ve perfected this recipe through countless attempts to bring you the definitive version that delivers consistent, stunning results every time.
Here’s why this best coconut cake recipe will become your new favorite:
- Moist, tender layers – The secret coconut milk syrup keeps these cake layers impossibly moist for days
- Restaurant-quality presentation – Looks stunning enough for special occasions without requiring professional decorating skills
- Simple technique, impressive results – No complicated frosting techniques or specialized equipment needed
- Flavor that actually tastes like coconut – Uses fresh coconut milk and shredded coconut for authentic, delicious flavor
- Makes enough to feed a crowd – Two 9-inch layers yield 12-16 generous slices
- Budget-friendly – Costs far less than buying from a bakery despite tasting equally impressive
- Make-ahead friendly – Bake layers ahead and assemble when ready, perfect for party planning
- Freezer-friendly – Store finished cake or individual layers frozen for up to three months
- Naturally customizable – Works with different frostings, fillings, and flavor additions
- Family gathering favorite – Kids and adults alike adore this classic, elegant cake
Ingredient Notes
Creating the perfect moist coconut cake requires understanding how each ingredient contributes to the final result and selecting quality options that work together harmoniously.
All-Purpose Flour – Two cups provides structure without creating a dense, heavy cake. Spoon flour into measuring cups and level off rather than scooping directly from the bag, which compacts flour and can add up to 20% extra, resulting in dry cake. For guaranteed accuracy, weigh flour if you have a kitchen scale – two cups typically weighs about 240 grams.
Sugar – Two cups of granulated sugar sweetens the cake and also plays a crucial role in moisture retention. Sugar actually helps retain moisture in baked goods, keeping this coconut cake tender and moist even days after baking. The sugar undergoes caramelization during baking, creating subtle flavor complexity beyond just sweetness.
Baking Powder – One and a half teaspoons of baking powder provides chemical leavening that helps the cake rise and achieve the desired light, fluffy texture. Baking powder loses potency over time; if your cake doesn’t rise properly, check the date – it should be replaced annually for best results. Double-acting baking powder is standard and works perfectly for this recipe.
Salt – A quarter teaspoon enhances all the flavors, making sweetness and coconut flavor taste more pronounced. Salt adds no perceptible salty taste but dramatically improves overall flavor balance.
Whole Eggs – Three large eggs bind ingredients together and add moisture and structure. Room temperature eggs incorporate more smoothly into the batter, creating better texture and more even crumb. Cold eggs can curdle slightly when added to the warm butter-sugar mixture, creating a separated batter that results in inferior texture.
Buttermilk – One cup of buttermilk provides tanginess that balances the sweetness while adding moisture that keeps the cake tender. The acid in buttermilk reacts with baking soda (if included) to create additional lift. If you don’t have buttermilk, make a substitute by adding 1 tablespoon white vinegar to regular milk and letting it sit for 5 minutes.
Coconut Milk – One cup of full-fat coconut milk (the kind in a can, not the drinking coconut milk) contributes rich coconut flavor, moisture, and a slightly tender crumb. This is what makes the difference between ordinary cake and deeply coconut-flavored coconut cake. Shake or stir the coconut milk well before measuring as the cream naturally separates from the liquid.
Shredded Coconut – One and a half cups of unsweetened shredded coconut mixed into the batter provides texture and coconut flavor throughout. Unsweetened coconut is crucial – sweetened varieties can make the cake overly sweet and mask the true coconut flavor. An additional ½ cup is used for toasting and coating the finished cake.
Vanilla Extract – Two teaspoons of pure vanilla extract adds subtle vanilla notes that complement the coconut beautifully. Pure vanilla tastes infinitely better than imitation extract – it’s worth the investment.
Butter – Half a cup (one stick) for the cake, plus additional for the coconut milk syrup, provides richness and helps create tender crumb structure. Room temperature butter creams more easily with sugar, creating better texture.
Coconut Milk for Syrup – Additional canned coconut milk is used to create the moistening syrup that keeps layers tender even days after baking. This technique is what separates good coconut cake from great coconut cake.
Substitutions: Use coconut extract if you can’t find or prefer not to use full-fat coconut milk; use about ¾ cup coconut milk plus ¼ cup water. Replace some all-purpose flour with white whole wheat flour for added nutrition. Use Greek yogurt to replace half the buttermilk for tangier flavor and added protein. For dairy-free, use coconut milk in place of buttermilk and use dairy-free butter.
Equipment Needed
- Two 9-inch round cake pans – Light-colored metal pans conduct heat most evenly; dark pans may result in overbaked edges
- Parchment paper – Prevents sticking and ensures even browning; line the bottom of pans for foolproof removal
- Mixing bowls – One large for wet ingredients, one for dry ingredients
- Electric mixer – Helpful for creaming butter and sugar and mixing batter thoroughly; hand mixing works but requires more effort
- Measuring cups and spoons – Essential for accurate ingredient quantities
- Whisk – For combining dry ingredients smoothly without lumps
- Rubber spatula or wooden spoon – For folding ingredients and scraping bowls
- Toothpick or cake tester – For testing doneness at the thickest part of cake
- Cooling racks – Two racks allow both cake layers to cool simultaneously; prevents soggy cakes that stay in warm pans too long
- Long serrated knife – For leveling cake layers if they dome during baking
- Offset spatula – Helpful for frosting layers, though a regular butter knife works
- Cake turntable – Optional but incredibly helpful for frosting cakes evenly
- Small saucepan – For making the coconut milk syrup
- Pastry brush – For brushing the warm cake layers with coconut milk syrup
Coconut Cake Recipe
- Total Time: 45 minutes (plus cooling and assembly time)
- Yield: One 2-layer, 9-inch cake (12-16 servings) 1x
- Diet: Vegetarian
Description
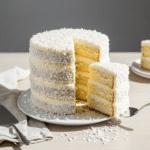
This best coconut cake recipe features moist, fluffy vanilla cake layers infused with coconut milk, topped with creamy coconut frosting, and coated with toasted coconut flakes. The secret coconut milk syrup keeps the layers impossibly tender for days. Perfect for celebrations, special occasions, or whenever you want an elegant, impressive homemade coconut cake.
Ingredients
For the Cake:
- 1 cup full-fat canned coconut milk (shake well before measuring)
- 1 cup buttermilk
- ½ cup (1 stick) butter, softened to room temperature
- 2 cups granulated sugar
- 3 large eggs, at room temperature
- 2 teaspoons pure vanilla extract
- 2 cups all-purpose flour
- 1½ teaspoons baking powder
- ¼ teaspoon salt
- 1½ cups unsweetened shredded coconut
For the Coconut Milk Syrup:
- ½ cup full-fat canned coconut milk
- ¼ cup sugar
- 2 tablespoons butter
For the Coconut Frosting:
- 1 cup (2 sticks) butter, softened to room temperature
- 4 cups powdered sugar, sifted
- 3–4 tablespoons heavy cream or milk
- 1 teaspoon pure vanilla extract
- 1 cup full-fat canned coconut milk, well shaken
For Assembly:
- ½ cup unsweetened shredded coconut, toasted until golden
Instructions
- Prepare pans and preheat oven. Position an oven rack in the center and preheat to 350°F (175°C). This temperature ensures even baking without overbaking the edges. Line the bottoms of two 9-inch round cake pans with parchment paper rounds, then lightly grease the parchment and sides of pans. Parchment paper guarantees easy cake removal – cakes baked without parchment sometimes stick despite greasing.
- Combine wet ingredients. In a measuring cup, whisk together one cup full-fat coconut milk and one cup buttermilk. Set aside. Room temperature mixing usually creates better texture, so if your ingredients are cold, let them sit out for 30 minutes before beginning.
- Cream butter and sugar. In a large mixing bowl using an electric mixer on medium speed, beat softened butter and sugar together for 3-4 minutes until the mixture is light, fluffy, and pale – almost the consistency of frosting. This creaming process incorporates air, which helps the cake rise and creates tender crumb structure. If mixing by hand, this will take 5-7 minutes of vigorous beating with a wooden spoon.
- Add eggs one at a time. Beat in eggs individually, beating well after each addition (about 30-45 seconds per egg). Add vanilla extract and beat to combine. The mixture should be smooth and well combined. Scrape down the sides of the bowl occasionally to ensure all ingredients are incorporated evenly.
- Combine dry ingredients. In a separate bowl, whisk together flour, baking powder, and salt. Whisking combines these ingredients evenly and prevents lumps of baking powder that would create bitter spots in the cake. Some bakers prefer sifting dry ingredients for even lighter texture.
- Alternate adding dry and wet ingredients. Add the dry ingredients to the butter mixture in three additions, alternating with the coconut milk mixture (start and end with dry). So the order is: ⅓ dry, ½ wet, ⅓ dry, ½ wet, ⅓ dry. After each addition, mix on low speed or by hand just until combined. This technique prevents overmixing, which would develop too much gluten and create tough cake.
- Fold in shredded coconut. Using a rubber spatula, gently fold in one and a half cups unsweetened shredded coconut until evenly distributed throughout the batter. The batter should be thick, smooth, and well combined.
- Divide between prepared pans. Divide batter evenly between the two prepared pans (using a scale or eye to estimate). Smooth the tops gently with a spatula. Avoid overfilling pans – batter should reach about halfway up the sides for cakes that rise properly.
- Bake until golden and set. Bake for 28-32 minutes until a toothpick inserted in the center comes out with just a few moist crumbs (not wet batter, but a few crumbs are fine). The tops should be golden brown and the cakes should spring back when lightly pressed. Baking time varies based on oven, so check at 25 minutes and watch carefully.
- Make coconut milk syrup while cakes bake. In a small saucepan, combine ½ cup coconut milk, ¼ cup sugar, and 2 tablespoons butter. Heat over medium heat, stirring occasionally, until the butter is melted and sugar is dissolved. Remove from heat and let cool slightly. This syrup keeps the cake layers incredibly moist.
- Cool cakes briefly, then brush with syrup. Remove cakes from oven and let cool in pans for 5 minutes. This brief cooling allows them to firm up just enough to handle without falling apart. Brush the warm cakes generously with the cooled (but not cold) coconut milk syrup. The warm cake absorbs the syrup beautifully, adding moisture throughout. Let cakes cool in pans for another 10 minutes.
- Remove from pans and cool completely. Run a thin knife around the edges of the pans and turn cakes out onto cooling racks. Cool completely before frosting – this typically takes 1-2 hours, though you can speed this by placing cakes in the refrigerator for 30 minutes.
- Make coconut frosting. In a large mixing bowl, beat softened butter on medium speed for about 2 minutes until pale and fluffy. Gradually add sifted powdered sugar (sifting prevents lumps), beating on low speed to avoid getting powdered sugar everywhere. Add cream, vanilla, and one cup coconut milk, beating until the frosting reaches spreading consistency. If frosting seems too thick, add more cream 1 tablespoon at a time; if too thin, add more powdered sugar.
- Level cake layers if necessary. If cake layers domed during baking, use a long serrated knife to level the tops by slicing off the domes in one smooth motion. This creates level layers that stack evenly and look professional.
- Assemble the cake. Place one cake layer on a cake plate or turntable. Spread about ¾ cup of frosting evenly over the top. Place the second layer on top and frost the top and sides of the entire cake with remaining frosting. An offset spatula makes frosting easier, but a regular butter knife works perfectly fine.
- Toast coconut and coat cake. Spread ½ cup unsweetened shredded coconut on a baking sheet and toast in a 325°F oven for 5-7 minutes, stirring occasionally, until golden brown and fragrant. Gently press or pat the toasted coconut onto the frosted cake, coating the top and sides. This creates a beautiful presentation and adds wonderful coconut flavor and texture.
- Chill before serving. Refrigerate the finished coconut cake for at least 30 minutes before serving. This allows the frosting to set and makes slicing cleaner. Cakes actually taste better slightly chilled.
Notes
- Coconut milk syrup is key – This technique is what makes the difference between ordinary cake and absolutely moist, delicious coconut cake
- Full-fat canned coconut milk is essential – Don’t use light coconut milk or drinking coconut milk; these lack the richness needed for proper texture and flavor
- Room temperature ingredients – Butter, eggs, and milk should be at room temperature for proper mixing and emulsification
- Don’t overmix after adding flour – Overmixing develops gluten, making cake tough instead of tender
- Toast the coconut – Toasted coconut has deeper, more complex flavor than raw shredded coconut
- Level layers for professional appearance – This optional step creates a more elegant-looking cake when assembled
- Refrigerate before serving – Chilled cake is easier to slice and frosting cuts more cleanly
- Prep Time: 15 minutes
- Cook Time: 30 minutes
- Category: Dessert
- Method: Baking
- Cuisine: American
Nutrition
- Serving Size: 1 slice (1/12 of cake)
- Calories: 485
- Sugar: 62g
- Sodium: 185mg
- Fat: 24g
- Saturated Fat: 18g
- Unsaturated Fat: 4g
- Trans Fat: 0.5g
- Carbohydrates: 62g
- Fiber: 1g
- Protein: 3g
- Cholesterol: 85mg
Tips & Variations
Flavor Variations:
- Pineapple Coconut Cake: Add ½ cup well-drained crushed pineapple to the batter for tropical Hawaiian-inspired flavor
- Cream Cheese Frosting Version: Use cream cheese frosting instead of buttercream for tangy-sweet richness that pairs beautifully with coconut
- Coconut Almond Cake: Add ½ teaspoon almond extract to the batter and use ½ cup chopped toasted almonds in addition to or instead of some shredded coconut
- Coconut Lime Cake: Add 2 tablespoons fresh lime juice and 1 tablespoon lime zest to the batter for bright, tropical flavor
- Caramelized Coconut Cake: Toast the shredded coconut in the batter before adding for deeper, caramelized coconut flavor
- Chocolate Coconut Cake: Use chocolate layers instead of vanilla for a decadent coconut-chocolate combination
- Coconut Cake with Coconut Custard Filling: Add layers of coconut pudding or custard between cake layers for extra richness
Frosting Variations:
- Cream Cheese Coconut Frosting: Blend 8 oz cream cheese with the butter for tangy frosting that cuts through richness
- Whipped Coconut Frosting: Fold whipped heavy cream into cooled coconut frosting for lighter texture
- Coconut Ermine Frosting: Use cooked flour frosting (ermine) combined with coconut for stable frosting that’s less sweet than buttercream
Make-Ahead Strategies:
- Component baking: Bake cake layers ahead and freeze individually, then thaw, brush with syrup, and assemble when ready
- Partial assembly: Frost layers ahead and refrigerate up to 24 hours before applying coconut coating
- Full assembly ahead: Complete the entire cake up to 2 days ahead; refrigerate until serving
Texture Variations:
- Extra moist: Use additional coconut milk in the batter, up to 1¼ cups total
- Lighter version: Replace some butter with oil for a slightly lighter crumb
- Denser cake: Reduce baking powder to 1 teaspoon for thicker, denser cake if preferred
Pro Chef Tips
Measure flour correctly – The most common baking mistake is adding too much flour. Spoon flour into measuring cups and level off the top rather than scooping directly from the bag, which compacts flour and can add 20% extra flour, resulting in dry, dense cake. For absolute precision, weigh flour on a kitchen scale.
Use room temperature ingredients – Room temperature butter, eggs, and milk incorporate more smoothly into the batter, creating better texture and emulsification. Cold ingredients may cause the batter to break or separate slightly, resulting in coarser crumb. Remove ingredients from the refrigerator 30-60 minutes before baking.
Don’t skip the coconut milk syrup – This technique is what separates good coconut cake from great coconut cake. The warm syrup is absorbed by the warm cake layers, keeping them incredibly moist for days. Many home bakers skip this step and wonder why their cake seems dry after a day – the syrup makes all the difference.
Mix using proper technique – Mix wet and dry ingredients separately, then alternate adding them to prevent overmixing. Overmixing develops gluten, creating tough, dense cake instead of tender, fluffy cake. Stop mixing as soon as ingredients are just combined.
Use full-fat coconut milk – Light coconut milk doesn’t provide the richness and flavor that makes this cake special. Full-fat canned coconut milk has about 13-14% coconut solids and should never be skipped or substituted with lower-fat versions.
Toast the coconut coating – Raw shredded coconut tastes bland; toasting brings out deeper, more complex coconut flavor and creates a more attractive golden appearance. Toast just until golden – overtoasting creates bitter flavors.
Chill cakes before frosting – Slightly chilled cakes are less crumbly and easier to frost. The frosting adheres better and creates a neater appearance when applied to cool cake.
Use an offset spatula – This professional tool makes frosting dramatically easier, though a regular butter knife works. The offset angle helps you apply frosting smoothly without dragging crumbs.
Temperature in the pan – Let cake cool briefly in the pan (5-10 minutes) before removing. If you remove cakes too early when still very hot, they may break; if you wait too long, they stick to the pan and become difficult to remove.
Common Mistakes to Avoid
Using sweetened shredded coconut – Sweetened coconut makes the cake overly sweet and masks true coconut flavor. Always use unsweetened shredded coconut for the best-tasting coconut cake. Unsweetened is typically found in natural foods sections or specialty stores.
Skipping the coconut milk syrup – Without it, the cake will seem dry after a day or two. This crucial step keeps layers moist and tender for days. Don’t skip it – it’s quick to prepare and makes an enormous difference.
Not using full-fat coconut milk – Light coconut milk lacks the richness and flavor needed for authentic coconut cake. The fat content is what creates flavor and the right texture. Don’t substitute or reduce this ingredient.
Overmixing the batter – Once flour is added, mix only until combined. Overmixing develops gluten, creating tough, dense cake instead of tender, fluffy cake. Stop mixing as soon as you don’t see streaks of flour remaining.
Adding cold ingredients – Cold eggs, butter, and milk don’t incorporate smoothly, potentially causing batter to break or separate. This results in coarser crumb structure and inferior texture. Allow ingredients to reach room temperature before beginning.
Overbaking – Cake continues to cook in the pan after removal from the oven from residual heat. Remove cake when a toothpick comes out with just a few moist crumbs – not completely dry. Overbaked cake is dense and dry, no matter how much syrup you use.
Not cooling completely before frosting – Warm cake melts frosting, creating a messy appearance and poor texture. Cool cakes completely (or even refrigerate for 30 minutes) before frosting for professional-looking results.
Storage & Meal Prep
Storing Unfrosted Cake: Unfrosted cake layers stay fresh at room temperature in an airtight container for up to 3 days. Wrap each layer individually in plastic wrap for best results. The coconut milk syrup keeps the cakes moist throughout storage.
Storing Frosted Cake: Keep a frosted coconut cake in the refrigerator in an airtight container for up to 5 days. The cold helps preserve the frosting’s structure and keeps the cake tasting fresh. Serve at room temperature for best flavor – remove from the refrigerator about 30 minutes before serving.
Reheating: No reheating is necessary. Serve cold directly from the refrigerator, or allow to reach room temperature. Cold coconut cake is actually preferred by many as the frosting sets beautifully and slices cleanly.
Slicing: Use a sharp, thin-bladed knife dipped in hot water and wiped clean between slices for clean cuts. This prevents frosting from dragging and creating messy slices. If the cake has been refrigerated, the cold frosting cuts more cleanly than room temperature frosting.
Shelf Life: Properly stored in the refrigerator, frosted coconut cake maintains best quality for 4-5 days. The cake is still safe to eat for up to 7 days if properly stored, though flavors begin to fade after day 5.
Unfrosted Layer Storage: If you’ve baked cake layers but aren’t ready to frost, wrap each layer tightly in plastic wrap and refrigerate for up to 2 days, or freeze for up to 1 month.
Make-Ahead Strategy: Bake layers early in the day, brush with syrup while warm, wrap tightly in plastic wrap, and refrigerate. Make frosting the same day or next day. Assemble 1-2 days before serving for best flavor development.
Make-Ahead & Freezer Notes
Can You Make Coconut Cake Ahead? Absolutely! This recipe is excellent for advance preparation. Bake layers up to 1 day ahead, brush with syrup, wrap tightly, and refrigerate. Make frosting separately and refrigerate for up to 2 days. Assemble 1-2 days before serving.
Freezing Unfrosted Layers: Cool cake layers completely, brush with syrup, wrap individually in plastic wrap, then in aluminum foil, and freeze for up to 3 months. Thaw in the refrigerator overnight before frosting and assembling.
Freezing Frosted Cake: You can freeze a completely frosted, decorated cake for up to 2 months. Freeze uncovered for about 4 hours until frosting is solid, then wrap carefully in plastic wrap and aluminum foil. Thaw overnight in the refrigerator before serving.
Best Reheating Method: No reheating necessary! Serve coconut cake cold straight from the refrigerator or at room temperature. If frozen, thaw overnight in the refrigerator before serving. The cake is delicious at any temperature.
Component Freezing: Freeze frosting separately in an airtight container for up to 1 month. Thaw in the refrigerator and re-whip briefly to restore texture before using.
Make-Ahead Timeline for Events:
- One month ahead: Bake and freeze unfrosted layers
- Two days before: Thaw layers, brush with syrup, make frosting
- One day before: Assemble cake, apply coconut coating, refrigerate
- Day of: Remove from refrigerator 30 minutes before serving
Baking from Frozen: If you want to bake from partially thawed dough, you can – just add 2-3 minutes to baking time. It’s easier to completely thaw layers first, then assemble.
Serving Suggestions
Perfect homemade coconut cake deserves equally delicious accompaniments and serving occasions that complement its elegant, tropical flavor.
Beverage Pairings:
- Hot coffee or espresso for afternoon dessert
- Cold milk for classic cake and milk combination
- Hot tea – chamomile or herbal varieties complement coconut beautifully
- Iced tea with lemon or peach
- Sparkling water or champagne for celebrations
- Fresh coconut water for tropical pairing
- Hot chocolate with a light dusting of coconut
- After-dinner coffee or espresso
Occasion Pairings:
- Birthday celebrations – coconut is a classic birthday cake choice
- Wedding receptions and showers – elegant and sophisticated
- Sunday family dinners – special enough for celebration, simple enough for weekends
- Holiday gatherings – Thanksgiving, Christmas, or Easter dinners
- Church socials or potluck events
- Anniversary celebrations – timeless classic choice
- End-of-season garden parties or outdoor gatherings
- Valentine’s Day or romantic dinners
Serving Presentations:
- Simple slices on dessert plates with fresh fruit
- Plated with toasted coconut flakes on top
- Small cake samples at brunch or afternoon tea
- Whole cake on a cake stand as the centerpiece
- Individual layers stacked for dramatic presentation
- Alongside fresh berries for color contrast
- With a dollop of whipped cream on the side
Flavor Complements:
- Fresh pineapple chunks for tropical combination
- Berry compote or fresh berries for tartness
- Whipped cream sweetened with vanilla and coconut
- Toasted coconut ice cream for decadent pairing
- Candied coconut flakes as edible garnish
- Caramelized pineapple upside-down style
- Passion fruit coulis drizzled around the plate
Seasonal Variations:
- Spring: Pair with fresh berries and mint
- Summer: Serve with pineapple, tropical fruit, and light beverages
- Fall: Dust with cinnamon and serve with apple cider
- Winter: Serve slightly warmed with hot beverages
FAQs Section
Can I make this coconut cake without eggs? You can make an egg-free version using egg replacers like flax eggs (1 tablespoon ground flax mixed with 3 tablespoons water per egg) or commercial egg replacer following package directions. The texture will be slightly different – somewhat less tender and slightly denser – but still delicious. Applesauce (use ½ cup applesauce per egg) also works, though it adds moisture that requires slight flour adjustment.
What if my cake layers dome too much during baking? Cake doming is common and easily fixed. Once completely cooled, use a long serrated knife to level the domed tops by slicing them off in one smooth motion. Many professional bakers do this routinely. You can save the cake scraps for crumbs to use in other recipes, or enjoy as a baker’s treat.
Why is my coconut cake dry despite using the syrup? Possible causes include using light coconut milk instead of full-fat (make sure it’s the canned variety, not drinking coconut milk), overbaking (check oven temperature with a thermometer), or not applying the syrup while cakes are still warm enough to absorb it. Ensure syrup is applied to warm cakes, not cooled ones.
Can I use unsweetened coconut milk from a carton instead of canned? The drinking variety of coconut milk (usually found in the beverage aisle) has very different consistency and fat content than canned coconut milk used for cooking. Don’t substitute them – use full-fat canned coconut milk specifically. The canned variety has significantly more coconut solids, creating the proper texture and flavor.
How far in advance can I assemble the complete cake? A fully assembled, frosted coconut cake can be refrigerated for up to 2 days before serving. Beyond that, frosting can begin to break down and absorb moisture from the cake. The flavors actually improve slightly as they meld overnight, so 1-2 days ahead is ideal.
What’s the best knife for slicing coconut cake? Use a long, thin-bladed serrated knife (like a bread knife) dipped in hot water and wiped clean between cuts. The heat helps the knife glide through frosting without dragging. If the cake has been refrigerated, the cold helps frosting cut more cleanly than room temperature cake.
Conclusion
And there you have it — the best coconut cake recipe that’s light, fluffy, and absolutely gorgeous. 🎂✨ This cake is the perfect blend of moist cake layers, velvety frosting, and the tropical sweetness of coconut in every bite.
Whether it’s for a birthday party, Easter brunch, baby shower, or just because, this cake always turns heads. What’s even better? It’s easier to make than it looks, and the result is a bakery-quality cake right from your own kitchen.
👉 Don’t forget to pin this recipe on Pinterest so you can bake it anytime. Share a slice with loved ones — or keep it all for yourself (we won’t tell 😉). 🥥