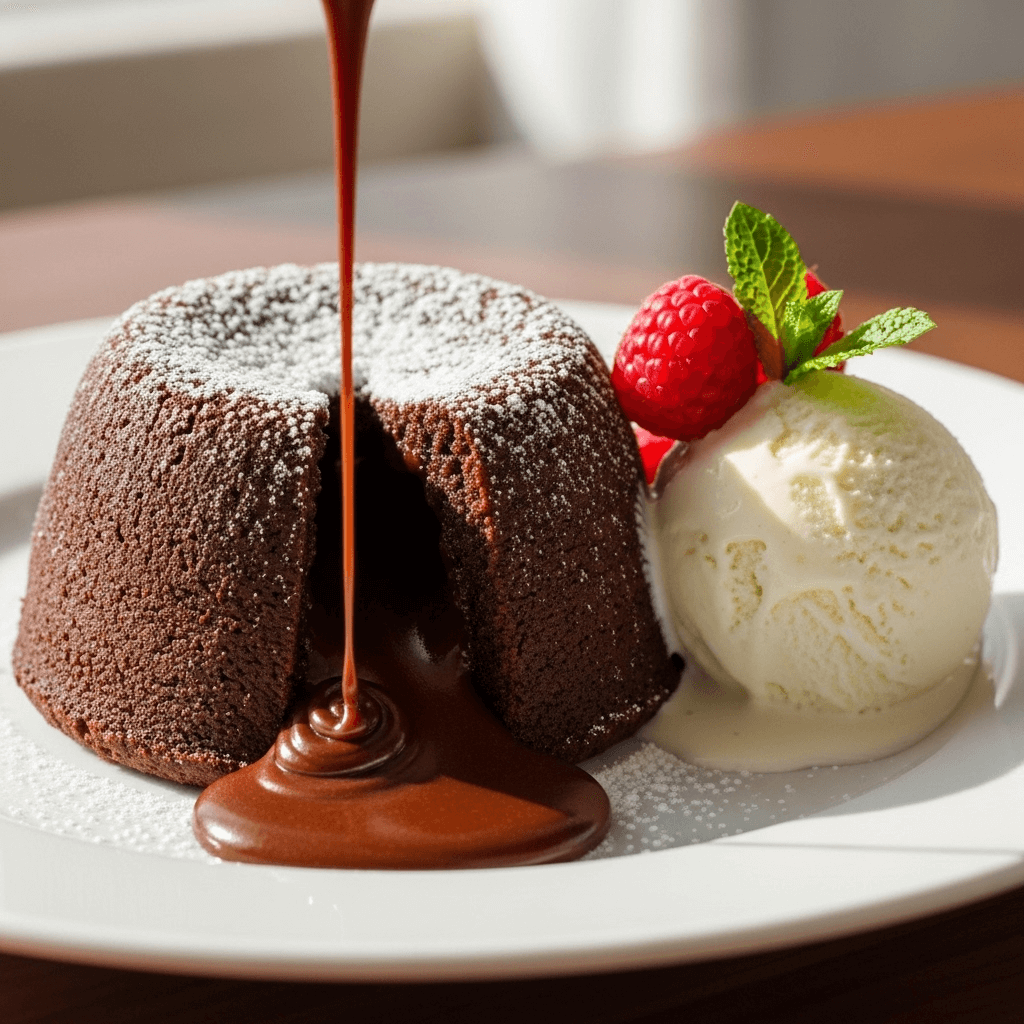

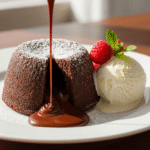
There’s something utterly magical about cutting into a chocolate lava cake and watching that warm, molten chocolate center ooze out onto your plate—the crispy exterior, the tender cake layer, and that irresistible gooey chocolate lava flowing like liquid silk. These easy molten chocolate lava cakes bring restaurant-quality elegance and decadence right to your home kitchen, and they’re surprisingly simple to make with just a few basic ingredients!
What makes these individual chocolate lava cakes truly special is their incredible wow-factor and versatility. They’re perfect for romantic date nights and Valentine’s Day when you want to impress, elegant enough for dinner parties and special celebrations, ideal for holiday desserts like Christmas and New Year’s Eve, wonderful for birthdays and anniversaries, and they’re the ultimate impressive dessert that looks like you spent hours but takes just 30 minutes. These decadent chocolate cakes work for any occasion—from intimate dinners for two to impressive entertaining when you want to show off your baking skills.
The beauty of this molten lava cake recipe lies in its dramatic presentation and rich chocolate flavor. The outside bakes to a delicate cake texture while the inside remains gloriously molten and flowing. Serve them warm with a dusting of powdered sugar, a scoop of vanilla ice cream, or fresh berries, and watch your guests’ faces light up with delight. Once you master this easy chocolate lava cake recipe, you’ll have an impressive dessert in your repertoire that never fails to impress!
History / Background
The chocolate lava cake, also known as molten chocolate cake or “mi-cuit au chocolat” (half-cooked chocolate) in French, has a fascinating and somewhat disputed origin story. While several chefs claim to have invented this iconic dessert, most food historians credit French chef Michel Bras with creating the original version in 1981.
Michel Bras, working at his family’s restaurant in Laguiole, France, was inspired by a childhood memory of coming in from the cold and being served a piece of chocolate cake with hot chocolate. He spent two years perfecting a dessert that would capture that sensation—a warm chocolate exterior with a molten chocolate center. His “coulant au chocolat” featured a frozen chocolate ganache center that would melt during baking, creating that signature flowing center.
However, another story credits American chef Jean-Georges Vongerichten with popularizing the dessert in the United States. According to Vongerichten, he accidentally discovered the molten center in 1987 at his restaurant in New York City when he removed chocolate cakes from the oven too early—they weren’t fully set in the center. Rather than seeing this as a mistake, he recognized it as a happy accident that created an incredibly luxurious texture. He added the dessert to his menu at Restaurant Jean Georges, where it became a sensation.
The chocolate lava cake exploded in popularity during the 1990s and early 2000s, becoming a signature dessert at upscale restaurants and chain establishments like Chili’s, which introduced it to mainstream America with their “Molten Chocolate Cake” in 1998. The dessert became so ubiquitous that it won the title of “sexiest dessert” and appeared on countless restaurant menus across the country.
Part of the lava cake’s appeal lies in its dramatic presentation—the act of cutting into the cake and watching the chocolate flow out creates an element of theater and indulgence. The French term “mi-cuit” (half-cooked) perfectly describes the technique: the edges are fully cooked while the center remains deliberately underbaked, creating that molten texture.
The dessert represents a shift in fine dining toward more interactive, experiential dishes. Unlike a static plated dessert, the lava cake requires the diner to “activate” it by cutting in, releasing the flowing center. This element of surprise and indulgence made it perfect for special occasions and romantic dinners.
Today, chocolate lava cake remains a popular restaurant dessert and has become accessible to home cooks with countless recipe variations available. While professional versions often use frozen ganache centers or sous-vide techniques, home recipes typically rely on precise timing—pulling the cakes from the oven at exactly the right moment to achieve that perfect molten center.
Why You’ll Love This Recipe
These homemade chocolate lava cakes will quickly become your go-to impressive dessert for any special occasion. Here’s why this easy molten chocolate cake recipe is absolutely irresistible:
These rich chocolate lava cakes deliver pure decadence with an incredibly tender chocolate cake exterior and that signature warm, flowing chocolate center that oozes out when you cut in. They taste like the ultimate chocolate indulgence—intensely chocolatey, perfectly sweet, and utterly luxurious. The combination of textures from the slightly crispy edges, tender cake, and molten center creates an unforgettable eating experience.
- Restaurant-Quality at Home: Tastes like a $15 dessert from an upscale restaurant but costs just a few dollars to make.
- Surprisingly Easy: Despite their impressive appearance, these cakes use simple ingredients and straightforward techniques anyone can master.
- Ready in 30 Minutes: From start to finish in just half an hour—faster than ordering dessert delivery!
- Perfect for Date Night: The ultimate romantic dessert that impresses without requiring hours in the kitchen.
- Individual Servings: Each person gets their own cake, making portion control easy and presentation elegant.
- Incredible Wow-Factor: The molten center flowing out creates a dramatic “wow” moment every single time.
- Make-Ahead Friendly: Prepare the batter ahead and refrigerate, then bake right before serving for stress-free entertaining.
- Customizable: Easily adapted with different flavors, fillings, or toppings based on your preferences.
- Rich Chocolate Flavor: Made with quality chocolate, these cakes deliver intense, pure chocolate taste that satisfies any chocolate craving.
- Elegant Presentation: Looks sophisticated and bakery-worthy with minimal effort—perfect for impressing guests.
- Small Batch: Makes 4 individual cakes, perfect for intimate dinners without excess leftovers.
- No Special Skills Required: If you can melt chocolate and whisk ingredients, you can make these perfectly!
Ingredient Notes
Let’s explore what makes these chocolate lava cakes so decadent and how each ingredient contributes:
Semi-Sweet or Dark Chocolate: The star ingredient! Use quality chocolate that you enjoy eating by itself—the flavor really shines through. Semi-sweet chocolate (55-60% cacao) works beautifully for balanced sweetness, while dark chocolate (60-70% cacao) creates a more intense, sophisticated flavor. Avoid chocolate chips—they contain stabilizers that prevent proper melting. Use a chocolate bar and chop it.
Unsalted Butter: Provides richness, moisture, and helps create that tender texture. Use real butter, not margarine. The butter also helps create the flowing center by remaining liquid when warm.
Eggs: Whole eggs provide structure and richness, while the extra egg yolks create that luxurious, custardy texture in the molten center. Use large eggs at room temperature for best incorporation.
Granulated Sugar: Sweetens the cakes and helps create structure. The sugar also contributes to the slightly crispy exterior.
All-Purpose Flour: Just a small amount provides minimal structure—too much flour would make the cakes cakey instead of molten. Measure carefully using the spoon-and-level method.
Salt: A pinch enhances the chocolate flavor and balances sweetness. Never skip salt in chocolate desserts!
Vanilla Extract: Adds depth and rounds out the chocolate flavor. Use pure vanilla extract for the best taste.
Cocoa Powder (for dusting ramekins): Prevents sticking and adds chocolate flavor. Using cocoa instead of flour to dust the ramekins enhances the chocolate experience.
Powdered Sugar (for dusting): Optional but beautiful garnish that adds a professional bakery appearance.
Substitutions: For gluten-free lava cakes, replace flour with an equal amount of almond flour or gluten-free 1:1 baking flour. For dairy-free, use coconut oil or vegan butter instead of butter, though the texture will be slightly different. You can also add a tablespoon of espresso powder to intensify the chocolate flavor without adding coffee taste. For extra richness, use all dark chocolate instead of semi-sweet.
Equipment Needed
You’ll need just a few basic baking tools to make these impressive lava cakes:
- Four 6-Ounce Ramekins: Individual ceramic ramekins are essential for proper baking and elegant presentation. The 6-ounce size is standard—too large and the cakes won’t have molten centers, too small and they’ll overflow.
- Baking Sheet: For placing ramekins on during baking—makes them easy to transport in and out of the oven safely.
- Medium Microwave-Safe Bowl: For melting chocolate and butter together. You can also use a double boiler on the stovetop.
- Large Mixing Bowl: For whisking together eggs, sugar, and other ingredients.
- Whisk: For mixing ingredients smoothly—a balloon whisk works best.
- Rubber Spatula: For folding ingredients together gently and scraping down bowl sides.
- Measuring Cups and Spoons: Accurate measurements are crucial for the right texture and molten center.
- Pastry Brush: For brushing butter inside ramekins to ensure easy release.
- Fine-Mesh Sieve or Small Strainer: For dusting cocoa powder into ramekins and powdered sugar over finished cakes.
- Kitchen Timer: Precise timing is critical for achieving the perfect molten center—even 1-2 minutes makes a difference!
- Oven Mitts: For safely handling hot ramekins.
- Cooling Rack (optional): For cooling ramekins briefly before unmolding, if desired.
Easy Chocolate Lava Cake (Molten Chocolate Cake Recipe!)
- Total Time: 27 minutes
- Yield: 4 individual cakes 1x
- Diet: Vegetarian
Description
These easy chocolate lava cakes are pure decadence! Individual molten chocolate cakes with crispy edges, tender cake, and a warm, gooey chocolate center that flows out when you cut in. Restaurant-quality elegance made at home in just 30 minutes—perfect for special occasions!
Ingredients
For the Cakes:
- 6 ounces (170g) semi-sweet or dark chocolate (55-70% cacao), chopped
- ½ cup (115g) unsalted butter, plus more for greasing ramekins
- 2 large eggs, at room temperature
- 2 large egg yolks, at room temperature
- ¼ cup (50g) granulated sugar
- 2 tablespoons (15g) all-purpose flour
- Pinch of salt
- ½ teaspoon vanilla extract
- 1 tablespoon cocoa powder, for dusting ramekins
For Serving:
- Powdered sugar, for dusting
- Vanilla ice cream (optional but highly recommended)
- Fresh berries (raspberries or strawberries) (optional)
- Whipped cream (optional)
Instructions
- Preheat Oven: Preheat your oven to 425°F (220°C). This high temperature is crucial for achieving the perfect texture—crispy edges with a molten center. Place a baking sheet in the oven while it preheats (this helps the bottoms cook evenly).
- Prepare Ramekins: Generously butter the insides of four 6-ounce ramekins, making sure to coat the bottom and all the way up the sides—don’t miss any spots or the cakes will stick! Dust the buttered ramekins with cocoa powder, tapping out any excess. This prevents sticking and adds extra chocolate flavor. Place prepared ramekins on a baking sheet and set aside.
- Melt Chocolate and Butter: In a medium microwave-safe bowl, combine the chopped chocolate and ½ cup butter. Microwave in 30-second intervals, stirring between each, until completely melted and smooth (usually 1-1½ minutes total). Alternatively, melt in a double boiler over simmering water. Stir until smooth and glossy. Set aside to cool slightly while you prepare the egg mixture—you don’t want it so hot that it cooks the eggs.
- Whisk Eggs and Sugar: In a large mixing bowl, whisk together the whole eggs, egg yolks, and granulated sugar vigorously for about 2-3 minutes until the mixture becomes pale yellow, slightly thick, and falls in ribbons from the whisk. This incorporates air and helps create the right texture. The mixture should nearly double in volume.
- Combine Mixtures: Pour the slightly cooled melted chocolate mixture into the egg mixture. Whisk gently until fully combined and smooth. Add the vanilla extract and salt, whisking to incorporate.
- Add Flour: Sift or sprinkle the flour over the chocolate mixture. Using a rubber spatula, gently fold the flour in with just a few strokes until no white flour streaks remain—do NOT overmix! Overmixing develops gluten and creates cakey texture instead of molten centers. The batter should be smooth, glossy, and pourable.
- Fill Ramekins: Divide the batter evenly among the four prepared ramekins, filling each about ¾ full (roughly ½ cup batter per ramekin). The batter should come almost to the top. Smooth the tops gently with the back of a spoon if needed.
- Bake: Place the baking sheet with ramekins in the preheated 425°F oven. Bake for exactly 12-14 minutes. The exact time depends on your oven and ramekin size. The edges should look set and slightly pulling away from the sides, the tops should look set with a slight jiggle in the very center, and a thin crust will have formed on top. The centers should still look slightly wet and soft. DO NOT OVERBAKE—better to slightly underbake than overbake!
- Cool Briefly: Remove from oven and let the cakes rest in the ramekins for exactly 1 minute. This brief rest helps them set slightly and makes unmolding easier while keeping the centers molten.
- Unmold and Serve: Run a thin knife carefully around the edge of each ramekin to loosen. Place a dessert plate upside down over each ramekin. Using oven mitts (they’re still hot!), carefully flip the ramekin and plate together. Gently lift off the ramekin—the cake should release onto the plate. If it sticks, give it a gentle shake.
- Garnish and Serve Immediately: Dust with powdered sugar using a fine-mesh sieve. Top with a scoop of vanilla ice cream, fresh berries, or whipped cream if desired. Serve immediately while the centers are still warm and molten—they’re best within 5 minutes of baking!
Notes
- Timing is Everything: The bake time is crucial! At 12 minutes, the centers will be very molten. At 14 minutes, they’ll still flow but be slightly more set. Test your oven and adjust accordingly.
- Don’t Skip Preheating: The high oven temperature is essential for creating the contrast between set edges and molten center.
- Room Temperature Eggs: Cold eggs can seize the chocolate. Let eggs sit at room temperature for 30 minutes before starting.
- Serve Immediately: These are best served within minutes of baking while the centers are warm and flowing. They’ll continue to set as they cool.
- Ramekin Size Matters: Using different sized ramekins will require adjusted baking times. 6-ounce ramekins are standard for this recipe.
- Can Be Made Ahead: Fill unbaked batter into ramekins, cover with plastic wrap, and refrigerate up to 24 hours. Add 2-3 minutes to baking time when baking cold.
- Prep Time: 15 minutes
- Cook Time: 12 minutes
- Category: Dessert
- Method: Baking
- Cuisine: French-American
Nutrition
- Serving Size: 1 lava cake
- Calories: 485
- Sugar: 28g
- Sodium: 85mg
- Fat: 35g
- Saturated Fat: 21g
- Unsaturated Fat: 12g
- Trans Fat: 0g
- Carbohydrates: 38g
- Fiber: 3g
- Protein: 7g
- Cholesterol: 215mg
Tips & Variations
Customize these decadent lava cakes with these delicious variations:
Peanut Butter Lava Cake: Place a tablespoon of creamy peanut butter in the center of each ramekin before adding batter on top. The peanut butter stays molten and creates an incredible flavor combination!
Salted Caramel Lava Cake: Add a spoonful of salted caramel sauce in the center before baking for a sweet-salty molten center that’s absolutely divine.
Raspberry Lava Cake: Add a few fresh or frozen raspberries to the center of each cake before baking, or serve with raspberry sauce drizzled on the plate.
Espresso Lava Cake: Add 1 tablespoon of instant espresso powder to the melted chocolate for deeper, more complex chocolate flavor without tasting like coffee.
Orange Chocolate Lava Cake: Add 1 teaspoon of orange zest to the batter and a few drops of orange extract for a sophisticated citrus-chocolate combination.
White Chocolate Lava Cake: Use white chocolate instead of dark chocolate, reduce sugar slightly, and add extra vanilla for sweet, creamy cakes.
Mint Chocolate Lava Cake: Add ½ teaspoon of peppermint extract to the batter and serve with mint chocolate chip ice cream for a refreshing twist.
Nutella Lava Cake: Replace half the chocolate with Nutella for hazelnut-chocolate cakes, or place a spoonful of Nutella in the center before baking.
Bourbon Lava Cake: Add 1 tablespoon of bourbon to the batter for adult-only cakes with warm, sophisticated notes.
S’mores Lava Cake: Add mini marshmallows and graham cracker crumbs to the center before baking for campfire-inspired cakes.
Chambord Lava Cake: Add a tablespoon of Chambord (raspberry liqueur) for elegant, berry-infused cakes perfect for special occasions.
Pro Chef Tips
Elevate your chocolate lava cakes from good to absolutely restaurant-perfect with these professional techniques:
Use Quality Chocolate: Since chocolate is the main flavor, use the best quality you can afford. Cheap chocolate produces mediocre cakes. Look for chocolate with a cacao percentage between 55-70%—brands like Ghirardelli, Lindt, Valrhona, or Guittard work beautifully.
Butter and Cocoa the Ramekins Thoroughly: This step is non-negotiable! Miss a spot and your cake will stick. Use a pastry brush to get butter in every crevice, then coat with cocoa powder. The cocoa adds flavor and prevents the white flour look on dark chocolate cakes.
Don’t Overmix the Batter: Once you add flour, fold gently just until combined. Overmixing develops gluten, which creates a cakey texture instead of that tender, molten interior. A few gentle folds are all you need.
Achieve Perfect Molten Centers: The secret is pulling them from the oven when the edges are set but the centers still jiggle slightly when you gently shake the pan. The tops should look set with maybe a tiny bit of shine in the very center. They’ll continue cooking from residual heat, so slight underbaking is key.
Use an Oven Thermometer: Oven temperatures vary wildly. An oven thermometer ensures your oven is truly at 425°F. Too cool and the cakes won’t set properly; too hot and they’ll overbake.
Fill Ramekins Evenly: Use a measuring cup or ladle to ensure each ramekin gets exactly the same amount of batter. Uneven filling means uneven baking—some will be overdone while others are underdone.
Bring Ingredients to Room Temperature: Cold eggs can seize chocolate and create lumps. Room temperature ingredients blend more smoothly and create better texture. Let eggs sit out for 30 minutes before starting.
The One-Minute Rest is Crucial: Don’t skip this! The brief rest after baking allows the cakes to set just enough to unmold without collapsing, while keeping centers molten. Too long and they’ll be too set; not long enough and they’ll fall apart.
Know Your Oven’s Hot Spots: All ovens have hot spots. Rotate the baking sheet halfway through baking if your oven bakes unevenly, though 12 minutes is such a short time that you may not need to.
Practice the Flip: The unmolding technique takes confidence. Hold the plate firmly against the ramekin, flip decisively, then gently lift. If you’re tentative, you’ll have a mess. One swift, confident flip works every time!
Common Mistakes to Avoid
Even experienced bakers struggle with lava cakes. Here are the most common pitfalls:
Overbaking: This is the number one mistake! Overbaked lava cakes have set centers instead of molten ones—they’re just chocolate cakes at that point. The edges should be set and pulling away slightly, but the centers should still jiggle when you gently shake the pan. Remember, they continue cooking from residual heat after you remove them from the oven. When in doubt, underbake slightly—you can always put them back for another minute, but you can’t undo overbaking.
Not Greasing Ramekins Properly: Inadequate greasing causes cakes to stick and break when unmolding, ruining your beautiful presentation. Butter must coat every single surface—bottom, sides, rim—with no missed spots. The cocoa powder dusting helps prevent sticking and adds flavor. Use a pastry brush to ensure complete coverage.
Using Chocolate Chips: Chocolate chips contain stabilizers that prevent melting smoothly. They create a grainy, separated texture in the batter instead of smooth and silky. Always use chopped chocolate bars or baking chocolate specifically designed for melting.
Wrong Ramekin Size: Using different sized ramekins throws off the baking time completely. Too large and the batter spreads thin with no molten center; too small and they overflow or don’t bake through. Standard 6-ounce ramekins are ideal for this recipe.
Mixing Hot Chocolate into Cold Eggs: If the melted chocolate is too hot when added to eggs, it can scramble them, creating lumps and unpleasant texture. Let the chocolate cool for 3-5 minutes after melting so it’s warm but not hot, then whisk gradually.
Overmixing the Batter: Once flour is added, overmixing develops gluten and creates tough, cakey texture instead of that tender, delicate crumb. Fold gently just until flour disappears—a few strokes are sufficient.
Not Serving Immediately: Lava cakes are meant to be served straight from the oven while the centers are warm and flowing. As they cool, the centers set and lose that dramatic molten quality. If you must wait, keep them in a warm (200°F) oven for up to 10 minutes, though they’re truly best within 5 minutes of baking.
Storage & Meal Prep
While lava cakes are best fresh, here’s how to handle storage and prep:
Best Practice: Chocolate lava cakes are meant to be served immediately after baking for the ultimate molten center experience. However, life happens and sometimes you need flexibility!
Baked Cakes: Once baked and cooled completely, lava cakes can be stored in the refrigerator for up to 2 days, though they’ll lose their molten centers and become regular chocolate cakes. Cover tightly with plastic wrap. Reheat in the microwave for 20-30 seconds to warm through, though the centers won’t be molten anymore.
Serving Leftover Cakes: If you have leftover baked cakes, embrace them as chocolate cakes rather than lava cakes. Warm them and serve with ice cream—they’re still delicious, just not molten. The texture becomes more like a rich, fudgy brownie.
Freezing Baked Cakes: You can freeze completely cooled baked cakes wrapped tightly in plastic wrap, then aluminum foil, for up to 2 months. Thaw in the refrigerator overnight and reheat in the microwave or a 350°F oven until warm. Again, they won’t have molten centers, but they’re still tasty chocolate desserts.
Reheating Tips: Microwave refrigerated cakes for 20-30 seconds, or warm in a 350°F oven for 5-8 minutes until heated through. The centers won’t flow, but warming makes them taste freshly baked.
Make-Ahead & Freezer Notes
The beauty of lava cakes is they can be mostly prepared ahead:
Make-Ahead Unbaked Batter (Best Method): This is the secret to stress-free entertaining! Prepare the batter completely, pour into greased and cocoa-dusted ramekins, cover tightly with plastic wrap, and refrigerate for up to 24 hours before baking. When ready to serve, remove from refrigerator and let sit at room temperature for 10 minutes, then bake, adding 2-3 extra minutes to the baking time since the batter is cold. This method gives you fresh, molten lava cakes with minimal last-minute work!
Freezing Unbaked Batter: For longer storage, prepare batter in ramekins, cover tightly with plastic wrap then aluminum foil, and freeze for up to 1 month. Do not thaw before baking—bake directly from frozen at 425°F for 16-18 minutes. Test one first to determine exact time for your oven.
Individual Portion Control: The make-ahead method is perfect for entertaining. Prepare batter in the afternoon, refrigerate, then pop in the oven 15 minutes before dessert time. Your guests think you’re a culinary genius!
Professional Restaurant Technique: Many restaurants prepare dozens of lava cakes in advance and keep them refrigerated or frozen, baking to order. This is how they can serve them so quickly and consistently.
Ganache Center Method: For even more reliable molten centers, some professional chefs use a frozen ganache center. Make chocolate ganache, freeze in small balls, place one in each ramekin, then cover with batter. The frozen ganache melts during baking, guaranteeing a flowing center even if you slightly overbake the cake portion.
Timing for Dinner Parties: If serving after dinner, prepare the batter and fill ramekins right before guests arrive. Refrigerate them during dinner, then bake while you clear the table. They’ll be ready perfectly timed for dessert!
Serving Suggestions
These decadent lava cakes pair beautifully with various accompaniments:
Classic Pairing: Serve with a scoop of high-quality vanilla ice cream or vanilla bean gelato on the side. The cold creaminess against warm chocolate is absolute perfection. The ice cream begins melting into the flowing chocolate—heavenly!
Elegant Restaurant-Style: Dust with powdered sugar through a fine-mesh sieve, add a quenelle (elegant oval scoop) of vanilla ice cream beside the cake, garnish with fresh mint leaves, and drizzle the plate with raspberry sauce or caramel sauce for beautiful presentation.
Berry Accompaniment: Serve with fresh raspberries, strawberries, or mixed berries. The tart fruitiness cuts through the rich chocolate perfectly and adds beautiful color contrast.
Whipped Cream: A dollop of freshly whipped cream (sweetened with a bit of vanilla) provides lightness that balances the dense chocolate.
Coffee Pairing: Serve with espresso, cappuccino, or strong coffee. The bitter coffee complements the sweet chocolate beautifully—a classic combination.
Dessert Wine: Pair with dessert wines like Port, late harvest Zinfandel, or even a rich Cabernet Sauvignon. The wine’s sweetness and tannins complement dark chocolate gorgeously.
Sauce Drizzles: Drizzle the plate with salted caramel sauce, raspberry coulis, or chocolate ganache before placing the cake for restaurant-worthy presentation.
Nutty Garnish: Sprinkle with chopped toasted hazelnuts, pecans, or pistachios for textural contrast and sophisticated flavor.
Sea Salt Finish: A tiny pinch of flaky sea salt on top before serving enhances the chocolate flavor and adds a gourmet touch.
Boozy Ice Cream: Serve with bourbon vanilla ice cream, Baileys ice cream, or rum raisin for adult-only indulgence.
Chocolate Lover’s Dream: Go all-out with chocolate ice cream, chocolate sauce, and chocolate shavings for ultimate chocolate overload!
FAQs Section
Why didn’t my lava cake have a molten center?
The most common reason is overbaking. The cakes need to come out when the edges are set but the centers still jiggle slightly. Even 1-2 minutes too long will set the centers completely. Other causes include using ramekins that are too large (spreading the batter thin), oven temperature too low (preventing proper setting of edges while centers cook through), or not enough batter in each ramekin. Make sure you’re baking at exactly 425°F and removing them when the edges pull away but centers still look slightly soft.
Can I make these without ramekins?
While ramekins are ideal, you can use other oven-safe individual containers like small glass custard cups, standard muffin tins, or even small oven-safe coffee mugs. However, baking times will vary based on size and material. Glass or ceramic bakes differently than metal. For muffin tins, reduce baking time to 8-10 minutes and watch carefully. The cakes may not unmold as cleanly from muffin tins.
Can I make one large lava cake instead of individual ones?
It’s very difficult to achieve a molten center in a large cake because the edges will overcook before the center reaches the right consistency. The individual portions work because they’re small enough that the heat penetrates evenly while leaving the center molten. If you must make a large cake, use a 6-inch springform pan and bake for 18-20 minutes, but results are less predictable.
Do I have to flip the cakes onto plates?
No! If unmolding makes you nervous, you can absolutely serve them directly in the ramekins. Place the hot ramekin on a plate, dust the top with powdered sugar, and add ice cream beside it. Have guests break into the cake with their spoon. This is less dramatic but equally delicious and fool-proof.
What if my cakes stick to the ramekins?
Sticking means inadequate greasing. You must thoroughly butter every surface and dust with cocoa powder. If a cake does stick, run a thin knife around the edge while still warm, let it cool for 2-3 minutes to contract slightly, then try flipping again. In worst case, scoop it out and serve it as a “deconstructed” lava cake with ice cream—still delicious!
Can I make these gluten-free?
Yes! Replace the 2 tablespoons of all-purpose flour with 2 tablespoons of almond flour, gluten-free 1:1 flour blend, or even omit the flour entirely (though texture will be more fragile). The small amount of flour in this recipe means gluten-free substitution works beautifully with minimal texture difference.
How do I know when they’re perfectly done?
The tops should look set with a thin crust that’s no longer shiny wet, the edges should be pulling away from the ramekin sides slightly, and when you gently shake the pan, the centers should have a subtle jiggle—not liquid movement, but a soft wobble. If they jiggle a lot, they need another minute. If they don’t jiggle at all, they’re likely overdone. It takes practice to recognize that perfect moment, so don’t be discouraged if your first attempt isn’t perfect!
Conclusion
There’s something absolutely magical about chocolate lava cake—the anticipation as you cut in, the moment the warm, molten chocolate flows out onto your plate, and that first bite of rich, decadent chocolate heaven. These easy molten chocolate lava cakes prove that restaurant-quality elegance and impressive desserts don’t require professional pastry chef skills or hours of work. With just a few simple ingredients and 30 minutes, you can create dessert magic that will have everyone asking for your recipe!
Whether you’re making these individual chocolate lava cakes for a romantic date night at home, serving them at an elegant dinner party where you want to wow your guests, celebrating a special occasion like Valentine’s Day or an anniversary, or simply indulging your chocolate cravings with something truly special, this recipe delivers pure decadence every single time. The make-ahead capability means you can enjoy stress-free entertaining while still serving fresh, warm lava cakes that taste like they came from an upscale restaurant.
The best part? Once you master the simple technique and timing, you’ll have an impressive signature dessert in your repertoire that never fails to elicit gasps of delight. The combination of crispy edges, tender cake, and that gloriously flowing molten center creates an unforgettable dessert experience that transforms any meal into a special occasion.