
If you’re looking for a dessert that’s both impressively elegant and surprisingly simple to make, this easy chocolate mousse recipe is exactly what you need. Imagine the most luxuriously smooth, intensely chocolatey, cloud-like dessert that melts on your tongue – that’s what you’ll create with this foolproof recipe. This isn’t just any chocolate mousse; it’s the kind of dessert that makes people close their eyes and savor every spoonful.
Chocolate mousse has long been the go-to dessert for romantic dinners, special celebrations, and any time you want to impress your guests with minimal effort. Despite its fancy French origins and restaurant-quality appearance, homemade chocolate mousse is actually one of the easiest desserts you can make. With just a handful of simple ingredients and about 15 minutes of active preparation time, you’ll have a sophisticated dessert that rivals anything from a high-end patisserie.
This recipe creates a perfectly balanced chocolate mousse – rich and decadent without being too heavy, intensely chocolatey without being overwhelming, and silky smooth with that signature airy texture that makes mousse so irresistible. Whether you’re planning a romantic Valentine’s Day dinner, need an impressive dessert for a dinner party, or simply want to treat yourself to something special, this chocolate mousse recipe delivers pure bliss in every bite.
History / Background
Chocolate mousse, or “mousse au chocolat” as it’s called in its native France, has a fascinating history that dates back to the 18th century. The word “mousse” literally means “foam” in French, perfectly describing the light, airy texture that characterizes this beloved dessert. While the exact origin is debated, most food historians agree that chocolate mousse emerged in France sometime in the 1700s, though it didn’t become widely popular until much later.
The earliest versions of mousse were actually savory dishes, often made with fish or foie gras. The transition to sweet mousses came about as French chefs began experimenting with chocolate, which was becoming more accessible to the general public during the 19th century. The technique of folding whipped cream or beaten egg whites into a flavored base to create a light, foamy texture became a hallmark of French cuisine.
Chocolate mousse as we know it today gained international fame in the early 20th century, particularly in the 1960s and 1970s when French cuisine was experiencing a golden age and French restaurants were opening worldwide. It became synonymous with sophistication and romance, appearing on the menus of upscale restaurants from Paris to New York to San Francisco.
The dessert’s popularity in America exploded after Julia Child featured it in her groundbreaking cookbook “Mastering the Art of French Cooking” (1961) and demonstrated it on her television show “The French Chef.” She demystified French cooking techniques for American home cooks, showing them that this seemingly intimidating dessert was actually quite achievable in a home kitchen.
Today, chocolate mousse remains a classic dessert found in restaurants worldwide, but it has also become a beloved homemade treat. While traditional recipes often use raw eggs (which some modern cooks avoid for food safety reasons), contemporary versions have adapted the recipe to be safer while maintaining that signature silky texture and rich chocolate flavor. Whether served in elegant glass cups at a fancy dinner party or enjoyed straight from the mixing bowl in your pajamas, chocolate mousse continues to be the ultimate indulgent chocolate dessert.
Why You’ll Love This Recipe
This chocolate mousse recipe is about to become your secret weapon for impressive desserts! It combines the elegance of a French patisserie with the simplicity of a weeknight recipe, making it perfect for both special occasions and everyday indulgence.
Here’s why this chocolate mousse will become your favorite dessert:
- Surprisingly Easy – Despite its fancy reputation, this mousse requires just 15 minutes of active prep time
- Only 4 Ingredients – Simple pantry staples create an incredibly sophisticated dessert
- Make-Ahead Friendly – Prepare up to 3 days in advance, perfect for stress-free entertaining
- Intensely Chocolatey – Pure, rich chocolate flavor without being overly sweet
-
- Light Yet Decadent – The perfect balance between indulgent and airy
- Impressive Presentation – Looks like it came from a fancy restaurant with minimal effort
- No Baking Required – No need to turn on your oven, ideal for hot summer days
- Customizable – Easily adapt with different chocolates, flavors, and toppings
- Portion Control Built-In – Serve in individual glasses for perfectly sized portions
- Romantic & Elegant – Perfect for date nights, anniversaries, and Valentine’s Day
- Crowd-Pleaser – Everyone loves chocolate mousse, from kids to sophisticated adults
Ingredient Notes
The beauty of chocolate mousse lies in its simplicity. Just four main ingredients create this luxurious dessert, but quality matters! Let’s break down each component and why it’s important.
Dark Chocolate – This is the star ingredient, so choose wisely! Use high-quality dark chocolate with 60-70% cacao content for the best balance of rich chocolate flavor and sweetness. Brands like Ghirardelli, Lindt, or Guittard work beautifully. Avoid chocolate chips as they contain stabilizers that prevent smooth melting. Bittersweet chocolate (70% cacao) creates a more sophisticated, less sweet mousse, while semisweet chocolate (60% cacao) is slightly sweeter and more approachable. You’ll need about 8 ounces (225g), which is usually 1-2 bars depending on packaging.
Heavy Whipping Cream – Also called heavy cream, this is essential for creating that signature light, airy texture. It must have at least 36% fat content to whip properly. Don’t substitute with half-and-half or light cream – they simply won’t whip. Make sure your cream is very cold (straight from the refrigerator) for best results. You’ll need 2 cups total, with part of it whipped and part used in the chocolate mixture.
Granulated Sugar – Adds just enough sweetness without overwhelming the chocolate. The amount can be adjusted based on your chocolate choice and personal preference. Using superfine (caster) sugar dissolves more easily, but regular granulated sugar works perfectly fine. About ¼ cup is standard, but you can reduce this if using sweeter chocolate or increase if you prefer a sweeter mousse.
Eggs – Traditional chocolate mousse uses raw egg whites for that airy, fluffy texture. However, this recipe uses a method that gently cooks the eggs for food safety while maintaining the light texture. You’ll need 3-4 large eggs depending on your method. If you’re concerned about eggs, there are eggless versions that rely solely on whipped cream (I’ll cover this in the variations section).
Pure Vanilla Extract – While optional, a teaspoon of vanilla enhances the chocolate flavor and adds aromatic depth. Use pure vanilla extract rather than imitation for the best flavor.
Salt – Just a tiny pinch (⅛ teaspoon) enhances all the other flavors and makes the chocolate taste even more chocolatey. Don’t skip it!
Optional Flavor Additions – Coffee or espresso powder (1 teaspoon) intensifies chocolate flavor, orange zest adds brightness, peppermint extract creates a refreshing twist, or a tablespoon of liqueur (Grand Marnier, Kahlua, or rum) adds sophisticated depth.
Equipment Needed
Making chocolate mousse requires some basic kitchen equipment. Here’s what you’ll need for success:
Essential Equipment:
- Double Boiler or Heat-Safe Bowl Over Saucepan – For gently melting chocolate without burning it
- Electric Hand Mixer or Stand Mixer – Essential for whipping cream to stiff peaks (you can whisk by hand, but it takes serious arm strength!)
- Large Mixing Bowls – At least two, preferably three (one for melting chocolate, one for whipping cream, one for eggs)
- Rubber Spatula – For folding ingredients together gently
- Whisk – For mixing and folding
- Sharp Knife and Cutting Board – For chopping chocolate
- Measuring Cups and Spoons – For accurate measurements
- Serving Glasses or Ramekins – Small dessert cups, wine glasses, or mason jars for elegant presentation
Helpful but Optional:
- Piping bag with star tip for elegant presentation
- Fine-mesh sieve for smooth texture
- Instant-read thermometer if using the egg method
- Offset spatula for smooth tops
- Plastic wrap for covering
Pro Tip: Chill your mixing bowl and beaters in the freezer for 15 minutes before whipping cream – it helps the cream whip faster and hold its shape better!
Print
Chocolate Mousse Recipe
- Total Time: 3 hours 25 minutes (including chilling time)
- Yield: 6 servings 1x
- Diet: Vegetarian
Description
This easy chocolate mousse recipe is rich, creamy, and incredibly decadent! Made with just four simple ingredients, it creates a silky-smooth, airy dessert that’s perfect for special occasions or any time you’re craving something chocolatey and elegant. Ready in just 20 minutes of active prep time!
Ingredients
- 8 ounces (225g) high-quality dark chocolate (60-70% cacao), finely chopped
- 2 cups heavy whipping cream, divided and cold
- ¼ cup granulated sugar
- 3 large egg yolks
- 1 teaspoon pure vanilla extract
- ⅛ teaspoon salt
- Optional: 1 teaspoon instant espresso powder (intensifies chocolate flavor)
For Topping (Optional):
- Whipped cream
- Chocolate shavings or cocoa powder
- Fresh berries
- Mint leaves
Instructions
Step 1: Melt the Chocolate
Finely chop the dark chocolate and place it in a heat-safe bowl. Create a double boiler by setting the bowl over a saucepan with about 1 inch of simmering water (make sure the bottom of the bowl doesn’t touch the water). Stir occasionally until the chocolate is completely melted and smooth, about 3-5 minutes. Remove from heat and let cool for 5 minutes until just warm to the touch, not hot. If the chocolate is too hot, it will deflate your whipped cream later.
Step 2: Prepare the Egg Mixture
In a separate heat-safe bowl, whisk together the egg yolks and 2 tablespoons of the sugar until well combined and slightly pale. Place the bowl over the same simmering water (wipe the pan first if needed). Whisk constantly for 2-3 minutes until the mixture thickens slightly and reaches 160°F on a thermometer (this pasteurizes the eggs for safety). Remove from heat immediately and whisk in the vanilla extract and salt. Let cool for 5 minutes.
Step 3: Combine Chocolate and Eggs
Gradually add the warm egg mixture to the melted chocolate in three additions, whisking constantly after each addition until smooth and glossy. If you add it all at once, the chocolate might seize. The mixture should be smooth and pourable. Set aside to cool to room temperature, stirring occasionally (this takes about 10-15 minutes).
Step 4: Whip the Cream
In a large, cold mixing bowl, combine 1½ cups of the cold heavy cream with the remaining 2 tablespoons of sugar. Using an electric mixer, beat on medium-high speed until soft peaks form (when you lift the beaters, the peaks fold over on themselves), about 2-3 minutes. Be careful not to overwhip, or you’ll end up with butter!
Step 5: Fold Cream into Chocolate
Using a rubber spatula, add about one-third of the whipped cream to the cooled chocolate mixture. Gently fold it in using a circular motion, cutting through the center and folding over. This lightens the chocolate mixture. Then gently fold in the remaining whipped cream in two additions, being careful not to deflate the mixture. Fold just until no white streaks remain. The mousse should be light, airy, and uniform in color.
Step 6: Portion into Serving Dishes
Divide the chocolate mousse among 6 serving glasses, ramekins, or dessert cups. You can spoon it in for a rustic look, or transfer to a piping bag and pipe for elegant swirls. Smooth the tops with an offset spatula if desired.
Step 7: Chill
Cover each serving glass with plastic wrap (press it directly on the surface to prevent a skin from forming, or leave a small gap if you don’t mind a slight skin). Refrigerate for at least 3 hours, or up to 3 days. The mousse needs this time to set properly and develop its full flavor.
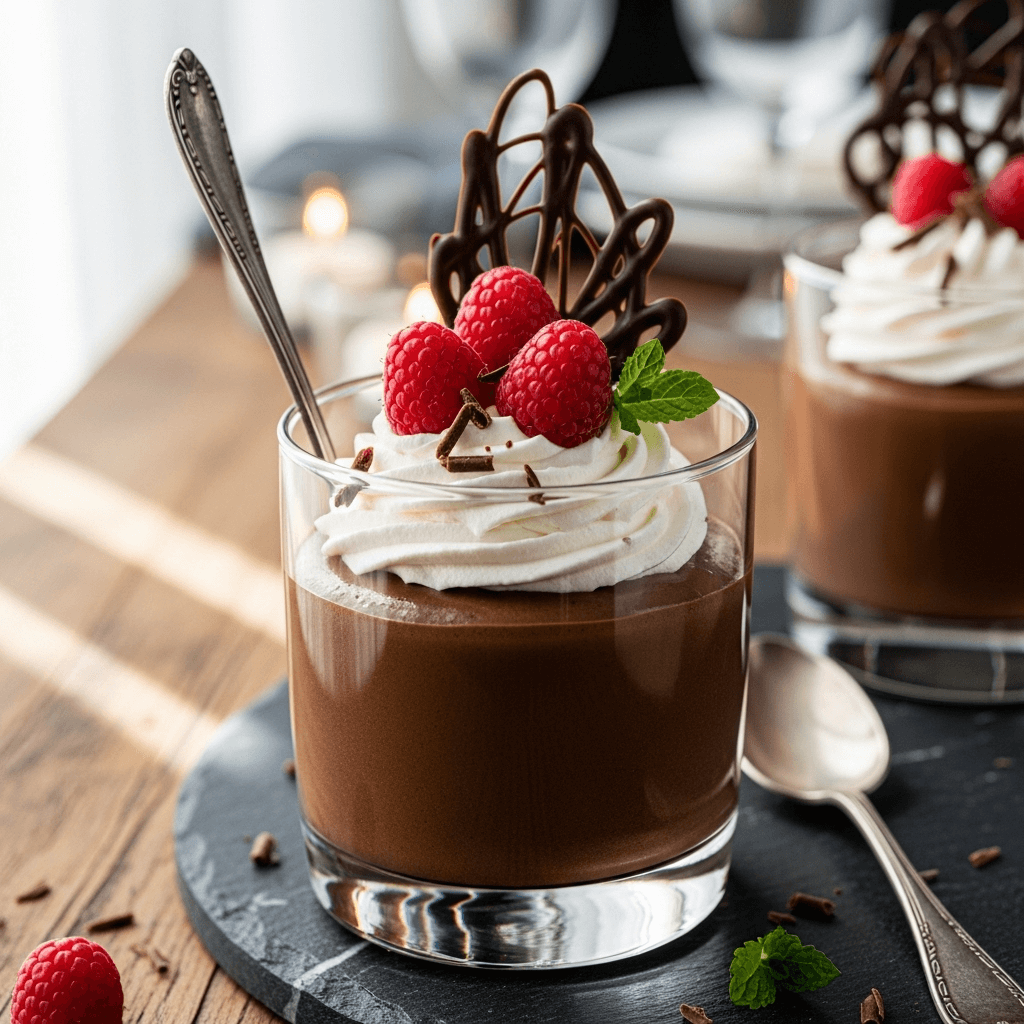
Step 8: Garnish and Serve
Just before serving, top with a dollop of freshly whipped cream, chocolate shavings, a dusting of cocoa powder, fresh berries, or a sprig of mint. Serve chilled and watch everyone’s eyes light up!
Notes
- Temperature Control: Make sure your melted chocolate cools to just warm (not hot) before folding in whipped cream, or the cream will deflate.
- Folding Technique: Fold gently but thoroughly. The key is to maintain the airiness while fully incorporating ingredients.
- Egg Safety: Heating the egg yolks to 160°F pasteurizes them for food safety. If you prefer not to use eggs at all, see the variation section.
- Chocolate Quality: Use the best quality chocolate you can afford – it makes a noticeable difference in the final flavor.
- Don’t Rush the Chill: The mousse needs at least 3 hours to set properly. Overnight is even better for the best texture and flavor development.
- Prep Time: 20 minutes
- Cook Time: 5 minutes (melting chocolate)
- Category: Dessert
- Method: Stovetop
- Cuisine: French
Nutrition
- Serving Size: 1 serving (approximately ⅔ cup)
- Calories: 385
- Sugar: 24g
- Sodium: 65mg
- Fat: 30g
- Saturated Fat: 18g
- Unsaturated Fat: 10g
- Trans Fat: 0g
- Carbohydrates: 28g
- Fiber: 3g
- Protein: 5g
- Cholesterol: 145mg
Tips & Variations
Flavor Variations:
- Classic French Chocolate Mousse: Add 2 tablespoons of Grand Marnier or Cognac to the melted chocolate for traditional French flair
- Mocha Mousse: Stir 1-2 teaspoons instant espresso powder into the melted chocolate for deep coffee flavor
- Mint Chocolate Mousse: Add ½ teaspoon peppermint extract and fold in crushed peppermint candies
- Orange Chocolate Mousse: Add 1 tablespoon orange zest and 1 tablespoon Grand Marnier for chocolate-orange perfection
- Mexican Chocolate Mousse: Add ½ teaspoon cinnamon and a pinch of cayenne pepper for subtle warmth
- White Chocolate Mousse: Substitute white chocolate for dark (reduce sugar to 2 tablespoons as white chocolate is sweeter)
- Salted Caramel Chocolate Mousse: Swirl 2 tablespoons of salted caramel sauce through the finished mousse
Texture Variations:
- Extra Light and Airy: Fold in beaten egg whites along with the whipped cream (see FAQ for method)
- Dense and Fudgy: Use only 1 cup of whipped cream instead of 1½ cups for a richer, denser mousse
- Silky Smooth: Press the finished mousse through a fine-mesh sieve before portioning for ultra-smooth texture
Dietary Modifications:
- Eggless Chocolate Mousse: Skip the egg step entirely and use 2 full cups of whipped cream. The texture will be slightly different but still delicious
- Vegan Chocolate Mousse: Use coconut cream (refrigerate a can overnight, scoop out the solid cream) and dairy-free chocolate
- Lower Sugar: Reduce sugar to 2 tablespoons or use a sugar substitute suitable for whipping
- Dairy-Free: Use coconut cream in place of heavy cream (make sure to chill the can overnight first)
Presentation Ideas:
- Serve in elegant wine glasses or martini glasses for special occasions
- Layer mousse with whipped cream and cookie crumbs for a parfait
- Pipe into chocolate cups or edible chocolate bowls
- Serve in small mason jars with lids for a rustic, portable presentation
- Top with fresh raspberries, strawberries, or cherries
- Dust with cocoa powder using a small sieve for professional appearance
- Add chocolate curls made by running a vegetable peeler along a chocolate bar
- Garnish with candied orange peel or edible gold leaf for ultra-elegant occasions
Pro Chef Tips
Tip #1: Use a Double Boiler, Not Direct Heat
Never melt chocolate directly over high heat – it can burn, seize, or become grainy in seconds. Always use gentle, indirect heat from a double boiler or bowl over simmering water. This gives you complete control and ensures smooth, silky melted chocolate. If you don’t have a double boiler, a heat-safe bowl over a saucepan works perfectly. Just make sure the water isn’t touching the bottom of the bowl.
Tip #2: Temperature is Everything
The most common mistake is adding hot melted chocolate to cold whipped cream, which causes the chocolate to seize and create chunks. Let your melted chocolate cool until it’s just barely warm to the touch (about 85-90°F) before folding it in. Conversely, make sure your cream is very cold before whipping – this helps it whip faster and hold its structure better.
Tip #3: Master the Folding Technique
Folding is a gentle motion that preserves the air bubbles in your whipped cream. Cut down through the center of the mixture with your spatula, scrape along the bottom of the bowl, and fold over the top. Rotate the bowl a quarter turn and repeat. Don’t stir or mix vigorously – this deflates all those precious air bubbles that give mousse its light texture. Fold just until no white streaks remain.
Tip #4: Lighten the Chocolate First
Adding a small amount of whipped cream to the chocolate mixture first (about one-third) lightens it and makes it easier to fold in the remaining cream without deflation. This “sacrificial” portion gets stirred in more vigorously, which is fine because you’re tempering the chocolate mixture. The remaining cream can then be folded in very gently.
Tip #5: Chop Chocolate Finely and Evenly
Finely chopped chocolate melts more evenly and quickly than large chunks. Use a large, sharp knife and chop into small, uniform pieces about the size of chocolate chips. This prevents some pieces from being completely melted while others remain solid, which can create a grainy texture.
Tip #6: Don’t Overwhip the Cream
Stop whipping when soft peaks form – when you lift the beaters, the peaks should fold over gently at the tips. Overwhipped cream becomes grainy and butter-like, and won’t fold smoothly into the chocolate. If you accidentally overwhip slightly, you can rescue it by gently folding in 1-2 tablespoons of unwhipped cream.
Tip #7: Quality Chocolate Makes the Difference
Since chocolate is the star ingredient, quality matters enormously. Use real chocolate (check that cocoa butter is the first fat listed), not chocolate chips or candy coating which contain stabilizers. Dark chocolate with 60-70% cacao content provides the best balance of chocolate intensity and sweetness. My favorites are Ghirardelli, Valrhona, Callebaut, or Lindt.
Common Mistakes to Avoid
Mistake #1: Adding Hot Chocolate to Whipped Cream
This is the number one cause of failed chocolate mousse! When hot melted chocolate meets cold whipped cream, the chocolate seizes into hard little specks, creating a grainy, unappetizing texture. Solution: Always let your melted chocolate cool to just warm or room temperature (test by touching – it should feel only slightly warm, not hot) before folding in the whipped cream. Patience here makes all the difference.
Mistake #2: Using Chocolate Chips Instead of Bar Chocolate
Chocolate chips contain stabilizers that help them hold their shape during baking, but these same stabilizers prevent them from melting smoothly into mousse. They create a grainy, separated texture. Solution: Always use bar chocolate (dark, semisweet, or bittersweet) chopped into small pieces. It melts smoothly and incorporates beautifully.
Mistake #3: Overmixing or Stirring Instead of Folding
Vigorous stirring deflates all the air bubbles in your whipped cream, resulting in a dense, heavy mousse instead of a light, airy one. Solution: Use a gentle folding motion with a rubber spatula. Cut through the center, scrape the bottom, fold over the top, and rotate the bowl. Repeat just until combined with no white streaks. It should take 30-50 gentle folds.
Mistake #4: Not Chilling Long Enough
Mousse needs adequate time to set properly in the refrigerator. Serving it too soon results in a soupy, soft texture that doesn’t hold its shape. Solution: Allow at least 3 hours of chilling time, though overnight is even better. The mousse continues to firm up and the flavors meld beautifully during this time. Plan ahead and make it earlier in the day or the night before serving.
Mistake #5: Getting Water or Steam in the Chocolate
Even a tiny drop of water causes melted chocolate to seize into a thick, grainy paste that’s unusable. This commonly happens when steam from your double boiler condenses and drips into the bowl, or when you use a wet bowl or utensils. Solution: Make sure all bowls and utensils are completely dry before use. When using a double boiler, keep the water at a gentle simmer (not a rolling boil) to minimize steam, and make sure the bowl fits snugly so steam can’t escape around the sides.
Storage & Meal Prep
Refrigerator Storage:
Chocolate mousse stores beautifully in the refrigerator, making it perfect for advance preparation. Cover each serving glass with plastic wrap, pressing it directly onto the surface of the mousse to prevent a skin from forming (or leave a small gap if you don’t mind a thin skin developing). Alternatively, if your mousse is in a large bowl, press plastic wrap directly on the surface.
Properly stored chocolate mousse will keep in the refrigerator for up to 3-4 days. The flavor actually improves after 24 hours as it has time to meld. However, the texture is at its absolute peak on day 2-3. After 4 days, it’s still safe to eat but the texture may become slightly denser.
Texture Changes Over Time:
Fresh mousse (day 1) has the airiest, fluffiest texture. By day 2-3, it settles slightly and develops a creamier, more cohesive texture – many people actually prefer this! By day 4-5, it becomes noticeably denser but is still delicious. The chocolate flavor intensifies over time, which is a bonus.
Serving from Refrigerator:
Chocolate mousse is best served cold, straight from the refrigerator. Remove it 5 minutes before serving if you want it to be less firm, but it should still be chilled. Add any garnishes (whipped cream, chocolate shavings, berries) just before serving for the best presentation.
Meal Prep Strategy:
For entertaining, make the mousse 1-2 days ahead and store covered in the refrigerator. Prepare any garnishes (chocolate shavings, whipped cream) a few hours before serving and store separately. Assemble and garnish each serving just before presenting to guests. This approach gives you maximum freshness with minimal last-minute stress.
Transportation Tips:
If you need to transport chocolate mousse to a party or event, keep it chilled in a cooler with ice packs. Transport in individual covered glasses or containers to prevent spilling. The mousse is quite stable once set, so it travels well as long as it stays cold.
Make-Ahead & Freezer Notes
Make-Ahead Instructions (The Best Option):
Chocolate mousse is actually one of the best make-ahead desserts! In fact, making it 1-2 days in advance improves both the texture and flavor. Here’s the ideal timeline:
2-3 Days Before: Prepare the entire mousse recipe as directed. Portion into serving glasses, cover tightly, and refrigerate. Don’t add garnishes yet.
Day Of: About 30 minutes before serving, prepare fresh whipped cream and any other garnishes (chocolate shavings, berries). Garnish each serving just before presenting.
This advance preparation allows the flavors to develop fully and actually improves the mousse’s texture as it sets more firmly.
Freezing Chocolate Mousse:
While chocolate mousse can be frozen, I generally don’t recommend it as the texture changes noticeably. The whipped cream separates slightly during freezing and thawing, creating a less smooth, slightly grainy texture. However, if you must freeze it:
- Prepare mousse completely and portion into individual serving containers
- Cover tightly with plastic wrap pressed directly on the surface, then add a lid or second layer of wrap
- Freeze for up to 1 month
- To thaw: Transfer to the refrigerator 24 hours before serving (never thaw at room temperature)
- Once thawed, give it a gentle stir to re-incorporate any separated cream
- Re-garnish before serving as original garnishes won’t survive freezing
Frozen Mousse Alternative:
For better results, consider making “frozen chocolate mousse” intentionally – serve it semi-frozen like gelato! Prepare the mousse, freeze until firm but not solid (about 2 hours), and serve immediately in that state. It’s like a cross between mousse and ice cream and is absolutely delicious on hot summer days. Just take it out of the freezer 5-10 minutes before serving for the perfect soft-frozen texture.
Freezing Components:
A better approach than freezing finished mousse is to freeze just the chocolate base (chocolate mixed with eggs) before adding whipped cream. Freeze in an airtight container for up to 1 month. Thaw overnight in the refrigerator, then fold in freshly whipped cream and proceed with the recipe. This maintains the light, airy texture much better.
Serving Suggestions
This elegant chocolate mousse is incredibly versatile and pairs beautifully with many flavors and textures. Here are ideas for taking your dessert presentation to the next level:
Classic Garnishes:
- Freshly whipped cream (slightly sweetened)
- Chocolate shavings or curls (use a vegetable peeler on a chocolate bar)
- Dusting of unsweetened cocoa powder
- Fresh mint leaves for color contrast and fresh aroma
- Chocolate-covered espresso beans for coffee lovers
Fresh Fruit Pairings:
- Fresh raspberries (the tartness perfectly balances the rich chocolate)
- Sliced strawberries
- Fresh cherries or cherry compote
- Orange segments or candied orange peel
- Banana slices (surprisingly delicious with chocolate)
- Blackberries or mixed berries
- Passion fruit pulp for tropical twist
Textural Additions:
- Crushed amaretti cookies or biscotti
- Crumbled shortbread or graham crackers
- Candied nuts (pecans, hazelnuts, or almonds)
- Toffee bits or crushed honeycomb
- Toasted coconut flakes
- Chocolate-covered pretzel pieces for sweet-salty contrast
- Meringue cookies or meringue kisses
For Special Occasions:
Romantic Dinner (Valentine’s Day, Anniversary): Serve in elegant wine glasses, garnish with fresh raspberries, chocolate shavings, and a gold-dusted strawberry. Pair with champagne or dessert wine.
Dinner Party: Create a mousse bar with plain mousse and bowls of various toppings (berries, nuts, sauces) so guests can customize their own.
Holiday Entertaining: Top with crushed peppermint candies and a small candy cane for Christmas, or add orange zest and chocolate pumpkins for Halloween.
Beverage Pairings:
- Coffee or espresso (traditional French pairing)
- Port wine (especially tawny port with dark chocolate mousse)
- Dessert wines like Moscato or late-harvest Riesling
- Champagne or sparkling wine
- Irish cream liqueur
- Hot chocolate for ultimate chocolate indulgence
- Mint tea for a refreshing contrast
Creating Layers: Transform simple mousse into elegant parfaits by layering:
- Chocolate mousse + vanilla mousse + whipped cream
- Chocolate mousse + crushed cookies + whipped cream
- Chocolate mousse + caramel sauce + sea salt
- Chocolate mousse + coffee-soaked ladyfingers (like tiramisu)
Plated Dessert Presentation: For restaurant-style plating, pipe a swirl of mousse onto a plate, add a quenelle of whipped cream, garnish with fresh berries and mint, and drizzle with raspberry sauce or caramel. Dust the plate with cocoa powder for dramatic effect.
FAQs Section
Q: Can I make chocolate mousse without raw eggs?
A: Absolutely! This recipe includes a method where egg yolks are heated to 160°F to pasteurize them, making them safe to eat. If you prefer to skip eggs entirely, you can make an eggless version using only whipped cream: Simply melt and cool the chocolate, then fold in 2 cups of whipped cream (instead of 1½ cups). The texture will be slightly different – more like a chocolate whipped cream – but it’s still delicious and completely egg-free.
Q: Why did my chocolate mousse turn out grainy?
A: Graininess typically occurs when hot melted chocolate comes into contact with cold whipped cream, causing the chocolate to seize. The chocolate needs to cool to just warm (about 85-90°F) before folding in the cream. Another cause is using chocolate chips instead of bar chocolate – chips contain stabilizers that prevent smooth melting. Finally, getting even a drop of water in melted chocolate causes it to seize into a grainy paste. Always use completely dry bowls and utensils.
Q: Can I use milk chocolate instead of dark chocolate?
A: Yes, but the mousse will be much sweeter and less intensely chocolatey. Milk chocolate contains more sugar and less cacao than dark chocolate. If using milk chocolate, reduce the added sugar to 1-2 tablespoons total, and consider adding a pinch of espresso powder to deepen the chocolate flavor. Semi-sweet or bittersweet chocolate (60-70% cacao) provides the best balance of chocolate flavor and sweetness.
Q: How long does chocolate mousse need to chill before serving?
A: Chocolate mousse needs a minimum of 3 hours in the refrigerator to properly set. However, the texture and flavor are actually best after 6-8 hours or overnight. The mousse firms up as it chills, and the flavors have time to meld together beautifully. If you’re short on time, you can quick-chill it in the freezer for 45 minutes to 1 hour, but longer refrigerator chilling produces superior results. Plan ahead and make it the day before serving for the best experience.
Q: Can I make chocolate mousse dairy-free or vegan?
A: Yes! For dairy-free mousse, use refrigerated coconut cream (use only the thick cream from a can of full-fat coconut milk that’s been refrigerated overnight – don’t shake the can, just scoop out the solid cream on top). Whip the coconut cream just like regular cream and fold into melted dairy-free chocolate. For a fully vegan version, you’ll also need to omit the eggs – use aquafaba (liquid from a can of chickpeas) beaten to stiff peaks, or simply rely on coconut cream alone. The texture will be slightly different but still delicious!
Q:Why is my chocolate mousse too soft and not setting?
A: Several factors can cause this: (1) Not chilling long enough – mousse needs at least 3 hours, preferably overnight, (2) Overwhipping the cream into butter, which can’t hold structure properly, (3) Using too much cream relative to chocolate – stick to the recipe proportions, or (4) Adding hot chocolate to the cream, which melts the fat and prevents proper setting. Make sure to chill adequately and follow the temperature guidelines carefully. If your mousse is still too soft after overnight chilling, you may have used chocolate with too low a cacao percentage – darker chocolate (higher cacao) sets more firmly.
Q: What’s the difference between chocolate mousse and chocolate pudding?
A: While both are chocolate desserts, they’re quite different! Chocolate pudding is cooked on the stovetop with milk, sugar, cornstarch, and cocoa powder, creating a thick, creamy texture through the starch. Chocolate mousse, on the other hand, gets its light, airy texture from folded whipped cream or beaten egg whites – no cooking or thickeners required. Mousse is lighter, airier, and more elegant, while pudding is denser and more custard-like. Think of mousse as a chocolate cloud and pudding as a thick, creamy spoonable dessert.
Conclusion
And there you have it – everything you need to create the most luxurious, restaurant-quality chocolate mousse right in your own kitchen! This elegant French dessert may seem intimidating at first, but as you’ve learned, it’s actually quite simple when you understand the basic techniques. With just four ingredients and about 20 minutes of active time, you can create a dessert that will absolutely wow anyone lucky enough to taste it.
The best part about mastering this easy chocolate mousse recipe is how versatile it is. Whether you’re planning a romantic dinner for two, hosting an elegant dinner party, or simply treating yourself to something special on a random Tuesday, this chocolate mousse delivers pure decadent bliss in every spoonful. The rich chocolate flavor, the silky-smooth texture, and that signature lightness make it the ultimate chocolate lover’s dream.
I’d absolutely love to hear about your chocolate mousse adventures! Did you try any of the flavor variations? What did you serve it with? How did your guests react? Leave a comment below and share your experience – I read every comment and love hearing from you. If this recipe becomes your go-to fancy dessert (and I have a feeling it will!), please give it a five-star rating and share it with anyone in your life who appreciates really good chocolate.
Don’t forget to save this recipe to your Pinterest boards so you can easily find it whenever a chocolate craving strikes or you need to impress someone special. Here’s to many more bowls of perfectly smooth, intensely chocolatey, cloud-like chocolate mousse! Happy cooking, and enjoy every decadent bite!