

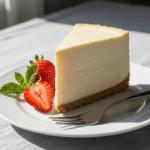
If you’re looking for the perfect dessert that never fails to impress, this classic New York cheesecake recipe is exactly what you need. Rich, creamy, and absolutely decadent, this homemade cheesecake features a buttery graham cracker crust and a silky smooth filling that melts in your mouth. Whether you’re celebrating a special occasion, hosting a dinner party, or simply treating yourself to something extraordinary, this cheesecake is guaranteed to steal the show.
This isn’t just any cheesecake—it’s the kind that bakeries charge premium prices for, but you can make it right in your own kitchen. The best part? While it looks incredibly fancy and tastes like it came from a five-star restaurant, the process is surprisingly straightforward when you follow the right techniques. Serve it plain, topped with fresh berries, drizzled with caramel, or adorned with chocolate ganache. No matter how you dress it up, this creamy New York style cheesecake will become your go-to recipe for every celebration.
History / Background
The cheesecake we know and love today has a fascinating history that spans thousands of years. Ancient Greeks were actually the first to create a version of cheesecake, serving it to athletes during the first Olympic games in 776 BC for an energy boost. The Romans later adopted this recipe, spreading it throughout Europe as their empire expanded.
However, the New York style cheesecake we’re making today is distinctly American. This iconic dessert emerged in the 1900s when cream cheese was invented in New York in 1872 by William Lawrence, a dairyman from Chester, New York. He was trying to recreate French Neufchâtel cheese but accidentally created something entirely new and even better—cream cheese.
The classic New York cheesecake as we know it was popularized by Arnold Reuben, a German-Jewish immigrant who owned the legendary Turf Restaurant in New York City. In the 1920s, he claimed to have created the original New York cheesecake recipe after being served a cheese pie at a dinner party. His version used cream cheese, heavy cream, and eggs to create that signature dense, rich, and creamy texture that sets New York cheesecake apart from all other varieties.
What makes New York cheesecake unique is its pure, unadulterated flavor and incredibly smooth texture. Unlike Italian cheesecakes that use ricotta, or Japanese cheesecakes that are light and fluffy, New York style is all about richness and density. It traditionally contains no lemon, no sour cream topping, and no fruit mixed into the batter—just pure, creamy perfection that showcases the quality of the cream cheese itself.
Why You’ll Love This Recipe
This is hands-down the best cheesecake recipe you’ll ever make, and once you try it, you’ll understand why it’s been passed down through generations of home bakers. The texture is absolutely perfect—dense and creamy without being heavy, with a luxurious mouthfeel that’s simply irresistible.
Here’s why this recipe is a winner:
- Restaurant-quality results at home – Save money and impress everyone with bakery-level cheesecake that tastes even better than store-bought
- Surprisingly simple process – Despite its fancy appearance, this recipe uses straightforward techniques that any home baker can master
- Make-ahead friendly – Actually tastes better the next day, making it perfect for stress-free entertaining and party planning
- Endlessly customizable – Use this as your base recipe and top it with anything from fresh strawberries to salted caramel
- Feeds a crowd – One cheesecake serves 12-16 people, making it economical for gatherings and celebrations
- No weird ingredients – Everything you need is probably already in your kitchen or easily found at any grocery store
- Impressive presentation – The tall, beautiful slice makes a stunning statement on any dessert table
- Freezer-friendly – Make it weeks in advance and freeze for ultimate convenience
Ingredient Notes
Let’s talk about what makes this cheesecake so incredibly delicious. Each ingredient plays a crucial role in creating that signature texture and flavor.
Cream Cheese: This is the star of the show. Use full-fat cream cheese (never low-fat or whipped) and make sure it’s at room temperature before you start. Philadelphia brand is the gold standard, but any quality full-fat cream cheese works. Room temperature cream cheese blends smoothly without lumps, which is essential for that silky texture.
Granulated Sugar: Provides sweetness and helps create structure. Don’t substitute with alternative sweeteners for your first attempt—the traditional recipe works perfectly as written.
Sour Cream: Adds tanginess and extra creaminess while helping to prevent cracks. Full-fat sour cream is essential. Greek yogurt can substitute in a pinch, but sour cream gives the most authentic flavor.
Large Eggs: These bind everything together and provide structure. Room temperature eggs incorporate more smoothly into the batter. You’ll need 4-5 large eggs depending on how dense you want your cheesecake.
Heavy Cream: Creates that luxurious, rich texture that defines New York style cheesecake. Don’t substitute with milk or half-and-half.
Pure Vanilla Extract: Use real vanilla extract, not imitation. It enhances all the other flavors without making the cheesecake taste “vanilla-y.”
Graham Crackers: For the crust. You can substitute with digestive biscuits, vanilla wafers, or even Oreos for a chocolate crust variation.
Unsalted Butter: Binds the crust together. Always use unsalted so you can control the salt level.
Salt: Just a pinch enhances all the flavors and balances the sweetness.
Cornstarch (optional): A tablespoon of cornstarch added to the filling helps prevent cracks and creates an even smoother texture.
Equipment Needed
Having the right tools makes this recipe even easier. Here’s what you’ll need:
- 9-inch or 10-inch springform pan – Essential for easy removal and beautiful presentation
- Large mixing bowl – For the filling
- Electric mixer (hand mixer or stand mixer) – Makes mixing smooth and effortless
- Food processor or plastic bag with rolling pin – For crushing graham crackers
- Medium bowl – For preparing the crust
- Rubber spatula – For scraping down the bowl and smoothing the top
- Aluminum foil – For wrapping the springform pan to prevent water leaks
- Large roasting pan – For the water bath
- Measuring cups and spoons – For accurate measurements
- Wire cooling rack – For proper cooling
- Knife or offset spatula – For smoothing the top
- Parchment paper (optional) – For lining the bottom of the pan
Cheesecake Recipe
- Total Time: 10 hours
- Yield: 12-16 servings 1x
- Diet: Vegetarian
Description
This classic New York cheesecake recipe delivers a perfectly dense, creamy, and smooth texture with a buttery graham cracker crust. It’s the ultimate show-stopping dessert that’s surprisingly easy to make at home.
Ingredients
For the Crust:
- 2 cups graham cracker crumbs (about 16–18 full crackers)
- 1/4 cup granulated sugar
- 1/2 cup unsalted butter, melted
- 1/4 teaspoon salt
For the Filling:
- 32 oz (4 packages) cream cheese, softened to room temperature
- 1 1/2 cups granulated sugar
- 1 cup sour cream, room temperature
- 4 large eggs, room temperature
- 1/2 cup heavy cream
- 2 teaspoons pure vanilla extract
- 1 tablespoon cornstarch (optional, helps prevent cracks)
- 1/4 teaspoon salt
Instructions
Step 1: Prepare Your Oven and Pan
Preheat your oven to 325°F (163°C). Wrap the outside of a 9-inch springform pan completely with aluminum foil (at least two layers) to prevent water from seeping in during the water bath. Grease the inside of the pan lightly with butter or cooking spray.
Step 2: Make the Graham Cracker Crust
In a food processor, pulse graham crackers until they become fine crumbs, or place them in a sealed plastic bag and crush with a rolling pin. Transfer crumbs to a medium bowl and mix with sugar, melted butter, and salt until the mixture resembles wet sand and holds together when pressed. Press the mixture firmly into the bottom of your prepared springform pan, using the bottom of a measuring cup to create an even, compact layer. Bake the crust for 10 minutes, then remove and let cool while you prepare the filling.
Step 3: Beat the Cream Cheese
In a large mixing bowl, beat the softened cream cheese on medium speed for 3-4 minutes until completely smooth, light, and fluffy with no lumps. Scrape down the sides and bottom of the bowl frequently to ensure everything is evenly mixed.
Step 4: Add Sugar and Sour Cream
Add the sugar and beat for another 2 minutes until well combined. Add the sour cream and mix on low speed just until incorporated. Don’t overmix at this stage.
Step 5: Incorporate Eggs Carefully
Add the eggs one at a time, mixing on low speed after each addition just until the yellow disappears. Overmixing after adding eggs can incorporate too much air, which leads to cracks. Scrape down the bowl between each egg.
Step 6: Add Final Ingredients
Pour in the heavy cream, vanilla extract, cornstarch (if using), and salt. Mix on the lowest speed just until everything is combined and smooth. The batter should be thick, creamy, and lump-free.
Step 7: Pour and Smooth
Pour the filling over the cooled crust. Tap the pan gently on the counter a few times to release any air bubbles. Use a spatula to smooth the top into an even layer.
Step 8: Prepare the Water Bath
Place the wrapped springform pan inside a larger roasting pan. Carefully pour hot water into the roasting pan until it reaches about halfway up the sides of the springform pan. The water bath ensures gentle, even cooking and helps prevent cracks.
Step 9: Bake Low and Slow
Bake at 325°F for 1 hour and 30 minutes. The cheesecake is done when the edges are set but the center still has a slight jiggle (about a 2-inch circle in the middle). It should not be liquid or soupy, just slightly wobbly—it will firm up as it cools.
Step 10: Cool Gradually
Turn off the oven and crack the door open about 4 inches. Let the cheesecake cool in the oven for 1 hour. This gradual temperature change prevents sudden contraction that causes cracks.
Step 11: Finish Cooling
Remove the cheesecake from the water bath and remove the foil. Run a thin knife around the edge to loosen it from the pan (this prevents cracking as it cools). Let it cool completely at room temperature for another hour.
Step 12: Refrigerate
Cover the cheesecake with plastic wrap (don’t let it touch the surface) or aluminum foil and refrigerate for at least 6-8 hours, preferably overnight. This chilling time is essential for the texture to set properly.
Step 13: Serve and Enjoy
When ready to serve, run a knife around the edge again and carefully remove the springform pan sides. Slice with a hot, clean knife (dip in hot water and wipe between cuts) for perfect, clean slices.
Notes
- Room temperature ingredients are crucial for a smooth, lump-free batter
- Don’t skip the water bath—it’s the secret to creamy texture and fewer cracks
- The cheesecake will continue to set as it chills, so don’t worry if the center seems slightly soft after baking
- For extra insurance against cracks, you can reduce oven temperature to 300°F and bake for 1 hour 45 minutes instead
- If cracks do appear, cover them with toppings like whipped cream, fruit, or ganache
- Leftover cheesecake keeps for up to 5 days in the refrigerator
- Prep Time: 30 minutes
- Cook Time: 8 hours (chilling)
- Category: Dessert
- Method: Baking
- Cuisine: American
Nutrition
- Serving Size: 1 slice (1/12 of cheesecake)
- Calories: 485
- Sugar: 32g
- Sodium: 310mg
- Fat: 35g
- Saturated Fat: 20g
- Unsaturated Fat: 12g
- Trans Fat: 1g
- Carbohydrates: 38g
- Fiber: 0.5g
- Protein: 8g
- Cholesterol: 165mg
Tips & Variations
Flavor Variations:
- Chocolate Cheesecake: Add 8 oz melted and cooled chocolate to the filling
- Lemon Cheesecake: Add 2 tablespoons lemon zest and 2 tablespoons lemon juice
- Pumpkin Cheesecake: Replace 1 cup of the filling with pumpkin puree and add pumpkin spice
- Oreo Cheesecake: Use crushed Oreos for the crust and fold some into the filling
- Salted Caramel: Swirl caramel sauce through the batter before baking
- Berry Swirl: Gently swirl berry puree through the batter for a marbled effect
Topping Ideas:
- Fresh strawberries, blueberries, or mixed berries
- Cherry or blueberry pie filling
- Chocolate ganache
- Caramel sauce with sea salt
- Whipped cream rosettes
- Crushed cookies or candy bars
- Fresh fruit compote
Make It Lighter:
- Use reduced-fat cream cheese (not fat-free) for slightly fewer calories
- Replace half the sour cream with Greek yogurt
- Use 3 whole eggs and 2 egg whites instead of 4 whole eggs
Pro Chef Tips
Temperature Control Is Everything: Professional bakers know that room temperature ingredients are non-negotiable. Take your cream cheese, eggs, and sour cream out of the fridge at least 2 hours before you start. Cold ingredients create lumps and incorporate unevenly, resulting in a dense, heavy texture instead of that signature smooth creaminess.
The Water Bath Method: The water bath (bain-marie) isn’t just for fancy restaurants. It creates steam in the oven that keeps the top of the cheesecake from drying out and cracking. It also provides gentle, even heat that cooks the cheesecake uniformly from edge to center. Make sure your water is hot when you add it—this maintains consistent oven temperature.
Don’t Overmix After Adding Eggs: This is where most home bakers go wrong. Once you add the eggs, mix on the lowest speed and only until combined. Overmixing incorporates air bubbles that expand during baking and cause cracks as they deflate during cooling. Think of it as gently folding the eggs in rather than beating them.
The Jiggle Test: Your cheesecake is done when the outer 3-4 inches are set but the center 2-3 inches still jiggles slightly when you gently shake the pan. It should move like Jello, not liquid. It will seem underdone, but trust the process—it continues cooking from residual heat and firms up completely when chilled.
Slice Like a Pro: Always use a hot, clean knife for cutting. Fill a tall container with very hot water, dip your knife in, wipe it completely dry with a towel, then make one smooth cut. Clean and reheat the knife between every single slice. This method gives you those perfect, photo-worthy slices without dragging or crumbling.
Common Mistakes to Avoid
Using Cold Ingredients: This is the number one mistake that leads to lumpy batter. Cold cream cheese won’t blend smoothly no matter how long you mix it, and you’ll end up with dense, heavy cheesecake filled with cream cheese lumps. Always start with room temperature ingredients.
Skipping the Water Bath: Some recipes claim you don’t need it, but if you want professional results, the water bath is essential. Baking cheesecake without it causes the edges to cook too quickly while the center stays raw, leading to cracks, dry edges, and uneven texture. Don’t skip this step.
Overmixing the Batter: More mixing does not equal better results. Once your eggs are added, overmixing incorporates excess air that creates bubbles and eventually cracks. Mix each ingredient only until just combined, then stop.
Opening the Oven Door Repeatedly: Every time you open the oven, the temperature drops dramatically, causing uneven baking. Trust your timer and only check the cheesecake when you think it’s done. Sudden temperature changes are a primary cause of cracking.
Not Allowing Proper Cooling Time: Rushing the cooling process causes thermal shock—the sudden temperature change makes the cheesecake contract rapidly and crack. Always cool gradually in the oven, then at room temperature, then refrigerate for hours. Patience is key.
Cutting While Warm: Cutting into a warm cheesecake results in a gooey mess. The filling needs those hours of refrigeration to fully set. Wait at least 6-8 hours (overnight is best) before slicing for clean, perfect pieces.
Storage & Meal Prep
Cheesecake actually stores beautifully, making it perfect for advance preparation.
Refrigerator Storage:
Cover the cheesecake tightly with plastic wrap or store in an airtight container. It will keep in the refrigerator for up to 5 days. The flavor actually improves after a day or two as the flavors meld together. Make sure nothing with a strong odor is nearby in your fridge, as cheesecake can absorb odors.
Individual Slice Storage:
If you’ve already cut the cheesecake, wrap each slice individually in plastic wrap and store in an airtight container. This keeps them fresh and makes it easy to grab a single serving.
Reheating (Not Recommended):
Cheesecake is best served cold or at room temperature. If you prefer it less cold, simply let it sit at room temperature for 20-30 minutes before serving. Never microwave cheesecake—it will become rubbery and lose its texture.
Preventing Sogginess:
If your crust tends to get soggy, add a thin layer of melted chocolate to the crust before adding the filling. This creates a moisture barrier that keeps everything crisp.
Make-Ahead & Freezer Notes
This is one of the best desserts for making ahead—it actually needs time to set, so you’re forced to make it in advance!
Make-Ahead Instructions:
Cheesecake is best made 1-2 days before you plan to serve it. The texture improves and the flavors develop beautifully. Make it, let it cool completely, refrigerate overnight, and serve the next day. You can make it up to 3 days ahead without any loss of quality.
Freezing the Whole Cheesecake:
Yes! Cheesecake freezes exceptionally well. Once completely chilled, wrap the entire cheesecake (still in the pan or removed) tightly in plastic wrap, then wrap again in aluminum foil. Place in a freezer bag for extra protection. Freeze for up to 3 months.
Freezing Individual Slices:
This is perfect for portion control or having dessert ready anytime. Cut the chilled cheesecake into slices, wrap each slice individually in plastic wrap, then place in a freezer-safe container with parchment paper between layers. Freeze for up to 2 months.
Thawing Instructions:
Transfer the wrapped cheesecake from the freezer to the refrigerator and let it thaw overnight (8-12 hours). Never thaw at room temperature, as this can cause condensation and make the cheesecake weepy. Individual slices thaw in about 3-4 hours in the refrigerator.
Adding Toppings After Thawing:
If you plan to add fruit, whipped cream, or sauce toppings, wait until after the cheesecake has completely thawed. Add toppings just before serving for the best presentation and texture.
Serving Suggestions
This rich, creamy cheesecake pairs beautifully with various accompaniments:
Fresh Fruit:
- Macerated strawberries (toss sliced strawberries with a tablespoon of sugar)
- Fresh raspberry or blackberry coulis
- Mixed berry compote
- Sliced peaches with a drizzle of honey
- Caramelized pineapple
Sauces and Drizzles:
- Hot fudge or chocolate ganache
- Salted caramel sauce
- Raspberry or strawberry sauce
- Lemon curd
- Dulce de leche
Beverage Pairings:
- Freshly brewed coffee or espresso
- Hot tea (Earl Grey or chamomile complement the richness)
- Dessert wines like Port or Moscato
- Champagne or sparkling wine for celebrations
- Cold milk for a nostalgic pairing
Complete the Dessert Spread:
Serve your cheesecake alongside:
- Fresh whipped cream dollops
- Chocolate-covered strawberries
- Butter cookies or shortbread
- Candied nuts
- Edible flowers for elegant presentation
FAQs Section
Q: Why did my cheesecake crack?
A: Cracks happen due to sudden temperature changes or overbaking. The most common causes are skipping the water bath, opening the oven door during baking, not cooling gradually, or baking at too high a temperature. Follow the gradual cooling method (cool in oven with door cracked, then room temperature, then refrigerate) to minimize cracking. Even if cracks appear, you can cover them with toppings!
Q: Can I make cheesecake without a water bath?
A: Technically yes, but the results won’t be as good. Without a water bath, your cheesecake is more likely to crack, have dry edges, and develop an uneven texture. If you absolutely can’t do a water bath, place a pan of water on the rack below the cheesecake to create steam, and reduce the oven temperature to 300°F.
Q: How do I know when my cheesecake is done?
A: The edges should be set and slightly puffed, while the center 2-3 inches should still jiggle slightly when you gently shake the pan. It should wobble like Jello, not ripple like liquid. An instant-read thermometer inserted in the center should read 150-155°F. Don’t wait for it to be completely firm—it will continue cooking as it cools.
Q: Can I use a regular cake pan instead of a springform pan?
A: It’s not recommended for your first attempt. A springform pan allows you to remove the cheesecake cleanly without flipping or inverting. If you must use a regular pan, line it with parchment paper with long overhangs on two sides to create “handles” for lifting the cheesecake out. Be aware that serving will be messier.
Q: My cheesecake center sank—what happened?
A: This usually means it was underbaked or cooled too quickly. The center needs to reach at least 150°F to properly set. If you cool it too quickly, the sudden temperature change causes it to collapse. Always allow gradual cooling and ensure the center has a slight jiggle but isn’t liquid when you take it out.
Q: Can I make this cheesecake gluten-free?
A: Absolutely! Simply replace the graham crackers with gluten-free graham crackers or gluten-free cookies. The filling is naturally gluten-free. You can also use almond flour mixed with melted butter and sugar for the crust.
Q: Why is my cheesecake grainy or lumpy?
A: This happens when the cream cheese isn’t at room temperature before mixing, or when you don’t beat it long enough initially. Cold cream cheese won’t blend smoothly. Always let your cream cheese sit out for 2-3 hours until it’s truly soft, then beat it for several minutes before adding other ingredients.
Conclusion
There you have it—the ultimate guide to making perfect, bakery-quality New York cheesecake right in your own kitchen! While it might seem intimidating at first, this recipe breaks down every step so clearly that even first-time cheesecake bakers can achieve amazing results. The secret is simply following the techniques, using room temperature ingredients, and being patient with the cooling process.
This classic cheesecake is more than just a dessert—it’s a labor of love that shows your family and friends how much you care. Whether you’re celebrating a birthday, holiday, or just want to treat yourself to something special, this creamy, dreamy cheesecake never disappoints. The best part? It actually gets better as it sits, so you can make it ahead and impress everyone with zero stress.
I’d love to hear how your cheesecake turns out! Drop a comment below with your results, questions, or favorite topping combinations. And if this recipe helped you create cheesecake magic, please share it on Pinterest so other home bakers can discover it too. Save it to your dessert board and come back to it whenever you need a show-stopping sweet treat. Happy baking, and enjoy every creamy, delicious bite!