
Introduction of Recipe
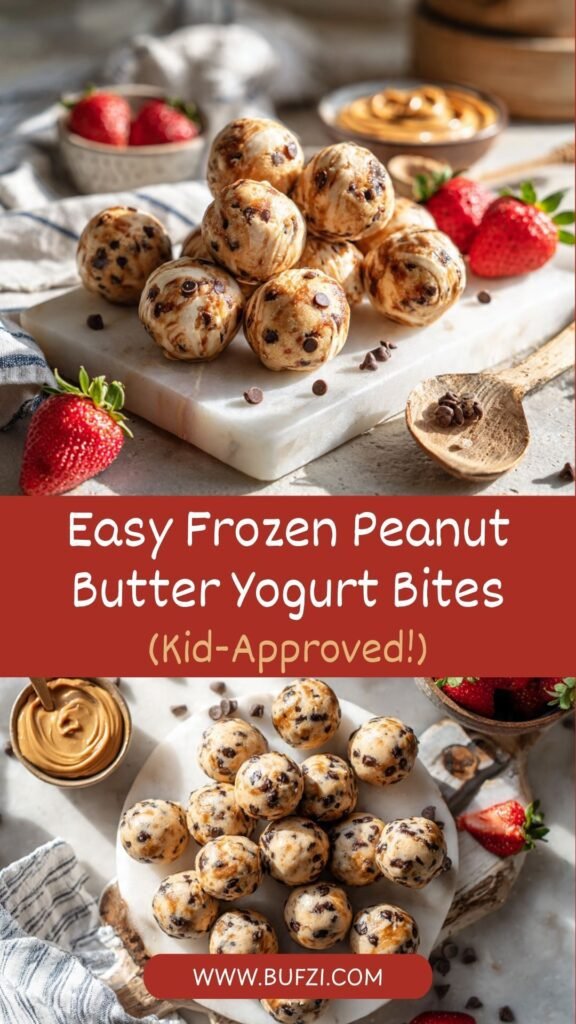
If you’re looking for a simple, healthy frozen treat that tastes like dessert but is actually good for you, these Easy Frozen Peanut Butter Yogurt Bites are exactly what you need! These little gems are the perfect combination of creamy Greek yogurt, rich peanut butter, and just a touch of sweetness, all frozen into bite-sized poppable treats. They’re incredibly satisfying, protein-packed, and take just minutes to prepare with only three basic ingredients.
These frozen yogurt bites have become wildly popular among health-conscious families, busy moms, fitness enthusiasts, and anyone who wants a guilt-free sweet snack. They’re perfect for hot summer afternoons, post-workout fuel, after-school snacks for kids, or even a healthier dessert alternative when you’re craving something sweet. The best part? You can customize them endlessly with different mix-ins, toppings, and flavor combinations. Whether you’re meal-prepping healthy snacks for the week or need something quick to satisfy your sweet tooth, these frozen peanut butter yogurt bites deliver every single time.
History / Background
While frozen yogurt as a dessert has been around since the 1970s, the concept of frozen yogurt bites is a much more recent phenomenon that emerged from the health food blogging community in the early 2010s. As Greek yogurt gained massive popularity in America for its high protein content and creamy texture, creative home cooks and wellness bloggers started experimenting with ways to make it more fun and portable, especially for kids and picky eaters.
The peanut butter yogurt bite variation specifically took off around 2015-2017 when Pinterest users and Instagram food bloggers discovered that combining protein-rich Greek yogurt with natural peanut butter created a perfectly balanced frozen snack that tasted indulgent but was actually nutritious. The trend aligned perfectly with the growing interest in meal prep, healthy snacking, and kid-friendly alternatives to ice cream and sugary treats.
What makes these bites special is their simplicity and versatility. Unlike traditional frozen desserts that require special equipment or complicated techniques, frozen yogurt bites can be made in any kitchen with just a mini muffin tin or silicone molds. They represent the modern approach to healthy eating—making nutritious food so delicious and convenient that it becomes the obvious choice. Today, they’re a staple in meal prep communities, fitness circles, and family kitchens across America, with countless variations shared daily on social media platforms.
Why You’ll Love This Recipe
These frozen peanut butter yogurt bites are about to become your new favorite healthy snack, and here’s why: they’re ridiculously easy to make, require zero cooking or baking skills, and use ingredients you probably already have in your pantry. Unlike most frozen treats that are loaded with sugar and empty calories, these bites are packed with protein, probiotics, and healthy fats that actually fuel your body. They’re the perfect solution when you want something sweet but don’t want to derail your healthy eating goals.
What really sets these apart is how customizable they are—you can make them as simple or as fancy as you like, adapting them to different dietary needs, flavor preferences, and occasions. Kids absolutely love them because they’re fun to eat and taste like a treat, while parents love them because they’re secretly healthy. Plus, they’re incredibly budget-friendly, costing just pennies per bite compared to store-bought protein snacks or healthy desserts.
- Ready in 10 minutes (plus freezing time) – Minimal active prep time makes these perfect for busy schedules
- Only 3 basic ingredients – No long shopping list or specialty items required
- High in protein – Each bite contains 3-4 grams of protein from Greek yogurt and peanut butter
- Naturally sweetened – Uses honey or maple syrup instead of refined sugar
- Kid-friendly & picky-eater approved – Fun bite-sized format makes healthy eating exciting
- Meal prep champion – Make a big batch and store for weeks of healthy snacking
- Budget-friendly – Costs less than $0.15 per bite
- Customizable – Endless flavor combinations and add-ins to keep things interesting
- Gut-healthy – Greek yogurt provides beneficial probiotics for digestive health
Ingredient Notes
Greek Yogurt – This is the foundation of your frozen bites, so quality matters. Full-fat Greek yogurt creates the creamiest, most indulgent texture, but 2% or even non-fat works beautifully if you’re watching calories. Greek yogurt is essential rather than regular yogurt because it’s much thicker and higher in protein (about 15-20g per cup compared to 8-10g in regular yogurt). The thickness prevents icy crystals from forming and gives you that smooth, creamy bite. Plain unsweetened Greek yogurt is recommended so you control the sweetness level. Substitutes: Icelandic skyr (even higher protein), coconut yogurt for dairy-free, or thick cashew yogurt.
Peanut Butter – Natural peanut butter with no added sugar works best and keeps these bites truly healthy. The natural oils in peanut butter create richness and help prevent the yogurt from freezing rock-hard. Creamy peanut butter blends more smoothly into the yogurt, but crunchy adds nice texture. Make sure your peanut butter is at room temperature so it mixes easily without creating lumps. Substitutes: Almond butter, cashew butter, sunflower seed butter (for nut-free), or even tahini for a unique twist.
Honey or Maple Syrup – A touch of natural sweetness balances the tang of Greek yogurt and enhances the peanut butter flavor. Honey provides floral notes and stays slightly softer when frozen, while maple syrup adds a subtle caramel-like depth. You only need 2-3 tablespoons for the entire batch, making these naturally low in sugar. The sweetener also helps prevent the yogurt from freezing too hard. Substitutes: Agave nectar, monk fruit syrup for sugar-free, or even mashed banana for natural sweetness.
Optional Add-Ins – Mini chocolate chips, chopped nuts, shredded coconut, chia seeds, ground flaxseed, vanilla extract, cinnamon, cocoa powder, or freeze-dried fruit pieces. These transform your basic bites into exciting flavor variations while adding extra nutrients and texture.
Equipment Needed
- Mini muffin tin (24-count) or silicone bite molds – Creates perfect portion-sized bites; silicone makes removal easier
- Mixing bowl (medium-sized) – For combining all ingredients smoothly
- Whisk or rubber spatula – To mix ingredients until creamy and well-combined
- Measuring cups and spoons – For accurate ingredient ratios
- Spoon or small cookie scoop – For portioning mixture evenly into molds
- Plastic wrap or aluminum foil – To cover the muffin tin during freezing
- Airtight freezer container or bag – For storing finished bites
- Optional: Electric mixer – Makes mixing faster and ensures ultra-smooth consistency

Easy Frozen Peanut Butter Yogurt Bites
- Total Time: 2 hours 10 minutes
- Yield: 24 frozen yogurt bites 1x
- Diet: Vegetarian
Description
These Easy Frozen Peanut Butter Yogurt Bites are a healthy, protein-packed frozen treat made with just three simple ingredients. Creamy Greek yogurt blended with natural peanut butter and a touch of honey creates perfectly poppable frozen bites that taste indulgent but are actually nutritious. Perfect for meal prep, after-school snacks, or guilt-free dessert!
Ingredients
Base Recipe:
- 2 cups plain Greek yogurt (full-fat or 2% recommended)
- ½ cup natural peanut butter (creamy or crunchy)
- 3 tablespoons honey or pure maple syrup
- 1 teaspoon vanilla extract (optional but recommended)
Optional Mix-Ins:
- ¼ cup mini chocolate chips
- 2 tablespoons chia seeds
- 2 tablespoons ground flaxseed
- ¼ cup chopped roasted peanuts
- ¼ cup shredded unsweetened coconut
Optional Toppings (add before freezing):
- Drizzle of melted dark chocolate
- Sprinkle of sea salt
- Chopped nuts or seeds
- Freeze-dried strawberries, crushed
Instructions
- Prepare Your Molds – Line a 24-count mini muffin tin with paper liners or lightly spray with cooking spray. Alternatively, use silicone bite molds set on a baking sheet for easiest removal. Have your molds ready before mixing so the batter doesn’t sit too long.
- Mix the Base – In a medium mixing bowl, combine the Greek yogurt, peanut butter, honey (or maple syrup), and vanilla extract if using. Use a whisk or rubber spatula to mix vigorously until completely smooth and creamy with no streaks of peanut butter remaining. This should take about 2-3 minutes of stirring. The mixture should be thick but pourable, similar to thick cake batter.
- Add Mix-Ins – If using any mix-ins like chocolate chips, chia seeds, or chopped nuts, gently fold them into the yogurt mixture until evenly distributed. Don’t overmix at this stage—just fold until combined.
- Portion Into Molds – Using a spoon or small cookie scoop (about 1 tablespoon each), divide the yogurt mixture evenly among the prepared molds, filling each cavity about ¾ full. They won’t rise, so you don’t need to worry about overflow. Tap the pan gently on the counter a few times to remove any air bubbles and smooth the tops.
- Add Toppings – If you want to add toppings like a chocolate drizzle, chopped nuts, or sea salt, now is the time. Add them to the tops of the unbaked bites while they’re still soft.
- Freeze Until Solid – Cover the entire muffin tin tightly with plastic wrap or aluminum foil to prevent freezer burn and absorption of other freezer odors. Place in the freezer on a flat surface and freeze for at least 2-3 hours, or until completely solid. For fastest freezing, don’t stack anything on top.
- Remove and Store – Once frozen solid, remove the bites from the molds. If using a metal tin with liners, they should pop out easily. If they’re stubborn, let them sit at room temperature for 2-3 minutes, then gently twist to release. Transfer the frozen bites to an airtight freezer container or freezer bag, placing parchment paper between layers if stacking. Store in the freezer for up to 3 months.
- Enjoy – Let the frozen bites sit at room temperature for 2-5 minutes before eating for the best texture—they should be creamy, not rock-hard. Enjoy straight from the freezer as a quick snack or healthy dessert!
Notes
- Consistency Tip: If your mixture seems too thick to pour easily, add 1-2 tablespoons of milk to thin it slightly. If it’s too thin, add more peanut butter or refrigerate for 15 minutes before portioning.
- Sweetness Level: Taste your mixture before freezing and adjust sweetness as needed. Remember that frozen foods taste less sweet than room temperature foods, so it should taste slightly sweeter than you want the final product.
- Nut-Free Version: Substitute sunflower seed butter or tahini for peanut butter to make these allergy-friendly.
- Dairy-Free Version: Use coconut yogurt or cashew yogurt in place of Greek yogurt.
- Texture: Using full-fat Greek yogurt creates the creamiest texture. Non-fat yogurt works but will be slightly icier.
- Don’t Skip Freezing Time: These need at least 2 hours to freeze properly. Rushing this step will result in soft, messy bites.
- Prep Time: 10 minutes
- Freezing Time:: 2-3 hours
- Cook Time: 0 minutes (no cooking required)
- Category: Snack, Dessert, Healthy Treat
- Method: No-Bake, Freezing
- Cuisine: American
Nutrition
- Serving Size: 1 frozen yogurt bite
- Calories: 52
- Sugar: 3g
- Sodium: 15mg
- Fat: 2.5g
- Saturated Fat: 0.8g
- Unsaturated Fat: 1.5g
- Trans Fat: 0g
- Carbohydrates: 5g
- Fiber: 0.5g
- Protein: 3g
- Cholesterol: 3mg
Tips & Variations
Chocolate Peanut Butter Bites – Add 2 tablespoons of cocoa powder to the base mixture and fold in mini chocolate chips for double chocolate indulgence.
Jelly Swirl Bites – Drop ½ teaspoon of strawberry or grape jam on top of each bite before freezing and swirl gently with a toothpick for a PB&J version.
Protein Power Bites – Mix in 2 scoops of vanilla or chocolate protein powder to boost protein content even higher—perfect for post-workout snacks.
Banana Bread Bites – Add ½ cup mashed ripe banana to the mixture along with ½ teaspoon cinnamon and a handful of chopped walnuts for banana bread flavor.
Cookie Dough Bites – Fold in mini chocolate chips, a splash of vanilla, and tiny pieces of cookie dough (egg-free) for an indulgent treat.
Tropical Bites – Substitute almond butter for peanut butter, add shredded coconut and crushed pineapple (drained well), and top with macadamia nuts.
Berry Blast Bites – Swirl in 2-3 tablespoons of berry puree (strawberry, blueberry, or mixed berry) for a fruity twist.
Almond Joy Bites – Use almond butter, add shredded coconut and mini chocolate chips, and top with a whole almond before freezing.
Coffee Lover’s Bites – Add 1 tablespoon of instant espresso powder to the base mixture for a subtle coffee flavor that pairs perfectly with chocolate chips.
Pro Chef Tips
Temperature is Everything – Make sure your peanut butter is at room temperature before mixing. Cold peanut butter won’t incorporate smoothly and will create lumps. If it’s too firm, microwave for 10-15 seconds to soften.
The Whisking Technique – Whisk in a circular motion, scraping the sides of the bowl frequently to ensure every bit of peanut butter is fully incorporated. The mixture should look completely uniform with no streaks. This prevents some bites from being bland while others are too peanut-buttery.
Silicone Molds are Game-Changers – If you make these regularly, invest in silicone mini muffin molds or candy molds. They make removal effortless—just pop them out from the bottom with no sticking or tearing. Plus, you don’t need liners, which saves money and waste.
The “Let it Rest” Secret – The absolute best texture comes from letting frozen bites sit at room temperature for 3-5 minutes before eating. They’ll be creamy and smooth rather than rock-hard. This is the difference between “okay” and “amazing.”
Layer Your Mix-Ins Strategically – For a more interesting bite, add half the base mixture to the molds, sprinkle some chocolate chips or nuts, then top with remaining mixture. This creates a surprise center that’s more evenly distributed than just folding everything in.
Prevent Freezer Burn – Always cover tightly and store in airtight containers. Exposure to air in the freezer will create ice crystals and diminish flavor. For longest storage, use vacuum-sealed bags if you have them.
Taste Before Freezing – Always taste your mixture before portioning into molds. It’s much easier to adjust sweetness or add more peanut butter at this stage than trying to fix frozen bites. Remember, frozen foods taste less sweet than room-temperature foods.
Common Mistakes to Avoid
Using Low-Quality Yogurt – Not all Greek yogurts are created equal. Some brands are watery or have a chalky texture. Stick with thick, creamy brands like Fage, Chobani, or store-brand Greek yogurt with at least 15g protein per cup. Watery yogurt will create icy, hard bites instead of creamy ones.
Not Mixing Thoroughly – If you don’t fully incorporate the peanut butter, you’ll end up with inconsistent bites—some bland, some overwhelming. Take the extra minute to whisk until completely smooth with no streaks or lumps visible.
Overfilling the Molds – Filling the molds too full makes them difficult to remove and can cause them to stick together. Fill only ¾ full for perfect portion sizes that release easily.
Skipping the Resting Time – Eating these straight from the deep freezer when rock-hard is disappointing. The texture is icy and hard rather than creamy. Always let them soften for 3-5 minutes before enjoying. This small step makes a huge difference.
Adding Wet Mix-Ins – If you’re adding fruit, make sure it’s well-drained or freeze-dried. Fresh fruit has too much water content and will create ice crystals that ruin the creamy texture. Stick to dried fruit, freeze-dried fruit, or well-drained fruit purees.
Storage & Meal Prep
Freezer Storage – These frozen peanut butter yogurt bites are designed for freezer storage and will keep beautifully for up to 3 months when stored properly. Once completely frozen and removed from molds, transfer them to an airtight freezer container or heavy-duty freezer bag. Place parchment paper between layers if stacking to prevent them from sticking together. Always label with the date so you know how long they’ve been stored.
Preventing Freezer Burn – The key to maintaining quality over time is preventing exposure to air. Use containers with tight-fitting lids rather than flimsy bags when possible. Press out all excess air before sealing bags. For longest storage (2-3 months), consider vacuum-sealing in small batches.
Portioning for Convenience – Store bites in portions that make sense for your household. If you’re packing school lunches, put 2-3 bites per small container for grab-and-go convenience. For personal snacking, keep a dozen in an accessible container at the front of your freezer.
Thawing Tips – For best texture, let bites sit at room temperature for 3-5 minutes before eating. They should be creamy and smooth, not rock-hard. If you’re packing them in lunchboxes, they’ll be perfectly softened by lunchtime. Don’t microwave to speed thawing—this will create a melted mess rather than the perfect creamy texture.
Meal Prep Strategy – These are ideal for Sunday meal prep. Make a double or triple batch and store in weekly portions. They’re perfect for packing in school lunches, grabbing before workouts, or having on hand when sweet cravings hit. The minimal time investment pays off all week long.
Make-Ahead & Freezer Notes
Perfect Make-Ahead Snack – This entire recipe is designed to be made ahead! In fact, these MUST be made ahead since they require freezing time. The beauty is that once made, you have healthy snacks ready to grab for weeks. Make a batch on Sunday and enjoy all month long.
Freezing Instructions – After portioning into molds, freeze uncovered for the first 30 minutes to set the tops, then cover tightly with plastic wrap to prevent freezer burn. Once completely frozen solid (2-3 hours minimum), remove from molds and transfer to proper freezer storage. This two-step process ensures the best texture and prevents freezer odors from being absorbed.
Freezer Life – When stored properly in airtight containers with parchment between layers, these bites maintain excellent quality for up to 3 months. They’re technically safe to eat longer, but quality may decline after that point. The peanut butter’s oils can eventually separate or develop freezer taste if stored too long.
Freezing Before or After Molding – You can freeze the entire mixture in a container, then scoop and shape into balls later if preferred. This works well if you don’t have molds available. Just use a small cookie scoop to portion frozen mixture and roll quickly between your hands (work fast so body heat doesn’t melt them).
Best Reheating Method – These don’t require reheating—they’re meant to be enjoyed frozen! Simply let them sit at room temperature for 3-5 minutes to reach the perfect creamy consistency. The warmer your room, the faster they’ll soften. In summer, 2-3 minutes is enough; in winter, give them a full 5 minutes.
Double Batch Friendly – The recipe doubles or triples beautifully. If you have freezer space, make multiple batches with different flavor variations so you have variety. Use the same proportions—double all ingredients equally for consistent results.
Serving Suggestions
As a Post-Workout Snack – The combination of protein from Greek yogurt and healthy fats from peanut butter makes these perfect for muscle recovery after exercise. Enjoy 2-3 bites within 30 minutes of finishing your workout.
In School Lunchboxes – Pack 2-3 frozen bites in a small container in the morning. By lunchtime, they’ll be perfectly softened and ready to eat. Kids love the treat-like quality while parents love the nutrition. Pair with apple slices and crackers for a balanced lunch.
With Fresh Fruit – Serve alongside fresh berries, sliced bananas, apple wedges, or any favorite fruit for a complete and satisfying snack. The fresh fruit adds fiber and vitamins while complementing the creamy yogurt bites.
As Healthy Dessert – Enjoy 2-4 bites after dinner as a guilt-free dessert that satisfies sweet cravings without derailing healthy eating. Add a cup of herbal tea or decaf coffee for a complete dessert experience.
With Granola and Fresh Berries – Create a yogurt bite bowl by letting bites soften slightly, then serving in a bowl with granola, fresh berries, and a drizzle of honey. This makes a fun breakfast or brunch option.
For Movie Night – Serve a bowl of assorted frozen yogurt bites (make different flavors!) as a healthier alternative to popcorn or candy during family movie night. Everyone can grab their favorites.
Afternoon Pick-Me-Up – Keep a container at work and enjoy 2-3 bites with your afternoon coffee or tea for a protein boost that beats vending machine snacks every time.
With Dark Chocolate – For an extra-special treat, enjoy your yogurt bite with a square of dark chocolate. The combination is reminiscent of peanut butter cups but much healthier.
FAQs Section
Can I use regular yogurt instead of Greek yogurt?
While you can technically use regular yogurt, it’s not recommended because it has much higher water content and less protein. Regular yogurt will create icy, hard bites rather than creamy ones. If you must use regular yogurt, strain it through cheesecloth for 2-3 hours first to remove excess liquid, essentially creating your own Greek-style yogurt. The thickness of Greek yogurt is what makes these bites creamy rather than icy.
Why are my frozen yogurt bites rock-hard?
Rock-hard bites usually result from using non-fat or low-fat yogurt without enough fat content to stay creamy when frozen. The fat in full-fat Greek yogurt is what keeps them smooth and scoopable. Another cause is not adding enough peanut butter or sweetener—both help prevent hard freezing. Finally, eating them straight from the freezer without letting them soften for 3-5 minutes will also make them seem too hard. Let them sit at room temperature briefly before enjoying.
Can I make these without peanut butter for nut allergies?
Absolutely! Sunflower seed butter is the most popular nut-free substitute and tastes very similar to peanut butter. Other options include tahini (sesame seed butter), soy nut butter, or pea protein butter. You can even use cookie butter or biscoff spread for a sweeter version, though it won’t have the protein benefit. The ratios remain the same—just swap the peanut butter 1:1 with your chosen substitute.
How do I prevent the chocolate chips from sinking to the bottom?
Chocolate chips tend to sink because of their weight. To prevent this, toss them in a tiny bit of flour or cocoa powder before folding into the mixture—this helps suspend them. Alternatively, use mini chocolate chips which are lighter and distribute better. You can also add half the mixture to molds first, sprinkle chips, then top with remaining mixture for more even distribution throughout the bite.
Can I make these dairy-free?
Yes! Use coconut yogurt, cashew yogurt, almond milk yogurt, or soy yogurt in place of Greek yogurt. Choose thick, Greek-style versions of these alternative yogurts for best texture. Brands like Kite Hill, Cocojune, or Silk make excellent thick non-dairy yogurts. The rest of the recipe remains the same. Keep in mind that coconut yogurt will add a subtle coconut flavor to the final product.
How long do they need to sit out before eating?
This depends on your room temperature and personal preference. In a warm room (75°F+), 2-3 minutes is usually enough. In cooler temperatures, give them a full 5 minutes. You want them softened to a creamy, ice-cream-like consistency rather than rock-hard. The outer edge should feel slightly soft when gently pressed. Some people prefer them a bit harder, so experiment to find your ideal texture.
Can I add protein powder to increase protein content?
Yes! Adding 1-2 scoops of vanilla or chocolate protein powder works well and significantly boosts protein content. However, protein powder absorbs liquid, so you may need to add 2-4 tablespoons of milk to maintain the right consistency for pouring. Mix the protein powder with the liquid first to prevent lumps, then add to the yogurt mixture. Whey, casein, pea, and plant-based proteins all work—just choose one that tastes good on its own since it will affect the final flavor.
Conclusion
These Easy Frozen Peanut Butter Yogurt Bites are proof that healthy snacking doesn’t have to be boring or complicated! With just three simple ingredients and 10 minutes of prep time, you can create a batch of delicious, protein-packed frozen treats that everyone in your family will love. They’re the perfect solution for busy families who want to eat healthier without sacrificing taste or convenience.
Whether you’re looking for a post-workout snack, a lunchbox treat for the kids, a guilt-free dessert, or just something to keep in the freezer for those inevitable snack attacks, these yogurt bites have you covered. The endless flavor variations mean you’ll never get bored, and the fact that they’re actually good for you makes them even better. Plus, with how budget-friendly and meal-prep-friendly they are, you’ll wonder why you didn’t start making them sooner!
I’d love to hear how your frozen peanut butter yogurt bites turn out! Try this recipe and let me know which flavor variation is your favorite in the comments below. Don’t forget to save this recipe to your Pinterest boards so you can find it easily later—and share it with your friends who love easy, healthy snacks too. Happy snacking, and enjoy every creamy, dreamy bite! 🥜🍦
weed vape cartridges online with fast delivery