
There’s something magical about starting your day with a vibrant, refreshing smoothie that takes just minutes to make. This easy smoothie recipe is your go-to solution for busy mornings, post-workout fuel, or even a nutritious afternoon snack. Whether you’re a smoothie beginner or a blending enthusiast, this simple yet delicious recipe delivers the perfect balance of sweet, creamy, and satisfying flavors in every sip.
What makes this the best easy smoothie recipe? It’s incredibly versatile, uses just five basic ingredients you probably already have in your kitchen, and can be customized to suit any dietary preference or taste. Serve it for breakfast alongside your morning toast, as a quick lunch replacement when you’re on the go, or as a healthy dessert alternative that won’t leave you feeling guilty. This healthy fruit smoothie is perfect for kids and adults alike, making it a true family favorite that everyone will request again and again.
History / Background
The modern smoothie as we know it today has an interesting journey that began in the 1930s. The concept originated with the invention of the blender by Stephen Poplawski in 1922, but it wasn’t until health food stores on the West Coast began popularizing blended fruit drinks in the 1960s and 70s that smoothies truly took off. The term “smoothie” itself was trademarked by Steve Kuhnau in 1973 when he opened the first Smoothie King location in Louisiana.
However, the concept of blending fruits and liquids together dates back much further. Ancient cultures across South America and the Caribbean have been creating fruit-based drinks for centuries, using mortars and pestles to crush tropical fruits with ice and natural sweeteners. These traditional beverages laid the groundwork for what would eventually become the smoothie phenomenon we know today.
The smoothie revolution exploded in the 1990s and early 2000s with the rise of health consciousness and the popularity of juice bars across America. Today, smoothies have become a staple in American kitchens, valued for their nutritional benefits, convenience, and endless customization options. This easy smoothie recipe embraces that tradition of simplicity and health, bringing together wholesome ingredients in a way that anyone can master, regardless of their cooking experience.
Why You’ll Love This Recipe
This easy homemade smoothie recipe is about to become your new morning obsession, and here’s why: it strikes the perfect balance between nutrition and indulgence, giving you a drink that tastes like a treat but fuels your body with real goodness. The creamy texture rivals anything you’d get at an expensive smoothie bar, but you’ll make it for a fraction of the cost right in your own kitchen.
Here’s what makes this recipe absolutely irresistible:
- Lightning-fast preparation – From fridge to glass in just 5 minutes, making it perfect for hectic mornings
- Budget-friendly ingredients – Uses affordable, everyday items you can find at any grocery store
- Naturally sweet – No refined sugars needed thanks to the natural sweetness of ripe fruit
- Incredibly creamy – Achieves that thick, milkshake-like consistency without ice cream
- Highly customizable – Easily adapt to accommodate dietary restrictions, allergies, or taste preferences
- Kid-approved taste – Even picky eaters love this smooth, fruity flavor
- Nutrient-packed – Delivers vitamins, minerals, fiber, and protein in one convenient glass
- No special skills required – If you can press a button on a blender, you can make this recipe
- Meal prep friendly – Make smoothie packs ahead for grab-and-go convenience
- Naturally gluten-free and can be made vegan – Accommodates various dietary needs effortlessly
Ingredient Notes
The beauty of this easy smoothie recipe lies in its simplicity. Each ingredient plays a crucial role in creating that perfect texture and flavor you’re looking for. Let’s break down what you’ll need and why each component matters:
Frozen Banana – This is your secret weapon for achieving that thick, creamy, ice cream-like consistency without adding any dairy or ice that would water down your smoothie. Bananas also provide natural sweetness, potassium, and help bind everything together. Always use a banana that’s ripe with brown spots before freezing for maximum sweetness. Substitution: Fresh banana plus ice cubes, or frozen mango for a tropical twist.
Frozen Berries – Whether you choose strawberries, blueberries, mixed berries, or raspberries, frozen fruit adds incredible flavor, gorgeous color, and important antioxidants. Frozen berries are actually more nutrient-dense than fresh in many cases since they’re flash-frozen at peak ripeness. Substitution: Fresh berries plus extra ice, frozen peaches, or frozen cherries.
Milk or Milk Alternative – This is your liquid base that helps everything blend smoothly. Regular dairy milk adds protein and calcium, while almond milk, oat milk, coconut milk, or soy milk work beautifully for dairy-free options. The type of milk you choose will slightly affect the flavor and nutrition profile. Substitution: Any milk you prefer, fruit juice for a sweeter version, or even coconut water for a lighter option.
Greek Yogurt – This ingredient is optional but highly recommended for adding protein, probiotics, and extra creaminess. Greek yogurt transforms your smoothie from a simple fruit drink into a satisfying meal replacement. Substitution: Regular yogurt, dairy-free yogurt, silken tofu for vegan protein, or simply omit for a lighter smoothie.
Honey or Sweetener – Depending on how sweet your fruit is, you may want to add a touch of natural sweetness. Honey, maple syrup, or a couple of dates work wonderfully. Many times, if your banana is very ripe, you won’t need any additional sweetener at all. Substitution: Maple syrup, agave nectar, dates, stevia, or omit entirely.
Optional Add-ins – This is where you can get creative! Add a handful of spinach for extra nutrients without affecting the taste, a tablespoon of nut butter for healthy fats and protein, chia seeds or flax seeds for omega-3s and fiber, protein powder for post-workout recovery, or a splash of vanilla extract for enhanced flavor.
Equipment Needed
The wonderful thing about making smoothies is that you don’t need a kitchen full of fancy gadgets. Here’s everything you’ll need to make this easy smoothie recipe:
High-Speed Blender – This is your most important tool. A good blender is essential for achieving that smooth, creamy texture without chunks. You don’t need a top-of-the-line Vitamix (though those work great), but you do want something more powerful than a basic blender. Popular options include Ninja blenders, NutriBullet, or any blender with at least 600 watts of power.
Measuring Cups – For accurately measuring your milk and other liquid ingredients.
Measuring Spoons – To measure sweeteners, nut butters, or any small quantity add-ins.
Rubber Spatula – Helpful for scraping down the sides of your blender to ensure everything gets incorporated evenly.
Serving Glasses – Choose whatever glass you love drinking from! Mason jars are popular for their Instagram-worthy look, tall glasses work great for a substantial breakfast smoothie, or use a to-go cup with a lid and straw for convenience.
Storage Containers – If you’re meal prepping smoothie packs, you’ll want freezer-safe bags or containers to organize your pre-measured ingredients.
PrintSmoothie Recipe
- Total Time: 5 minutes
- Yield: 2 servings (about 16 ounces total) 1x
- Diet: Vegetarian
Description
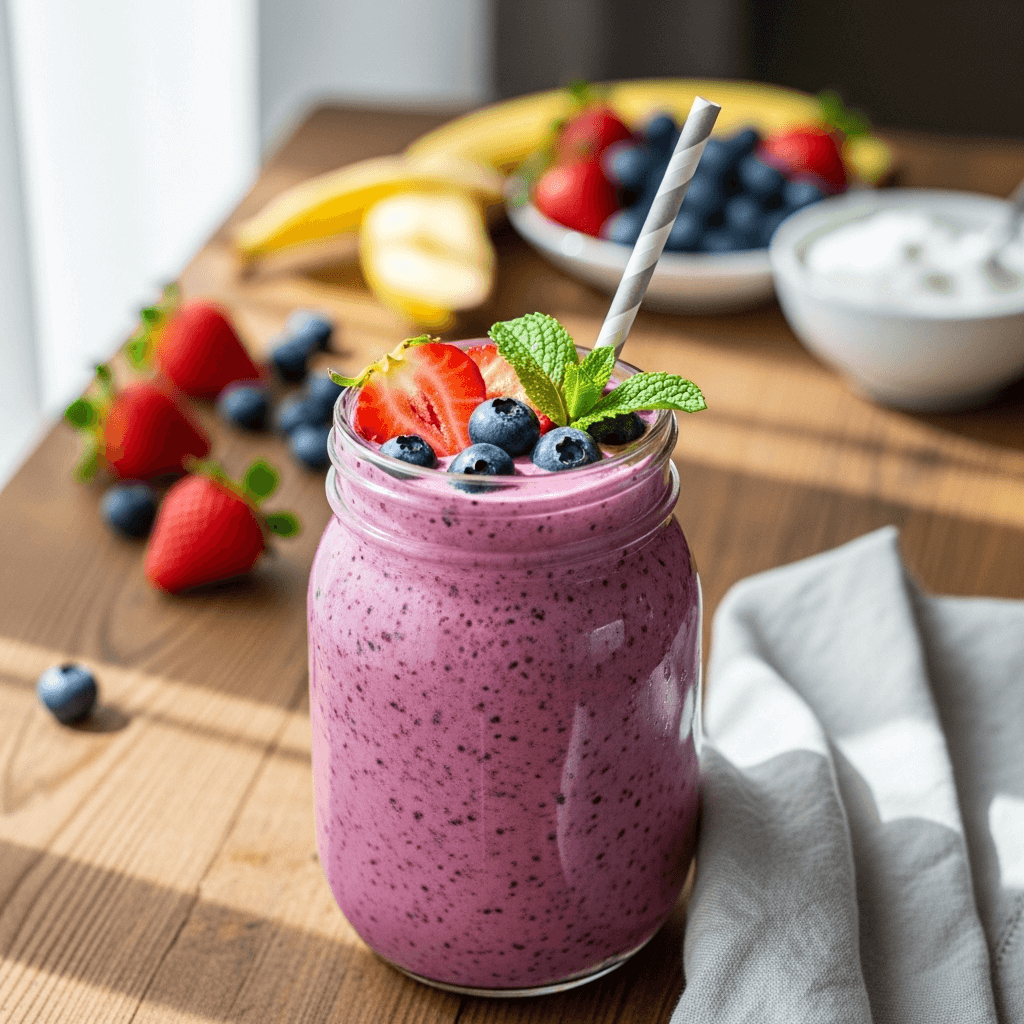
This easy 5-minute smoothie recipe is the perfect healthy breakfast or snack that requires just five simple ingredients and a blender. Naturally sweet, incredibly creamy, and endlessly customizable, it’s a family-friendly favorite that delivers nutrition and delicious flavor in every sip.
Ingredients
- 1 large frozen banana, broken into chunks
- 1 cup frozen mixed berries (strawberries, blueberries, or your favorite)
- 1 cup milk of choice (dairy, almond, oat, or coconut milk)
- ½ cup Greek yogurt (plain or vanilla)
- 1 tablespoon honey or maple syrup (optional, adjust to taste)
- Optional add-ins: 1 handful spinach, 1 tablespoon nut butter, 1 tablespoon chia seeds, ½ teaspoon vanilla extract, or 1 scoop protein powder
Instructions
- Prepare your ingredients. If you haven’t already, peel and slice your banana, then freeze it in a freezer bag for at least 2 hours or overnight. This step is crucial for achieving that thick, creamy texture. Gather all your other ingredients so everything is ready to blend.
- Layer your ingredients properly. Add your liquid (milk) to the blender first – this prevents the blender blades from getting stuck and helps everything blend more smoothly. Next, add your Greek yogurt, followed by the frozen banana chunks and frozen berries. If you’re using any optional add-ins like spinach, nut butter, or seeds, add them now. Add your sweetener last if using.
- Blend on low, then increase speed. Start your blender on the lowest setting for about 10 seconds to break up the frozen fruit. This prevents strain on your blender motor. Then gradually increase to medium-high speed and blend for 45 to 60 seconds, or until the mixture is completely smooth and creamy with no visible chunks.
- Check consistency and adjust. Stop the blender and check your smoothie’s thickness. If it’s too thick to blend properly, add a splash more milk (1 to 2 tablespoons at a time) and blend again. If it’s too thin, add a few more frozen berries or a couple of ice cubes. The perfect smoothie should be thick enough to eat with a spoon but still drinkable through a straw.
- Taste and adjust sweetness. Give your smoothie a quick taste test. If you’d like it sweeter, add a little more honey or maple syrup and blend again briefly. Remember that the natural sweetness will depend on how ripe your banana was and what type of berries you used.
- Serve immediately. Pour your smoothie into glasses and enjoy right away for the best texture and temperature. Smoothies tend to separate if they sit for too long, though a quick stir will bring them back together. Garnish with fresh berries, a sprinkle of granola, or a mint leaf if you want to make it extra special.
Notes
- Make it a smoothie bowl: For a thicker, spoonable consistency, use only ¾ cup milk instead of 1 cup, and serve in a bowl topped with granola, fresh fruit, coconut flakes, and seeds.
- Protein boost: Add a scoop of your favorite protein powder or 2 tablespoons of nut butter to make this more filling and turn it into a complete meal replacement.
- Green smoothie version: Add 1 to 2 handfuls of fresh spinach or kale. You won’t taste it at all, but you’ll get extra vitamins and minerals.
- Tropical variation: Replace berries with frozen mango and pineapple, and use coconut milk for a vacation-worthy tropical smoothie.
- Adjust thickness: Remember that smoothies thicken as they sit. If making ahead, you may need to add a splash more liquid when ready to drink.
- Prep Time: 5 minutes
- Cook Time: 0 minutes
- Category: Breakfast
- Method: Blending
- Cuisine: American
Nutrition
- Serving Size: 1 smoothie (8 ounces)
- Calories: 215
- Sugar: 28g
- Sodium: 85mg
- Fat: 3g
- Saturated Fat: 1g
- Unsaturated Fat: 1g
- Trans Fat: 0g
- Carbohydrates: 42g
- Fiber: 5g
- Protein: 9g
- Cholesterol: 8mg
Tips & Variations
The versatility of this easy smoothie recipe is one of its greatest strengths. Here are some creative ways to customize it based on your preferences, dietary needs, or what you have on hand:
Make it chocolate: Add 1 to 2 tablespoons of cocoa powder or cacao powder for a chocolate berry smoothie that tastes like dessert but is still healthy. You might want to add an extra teaspoon of sweetener to balance the cocoa’s bitterness.
Boost the nutrition: Sneak in nutritious add-ins that won’t affect the taste. Try adding a tablespoon of ground flaxseed for omega-3 fatty acids, a teaspoon of spirulina powder for plant-based protein, or half an avocado for healthy fats and extra creaminess.
Go tropical: Transform this into a tropical paradise smoothie by swapping the berries for frozen mango, pineapple, and a splash of coconut milk. Add a squeeze of lime juice for brightness.
Make it a green smoothie: Add a generous handful (or two) of baby spinach or kale. The fruit completely masks the vegetable flavor, making this an excellent way to increase your daily greens intake, especially for kids who resist eating vegetables.
Protein powder options: If using protein powder, vanilla or unflavored varieties work best with this recipe. Add it along with the other ingredients and blend as directed. Start with half a scoop if you’re sensitive to the protein powder taste.
Coffee lover’s version: Add a shot of cold espresso or 2 tablespoons of cold brew coffee for a caffeinated breakfast smoothie. This works especially well with chocolate variations.
Lower sugar option: Use unsweetened almond milk, skip the added sweetener entirely, and use mostly berries instead of banana for a lower-carb, lower-sugar version that’s still delicious.
Nut-free modification: If you have nut allergies, use oat milk or coconut milk instead of almond milk, and skip any nut butter add-ins. The recipe is naturally nut-free otherwise.
Pro Chef Tips
Want to take your smoothie game to the next level? These professional tips will help you achieve smoothie perfection every single time:
Always freeze your fruit in advance. This cannot be stressed enough – frozen fruit is the key to a thick, creamy smoothie without watering it down with ice. When bananas are starting to get too ripe with lots of brown spots, peel them, break them into chunks, and freeze in a single layer on a baking sheet before transferring to a freezer bag. This prevents them from clumping together.
Add liquid first, always. Professional smoothie makers know this secret: adding liquid to the blender first creates a vortex that pulls ingredients down toward the blades, resulting in smoother blending and less strain on your blender motor. It also prevents the blades from getting stuck on thick ingredients.
Use vanilla yogurt for extra flavor. While plain yogurt is more versatile and has less added sugar, vanilla yogurt adds a subtle sweetness and depth of flavor that can eliminate the need for additional sweeteners entirely.
Let frozen ingredients sit for 5 minutes. If your blender is struggling with frozen ingredients, let them sit at room temperature for about 5 minutes before blending. This slight thaw makes blending easier without significantly affecting the final texture.
Blend in stages for stubborn ingredients. If you’re adding ingredients like leafy greens, seeds, or protein powder that tend to clump, blend your liquid and greens first until completely smooth, then add the frozen fruit. This two-stage blending ensures no green flecks or powder lumps in your final smoothie.
Balance your flavors like a pro. Think of your smoothie like a chef thinks of seasoning. You need a balance of sweet (fruit, honey), tart (berries, citrus), creamy (yogurt, banana, nut butter), and sometimes a pinch of salt to make all the flavors pop. A tiny pinch of sea salt can actually enhance the sweetness of your smoothie.
Invest in a tamper tool. If your blender came with a tamper (that stick-like tool), use it! It helps push ingredients down toward the blades without having to stop and scrape the sides constantly.
Make smoothie packs for busy mornings. Pre-portion all your solid ingredients (frozen fruit, add-ins) into freezer bags or containers. In the morning, simply dump the frozen pack into your blender, add liquid and yogurt, and blend. This meal prep hack saves valuable morning minutes.
Common Mistakes to Avoid
Even though smoothies seem foolproof, there are a few common pitfalls that can result in less-than-perfect results. Here’s what to watch out for:
Using too much liquid. This is mistake number one that results in thin, watery smoothies that lack that satisfying, milkshake-like consistency. Start with less liquid than you think you need – you can always add more, but you can’t take it away. For this recipe, one cup of milk is perfect, but if you’re doubling or changing fruits, be conservative with your liquid additions.
Not using frozen fruit. If you use all fresh fruit instead of frozen, your smoothie will be warm and thin unless you add a lot of ice, which then waters down the flavor. Fresh fruit just doesn’t create the same thick, creamy texture that frozen fruit does. The only exception is if you’re making a tropical smoothie and plan to drink it immediately in a warm climate.
Blending for too long. Over-blending can actually warm up your smoothie due to the friction from the blender blades, and it can also incorporate too much air, making it frothy instead of creamy. Once your smoothie is smooth with no visible chunks (usually 45 to 60 seconds), stop blending.
Using old, freezer-burned fruit. While frozen fruit is convenient, fruit that’s been in your freezer for months with freezer burn will negatively affect the taste and texture of your smoothie. Use frozen fruit within 3 to 6 months for best quality, and store it in airtight containers or bags to prevent ice crystals.
Not tasting and adjusting. Different fruits have varying sweetness levels depending on ripeness and variety. Always taste your smoothie before serving and adjust the sweetness or tartness as needed. This extra 30 seconds ensures your smoothie is perfectly balanced every time.
Forgetting to clean your blender immediately. This isn’t about the recipe itself, but it’s crucial for smoothie success. If you let smoothie residue dry in your blender, it becomes incredibly difficult to clean. Rinse and wash your blender right after making your smoothie, or fill it with warm water and a drop of dish soap and blend briefly for an easy clean.
Storage & Meal Prep
One of the greatest advantages of this easy smoothie recipe is how well it adapts to meal prep strategies, saving you precious time during busy weekdays.
Immediate consumption is best. For optimal texture, flavor, and nutrient preservation, smoothies are best enjoyed immediately after blending. The cold temperature, perfect consistency, and vibrant taste are at their peak right out of the blender.
Short-term refrigeration. If you need to make your smoothie ahead of time, you can store it in an airtight container or mason jar in the refrigerator for up to 24 hours. Give it a good shake or stir before drinking, as separation is natural and doesn’t affect quality. The smoothie may thicken considerably in the fridge, so you might want to add a splash of milk when ready to drink.
Smoothie packs for freezer storage. This is the ultimate meal prep hack for smoothie lovers. Pre-portion all your solid ingredients (frozen fruit, greens, seeds, protein powder) into individual freezer bags or containers. Label them with the date and type of smoothie. These packs will keep in the freezer for up to 3 months. In the morning, dump the contents into your blender, add your liquid ingredients (milk and yogurt), and blend. You’ll have a fresh smoothie in minutes.
Freezing blended smoothies. You can freeze already-blended smoothies in ice cube trays, then transfer the frozen cubes to a freezer bag. When ready to enjoy, blend the frozen smoothie cubes with a little fresh milk to restore the creamy texture. This works well for about 1 month.
Reheating notes. Obviously, smoothies aren’t meant to be reheated! They’re best served cold and fresh. If your smoothie has been in the fridge and is too cold to drink comfortably, let it sit at room temperature for 5 to 10 minutes, or add a splash of room-temperature milk to take the chill off.
Make-Ahead & Freezer Notes
The beauty of this smoothie recipe is its incredible adaptability to various make-ahead strategies that fit your lifestyle:
Pre-freeze banana chunks. The most important prep you can do is keeping a supply of frozen banana chunks on hand. Whenever bananas get overripe, peel them, break into 1-inch chunks, and freeze on a parchment-lined baking sheet. Once solid, transfer to a freezer bag where they’ll keep for up to 3 months. This means you always have the foundation for a perfect smoothie ready to go.
Create custom smoothie packs. Take one hour on the weekend to prep individual smoothie packs for the entire week. Place the frozen fruit, greens, and any dry add-ins (seeds, protein powder) into freezer bags. Remove as much air as possible and lay flat to freeze, which saves space and allows for faster thawing if needed. Stack them neatly in your freezer and grab one each morning.
Batch prep yogurt portions. If you buy large containers of Greek yogurt, portion it out into individual ½-cup servings in small containers or ice cube trays. This makes measuring easier during busy mornings and reduces food waste.
Freeze in serving glasses. For a truly grab-and-go option, blend your smoothies, pour into mason jars or travel cups, and freeze. Take one out the night before and let it thaw in the refrigerator overnight. By morning, it will be perfectly slushy and ready to shake and drink. This method works for up to 1 month.
Best thawing and blending method. If you’ve frozen smoothie packs or ingredients, you don’t need to thaw them first. In fact, they blend better when frozen solid. Simply add your liquid to the blender, add the frozen contents of your smoothie pack, and blend starting on low speed before increasing to high.
Maintain freshness. For the freshest-tasting smoothies, use frozen fruit within 3 months, store yogurt according to package directions, and keep your milk fresh by checking expiration dates regularly. Quality ingredients equal quality smoothies.
Serving Suggestions
While this easy smoothie recipe is absolutely delicious on its own, here are some wonderful ways to serve it and complementary items that turn your smoothie into a complete meal or special occasion treat:
For breakfast, pair with: A slice of whole-grain toast with almond butter or avocado, a small bowl of granola or overnight oats if the smoothie isn’t filling enough, or a hard-boiled egg for additional protein. This combination creates a balanced breakfast with carbohydrates, protein, healthy fats, and fiber.
Turn it into a smoothie bowl. Use less liquid (about ¾ cup instead of 1 cup) for an extra-thick consistency, pour into a bowl, and top with fresh berries, sliced banana, granola, coconut flakes, chia seeds, hemp hearts, a drizzle of nut butter, or cacao nibs. Smoothie bowls are not only Instagram-worthy but also more satisfying since they require eating with a spoon, which slows down consumption.
For a post-workout snack. Serve your protein-boosted smoothie alongside a handful of raw almonds or a protein bar for sustained energy and muscle recovery. The combination of fast-acting fruit sugars and slower-digesting protein is ideal for post-exercise nutrition.
Kids’ breakfast or snack. Serve in a fun cup with a colorful straw, pair with whole-grain crackers and cheese cubes, or freeze into popsicle molds for a healthy frozen treat that kids think is dessert. You can also pour the smoothie into small cups for portion control with younger children.
Brunch entertaining. Set up a smoothie bar where guests can customize their own smoothies with various fruits, add-ins, and toppings. Serve in pretty glass jars with striped straws and garnish with fresh mint leaves, edible flowers, or a sprinkle of bee pollen for an elegant presentation.
Afternoon pick-me-up. Replace your afternoon coffee with this smoothie (or make the coffee version) and pair with a small handful of trail mix or a rice cake with peanut butter for sustained energy that won’t lead to a crash later.
Light lunch option. On warmer days, a protein-rich version of this smoothie can serve as a complete light lunch. Pair with a small side salad or vegetable soup for added fiber and vegetables.
FAQs Section
Can I make this smoothie without a high-powered blender?
Yes, you can make this smoothie with a regular blender, though it may take a bit longer to achieve that silky-smooth consistency. The key is to let your frozen fruit sit at room temperature for about 5 minutes before blending to soften slightly. Also, add your liquid first and start on a lower speed, gradually increasing to prevent straining your blender motor. If your blender really struggles, you can add slightly more liquid or use partially thawed fruit. For those who make smoothies regularly, investing in a more powerful blender is worthwhile for the time and frustration it saves.
How can I make my smoothie thicker or thinner?
For a thicker smoothie, use less liquid (start with ¾ cup instead of 1 cup), add more frozen banana, use frozen yogurt instead of regular, or add a handful of ice cubes. You can also add ingredients like avocado, frozen cauliflower (trust us, you won’t taste it), or even a tablespoon of oats. For a thinner smoothie, simply add more liquid a tablespoon at a time until you reach your desired consistency. Coconut water, fruit juice, or just more milk all work well as thinning agents.
Is this smoothie suitable for weight loss?
This smoothie can absolutely fit into a weight loss plan when consumed mindfully. At approximately 215 calories per serving, it’s a reasonable breakfast or snack option. To make it more weight-loss friendly, use unsweetened almond milk (30-40 calories per cup versus 80-100 for regular milk), skip added sweeteners and rely on fruit’s natural sugars, use non-fat Greek yogurt, and bulk it up with spinach or other greens for volume without extra calories. Adding protein powder or nut butter will make it more satiating so you stay full longer. Remember that weight loss is about overall calorie balance throughout the day, and this nutrient-dense smoothie is certainly healthier than many breakfast alternatives.
Can I use fresh fruit instead of frozen?
You can use fresh fruit, but you’ll need to add ice cubes to get that thick, cold smoothie texture – typically ½ to 1 cup of ice depending on how much fresh fruit you’re using. However, keep in mind that ice will dilute the flavor slightly as it melts. The best compromise if you prefer using fresh fruit is to use at least one frozen element, like keeping your bananas frozen even if you use fresh berries. This gives you the thick texture without watering down the taste.
How long does this smoothie stay fresh?
Freshly blended smoothies are best consumed immediately but can be stored in the refrigerator in an airtight container for up to 24 hours. You’ll notice some separation, which is completely normal – just shake or stir it before drinking. The texture will thicken considerably in the fridge. For longer storage, freeze smoothie packs (pre-measured dry ingredients) for up to 3 months, or freeze already-blended smoothies in ice cube trays or mason jars for up to 1 month. The nutrition and taste remain good, though some vitamin degradation can occur over time, especially vitamin C.
Can I make this dairy-free or vegan?
Absolutely! This smoothie is easily adapted to be completely dairy-free and vegan. Simply swap the regular milk for any plant-based milk like almond, oat, soy, or coconut milk. Replace the Greek yogurt with dairy-free yogurt (coconut, almond, or soy-based), or use half an avocado or silken tofu for creaminess and protein without dairy. Use maple syrup or agave nectar instead of honey if you’re strictly vegan. The taste will be slightly different depending on your substitutions, but it will still be delicious and creamy.
What’s the best way to prevent my smoothie from separating?
Some separation is natural and doesn’t indicate anything is wrong with your smoothie. It happens because fruit fiber and liquid separate over time due to gravity. To minimize separation, blend thoroughly until completely smooth (this incorporates ingredients better), serve immediately when possible, store in an airtight container that’s filled to the top to minimize air exposure, and give it a good shake or stir before drinking if it has been sitting. Adding ingredients that act as emulsifiers, like yogurt, avocado, or nut butter, can also help keep things mixed together longer.
Conclusion
There you have it – your complete guide to making the perfect easy smoothie recipe that’s guaranteed to become a staple in your kitchen! This simple five-ingredient smoothie proves that healthy eating doesn’t have to be complicated or time-consuming. With just a few minutes and a blender, you can create a nutritious, delicious drink that fuels your body and satisfies your taste buds.
The beauty of this recipe lies in its versatility. Whether you’re making it for a quick weekday breakfast, a post-workout recovery drink, a healthy snack for the kids, or a light lunch on a warm afternoon, it delivers every single time. And once you’ve mastered this basic formula, the possibilities for customization are truly endless. Don’t be afraid to experiment with different fruits, add-ins, and flavor combinations until you find your perfect blend.
Remember, the key to smoothie success is using frozen fruit for that thick, creamy texture, balancing your flavors with sweet and tart elements, and not being shy about adding nutritious ingredients like greens or seeds – they’ll boost the health factor without affecting the delicious taste. Meal prepping smoothie packs on the weekend sets you up for stress-free mornings all week long.
We’d love to hear how your easy smoothie turns out! Did you try any of the variations? What’s your favorite combination? Leave a comment below and share your smoothie success stories. If you loved this recipe, don’t forget to rate it with five stars and save it to your Pinterest boards so you can find it again and again. Your support helps us continue creating simple, delicious recipes that make healthy eating achievable for everyone.
Now grab your blender and get mixing – your perfect smoothie is just five minutes away! Cheers to easy, healthy, and absolutely delicious mornings!