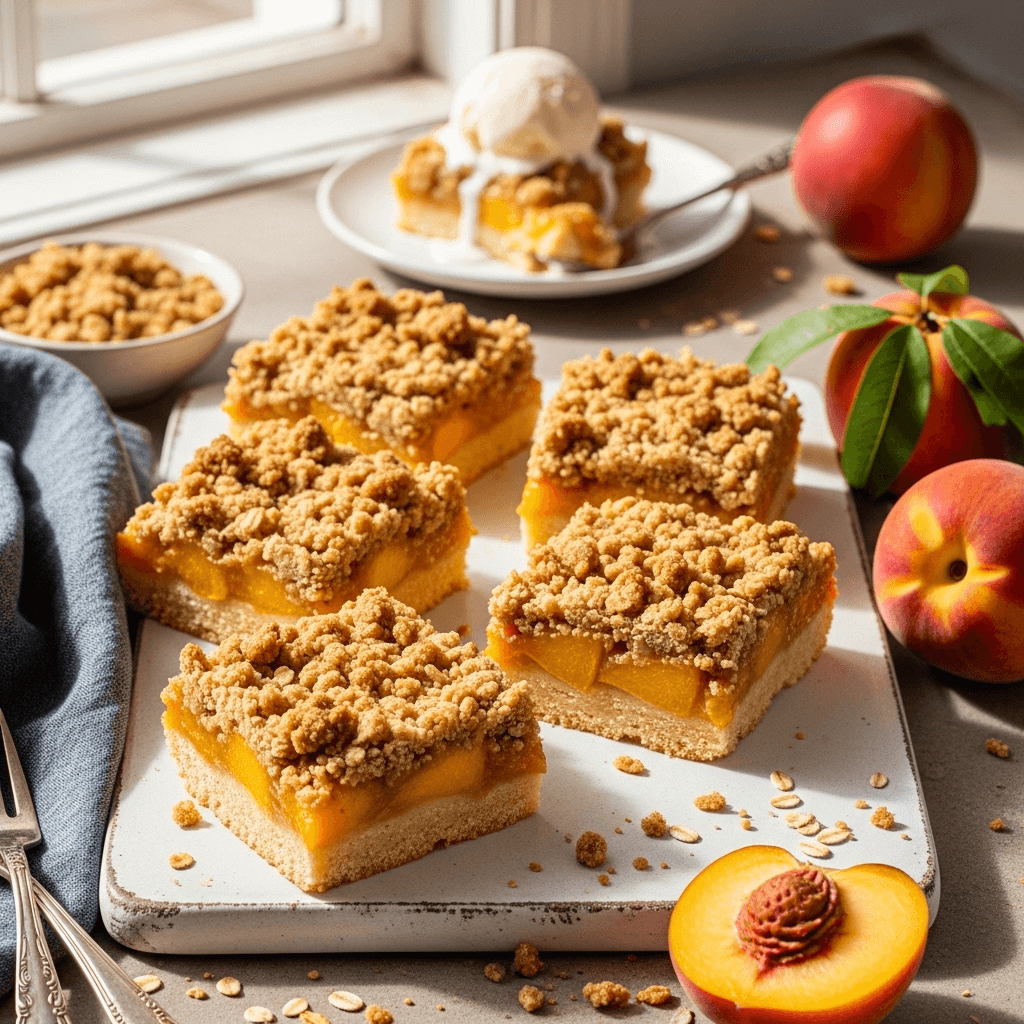

Imagine all the deliciousness of classic peach cobbler—the sweet, juicy peaches, the buttery, golden crust, and that irresistible tender-crisp topping—transformed into a perfectly portable bar that’s easier to make and even easier to serve. These peach cobbler bars capture everything we love about traditional Southern peach cobbler but reimagined in a convenient, crowd-pleasing format that’s ideal for potlucks, picnics, and everyday dessert cravings. With layers of buttery shortbread crust, sweet cinnamon-spiced peach filling, and a crumbly streusel topping that bakes up golden and crispy, these bars deliver pure summertime bliss in every bite.
This easy peach cobbler bars recipe is perfect for showcasing peak-season fresh peaches during summer months, though it works beautifully with frozen peaches year-round for when those cobbler cravings hit in winter. They’re ideal for backyard barbecues, Fourth of July celebrations, church potlucks, bake sales, or simply as a special weekend treat for your family. Unlike traditional cobbler that requires careful spooning and serving in bowls, these bars can be cut into neat squares, eaten with your hands, and packed for picnics or lunchboxes. Best of all, this recipe comes together in about an hour with simple pantry ingredients, making homemade peach dessert bars accessible to bakers of all skill levels—no rolling pins, pie plates, or fancy techniques required.
History / Background
Peach cobbler itself is a quintessentially American dessert with deep roots in Southern culinary tradition, dating back to the early American colonial period. The term “cobbler” likely originated because the biscuit or pastry topping resembled a cobbled stone pathway. Early American settlers adapted traditional British puddings and pies using ingredients available in the New World, and peaches—which thrived in the Southern climate—became a natural choice. By the 19th century, peach cobbler had become a staple dessert throughout the South, particularly in Georgia (the Peach State), South Carolina, and other peach-growing regions.
Traditional peach cobbler recipes varied widely from family to family and region to region. Some featured a cake-like topping, others used biscuit dough, and still others employed a pastry crust. The common thread was always the star ingredient: juicy, sweet peaches at their peak ripeness, usually flavored with warm spices like cinnamon and nutmeg, sometimes enriched with a little butter and sugar.
Peach cobbler bars represent a modern evolution of this beloved classic, emerging from the convenience-focused baking trends of the late 20th and early 21st centuries. As bar cookies and sheet pan desserts gained popularity—especially in community cookbooks and food blogs—creative bakers began adapting traditional fruit desserts into bar form. This innovation made these desserts more portable, easier to serve at large gatherings, and simpler to prepare without sacrificing the essential flavors that made the originals so beloved.
Today, these peach crumble bars bridge the gap between nostalgic Southern tradition and modern convenience. They honor the spirit of Grandma’s peach cobbler while accommodating busy schedules and contemporary entertaining styles. Whether you’re using peaches from your own backyard tree, the farmers market, or your freezer, these bars bring that same comforting, summery sweetness that’s made peach cobbler an American favorite for generations.
Why You’ll Love This Recipe
These buttery peach cobbler bars hit every mark for what makes a dessert recipe truly special—they’re delicious, practical, and guaranteed to earn you compliments every single time you make them.
- Easier than traditional cobbler – No need for perfectly spooned portions or careful lattice work—just press, spread, bake, and cut into neat squares
- Uses fresh or frozen peaches – Enjoy peach cobbler flavor year-round without waiting for summer peach season
- Portable and party-perfect – These bars travel beautifully and can be eaten with your hands, making them ideal for potlucks and picnics
- Incredible texture combination – Buttery crust, tender fruit filling, and crispy crumble topping create the perfect bite every time
- Crowd-pleasing flavor – Sweet peaches with warm cinnamon appeal to everyone from kids to grandparents
- Simple ingredients – Uses basic pantry staples—no specialty ingredients required
- Makes a big batch – One 9×13 pan yields 16 generous bars, perfect for feeding a crowd
- Impressive yet easy – Looks and tastes bakery-quality but comes together quickly with minimal effort
- Customizable – Easy to adapt with different fruits, spices, or topping variations
- Great with ice cream – While delicious on their own, they’re absolutely heavenly warm with vanilla ice cream
Ingredient Notes
Fresh or Frozen Peaches: You’ll need about 4 cups of diced peaches (roughly 4-5 medium peaches if using fresh). Choose ripe but still slightly firm peaches—overly soft ones create too much liquid. If using frozen peaches, don’t thaw them first; use straight from frozen and add 2-3 extra minutes to baking time. Frozen peaches actually work wonderfully here since they release less excess moisture.
All-Purpose Flour: Forms the structure for both the crust and crumble topping. For gluten-free peach bars, use a 1:1 gluten-free flour blend—the texture will be slightly more delicate but still delicious.
Butter: Unsalted butter is best so you can control the salt level. The butter should be cold and cubed for the crust and topping to create that perfect crumbly texture. Don’t substitute margarine—real butter is essential for flavor and proper texture.
Granulated and Brown Sugar: Granulated sugar sweetens the filling and provides structure, while brown sugar in the topping adds moisture and a deeper, caramel-like flavor. Light or dark brown sugar both work fine—dark brown has a more pronounced molasses flavor.
Cinnamon: This warm spice is classic with peaches and enhances their natural sweetness. If you love spice, add a pinch of nutmeg or ginger to the filling as well.
Cornstarch: Essential for thickening the peach filling so it sets properly and doesn’t create soggy bars. Don’t skip this ingredient—it’s what prevents a runny filling.
Lemon Juice: Brightens the peach flavor and adds a subtle tang that balances the sweetness. It also helps prevent the peaches from browning if you’re preparing them ahead.
Vanilla Extract: Adds depth and rounds out all the other flavors. Use pure vanilla extract rather than imitation for the best taste.
Salt: Just a small amount enhances all the other flavors and balances the sweetness throughout the recipe.
Old-Fashioned Oats (Optional): Adding oats to the crumble topping creates extra texture and a more rustic appearance. Quick oats work too, but avoid instant oats.
Equipment Needed
- 9×13-inch baking pan (metal or glass)
- Parchment paper (recommended for easy removal)
- Large mixing bowl
- Medium mixing bowl
- Whisk
- Rubber spatula
- Pastry cutter or fork (for cutting butter into flour)
- Sharp knife and cutting board (if using fresh peaches)
- Measuring cups and spoons
- Cooling rack
- Peeler (optional, for fresh peaches)
Pro Tip: Lining your pan with parchment paper with overhang on the sides creates easy “handles” for lifting out the entire batch for perfectly clean cuts.
Print
Peach Cobbler Bars Recipe
- Total Time: 1 hour 5 minutes (plus cooling)
- Yield: 16 bars 1x
- Diet: Vegetarian
Description
These easy peach cobbler bars feature a buttery shortbread crust, sweet cinnamon-spiced peach filling, and a golden crumbly topping. They capture all the deliciousness of traditional peach cobbler in a convenient, portable bar format that’s perfect for summer gatherings. Use fresh or frozen peaches for a dessert that tastes like sunshine in every bite.
Ingredients
For the Crust:
- 2 cups (240g) all-purpose flour
- ½ cup (100g) granulated sugar
- ¼ teaspoon salt
- ¾ cup (1½ sticks/170g) unsalted butter, cold and cubed
For the Peach Filling:
- 4 cups diced peaches (about 4–5 medium peaches, or frozen)
- ½ cup (100g) granulated sugar
- 3 tablespoons cornstarch
- 1 teaspoon ground cinnamon
- 1 tablespoon lemon juice
- 1 teaspoon vanilla extract
- Pinch of salt
For the Crumble Topping:
- 1 cup (120g) all-purpose flour
- ½ cup (100g) packed brown sugar
- ½ cup (45g) old-fashioned oats (optional but recommended)
- ½ teaspoon ground cinnamon
- ¼ teaspoon salt
- ½ cup (1 stick/113g) unsalted butter, cold and cubed
Instructions
- Preheat and prep: Preheat your oven to 350°F (175°C). Line a 9×13-inch baking pan with parchment paper, leaving overhang on two opposite sides for easy removal. Spray lightly with cooking spray or grease with butter.
- Make the crust: In a large bowl, whisk together flour, sugar, and salt. Add the cold cubed butter. Using a pastry cutter, fork, or your fingertips, work the butter into the flour mixture until it resembles coarse crumbs with some pea-sized pieces remaining. The mixture should hold together when pressed.
- Press and pre-bake: Press the crust mixture firmly and evenly into the bottom of the prepared pan, creating a compact layer. Use your hands or the bottom of a measuring cup to pack it down well. Bake for 15 minutes until the edges just begin to turn lightly golden. Remove from oven and set aside.
- Prepare peach filling: While the crust bakes, make the filling. If using fresh peaches, peel and dice them into ½-inch pieces. In a medium bowl, combine the diced peaches, granulated sugar, cornstarch, cinnamon, lemon juice, vanilla extract, and salt. Toss gently until peaches are evenly coated and the cornstarch is dissolved.
- Make crumble topping: In a medium bowl, whisk together flour, brown sugar, oats (if using), cinnamon, and salt. Add the cold cubed butter and use a pastry cutter or your fingers to work it into the dry ingredients until the mixture forms crumbles ranging from pea-sized to larger chunks. Some larger pieces are good—they create a nice texture contrast.
- Assemble: Pour the peach filling evenly over the pre-baked crust, spreading it into an even layer with a spatula. Sprinkle the crumble topping evenly over the peaches, covering completely. It’s okay to have some larger clumps—this creates appealing texture.
- Bake: Bake for 40-45 minutes, until the topping is golden brown and the filling is bubbling around the edges. If the top is browning too quickly, tent loosely with aluminum foil for the last 10 minutes of baking.
- Cool completely: Remove from the oven and place on a cooling rack. Let cool to room temperature in the pan, about 2 hours. This cooling time is crucial for the filling to set properly. For cleanest cuts, refrigerate for 1 hour after cooling to room temperature.
- Cut and serve: Use the parchment paper overhang to lift the entire batch onto a cutting board. Cut into 16 squares (4 rows by 4 rows) using a sharp knife, wiping clean between cuts. Serve at room temperature or slightly warm, with vanilla ice cream if desired.
Notes
- Fresh peaches should be ripe but still slightly firm. Overly ripe peaches create too much liquid.
- If using frozen peaches, do not thaw—use them frozen and add 2-3 extra minutes to baking time.
- The filling will seem loose when you remove it from the oven but will firm up as it cools.
- For extra peachy flavor, add ¼ teaspoon almond extract to the filling.
- Store leftovers covered in the refrigerator, but bring to room temperature for 20 minutes before serving for best texture.
- These taste even better the next day once the flavors have melded together.
- Prep Time: 20 minutes
- Cook Time: 45 minutes
- Category: Dessert
- Method: Baking
- Cuisine: American
Nutrition
- Serving Size: 1 bar (1/16 of recipe)
- Calories: 285
- Sugar: 22g
- Sodium: 95mg
- Fat: 14g
- Saturated Fat: 9g
- Unsaturated Fat: 4g
- Trans Fat: 0g
- Carbohydrates: 38g
- Fiber: 2g
- Protein: 3g
- Cholesterol: 38mg
Tips & Variations
Mixed berry peach bars: Replace 2 cups of the peaches with mixed berries (blueberries, raspberries, blackberries) for a beautiful mixed fruit variation.
Peach and blueberry: Use 3 cups peaches and 1 cup blueberries for a patriotic red, white, and blue-adjacent dessert perfect for Fourth of July.
Spiced variation: Add ¼ teaspoon nutmeg and ⅛ teaspoon ginger to the filling for a more complex spice profile reminiscent of peach pie.
Almond lover’s version: Add ¼ teaspoon almond extract to the filling and sprinkle ¼ cup sliced almonds over the crumble topping before baking.
Extra crumbly topping: Double the crumble topping recipe for an even thicker, more indulgent layer on top.
Reduced sugar: Cut the sugar in the filling to ⅓ cup if your peaches are very sweet, or if you prefer less sweetness.
Gluten-free option: Use a 1:1 gluten-free flour blend and gluten-free oats. The texture will be slightly more delicate but still delicious.
Other stone fruits: This recipe works beautifully with nectarines, plums, or apricots—or a combination of stone fruits.
Add nuts: Mix ½ cup chopped pecans or walnuts into the crumble topping for added crunch and richness.
Pro Chef Tips
Cold butter is crucial: Keeping the butter cold when making both the crust and topping creates that perfect crumbly, tender texture. If your kitchen is warm, chill the cubed butter in the freezer for 10 minutes before using, and work quickly. Warm butter creates a paste instead of crumbles.
Don’t skip the pre-bake: Pre-baking the crust for 15 minutes ensures it stays crisp rather than becoming soggy from the fruit filling. This step is essential for proper texture—raw crust won’t cook through properly once the wet filling is added.
Cornstarch dissolving technique: Make sure the cornstarch is fully dissolved into the peach mixture with no white streaks remaining. Any lumps of cornstarch will create gummy spots in the filling. Toss thoroughly and let sit for 2-3 minutes, allowing the cornstarch to begin absorbing the peach juices.
Peach prep matters: If using fresh peaches, make sure they’re cut into uniform ½-inch pieces so they cook evenly. Larger chunks won’t soften enough; smaller pieces turn to mush. Uniform sizing is key to perfect texture.
The cooling patience test: I know it’s torture, but letting these cool completely (ideally with refrigeration) before cutting makes an enormous difference in clean cuts and proper texture. The filling needs time to set. Cutting while warm results in a delicious mess rather than neat bars.
Topping distribution secret: Don’t pack down the crumble topping—just sprinkle it loosely over the fruit. Packed topping becomes dense and cake-like instead of maintaining that desirable crumbly texture.
Boost the peachy flavor: Brushing the pre-baked crust with a thin layer of peach preserves before adding the filling intensifies the peach flavor throughout and adds extra moisture barrier protection for the crust.
Common Mistakes to Avoid
Using overly ripe or mushy peaches: While you want ripe peaches for flavor, overly soft ones release too much liquid that the cornstarch can’t adequately thicken, resulting in soggy bars. Choose peaches that are ripe but still slightly firm with a little give when gently pressed. If using fresh peaches and they’re very juicy, increase cornstarch to 4 tablespoons.
Skipping the cornstarch: Some bakers think they can omit the cornstarch, but it’s absolutely essential for thickening the fruit juices and creating a filling that sets properly. Without it, you’ll have peach soup instead of a nice thick filling. Don’t substitute flour for cornstarch—it creates a different texture and can taste pasty.
Cutting before completely cool: This is the most common mistake that leads to messy bars instead of neat squares. The filling needs several hours to cool and set properly. Even if the bars look set after an hour, the filling is still too soft. For best results, cool to room temperature, then refrigerate for at least an hour before cutting.
Not pressing the crust firmly enough: The bottom crust needs to be packed down tightly to hold together. A loosely pressed crust will be crumbly and fall apart when you try to cut the bars. Use significant pressure when pressing—really pack it down with your hands or a flat-bottomed measuring cup.
Thawing frozen peaches: If using frozen peaches, add them directly to the filling mixture while still frozen. Thawing releases too much liquid that makes the filling watery. Frozen peaches actually work better than fresh in some cases because they release less moisture during baking and the cornstarch can control the liquid more effectively.
Storage & Meal Prep
Room temperature storage: These bars can sit at room temperature for up to 4 hours, making them perfect for picnics and potlucks. However, for longer storage, refrigeration is best to maintain freshness and prevent the fruit from fermenting.
Refrigerator storage: Store cut bars in an airtight container in the refrigerator for up to 5 days. Place parchment paper between layers if stacking to prevent sticking. The bars will firm up in the refrigerator—let them sit at room temperature for 20-30 minutes before serving for the best texture and flavor.
Reheating for that fresh-baked taste: These are delicious cold from the fridge, but if you want to recapture that warm-from-the-oven experience, reheat individual bars in the microwave for 15-20 seconds, or place on a baking sheet in a 300°F oven for 8-10 minutes. The topping will crisp back up beautifully.
Maintaining topping crispness: The crumble topping will soften slightly during storage in an airtight container. To restore crispness, warm bars in a 300°F oven for 5-7 minutes before serving.
Portability tips: These bars travel exceptionally well. Pack in a single layer in a covered container for best results. They hold together beautifully and can be eaten with your hands, making them ideal for picnics, potlucks, and lunchboxes.
Make-Ahead & Freezer Notes
Advance preparation: You can make these bars 1-2 days ahead of time. Store covered in the refrigerator and bring to room temperature before serving, or warm slightly for that fresh-baked appeal.
Freezing baked bars: These freeze beautifully for up to 3 months. Cut into bars first, then freeze in a single layer on a baking sheet for 2 hours until solid. Transfer to freezer-safe containers or bags with parchment paper between layers. Thaw overnight in the refrigerator or at room temperature for 2-3 hours.
Freezing components separately: For maximum freshness, you can pre-bake the crust, cool completely, wrap tightly, and freeze for up to 1 month. Freeze the crumble topping separately in a freezer bag. When ready to bake, add fresh peach filling to the frozen crust and top with frozen crumble—no thawing needed. Bake at 350°F for 50-55 minutes.
Best reheating method: Reheat thawed bars in a 300°F oven for 10 minutes to restore the crispy topping texture. Microwave reheating works but won’t crisp the topping.
Gift-giving option: These make wonderful homemade gifts. Wrap individual bars in plastic wrap, tie with ribbon, and present in decorative boxes or tins. Include a note mentioning refrigeration for storage.
Serving Suggestions
These peachy bars are incredibly versatile and pair beautifully with various accompaniments depending on how you’re serving them.
Classic à la mode: Serve warm bars with a generous scoop of vanilla ice cream melting over the top. The contrast of warm fruit and cold ice cream is absolutely heavenly. French vanilla, butter pecan, or cinnamon ice cream all pair beautifully.
Whipped cream topping: A dollop of fresh whipped cream or whipped topping adds lightness and elegance. For extra flavor, add a splash of vanilla extract or a sprinkle of cinnamon to the whipped cream.
Summer barbecue dessert: These are perfect for backyard cookouts, pool parties, and picnics. Serve alongside watermelon, fresh berries, and lemonade for the ultimate summer spread.
Brunch sweet treat: Cut into smaller squares (25 instead of 16) and serve as part of a brunch buffet alongside quiche, fresh fruit salad, and coffee cake.
Coffee and tea pairing: These bars are wonderful with morning coffee or afternoon iced tea. The sweet fruit and buttery crust complement both beverages perfectly.
Breakfast option: While these are dessert bars, they’re not overly sweet and make a delightful special occasion breakfast treat, similar to coffee cake or fruit Danish.
Holiday gatherings: Serve at Fourth of July celebrations, Labor Day cookouts, or Thanksgiving alongside traditional pies for variety on the dessert table.
Potluck presentation: Leave uncut in the pan and bring a sharp knife for easy serving. Or pre-cut and arrange on a platter lined with parchment paper for a beautiful presentation.
FAQs Section
Can I use canned peaches instead of fresh or frozen?
While fresh or frozen peaches work best, you can use canned peaches in a pinch. Use 2 (15-ounce) cans of peaches in juice or light syrup (not heavy syrup), drained very well and patted dry with paper towels. Reduce the sugar in the filling to ⅓ cup since canned peaches are pre-sweetened. Increase cornstarch to 4 tablespoons to handle any residual liquid.
Do I need to peel the peaches?
For the smoothest texture and most elegant presentation, yes, peel the peaches. However, if you prefer a more rustic texture or are short on time, leaving the skins on is fine—they’ll soften during baking. The skins add a slight chewiness and deeper color to the filling. For easy peeling, blanch peaches in boiling water for 30 seconds, then plunge into ice water; the skins will slip right off.
Why is my crumble topping hard instead of crumbly?
This usually happens when the butter was too warm when mixed in, or the topping was pressed down too firmly. The butter should be cold and cubed, and you should achieve a mixture with various-sized crumbles—some pea-sized, some larger. Don’t pack it down when sprinkling over the fruit; just scatter it loosely. Overbaking can also make the topping too hard—watch for golden brown color and remove promptly.
Can I make these into individual portions?
Absolutely! Use a muffin tin lined with cupcake liners or greased well. Divide the crust mixture among 12 muffin cups, pressing firmly into the bottom. Add a spoonful of filling to each, then top with crumble. Bake at 350°F for 25-30 minutes. These individual peach cobbler cups are adorable and perfect for portion control.
What’s the best way to tell when they’re done baking?
The topping should be golden brown, and you should see the filling bubbling around the edges. The center may look slightly jiggly, but it will set as it cools. If the topping is browning too quickly before the filling bubbles, tent loosely with foil and continue baking. Better to slightly overbake than underbake—the filling needs heat to properly activate the cornstarch.
Can I substitute the peaches with other fruits?
Yes! This recipe works beautifully with apples (increase cinnamon to 2 teaspoons), cherries, berries, or plums. You can also do mixed fruit combinations. Adjust the cornstarch based on the fruit’s juiciness—berries need 4 tablespoons; apples need only 2 tablespoons since they’re drier.
How do I prevent a soggy bottom crust?
Pre-baking the crust is essential—don’t skip this step. Also, make sure the crust is pressed firmly and evenly with no thin spots. Some bakers brush the pre-baked crust with a thin layer of egg white or apricot preserves before adding the filling to create a moisture barrier. Finally, ensure you’re using enough cornstarch in the filling to properly thicken the fruit juices.
Conclusion
These easy peach cobbler bars are the perfect marriage of nostalgic Southern comfort and modern convenience. They deliver all the delicious flavor of traditional peach cobbler—sweet peaches, warm cinnamon, buttery crust, and that irresistible crumbly topping—in a format that’s easier to make, serve, and transport. Whether you’re baking them for a summer cookout, a family dessert, or just because you’re craving something sweet and peachy, this recipe never disappoints.
The best part? Once you master this simple technique, you’ll find endless ways to customize these bars with different fruits and flavor combinations. But honestly, the classic peach version is so good, you might not want to change a thing. It’s one of those recipes that becomes part of your regular rotation because it’s just that reliable, that delicious, and that beloved by everyone who tries it.
I’d love to hear about your peach cobbler bars! Did you use fresh or frozen peaches? Did you try any of the variations? What did you serve them with? Drop a comment below and share your experience, and please rate the recipe so other bakers know what to expect. If these bars brought a little sunshine to your kitchen, share this recipe on Pinterest—your pins help other home bakers discover these delicious treats!
Now go preheat that oven and get ready to fill your kitchen with the incredible aroma of cinnamon peaches and buttery goodness. Happy baking, friend! 🍑