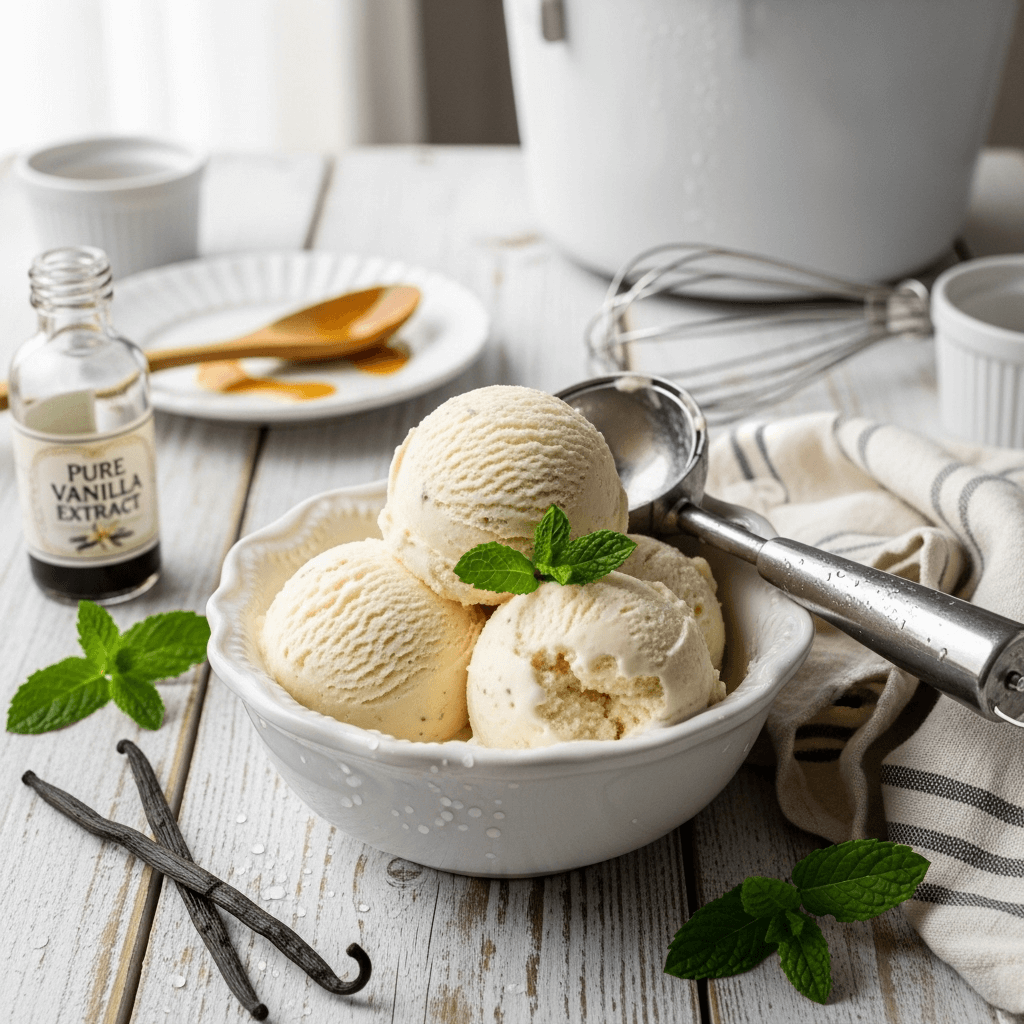

There’s nothing quite like a scoop of homemade vanilla ice cream—that pure, creamy, intensely vanilla-flavored frozen dessert that tastes a million times better than anything you can buy at the store. This easy homemade vanilla ice cream recipe creates the most luxurious, velvety-smooth ice cream with a rich custard base that melts on your tongue. It’s the kind of ice cream that makes you close your eyes and savor every single bite.
What makes this creamy vanilla ice cream so special is its genuine flavor profile. Real vanilla beans or high-quality vanilla extract combined with rich cream and eggs create a depth of flavor that store-bought varieties simply can’t match. The custard base (also called French vanilla ice cream base) gives it that signature silky texture and prevents ice crystals from forming, resulting in perfectly smooth, scoopable ice cream every time.
This classic vanilla ice cream recipe is incredibly versatile and perfect for countless occasions: summer barbecues and pool parties, birthday celebrations, ice cream socials, holiday desserts, topping warm pies and cobblers, creating epic sundaes and milkshakes, or simply enjoying by the spoonful on a warm evening. It’s also the perfect base for mix-ins like chocolate chips, cookie dough, or fruit—the possibilities are endless!
History / Background
Vanilla ice cream has a fascinating history that spans continents and centuries. While frozen desserts have existed since ancient times (Romans and Chinese enjoyed snow mixed with fruit and honey), modern ice cream as we know it evolved in Europe during the 16th and 17th centuries. The addition of vanilla—a flavor obtained from orchids native to Mexico—elevated ice cream from a simple frozen treat to something truly extraordinary.
Vanilla itself has an interesting backstory. The Aztecs were the first to discover vanilla, using it to flavor their chocolate drinks. When Spanish conquistadors brought vanilla back to Europe in the 1520s, it became incredibly prized and expensive. Thomas Jefferson is often credited with introducing vanilla ice cream to America after encountering it during his time as ambassador to France in the 1780s. He was so enamored that he brought back a recipe, which still exists in the Library of Congress today!
For centuries, ice cream was a luxury reserved for the wealthy because making it required ice (difficult to obtain year-round), cream (expensive), and vanilla (incredibly costly). The invention of the hand-crank ice cream maker in the 1840s and later the electric ice cream maker revolutionized home ice cream production. Suddenly, families could create their own frozen treats at home without employing a team of servants to crank ice and salt mixtures for hours.
Today, vanilla remains the most popular ice cream flavor in America, accounting for about 28% of all ice cream sales. Despite—or perhaps because of—its ubiquity, a truly excellent homemade vanilla ice cream made with real ingredients stands head and shoulders above commercial versions. This recipe honors that tradition of creating something exceptional from simple, quality ingredients.
Why You’ll Love This Recipe
This homemade vanilla ice cream recipe delivers restaurant-quality results that will make you wonder why you ever bought store-bought ice cream!
Here’s why this recipe will become your frozen dessert staple:
- Incredible smooth and creamy texture – The custard base creates that premium, luxurious mouthfeel
- Pure, intense vanilla flavor – Real vanilla extract or vanilla beans deliver authentic taste
- No weird additives – You control every ingredient, avoiding gums and artificial stabilizers
- Customizable base – Perfect for adding your favorite mix-ins and flavors
- Impressive yet achievable – Looks and tastes gourmet but uses simple techniques
- Family-friendly activity – Kids love helping make (and especially eating!) homemade ice cream
- More economical than premium brands – Make high-quality ice cream for less money
- Gluten-free naturally – Safe for those avoiding gluten
- Makes perfect gifts – Package in pretty containers for impressive homemade presents
- Fresher than store-bought – No months-long freezer storage means better flavor
- Wedding and party ready – Impress guests with homemade ice cream at special events
- Endless variation potential – Once you master the base, flavor possibilities are infinite
Ingredient Notes
Understanding your ingredients is key to making the best possible ice cream:
Heavy Cream – This is what makes ice cream rich and luxurious. Heavy cream (also called heavy whipping cream) contains 36-40% milk fat, which creates that smooth, creamy texture. Don’t substitute with half-and-half or light cream—you need the high fat content for proper texture and richness.
Whole Milk – Balances the heavy cream to create the perfect consistency. Whole milk adds volume without making the ice cream too heavy. Using lower-fat milk will result in icier, less creamy ice cream.
Granulated Sugar – Sweetens the ice cream and lowers the freezing point, which helps create a smooth, scoopable texture. The amount of sugar also affects how hard the ice cream freezes—too little and it freezes rock-solid, too much and it stays too soft.
Egg Yolks – These are crucial for creating the custard base that makes French vanilla ice cream so special. Egg yolks contain lecithin, which acts as an emulsifier, keeping fat and water blended smoothly. They also add richness, color, and that signature velvety texture. Use fresh, large egg yolks.
Pure Vanilla Extract – This is where flavor magic happens! Use pure vanilla extract, not imitation vanilla flavoring. The difference is profound. For an even more intense vanilla flavor, you can scrape the seeds from a vanilla bean pod and add both the seeds and the pod to the cream mixture.
Salt – Just a pinch enhances all the other flavors and balances sweetness. Don’t skip it!
Optional: Vanilla Bean – For the ultimate vanilla experience, use a whole vanilla bean in addition to or instead of extract. The tiny black specks throughout your ice cream indicate genuine vanilla bean, and the flavor is incomparable.
Equipment Needed
Here’s what you’ll need to make perfect homemade ice cream:
- Ice cream maker – Essential for churning the mixture and incorporating air while freezing. Canister-style (requires pre-freezing), compressor models (self-freezing), or old-fashioned hand-crank all work.
- Medium heavy-bottomed saucepan – For cooking the custard base without scorching
- Whisk – For stirring and tempering eggs
- Fine-mesh strainer – For straining the custard to ensure silky-smooth texture
- Large bowl – For straining the custard into
- Medium bowl – For whisking egg yolks
- Measuring cups and spoons – For accurate ingredient measurements
- Rubber spatula – For scraping down sides and stirring
- Candy/instant-read thermometer – Optional but helpful for monitoring custard temperature (should reach 170-175°F)
- Plastic wrap – For covering custard during chilling
- Freezer-safe container – For storing finished ice cream (preferably shallow and wide)
Vanilla Ice Cream Recipe
- Total Time: 4 hours 25 minutes
- Yield: 1.5 quarts (about 6 cups or 12 servings) 1x
- Diet: Gluten Free
Description
This easy homemade vanilla ice cream features a rich custard base made with real cream, milk, eggs, and pure vanilla extract. It’s incredibly smooth, creamy, and packed with genuine vanilla flavor—far superior to any store-bought version!
Ingredients
Ice Cream Base:
- 2 cups heavy cream (cold)
- 1 cup whole milk
- ¾ cup granulated sugar (divided: ½ cup + ¼ cup)
- 5 large egg yolks, room temperature
- 2 tablespoons pure vanilla extract
- Pinch of salt (about ⅛ teaspoon)
Optional for Intense Vanilla Flavor:
- 1 vanilla bean pod, split lengthwise and seeds scraped
Instructions
- Prepare Ice Cream Maker: If using a canister-style ice cream maker, make sure the bowl has been in the freezer for at least 24 hours before you plan to make ice cream. It needs to be completely frozen solid.
- Heat Cream Mixture: In a medium heavy-bottomed saucepan, combine 2 cups heavy cream, 1 cup whole milk, ½ cup sugar, and a pinch of salt. If using a vanilla bean, add the scraped seeds and the empty pod to the mixture. Heat over medium heat, stirring occasionally, until the mixture is steaming hot and sugar has dissolved completely. Do not let it boil. Remove from heat.
- Whisk Egg Yolks: While the cream mixture heats, whisk the 5 egg yolks and remaining ¼ cup sugar in a medium bowl until the mixture is pale yellow and slightly thickened, about 2 minutes. This is important for texture!
- Temper the Eggs: This is a crucial step to prevent scrambled eggs! Slowly pour about 1 cup of the hot cream mixture into the egg yolks while whisking constantly. This gradually raises the temperature of the eggs without cooking them. Once combined, pour the tempered egg mixture back into the saucepan with the remaining cream mixture, whisking constantly.
- Cook the Custard: Return the saucepan to medium-low heat. Cook, stirring constantly with a wooden spoon or rubber spatula, until the custard thickens enough to coat the back of the spoon, about 5-8 minutes. The mixture should reach 170-175°F on an instant-read thermometer. When you run your finger through the custard on the spoon, it should leave a clear path. Do not let it boil or the eggs will curdle!
- Strain the Custard: Pour the custard through a fine-mesh strainer into a large clean bowl. This removes any small bits of cooked egg and ensures silky-smooth ice cream. If you used a vanilla bean pod, remove it from the strainer (you can rinse, dry, and save it to make vanilla sugar or extract).
- Add Vanilla Extract: Stir in the vanilla extract and mix well. The vanilla flavor will be strong—this is perfect!
- Chill Completely: Cover the bowl with plastic wrap, pressing it directly onto the surface of the custard to prevent a skin from forming. Refrigerate for at least 4 hours, or preferably overnight. The custard must be completely cold (40°F or below) before churning. Cold custard churns faster and produces smoother ice cream.
- Churn the Ice Cream: Pour the chilled custard into your ice cream maker and churn according to the manufacturer’s instructions. This typically takes 20-30 minutes. The ice cream is ready when it reaches the consistency of soft-serve—thick and creamy but still soft.
- Freeze for Scoopable Texture: Transfer the ice cream to a freezer-safe container. Press plastic wrap or parchment paper directly onto the surface to prevent ice crystals, then cover with a lid. Freeze for at least 4 hours or until firm enough to scoop. For best texture, let ice cream sit at room temperature for 5-10 minutes before scooping if it’s very hard.
- Serve and Enjoy: Scoop into bowls or cones and enjoy your homemade masterpiece! This ice cream is best enjoyed within 2 weeks for optimal texture and flavor.
Notes
- Temperature Control: Cooking the custard to exactly 170-175°F is ideal. Below 160°F and the eggs won’t thicken properly; above 180°F and you risk curdling.
- Chilling is Essential: Never skip the chilling step! Warm custard won’t churn properly and will result in icy, grainy ice cream. Patience pays off here.
- Vanilla Bean Alternative: If using a vanilla bean, use 1-2 teaspoons of vanilla extract in addition to the bean for maximum flavor, not instead of.
- No Ice Cream Maker: You can make this without a machine by pouring the chilled custard into a shallow pan, freezing, and stirring vigorously every 30 minutes for 3-4 hours. It won’t be quite as smooth but still delicious.
- Texture Tip: Homemade ice cream freezes harder than store-bought because it lacks commercial stabilizers. This is normal! Let it soften at room temperature for 5-10 minutes before serving.
- Egg Safety: Use fresh, high-quality eggs and ensure your custard reaches at least 160°F to pasteurize the eggs safely.
- Prep Time: 15 minutes
- Cook Time: 10 minutes (plus 4 hours chilling, plus churning time)
- Category: Dessert
- Method: Stovetop
- Cuisine: American
Nutrition
- Serving Size: ½ cup (1/12 of recipe)
- Calories: 285
- Sugar: 15g
- Sodium: 45mg
- Fat: 22g
- Saturated Fat: 13g
- Unsaturated Fat: 8g
- Trans Fat: 0g
- Carbohydrates: 17g
- Fiber: 0g
- Protein: 4g
- Cholesterol: 155mg
Tips & Variations
Transform your basic vanilla ice cream into endless delicious variations:
Chocolate Chip Ice Cream: Add 1 cup of mini chocolate chips during the last minute of churning. The chips will distribute evenly throughout the ice cream.
Cookies and Cream: Crush 15-20 Oreo cookies and fold them in during the last minute of churning for classic cookies and cream ice cream.
Strawberry Ice Cream: Puree 2 cups of fresh strawberries with 2 tablespoons sugar, then swirl into the ice cream after churning but before freezing.
Coffee Ice Cream: Add 2 tablespoons of instant espresso powder to the cream mixture when heating for rich coffee-flavored ice cream.
Mint Chocolate Chip: Add 1-2 teaspoons peppermint extract (start with 1 and taste) and a few drops of green food coloring. Add chocolate chips during the last minute of churning.
Bourbon Vanilla: Add 2 tablespoons of bourbon to the custard after straining for an adult-only version with complex flavor.
Salted Caramel Swirl: Make or buy caramel sauce, add a generous pinch of sea salt, and swirl it through the ice cream after churning.
Lower Fat Version: Replace 1 cup of heavy cream with 1 cup of half-and-half. The texture won’t be quite as rich but will still be good.
Pro Chef Tips
Elevate your ice cream from good to absolutely extraordinary with these professional techniques:
1. Use the Freshest Ingredients Possible: Ice cream is all about quality ingredients since there are so few of them. Use the best vanilla extract you can afford, the freshest eggs, and high-quality cream. The difference is remarkable.
2. Master the Custard Temperature: Invest in an instant-read thermometer if you don’t have one. Cooking custard to exactly 170-175°F ensures proper thickening without curdling. This is the difference between grainy and silky-smooth ice cream.
3. Overnight Chilling is Best: While 4 hours is the minimum, overnight chilling (8-12 hours) allows flavors to meld and ensures the coldest possible base, which churns into the smoothest ice cream.
4. Pre-Freeze Your Storage Container: Place your storage container in the freezer while the ice cream churns. Transferring soft ice cream into a frozen container helps it firm up faster and more evenly.
5. The Vodka Trick: Add 1-2 tablespoons of vodka to your custard before churning. Alcohol doesn’t freeze, so it keeps ice cream softer and more scoopable straight from the freezer. You won’t taste it!
6. Scrape Vanilla Beans Correctly: When using vanilla beans, split the pod lengthwise and scrape the seeds with the back of a knife. Add both seeds and the pod to the cream for maximum flavor extraction.
7. Prevent Ice Crystals: Always press plastic wrap directly onto the surface of the ice cream before sealing the container. Air exposure causes ice crystals to form, creating that unpleasant freezer-burned texture.
8. Perfect Scooping Technique: Dip your ice cream scoop in hot water between scoops for smooth, professional-looking results. Wipe dry before scooping to avoid adding water to your ice cream.
Common Mistakes to Avoid
Learn from these common pitfalls to ensure perfect ice cream every time:
1. Not Tempering Eggs Properly: Pouring hot cream directly into eggs without tempering will scramble them instantly. Always add hot liquid slowly while whisking constantly. Take your time with this step—rushing creates scrambled eggs in your ice cream base!
2. Letting the Custard Boil: Once you’ve added the eggs back to the saucepan, the mixture should never boil. Boiling causes the eggs to curdle and separate. Keep the heat medium-low and stir constantly.
3. Churning Warm Custard: This is a huge mistake! Warm custard churns very slowly, can overwhelm your ice cream maker’s freezing capacity, and produces icy, grainy ice cream. Always chill thoroughly first—4 hours minimum, overnight is better.
4. Overfilling the Ice Cream Maker: Only fill your ice cream maker about ¾ full. The mixture expands as air is incorporated during churning. Overfilling can cause overflow or prevent proper churning.
5. Storing Ice Cream Improperly: Leaving ice cream exposed to air in the freezer causes ice crystals and freezer burn. Always press plastic wrap onto the surface and use an airtight container. Store in the back of the freezer where temperature is most consistent, not in the door.
Storage & Meal Prep
Keep your homemade ice cream at its best with proper storage:
Freezer Storage: Homemade ice cream is best consumed within 2 weeks for optimal texture and flavor. After that, it’s still safe to eat but may develop ice crystals and lose some quality. Store in an airtight, freezer-safe container in the coldest part of your freezer (not the door).
Preventing Ice Crystals: Press plastic wrap, parchment paper, or wax paper directly onto the surface of the ice cream before sealing the container. This creates a barrier against air and prevents freezer burn.
Scooping Hard Ice Cream: If your ice cream freezes too hard, let it sit at room temperature for 5-10 minutes before scooping. You can also run your ice cream scoop under hot water between scoops for easier serving.
Texture Changes: Homemade ice cream lacks the stabilizers and emulsifiers that commercial ice cream contains, so it will freeze harder and may develop a slightly different texture over time. This is completely normal and doesn’t mean anything is wrong.
Container Choice: Use a shallow, wide container rather than a tall, narrow one. Ice cream in shallow containers is easier to scoop and experiences fewer temperature fluctuations.
Make-Ahead & Freezer Notes
Plan ahead for the smoothest ice cream-making experience:
Making the Custard Ahead: You can make the custard base up to 3 days in advance and keep it refrigerated until ready to churn. In fact, letting it sit in the fridge for 24 hours actually improves the flavor and texture!
Freezing Timeline: After churning, ice cream is soft-serve consistency. It needs at least 4 hours of freezing to firm up for proper scooping. For special occasions, plan to churn your ice cream the day before serving.
Pre-Freezing Ice Cream Maker Bowl: Canister-style ice cream makers need their bowls frozen solid for at least 24 hours before use. Keep your bowl in the freezer so it’s always ready when ice cream cravings strike!
Long-Term Freezer Storage: While best within 2 weeks, properly stored homemade ice cream can last up to 1 month in the freezer. The texture may become slightly icier over time, but it’s still delicious.
Refreshing Old Ice Cream: If ice cream has been in the freezer for a while and developed ice crystals, let it soften slightly, then re-churn it briefly in your ice cream maker to restore smoothness.
Serving Suggestions
Create memorable dessert experiences with your homemade vanilla ice cream:
Classic Sundae: Top with hot fudge sauce, whipped cream, chopped nuts, and a cherry for the ultimate ice cream sundae experience.
Warm Dessert Pairing: Serve alongside warm brownies, apple pie, peach cobbler, or chocolate lava cake. The temperature contrast is divine!
Ice Cream Sandwiches: Sandwich a scoop between two chocolate chip cookies, then roll the edges in mini chocolate chips or sprinkles.
Root Beer Float: Pour root beer over a generous scoop for a nostalgic treat that never gets old.
Affogato: Pour a shot of hot espresso over a scoop of vanilla ice cream for an elegant Italian dessert.
Banana Split: The classic! Serve with sliced bananas, chocolate sauce, strawberry sauce, pineapple, whipped cream, nuts, and cherries.
Fresh Fruit Topping: Serve with fresh berries, sliced peaches, or caramelized bananas for a lighter dessert option.
Ice Cream Cake: Use homemade ice cream as a layer in ice cream cake for birthday celebrations. The homemade quality elevates the entire dessert.
FAQs Section
Q: Can I make ice cream without an ice cream maker?
A: Yes! Pour the chilled custard into a shallow, freezer-safe pan. Freeze, stirring vigorously with a fork or whisk every 30 minutes for 3-4 hours until frozen. This “still-freeze” method won’t incorporate as much air, so it’ll be denser and icier, but it still works and tastes delicious.
Q: Why is my ice cream icy instead of creamy?
A: Several factors cause iciness: not enough fat (use heavy cream, not milk), not enough sugar (sugar lowers freezing point), churning warm custard, or storing ice cream in a container that allows air exposure. Make sure to follow the recipe exactly and chill custard completely before churning.
Q: Do I really need to use egg yolks?
A: For this custard-based recipe, yes! The egg yolks create that luxurious, creamy texture that makes this ice cream special. However, you can make Philadelphia-style ice cream (egg-free) by simply mixing cream, milk, sugar, and vanilla and churning—it’ll be lighter and less rich but still good.
Q: Can I use vanilla extract instead of vanilla beans?
A: Absolutely! This recipe calls for vanilla extract, which is more accessible and affordable. Vanilla beans add beautiful specks and slightly more complex flavor, but extract works perfectly and most people won’t notice a difference in blind taste tests.
Q: How long can homemade ice cream last in the freezer?
A: Homemade ice cream is best within 2 weeks but can last up to 1 month if properly stored in an airtight container with plastic wrap pressed onto the surface. After that, ice crystals develop and texture deteriorates, though it’s still safe to eat.
Q: Why did my custard curdle?
A: Curdling happens when eggs get too hot too quickly. This occurs if you don’t temper the eggs properly or if you let the custard boil. The fix: strain the custard through a fine-mesh strainer to remove lumps. Prevention: use a thermometer and cook only to 175°F.
Q: Can I reduce the sugar?
A: Sugar serves multiple purposes in ice cream: sweetness, yes, but also texture. Sugar lowers the freezing point, keeping ice cream soft and scoopable. Reducing sugar significantly will result in rock-hard ice cream. You can reduce it by about 2 tablespoons maximum without major texture issues.
Conclusion
Making homemade vanilla ice cream is one of those wonderful kitchen experiences that feels both accomplishingly impressive and surprisingly doable. Yes, it takes some time (mostly hands-off chilling), and yes, you need an ice cream maker for the best results—but the payoff is absolutely worth it. That first spoonful of silky-smooth, intensely vanilla-flavored ice cream that you made yourself is a moment of pure culinary joy.
This recipe isn’t just about making ice cream; it’s about creating memories. Whether you’re letting kids help measure ingredients, enjoying the anticipation as the ice cream churns, or seeing faces light up when they taste your homemade creation, it’s an experience that brings people together. Plus, once you master this base recipe, you have the foundation for hundreds of flavor variations.
I’d love to hear about your ice cream adventures! What’s your favorite way to enjoy vanilla ice cream—plain, with toppings, or as part of another dessert? Did you try any flavor variations? Share your experience in the comments below! Don’t forget to save this recipe to your Pinterest boards so you can find it whenever the ice cream craving strikes. And if you make this beautiful homemade vanilla ice cream, please snap a photo and tag me—seeing your creations makes my day!
Now grab your ice cream maker, some quality ingredients, and get ready to make the creamiest, dreamiest vanilla ice cream you’ve ever tasted. Your freezer (and your taste buds) will thank you! 🍦