
Get ready for the ultimate stress-free breakfast—this Overnight Baked French Toast (also known as French toast casserole) is a game-changer for busy mornings, holiday breakfasts, and weekend brunches. Imagine waking up to the aroma of cinnamon and vanilla wafting through your kitchen, with a golden, custardy French toast bake already prepped and ready to pop in the oven. This easy baked French toast recipe transforms simple bread into a decadent breakfast casserole with a crispy, caramelized top and a soft, custard-soaked interior that’s pure comfort food magic.
Whether you’re hosting Christmas morning, planning a Mother’s Day brunch, feeding overnight guests, or just want to make weekday mornings easier, this overnight French toast casserole is your secret weapon. The beauty of this recipe is that you assemble it the night before, refrigerate it while you sleep, then bake it fresh in the morning—no standing over a hot griddle flipping individual slices! This make-ahead French toast serves a crowd, looks impressive on the table, and tastes like you spent hours in the kitchen when you actually did most of the work while watching TV the night before. It’s the perfect combination of convenience and indulgence.
History / Background
French toast itself has a surprisingly ancient and international history that predates France by centuries. The concept of soaking stale bread in a mixture of eggs and milk, then frying it, appears in Roman cookbooks dating back to the 4th century AD. The Romans called it “Pan Dulcis” and it was a practical way to use up hard, old bread that would otherwise go to waste.
Throughout medieval Europe, similar dishes appeared under various names: in England it was called “Poor Knights of Windsor,” in Spain “torrijas,” and in Germany “Arme Ritter” (poor knights). The dish was popular among poorer classes because it transformed cheap, stale bread into something delicious and satisfying. The name “French toast” didn’t appear in English until the 17th century, though the French themselves call it “pain perdu” (lost bread), again referencing the use of bread that would otherwise be lost or wasted.
French toast came to America with early European settlers and became a breakfast staple. However, the overnight baked version—the casserole-style French toast—is a distinctly American innovation that emerged in the late 20th century. As American home cooks increasingly sought ways to simplify holiday entertaining and feed crowds efficiently, the idea of making French toast in a baking dish rather than individually on a griddle became popular.
The baked French toast casserole really took off in the 1980s and 1990s, appearing in women’s magazines, community cookbooks, and eventually dominating Pinterest boards and food blogs. It perfectly aligned with several American food trends: make-ahead convenience, brunch culture, and the desire for impressive yet achievable recipes for special occasions. The overnight method became especially popular for Christmas morning and holiday brunches when hosts wanted to spend time with family rather than being chained to the stove.
Today, overnight baked French toast is considered essential for stress-free entertaining. It represents modern American ingenuity in the kitchen—taking a classic dish and reimagining it to fit our busy lives while maintaining the comfort and indulgence we crave.
Why You’ll Love This Recipe
This make-ahead baked French toast is about to revolutionize your breakfast and brunch game, and here’s exactly why it deserves a permanent spot in your recipe collection:
This isn’t just convenient—it’s genuinely delicious, with a texture and flavor that many people actually prefer to traditional stovetop French toast. The overnight soak allows the bread to fully absorb the custard, creating an incredibly rich, custardy interior, while baking gives you that beautiful golden, slightly crispy top that everyone fights over. The make-ahead nature means you can enjoy a leisurely morning with your family instead of being stuck at the stove.
- Ultimate Make-Ahead Convenience: Assemble the night before and just bake in the morning—perfect for stress-free entertaining
- Feeds a Crowd Easily: One pan serves 8-12 people, making it ideal for holidays and gatherings
- No Flipping Required: Bake it all at once instead of standing over a griddle flipping individual pieces
- Consistently Perfect Results: Every piece is evenly cooked with that ideal custardy texture
- Impressive Presentation: Looks beautiful when served from the baking dish or plated elegantly
- Customizable: Easily adapt with different breads, toppings, and flavor variations
- Budget-Friendly: Uses simple, affordable ingredients to feed many people
- Holiday Essential: Perfect for Christmas morning, Easter brunch, Mother’s Day, or any special breakfast
- Kid and Adult Approved: Everyone loves this sweet, comforting breakfast
- Leftover-Friendly: Reheats beautifully for easy breakfasts throughout the week
Ingredient Notes
Let’s break down what makes this overnight French toast casserole so irresistibly delicious:
Bread: This is the foundation! Use a sturdy, thick bread that can absorb the custard without falling apart. French bread, challah, brioche, or Texas toast are ideal choices. The bread should be slightly stale or day-old—fresh bread is too soft and gets mushy. If your bread is fresh, leave the slices out overnight or toast them lightly. You’ll need about 1 pound of bread (12-16 slices depending on size). Thick-cut bread (3/4 to 1-inch slices) works best.
Eggs: The protein that sets the custard and gives structure. Large eggs at room temperature incorporate most smoothly. You need quite a few eggs (8 eggs for this recipe) to create enough custard to soak a whole loaf of bread. Don’t try to reduce the eggs or the custard won’t set properly.
Whole Milk or Half-and-Half: Provides the creamy base for the custard. Whole milk creates a lighter custard, while half-and-half makes it richer and more decadent. You can use a combination of both. Don’t use skim or low-fat milk—you need the fat for proper texture and flavor. For the ultimate indulgence, use heavy cream in place of some of the milk.
Granulated Sugar: Sweetens the custard to that perfect level. The amount here creates a pleasantly sweet but not overly sugary breakfast. You can adjust by a tablespoon or two based on your preference, but don’t eliminate it entirely—it affects texture as well as sweetness.
Vanilla Extract: Essential for that classic French toast flavor! Use pure vanilla extract, never imitation. Vanilla enhances all the other flavors and adds warmth and depth. Don’t skip this—it makes a huge difference.
Cinnamon: The signature spice that makes French toast taste like French toast. Ground cinnamon adds that cozy, warm flavor we all love. You can adjust the amount based on how much you love cinnamon, or add nutmeg and a pinch of cardamom for more complex spice notes.
Salt: Just a pinch balances the sweetness and enhances all the other flavors. It’s essential even in sweet dishes!
Butter: For greasing the pan and dotting on top before baking. Butter adds richness and helps create that golden, slightly crispy top. Use unsalted butter so you control the salt level.
Optional Toppings Before Baking: Brown sugar, a streusel topping, or a cinnamon-sugar mixture can be sprinkled on top before baking for extra sweetness and crunch. Sliced almonds or pecans add wonderful texture and nutty flavor.
Serving Toppings: Maple syrup (always!), powdered sugar, fresh berries, whipped cream, butter, additional cinnamon, or caramel sauce. These finish the dish beautifully.
Equipment Needed
You only need basic baking equipment for this simple breakfast casserole:
Essential Equipment:
- 9×13-inch Baking Dish: A standard 9×13 glass or ceramic baking dish is perfect. You can also use a slightly smaller dish (like 9×9) for thicker French toast—just adjust baking time slightly.
- Large Mixing Bowl: For whisking together the custard mixture.
- Whisk: For thoroughly combining eggs, milk, and spices into a smooth custard.
- Measuring Cups and Spoons: Accurate measurements ensure proper custard consistency.
- Sharp Bread Knife: For slicing bread into thick, even pieces if not using pre-sliced.
- Plastic Wrap or Aluminum Foil: For covering the dish during overnight refrigeration.
- Butter or Cooking Spray: For greasing the baking dish.
Optional but Helpful:
- Rubber Spatula: For scraping down the bowl and spreading custard evenly.
- Pastry Brush: For buttering the baking dish evenly.
- Cooling Rack: For cooling slightly before serving.
- Serving Spatula: For cutting and serving neat portions.

Overnight Baked French Toast Recipe
- Total Time: 9 hours (includes overnight refrigeration)
- Yield: 8-12 servings 1x
- Diet: Vegetarian
Description
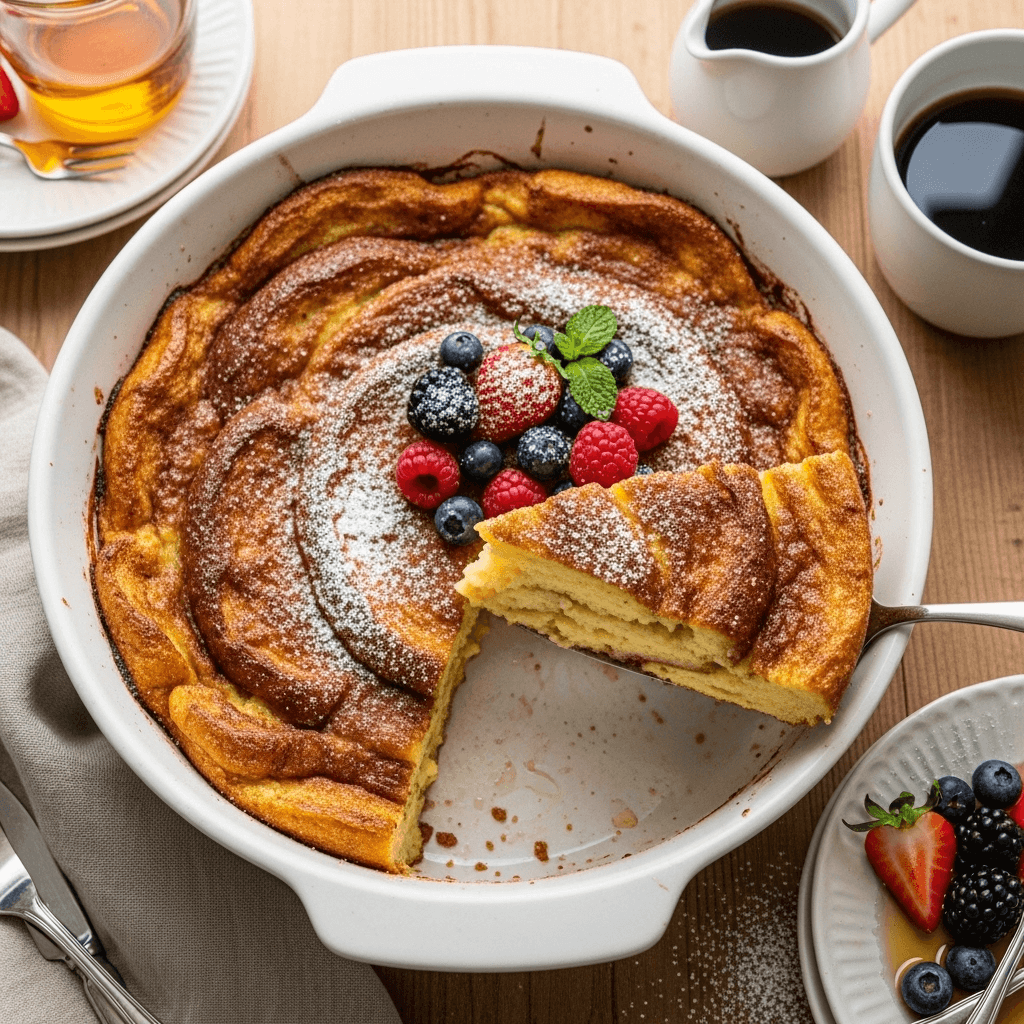
The ultimate make-ahead breakfast! This overnight baked French toast features thick bread soaked in cinnamon-vanilla custard, then baked to golden perfection. Prep it the night before for stress-free holiday mornings and brunches.
Ingredients
For the French Toast:
- 1 loaf (about 1 pound) French bread, challah, or brioche, cut into 1-inch thick slices
- 8 large eggs, room temperature
- 2 cups whole milk (or use half milk, half heavy cream for extra richness)
- 1/2 cup half-and-half (or use all milk for lighter version)
- 1/2 cup granulated sugar
- 2 teaspoons vanilla extract
- 1 teaspoon ground cinnamon
- 1/4 teaspoon ground nutmeg (optional)
- 1/4 teaspoon salt
- 2 tablespoons butter, melted (plus more for greasing pan)
Optional Topping (Before Baking):
- 1/4 cup brown sugar
- 1/2 teaspoon additional cinnamon
- 2 tablespoons cold butter, cut into small pieces
- 1/2 cup chopped pecans or sliced almonds (optional)
For Serving:
- Maple syrup
- Powdered sugar
- Fresh berries (strawberries, blueberries, raspberries)
- Whipped cream
- Extra butter
Instructions
- Prepare the Pan: Generously butter a 9×13-inch baking dish, making sure to coat the bottom and sides well. This prevents sticking and adds flavor.
- Arrange the Bread: Cut the bread into 1-inch thick slices if not already sliced. Arrange the bread slices in the prepared baking dish in slightly overlapping rows, like shingles on a roof. You want them snug but not completely squished. If pieces are too thick, you can cut them in half diagonally.
- Make the Custard: In a large mixing bowl, whisk together the eggs until well beaten. Add the milk, half-and-half, sugar, vanilla extract, cinnamon, nutmeg (if using), and salt. Whisk vigorously until completely smooth and well combined—about 30 seconds. The mixture should be uniform with no streaks of egg whites visible.
- Pour Over Bread: Slowly pour the custard mixture evenly over all the bread slices, making sure to coat each piece. Use your fingers or a spoon to gently press down on the bread to help it absorb the custard. Make sure the custard gets into all the gaps and spaces between slices.
- Press and Soak: Using your hands or a spatula, gently press the bread down into the custard several times to ensure even soaking. Some pieces like to float—push them down. Drizzle the melted butter evenly over the top.
- Cover and Refrigerate Overnight: Cover the baking dish tightly with plastic wrap or aluminum foil. Refrigerate for at least 4 hours, preferably overnight (8-12 hours). This allows the bread to fully absorb the custard for that perfect texture. During refrigeration, you can press down on the bread once or twice if you think of it.
- Prepare to Bake: When ready to bake, remove the dish from the refrigerator and let it sit at room temperature for 20-30 minutes while you preheat the oven. This takes the chill off and ensures even baking. Preheat your oven to 350°F (175°C).
- Add Optional Topping: If using the brown sugar topping, mix brown sugar and cinnamon together and sprinkle evenly over the top. Dot with small pieces of cold butter and sprinkle with nuts if using.
- Bake Covered: Cover the dish with aluminum foil (spray the underside with cooking spray to prevent sticking) and bake for 30 minutes. This allows the custard to set without the top browning too quickly.
- Bake Uncovered: Remove the foil and continue baking for 15-25 more minutes until the top is golden brown and slightly crispy, and the center is set (it should jiggle just slightly when you shake the pan gently). A knife inserted in the center should come out mostly clean. If the top is browning too quickly, tent loosely with foil.
- Rest Before Serving: Remove from the oven and let it rest for 5-10 minutes before serving. This allows the custard to set fully and makes serving easier.
- Serve: Cut into squares and serve warm with maple syrup, powdered sugar, fresh berries, and whipped cream. Enjoy while hot!
Notes
- Bread Matters: Use sturdy, day-old bread. Fresh bread gets too soggy. If your bread is fresh, leave it out overnight or toast slices lightly.
- Overnight is Best: While you can bake after 4 hours, overnight soaking creates the best texture.
- Don’t Overbake: The center should be set but still slightly custardy, not dry. It continues cooking after removal from the oven.
- Make it Richer: Use half-and-half or heavy cream instead of milk for extra-decadent results.
- Gluten-Free Option: Use gluten-free bread—the rest of the recipe is naturally gluten-free.
- Scaling: This recipe perfectly fills a 9×13 dish. For smaller crowds, halve everything and use an 8×8 or 9×9 dish.
- Prep Time: 15 minutes (plus overnight chilling)
- Cook Time: 45-55 minutes
- Category: Breakfast
- Method: Baking
- Cuisine: American
Nutrition
- Serving Size: 1 piece (1/10 of recipe)
- Calories: 285
- Sugar: 15g
- Sodium: 320mg
- Fat: 10g
- Saturated Fat: 5g
- Unsaturated Fat: 4g
- Trans Fat: 0h
- Carbohydrates: 38h
- Fiber: 2g
- Protein: 10g
- Cholesterol: 165mg
Tips & Variations
Flavor Variations:
- Blueberry Baked French Toast: Add 1 cup fresh or frozen blueberries scattered between bread layers
- Strawberry Cream Cheese: Add dollops of sweetened cream cheese and sliced strawberries between layers
- Apple Cinnamon: Layer thin apple slices between bread and increase cinnamon to 2 teaspoons
- Banana Foster: Add sliced bananas and a drizzle of caramel sauce before baking
- Chocolate Chip: Sprinkle chocolate chips between layers for a dessert-like breakfast
- Pumpkin Spice: Add 1/2 cup pumpkin puree and pumpkin pie spice to the custard for fall flavor
- Lemon Blueberry: Add lemon zest to custard and fold in blueberries
- Pecan Pie Style: Add chopped pecans and a brown sugar-butter topping
- Eggnog French Toast: Replace milk with eggnog during the holidays
Bread Options:
- Challah: Rich, eggy bread that creates luxurious texture
- Brioche: Buttery and tender, the ultimate decadent choice
- French Bread: Classic and readily available
- Texas Toast: Thick-cut white bread that works perfectly
- Croissants: For an extra-buttery, flaky version
- Cinnamon Raisin Bread: Built-in flavor and sweetness
- Sourdough: Adds pleasant tang
Healthier Modifications:
- Use whole wheat bread for added fiber
- Replace half-and-half with almond milk or oat milk
- Reduce sugar to 1/3 cup
- Use egg whites in place of some whole eggs (6 whole + 4 whites)
- Skip the butter topping
Pro Chef Tips
Here are professional secrets to making the absolute best overnight baked French toast:
Use Day-Old Bread (Mandatory!): This is not optional—fresh bread becomes a mushy disaster! Day-old or slightly stale bread has less moisture, so it absorbs the custard without falling apart or turning to mush. If you only have fresh bread, slice it and leave it uncovered on the counter overnight, or arrange slices on a baking sheet and dry them in a 250°F oven for 15-20 minutes. The bread should feel slightly firm and dry to the touch. This prep step is the number one factor in texture success.
Cut Bread Thick: Thin bread (like regular sandwich bread) gets too soggy and doesn’t have enough structure. Aim for 3/4 to 1-inch thick slices—thick enough to maintain structure but not so thick that the custard can’t penetrate. If your bread slices are too thick, you can slice them in half horizontally or diagonally to create thinner pieces with more surface area.
Whisk the Custard Thoroughly: Take 30-60 seconds to really whisk the custard until it’s completely smooth with no streaks of egg white visible. Properly whisked custard distributes evenly through the bread and creates that luxurious, uniform texture. Underdone custard creates eggy pockets and streaky texture. Consider using a blender for the smoothest possible custard.
Press Down Multiple Times: After pouring the custard, press the bread down several times throughout the refrigeration period—when you first pour it, 30 minutes later, and once more before bed. This ensures maximum absorption and prevents dry spots. Some bread naturally wants to float; pressing it down helps every piece absorb enough custard for perfect texture.
The Room Temperature Rest Matters: Letting the cold dish sit out for 20-30 minutes before baking is crucial for even cooking. A cold dish going into a hot oven bakes unevenly—the edges overcook while the center stays underdone. This rest also allows the oven to fully preheat. Don’t skip this step, especially if you’re baking straight from overnight refrigeration.
Use the Two-Stage Baking Method: Baking covered for the first 30 minutes allows the custard to gently set without the top drying out or burning. Then removing the foil lets the top get golden and slightly crispy. This two-stage method creates the perfect texture: custardy inside, golden and crisp on top. If you bake uncovered the entire time, the top burns before the center cooks through.
Test for Doneness: The French toast is done when the center jiggles just slightly when you gently shake the pan, and a knife inserted in the center comes out mostly clean (a few moist crumbs are fine). It should register about 160°F in the center with an instant-read thermometer. It continues cooking from residual heat, so slightly underdone is better than overdone, which becomes dry and rubbery.
Common Mistakes to Avoid
Mistake #1: Using Fresh Bread
This is the biggest mistake and creates a soggy, mushy disaster. Fresh bread contains too much moisture and doesn’t have enough structure to absorb custard properly. It falls apart and turns to mush during the overnight soak. Always use day-old, slightly stale bread. If you only have fresh bread, dry it out first by leaving slices uncovered overnight or lightly toasting them in the oven at 250°F for 15 minutes. The bread should feel firm and dry to the touch before you use it.
Mistake #2: Not Soaking Long Enough
While you technically can bake after 4 hours, the texture is nowhere near as good as overnight soaking. The bread needs adequate time to fully absorb the custard and transform from separate pieces into a cohesive casserole. Insufficient soaking time results in dry spots, uneven texture, and pieces that don’t hold together. Always plan to soak overnight (8-12 hours) for the best results. Make it part of your bedtime routine—assemble after dinner and bake in the morning.
Mistake #3: Skipping the Covered Baking Phase
Many home cooks try to speed things up by baking uncovered the entire time. This causes the top to brown and dry out before the center has time to cook through, leaving you with a burned top and raw middle. The initial covered baking phase allows gentle, even heat to set the custard throughout. Only after the interior is mostly cooked should you remove the foil to brown the top. This two-stage method is essential for even cooking.
Mistake #4: Overbaking Until Dry
French toast casserole should be custardy and moist, not dry and bread-pudding-like. Many people overbake because they think it looks “too wet” in the middle. The center should still jiggle very slightly when you shake the pan—it firms up as it cools. If you wait until it’s completely firm in the oven, it will be overcooked and dry when served. Remove it when there’s still a tiny wobble in the center. Use a thermometer for confidence—160°F in the center is perfect.
Mistake #5: Cutting and Serving Immediately
Cutting into the French toast the second it comes out of the oven creates a mess—pieces fall apart and the custard runs everywhere. Let it rest for 5-10 minutes after baking. This rest period allows the custard to set fully, making it much easier to cut clean squares. The temperature also becomes more pleasant for eating rather than tongue-burningly hot. Your patience will be rewarded with neat, bakery-perfect squares.
Storage & Meal Prep
Refrigerator Storage:
Store leftover baked French toast in an airtight container in the refrigerator for up to 4 days. The pieces can be stacked with parchment paper between layers to prevent sticking. The casserole actually reheats quite well, making it perfect for easy breakfasts throughout the week.
Reheating Instructions:
For best results, reheat in the oven: place pieces on a baking sheet at 350°F for 10-15 minutes until warmed through. This restores some crispiness to the top. For faster reheating, microwave individual pieces for 30-60 seconds until hot. The microwave makes them softer but is convenient for quick mornings. You can also reheat in a toaster oven at 350°F for 8-10 minutes for small portions.
Meal Prep Strategy:
Bake the entire casserole on Sunday, let it cool, then cut into individual portions. Store each portion in a small container or wrap individually in plastic wrap. Grab one each morning for a quick, ready-made breakfast. This is perfect for busy families where everyone eats breakfast at different times.
Keeping Warm for Buffets:
If serving at a brunch buffet, keep the French toast warm in a 200°F oven for up to 1 hour. Cover loosely with foil to prevent excessive drying. For longer buffets, consider baking two smaller casseroles and introducing the second one fresh from the oven.
Make-Ahead & Freezer Notes
The Overnight Method (Recommended):
This recipe is designed to be made ahead! Assemble completely the night before (or up to 24 hours ahead), cover tightly, and refrigerate. In the morning, let it sit at room temperature for 20-30 minutes, then bake as directed. This is what makes it perfect for holidays and special occasions—all the work is done when you have time, and mornings are stress-free.
Freezing Unbaked:
You can assemble the entire casserole, cover it tightly (first with plastic wrap, then aluminum foil), and freeze for up to 2 months without baking. To bake from frozen: thaw overnight in the refrigerator, let sit at room temperature 30 minutes, then bake as directed. Or bake from frozen—add 15-20 minutes to the covered baking time, checking the center for doneness.
Freezing Baked Portions:
After baking and cooling completely, cut into individual portions, wrap each piece tightly in plastic wrap, then place all wrapped pieces in a large freezer bag. Freeze for up to 2 months. To reheat from frozen: unwrap, place on a microwave-safe plate, and microwave for 1-2 minutes until hot, or reheat in a 350°F oven for 15-20 minutes.
Best Freezing Practices:
For the best texture after freezing, slightly underbake the casserole by 5 minutes before freezing. It will finish cooking when reheated. Also, wrap extremely well to prevent freezer burn—double wrapping is recommended. Label with the date and reheating instructions.
Holiday Planning Timeline:
- 2 Months Before: Bake and freeze individual portions if desired
- Night Before: Assemble casserole, refrigerate overnight
- Morning Of: Let sit 30 minutes, bake 45-55 minutes, rest 10 minutes, serve warm
Serving Suggestions
This overnight baked French toast is delicious on its own, but here are ways to make breakfast extra special:
Classic Toppings:
- Pure Maple Syrup: The traditional and essential topping—warm it for luxury
- Powdered Sugar: Dust generously over the top for a bakery-pretty finish
- Butter: A pat of butter melting on top adds richness
- Whipped Cream: Fresh whipped cream or Cool Whip for indulgence
- Fresh Berries: Strawberries, blueberries, raspberries, or blackberries add freshness
Upgraded Toppings:
- Berry Compote: Simmer berries with sugar until syrupy for a homemade topping
- Caramel Sauce: Drizzle with salted caramel for decadence
- Cream Cheese Glaze: Mix powdered sugar with cream cheese and milk for a sweet drizzle
- Candied Pecans: Add crunch and nutty sweetness
- Mascarpone: Dollops of sweetened mascarpone cheese for Italian flair
- Lemon Curd: Tart and sweet complement to rich French toast
Complete Breakfast Spread:
- Crispy Bacon: The perfect salty contrast to sweet French toast
- Breakfast Sausages: Links or patties complement beautifully
- Scrambled Eggs: For those who want savory protein alongside
- Fresh Fruit Salad: Light and refreshing balance
- Yogurt Parfaits: For guests who want something lighter
- Hash Browns: Crispy potatoes round out the meal
- Orange Juice: Freshly squeezed is especially nice for special occasions
Beverage Pairings:
- Coffee: Hot coffee is the classic pairing
- Hot Chocolate: For a cozy, indulgent breakfast
- Mimosas: Champagne and orange juice for adult brunches
- Fresh Orange Juice: Classic breakfast beverage
- Milk: For kids and traditionalists
- Chai Lattes: Spiced tea complements the cinnamon flavors
Plating for Elegance: Cut neat squares, dust with powdered sugar, add fresh berries and a sprig of mint, and drizzle with syrup in a decorative pattern. Serve on white plates for restaurant-quality presentation.
FAQs Section
Can I use different types of bread?
Absolutely! Challah and brioche are the most luxurious choices with their eggy, buttery richness. French bread is classic and readily available. Texas toast (thick-sliced white bread) works great. Croissants make an incredibly decadent version. Even cinnamon raisin bread or Hawaiian sweet bread work beautifully. The key is using thick-cut, sturdy bread—avoid thin sandwich bread which gets too soggy. Always use day-old or slightly stale bread regardless of the type.
What if I don’t have time to let it sit overnight?
While overnight soaking creates the best texture, you can get away with a minimum 4-hour soak if you’re pressed for time. The bread won’t absorb quite as much custard and the texture won’t be as uniform, but it will still be delicious. Press down on the bread several times during those 4 hours to maximize absorption. For even faster prep, use very stale bread which absorbs faster than day-old bread.
Why is my baked French toast soggy in the middle?
Soggy middles usually mean: the bread was too fresh and contained too much moisture, you used too much custard for the amount of bread, or it didn’t bake long enough. Make sure you’re using day-old bread, measure the custard ingredients accurately, and bake until the center is set (jiggles only slightly). Also ensure your oven is properly preheated to 350°F—an oven that’s too cool extends baking time and can create sogginess.
Can I make this dairy-free?
Yes! Replace the milk and half-and-half with your favorite non-dairy milk (almond, oat, or coconut milk all work). Use vegan butter or coconut oil for greasing. The texture will be slightly different—not quite as rich—but it’s still delicious. Coconut milk creates the richest dairy-free version. Make sure your bread doesn’t contain dairy either (many breads contain milk or butter).
My French toast burned on top before the middle cooked—what happened?
This happens when the oven temperature is too high or you bake uncovered the entire time. Always bake at 350°F (not higher), and always use the two-stage method: 30 minutes covered, then uncover for the final 15-25 minutes. If your oven runs hot, reduce temperature to 325°F and extend baking time slightly. If the top is browning too quickly even when following directions, tent it loosely with foil.
How do I know when it’s fully baked?
The French toast is done when: (1) the edges are golden brown and set, (2) the center jiggles only slightly when you gently shake the pan, (3) a knife inserted in the center comes out mostly clean with just a few moist crumbs, and (4) an instant-read thermometer registers 160°F in the center. It will firm up more as it rests, so slightly underdone is better than overbaked and dry.
Can I double this recipe?
Yes, but you’ll need two 9×13 pans—a single pan won’t hold double the recipe. Make two casseroles using the exact same measurements and bake them side-by-side in the oven. Both will bake in the same amount of time. This is perfect for large gatherings or when hosting multiple families for brunch.
Conclusion
There you have it—everything you need to know to make the most incredible overnight baked French toast for stress-free, impressive breakfasts and brunches! This make-ahead French toast casserole is truly a game-changer for anyone who loves to entertain, has a busy household, or just wants to treat themselves to something special without morning chaos.
The beauty of this recipe is how it gives you back your time. Instead of standing over a griddle flipping individual pieces while everyone else enjoys their morning, you get to actually sit down and enjoy breakfast with your loved ones. The overnight prep means you’re doing the work when it’s convenient for you, then just popping it in the oven in the morning while you sip your coffee in peace. It’s the ultimate win-win: convenience for you, delicious breakfast for everyone.
Whether you make it for Christmas morning, Mother’s Day brunch, Easter breakfast, weekend hosting, or just a special Sunday with your family, this overnight baked French toast delivers bakery-quality results with home-cooked love. Once you try this method, you’ll never want to make stovetop French toast for a crowd again!
I’d love to hear how your baked French toast turns out! Did you add blueberries? Top it with caramel? Serve it for a special occasion? Drop a comment below and share your experience. And if this recipe makes your mornings easier and more delicious, please hit that Pinterest save button and share it with friends who need stress-free breakfast solutions!
Now set that alarm a little later, because tomorrow morning just got a whole lot easier!