

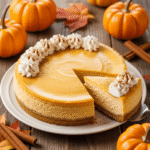
Get ready to fall in love with the ultimate autumn dessert—a velvety smooth pumpkin cheesecake that combines the rich creaminess of classic cheesecake with warm pumpkin spice flavors. This homemade pumpkin cheesecake features a buttery graham cracker crust, a luscious pumpkin-spiced filling, and a perfectly crack-free top that looks like it came from a fancy bakery. Whether you’re planning your Thanksgiving dessert table, hosting a fall dinner party, or simply craving something special and seasonal, this pumpkin spice cheesecake delivers every single time.
What makes this recipe truly special is how it balances the tangy richness of cream cheese with sweet pumpkin puree and cozy spices like cinnamon, nutmeg, and ginger. The texture is impossibly smooth and creamy—never grainy or dense—and the flavor is perfectly balanced, letting both the pumpkin and cream cheese shine without one overpowering the other. This easy pumpkin cheesecake recipe includes all my secrets for preventing cracks, achieving silky texture, and creating a dessert that will have everyone asking for the recipe. It’s elegant enough for holiday gatherings but straightforward enough for home bakers of any skill level.
History / Background
The story of pumpkin cheesecake is really the convergence of two beloved dessert traditions—classic American cheesecake and traditional pumpkin pie. Cheesecake itself has ancient roots dating back to ancient Greece, where it was served to athletes at the first Olympic games. The modern cream cheese-based cheesecake we know today became popular in America in the late 1800s after cream cheese was invented in New York in 1872.
Pumpkin pie, meanwhile, is deeply woven into American culinary history. Native Americans were using pumpkins in various dishes long before European settlers arrived. The Pilgrims and early colonists adopted pumpkin into their cooking, and by the early 18th century, pumpkin pie had become associated with autumn harvest celebrations and Thanksgiving. The first pumpkin pie recipes appeared in American cookbooks in the 1796 edition of “American Cookery” by Amelia Simmons.
The marriage of these two traditions—pumpkin cheesecake—is a relatively modern creation that emerged in the mid-to-late 20th century as American home bakers began experimenting with classic recipes. By the 1970s and 1980s, pumpkin cheesecake was appearing in magazine features and becoming a popular alternative to traditional pumpkin pie during the holiday season.
The genius of pumpkin cheesecake is that it offers the best of both worlds: the comforting, spiced pumpkin flavor that Americans associate with fall holidays, combined with the luxurious, creamy richness of New York-style cheesecake. It quickly became a showstopper dessert for Thanksgiving and autumn celebrations, offering something special for those who wanted to elevate their dessert game beyond the standard pumpkin pie.
Today, pumpkin cheesecake has earned its place as a fall classic in American baking. It represents the creativity of home bakers who love to put their own spin on traditional recipes, creating something that honors the past while offering something beautifully new.
Why You’ll Love This Recipe
This creamy pumpkin cheesecake recipe is about to become your go-to fall dessert, and here’s exactly why it deserves a spot in your recipe collection:
This isn’t just another pumpkin dessert—it’s a showstopping centerpiece that looks incredibly impressive but is surprisingly achievable for home bakers. The texture is absolutely divine: silky, dense, and creamy with none of that grainy or rubbery texture that plagues so many homemade cheesecakes. The pumpkin spice flavor is warm and cozy without being overwhelming, and the graham cracker crust provides the perfect buttery, crunchy contrast to the smooth filling.
- Bakery-Quality Results: Looks and tastes like it came from an expensive bakery, but costs a fraction of the price
- No-Crack Guarantee: My foolproof method ensures a perfectly smooth top every single time
- Perfectly Balanced Flavor: Not too sweet, not too spiced—just the right amount of pumpkin and cream cheese
- Make-Ahead Friendly: Actually tastes better the day after it’s made, making it perfect for stress-free entertaining
- Thanksgiving Showstopper: Guaranteed to impress guests and become a requested holiday tradition
- Easier Than You Think: Step-by-step instructions make even your first cheesecake successful
- Seasonal Perfection: Captures all the cozy flavors of fall in one elegant dessert
- Versatile Serving: Delicious on its own or topped with whipped cream, caramel, or pecans
- Freezer-Friendly: Can be made weeks in advance and frozen without losing quality
- Crowd-Pleaser: Appeals to both pumpkin pie lovers and cheesecake devotees
Ingredient Notes
Let’s break down what makes this pumpkin cheesecake so incredibly delicious:
Graham Crackers: The foundation of the crust. You’ll need about 12-14 full graham cracker sheets (one and a half sleeves) to make approximately 1 3/4 cups of crumbs. Regular honey graham crackers work perfectly, but you can also use cinnamon graham crackers for extra spice or gingersnaps for a more intense flavor. To make crumbs, pulse them in a food processor or place them in a sealed bag and crush with a rolling pin.
Cream Cheese: The star of any cheesecake! You must use full-fat cream cheese (not low-fat or fat-free) for proper texture and flavor. The packages should be at room temperature before mixing—this is crucial! Cold cream cheese creates lumps that won’t smooth out no matter how long you mix. Set your cream cheese out on the counter 1-2 hours before baking, or soften quickly by placing sealed packages in warm water for 10 minutes.
Pumpkin Puree: Use plain canned pumpkin puree (like Libby’s), NOT pumpkin pie filling which already contains sugar and spices. Pure pumpkin gives you control over sweetness and spicing. Make sure to use 100% pure pumpkin. In a pinch, you can make your own puree from sugar pumpkins, but canned is consistent, convenient, and works beautifully.
Granulated Sugar: Sweetens the filling and affects texture. The amount here creates perfectly balanced sweetness that lets the pumpkin shine. You can reduce it slightly if you prefer less sweet desserts, but don’t eliminate it entirely—sugar also affects the structure of the cheesecake.
Eggs: Provide structure and richness. Eggs help the cheesecake set properly and give it that dense, creamy texture. They should be at room temperature like the cream cheese—cold eggs can cause the batter to seize up and become lumpy. Take them out of the fridge when you start preparing your crust.
Heavy Cream or Sour Cream: Adds extra richness and helps create that ultra-smooth, luxurious texture. Heavy cream makes the cheesecake slightly lighter, while sour cream adds tang. Either works beautifully—choose based on your preference.
Vanilla Extract: Enhances all the other flavors and adds depth. Always use pure vanilla extract, never imitation—the quality difference is noticeable in cheesecake.
Pumpkin Pie Spice: The warm blend typically includes cinnamon, ginger, nutmeg, allspice, and cloves. You can buy pre-mixed pumpkin pie spice or make your own by combining 1 teaspoon cinnamon, 1/2 teaspoon ginger, 1/4 teaspoon nutmeg, 1/4 teaspoon allspice, and 1/8 teaspoon cloves.
Butter: For the crust, use melted unsalted butter. The butter binds the graham cracker crumbs together and adds rich flavor. Salted butter can work if that’s what you have, but unsalted gives you better control over the overall saltiness.
Salt: Just a pinch brightens all the flavors and balances the sweetness. Don’t skip it!
Equipment Needed
Here’s what you’ll need to create perfect pumpkin cheesecake:
Essential Equipment:
- 9-inch Springform Pan: This is non-negotiable for cheesecake! The removable bottom and sides make it easy to remove the cheesecake without damaging it. Make sure the bottom is inserted with the lip facing down for easier removal.
- Food Processor or Rolling Pin: For making graham cracker crumbs.
- Electric Mixer: A stand mixer or hand mixer makes mixing much easier and creates smoother batter. You can mix by hand, but it takes significant arm strength and time.
- Large Mixing Bowls: At least 2 medium-to-large bowls for preparing components.
- Measuring Cups and Spoons: For accurate measurements (critical in baking!).
- Rubber Spatula: For scraping down bowl sides and smoothing the top of the cheesecake.
- Aluminum Foil: Heavy-duty foil for wrapping the springform pan (prevents water bath leaks).
- Large Roasting Pan: For the water bath—needs to be large enough to hold the springform pan with space around it.
- Kettle or Large Pot: For boiling water for the water bath.
Optional but Helpful:
- Instant-Read Thermometer: Takes the guesswork out of doneness (cheesecake is done at 150°F in the center).
- Offset Spatula: Makes smoothing the top easier.
- Parchment Paper: For lining the bottom of the springform pan (makes removal easier).
- Cooling Rack: For cooling the cheesecake evenly.
Pumpkin Cheesecake Recipe
- Total Time: 6 hours (includes cooling and chilling time)
- Yield: 12-16 slices 1x
- Diet: Vegetarian
Description
Silky smooth pumpkin cheesecake with warm fall spices, buttery graham cracker crust, and a perfectly crack-free top. This make-ahead dessert is the ultimate Thanksgiving centerpiece that’s easier than you think!
Ingredients
For the Graham Cracker Crust:
- 1 3/4 cups graham cracker crumbs (about 12–14 full sheets)
- 1/4 cup granulated sugar
- 6 tablespoons unsalted butter, melted
- 1/4 teaspoon salt
For the Pumpkin Cheesecake Filling:
- 24 ounces (3 blocks) cream cheese, softened to room temperature
- 1 cup granulated sugar
- 1 cup pure pumpkin puree (not pumpkin pie filling)
- 3 large eggs, room temperature
- 1/2 cup heavy cream or sour cream, room temperature
- 2 teaspoons vanilla extract
- 2 teaspoons pumpkin pie spice
- 1/4 teaspoon salt
- 1 tablespoon all-purpose flour (optional, helps prevent cracking)
For Serving (Optional):
- Whipped cream
- Caramel sauce
- Candied pecans or walnuts
- Extra sprinkle of cinnamon
Instructions
- Prepare the Pan: Position oven rack in the lower third of the oven and preheat to 350°F (175°C). Wrap the outside of a 9-inch springform pan (bottom and sides) with 2-3 layers of heavy-duty aluminum foil. This prevents water from the water bath from seeping in. You can also line the bottom of the pan with parchment paper for easier removal.
- Make the Crust: In a medium bowl, combine graham cracker crumbs, sugar, melted butter, and salt. Mix with a fork until the mixture resembles wet sand and holds together when squeezed. Press the mixture firmly into the bottom of the prepared springform pan and slightly up the sides (about 1/2 inch). Use the bottom of a measuring cup or glass to compact it firmly. Bake for 10 minutes, then remove and let cool while you prepare the filling. Reduce oven temperature to 325°F (163°C).
- Beat the Cream Cheese: In a large mixing bowl using an electric mixer on medium speed, beat the softened cream cheese for 2-3 minutes until completely smooth, light, and fluffy with no lumps. Scrape down the sides of the bowl frequently. This step is crucial for smooth texture!
- Add Sugar and Pumpkin: Add the sugar and beat for 1-2 minutes until well combined. Add the pumpkin puree and beat until fully incorporated and smooth. Scrape down the sides and bottom of the bowl to ensure everything is evenly mixed.
- Add Remaining Ingredients: Add the eggs one at a time, mixing on low speed just until each egg is incorporated. Don’t overmix—excessive mixing incorporates too much air, which causes cracks. Add the heavy cream (or sour cream), vanilla extract, pumpkin pie spice, salt, and flour (if using). Mix on low speed just until combined and smooth. The batter should be silky and pourable.
- Pour and Smooth: Pour the filling over the pre-baked crust in the springform pan. Use a rubber spatula to smooth the top evenly. Tap the pan gently on the counter 2-3 times to release any air bubbles.
- Prepare Water Bath: Place the foil-wrapped springform pan into a large roasting pan. Boil water in a kettle. Carefully pour the hot water into the roasting pan (not into the cheesecake!) until it comes about 1 inch up the sides of the springform pan. The water bath ensures even, gentle cooking and prevents cracking.
- Bake: Carefully transfer the roasting pan with the water bath to the oven. Bake at 325°F for 1 hour 15 minutes to 1 hour 30 minutes. The cheesecake is done when the edges are set but the center still jiggles slightly when you gently shake the pan (about a 2-inch circle in the middle). The center should register 150°F on an instant-read thermometer. Don’t overbake—it will continue cooking as it cools.
- Turn Off Oven: Turn off the oven and crack the oven door open about 4 inches. Let the cheesecake cool in the oven for 1 hour. This gradual temperature change prevents cracking from thermal shock.
- Remove and Cool: Remove the cheesecake from the water bath and remove the foil. Run a thin knife around the edge of the cheesecake to loosen it from the pan sides (this prevents cracking as it cools and contracts). Let it cool to room temperature on a wire rack, about 1-2 hours.
- Refrigerate: Once at room temperature, cover the cheesecake (still in the springform pan) with plastic wrap or aluminum foil and refrigerate for at least 4 hours, preferably overnight. The cheesecake needs this time to fully set and develop its flavors.
- Remove from Pan and Serve: When ready to serve, remove the sides of the springform pan. Use a large spatula to carefully transfer the cheesecake to a serving plate, or serve directly from the springform base. Slice with a sharp knife, wiping it clean between cuts for neat slices. Top with whipped cream, caramel, or candied nuts if desired.
Notes
- Room Temperature Ingredients: This is crucial! Cold ingredients create lumps and don’t blend smoothly. Plan ahead and let cream cheese, eggs, and cream sit at room temperature for 1-2 hours.
- Don’t Overmix: Once eggs are added, mix just until incorporated. Overmixing adds air bubbles that expand during baking and cause cracks.
- Water Bath is Important: The humid environment prevents the top from drying out and cracking. Don’t skip it!
- The Jiggle Test: The cheesecake should wobble like jello in the center when done. It firms up completely as it cools.
- Patience is Key: Don’t rush the cooling or chilling process. Slow cooling prevents cracks, and proper chilling ensures perfect texture.
- Prep Time: 30 minutes
- Cook Time: 1 hour 15 minutes
- Category: Dessert
- Method: Baking
- Cuisine: American
Nutrition
- Serving Size: 1 slice (1/12 of cheesecake)
- Calories: 385
- Sugar: 24g
- Sodium: 280mg
- Fat: 26g
- Saturated Fat: 15g
- Unsaturated Fat: 9g
- Trans Fat: 0g
- Carbohydrates: 32g
- Fiber: 1g
- Protein: 7g
- Cholesterol: 115mg
Tips & Variations
Flavor Variations:
- Maple Pumpkin Cheesecake: Replace 1/4 cup of sugar with pure maple syrup for deeper fall flavor
- Ginger Snap Crust: Use crushed ginger snap cookies instead of graham crackers for spicier crust
- Chocolate Swirl: Melt 4 oz chocolate, swirl through batter before baking for marbled effect
- Pecan Praline Topping: Top with candied pecans and caramel sauce for extra decadence
- Spiced Whipped Cream: Top with whipped cream mixed with cinnamon and nutmeg
- Bourbon Pumpkin: Add 2 tablespoons bourbon to the filling for sophisticated depth
- Mini Pumpkin Cheesecakes: Make in muffin tins with cupcake liners for individual portions (bake 20-25 minutes)
- Salted Caramel Pumpkin: Drizzle with salted caramel sauce before serving
- Streusel Topping: Add a buttery cinnamon streusel on top during the last 20 minutes of baking
Dietary Modifications:
- Gluten-Free: Use gluten-free graham crackers or crushed gluten-free cookies for the crust
- Lower Sugar: Reduce sugar to 3/4 cup (texture and sweetness will change slightly)
- No Water Bath Method: Bake at 300°F for longer (about 90 minutes) and place a pan of water on the rack below
Pro Chef Tips
Here are professional secrets to creating perfect pumpkin cheesecake every time:
The Room Temperature Rule: This cannot be emphasized enough—room temperature ingredients are the number one secret to smooth, lump-free cheesecake. Cold cream cheese will never fully smooth out, no matter how long you beat it, creating a grainy texture. Set everything out 1-2 hours before baking. If you forget, place wrapped cream cheese in a bowl of warm (not hot) water for 10 minutes, and place eggs in warm water for 5 minutes. This simple step makes the biggest difference in final texture.
The Mixing Method Matters: Beat the cream cheese alone first until it’s absolutely silky and smooth before adding anything else. This initial beating breaks down any lumps. Then add sugar and beat well. Once you add the eggs, switch to low speed and mix just until incorporated—about 5-10 seconds per egg. Overmixing after eggs are added incorporates air, which expands during baking and causes cracks. Stop mixing as soon as ingredients are combined.
Prevent Cracks with Triple Protection: Use three methods together for a crack-free top: (1) a water bath for gentle, even heat; (2) don’t overbake—remove when the center still jiggles; and (3) cool gradually by turning off the oven and cracking the door, then cooling to room temperature before refrigerating. Temperature shock causes cracks more than anything else. These three steps together virtually guarantee a perfect top.
The Foil Wrap Technique: When wrapping your springform pan for the water bath, use heavy-duty foil and wrap it thoroughly—bottom and all the way up the sides in 2-3 layers. Even the slightest leak will make your crust soggy and potentially let water seep into the filling. Some bakers even place the wrapped pan inside a large oven bag for extra protection. The water bath is crucial, so make sure your pan is completely waterproof.
Test for Doneness Properly: Forget the toothpick test—it doesn’t work for cheesecake! The center should still jiggle like jello when you gently shake the pan. It looks underdone, but it will firm up perfectly as it cools. If you have an instant-read thermometer, 150°F in the very center is perfect. The carryover heat will bring it to 160°F (fully cooked) as it cools. Overbaked cheesecake is dense, dry, and prone to cracking.
The Overnight Advantage: While you can eat pumpkin cheesecake after 4 hours of chilling, it’s significantly better after overnight refrigeration. The flavors meld and deepen, the texture becomes even more creamy and smooth, and it slices more cleanly. Professional bakeries always make cheesecake at least a day ahead. If possible, make it 1-2 days before serving for optimal results.
Perfect Slicing Technique: For bakery-perfect slices, use a large, sharp knife. Run it under hot water, wipe it completely dry, then make one cut. Wipe the knife clean, run it under hot water again, dry it, and make the next cut. Yes, it’s tedious, but this method creates beautifully clean cuts with no crumbs or smearing. Cold cheesecake slices more cleanly than room temperature.
Common Mistakes to Avoid
Mistake #1: Using Cold Ingredients
This is the most common mistake in cheesecake-making. Cold cream cheese creates lumps that will never fully incorporate no matter how long you mix, resulting in a grainy, unpleasant texture with visible white streaks. Cold eggs can cause the mixture to seize up and become lumpy. The solution is simple but requires planning: set all dairy and eggs out on the counter 1-2 hours before you start baking. They should feel just slightly cool to the touch, not cold. If you’re in a rush, place sealed cream cheese packages in warm water for 10 minutes and eggs for 5 minutes. This one step makes the difference between a smooth, professional cheesecake and a lumpy, amateur one.
Mistake #2: Overmixing the Batter
Once you add the eggs to your cheesecake batter, overmixing becomes the enemy. Excessive beating incorporates too much air, which creates bubbles that expand during baking and then collapse, causing cracks and sometimes a curdled appearance. After adding eggs, mix on the lowest speed just until each egg disappears into the batter—usually 5-10 seconds per egg. The batter doesn’t need to be perfectly smooth at this point; it will smooth out during baking. It’s better to have a few small streaks than to overmix.
Mistake #3: Skipping the Water Bath
Some recipes claim you don’t need a water bath, but for the most professional results with minimal risk of cracking, it’s essential. The water bath (also called a bain-marie) creates a humid environment and ensures gentle, even heat distribution. Without it, the top of the cheesecake dries out, the edges overcook before the center is done, and cracks are almost inevitable. If you’re worried about water leaking into your pan, wrap it thoroughly in heavy-duty foil. The water bath is worth the extra step—it’s the difference between an amateur-looking cracked cheesecake and a bakery-perfect smooth top.
Mistake #4: Overbaking
Many home bakers are afraid of underbaking and end up leaving their cheesecake in the oven too long. Overbaked cheesecake is dense, dry, prone to cracking, and can even have a slightly eggy taste. The center should still jiggle like jello when you remove the cheesecake from the oven—this looks scary and underdone, but it’s exactly right! The residual heat continues cooking the center as it cools, and it will firm up perfectly in the refrigerator. Trust the jiggle! If you’re nervous, use an instant-read thermometer—150°F in the center is perfect.
Mistake #5: Rushing the Cooling Process
Cheesecake needs to cool gradually and slowly, or it will crack from temperature shock. Pulling it directly from a hot oven into room temperature or refrigerator air causes the surface to contract rapidly while the interior is still hot and expanded—this creates cracks. Instead, turn off the oven, crack the door open, and let it cool in the oven for an hour. Then remove it and let it come to room temperature on the counter (another 1-2 hours) before refrigerating. Yes, this takes time, but patience is rewarded with a crack-free, perfectly textured cheesecake.
Storage & Meal Prep
Refrigerator Storage:
Store pumpkin cheesecake covered in the refrigerator for up to 5 days. Keep it in the springform pan covered with plastic wrap or aluminum foil, or transfer it to a cake dome or covered plate. The cheesecake actually improves after a day or two as the flavors meld and deepen. Make sure it’s well-covered so it doesn’t absorb refrigerator odors.
Freezing Individual Slices:
For easy grab-and-go portions, slice the cheesecake and freeze individual slices. Wrap each slice tightly in plastic wrap, then again in aluminum foil. Place wrapped slices in a freezer bag with the air pressed out. Frozen slices keep for up to 2 months. To serve, thaw individual slices in the refrigerator for 3-4 hours or at room temperature for 1-2 hours.
Serving Temperature:
Cheesecake tastes best when slightly chilled but not ice-cold. For optimal flavor and creamy texture, remove it from the refrigerator 20-30 minutes before serving. This takes the chill off and allows the flavors to bloom. If serving frozen slices, let them thaw completely for best texture.
Toppings and Garnishes:
If you’re adding whipped cream, caramel sauce, or other toppings, add them just before serving rather than storing the cheesecake with toppings already on it. This keeps the toppings fresh and prevents them from making the cheesecake soggy.
Make-Ahead & Freezer Notes
Perfect Make-Ahead Dessert:
Pumpkin cheesecake is one of the best make-ahead desserts because it actually needs to be made ahead! It requires at least 4 hours of chilling (preferably overnight), making it perfect for stress-free entertaining. Make it 1-3 days before your event and store it covered in the refrigerator. This advance preparation actually improves the flavor and texture.
Freezing the Whole Cheesecake:
Pumpkin cheesecake freezes beautifully! Once the cheesecake is completely chilled, wrap the entire springform pan (or just the cheesecake on its base) tightly in several layers of plastic wrap, then wrap again in aluminum foil. Freeze for up to 2 months. To serve, thaw it in the refrigerator overnight (about 12-24 hours). Don’t thaw at room temperature as condensation can form on the surface.
Freezing for Long-Term Storage:
For the best freezer protection, wrap the fully chilled cheesecake as described above, then place it in a large freezer bag with the air pressed out, or store it in an airtight container. This extra protection prevents freezer burn and off-flavors. Label with the date so you remember when you made it.
Make-Ahead Timeline for Stress-Free Holidays:
- 2 Months Before: Bake and freeze the cheesecake
- 2 Days Before Event: Transfer frozen cheesecake to refrigerator to thaw slowly
- Day of Event: Remove from refrigerator 20-30 minutes before serving, add fresh toppings, and slice
Make-Ahead Components:
If you don’t want to freeze the whole cheesecake, you can make components ahead. The graham cracker crust can be pressed into the pan and baked up to 2 days ahead—store covered at room temperature. The cheesecake can be made 3 days ahead and refrigerated. Make whipped cream topping the day of serving for best texture.
Serving Suggestions
Pumpkin cheesecake is stunning on its own, but here are beautiful ways to serve and garnish it:
Classic Presentation:
- Dust the top with cinnamon or pumpkin pie spice
- Add a dollop of freshly whipped cream on each slice
- Garnish with a light sprinkle of ground nutmeg
Decadent Toppings:
- Caramel Sauce: Drizzle warm salted caramel over each slice for extra indulgence
- Candied Pecans or Walnuts: Add crunch and nutty flavor that complements the pumpkin
- Cinnamon Whipped Cream: Whip heavy cream with powdered sugar and cinnamon for spiced topping
- Gingersnap Crumbles: Crush gingersnap cookies over the top for extra spice and texture
- Chocolate Drizzle: Melt dark chocolate and drizzle artistically over slices
- Maple Syrup: A light drizzle of pure maple syrup enhances the autumn flavors
- Toasted Coconut: Adds unexpected texture and tropical notes
Complete Dessert Experience:
- Serve with a cup of hot coffee, espresso, or spiced chai latte
- Pair with a small glass of dessert wine like late-harvest Riesling or tawny port
- Offer apple cider or hot chocolate alongside for non-coffee drinkers
Holiday Presentation: For Thanksgiving or holiday gatherings, arrange the whole cheesecake on a cake stand or beautiful platter. Surround the base with fall leaves (real or artificial), small pumpkins, or cinnamon sticks for a festive presentation. You can also pipe whipped cream rosettes around the edge and place a candied pecan or chocolate leaf on each rosette.
Portion Sizes: Cheesecake is rich, so slices should be modest. A 9-inch cheesecake serves 12-16 people depending on how generous your slices are. For dinner parties, err on the smaller side (16 slices) since people are usually full after a meal. For dessert-focused events, you can cut slightly larger slices (12-14).
Plating for Elegance: For fancy presentation, place each slice on a white plate, add a dollop of whipped cream slightly off-center, drizzle caramel sauce artistically across the plate, and garnish with a small piece of candied pecan or a mint leaf. This restaurant-style plating elevates the dessert from homemade to haute cuisine.
FAQs Section
Can I make pumpkin cheesecake without a water bath?
While you technically can make cheesecake without a water bath, you’re much more likely to get cracks and an unevenly baked cheesecake. The water bath provides humid, gentle heat that prevents the top from drying out and cracking. If you really can’t do a water bath, lower the oven temperature to 300°F, place a pan of hot water on the rack below the cheesecake, and bake for about 90 minutes. Also be extra careful not to overbake and to cool gradually. However, for the most foolproof results, the water bath is worth it!
Why did my cheesecake crack?
Cracks have several common causes: overbaking (the most common reason), overmixing the batter after adding eggs, rapid temperature changes during cooling, or opening the oven door during baking. To prevent cracks: remove the cheesecake when the center still jiggles, mix gently once eggs are added, cool gradually (oven off with door cracked, then room temperature, then refrigerate), and resist the urge to peek in the oven. The good news: even cracked cheesecake tastes delicious, and you can always cover cracks with whipped cream or toppings!
Can I use pumpkin pie filling instead of pure pumpkin?
No, don’t use pumpkin pie filling! It contains added sugar and spices already mixed in, which will throw off the recipe’s balance completely. You’ll end up with an overly sweet, overly spiced cheesecake with incorrect texture. Always use 100% pure pumpkin puree (like Libby’s Pure Pumpkin). Read the label carefully—it should say “100% Pure Pumpkin” with only one ingredient: pumpkin.
How do I know when my cheesecake is done?
The center should still jiggle like jello when you gently shake the pan—about a 2-3 inch circle in the middle. This looks underdone but it’s perfect! The cheesecake continues cooking as it cools and will firm up completely in the refrigerator. If you have an instant-read thermometer, insert it into the center—150°F is the perfect temperature.