
If you’re craving Mexican-inspired comfort food that’s ready faster than ordering takeout, these Cheesy Chicken Quesadillas are about to become your new favorite weeknight dinner. Picture this: golden, crispy tortillas stuffed with tender seasoned chicken, gooey melted cheese, and your choice of delicious fillings, all coming together in one perfect, handheld meal. These quesadillas deliver that irresistible combination of crunchy exterior and melty, cheesy interior that makes them absolutely addictive.
Whether you’re feeding hungry kids after school, looking for a quick lunch, hosting game day, or just need something satisfying and simple for dinner, chicken quesadillas check all the boxes. They’re incredibly versatile—you can customize them with whatever you have in your fridge, make them as mild or spicy as you like, and they’re guaranteed crowd-pleasers every single time. Best of all, they come together in just 20 minutes with minimal cleanup, making them the ultimate easy meal that doesn’t sacrifice flavor. Serve them with salsa, guacamole, and sour cream, and watch them disappear in minutes!
History / Background
Quesadillas have a rich history that dates back to colonial Mexico in the 16th century. The word “quesadilla” comes from the Spanish word “queso,” meaning cheese, combined with the suffix “-adilla,” which roughly translates to “little cheesy thing.” The dish originated when Spanish conquistadors introduced dairy products, including cheese, to Mexico. Indigenous Mexican communities, who had been making corn tortillas for thousands of years, quickly incorporated this new ingredient into their cuisine, creating the first quesadillas.
Traditional Mexican quesadillas are actually quite different from what most Americans are familiar with. In central and southern Mexico, quesadillas are often made with handmade corn tortillas folded in half and filled with various ingredients like squash blossoms, huitlacoche (corn fungus), or picadillo (spiced ground meat). Interestingly, in Mexico City, quesadillas don’t always contain cheese—you have to specifically ask for “con queso” (with cheese) if you want it!
The chicken quesadilla as we know it in the United States became popular in the 1970s and 1980s with the rise of Tex-Mex cuisine. This American adaptation typically uses flour tortillas (which are larger and more pliable than corn), pre-shredded cheese, and ingredients like grilled chicken, bell peppers, and onions. The style evolved to suit American tastes and became a staple on restaurant menus across the country.
Today, chicken quesadillas are beloved comfort food in the US and around the world. They bridge the gap between traditional Mexican cooking and American convenience, making them accessible, customizable, and perfect for home cooks of all skill levels.
Why You’ll Love This Recipe
These easy chicken quesadillas are about to earn a permanent spot in your weekly meal rotation, and here’s exactly why you’ll fall in love with them:
This recipe takes everything that makes quesadillas amazing and simplifies it for busy home cooks without sacrificing any of that delicious, cheesy goodness. They’re the kind of recipe that saves dinner on those chaotic evenings when you need something fast, satisfying, and guaranteed to please everyone at the table.
- Lightning Fast: Ready in just 20 minutes from start to finish, making them perfect for busy weeknights, quick lunches, or last-minute dinner solutions
- Budget-Friendly: Uses affordable ingredients like rotisserie chicken or leftover chicken, flour tortillas, and cheese—most of which you probably already have
- Kid-Approved: Even the pickiest eaters love these! The mild flavors and familiar ingredients make them a guaranteed win with children
- Customizable: Easily adapt them to your taste preferences, dietary needs, or whatever ingredients you have on hand
- Minimal Cleanup: Just one skillet needed, which means less time at the sink and more time enjoying your meal
- Perfect for Meal Prep: Make several at once and reheat throughout the week for quick lunches or snacks
- Great for Crowds: Easy to scale up for parties, game day, or feeding a group—everyone loves them!
- Versatile Serving Options: Works for breakfast, lunch, dinner, or even as an appetizer cut into smaller wedges
- Leftover-Friendly: An excellent way to use up leftover cooked chicken, transforming it into something exciting and new
Ingredient Notes
Let’s break down what makes these chicken quesadillas so delicious and talk about your options:
Flour Tortillas: Large burrito-size flour tortillas (10-12 inches) work best because they’re sturdy, pliable, and have plenty of room for fillings. They get beautifully crispy when cooked. You can use regular, whole wheat, or even low-carb tortillas. Corn tortillas work too, but they’re more delicate and prone to breaking—if using corn, opt for the smaller taco-size and adjust your filling amount. For gluten-free, look for gluten-free flour tortillas which work perfectly in this recipe.
Cooked Chicken: This recipe is incredibly flexible! Use rotisserie chicken from the store (the ultimate time-saver), leftover grilled or baked chicken, or quickly cook some chicken breasts specifically for this recipe. Chicken thighs work wonderfully too and add extra flavor. You’ll need about 2 cups of shredded or diced cooked chicken. In a pinch, even canned chicken works, though fresh tastes better.
Cheese: The star of any quesadilla! A Mexican cheese blend (typically a mix of cheddar, Monterey Jack, asadero, and queso quesadilla) melts beautifully and has authentic flavor. Plain Monterey Jack, cheddar, or pepper jack (for spice lovers) all work great. Pre-shredded cheese is convenient, but freshly shredded melts better and doesn’t contain anti-caking agents. You’ll want about 2 cups total. For the best melt and flavor, use a combination of cheeses.
Bell Peppers and Onions: These add sweetness, crunch, and color. Any color bell pepper works—red and yellow are sweeter, while green is more traditional and slightly bitter. White or yellow onions are classic, but red onions add nice color. These vegetables are optional but highly recommended for flavor and texture.
Seasonings: Taco seasoning, cumin, chili powder, garlic powder, and paprika give the chicken that classic Tex-Mex flavor. You can use store-bought taco seasoning packets for convenience or make your own blend. Fresh cilantro adds brightness, though it’s divisive—skip it if you’re not a fan.
Oil or Butter: For cooking the quesadillas until golden and crispy. Butter gives the best flavor and color, but vegetable oil, olive oil, or even cooking spray works fine. You just need enough to lightly coat the pan and prevent sticking.
Optional Add-Ins: Black beans, corn, jalapeños, diced tomatoes, green chiles, or cooked bacon all make excellent additions. The beauty of quesadillas is that they’re incredibly forgiving and adaptable.
Equipment Needed
Good news—you don’t need any fancy equipment! Here’s what you’ll need:
- Large Non-Stick Skillet or Griddle: A 10-12 inch skillet is ideal. Non-stick makes flipping easier and prevents sticking. Cast iron works great too if seasoned properly.
- Spatula: A wide spatula makes flipping much easier—ideally one large enough to support half the quesadilla.
- Sharp Knife: For dicing vegetables and slicing the finished quesadillas.
- Cutting Board: For prep work.
- Mixing Bowl: For combining the chicken with seasonings.
- Measuring Cups and Spoons: For accurate measurements.
- Grater: If shredding cheese from a block (recommended for best melting).
- Pizza Cutter or Sharp Knife: For cutting quesadillas into wedges—a pizza cutter makes clean cuts through the crispy tortilla.
- Plate or Baking Sheet: For assembling quesadillas before cooking.
Optional but Helpful:
- Second Skillet: For cooking two quesadillas simultaneously
- Oven: For keeping finished quesadillas warm while you cook the rest (200°F)
- Quesadilla Maker: If you have one, it makes perfectly golden quesadillas every time

Cheesy Chicken Quesadillas Recipe
- Total Time: 20 minutes
- Yield: 4 quesadillas (8 servings) 1x
- Diet: Gluten Free
Description
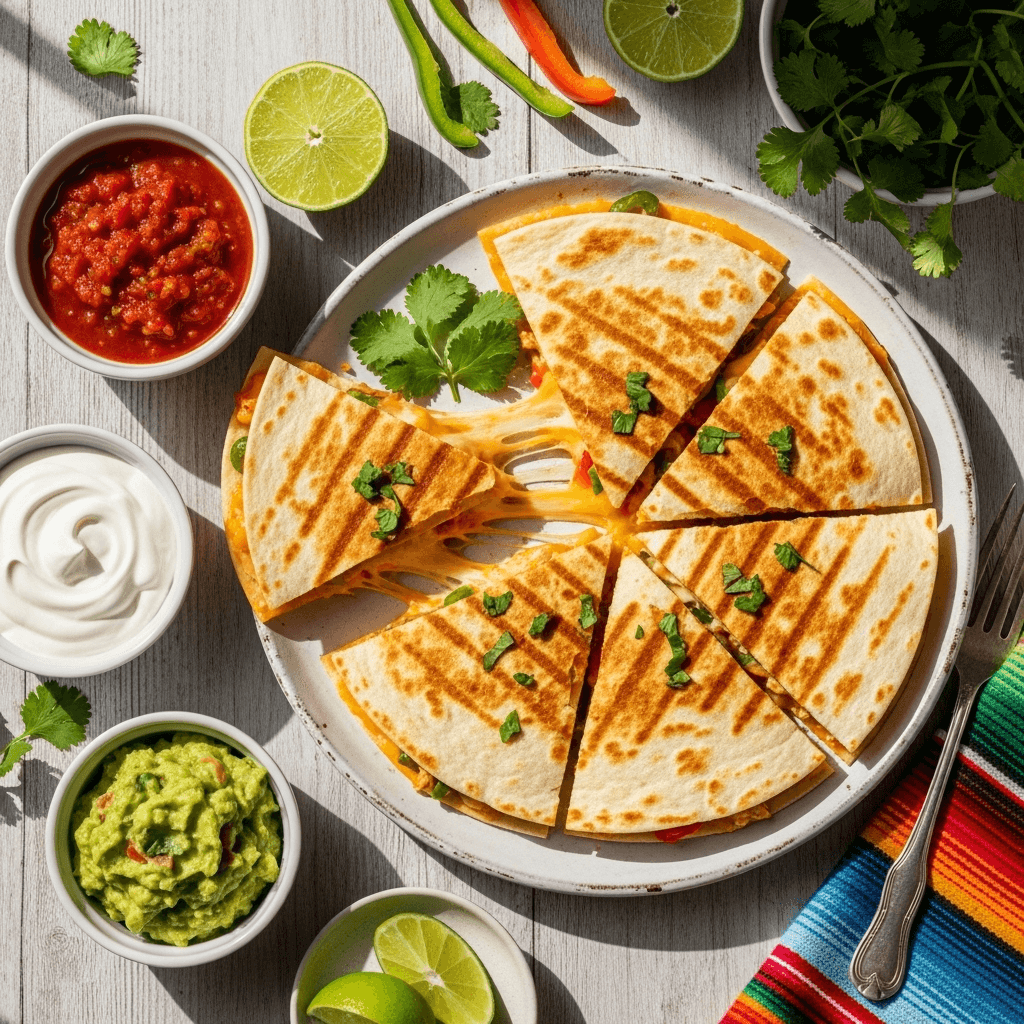
Crispy, golden quesadillas loaded with seasoned chicken and gooey melted cheese. Ready in just 20 minutes, these cheesy chicken quesadillas are perfect for easy weeknight dinners, quick lunches, or game day snacking!
Ingredients
For the Filling:
- 2 cups cooked chicken, shredded or diced (about 1 lb)
- 2 cups shredded Mexican cheese blend (or cheddar/Monterey Jack)
- 1 medium bell pepper, diced (any color)
- 1/2 medium onion, diced
- 2 tablespoons taco seasoning (or 1 teaspoon each: cumin, chili powder, garlic powder, paprika)
- 1/4 cup fresh cilantro, chopped (optional)
- Salt and black pepper to taste
For Assembly:
- 4 large flour tortillas (10–12 inch burrito size)
- 2–3 tablespoons butter or oil (for cooking)
For Serving:
- Sour cream
- Salsa or pico de gallo
- Guacamole or sliced avocado
- Fresh lime wedges
- Extra cilantro (optional)
Instructions
- Prep the Filling: In a medium mixing bowl, combine the shredded chicken with taco seasoning, mixing well to coat evenly. If your chicken is cold from the fridge, you can warm it slightly in the microwave for 30 seconds—this helps everything melt together better. Season with salt and pepper to taste.
- Sauté Vegetables (Optional but Recommended): Heat 1 tablespoon of butter or oil in your skillet over medium heat. Add the diced bell peppers and onions, cooking for 4-5 minutes until softened and slightly caramelized. Season with a pinch of salt. Remove from the skillet and set aside. If you’re short on time, you can skip this step and add raw vegetables directly to the quesadilla, but sautéing them first adds much better flavor.
- Assemble the Quesadillas: Lay one tortilla flat on a clean surface or plate. On one half of the tortilla, layer ingredients in this order: a handful of cheese (about 1/4 cup), half of the chicken mixture, sautéed peppers and onions, cilantro if using, and another handful of cheese on top. The cheese on top and bottom helps everything stick together. Fold the empty half of the tortilla over the filled half, creating a half-moon shape. Press down gently. Repeat with remaining tortillas.
- Cook the Quesadillas: Heat your skillet over medium heat. Add about 1/2 tablespoon of butter, letting it melt and coat the pan. Carefully place one assembled quesadilla in the skillet. Cook for 2-3 minutes on the first side, pressing down gently with your spatula occasionally to help everything meld together. You’ll know it’s ready to flip when the bottom is golden brown and crispy.
- Flip Carefully: Using a wide spatula, carefully flip the quesadilla to the other side. Cook for another 2-3 minutes until golden brown, crispy, and the cheese is fully melted. If the tortilla is browning too quickly but the cheese isn’t melted, reduce the heat to medium-low and give it more time.
- Keep Warm and Repeat: Transfer the cooked quesadilla to a cutting board or baking sheet. If you want to keep them warm while cooking the rest, place them in an oven set to 200°F. Add more butter to the skillet and repeat the cooking process with the remaining quesadillas.
- Slice and Serve: Using a sharp knife or pizza cutter, cut each quesadilla into 3-4 wedges. Serve immediately while hot and crispy with sour cream, salsa, guacamole, and lime wedges on the side.
Notes
- Rotisserie Chicken Shortcut: Using store-bought rotisserie chicken saves tons of time and adds great flavor. Just remove the skin and shred the meat.
- Cheese Melting: Don’t overstuff with cheese or it will ooze out. About 1/2 cup per quesadilla is perfect.
- Heat Control: If your tortillas are burning before the cheese melts, lower the heat. Medium to medium-low is ideal.
- Crispiness: For extra-crispy quesadillas, brush the outside of the tortilla with butter before cooking instead of adding butter to the pan.
- Even Cooking: Press down gently with your spatula while cooking to ensure even contact with the pan and better melting.
- Gluten-Free: Simply use gluten-free tortillas to make this recipe celiac-friendly.
- Prep Time: 10 minutes
- Cook Time: 10 minutes
- Category: Dinner
- Method: Stovetop
- Cuisine: Mexican
Nutrition
- Serving Size: 1/2 quesadilla (2 wedges)
- Calories: 385
- Sugar: 2g
- Sodium: 680mg
- Fat: 18g
- Saturated Fat: 9g
- Unsaturated Fat: 7g
- Trans Fat: 0g
- Carbohydrates: 28g
- Fiber: 2g
- Protein: 26g
- Cholesterol: 75mg
Tips & Variations
Customize Your Quesadillas:
- Spicy Kick: Add diced jalapeños, crushed red pepper flakes, use pepper jack cheese, or drizzle with hot sauce
- BBQ Chicken: Toss the chicken in BBQ sauce instead of taco seasoning for a sweet and tangy twist
- Buffalo Chicken: Mix the chicken with buffalo sauce and use blue cheese or ranch for dipping
- Veggie-Loaded: Add black beans, corn, diced tomatoes, or sliced mushrooms for extra nutrition
- Breakfast Quesadilla: Use scrambled eggs, bacon or sausage, cheese, and serve with hot sauce
- Lighter Version: Use low-fat cheese, whole wheat tortillas, and add more vegetables
- Pizza Quesadilla: Add pepperoni, mozzarella, and serve with marinara for dipping
- Fajita Style: Use fajita seasoning, add sautéed peppers and onions, top with fajita-style toppings
- Cheesy Upgrade: Try a mix of queso fresco, cotija, and Oaxaca cheese for authentic Mexican flavors
- Bean Addition: Mash some refried beans on the tortilla before adding other fillings for extra protein and creaminess
Pro Chef Tips
Here are insider secrets to take your chicken quesadillas from good to absolutely restaurant-quality:
The Cheese Barrier Method: Before adding any wet ingredients like chicken or vegetables, lay down a base layer of cheese directly on the tortilla. This creates a moisture barrier that prevents the tortilla from getting soggy. Then add your fillings, and finish with another layer of cheese on top. This double-cheese technique ensures perfect structural integrity and maximum gooeyness.
Room Temperature Ingredients: Take your cheese out of the fridge 15-20 minutes before cooking. Room temperature cheese melts faster and more evenly, preventing the tortilla from burning before everything inside is perfectly melted. Cold ingredients straight from the fridge cause uneven cooking.
Press and Toast: As your quesadilla cooks, gently press down on it with your spatula every 30 seconds or so. This ensures good contact between the tortilla and the hot pan, creating those beautiful golden-brown spots and helping the cheese melt evenly throughout.
The Flip Technique: When it’s time to flip, slide your spatula under the quesadilla and support it with your other hand (carefully!) on top as you turn it. This prevents the filling from sliding out or the tortilla from tearing. Confidence is key—a quick, decisive flip works better than a hesitant one.
Resting Period: Let the cooked quesadilla rest for 1-2 minutes before cutting. This allows the cheese to set slightly, making cleaner cuts and preventing all the filling from oozing out when you slice it. It’s tempting to cut immediately, but patience pays off!
The Griddle Advantage: If you have a large griddle or flat cooktop, you can cook multiple quesadillas at once, making this recipe even faster when feeding a crowd. Just maintain the same medium heat across the entire surface.
Pre-Season Your Chicken: If you’re cooking chicken specifically for quesadillas, season it aggressively—even more than you think you need. Chicken is the main filling, and well-seasoned chicken makes the entire quesadilla taste better. Don’t rely solely on the taco seasoning added later.
Common Mistakes to Avoid
Mistake #1: Overstuffing the Quesadilla
It’s tempting to cram in as much filling as possible, but overstuffed quesadillas are impossible to flip without spilling everywhere and the ingredients don’t melt together properly. The tortilla can’t fold properly and often tears. Stick to about 1/3 to 1/2 cup of filling total per quesadilla—less is more! The tortilla should be able to fold in half easily without bulging. Remember, you want a good ratio of crispy tortilla to filling in every bite.
Mistake #2: Cooking Over Too-High Heat
High heat seems like it would speed things up, but it actually burns the tortilla before the cheese melts, leaving you with a charred exterior and cold, unmelted filling. Medium to medium-low heat is your friend here. The quesadilla needs time for the cheese to melt and everything to warm through. If you see the tortilla browning within the first minute, your heat is too high—reduce it immediately.
Mistake #3: Using Wet Ingredients Without Draining
Adding ingredients with excess moisture (like undrained canned beans, tomatoes with juice, or very watery salsa) makes the quesadilla soggy and causes the filling to slide out. Always drain canned ingredients well, and if using fresh tomatoes, remove the seeds and excess juice. Pat vegetables dry after sautéing them if they’ve released moisture. A dry filling stays together better and creates a crispier finished product.
Mistake #4: Not Using Enough Fat in the Pan
Trying to cook quesadillas with just a spritz of cooking spray or barely any butter results in spotty browning and sticking. You need enough butter or oil to coat the entire surface that touches the pan. This creates that beautiful golden, crispy exterior that makes quesadillas so irresistible. Don’t be afraid of a thin layer of butter—it’s what makes the outside perfectly crispy while keeping the inside tender.
Mistake #5: Cutting Too Soon
Slicing into your quesadilla immediately after cooking causes all the melted cheese and fillings to ooze out in a messy pool. Give it just 1-2 minutes to rest, and the cheese will set slightly, holding everything together for clean, beautiful cuts. This small moment of patience makes a huge difference in presentation and makes eating them much less messy.
Storage & Meal Prep
Refrigerator Storage:
Store leftover quesadillas in an airtight container or wrap them tightly in aluminum foil or plastic wrap. They’ll keep in the refrigerator for 3-4 days. For best results, place a piece of parchment paper between each quesadilla to prevent them from sticking together. The cheese will solidify when cold, but they reheat beautifully.
Reheating Instructions:
The key to reheating quesadillas is restoring that crispy exterior. The microwave works in a pinch (30-60 seconds until hot), but it makes them soft and chewy rather than crispy. For best results, reheat in a skillet over medium heat for 2-3 minutes per side until heated through and crispy again. You can also use an oven at 350°F for 10 minutes, or an air fryer at 350°F for 3-4 minutes. The air fryer method actually makes them crispier than they were originally!
Meal Prep Tips:
Quesadillas are fantastic for meal prep. Cook a batch on Sunday and reheat throughout the week for quick lunches. You can also prep all your ingredients in advance—shred the chicken, dice the vegetables, and shred the cheese—then store everything in separate containers. When you’re ready to eat, assembly takes just minutes. This is especially helpful for busy weeknights when you want a hot, homemade dinner but have zero time for cooking.
Lunchbox Friendly:
Pack a quesadilla wedge in lunchboxes with small containers of salsa and sour cream for dipping. They’re delicious even at room temperature, making them perfect for packed lunches. Just make sure to pack them only after they’ve cooled completely to prevent condensation.
Make-Ahead & Freezer Notes
Preparing in Advance:
You can assemble quesadillas up to 4 hours ahead of time. Place them on a baking sheet, cover tightly with plastic wrap, and refrigerate until ready to cook. This is perfect for entertaining—do all the prep work early, then quickly cook them when guests arrive. They’ll taste freshly made!
Freezing Cooked Quesadillas:
Chicken quesadillas freeze exceptionally well! Let them cool completely, then wrap each one individually in plastic wrap, followed by a layer of aluminum foil. Store in a freezer bag with the air pressed out. They’ll keep for up to 3 months in the freezer. Label with the date so you remember when you made them.
Freezing Uncooked Quesadillas:
You can also assemble and freeze uncooked quesadillas. Place assembled quesadillas on a baking sheet and freeze until solid (about 2 hours), then wrap individually and store in a freezer bag. This prevents them from sticking together and makes it easy to grab just one or two at a time.
Reheating from Frozen:
For cooked frozen quesadillas, you can reheat directly from frozen. Place in a skillet over medium-low heat, cover with a lid, and cook for 4-5 minutes per side until heated through. Or bake at 350°F for 15-20 minutes, flipping halfway through. For uncooked frozen quesadillas, let them thaw in the refrigerator overnight, then cook as directed in the recipe. You can also cook them from frozen, just add an extra 2-3 minutes per side.
Best Freezing Practices:
Don’t add sour cream, tomatoes, or lettuce before freezing—these don’t freeze well. Stick to chicken, cheese, peppers, onions, and beans. Add fresh toppings after reheating for the best texture and flavor.
Serving Suggestions
Quesadillas are incredibly versatile and can be served in so many delicious ways. Here are my favorite combinations:
Classic Dipping Trio:
The traditional accompaniments are sour cream, salsa (mild, medium, or hot), and guacamole. These three cover all your bases—cooling creaminess, fresh acidity, and rich avocado flavor. Add lime wedges for squeezing over the top for brightness.
Make It a Complete Meal:
- Mexican Rice: Serve alongside fluffy cilantro-lime rice or Spanish rice
- Refried Beans or Black Beans: Warm, seasoned beans make a protein-rich, filling side
- Street Corn (Elote): Grilled or roasted corn with mayo, cotija cheese, chili powder, and lime
- Mexican Street Corn Salad: All the flavors of elote in an easy-to-eat salad form
- Simple Side Salad: A crisp green salad with lime vinaigrette balances the rich quesadilla
Fresh Toppings Bar:
Set up a topping station and let everyone customize their quesadillas:
- Pico de gallo or fresh salsa
- Pickled jalapeños
- Sliced black olives
- Diced tomatoes
- Shredded lettuce
- Sliced avocado or guacamole
- Mexican crema or sour cream
- Fresh cilantro
- Lime wedges
- Hot sauce varieties
- Pickled red onions
Soup Pairings:
Quesadilla wedges make excellent dippers for:
- Tortilla soup
- Black bean soup
- Chicken enchilada soup
- Tomato soup
- Creamy corn chowder
Beverage Pairings:
- Fresh lime margaritas (for adults)
- Mexican beer with lime
- Horchata (sweet rice drink)
- Jamaica (hibiscus tea)
- Fresh lemonade or limeade
- Mexican Coke in glass bottles
Party Presentation:
Cut quesadillas into smaller triangular wedges (6-8 per quesadilla) and arrange on a large platter with small bowls of different salsas and dips for a perfect appetizer spread.
FAQs Section
Can I make quesadillas without chicken?
Absolutely! Quesadillas are incredibly versatile. For vegetarian versions, use black beans, refried beans, roasted vegetables (like zucchini, mushrooms, or sweet potato), or just make them cheese-only. For other proteins, try ground beef, shredded pork, steak, shrimp, or even just beans for a budget-friendly option. The cooking method stays exactly the same—just swap out the chicken for your preferred filling.
What’s the best way to shred rotisserie chicken quickly?
Here’s a genius trick: place large chunks of the chicken in your stand mixer with the paddle attachment. Turn it on low speed and let it run for about 30-60 seconds—perfectly shredded chicken with zero effort! Alternatively, use two forks to pull the meat apart, or place chunks in a plastic bag and use a rolling pin to crush them into shreds. The stand mixer method is by far the fastest and creates the most evenly shredded chicken.
Why isn’t my cheese melting properly?
Several factors affect cheese melting: you might be using pre-shredded cheese with too many anti-caking agents (freshly shredded melts much better), your heat might be too high causing the tortilla to burn before the cheese melts, or you’re using low-fat cheese which doesn’t melt as well. The solution: use full-fat, freshly shredded cheese, cook over medium to medium-low heat, and cover the skillet with a lid for the last minute of cooking to trap heat and help the cheese melt faster.
Can I use corn tortillas instead of flour?
Yes, but with some modifications. Corn tortillas are more delicate and prone to cracking when folded. To prevent breaking, warm them first in a dry skillet for 15-20 seconds per side or wrap them in a damp towel and microwave for 20-30 seconds—this makes them pliable. Use smaller taco-size corn tortillas, reduce the filling amount, and be extra gentle when flipping. Many people actually prefer the authentic corn tortilla flavor, even though they require more care.
How do I prevent the tortilla from getting soggy?
Soggy quesadillas happen when there’s too much moisture in the filling. Always drain canned beans and vegetables thoroughly, pat sautéed vegetables dry if they’ve released water, and don’t use watery salsa inside the quesadilla (save it for dipping). Using the cheese barrier method (cheese directly against both sides of the tortilla) also helps create a moisture barrier. Cook over medium heat so the tortilla gets crispy before too much steam builds up inside.
Can I make quesadillas in the oven instead of on the stovetop?
Yes! Preheat your oven to 400°F. Brush both sides of the assembled quesadillas with melted butter or oil, place them on a baking sheet, and bake for 10-12 minutes, flipping halfway through. They won’t get quite as crispy as pan-fried versions, but this method is great for making multiple quesadillas at once without standing at the stove. You can also finish them under the broiler for 1-2 minutes to get extra-crispy tops.
What if I don’t have taco seasoning?
No problem! Make your own quick blend with spices you likely have: combine 1 teaspoon cumin, 1 teaspoon chili powder, 1/2 teaspoon garlic powder, 1/2 teaspoon paprika, 1/4 teaspoon onion powder, and a pinch each of salt, pepper, and cayenne (optional). This makes enough for one batch of quesadillas and actually tastes fresher and less salty than store-bought packets. You can multiply the recipe and store it in a jar for future use.
Conclusion
There you have it—the ultimate guide to making perfect, crispy, cheesy chicken quesadillas at home! This recipe proves that you don’t need to order takeout or spend a fortune at a restaurant to enjoy restaurant-quality Tex-Mex food. With just 20 minutes, a handful of simple ingredients, and one skillet, you can create a meal that’s guaranteed to satisfy everyone at your table.
The beauty of quesadillas is their incredible versatility. Make them exactly as written, or use this recipe as a jumping-off point to create your own signature version. Swap proteins, experiment with different cheeses, add your favorite vegetables, or adjust the spice level to suit your family’s preferences. Every variation is delicious!
These chicken quesadillas work for every occasion—quick weeknight dinners when you’re exhausted, game day gatherings with friends, packed lunches for work or school, or even lazy weekend breakfasts. They’re budget-friendly, kid-approved, and loved by adults too. Plus, they’re one of the best ways to use up leftover chicken, transforming it into something exciting and new.
I’d absolutely love to hear how your cheesy chicken quesadillas turn out! What fillings did you use? Did you try any of the variations? Drop a comment below and share your experience. And if you loved this recipe as much as I do, please hit that Pinterest save button and share it with your friends—it helps other home cooks discover easy, delicious recipes like this one!
Now grab those tortillas and get cooking—your perfect quesadilla is just 20 minutes away!