
Welcome to chocolate heaven! These individual mini chocolate cakes are everything a chocolate lover dreams about—rich, moist, intensely chocolatey, and perfectly portioned for one or two people. If you’ve ever craved a slice of decadent chocolate cake but didn’t want to commit to baking an entire layer cake, this easy mini chocolate cake recipe is your answer!
These adorable single-serve chocolate cakes are perfect for so many occasions: a romantic date night dessert, a special birthday treat for someone in your household, an elegant dinner party finale, or honestly, just a Tuesday evening when you need a chocolate fix. They bake in individual ramekins or small cake pans, creating beautiful personal-sized cakes that look bakery-professional but are surprisingly simple to make at home.
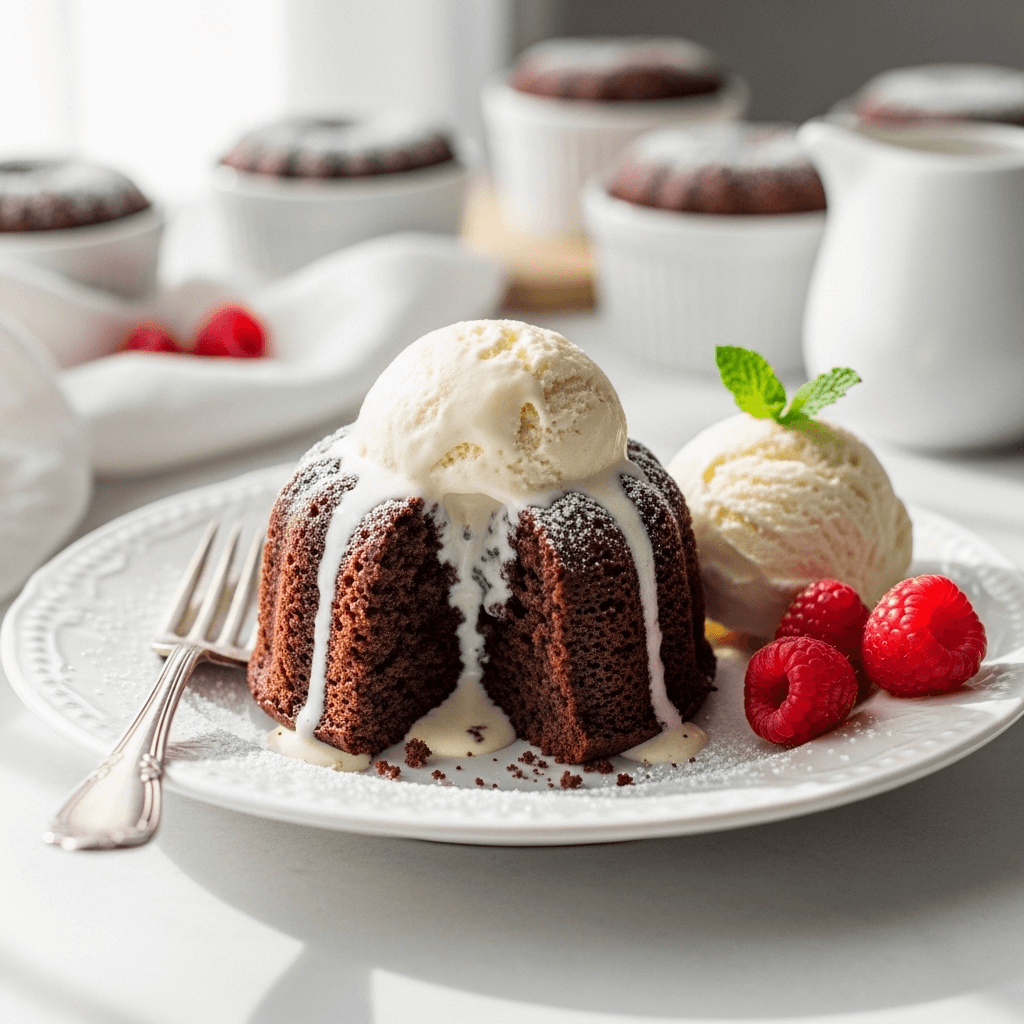
What makes these mini chocolate cakes extra special is their incredible texture—they’re tender and moist with a fine crumb, and the chocolate flavor is deep and satisfying without being overly sweet. Serve them warm with a scoop of vanilla ice cream melting on top, dust them with powdered sugar for an elegant presentation, or top with fresh whipped cream and berries. However you choose to enjoy them, these individual chocolate cakes deliver big flavor in a perfectly portioned package that feels indulgent and special every single time!
History / Background
Chocolate cake as we know it today is a relatively modern invention. While chocolate has been consumed for thousands of years by Mesoamerican civilizations like the Aztecs and Mayans, it was exclusively a beverage until the 1800s. The invention of cocoa powder by Dutch chemist Coenraad van Houten in 1828 revolutionized baking, making it possible to incorporate chocolate into cakes, cookies, and other baked goods.
The first chocolate cake recipes appeared in American cookbooks in the mid-1800s, but they were nothing like the moist, rich cakes we enjoy today. Early chocolate cakes were often quite plain and not particularly chocolatey. It wasn’t until the late 1800s and early 1900s, when baking chocolate became more refined and baking powder became widely available, that chocolate cakes began to resemble modern recipes.
The concept of individual-sized cakes has an interesting history of its own. While cupcakes gained popularity in the 19th century (the name comes from being baked in cup-sized molds), the idea of creating elegant, plated individual cakes became popular in fine dining during the 20th century. French pastry chefs pioneered many individual dessert presentations, understanding that personal-sized portions feel special and allow for beautiful plating.
The mini chocolate cake—sometimes called a “molten lava cake” when underbaked with a gooey center, or simply an individual chocolate cake when fully baked—gained massive popularity in American restaurants during the 1990s and 2000s. Chef Jean-Georges Vongerichten is often credited with popularizing the molten chocolate cake version at his New York restaurant in 1987, though he claims it was a happy accident (an underbaked cake that turned out to be delicious!).
Today, mini chocolate cakes have become a home baking favorite because they offer the satisfaction of a freshly baked cake without the commitment of making a large dessert. They’re perfect for our modern lives—whether you’re cooking for one, want portion control, or need an impressive dessert that doesn’t require leftover management!
Why You’ll Love This Recipe
These mini chocolate cakes are about to become your go-to chocolate dessert! They satisfy every chocolate craving while being practical, elegant, and genuinely easy to make. The fact that they’re individually portioned means you can bake just one or two for a quiet night at home, or make a whole batch for entertaining.
Here’s why this mini chocolate cake recipe deserves a permanent spot in your baking repertoire:
- Perfect Portions – No cutting slices or worrying about leftover cake going stale; each person gets their own perfect serving
- Quick & Easy – Ready in under 30 minutes from start to finish, making them perfect for last-minute dessert needs
- Impressive Presentation – Look and taste like something from a fancy bakery or upscale restaurant
- Small Batch Friendly – Make just one or two cakes when you’re baking for yourself or a date night at home
- Scalable Recipe – Easily double, triple, or quadruple the recipe for dinner parties or celebrations
- Beginner-Friendly – Simple one-bowl method with no special techniques or complicated steps required
- Rich Chocolate Flavor – Uses both cocoa powder and chocolate for deep, complex chocolate taste
- Moist & Tender – Never dry or crumbly; these cakes are perfectly soft and melt-in-your-mouth delicious
- Versatile – Serve warm, at room temperature, or chilled; dress them up or keep them simple
- Minimal Cleanup – One mixing bowl and your baking dishes—that’s it!
- Budget-Friendly – Uses everyday pantry ingredients without any expensive or hard-to-find items
Whether you’re an experienced baker or someone who rarely turns on the oven, these mini chocolate cakes are foolproof and forgiving. They work beautifully for special occasions but are simple enough to make on an ordinary weeknight when you want something sweet!
Ingredient Notes
Let’s talk about what goes into these delicious mini chocolate cakes. Using quality ingredients makes a noticeable difference in the final result!
All-Purpose Flour – The structure of your cake. All-purpose flour has the right protein content to create a tender cake without being too delicate. Make sure to measure correctly by spooning flour into your measuring cup and leveling it off—don’t pack it down. Substitution: You can use a 1:1 gluten-free flour blend for gluten-free cakes.
Unsweetened Cocoa Powder – This is where much of your chocolate flavor comes from! Use Dutch-process cocoa for a deeper, more mellow chocolate flavor, or natural cocoa powder for a brighter, more intense taste. I prefer Dutch-process for its rich color and smooth flavor. Make sure your cocoa powder is fresh—old cocoa loses its flavor and can taste flat.
Granulated Sugar – Provides sweetness and also contributes to the cake’s tender texture by keeping it moist. White sugar gives you the best rise and texture in cakes. Don’t be tempted to reduce it too much or your cakes may turn out dry and tough.
Baking Powder – The leavening agent that makes your cakes rise and creates that light, fluffy texture. Make sure yours is fresh (test it by mixing a teaspoon with hot water—it should bubble vigorously). Old baking powder won’t give you the lift you need.
Salt – Essential for enhancing all the flavors, especially chocolate! Even though it’s a small amount, don’t skip it. Salt makes the chocolate taste more chocolatey and balances the sweetness.
Egg – Provides structure, richness, and helps bind everything together. It also adds moisture and contributes to the tender crumb. Use large eggs at room temperature for best results—cold eggs don’t incorporate as well. If you only need one egg for a small batch, it will be perfectly mixed.
Milk – Adds moisture and creates a tender texture. Whole milk gives the richest flavor, but 2% or even non-dairy milk works fine. The milk should be at room temperature so it doesn’t cause the melted butter to solidify. Substitution: Buttermilk makes an even more tender, tangy cake if you have it!
Vegetable Oil or Melted Butter – Fat keeps your cakes moist and tender. Oil actually creates a more moist cake than butter, but butter adds more flavor. I like using a combination of both when possible, or just melted butter for maximum flavor. Coconut oil also works beautifully!
Vanilla Extract – Enhances the chocolate flavor and adds depth. Use pure vanilla extract, not imitation, for the best taste. The vanilla rounds out the chocolate and makes everything taste richer.
Hot Water or Hot Coffee – This might seem unusual, but hot liquid “blooms” the cocoa powder, intensifying the chocolate flavor and creating a more complex taste. Coffee particularly enhances chocolate without making the cake taste like coffee—it just makes the chocolate deeper and richer. If you don’t want to use coffee, hot water works perfectly fine!
Optional: Chocolate Chips – For extra chocolate chunks throughout your cakes! Semi-sweet or dark chocolate chips melt into pockets of gooey chocolate goodness.
Equipment Needed
You don’t need any fancy equipment to make these mini chocolate cakes—just some basic baking tools:
- 4-6 Ramekins or Mini Cake Pans – Standard 6-ounce ramekins work perfectly. You can also use 4-inch mini cake pans, large muffin tins, or even oven-safe teacups!
- Mixing Bowl – Medium-sized bowl for combining your ingredients.
- Whisk or Electric Mixer – A whisk works great for this simple batter, but an electric mixer makes it even easier.
- Measuring Cups and Spoons – For accurate ingredient measurements.
- Rubber Spatula – For scraping down the bowl and ensuring everything is well mixed.
- Baking Sheet – To place your ramekins on for easy transfer in and out of the oven.
- Cooking Spray or Butter – For greasing your ramekins so the cakes release easily.
- Wire Cooling Rack – For cooling the cakes after baking.
- Butter Knife or Small Offset Spatula – For loosening the cakes from the ramekins.
- Sifter or Fine-Mesh Strainer – Optional but helpful for sifting cocoa powder and flour to avoid lumps.
Optional but Nice to Have:
- Kitchen Scale – For the most accurate measurements, especially with flour.
- Small Ladle or Ice Cream Scoop – Makes portioning batter into ramekins easier and more even.
- Instant-Read Thermometer – To check if your cakes are perfectly done

Mini Chocolate Cakes
- Total Time: 25 minutes
- Yield: 4 mini cakes 1x
- Diet: Vegetarian
Description
These individual mini chocolate cakes are rich, moist, and intensely chocolatey with a tender crumb that melts in your mouth. Perfect for date nights, dinner parties, or whenever you want a decadent single-serve dessert without baking an entire cake. They’re ready in just 25 minutes from start to finish!
Ingredients
- ½ cup all-purpose flour
- ⅓ cup unsweetened cocoa powder (Dutch-process preferred)
- ¾ cup granulated sugar
- ½ teaspoon baking powder
- ¼ teaspoon salt
- 1 large egg, room temperature
- ¼ cup whole milk, room temperature
- ¼ cup vegetable oil (or melted butter)
- 1 teaspoon vanilla extract
- ¼ cup hot water (or hot coffee for deeper flavor)
- Optional: ⅓ cup semi-sweet chocolate chips
Instructions
Step 1: Preheat and Prepare
Preheat your oven to 350°F (175°C). Generously grease 4 ramekins (6-ounce size) with butter or cooking spray, making sure to coat the bottoms and sides completely. For extra insurance against sticking, you can also dust the greased ramekins lightly with cocoa powder. Place the prepared ramekins on a baking sheet for easy handling.
Step 2: Mix Dry Ingredients
In a medium mixing bowl, whisk together the flour, cocoa powder, sugar, baking powder, and salt. Make sure to break up any lumps in the cocoa powder—sifting it first is ideal but not absolutely necessary if you whisk thoroughly. The dry ingredients should be evenly combined with no streaks of cocoa or flour visible.
Step 3: Add Wet Ingredients
Create a well in the center of your dry ingredients. Add the egg, milk, oil, and vanilla extract. Whisk together, starting from the center and gradually incorporating the dry ingredients from the edges. Mix until just combined—the batter will be thick at this point. Don’t overmix; a few small lumps are fine.
Step 4: Add Hot Liquid
Pour in the hot water (or hot coffee) and whisk until the batter is smooth and well combined. The batter will become quite thin—this is exactly what you want! The hot liquid blooms the cocoa powder and creates moisture that leads to incredibly tender cakes. If using chocolate chips, fold them in gently with a spatula at this stage.
Step 5: Fill and Bake
Divide the batter evenly among your prepared ramekins, filling each about ⅔ to ¾ full. This gives them room to rise without overflowing. The easiest way to do this is with a ladle or a ⅓ cup measuring cup. Place the baking sheet with the ramekins into your preheated oven.
Step 6: Bake to Perfection
Bake for 15-18 minutes, or until the tops look set and a toothpick inserted into the center comes out with just a few moist crumbs (not wet batter). The cakes should spring back lightly when touched. Don’t overbake—you want them moist and tender, not dry! Remember that they’ll continue cooking slightly from residual heat after you remove them from the oven.
Step 7: Cool and Serve
Remove from the oven and let the cakes cool in the ramekins for 5 minutes. This resting time allows them to set up so they won’t fall apart when you remove them. After 5 minutes, run a butter knife around the edges of each ramekin to loosen the cakes. Place a small plate upside down over each ramekin and carefully flip to unmold. The cakes should slide right out.
Step 8: Garnish and Enjoy
Serve your mini chocolate cakes warm, at room temperature, or chilled—they’re delicious any way! Dust with powdered sugar, top with whipped cream, add a scoop of vanilla ice cream, or garnish with fresh berries. Dig in and enjoy your perfect portion of chocolate bliss!
Notes
- Ramekin Size: These measurements are for 6-ounce ramekins. If using smaller 4-ounce ramekins, you’ll get 5-6 cakes and should reduce baking time by 2-3 minutes. For larger 8-ounce ramekins, you’ll get 3 cakes and may need to add 2-3 minutes to baking time.
- Greasing is Essential: Don’t skip greasing your ramekins thoroughly! These cakes need to release cleanly, and inadequate greasing is the main reason they stick. Use butter or cooking spray generously, getting into all the corners.
- Room Temperature Ingredients: Eggs and milk at room temperature mix more smoothly into the batter and create better texture. Take them out of the fridge 30 minutes before baking, or quick-warm the milk in the microwave for 15 seconds and place the egg in warm water for 5 minutes.
- Don’t Overbake: The single biggest mistake is overbaking mini cakes because they’re small and cook quickly. Set a timer for 15 minutes and check them. They’re done when a toothpick comes out with moist crumbs, not completely clean.
- Serving in Ramekins: If you prefer, you can serve these cakes right in their ramekins for a rustic presentation! Just let them cool for 5-10 minutes, then serve with a spoon for guests to dig in.
- Scaling the Recipe: This recipe doubles, triples, and quadruples beautifully! Just make sure you have enough ramekins and oven space.
- Prep Time: 10 minutes
- Cook Time: 15 minutes
- Category: Dessert
- Method: Baking
- Cuisine: American
Nutrition
- Serving Size: 1 mini cake
- Calories: 305
- Sugar: 38g
- Sodium: 180mg
- Fat: 15g
- Saturated Fat: 3g
- Unsaturated Fat: 11g
- Trans Fat: 0g
- Carbohydrates: 42g
- Fiber: 3g
- Protein: 4g
- Cholesterol: 47mg
Tips & Variations
Molten Lava Cake Version: For gooey, molten centers, reduce the baking time to 12-13 minutes. The edges should be set but the centers will still be liquid. Serve immediately while the chocolate is still flowing!
Chocolate Ganache Topping: Make a simple ganache by heating ½ cup heavy cream until simmering, then pouring it over ½ cup chopped chocolate. Stir until smooth and drizzle over cooled cakes for an extra-decadent finish.
Peanut Butter Swirl: Drop a tablespoon of peanut butter into the center of each ramekin before baking and swirl gently with a toothpick. The combination of chocolate and peanut butter is heavenly!
Espresso Chocolate Cakes: Add 1 tablespoon of instant espresso powder to the dry ingredients for an intense mocha flavor that coffee lovers will adore.
Mint Chocolate Cakes: Add ¼ teaspoon peppermint extract along with the vanilla, and fold in chopped Andes mints or mini chocolate chips for a refreshing minty version.
Orange Chocolate Cakes: Add 1 tablespoon of orange zest to the batter and replace the vanilla with orange extract for a sophisticated chocolate-orange combination.
Nutty Addition: Fold in ¼ cup of chopped toasted pecans, walnuts, or hazelnuts for added texture and flavor.
White Chocolate Raspberry: Fold in white chocolate chips and fresh raspberries before baking. The tart berries complement the sweet chocolate perfectly!
Healthier Version: Replace half the sugar with applesauce, use Greek yogurt instead of oil, and reduce sugar slightly. They won’t be quite as rich but still delicious!
Gluten-Free: Use a 1:1 gluten-free flour blend designed for baking. Make sure it contains xanthan gum for proper structure.
Pro Chef Tips
Bloom Your Cocoa: Professional bakers always bloom cocoa powder with hot liquid because it awakens the chocolate flavor compounds and removes any raw cocoa taste. This step dramatically improves the depth and intensity of chocolate flavor—never skip it!
Quality Cocoa Matters: Not all cocoa powder is created equal. Dutch-process cocoa (like Droste or Valrhona) gives you a smoother, more sophisticated chocolate flavor with less bitterness. It’s darker in color and creates that deep, rich taste you find in high-end desserts. While natural cocoa works fine, investing in good Dutch-process cocoa is worth it for chocolate-focused recipes like this.
Don’t Overmix: Once you add the wet ingredients to the dry, mix until just combined. Overmixing develops gluten, which makes cakes tough and chewy instead of tender and soft. A few small lumps are perfectly fine—they’ll disappear during baking.
Use Coffee, Not Water: Even if you’re not a coffee drinker, using hot coffee instead of hot water amplifies the chocolate flavor without making the cake taste like coffee. The coffee acts as a flavor enhancer, making the chocolate taste more intense and complex. Just brew it strong or use instant coffee dissolved in hot water.
Test for Doneness Correctly: Insert a toothpick about halfway between the edge and center of the cake, not dead center. It should come out with a few moist crumbs clinging to it—not wet batter, but definitely not clean. Clean toothpicks mean overbaked, dry cakes. These small cakes carry over cook from residual heat, so pull them slightly early.
Let Them Rest: After baking, resist the urge to flip them out immediately. That 5-minute rest allows the structure to set properly. If you flip too soon, they may collapse or stick. If you wait too long, they’ll be harder to remove. Five minutes is the sweet spot.
Butter and Cocoa Your Pans: For chocolate cakes, greasing with butter and dusting with cocoa powder (instead of flour) works better. The cocoa blends with the cake and doesn’t leave white residue on your beautiful dark chocolate cakes.
Common Mistakes to Avoid
Undermixing the Batter: While you don’t want to overmix, you do need to mix thoroughly enough that there are no streaks of flour or pockets of cocoa powder. Make sure your batter is smooth and uniform in color. Lumpy batter with dry ingredients not fully incorporated will result in uneven texture and raw flour taste.
Using Old Leavening: Baking powder loses potency over time, and old baking powder won’t give you the rise you need. If your baking powder is more than 6 months old, test it first by mixing a teaspoon with hot water—it should bubble vigorously. Flat, dense cakes often result from expired leavening agents.
Overbaking Mini Cakes: This is the number one mistake! Mini cakes bake much faster than full-sized cakes, and it’s easy to leave them in too long. They go from perfectly moist to dry and crumbly in just 2-3 minutes. Set a timer for 15 minutes and check them. Remember, they’ll continue cooking from residual heat even after you remove them.
Not Greasing Properly: Cakes that stick to the ramekins are frustrating! You need to grease generously—don’t just give a quick spray. Use soft butter and really work it into all the corners and up the sides, or use plenty of cooking spray. Buttering and then dusting with cocoa powder provides double insurance against sticking.
Using Cold Ingredients: Cold eggs and milk don’t incorporate smoothly and can cause the melted butter to solidify into small lumps in your batter. Always use room temperature ingredients for the smoothest batter and best texture. This simple step makes a noticeable difference!
Overfilling the Ramekins: If you fill ramekins more than ¾ full, the batter will overflow during baking, creating a mess and uneven cakes. Fill them ⅔ to ¾ full maximum, which gives them room to rise properly without spilling over.
Storage & Meal Prep
Room Temperature Storage: These mini chocolate cakes can be stored in an airtight container at room temperature for up to 2 days. They’ll stay moist and delicious, though they’re definitely best enjoyed within the first 24 hours. Make sure they’re completely cooled before storing to prevent condensation, which can make them soggy.
Refrigerator Storage: You can refrigerate these cakes for up to 4-5 days in an airtight container. The cold temperature actually helps them stay fresh longer. Some people prefer the texture of chilled chocolate cake—it becomes denser and fudgier! Just bring them to room temperature or warm them slightly before serving for the best flavor.
Reheating Instructions: To recapture that fresh-from-the-oven texture, microwave individual cakes for 15-20 seconds, or warm them in a 300°F oven for about 5-7 minutes. You can also warm them in their ramekins if you stored them that way. A warm chocolate cake with ice cream is heavenly!
Portioning for Meal Prep: These are perfect for portion-controlled desserts! Wrap each cooled cake individually in plastic wrap, then store all of them in an airtight container. This way, you can grab just one whenever you want a sweet treat without being tempted by a whole cake.
Make-Ahead & Freezer Notes
Make-Ahead Batter: You can mix the batter up to 4 hours ahead, pour it into greased ramekins, cover with plastic wrap, and refrigerate. When ready to bake, let them sit at room temperature for 10 minutes while the oven preheats, then bake as directed (you may need to add 1-2 minutes to the baking time since they’re starting cold).
Freezing Baked Cakes: These mini chocolate cakes freeze beautifully! Let them cool completely, then wrap each cake individually in plastic wrap, followed by aluminum foil. Store in a freezer-safe container or bag for up to 3 months. Proper wrapping prevents freezer burn and maintains moisture.
Thawing and Reheating: Remove frozen cakes from the freezer and let them thaw at room temperature for 1-2 hours, or thaw in the refrigerator overnight. To serve warm, unwrap and microwave for 30-40 seconds, or warm in a 300°F oven for 10 minutes. They’ll taste freshly baked!
Freezing Unbaked Batter: You can actually freeze the batter in prepared ramekins! Pour batter into greased ramekins, cover tightly with plastic wrap and foil, and freeze for up to 2 months. Bake directly from frozen, adding 5-7 minutes to the baking time. This is perfect for having dessert ready to go whenever you need it!
Best Freezer Practices: Label everything with the date so you know when you froze them. If freezing multiple cakes, place them in a single layer first to freeze solid (about 2 hours), then you can stack them to save space. This prevents them from getting squished or stuck together.
Serving Suggestions
These mini chocolate cakes are versatile enough to dress up or down depending on the occasion!
Classic Presentation: Dust with powdered sugar using a fine-mesh sieve for an elegant, simple look. Add a fresh mint leaf or raspberry on top for a pop of color.
Ice Cream Paradise: Serve warm cakes with a scoop of vanilla bean ice cream melting on top. The contrast of hot chocolate cake and cold ice cream is unbeatable! Try other flavors like coffee, caramel, or mint chip too.
Whipped Cream & Berries: Top with a generous dollop of freshly whipped cream (sweetened with a touch of vanilla) and fresh strawberries, raspberries, or mixed berries. This adds brightness and balances the richness.
Chocolate Sauce Drizzle: Make or buy chocolate ganache, chocolate fudge sauce, or even caramel sauce to drizzle over the top. For extra decadence, warm the sauce slightly so it’s pourable.
Restaurant-Style Plating: For dinner parties, create a dessert plate by slicing the cake in half, fanning it slightly, and adding artistic drizzles of raspberry coulis or chocolate sauce on the plate. Garnish with a mint sprig and fresh berries.
Coffee or Tea Pairing: These cakes pair wonderfully with espresso, cappuccino, hot chocolate, or even a robust black tea. The beverage cuts through the richness and enhances the chocolate flavor.
Breakfast Treat: Yes, chocolate cake for breakfast! Serve with Greek yogurt and fresh berries for a more breakfast-appropriate (but still indulgent) morning treat.
Wine Pairing: For adults, pair with a glass of port, late-harvest Riesling, or even a bold red wine like Cabernet Sauvignon. The combination is sophisticated and delicious.
Build-Your-Own Dessert Bar: Set out mini chocolate cakes alongside various toppings like different ice cream flavors, sauces, whipped cream, nuts, sprinkles, and berries. Let guests customize their own dessert!
FAQs Section
Can I make these without eggs?
Yes! For egg-free mini chocolate cakes, you can substitute the egg with several options: ¼ cup applesauce, ¼ cup mashed banana, or a “flax egg” (1 tablespoon ground flaxseed mixed with 3 tablespoons water, let sit 5 minutes). The texture will be slightly different but still delicious. Applesauce gives the most neutral flavor while keeping cakes moist.
Why did my cakes stick to the ramekins?
Sticking usually happens because the ramekins weren’t greased thoroughly enough. You need to coat every surface—bottom, sides, and corners—with a generous amount of butter or cooking spray. I recommend using soft butter and really working it into all the crevices with a paper towel or pastry brush. Dusting with cocoa powder after buttering provides extra insurance. Also, make sure to let the cakes rest for 5 minutes before unmolding, as this allows them to set properly.
Can I bake these in a muffin tin instead of ramekins?
Absolutely! Standard muffin tins work great for these mini chocolate cakes. Grease the cups well or use paper liners (though cakes won’t have as nice of a dome if using liners). Fill each cup about ⅔ full. They’ll bake in 12-14 minutes instead of 15-18 minutes since muffin cups are typically smaller than 6-ounce ramekins. You’ll get about 6-8 cupcake-sized cakes from this recipe.
How do I know when they’re perfectly done?
The top should look set and feel springy when lightly touched. Insert a toothpick halfway between the edge and center—it should come out with a few moist crumbs clinging to it, not wet batter, but also not completely clean. Clean means overbaked and dry. The cakes will also start to pull away slightly from the sides of the ramekins when done. Remember they continue cooking from residual heat after removal!
Can I use this recipe to make one large cake?
Yes! Pour the batter into a greased 8-inch round cake pan and bake at 350°F for 25-30 minutes, or until a toothpick comes out with moist crumbs. The baking time will be longer since it’s a larger, thicker cake. You could also use an 8×8-inch square pan with similar baking time.
What’s the difference between this and a lava cake?
A regular mini chocolate cake like this recipe is fully baked through with a moist, tender crumb. A molten lava cake is intentionally underbaked so the center remains liquid and flows out when you cut into it. To make these into lava cakes, simply reduce the baking time to 12-13 minutes and serve immediately while centers are still molten.
Can I make these dairy-free?
Yes! Replace the milk with any non-dairy milk (almond, oat, soy, coconut all work). Use coconut oil instead of butter, or stick with vegetable oil which is already dairy-free. Make sure to use dairy-free chocolate chips if including those. The cakes will still be delicious with these substitutions!
Conclusion
And there you have it—everything you need to create perfect mini chocolate cakes that are rich, moist, and absolutely irresistible! These individual chocolate cakes prove that you don’t need to bake an entire layer cake to enjoy fresh, homemade chocolate cake perfection. Whether you’re treating yourself on a quiet evening, impressing someone special on date night, or serving an elegant dessert at your next dinner party, these single-serve cakes deliver big chocolate flavor in the most charming presentation.
The beauty of this easy mini chocolate cake recipe is its versatility and simplicity. With just one bowl, basic pantry ingredients, and about 25 minutes of your time, you can create bakery-quality desserts that look professional and taste incredible. The individual portions feel special and indulgent, and there’s something wonderful about having your very own personal cake!
I’d absolutely love to hear how your mini chocolate cakes turn out! Did you serve them for a special occasion? What toppings did you choose? Did they disappear as quickly as they do in my house? Leave a comment below and share your experience! And if this recipe made your day a little sweeter, please pin it to Pinterest so other chocolate lovers can discover it too. Your pins and shares help support this blog and inspire me to keep creating delicious recipes for you!
Now grab those ramekins, preheat that oven, and get ready to enjoy the most perfect little chocolate cakes you’ve ever tasted. Happy baking, my friend!