

If you’re searching for the perfect dessert that balances rich creaminess with bright, refreshing flavor, this lemon cheesecake recipe is exactly what you need. This elegant yet easy-to-make cheesecake features a buttery graham cracker crust, a silky smooth cream cheese filling infused with fresh lemon juice and zest, and a gorgeous glossy finish that makes it look like it came from a high-end bakery. Whether you’re celebrating a special occasion, hosting a spring brunch, or simply craving a show-stopping dessert, this homemade lemon cheesecake delivers the perfect combination of tangy and sweet in every luxurious bite. The beauty of this recipe lies in its versatility—it’s fancy enough for holidays like Easter and Mother’s Day, yet simple enough for a weekend baking project. From dinner parties to potlucks, this no-fail lemon cheesecake recipe will have everyone asking you for the recipe and begging for seconds.
History / Background
Cheesecake has ancient roots dating back to ancient Greece, where it was served to athletes during the first Olympic games in 776 BC. However, the creamy, New York-style cheesecake we know today emerged in the 1870s when American cream cheese was invented, revolutionizing the texture and richness of traditional cheesecake.
Lemon cheesecake specifically gained popularity in the mid-20th century as American bakers began experimenting with flavor variations beyond the classic vanilla. The addition of lemon to cheesecake was a natural evolution, as citrus has long been paired with dairy in European desserts like Italian ricotta cakes and French tarts. The bright acidity of lemon cuts through the richness of cream cheese, creating a more balanced, less heavy dessert that feels refreshing rather than cloying.
The rise of lemon cheesecake coincided with the 1950s and 1960s trend toward lighter, fruit-forward desserts. Homemakers discovered that adding fresh lemon juice and zest to traditional cheesecake batter created a sophisticated flavor profile that felt both elegant and approachable. The sunny yellow color also made it particularly popular for spring and summer celebrations.
Different regions developed their own takes on lemon cheesecake. New York-style versions remained dense and rich with a prominent lemon tang, while California interpretations often incorporated lighter, whipped textures. Southern bakers sometimes added buttermilk or sour cream for extra tanginess, while European versions might include mascarpone or ricotta alongside cream cheese.
What makes lemon cheesecake particularly special is its universal appeal. The familiar comfort of classic cheesecake combined with the bright, uplifting notes of lemon creates a dessert that feels both nostalgic and refreshing. It’s become a staple at spring weddings, Easter celebrations, bridal showers, and any occasion that calls for something a bit more special than everyday cake.
Why You’ll Love This Recipe
This homemade lemon cheesecake recipe is about to become your signature dessert, and I promise it’s easier to make than you might think. The combination of creamy texture and bright lemon flavor creates a dessert that’s both indulgent and refreshing.
Here’s why this recipe is absolutely irresistible:
- Perfectly Balanced Flavor – Not too sweet, not too tart; the lemon and cream cheese complement each other beautifully
- Bakery-Quality Results – Looks and tastes like something from an expensive dessert shop
- Surprisingly Simple – Easier than you’d expect with clear, foolproof instructions
- Make-Ahead Friendly – Must be made ahead, which means stress-free entertaining
- No Water Bath Required – This method eliminates the most intimidating step of cheesecake making
- Impressive Presentation – Always gets rave reviews and compliments
- Perfect for Celebrations – Ideal for holidays, birthdays, showers, and special dinners
- Fresh, Not Heavy – The lemon keeps it feeling light and refreshing despite being creamy
- Customizable – Easy to add your own creative touches and variations
- Crowd-Pleaser – Appeals to both cheesecake lovers and those who find traditional versions too rich
Ingredient Notes
Understanding your ingredients is key to cheesecake success. Here’s what you need to know about each component:
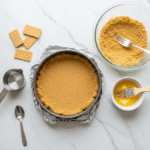
Graham Crackers – Forms the classic sweet, slightly honey-flavored crust. You’ll need about 1½ cups of crumbs (roughly 10-12 full crackers). For gluten-free, use GF graham crackers. Vanilla wafers or even gingersnaps create delicious variations.
Cream Cheese – The star ingredient that creates that signature creamy texture. Use full-fat brick-style cream cheese (like Philadelphia), not spreadable or reduced-fat versions which contain too much moisture. Always bring to room temperature before mixing to avoid lumps.
Granulated Sugar – Sweetens both the crust and filling. The amount is carefully balanced with the lemon’s tartness.
Sour Cream – Adds extra creaminess and a subtle tang that enhances the overall flavor. Full-fat Greek yogurt can substitute in a pinch, though the texture will be slightly different.
Eggs – Provide structure and help the cheesecake set properly. Use large eggs at room temperature for best incorporation. Cold eggs can create a lumpy batter.
Fresh Lemons – Absolutely use fresh lemons, not bottled lemon juice. You’ll need both the juice and zest for maximum lemon flavor. Plan on 2-3 medium lemons to get enough juice and zest.
Pure Vanilla Extract – Enhances all the flavors and adds depth. Always use pure vanilla, not imitation.
All-Purpose Flour or Cornstarch – Just a tablespoon helps stabilize the filling and prevents cracking. Cornstarch works for gluten-free needs.
Unsalted Butter – Binds the graham cracker crust together. Always use unsalted so you can control the salt level.
Heavy Cream – Optional for the topping, but creates a beautiful glossy finish. Can also be whipped for serving alongside.
Equipment Needed
Having the right tools makes cheesecake preparation much easier. Here’s what you’ll need:
- 9-inch Springform Pan – Essential for easy removal; regular cake pans don’t work well for cheesecake
- Food Processor or Blender – For making fine graham cracker crumbs
- Stand Mixer or Hand Mixer – Makes mixing the batter smooth and lump-free
- Mixing Bowls (2-3 various sizes) – For different components
- Microplane or Zester – For getting fine lemon zest without the bitter white pith
- Citrus Juicer – Manual or electric, for extracting maximum lemon juice
- Rubber Spatula – For scraping down bowl sides and smoothing the top
- Measuring Cups and Spoons – Precision matters in baking
- Roasting Pan or Large Baking Dish – If using water bath method (optional)
- Aluminum Foil – For wrapping the springform pan if using water bath
- Sharp Knife – For clean slicing (dip in hot water between cuts)
- Offset Spatula – Optional, for spreading sour cream topping smoothly
Lemon Cheesecake Recipe
- Total Time: 8 hours 20 minutes (includes cooling and chilling)
- Yield: 12 servings 1x
- Diet: Vegetarian
Description
This classic lemon cheesecake features a buttery graham cracker crust, ultra-creamy and smooth lemon-infused filling, and an optional sour cream topping. The perfect balance of tangy and sweet makes this homemade lemon cheesecake recipe ideal for any special occasion.
Ingredients
For the Graham Cracker Crust:
- 1½ cups graham cracker crumbs (about 10–12 full crackers)
- ⅓ cup granulated sugar
- 6 tablespoons unsalted butter, melted
- Pinch of salt
For the Lemon Cheesecake Filling:
- 32 ounces (4 packages) cream cheese, room temperature
- 1¼ cups granulated sugar
- 1 tablespoon all-purpose flour (or cornstarch for gluten-free)
- 4 large eggs, room temperature
- ⅔ cup sour cream, room temperature
- ⅓ cup fresh lemon juice (about 2–3 lemons)
- 2 tablespoons lemon zest (about 2 large lemons)
- 2 teaspoons pure vanilla extract
- ¼ teaspoon salt
For the Sour Cream Topping (Optional):
- 1 cup sour cream
- 3 tablespoons granulated sugar
- 1 teaspoon lemon zest
- ½ teaspoon vanilla extract
For Garnish (Optional):
- Fresh lemon slices
- Candied lemon peel
- Fresh berries
- Whipped cream
Instructions
- Prepare the Pan – Position oven rack in the center and preheat to 325°F (163°C). Wrap the outside bottom and sides of a 9-inch springform pan tightly with aluminum foil to prevent leaking. Grease the inside with butter or cooking spray.
- Make the Crust – In a medium bowl, combine graham cracker crumbs, sugar, melted butter, and a pinch of salt. Mix with a fork until the mixture resembles wet sand and holds together when pressed. Press firmly and evenly into the bottom of the prepared pan, using the bottom of a measuring cup to compact it. Bake for 10 minutes, then remove and let cool while you prepare the filling.
- Beat the Cream Cheese – In a large bowl using an electric mixer on medium speed, beat the room-temperature cream cheese for 2-3 minutes until completely smooth and creamy with no lumps. Scrape down the bowl frequently.
- Add Sugar and Flour – Add the sugar and flour to the cream cheese, beating on medium-low speed until well combined and smooth, about 1-2 minutes. Scrape down the sides and bottom of the bowl.
- Incorporate Eggs – Add eggs one at a time, mixing on low speed after each addition just until combined. Don’t overmix or incorporate too much air, which can cause cracking. Scrape the bowl after each egg.
- Add Remaining Filling Ingredients – Mix in the sour cream, lemon juice, lemon zest, vanilla extract, and salt on low speed until just combined and smooth. The batter should be silky and pale yellow. Don’t overmix at this stage.
- Pour and Smooth – Pour the filling over the pre-baked crust. Gently tap the pan on the counter a few times to release any air bubbles. Use a spatula to smooth the top into an even layer.
- Bake – Place the cheesecake in the preheated oven and bake for 50-55 minutes. The edges should be set but the center should still have a slight wobble (about 3 inches in diameter). It will continue to set as it cools. Don’t overbake or it will crack and have a grainy texture.
- Turn Off Oven – Turn off the oven and crack the door open about 1 inch. Let the cheesecake cool in the oven for 1 hour. This gradual cooling prevents sudden temperature changes that cause cracking.
- Room Temperature Cool – Remove from oven and run a thin knife around the edge to loosen the cheesecake from the pan (but don’t remove the springform ring yet). Let cool completely at room temperature, about 2 hours.
- Make Sour Cream Topping (Optional) – If using, whisk together sour cream, sugar, lemon zest, and vanilla. Spread evenly over the cooled cheesecake. Return to the refrigerator.
- Chill – Cover the cheesecake with plastic wrap (don’t let it touch the surface) and refrigerate for at least 4 hours, but preferably overnight. The cheesecake needs this time to fully set and develop flavors.
- Remove from Pan and Serve – When ready to serve, remove the springform ring by carefully releasing the clasp. Use a large spatula to transfer to a serving plate if desired. Garnish with lemon slices, berries, or whipped cream. Slice with a sharp knife dipped in hot water and wiped clean between cuts.
Notes
- All ingredients must be at room temperature for a smooth, lump-free batter. Set them out 1-2 hours before baking.
- Don’t overmix the batter, especially after adding eggs. Overmixing incorporates air that can cause cracking.
- The cheesecake is done when the edges are set but the center still jiggles slightly. It will firm up completely during cooling and chilling.
- For extra insurance against cracks, bake in a water bath: wrap foil around the pan, place in a roasting pan, and pour hot water halfway up the sides.
- Fresh lemon juice and zest are essential—bottled juice doesn’t provide the same bright flavor.
- The sour cream topping is optional but adds beautiful presentation and extra tanginess.
- Cheesecake tastes best when made at least one day ahead, allowing flavors to fully develop.
- Prep Time: 25 minutes
- Cook Time: 55 minutes
- Category: Dessert
- Method: Baking
- Cuisine: American
Nutrition
- Serving Size: 1 slice (1/12 of cheesecake)
- Calories: 445
- Sugar: 32g
- Sodium: 320mg
- Fat: 30g
- Saturated Fat: 18g
- Unsaturated Fat: 10g
- Trans Fat: 0g
- Carbohydrates: 37g
- Fiber: 0g
- Protein: 8g
- Cholesterol: 145mg
Tips & Variations
The beauty of lemon cheesecake is how wonderfully adaptable it is. Here are some delicious ways to customize this recipe:
Blueberry Lemon Cheesecake – Swirl ½ cup of blueberry compote or jam into the batter before baking for a beautiful marbled effect. Top with fresh blueberries before serving.
Lemon Raspberry Cheesecake – Add a layer of raspberry preserves over the crust before pouring in the filling, or garnish the finished cheesecake with fresh raspberries and raspberry coulis.
Lemon Lavender Cheesecake – Add 1 tablespoon of culinary dried lavender to the cream cheese mixture. Steep it in the warm cream first, then strain out the flowers before adding to the batter.
Key Lime Cheesecake – Substitute key lime juice and zest for regular lemon to create a Key lime pie-inspired cheesecake with similar tropical vibes.
Lemon Curd Topping – Instead of sour cream topping, spread a thick layer of homemade or store-bought lemon curd over the cooled cheesecake for intense lemon flavor.
No-Bake Lemon Cheesecake – Use stabilized whipped cream instead of eggs and skip the baking entirely. The texture will be lighter and mousse-like rather than dense and creamy.
Individual Mini Cheesecakes – Make in a muffin tin with cupcake liners for perfect portion control. Bake for 18-22 minutes instead of 50-55 minutes.
Gluten-Free Version – Use gluten-free graham crackers for the crust and substitute cornstarch for the flour in the filling.
Lower-Sugar Option – Reduce sugar to 1 cup in the filling and use a sugar substitute like erythritol (though texture may vary slightly).
Pro Chef Tips
After making countless cheesecakes, here are the professional techniques that guarantee bakery-perfect results every time:
Room Temperature Everything – This is the single most important tip. Room temperature cream cheese, eggs, and sour cream blend smoothly without lumps and without overmixing. Cold ingredients create a lumpy batter that requires excessive mixing, which incorporates too much air and causes cracking. Set everything out 1-2 hours before starting.
Don’t Overmix After Adding Eggs – Once eggs are added, mix on the lowest speed just until combined. Overmixing at this stage incorporates too much air, which expands during baking and causes cracks. Scrape the bowl and fold gently with a spatula if needed.
The Jiggle Test – The cheesecake is perfectly done when the edges are set but the center (about 3 inches in diameter) still has a slight wobble when you gently shake the pan. It should look slightly underdone—it will continue cooking during the cooling process and firm up completely when chilled.
Gradual Cooling Prevents Cracks – Sudden temperature changes cause cheesecakes to crack. Turn off the oven and let the cheesecake cool inside with the door cracked for an hour, then continue cooling at room temperature. This gradual transition is crucial.
Water Bath for Insurance – While this recipe doesn’t require a water bath, using one almost guarantees a crack-free top. Wrap the springform pan bottom and sides tightly with heavy-duty aluminum foil, place in a roasting pan, and pour hot water halfway up the sides. The steam creates gentle, even heat.
Use a Sharp, Hot Knife – For picture-perfect slices, heat your knife under hot water, wipe it dry, then make your cut. Clean and reheat the knife between each slice. This prevents dragging and creates clean edges.
Zest Before Juicing – Always zest your lemons before cutting and juicing them. It’s nearly impossible to zest a cut lemon effectively.
Patience Is Key – Let the cheesecake chill for at least 4 hours, but overnight is even better. The flavors deepen and the texture becomes perfectly creamy and slice-able.
Common Mistakes to Avoid
Even experienced bakers encounter cheesecake challenges. Here’s how to avoid the most common pitfalls:
Using Cold Ingredients – This is the number one mistake. Cold cream cheese creates lumps that require excessive mixing to smooth out, and that overmixing incorporates air that causes cracks. Always bring cream cheese, eggs, and sour cream to room temperature (1-2 hours on the counter).
Overmixing the Batter – Mixing too much or too vigorously incorporates excess air into the batter, which expands during baking and causes cracks. Mix on low speed, especially after adding eggs, and stop as soon as ingredients are just combined.
Overbaking – The biggest mistake! Cheesecake should come out of the oven when the center still jiggles. If it looks completely set in the oven, it will be overdone when chilled—resulting in a dry, grainy texture and guaranteed cracks. Trust the wobble!
Opening the Oven Door Frequently – Every time you open the oven, the temperature drops and creates temperature fluctuations that can cause cracking. Check the cheesecake through the oven window and only open the door once at the end to check doneness.
Skipping the Cooling Steps – Rushing the cooling process by refrigerating the cheesecake while still warm will cause it to crack and may result in a soggy crust. Follow the gradual cooling process: oven with door cracked, then room temperature, then refrigerator.
Not Chilling Long Enough – Cheesecake needs at least 4 hours (preferably overnight) to fully set. Cutting into it too soon results in a messy, soft filling that doesn’t slice cleanly. Exercise patience—it’s worth the wait!
Storage & Meal Prep
Proper storage keeps your lemon cheesecake fresh and delicious for days. Here’s everything you need to know:
Refrigerator Storage – Cover the cheesecake tightly with plastic wrap or store in an airtight container in the refrigerator for up to 5 days. The flavor actually improves over the first 2-3 days as it sits.
Preventing Dryness – To keep the cheesecake from drying out, press plastic wrap directly against any cut surfaces, or store slices in airtight containers. The surface can dry out when exposed to air.
Storing Before Serving – If you’ve made the cheesecake ahead for an event, keep it in the springform pan covered with plastic wrap until ready to serve. Remove the ring and transfer to a serving platter just before presentation.
Individual Slice Storage – Store leftover slices in individual airtight containers for easy grab-and-go desserts throughout the week. Place a piece of parchment between slices if stacking to prevent sticking.
Maintaining Crust Texture – While the crust will naturally soften slightly in the refrigerator, storing the whole cheesecake (rather than cutting all slices at once) helps maintain the best crust texture.
Best Temperature for Serving – Cheesecake tastes best when it’s cold but not ice-cold. Remove from the refrigerator 15-20 minutes before serving for optimal flavor and creamy texture.
Make-Ahead & Freezer Notes
Lemon cheesecake is one of the best make-ahead desserts, perfect for stress-free entertaining and holiday planning.
Make-Ahead Instructions (Highly Recommended) – Cheesecake actually tastes better when made 1-3 days ahead! The flavors meld and deepen, and the texture becomes even creamier. Prepare completely, chill overnight, then store covered in the refrigerator until ready to serve.
Timeline for Events – For special occasions, bake the cheesecake 2 days before your event. This gives it time to chill properly and allows you to focus on other preparations the day of.
Freezing Whole Cheesecake – Lemon cheesecake freezes beautifully for up to 3 months. After the cheesecake has chilled completely, wrap the entire springform pan (or removed cheesecake) tightly in plastic wrap, then aluminum foil, then place in a freezer bag. Freeze flat for best results.
Freezing Individual Slices – For portion control, slice the cheesecake and wrap individual pieces tightly in plastic wrap, then foil. Store in a freezer bag. This allows you to thaw just one slice at a time for easy desserts.
Thawing Instructions – Transfer frozen cheesecake to the refrigerator and let thaw slowly overnight (8-12 hours for whole cheesecake, 4-6 hours for individual slices). Never thaw at room temperature or in the microwave, as this creates condensation and compromises texture.
Freezing Without Topping – If making ahead to freeze, add the sour cream topping and garnishes after thawing rather than before freezing for the best appearance and texture.
Component Prep – You can make the crust up to 2 days ahead, wrap tightly, and refrigerate until ready to fill and bake. The unbaked filling ingredients can also be measured and prepped a day ahead (keep refrigerated).
Serving Suggestions
This elegant lemon cheesecake deserves equally thoughtful accompaniments. Here are some perfect serving ideas:
Classic Presentation – Serve slices on white dessert plates with a dollop of fresh whipped cream, a sprig of fresh mint, and a thin lemon wheel. Simple and elegant.
Berry Compote – Top with warm or chilled berry compote (strawberries, raspberries, or blueberries) for a beautiful color contrast and complementary flavors.
Fresh Fruit – Arrange fresh berries, sliced strawberries, or mixed fruit alongside each slice for a refreshing accompaniment that balances the richness.
Beverage Pairings – Serve with hot tea (especially Earl Grey or chamomile), coffee, or for special occasions, a glass of sweet dessert wine like Moscato or Riesling.
Afternoon Tea Service – Perfect for bridal showers, baby showers, or garden parties served alongside tea sandwiches, scones, and other petit fours.
Holiday Presentation – For Easter, garnish with pastel-colored candied lemon peel and sugared flowers. For summer gatherings, add edible flowers like pansies or violets.
Lemon Curd Drizzle – Warm slightly and drizzle lemon curd over individual slices just before serving for an extra hit of lemon flavor.
Ice Cream Addition – Serve alongside a small scoop of vanilla bean or lemon sorbet for a special restaurant-style plated dessert.
Brunch Dessert – This lighter, citrusy cheesecake works wonderfully as the sweet ending to a spring or summer brunch menu.
FAQs Section
Why did my cheesecake crack?
Cracks typically result from overbaking, overmixing (which incorporates too much air), or cooling too quickly. The center should still jiggle when you remove it from the oven. Gradual cooling (in the oven with the door cracked, then at room temperature) prevents sudden temperature changes that cause cracking. Using a water bath also helps prevent cracks.
Can I make this without a springform pan?
A springform pan is strongly recommended because it allows you to remove the cheesecake easily without damaging it. If you must use a regular cake pan, line it completely with parchment paper with overhang on all sides so you can lift the entire cheesecake out. The presentation won’t be as clean, but it will still taste delicious.
How do I know when the cheesecake is done?
The edges should be set and slightly puffed, but the center (about 3 inches in diameter) should still have a slight jiggle when you gently shake the pan. It should look slightly underdone—it will continue to cook during the gradual cooling process and firm up completely when refrigerated. An instant-read thermometer should register 150°F in the center.
Can I use bottled lemon juice instead of fresh?
While you technically can, I strongly discourage it. Fresh lemon juice provides a bright, vibrant flavor that bottled juice simply cannot match. Fresh lemon zest is absolutely essential—there’s no substitute that provides the same aromatic oils and intense lemon flavor. For the best-tasting cheesecake, always use fresh lemons.
Why is my cheesecake grainy or dense?
A grainy texture usually means the cheesecake was overbaked or the ingredients weren’t at room temperature, causing you to overmix trying to smooth out lumps. Dense texture comes from overmixing, which deflates the batter. Always use room temperature ingredients, mix gently on low speed, and don’t overbake.
How far in advance can I make lemon cheesecake?
You can make this cheesecake up to 3 days ahead—in fact, I recommend making it at least 1 day ahead for the best flavor and texture. Store covered in the refrigerator. For longer storage, freeze for up to 3 months and thaw overnight in the refrigerator before serving.
Can I make this cheesecake gluten-free or dairy-free?
For gluten-free, use gluten-free graham crackers for the crust and cornstarch instead of flour in the filling. For dairy-free, you’ll need dairy-free cream cheese alternatives (Kite Hill and Miyoko’s work well), dairy-free butter, and dairy-free sour cream or coconut cream. The texture will be slightly different but still delicious.
Conclusion
This lemon cheesecake recipe proves that with the right technique and a little patience, you can create an absolutely stunning dessert that rivals anything from a fancy bakery. The combination of creamy, rich filling with bright, tangy lemon flavor creates the perfect balance that makes every bite feel both indulgent and refreshing. The best part? While it looks and tastes impressive, it’s actually quite straightforward to make once you understand the key principles.
Whether you’re making this for Easter dinner, a spring celebration, Mother’s Day, or just because you’re craving something special, this homemade lemon cheesecake will absolutely deliver. It’s one of those showstopper desserts that makes people think you’re a baking wizard, but you’ll know the truth—it’s all about following the steps and letting time work its magic.
I truly hope you’ll give this lemon cheesecake recipe a try! It’s been my go-to special occasion dessert for years, and I just know it’s about to become yours too. Have you made it yet? I’d absolutely love to hear how it turned out! Drop a comment below sharing your experience, any creative variations you tried, or what occasion you made it for. And if this recipe helped you create something beautiful and delicious, please pin it to your favorite Pinterest board and share it with friends who appreciate a truly exceptional homemade dessert. Happy baking, friends!