
If you’ve been buying falafel from restaurants and thinking you could never recreate that perfect crispy-outside, fluffy-inside magic at home—prepare to have your mind blown! This authentic crispy falafel recipe delivers those golden, herb-packed fritters you crave, and they’re easier to make than you might think. Whether you’re looking for a satisfying vegetarian main course, a protein-packed lunch option, or the star of your next mezze platter, these homemade falafel balls check every single box. Get ready to impress your family with falafel that’s even better than takeout!
Introduction of Recipe
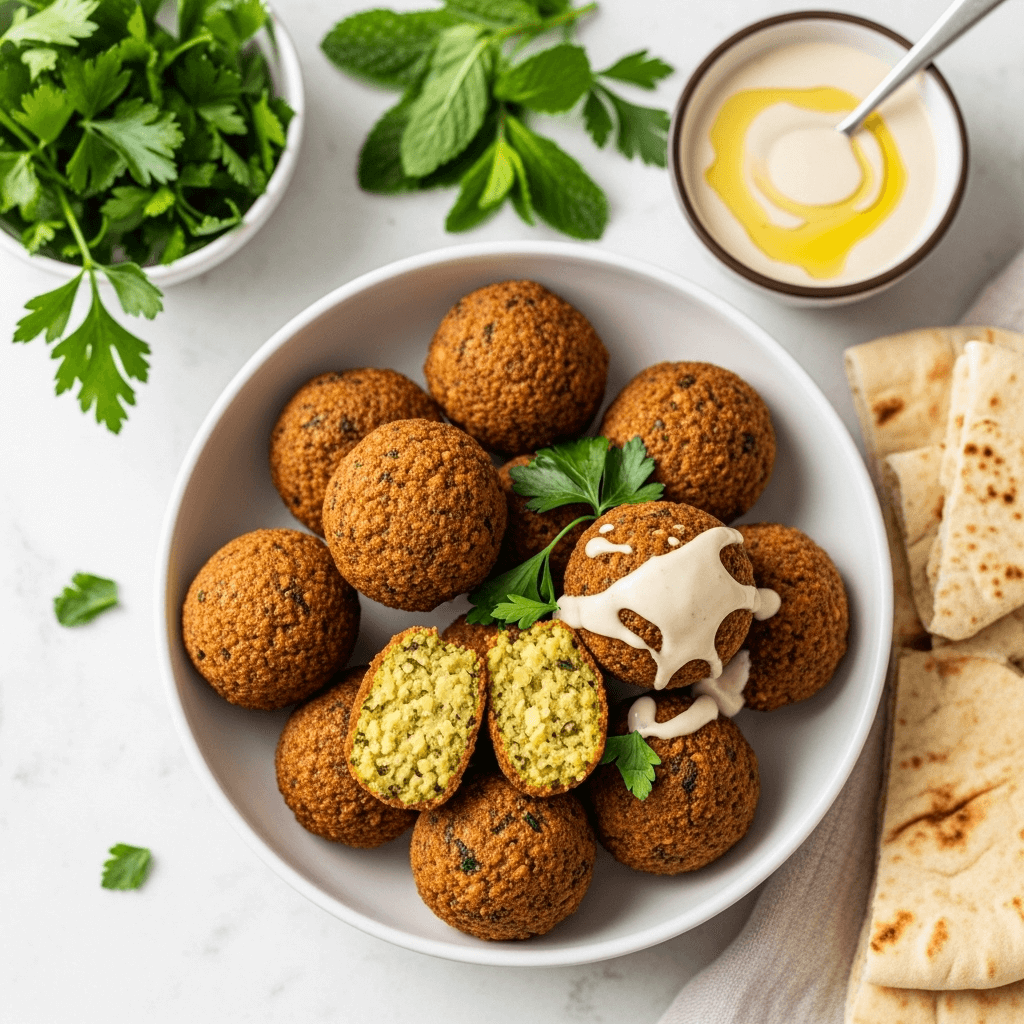
Falafel are deep-fried balls or patties made from ground chickpeas (or sometimes fava beans) mixed with fresh herbs, aromatics, and warm spices. The result? A crispy, golden exterior that gives way to a tender, flavorful interior bursting with the bright tastes of parsley, cilantro, cumin, and garlic. These aren’t your bland, dense, store-bought frozen falafel—we’re talking about the real deal that makes you close your eyes and savor every bite.
What makes this crispy falafel recipe so special is its versatility. Serve these delicious nuggets tucked into warm pita bread with tahini sauce for a classic falafel sandwich, arranged on a platter with hummus and fresh vegetables for a mezze spread, crumbled over a Mediterranean salad for added protein, or enjoyed as an appetizer with your favorite dipping sauces. They’re perfect for Meatless Mondays, meal prep lunches, casual dinner parties, potlucks where you need to bring something vegetarian, or anytime you’re craving something healthy yet satisfying.
The beauty of homemade falafel is that you control everything—the texture, the spice level, the herbs, and most importantly, the freshness. No more wondering what’s actually in those pre-made versions. This is pure, wholesome, delicious food that happens to be naturally vegan, packed with plant-based protein, and absolutely addictive.
History / Background
Falafel’s origins are hotly debated across the Middle East, with both Egypt and the Levantine countries (Lebanon, Palestine, Syria, and Jordan) claiming to be its birthplace. The most widely accepted story traces falafel back to Egypt, where Coptic Christians created ta’ameya (Egyptian falafel made from fava beans) as a protein-rich meat substitute during Lent. From there, the concept spread throughout the Middle East, evolving as it traveled.
In the Levant region, cooks adapted the recipe to use chickpeas instead of fava beans, creating what most of us recognize today as the classic falafel. The word “falafel” likely comes from the Arabic “filfil” (pepper) or “falāfil,” the plural of “filfila” (pepper), though others believe it derives from the Coptic “falafel,” meaning “that which has many beans.” Whatever its linguistic roots, falafel has become one of the most beloved and recognizable Middle Eastern dishes worldwide.
During the mass migrations of the 20th century, Middle Eastern immigrants brought falafel to Europe, North America, and beyond. It became particularly popular in Israel, where it was adopted as a national dish and spread through small falafel stands on virtually every street corner. Today, you’ll find falafel shops from Tel Aviv to New York City, London to Los Angeles.
What’s fascinating is how falafel has maintained its essential character while adapting to local tastes. Some regions add baking powder for extra fluffiness, others incorporate different spice blends, and creative chefs worldwide have experimented with additions like beets, sweet potatoes, or even black beans. Yet the core concept remains beautifully simple: chickpeas, herbs, spices, and a commitment to achieving that perfect crispy exterior.
Falafel isn’t just food—it’s cultural heritage, street food excellence, and proof that plant-based eating has been delicious and satisfying for centuries, long before it became trendy. When you make this crispy falafel recipe at home, you’re participating in a culinary tradition that spans continents and generations.
Why You’ll Love This Recipe
This homemade crispy falafel recipe is about to become your new favorite plant-based meal, and here’s exactly why these golden beauties deserve a spot in your weekly rotation:
Picture yourself biting into a perfectly fried falafel—the exterior shatters with a satisfying crunch while the inside stays tender and moist, packed with fresh herbs and aromatic spices that make your taste buds sing. That’s exactly what this recipe delivers, every single time.
- Authentically crispy texture: The secret techniques in this recipe guarantee that restaurant-quality crunch on the outside with a fluffy, not-at-all-dry interior
- Fresh, vibrant flavors: Using dried chickpeas (not canned!) and fresh herbs creates flavor that’s leagues beyond frozen store-bought versions
- Naturally plant-based: These vegan falafel are packed with protein and fiber, making them nutritionally satisfying without any meat or dairy
- Budget-friendly brilliance: Dried chickpeas cost pennies, and the other ingredients are simple pantry staples—you’ll feed a crowd for just a few dollars
- Meal prep champion: Make a big batch and enjoy falafel all week in sandwiches, salads, bowls, or as snacks
- Crowd-pleasing appeal: Even meat-eaters will devour these because they’re genuinely delicious, not just “good for vegetarian food”
- Customizable heat: Adjust the spices to your preference, from mild and family-friendly to spicy enough to make you sweat
- Gluten-free friendly: Naturally gluten-free when prepared properly (no flour needed!)
- Freezer-friendly: Make massive batches and freeze them for quick meals whenever cravings strike
- Impressive yet achievable: Looks and tastes like you’re a professional Middle Eastern chef, but the technique is totally doable for home cooks
Ingredient Notes
Let’s break down what makes these crispy falafel so incredibly delicious and where you have flexibility:
Dried Chickpeas: This is THE most critical ingredient—you absolutely must use dried chickpeas that you soak overnight, NOT canned chickpeas. I cannot stress this enough! Canned chickpeas contain too much moisture and will result in mushy falafel that fall apart in the oil. Dried chickpeas that have been soaked (but not cooked) have the perfect texture and starch content for binding. Plan ahead and soak 1 cup of dried chickpeas in plenty of cold water for at least 12 hours or overnight. They’ll double in size.
Fresh Herbs: Flat-leaf parsley and cilantro are traditional and non-negotiable for authentic flavor. Use the leaves and tender stems—don’t bother picking every single leaf off the stems. Fresh herbs provide moisture, vibrant color, and that unmistakable green flavor. If you absolutely hate cilantro (some people have that genetic aversion), you can use all parsley, though the flavor will be slightly different. Never substitute dried herbs—they won’t provide the right texture or flavor.
Onion: Regular yellow onion works perfectly. It adds moisture, sweetness, and helps bind everything together. Some recipes use green onions or shallots, which also work well. Roughly chop it before adding to your food processor.
Garlic: Fresh garlic cloves provide that pungent, aromatic kick that makes falafel so addictive. Plan on 4-6 cloves depending on their size and how much you love garlic. Garlic powder is not a substitute here—you need the moisture and sharp flavor of fresh.
Spices: The classic falafel spice blend includes cumin, coriander, and a touch of cayenne pepper. Ground cumin provides earthy warmth, ground coriander adds citrusy notes, and cayenne brings heat. Some cooks add a pinch of cardamom or black pepper for extra complexity. Toast whole seeds and grind them yourself for the absolute best flavor, but pre-ground spices work perfectly fine for weeknight cooking.
Baking Powder: This is the secret ingredient that creates the fluffiest interior texture! Just a teaspoon helps create little air pockets inside your falafel. Don’t skip it, and make sure your baking powder is fresh (it loses potency over time).
Salt: Essential for bringing out all the other flavors. Use kosher salt or fine sea salt. You’ll need more than you think—chickpeas require generous seasoning.
Sesame Seeds (optional): Some people like to roll their falafel in sesame seeds before frying for extra crunch and nutty flavor. This is optional but delicious!
Flour or Chickpea Flour (optional): If your mixture seems too wet, you can add 1-2 tablespoons of all-purpose flour or chickpea flour to help bind it. However, a properly made falafel mixture shouldn’t need this. It’s more of an insurance policy.
Oil for Frying: Use a neutral oil with a high smoke point like vegetable oil, canola oil, or peanut oil. You’ll need enough to deep-fry, typically 2-3 inches in your pot. Some people use olive oil for a more Mediterranean flavor, but it’s more expensive for deep frying.
Equipment Needed
Making falafel at home doesn’t require any special equipment, but a few key tools make the process much easier:
- Large bowl (for soaking chickpeas overnight)
- Food processor (this is essential—a blender won’t work properly)
- Large mixing bowl (for the processed falafel mixture)
- Falafel scoop or small ice cream scoop (optional but helpful for uniform sizing)
- Heavy-bottomed pot or deep fryer (for frying)
- Candy or deep-fry thermometer (for monitoring oil temperature)
- Spider strainer or slotted spoon (for removing falafel from hot oil)
- Paper towels and wire rack (for draining fried falafel)
- Measuring cups and spoons (for accuracy)
- Cutting board and knife (for prep)
- Baking sheet (if you’re forming falafel ahead of time)
Crispy Falafel Recipe
- Total Time: 40 minutes
- Yield: 20-24 falafel (serves 4-6) 1x
- Diet: Vegan
Description
This authentic crispy falafel recipe creates perfectly golden, restaurant-quality falafel with a crunchy exterior and fluffy interior packed with fresh herbs and aromatic spices. Made from dried chickpeas (never canned!), these vegan falafel balls are naturally gluten-free, protein-rich, and absolutely addictive. Perfect in pita sandwiches, on salads, or as part of a mezze platter!
Ingredients
For the Falafel:
- 1 cup dried chickpeas (NOT canned—this is crucial)
- 1 small yellow onion, roughly chopped (about ¾ cup)
- 4–6 cloves garlic
- 1 cup fresh parsley leaves and tender stems (about 1 large bunch)
- ½ cup fresh cilantro leaves and tender stems (about ½ bunch)
- 1½ teaspoons ground cumin
- 1 teaspoon ground coriander
- ½ teaspoon cayenne pepper (adjust to taste)
- 1½ teaspoons salt (or to taste)
- ½ teaspoon black pepper
- 1 teaspoon baking powder
- 2–4 tablespoons all-purpose flour or chickpea flour (if needed for binding)
- Vegetable oil for frying (about 3-4 cups)
Optional Add-Ins:
- ¼ cup sesame seeds (for coating)
- ¼ teaspoon ground cardamom
- 1 teaspoon lemon zest
- ½ teaspoon crushed red pepper flakes
Instructions
Step 1: Soak the Chickpeas
The night before you plan to make falafel (or at least 12 hours ahead), place the dried chickpeas in a large bowl and cover them with at least 3 inches of cold water. The chickpeas will double or even triple in size as they absorb water, so make sure you use plenty of water and a big enough bowl. Let them soak at room temperature for 12-24 hours. The longer soak helps them process more smoothly. After soaking, drain the chickpeas completely and pat them dry with a clean kitchen towel. Do not cook the chickpeas—they should remain raw for the proper texture.
Step 2: Process the Falafel Mixture
Add the soaked, drained chickpeas to your food processor. Add the chopped onion, garlic cloves, parsley, cilantro, cumin, coriander, cayenne, salt, and black pepper. Pulse the mixture in short bursts, scraping down the sides of the bowl as needed, until everything is finely chopped and combined. The texture should resemble coarse breadcrumbs or wet sand—you want it finely ground but not pureed into a paste. You should still see small bits of chickpea throughout. This usually takes about 1-2 minutes of pulsing. The mixture should hold together when squeezed but still be crumbly.
Step 3: Rest and Refrigerate
Transfer the falafel mixture to a bowl, cover with plastic wrap, and refrigerate for at least 1 hour or up to overnight. This rest time is crucial—it allows the flavors to meld and the mixture to firm up, making it much easier to shape and helping the falafel hold together during frying. Right before you’re ready to form and fry, stir in the baking powder. If the mixture seems too wet to hold its shape, add flour 1 tablespoon at a time until it binds properly when squeezed.
Step 4: Form the Falafel
Test your mixture by forming a small ball—it should hold together without crumbling or feeling mushy. If it falls apart, add a tablespoon more flour. If it’s too dry, add a tablespoon of water. Once the consistency is right, form the mixture into balls about the size of a ping-pong ball (roughly 2 tablespoons each) or flatten them slightly into thick patties. You can use a falafel scoop, small ice cream scoop, or simply your hands. Slightly flatten each ball—this helps them cook evenly and creates more surface area for that crispy crust. Place formed falafel on a baking sheet lined with parchment paper.
Step 5: Heat the Oil
Pour vegetable oil into a heavy-bottomed pot or Dutch oven to a depth of about 3 inches. Heat the oil over medium-high heat until it reaches 350°F (175°C) on a deep-fry thermometer. This temperature is crucial—too low and your falafel will absorb oil and be greasy; too high and they’ll burn on the outside while staying raw inside. If you don’t have a thermometer, test by dropping a small piece of the mixture into the oil. It should sizzle immediately and rise to the surface.
Step 6: Fry the Falafel
Working in batches of 4-6 falafel at a time (don’t overcrowd the pot, which will lower the oil temperature), carefully lower the falafel into the hot oil using a slotted spoon or spider strainer. Fry for 3-4 minutes, turning them occasionally with your spider strainer or slotted spoon, until they’re deep golden brown all over. The falafel should float to the top and turn a beautiful golden color. Remove them from the oil and transfer to a wire rack set over a baking sheet (or paper towels) to drain. Let the oil return to 350°F between batches.
Step 7: Serve Hot
Serve the falafel immediately while they’re still hot and crispy. They’re delicious stuffed into pita bread with tahini sauce, lettuce, tomatoes, and pickles, served on a platter with hummus and fresh vegetables, crumbled over salads, or enjoyed as an appetizer with your favorite dipping sauce. These are best eaten fresh and hot, though leftovers can be stored and reheated.
Notes
- Never Use Canned Chickpeas: This cannot be stressed enough. Canned chickpeas are already cooked and too soft, resulting in mushy, falling-apart falafel. Always use dried chickpeas that have been soaked but not cooked.
- Soaking Time: Don’t rush the soaking process. Chickpeas need at least 12 hours to properly hydrate. Under-soaked chickpeas won’t process smoothly and create a grainy texture.
- Texture Test: The processed mixture should resemble coarse breadcrumbs, not a smooth paste. If it’s too smooth, your falafel will be dense and heavy.
- Resting is Essential: The mixture needs time to rest and firm up in the refrigerator. This helps everything bind together and makes shaping much easier.
- Oil Temperature: Maintain 350°F for optimal frying. If the oil is too cool, falafel absorb grease; too hot and they burn.
- Baking Option: For a healthier version, you can bake falafel at 375°F for 25-30 minutes, flipping halfway through and brushing with oil. They won’t be quite as crispy as fried, but still delicious.
- Make Them Ahead: Form all the falafel before you start frying. This makes the frying process much smoother and more efficient.
- Prep Time: 20 minutes
- Cook Time: 20 minutes
- Category: Main Course
- Method: Deep-Frying
- Cuisine: Middle Eastern
Nutrition
- Serving Size: 4 falafel (about 1/5 of recipe)
- Calories: 285
- Sugar: 3g
- Sodium: 595mg
- Fat: 14g
- Saturated Fat: 2g
- Unsaturated Fat: 11g
- Trans Fat: 0g
- Carbohydrates: 32g
- Fiber: 7g
- Protein: 9g
- Cholesterol: 0mg
Tips & Variations
Let’s explore all the delicious ways you can customize this crispy falafel recipe:
Baked Falafel: For a lighter version, arrange formed falafel on a parchment-lined baking sheet, brush generously with olive oil, and bake at 375°F for 25-30 minutes, flipping halfway through. They won’t be quite as crispy as fried versions, but they’re still delicious and much lower in fat. Some people spray them with cooking spray before baking for extra crunch.
Air Fryer Falafel: Preheat your air fryer to 375°F, brush formed falafel with oil, and cook for 12-15 minutes, shaking the basket halfway through. This method provides excellent crispiness with minimal oil. You might need to work in batches depending on your air fryer size.
Spicy Falafel: Double the cayenne pepper or add 1-2 fresh jalapeños or serrano peppers to the food processor. Some people also add a pinch of crushed red pepper flakes or harissa paste for extra heat. For a smoky kick, add ½ teaspoon of smoked paprika.
Green Falafel: Increase the fresh herbs and add some fresh dill, mint, or basil to the mix. This creates an even more vibrant green color and fresh flavor. Lebanese-style falafel often includes fresh mint, which adds a wonderful brightness.
Fava Bean Falafel: For Egyptian-style ta’ameya, replace half the chickpeas with dried split fava beans (also soaked overnight but not cooked). This creates a different flavor and slightly lighter texture.
Beet Falafel: Add one small cooked beet to the food processor for gorgeous pink falafel with added sweetness and nutrition. This is a modern twist that’s become popular in trendy restaurants.
Sweet Potato Falafel: Replace half the chickpeas with cooked, mashed sweet potato for a slightly sweeter, softer falafel. These are particularly popular with kids.
Herb Variations: Experiment with the herbs based on what you have. All parsley works if you dislike cilantro. Adding fresh dill or mint creates interesting flavor variations. Some recipes include a small amount of fresh oregano.
Sesame Crusted: Roll formed falafel in sesame seeds before frying for extra crunch and nutty flavor. This also makes them look more professional and restaurant-style.
Mini Falafel: Make bite-sized falafel (about 1 tablespoon each) for appetizers or to serve on mezze platters. These cook faster—watch them carefully as they’ll only need 2-3 minutes in the oil.
Pro Chef Tips
Want to take your homemade falafel from good to absolutely exceptional? Here are insider secrets from Middle Eastern cooking experts:
Double Soak for Smoother Processing: After the overnight soak, change the water once and let the chickpeas sit for another hour. This extra hydration helps them process more smoothly and creates a finer, more uniform texture.
Keep Everything Cold: Work with cold ingredients and cold mixture. Some professional falafel makers even chill their food processor bowl before using it. Cold ingredients are easier to process without turning into a paste, and a chilled mixture is easier to shape.
Don’t Over-Process: Pulse rather than running the food processor continuously. You want a coarse, grainy texture, not a smooth puree. Over-processing creates dense, heavy falafel. Stop every few pulses to scrape down the sides and check the texture.
The Squeeze Test: Before forming all your falafel, test a small amount by squeezing it firmly in your hand. It should hold together in a solid ball without crumbling or feeling wet. If it falls apart, add flour; if it’s too wet, add a bit more of the chickpea mixture or refrigerate longer.
Uniform Sizing: Use a falafel scoop or small ice cream scoop to make uniform balls. Consistent sizing ensures even cooking—some won’t be raw inside while others burn.
Flatten Slightly: Don’t make perfect spheres. Slightly flatten each ball into a thick patty shape (about ¾ inch thick). This shape provides more surface area for crisping and cooks more evenly than round balls.
Temperature Matters: Keep your oil at a steady 350°F. Too hot and the outside burns before the inside cooks; too cool and they absorb oil and become greasy. Adjust your heat as needed between batches.
Don’t Crowd the Pot: Fry in small batches with plenty of space between each falafel. Overcrowding drops the oil temperature dramatically and creates soggy, greasy falafel. Be patient and work in batches.
The Toast Test: Toast your whole spices (cumin and coriander seeds) in a dry pan for 30 seconds before grinding them fresh. This blooms the oils and creates exponentially more flavor than pre-ground spices. If using pre-ground, this obviously doesn’t apply, but fresh-ground is always better.
Drain Properly: Use a wire rack set over a baking sheet rather than paper towels for draining. This allows air to circulate around the falafel, keeping them crispy instead of steaming on paper towels which can make the bottom soggy.
Serve Immediately: Falafel are best within the first 15-20 minutes after frying when they’re hot and at peak crispiness. If you must hold them, keep them in a 200°F oven on a wire rack, but understand they’ll soften slightly.
Common Mistakes to Avoid
Even experienced cooks can struggle with falafel if they don’t know these common pitfalls:
Using Canned Chickpeas: This is the #1 mistake that guarantees falafel failure. Canned chickpeas are too soft and wet. They create a mushy mixture that falls apart in the oil and tastes gummy. There is no way around this—you must use dried chickpeas that have been soaked overnight but not cooked. This isn’t optional; it’s fundamental to success.
Not Soaking Long Enough: Chickpeas need at least 12 hours to properly hydrate. Under-soaked chickpeas won’t process smoothly and create grainy, crumbly falafel that don’t hold together. If you’re short on time, quick-soaking in hot water can work in a pinch, but overnight cold soaking is always best.
Over-Processing the Mixture: Running your food processor too long turns the mixture into a paste instead of keeping it coarse and grainy. This creates dense, heavy falafel with no texture. Pulse in short bursts and stop when the mixture resembles coarse breadcrumbs or wet sand, not hummus!
Skipping the Refrigeration: Trying to form and fry falafel immediately after processing is a recipe for disaster. The mixture needs time to rest and firm up in the refrigerator. This allows the starches to hydrate properly and helps everything bind together. Don’t skip this step!
Wrong Oil Temperature: Oil that’s too cool creates greasy, oil-soaked falafel that fall apart. Oil that’s too hot burns the outside while leaving the inside raw. Use a thermometer and maintain 350°F consistently. This single factor makes the difference between crispy, perfect falafel and disappointing ones.
Making Them Too Large: Giant falafel balls look impressive but often stay raw in the center while burning on the outside. Stick to ping-pong ball size or smaller for even cooking. When in doubt, go smaller rather than larger.
Overcrowding the Pot: Adding too many falafel at once drops the oil temperature dramatically, resulting in greasy, soggy falafel. Work in small batches of 4-6 at a time, allowing the oil to return to temperature between batches. Patience is key.
Storage & Meal Prep
Falafel are fantastic for meal prep and actually reheat beautifully with the right technique:
Storing Cooked Falafel: Let cooled falafel cool completely to room temperature, then store in an airtight container in the refrigerator for up to 5 days. Layer them with parchment paper if stacking to prevent sticking. They’ll soften slightly in storage but can be re-crisped easily.
Reheating for Crispiness: The best way to revive leftover falafel is in the oven or air fryer. Preheat your oven to 350°F, place falafel on a baking sheet, and heat for 10-12 minutes until warmed through and crispy again. In an air fryer, reheat at 350°F for 5-7 minutes. Avoid microwaving, which makes them soggy and mushy.
Storing Uncooked Mixture: The unprocessed falafel mixture keeps well in the refrigerator for up to 2 days before forming and frying. Actually, the flavor improves as it sits! Just stir in the baking powder right before forming. Keep it covered tightly to prevent it from drying out.
Meal Prep Strategy: Make a double or triple batch of the mixture on Sunday, store it in the fridge, and fry fresh falafel throughout the week. Freshly fried falafel only take about 5 minutes to cook once the mixture is made, so you can have hot, crispy falafel for weeknight dinners with minimal effort.
Lunchbox Friendly: Pack cooked falafel in insulated lunch containers with pita bread, vegetables, and dressing in separate compartments. They’re delicious at room temperature, making them perfect for packed lunches or picnics.
Make-Ahead & Freezer Notes
Falafel are incredibly freezer-friendly, making them perfect for batch cooking:
Freezing Uncooked Falafel: This is the best method for meal prep! Form the falafel mixture into balls, place them on a parchment-lined baking sheet not touching each other, and freeze until solid (about 2 hours). Once frozen solid, transfer to freezer bags or containers where they can be stored for up to 3 months. Label with the date. To cook from frozen, add an extra minute or two to the frying time, or let them thaw for 30 minutes at room temperature first.
Freezing Cooked Falafel: Fully cooked falafel can also be frozen. Let them cool completely, arrange on a baking sheet, freeze until solid, then transfer to freezer bags. They’ll keep for up to 3 months. Reheat from frozen in a 350°F oven for 15-20 minutes or in an air fryer for 10-12 minutes until hot and crispy.
Flash Freezing Prevents Sticking: Always freeze falafel individually on a baking sheet first before bagging them together. This prevents them from freezing into one giant clump and allows you to grab just the amount you need.
Defrosting Tips: For the best texture, reheat frozen cooked falafel directly from the freezer rather than thawing first. Thawed falafel can become mushy. If you’re frying frozen uncooked falafel, let them sit at room temperature for 20-30 minutes first so they’re not ice-cold when they hit the hot oil (which can cause splattering).
Bulk Cooking Sessions: Dedicate an afternoon to making massive batches of falafel for the freezer. You can easily make 100+ falafel in one session, giving you quick, healthy meals for months. This is also a fun group cooking activity—invite friends over for a falafel-making party!
Serving Suggestions
Crispy falafel are incredibly versatile. Here are the most delicious ways to serve them:
Classic Falafel Sandwich: Stuff warm pita bread with 3-4 falafel, shredded lettuce, diced tomatoes, cucumber, pickled turnips, and drizzle generously with tahini sauce. This is the street food classic that made falafel famous.
Falafel Bowl: Create a Mediterranean grain bowl with quinoa or rice as the base, topped with falafel, hummus, tabbouleh, cucumber tomato salad, olives, and tahini dressing. This is meal prep perfection.
Mezze Platter: Arrange falafel on a large platter surrounded by hummus, baba ganoush, tabbouleh, fattoush salad, stuffed grape leaves, olives, feta cheese, and pita bread. Perfect for entertaining or casual dinner parties.
Falafel Salad: Crumble warm falafel over a bed of mixed greens, tomatoes, cucumbers, red onion, and feta. Dress with a lemon vinaigrette or tahini dressing for a protein-packed, satisfying salad.
Falafel Wrap: Use a large flour tortilla or flatbread instead of pita for an easier-to-eat wrap filled with falafel and all your favorite toppings. Great for kids or for eating on the go.
Sauces and Condiments: Serve with tahini sauce (essential!), tzatziki, hummus for dipping, spicy harissa, pickled vegetables, fresh lemon wedges, hot sauce, or Greek yogurt sauce. The more dipping options, the better!
Side Dishes: Round out your falafel meal with Mediterranean rice pilaf, roasted vegetables, Greek salad, tabbouleh, fattoush, cucumber tomato salad, pickled turnips, or fried cauliflower.
Beverages: Pair with mint lemonade, iced hibiscus tea, Turkish coffee, or cold beer. For dinner parties, serve with Lebanese wine or a crisp white wine like Sauvignon Blanc.
Make it a Party: Set up a falafel bar with all the toppings and sauces in bowls, letting everyone build their own perfect pita. This interactive setup is fun for casual entertaining and ensures everyone gets exactly what they want.
FAQs Section
Why do my falafel fall apart when frying?
This almost always comes down to using canned chickpeas instead of dried and soaked ones, or not refrigerating the mixture long enough before frying. Canned chickpeas are too wet and don’t have enough starch to bind properly. Make sure you’re using dried chickpeas that have been soaked overnight but NOT cooked. Also ensure your mixture rests in the refrigerator for at least an hour before forming. If your mixture still seems too crumbly, add 1-2 tablespoons of flour to help bind it.
Can I really not use canned chickpeas?
Unfortunately, no. This is the one non-negotiable rule for authentic, crispy falafel. Canned chickpeas have been cooked and are too soft and watery. They create mushy falafel that fall apart during frying. You must use dried chickpeas that have been soaked in water overnight but remain raw. This gives you the right texture and starch content for proper binding. There’s simply no shortcut here.
Conclusion
And there you have it — crispy falafel that’s perfectly golden on the outside and fluffy on the inside! 🧆✨
This recipe proves you don’t need a restaurant kitchen to make authentic, flavorful falafel at home. With a handful of simple ingredients, a good soak, and a hot pan, you get a Middle Eastern classic that’s crunchy, fragrant, and deeply satisfying.
Serve it with warm pita, tahini sauce, or a fresh salad, and you’ve got a wholesome, protein-packed meal everyone will love.
👉 Save this recipe on Pinterest, give it a try, and bring a little falafel shop magic right to your kitchen.