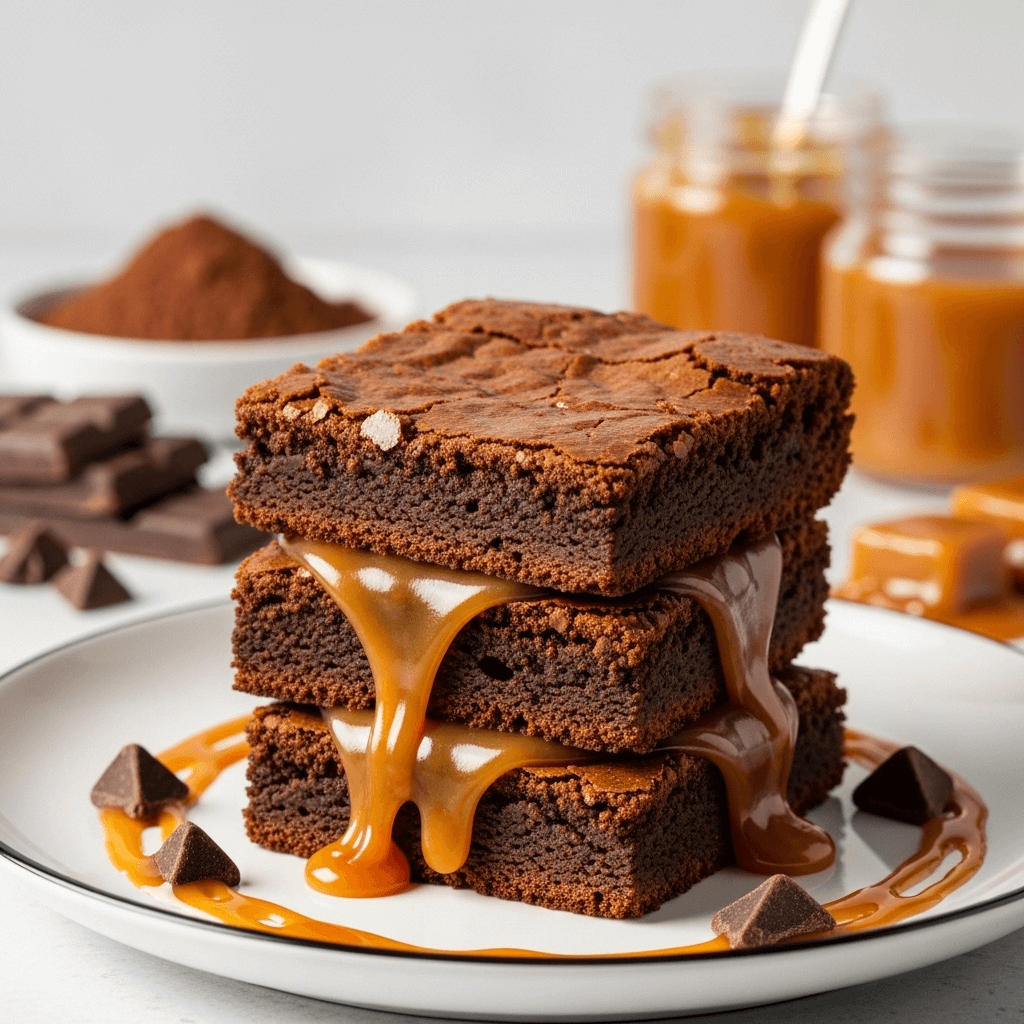

Get ready for the ultimate chocolate lover’s dream—these caramel brownies are everything you want in a dessert and more! Picture this: rich, fudgy brownies with crispy edges and a soft, gooey center, swirled with ribbons of luscious caramel, topped with a sprinkle of sea salt, and cut into thick, decadent squares. These aren’t just brownies; they’re a chocolate-caramel experience that’ll have everyone begging for the recipe.
What makes these caramel swirl brownies truly exceptional is the perfect balance of textures and flavors. The brownie base is intensely chocolatey—not cakey, not too dense, just perfectly fudgy. The caramel layer adds a buttery sweetness that cuts through the rich chocolate, while a pinch of flaky sea salt brings everything into perfect harmony. Every bite delivers that magical combination of chocolate and caramel that never gets old.
These gooey caramel brownies are perfect for so many occasions: birthday parties, potlucks, bake sales, holiday cookie trays, after-dinner desserts, or those moments when you just need something seriously indulgent. They look impressive enough for special occasions but are surprisingly easy to make—no candy thermometer or complicated techniques required. Just mix, swirl, bake, and prepare for the compliments to roll in.
Whether you’re a brownie purist who’s ready to level up your game or a caramel enthusiast looking for your new favorite dessert, these salted caramel brownies deliver on every level. Let’s make the most incredible brownies you’ve ever tasted!
History / Background
Brownies are an American invention with a fascinating origin story. While the exact origins are debated, most food historians agree that brownies first appeared in the United States in the late 19th or early 20th century. One popular story credits Bertha Palmer, a prominent Chicago socialite, who requested a dessert that was smaller and more portable than cake for the 1893 World’s Columbian Exposition. Her chef created a rich chocolate bar cookie that became an instant sensation.
The first published brownie recipe appeared in the 1897 Sears, Roebuck Catalog, though that version was actually made with molasses, not chocolate. Chocolate brownies as we know them emerged in the early 1900s, with various recipes appearing in cookbooks throughout the decade. The Fannie Farmer Cookbook published a chocolate brownie recipe in 1905 that closely resembles modern versions.
The debate over whether brownies should be fudgy or cakey has raged for over a century, with passionate advocates on both sides. In the 1920s and 30s, brownies became a staple of American home baking, appearing in community cookbooks, women’s magazines, and being served at church socials and school functions.
Caramel brownies specifically emerged during the 1980s and 90s when decadent, over-the-top desserts were all the rage. Home bakers and professional pastry chefs began experimenting with adding layers and swirls to basic brownies—caramel, cream cheese, peanut butter, and more. The combination of chocolate and caramel has long been beloved (think Twix bars, Rolos, and caramel-filled chocolates), so marrying these flavors in brownie form was a natural evolution.
The trend gained even more momentum with the rise of food blogs and Pinterest in the 2000s and 2010s. Stunning photos of caramel brownies with glossy caramel swirls and sea salt garnishes went viral, inspiring home bakers everywhere to try their hand at this indulgent treat. The addition of flaky sea salt—a technique borrowed from high-end chocolatiers—elevated caramel brownies from simple home dessert to gourmet territory.
Today, caramel brownies represent the perfect marriage of classic American brownies with contemporary flavor trends. They’re comfort food with a sophisticated twist, proving that sometimes the best recipes come from taking something beloved and making it even better.
Why You’ll Love This Recipe
These aren’t just any caramel brownies—these are THE caramel brownies that will ruin you for all other brownies. Once you make these, plain brownies will never be quite enough again.
Here’s why these caramel swirl brownies will become your signature dessert:
- Perfectly fudgy texture – Dense, moist, and chewy with that signature crackly top brownie lovers crave
- Easy caramel swirl – No candy thermometer or complicated caramel-making required—we use a simple shortcut that looks and tastes amazing
- Rich chocolate flavor – Uses both cocoa powder and melted chocolate for deep, intense chocolate taste
- Gooey caramel ribbons – Beautiful swirls of caramel throughout every bite, not just on top
- Sweet and salty perfection – Flaky sea salt on top creates that addictive sweet-salty combination
- Crowd-pleaser – Everyone loves these! Perfect for parties, potlucks, and gift-giving
- Impressive presentation – Looks like you spent hours but comes together easily
- Make-ahead friendly – Actually improves after a day, making them perfect for planning ahead
- Freezer-friendly – Makes a big batch that you can freeze for future chocolate emergencies
- Budget-friendly – Uses affordable ingredients to create bakery-quality results
- Customizable – Easy to adapt with different add-ins or toppings
- No mixer required – Everything comes together with simple mixing bowls and whisks
- Perfect edges and centers – Everyone gets their preferred brownie piece
Ingredient Notes
Quality ingredients make all the difference in brownies. Here’s what you need to know:
Unsalted Butter – Provides richness, moisture, and helps create that fudgy texture. Melted butter also helps develop the signature crackly top. Always use real butter, never margarine or oil substitutes—the flavor difference is dramatic. Unsalted butter lets you control the salt level precisely.
Granulated Sugar – Creates sweetness and helps form that shiny, crackly crust on top. Don’t reduce the sugar significantly or you’ll affect texture and structure. The sugar also helps keep brownies moist.
Brown Sugar – Adds moisture, chewiness, and a subtle caramel undertone that complements the caramel swirl. The molasses in brown sugar keeps brownies from being too dry.
Eggs – Provide structure, richness, and help create fudgy texture. Room temperature eggs incorporate better into the batter. We use 3 large eggs—the perfect amount for richness without making brownies cakey.
Vanilla Extract – Enhances chocolate flavor and adds warmth. Always use pure vanilla extract, never imitation. The difference is noticeable in chocolate desserts.
All-Purpose Flour – Provides structure. We use just the right amount—too much makes brownies cakey, too little makes them fall apart. Measure carefully by spooning into measuring cups and leveling off.
Unsweetened Cocoa Powder – Creates intense chocolate flavor. Use high-quality cocoa powder for best results—Dutch-process cocoa creates darker color and mellower flavor, while natural cocoa provides brighter chocolate taste. Both work beautifully.
Semi-Sweet Chocolate – Adding melted chocolate along with cocoa powder creates incredible depth and fudginess. Use good-quality chocolate bars or chips (not baking chocolate). The better your chocolate, the better your brownies.
Salt – Essential for enhancing chocolate flavor and balancing sweetness. A little salt in the batter is crucial—it makes everything taste more chocolatey.
Caramel Sauce – The star addition! You can use store-bought caramel sauce (choose thick caramel, not thin ice cream topping) or homemade. Store-bought works beautifully and saves time. Look for brands like Ghirardelli, Trader Joe’s, or Mrs. Richardson’s.
Flaky Sea Salt – The finishing touch that takes these brownies from great to extraordinary. Use flaky sea salt like Maldon or fleur de sel, not regular table salt. The large flakes provide bursts of salty flavor that contrast perfectly with sweet caramel.
Equipment Needed
You don’t need any special equipment to make these stunning brownies:
- 9×13-inch metal baking pan – Metal pans conduct heat better than glass and create better edges. If using glass, reduce oven temperature by 25°F and watch timing carefully.
- Parchment paper – Line the pan for easy removal and perfect cleanup. Leave overhang on two sides to lift brownies out easily.
- Two large mixing bowls – One for melting chocolate and butter, one for whisking dry ingredients
- Medium saucepan or microwave-safe bowl – For melting butter and chocolate together
- Whisk – For mixing the batter and incorporating eggs smoothly
- Rubber spatula – For folding batter and spreading evenly in the pan
- Measuring cups and spoons – Accurate measurements are crucial in baking
- Toothpick or cake tester – For checking doneness
- Knife for swirling – To create those beautiful caramel swirls
- Cooling rack – Allows air circulation for even cooling

Caramel Brownies Recip
- Total Time: 45-50 minutes (plus cooling time)
- Yield: 16 brownies 1x
- Diet: Vegetarian
Description
These fudgy caramel brownies are rich, gooey, and absolutely irresistible! Dense chocolate brownies swirled with ribbons of creamy caramel and topped with flaky sea salt create the ultimate indulgent dessert. Made with both cocoa powder and melted chocolate for intense chocolate flavor, these easy caramel swirl brownies come together in one bowl and deliver bakery-quality results every time. Perfect for parties, potlucks, or satisfying serious chocolate cravings!
Ingredients
For the Brownie Batter:
- ¾ cup (1½ sticks) unsalted butter
- 4 oz semi-sweet chocolate, chopped (or ¾ cup chocolate chips)
- 1 cup granulated sugar
- ½ cup packed light brown sugar
- 3 large eggs, room temperature
- 1 tablespoon vanilla extract
- ¾ cup all-purpose flour
- ½ cup unsweetened cocoa powder
- ½ teaspoon salt
- ¼ teaspoon baking powder
For the Caramel Swirl:
- ¾ cup thick caramel sauce (store-bought or homemade)
- Flaky sea salt for sprinkling
Instructions
- Preheat and prepare pan: Preheat your oven to 350°F (175°C). Line a 9×13-inch baking pan with parchment paper, leaving overhang on two opposite sides for easy removal. Lightly spray with cooking spray or butter. This preparation is crucial for easy removal later.
- Melt chocolate and butter: In a medium saucepan over low heat (or in the microwave in 30-second bursts), melt the butter and chopped chocolate together, stirring frequently until smooth and completely melted. Remove from heat and let cool for 5 minutes. This slight cooling prevents scrambling the eggs later.
- Add sugars: Whisk both granulated sugar and brown sugar into the slightly cooled chocolate-butter mixture until well combined and smooth. The mixture should be glossy and thick.
- Add eggs and vanilla: Add eggs one at a time, whisking well after each addition until fully incorporated. The batter should become smooth and glossy. Whisk in the vanilla extract. Don’t overmix at this stage—whisk just until combined.
- Combine dry ingredients: In a separate bowl, whisk together the flour, cocoa powder, salt, and baking powder until no lumps remain. This ensures even distribution of leavening and prevents pockets of flour or cocoa in your brownies.
- Fold in dry ingredients: Pour the dry ingredients into the chocolate mixture. Using a rubber spatula, fold gently until just combined with no visible flour streaks. Don’t overmix—a few small lumps are fine. Overmixing develops gluten and creates cakey brownies instead of fudgy ones.
- Spread batter in pan: Pour the brownie batter into your prepared pan and spread evenly with the spatula. Use the back of the spatula to smooth the top and push batter into corners.
- Add caramel: Warm the caramel sauce slightly if it’s very thick (10-15 seconds in microwave). Drop spoonfuls of caramel sauce over the brownie batter—about 10-12 dollops distributed across the surface. Don’t worry about perfection here.
- Create swirls: Using a butter knife, toothpick, or skewer, swirl the caramel through the brownie batter in a figure-eight or zigzag motion. Don’t over-swirl or the caramel will completely blend into the batter—you want visible ribbons and pockets of caramel. 8-10 swirls is perfect.
- Add sea salt: Sprinkle flaky sea salt evenly over the top of the brownies before baking. This is what creates that addictive sweet-salty combination.
- Bake: Bake for 30-35 minutes. The brownies are done when a toothpick inserted into the center (avoiding caramel pockets) comes out with a few moist crumbs but not wet batter. The edges should look set and the top should have a shiny, slightly crackled appearance. Don’t overbake—slightly underdone is better than overdone for fudgy brownies.
- Cool completely: Let brownies cool in the pan on a wire rack for at least 1 hour, preferably 2-3 hours or until completely cool. This is crucial! Cutting warm brownies creates a messy disaster. For the cleanest cuts, refrigerate for 30 minutes before slicing.
- Cut and serve: Use the parchment paper overhang to lift the entire brownie slab out of the pan. Place on a cutting board. Using a sharp knife (wipe clean between cuts), slice into 16 squares. Serve and watch them disappear!
Notes
- Don’t overbake: Brownies continue cooking from residual heat as they cool. Remove from oven when center still looks slightly underdone for perfect fudgy texture.
- Room temperature eggs: They incorporate more smoothly into the batter than cold eggs.
- Caramel thickness matters: Use thick caramel sauce, not thin ice cream topping which will sink and disappear.
- Cooling is crucial: Brownies must cool completely before cutting or they’ll be a gooey mess.
- Clean cuts: Wipe your knife between each cut for the prettiest slices.
- Storage improves them: These brownies actually taste better the next day after flavors meld.
- Prep Time: 15 minutes
- Cook Time: 30-35 minutes
- Category: Dessert
- Method: Baking
- Cuisine: American
Nutrition
- Serving Size: 1 brownie (1/16 of recipe)
- Calories: 285
- Sugar: 31g
- Sodium: 180mg
- Fat: 14g
- Saturated Fat: 8g
- Unsaturated Fat: 5g
- Trans Fat: 0g
- Carbohydrates: 39g
- Fiber: 2g
- Protein: 4g
- Cholesterol: 60mg
Tips & Variations
The basic caramel brownie is perfection, but here are ways to customize:
Peanut Butter Caramel Brownies – Add ½ cup peanut butter chips to the batter and drizzle with melted peanut butter before adding caramel. The peanut butter-caramel-chocolate combo is incredible.
Turtle Brownies – Add ½ cup chopped pecans to the batter and sprinkle more on top with the caramel for turtle candy-inspired brownies.
Salted Caramel Pretzel Brownies – Press crushed pretzels into the top before baking for salty crunch that complements the caramel.
Bourbon Caramel Brownies – Add 1 tablespoon bourbon to the brownie batter and use bourbon caramel sauce for sophisticated adult brownies.
Espresso Caramel Brownies – Add 1 tablespoon instant espresso powder to the dry ingredients to intensify chocolate flavor without making it taste like coffee.
White Chocolate Caramel Brownies – Substitute white chocolate for semi-sweet chocolate for sweeter, milder brownies that highlight the caramel.
Dark Chocolate Caramel Brownies – Use dark chocolate (70% cacao) instead of semi-sweet for more intense, less sweet brownies.
Dulce de Leche Brownies – Use dulce de leche instead of caramel sauce for slightly different caramel flavor with Latin flair.
Salted Caramel Cheesecake Brownies – Add a cream cheese swirl along with the caramel for double-swirl decadence.
Gluten-Free Caramel Brownies – Substitute gluten-free 1:1 baking flour for all-purpose flour. The texture will be nearly identical.
Vegan Caramel Brownies – Use vegan butter, flax eggs (3 tablespoons ground flaxseed mixed with 9 tablespoons water), dairy-free chocolate, and vegan caramel sauce.
Pro Chef Tips
These professional techniques will take your brownies from homemade to bakery-quality:
Use both cocoa and melted chocolate – This combination creates more complex, intense chocolate flavor than using just one or the other. The cocoa provides deep chocolate taste while the melted chocolate adds richness and fudginess.
Don’t overmix after adding flour – Overmixing develops gluten, which creates cakey rather than fudgy brownies. Fold just until no flour streaks remain, even if there are small lumps. Those will bake out.
Line with parchment paper – This isn’t optional! It makes removing brownies completely foolproof and cleanup effortless. Leave overhang on two sides to create handles for lifting out the entire slab.
Slightly underbake – The single most important tip for fudgy brownies. When the toothpick comes out with moist crumbs (not wet batter, but not clean either), they’re perfect. Brownies continue cooking from residual heat as they cool.
Cool completely before cutting – This requires patience but is non-negotiable. Warm brownies are too soft to cut cleanly. For the absolute cleanest cuts, refrigerate for 30 minutes first, then cut while cold using a sharp knife wiped clean between each cut.
Warm the caramel slightly – If your caramel sauce is too thick to drop easily, warm it for 10-15 seconds in the microwave. It should be pourable but not too thin. The right consistency creates better swirls.
Don’t over-swirl – You want visible ribbons of caramel, not caramel completely mixed into the batter. Do 8-10 swirls and stop, even if it doesn’t look “perfect.” Those imperfect swirls create the beautiful marbled effect.
Use quality chocolate – Since chocolate is a primary flavor, quality matters. Use chocolate you’d enjoy eating on its own. Cheap chocolate creates inferior-tasting brownies.
Room temperature ingredients – Let eggs and butter come to room temperature (or slightly warm for butter since it’s melted). Ingredients at similar temperatures combine more smoothly.
Invest in flaky sea salt – Regular table salt doesn’t provide the same effect. Flaky sea salt creates bursts of salty flavor and adds visual appeal. It’s worth buying Maldon or another flaky variety.
Common Mistakes to Avoid
Even experienced bakers can mess up brownies. Here’s what to watch out for:
Overbaking – This is the number one brownie killer. Overbaked brownies are dry, crumbly, and disappointing. Remove them when the toothpick comes out with moist crumbs, not completely clean. The center should still look slightly underdone. Remember, they’ll continue cooking as they cool, so err on the side of slightly underdone.
Cutting too soon – I know waiting is torture when warm brownies smell amazing, but cutting them before they’re completely cool creates a messy, crumbly disaster. The brownies need time to set up as they cool. Plan ahead and make them well before you need to serve them.
Using thin caramel sauce – Thin caramel ice cream topping sinks into the brownies and disappears rather than creating those gorgeous swirls. Use thick caramel sauce that holds its shape. If your caramel is too thin, it won’t swirl properly.
Overmixing the batter – Once you add flour, treat the batter gently. Vigorous mixing develops gluten, which makes brownies cakey instead of fudgy. Fold just until combined, even if you see small lumps. They’ll disappear during baking.
Using a glass pan without adjusting – Glass pans conduct heat differently than metal pans and can cause uneven baking or overbaking at the edges. If you must use glass, reduce oven temperature by 25°F and watch timing carefully.
Not measuring flour correctly – Too much flour makes brownies cakey and dry. Always spoon flour into measuring cups and level off with a knife rather than scooping directly from the bag, which compacts flour and gives you too much.
Skipping the sea salt – The flaky salt on top isn’t just garnish—it’s essential to the flavor profile. The sweet-salty combination is what makes these brownies so addictive. Don’t skip it!
Storage & Meal Prep
Caramel brownies store beautifully and actually improve with time:
Room Temperature Storage – Store brownies in an airtight container at room temperature for up to 4 days. Layer parchment paper between stacked brownies to prevent sticking. They’ll stay fudgy and delicious, and the flavors actually deepen and improve after a day.
Refrigerator Storage – For longer storage, refrigerate brownies in an airtight container for up to 1 week. The cold makes them extra fudgy and dense. Let them come to room temperature for 10-15 minutes before serving for best texture, or enjoy them cold for a different experience.
Preventing Drying Out – Always store in airtight containers. Brownies exposed to air dry out quickly. If storing at room temperature for more than 2 days, wrap individual brownies in plastic wrap before placing in container.
Layering for Storage – If stacking brownies in a container, place parchment or wax paper between layers to prevent sticking. The caramel can be sticky, so this extra step is worth it.
Individual Wrapping – For packed lunches or gifts, wrap individual brownies tightly in plastic wrap. They’ll stay fresh for 3-4 days this way and are perfectly portable.
Warming Before Serving – If you want that fresh-baked warmth, microwave individual brownies for 10-15 seconds. The caramel gets gooey again and the chocolate becomes even more fudgy. Add a scoop of vanilla ice cream for ultimate indulgence.
Brownies Improve with Age – Unlike many baked goods, brownies actually taste better the next day after all the flavors have had time to meld. Make them a day ahead of when you need them for optimal flavor.
Make-Ahead & Freezer Notes
These brownies are perfect for advance preparation and freeze beautifully:
Make-Ahead Timeline – Bake brownies 1-2 days before you need them. Store at room temperature or refrigerated until ready to serve. The texture and flavor improve as they sit, making them ideal make-ahead desserts for parties and gatherings.
Freezing Whole Pan – Let brownies cool completely, then wrap the entire uncut slab tightly in plastic wrap, then aluminum foil. Freeze for up to 3 months. Thaw overnight in refrigerator, then bring to room temperature before cutting and serving.
Freezing Individual Brownies – Cut brownies, wrap each one individually in plastic wrap, then place all wrapped brownies in a freezer-safe bag or container. Freeze for up to 3 months. This method lets you remove just what you need without thawing everything.
Thawing Instructions – For whole pan, thaw in refrigerator overnight, then let come to room temperature. For individual brownies, thaw at room temperature for 30-45 minutes, or microwave for 15-20 seconds straight from frozen.
Texture After Freezing – Frozen and thawed brownies taste nearly identical to fresh ones. The fudgy texture holds up perfectly, and the caramel remains gooey. You won’t be able to tell they were frozen.
Freezing Batter – While you can’t freeze unbaked batter (it affects the texture), you can prep all dry and wet ingredients separately, refrigerate, and combine just before baking for slightly faster preparation.
Emergency Dessert Stash – Keep a batch of brownies in your freezer for unexpected guests or sudden chocolate emergencies. They thaw quickly and always impress.
Serving Suggestions
These versatile brownies can be served in countless delicious ways:
Classic Presentation – Cut into squares and serve on a platter, dusted with powdered sugar or with extra caramel drizzle. Simple but stunning.
À La Mode – Warm a brownie for 10-15 seconds and top with vanilla ice cream. The contrast of cold ice cream and warm, gooey brownie is magical. Add extra caramel sauce and whipped cream for full decadence.
Brownie Sundae – Layer brownie pieces with ice cream, hot fudge, caramel sauce, whipped cream, and a cherry for an over-the-top sundae experience.
With Coffee or Milk – These rich brownies pair perfectly with hot coffee, cold milk, or even hot chocolate for the ultimate chocolate experience.
Brownie Trifle – Cube brownies and layer in glasses with chocolate pudding, whipped cream, and caramel sauce for elegant individual desserts.
Gift-Giving – Wrap brownies individually in cellophane tied with ribbon for homemade gifts that everyone loves. Package 4-6 in a decorative tin or box.
Party Platter – Arrange brownies on a platter with fresh berries, cookies, and other treats for a dessert spread.
With Fresh Berries – The tartness of fresh raspberries or strawberries cuts through the rich chocolate and caramel beautifully.
Brownie Milkshake – Blend a brownie with vanilla ice cream and milk for an indulgent milkshake.
For Brunch – Yes, brownies for brunch! Serve as the sweet finale to a brunch spread with coffee and fresh fruit.
Holiday Treats – Cut into smaller pieces and arrange on holiday cookie platters. They’re always the first thing to disappear.
FAQs Section
Can I use homemade caramel instead of store-bought?
Absolutely! Homemade caramel is delicious in these brownies. Make sure it’s thick enough to hold its shape when dolloped—thin caramel will sink into the batter. Let homemade caramel cool slightly before swirling so it’s not too hot. Store-bought is simply more convenient and produces equally delicious results.
Why are my brownies cakey instead of fudgy?
Several factors cause cakey brownies: too much flour (measure correctly!), overbaking, using too many eggs, or overmixing the batter after adding flour. For fudgy brownies, measure flour accurately by spooning into cups and leveling, slightly underbake, and fold gently after adding flour just until combined.
How do I know when brownies are done?
Insert a toothpick into the center (avoiding caramel swirls). It should come out with moist crumbs clinging to it—not wet batter, but not completely clean either. The edges should look set and pull slightly away from the pan. The top should have a shiny, slightly crackled appearance. When in doubt, slightly underdone is better than overbaked.
Can I make these brownies in a different size pan?
Yes, but timing changes significantly. In an 8×8-inch pan, brownies will be thicker and need 40-45 minutes of baking. In a 9×9-inch pan, bake for 35-40 minutes. For a half-sheet pan (thinner brownies), check at 20-25 minutes. Always use the toothpick test rather than relying solely on timing.
My caramel sank to the bottom. What happened?
Your caramel sauce was too thin. Thin caramel (like ice cream topping) doesn’t have enough body to create swirls—it sinks into the batter. Use thick caramel sauce that can hold its shape. If your caramel is borderline, you can refrigerate it for 30 minutes to thicken before using.
Can I make these gluten-free?
Yes! Substitute a gluten-free 1:1 baking flour blend (like Bob’s Red Mill or King Arthur) for the all-purpose flour in equal measure. The texture will be nearly identical. Make sure all other ingredients (especially the caramel sauce) are certified gluten-free if needed for celiac disease.
How should I store brownies with caramel?
Store in an airtight container at room temperature for up to 4 days or refrigerated for up to 1 week. If stacking, place parchment paper between layers to prevent the sticky caramel from causing brownies to stick together. The caramel may make them slightly stickier than plain brownies, but proper storage prevents issues.
Conclusion
And there you have it—everything you need to make the most incredible, fudgy, caramel-swirled brownies that’ll make you the hero of every gathering! These caramel brownies prove that sometimes the best desserts come from taking something classic and making it even better. The combination of rich chocolate, gooey caramel, and that perfect touch of sea salt creates something truly magical.
What I love most about this easy caramel brownie recipe is how it delivers serious wow-factor without requiring any advanced baking skills. Mix everything in bowls, swirl in some caramel, sprinkle with salt, and bake. That’s it! Yet the results look and taste like they came from an upscale bakery. Your friends and family will never believe how simple these were to make.
The best part? These brownies actually improve as they sit, making them the ultimate make-ahead dessert. Bake them a day or two before your event and enjoy having one less thing to worry about while they’re getting even more delicious in your container. Plus, with a batch in the freezer, you’re always prepared for unexpected guests or sudden chocolate cravings.
Now I want to hear from YOU! Have you made caramel brownies before? What’s your favorite brownie add-in? Are you team edge piece or team center piece? Do you prefer them straight from the pan or with ice cream on top? Drop a comment below and share your brownie experiences—I love hearing from fellow chocolate enthusiasts!
If this recipe helped you create the perfect fudgy caramel brownies, please give it a 5-star rating and leave a review. Your feedback helps other bakers and lets me know what recipes you want more of. And don’t forget to PIN this recipe to your Desserts, Brownies, or Chocolate Recipes boards on Pinterest so you can find it easily whenever that brownie craving strikes!
Happy baking, and may your brownies always be fudgy and your caramel perfectly swirled!